HTML & CSS
Getting started with
&


+
I'm Ally Palanzi
Front-end Engineer @ Vox Media
Also a graphic designer
I like to make internet things
@mylifeasalllly
ally@palanzi.com
Rules
- No question is a dumb question. Please ask lots of questions!
- Tell me if I am going too fast, or if something doesn’t make sense. This is for you so tell me how to improve!
- Help each other!
- Have fun.
- ASK QUESTIONS.
let's get started
some terms
- The inner workings and functionality of a website or application.
- PHP, Ruby on Rails, Django
- Femsplain runs on Wordpress, which uses PHP
- The outwardly visible elements of a website or application
- HTML, CSS, JavaScript
Front End
Back End
HTML
HyperText Markup Language gives content structure and meaning by defining that content as, for example, headings, paragraphs, or images.
css
Cascading Style Sheets is a presentation language created to style the appearance of content—using, for example, fonts or colors.
tools we'll use
- Sublime Text
- Chrome or Firefox
open chrome or firefox now!
Developer tools!
how to open
- Mac: Cmd + Option + i
- Windows/Linux: Ctrl + Shift + i or F12
- Both: Right click on screen, inspect element
changing css

change html
file structure
-
Project folder - includes anything that you want on your site.
-
index.html - for main content page.
- we call the first page index.html because that is what a browser looks for when loading up a website - any other html pages can be named anything
- styles.css - for css
- image folder
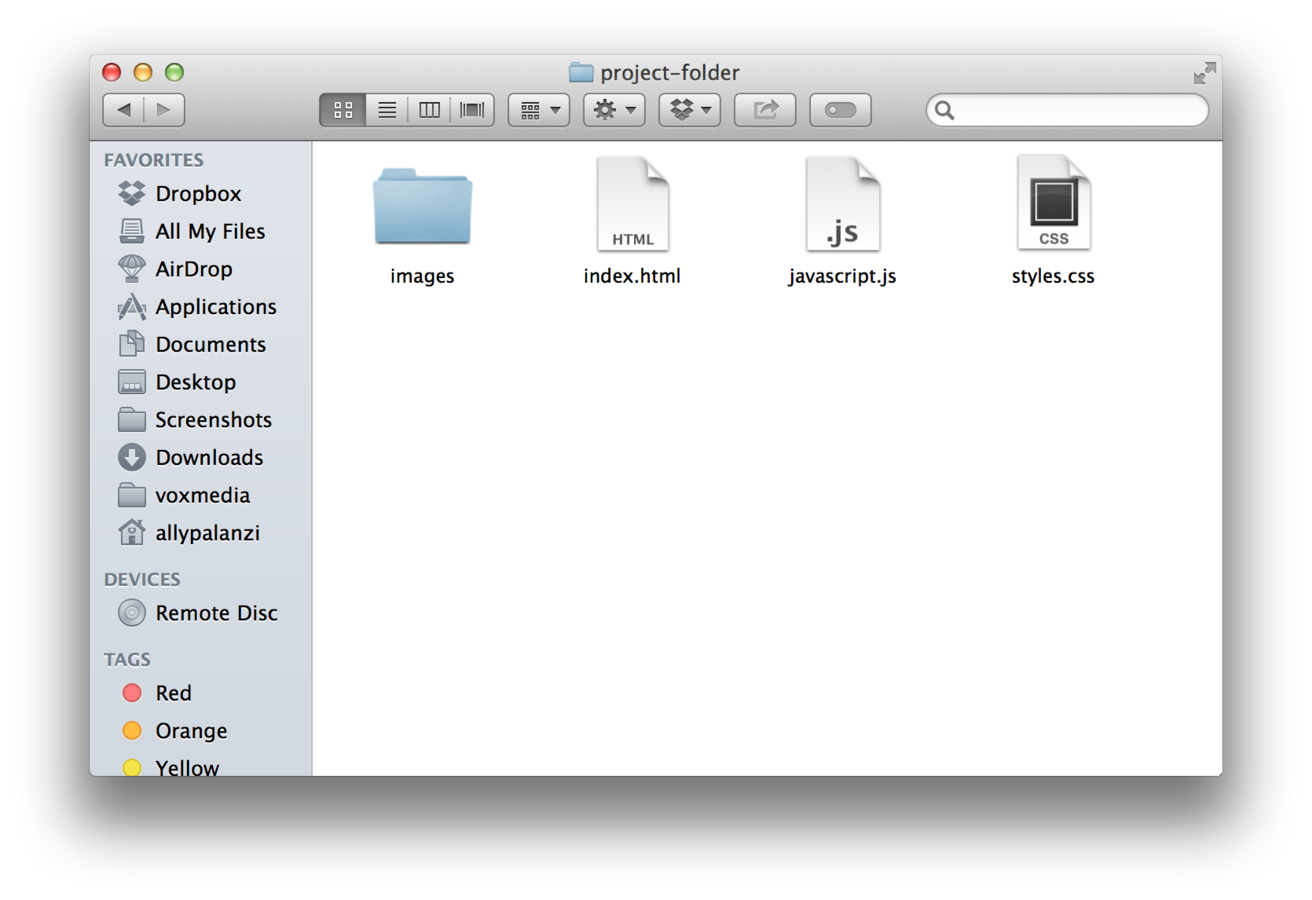
File names are case sensitive and shouldn’t have special characters or spaces
exercise!
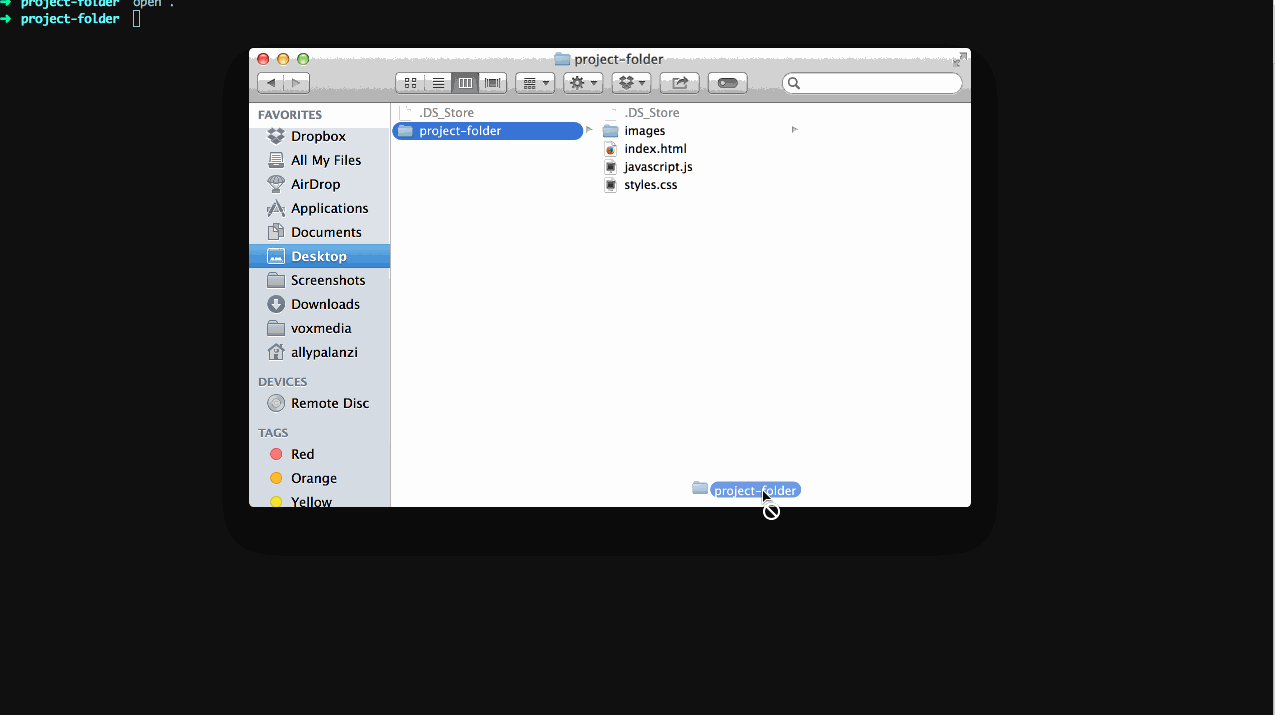
Create a folder on your desktop (or where ever you want on your computer) called femsplain-workshop and put the files you’ll need inside
sublime text!
open folder in sublime
html
Document Structure
<!DOCTYPE html>

<html>

    <head>
      <title>Page Title</title>
    </head>

    <body>

      <h1>I am a heading!</h1>

      <p>I am a paragraph!</p>

    </body>

</html>
Doctype
Tells the browser that you are using HTML, and the type of HTML.
HTML
Tells the browser that everything inside will be HTML
Head
Contains the which tells the browser the name of the page
<title>Contains tags, which give the browser information about the page - used for search engines mostly
<meta>Meta Tags
<!DOCTYPE html>

<html>

    <head>
      <title>Page Title</title>
      <meta name="description" content="This is my webstie about website things.">
      <meta name="keywords" content="various, keywors, here">
      <meta name="author" content="Ally Palanzi">
    </head>

    <body>

      <h1>I am a heading!</h1>

      <p>I am a paragraph!</p>

    </body>

</html>
Body
Contains the content of the page
exercise!
- Open your index.html file
- Setup your document structure
- Doctype, HTML, Head, Title, Body
TAGS!
Tags tell the browser how to render what is inside
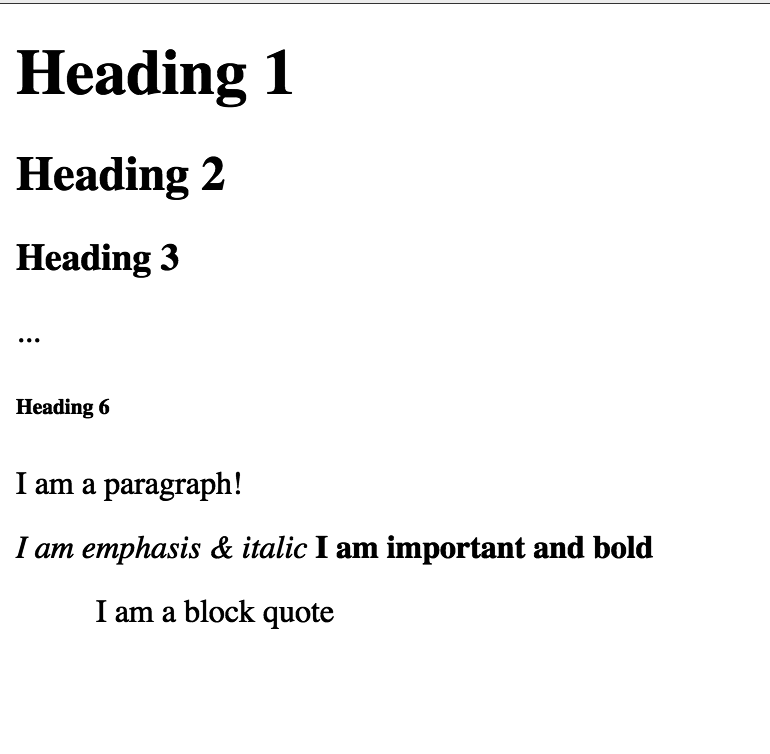
<tagname>Some Content</tagname>text based tags
<h1>Heading 1</h1>
<h2>Heading 2</h2>
<h3>Heading 3</h3>
...
<h6>Heading 6</h6>

<p>I am a paragraph!</p>

<em>I am emphasis & italic</em>
<strong>I am important and bold</strong>

<blockquote>I am a block quote</blockquote>
Divisions and spans
-
act as containers solely for styling purposes
-
generic containers
-
do not come with any meaning or semantic value
<h1>Heading 1</h1>
<h2>Heading 2</h2>
<h3>Heading 3</h3>
...
<h6>Heading 6</h6>

<div>
    <p>I am a paragraph!</p>
</div>

<span>
    <em>I am emphasis & italic</em>
</span>

<strong>I am important and bold</strong>

<blockquote>I am a block quote</blockquote>
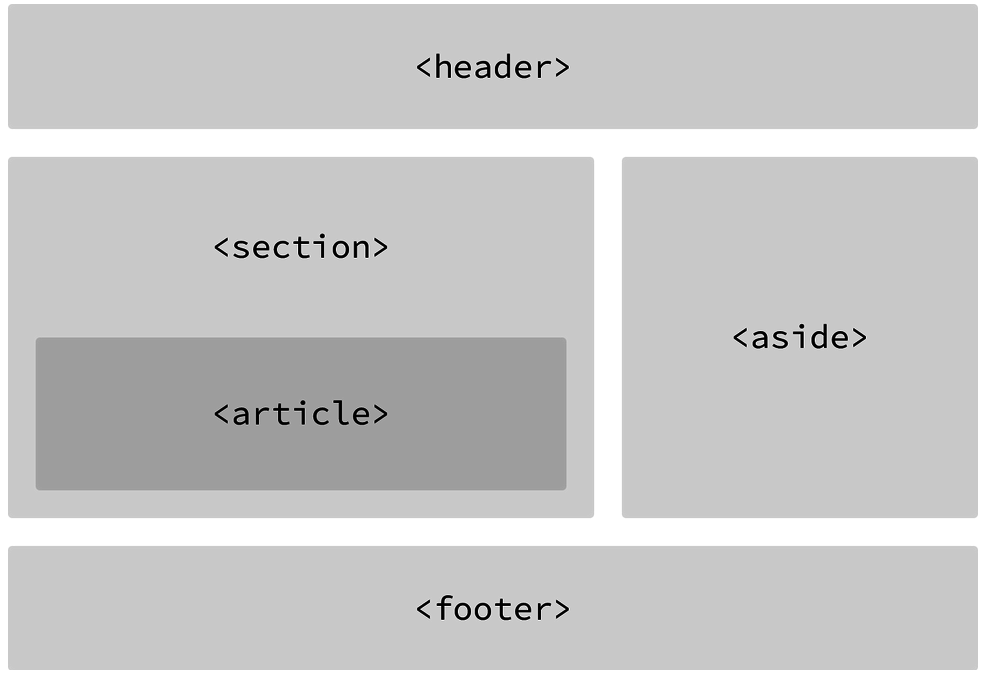
structural tags
- Navigation: <nav></nav>
- Header: <header></header>
- Section: <section></section>
- Article: <article></article>
- Aside: <aside></aside>
- Footer: <footer></footer>
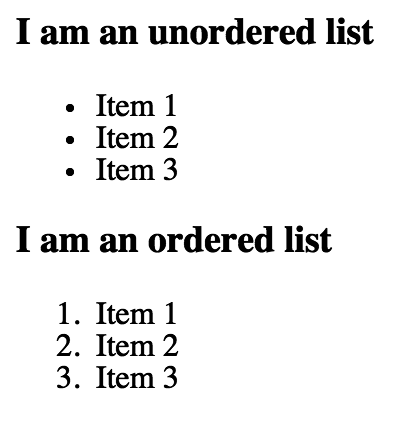
- Ordered List: <ol></ol>
- Unordered List: <ul></ul>
- List Item: <li></li>
lists
<h3>I am an unordered list</h3>
<ul>
    <li>Item 1</li>
    <li>Item 2</li>
    <li>Item 3</li>
</ul>


<h3>I am an ordered list</h3>
<ol>
    <li>Item 1</li>
    <li>Item 2</li>
    <li>Item 3</li>
</ol>
<header>
    <nav>
        I am navigation!
    </nav>
</header>

<section>
    <h1>I am a section</h1>
    <article>
        <h2>I am an article</h2>
        <p>Lorem ipsum dolor sit amet, consectetur adipiscing elit,
         et dolore magna aliqua. Ut enim ad minim veniam, quis no
         aliquip ex ea commodo consequat. Duis aute irure dolor in
         dolore eu fugiat nulla pariatur. Excepteur sint occaecat
         officia deserunt mollit anim id est laborum.</p>
    </article>
</section>

<aside>
    <h2>I am an aside</h2>
</aside>

<footer>
    <p>I am the footer.</p>
</footer>

What's the difference?
- based on what the element is that your styling
- creates semantic value — this means the page becomes more valuable and the structure is easily parsed by screen readers, search engines, and it’s also more readable
self closing tags
- <img> images
- <hr> horizontal rule
<h1>Heading 1</h1>
<hr>
<img src="https://placekitten.com/g/500/500">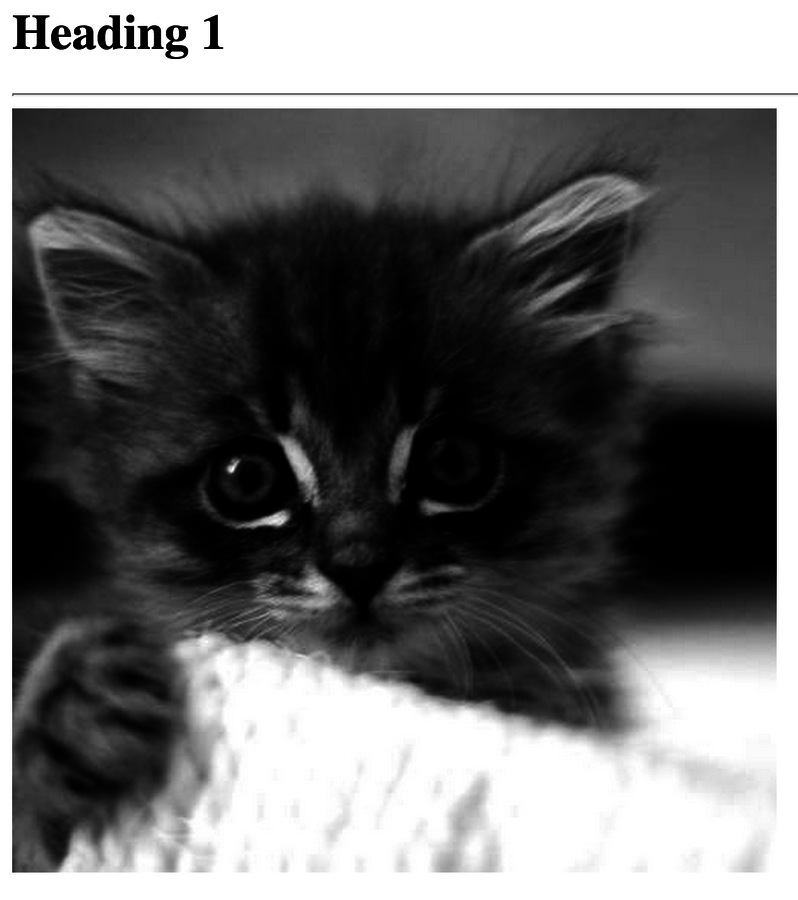
Adding an image
- Link hosted from the web
- Hosted from your website, inside of your project-folder
Place an image into your image folder and call it with the following syntax:
<img src="images/filename">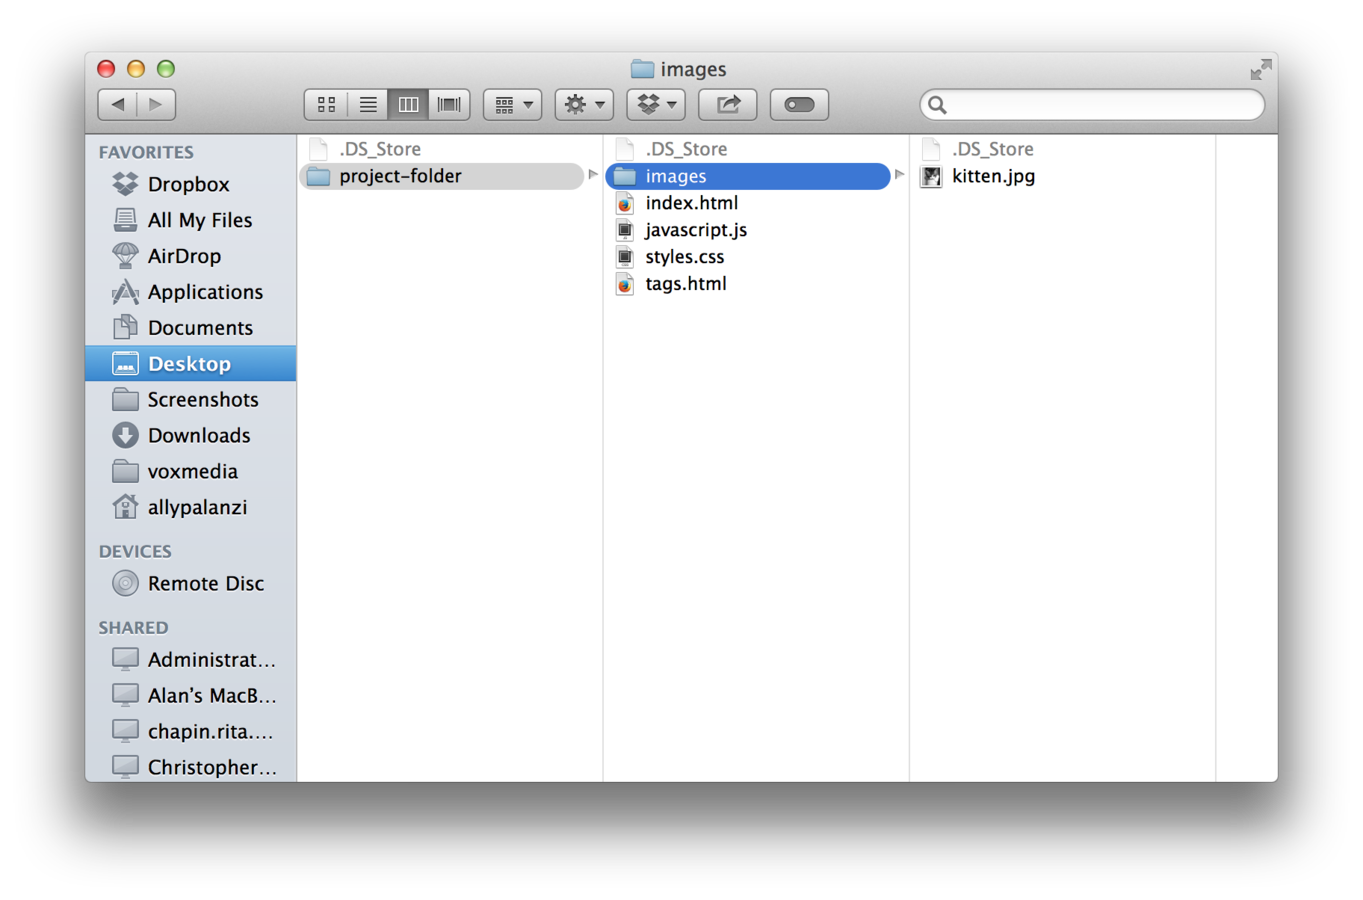
<img src="images/kitten.jpg">attributes
-
classes
-
ids
-
src
-
linking to source of elements
-
ex: adding images, adding source to script or style file (examples to come)
-
-
href
- linking to external source
- hyperlinks
<a href="http://femsplain.com">Femsplain!!!</a>exercise!
-
Add the largest header to your index.html file
-
Add a header, section, article, and footer element. Make sure to place some text inside these using either headers or paragraphs.
-
Bold and italicise some text too!
-
Create a list with numbers inside of the article element.
-
Have at least one link.
- Add an image of your choice.
css
body {
    background: pink;
}

h1 {
    color: red;
}

div {
    background-color: blue;
    color: white;
    font-family: Helvetica;
    width: 500px;
}
selector {
    property: value;
}
css syntax
p {
    color: red;
}
Selects all <p> tags on a page.
header {
    background-color: red;
}
Selects all <header> tags on a page.
the cascade
body {
    background: pink;
}

h1 {
    color: red;
}

div {
    background-color: blue;
    color: white;
    font-family: Helvetica;
    width: 500px;
}
selectors
class
Selects all elements with the class .alert
.alert {
    color: red;
}
<p class="alert">Alert! Alert!</p>HTML
ID
Selects all elements with the class #navigation
#navigation {
    background-color: black;
}
<nav id="navigation">I'm here to navigate you.</nav>HTML
class vs id
-
Class: Many elements can have the same class
- There can be many warnings on one webpage.
-
The "." is how you tell CSS "this is a class name."
-
ID: Should only apply to one element on a webpage
-
A webpage only has one footer
-
The "#" is how you tell CSS "this is an id."
-
properties
some main ones
- font-family
- font-size
- line-height
- color
- background-image
- background-color
color
- Color name
- red, blue, yellow, etc.
- Hexcodes
- #ff0000, #000000
- RGB
- rgb(0,0,0)
fonts
h1 {
    font-family: Times;
    font-size: 25px;
}

p {
    font-family: Helvetica;
    font-size: 15px;

}
adding css to html
- Embeded
- External
- Inline
<head>
    <style>
        header {
            background-color: blue;
        }

        p {
            color: red;
        }
    </style>
</head>


<header>
    <nav>
        I am navigation!
    </nav>
</header>

<section>
    <h1>I am a section</h1>
    <article>
        <h2>I am an article</h2>
        <p>Lorem ipsum dolor sit amet, consectetur adipiscing elit,
         et dolore magna aliqua. Ut enim ad minim veniam, quis no
         aliquip ex ea commodo consequat. Duis aute irure dolor in
         dolore eu fugiat nulla pariatur. Excepteur sint occaecat
         officia deserunt mollit anim id est laborum.</p>
    </article>
</section>

<footer>
    <p>I am the footer.</p>
</footer>
Embedded

External
<head>
  <link rel="stylesheet" type="text/css" href="styles.css">
</head>
Add styles to a separate file, and then call that file in the head tag.
Inline
<p style="color: red;">I am a red paragraph!</p>adding css to html
- Embeded
- not scalable
- can only be used in one html file
- External
- best way!
- can share between html files
- easier to maintain
- Inline
- not preferable
- difficult to keep track of in large projects
- but ya gotta do whatcha gotta do
exercise!
- Add a link to your styles.css stylesheet in your HTML file.
- Add some classes to things, change some properties.
- Have a least one background-color, font-family, font-size, and color
the box model
- margin
- border
- padding
- width
- height
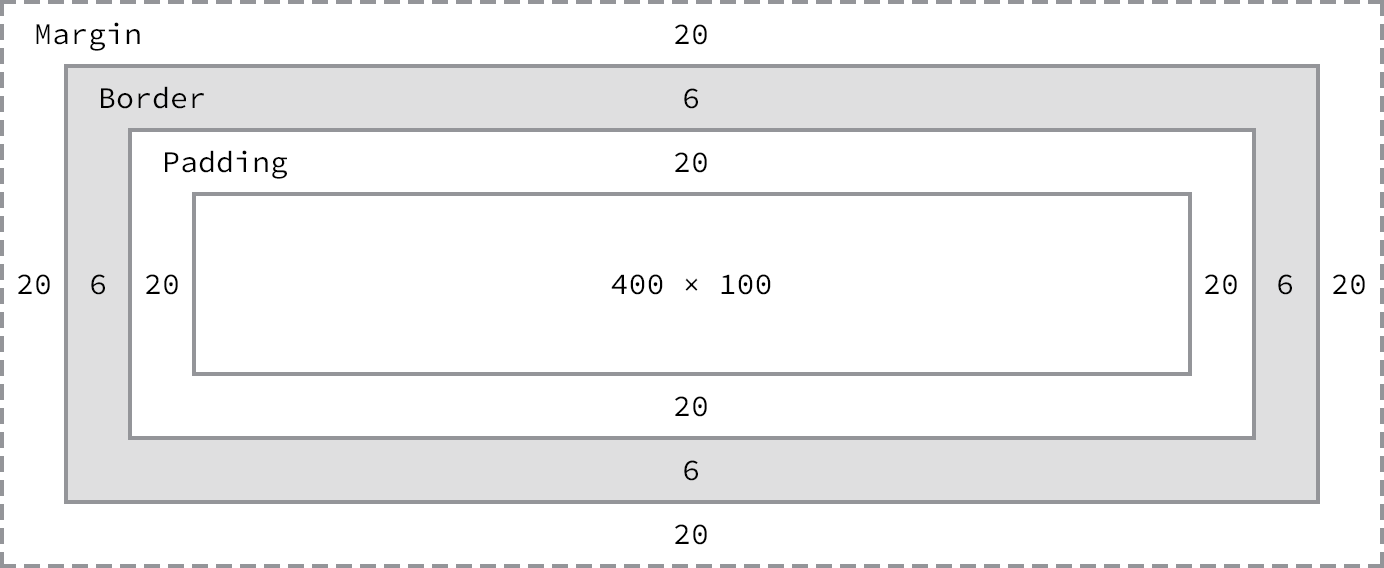
div {
    margin-top: 10px;
    margin-right: 20px;
    margin-bottom: 10px;
    margin-left: 20px;

    padding-top: 20px;
    padding-right: 20px;
    padding-bottom: 20px;
    padding-left: 20px;

    border-color: blue;
    border-size: 2px;
    border-style: solid;

    background-color: red;
    width: 500px;
    height: 500px;
}
simplify
div {
    margin: top right bottom left;
    padding: top right bottom left;
    border: size color style;
}

div {
    margin: 10px 20px;
    padding: 10px 20px;
    border: 1px red solid;
}exercise!
- Try it yourself!
- Give add some margin, padding, and border to some elements on your page.
display
selector {
    display: inline;
}

selector-two {
    display: inline-block;
}

selector-three {
    display: block;
}- inline
- displayed inline
- spans are automatically this way
- not effected by padding or margin
- block
- displayed as block
- breaks into new lines
- effected by padding & margin
- inline-block
- displays element inline
- but can be effected by padding & margin
floats
div {
    float: left;
}

section {
    float: right;
}Clearing floats
- If you have one floated item, each item next to it will try to float
- Because of this, you need to clear previous floats on the element below that you do not want to float
keep on learnin'
HTML & CSS
By allypalanzi
