HTML & CSS Workshop
NYCH Village Bloggurls
The Internet
INTRO
INTRO // Technologies

HTML
Content
CSS
Presentation
We'll be learning about HTML & CSS today
INTRO
Tools We'll Be Using
INTRO // Tools

ATOM
https://atom.io

CHROME
https://google.com/chrome
Browser
Text Editor
INTRO // Goal
Today we will be:
-
Reviewing your homework
-
Transferring your HTML pages into our templated pages
-
Learning about CSS and customizing your pages
-
Publishing our website and sharing it with the world!
INTRO
Let's get started!
https://github.com/codepals
HyperText Markup Language
HTML
A language used to describe the content and structure of our documents
HTML
Think of HTML as ....
HTML Shell
HTML
<!DOCTYPE html>
<html>
	<head>
		<title></title>
	</head>
	<body>

	</body>
</html>
<head>
HTML
<!DOCTYPE html>
<html>
	<head>
		<title></title>
	</head>
	<body>

	</body>
</html>-
Can be though of as the brain of the document
-
Its properties are not part of the physical layout of the page
<body>
HTML
<!DOCTYPE html>
<html>
	<head>
		<title></title>
	</head>
	<body>

	</body>
</html>-
Represents the area from the top left corner of our page, to the bottom right
-
Holds the physical structure of the page, much like our own body
-
All of our work today will be done here!
Let's take a deeper dive into an HTML tag
HTML
A typical HTML tag
HTML
<p>Content</p>The tag above represents a paragraph
A typical HTML tag
<p>Content</p>This is the opening tag.
It always starts with a tag name ('p' in this case).
HTML tags always start with a < and end with a >
HTML
A typical HTML tag
<p>Content</p>This is the closing tag.
Most (but not all) HTML tags have a closing tag.
Closing tags always start with a forward slash ( / )
followed by the tag name.
HTML
A typical HTML tag
<p>Content</p>This is the content of the tag.
The content appears between the opening and closing tags. This is the content that will appear on your page.
HTML
Add content to the <body>
We write elements (content wrapped in tags) to the document's body
<!DOCTYPE html>
<html>
	<head>
		<title></title>
	</head>
	<body>
		<p>Content</p>
	</body>
</html>
HTML
Elements Without Closing Tags
Some tags don't have closing tags.
Tags such as image do not enclose any content
(in the case of an image, it points to the location of a file) ...
So it doesn't need an opening and closing tag.
<img src="picture.jpg" />
Note: the / at the end is optional
HTML
Hierarchy In HTML
<section>
  <p>
    Some text in a paragraph.
    <a href="http://www.cbc.ca">CBC</a>
  </p>
</section>
HTML tags can be nested inside on another.
HTML is represented as a tree. That means you can put tags inside other tags as their content. The outer tag is the parent and the inner tag(s) are the children.
HTML
Elements You'll Be Using
Heading Text
Paragraphs
Content containers
List Item
<h1> to <h6>
<p>
<header> <footer>
<main> <section>
<nav>
<li>
HTML
Images
<img>
List Container
<ul> or <ol>
<a>
Anchor
(Linking to other sites)
Cascading Style Sheets
CSS
CSS
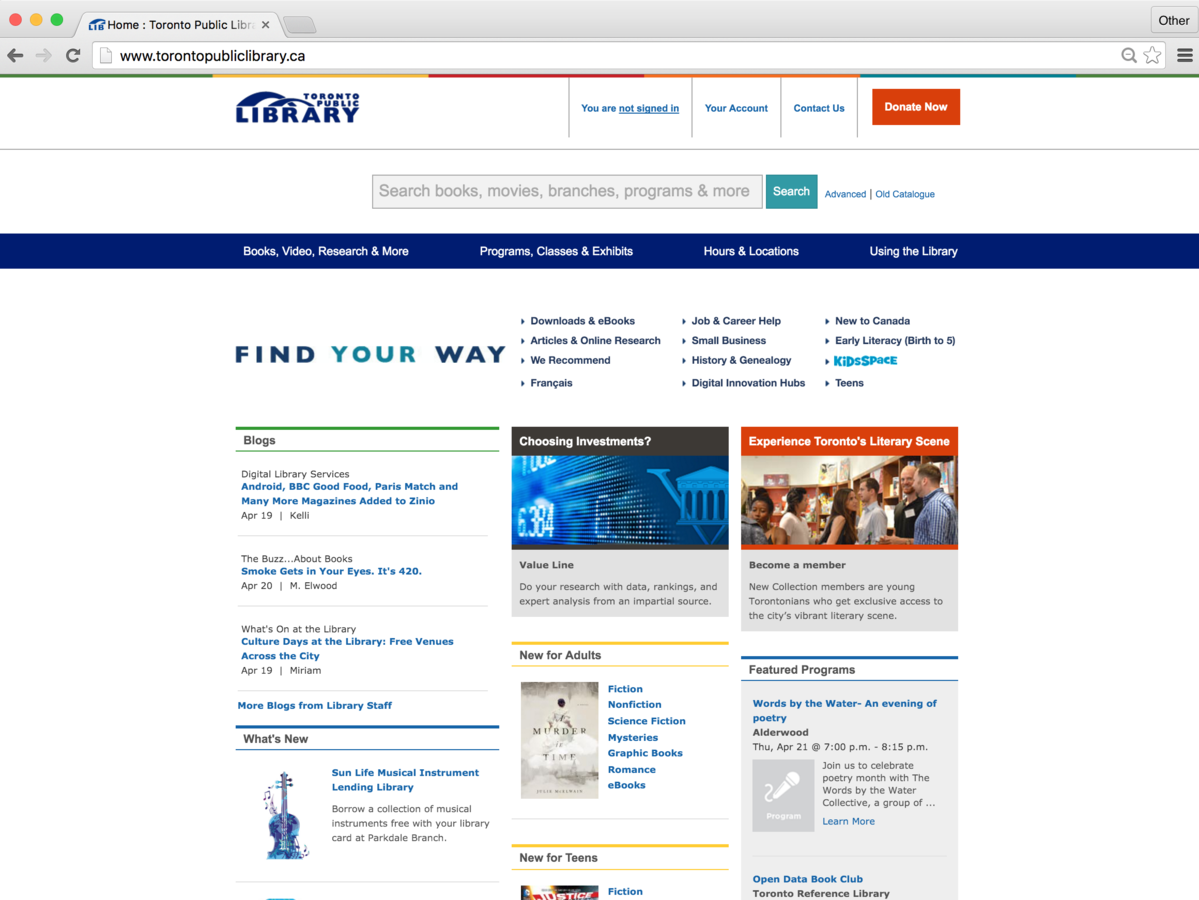
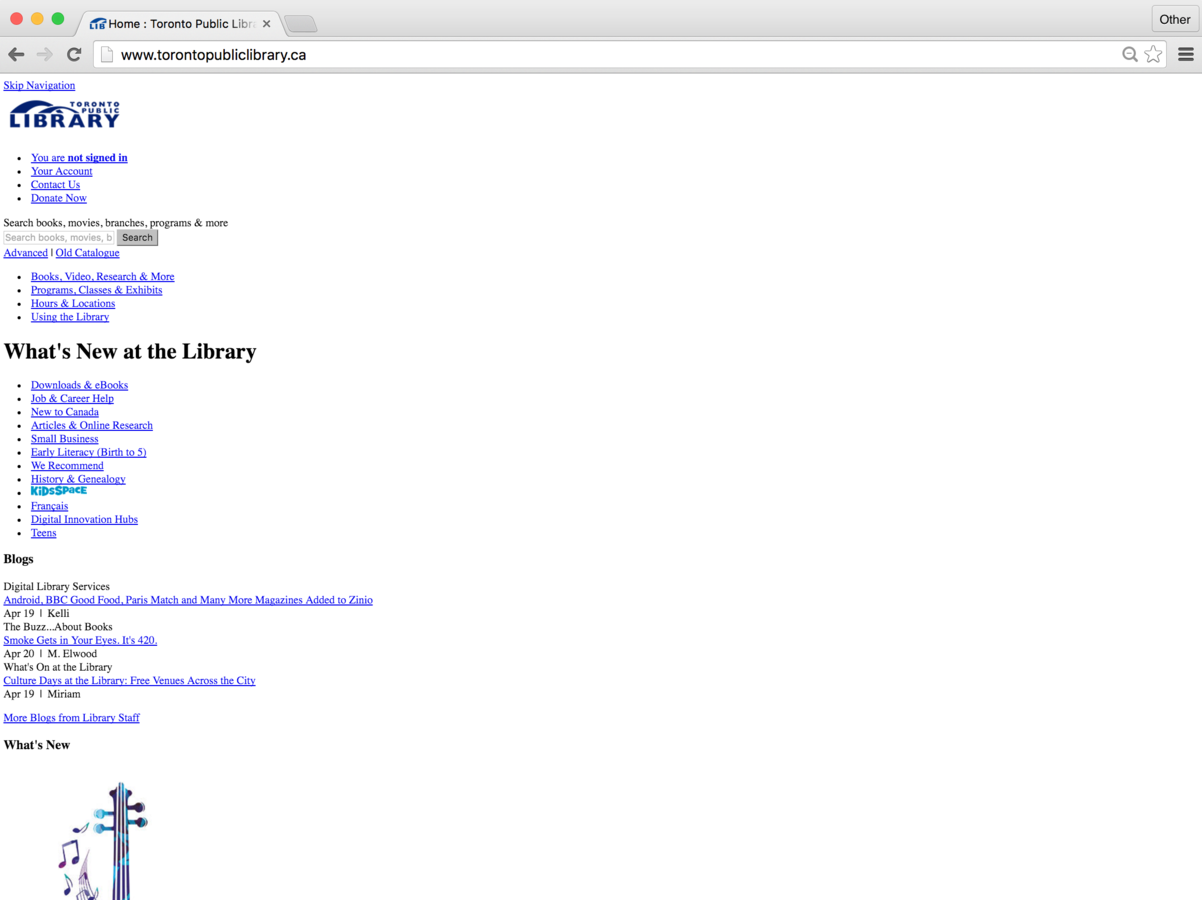
HTML Only
With CSS
The Magic of CSS
CSS
p {
    font-size: 16px;
    color: purple;
}
CSS Syntax
CSS
p {
    font-size: 16px;
    color: purple;
}
CSS Selector
- Choose the element you want to target
CSS
p {
    font-size: 16px;
    color: purple;
}
CSS Declaration Block
- Starts and ends with curly braces! { }
- All the rules inside the declaration block will be applied to the element you selected
CSS
p {
    font-size: 16px;
    color: purple;
}
CSS Declaration
- Also know as a CSS style rule
- Consists of key value pairs
- Format => property: value;
CSS
p {
    font-size: 16px;
    color: purple;
}
Property
- The code on the LEFT side of the : is the property
- There are a specific set of properties you can manipulate in CSS
CSS
p {
    font-size: 16px;
    color: purple;
}
Value
- The code on the RIGHT side of the : is the value
- Every property accepts a specific set of values
CSS
p {
    font-size: 16px;
    color: purple;
}
The Colon => :
- The colon separates the property from the value
CSS
p {
    font-size: 16px;
    color: purple;
}
The Semi-Colon => ;
- The semi-colon denotes the end of a CSS declaration
CSS
h1 {
    background-color: red;
    text-align: center;
}
Selecting an element
- You can select an element by calling it by its tag name
CSS
But what if you wanted to select a group of elements that aren't of the same type?
CSS
.highlight {
    background-color: yellow;
}
Classes
- Classes allow you to select multiple elements regardless of its type
CSS
.red {
    background-color: red;
}
HTML
<h1 class="red">Ninja Turtles</h1>
<h2>Leonardo</h2>
<p class="red">blurb text</p>
CSS
- Both the <h1> and the <p> will have the background colour of red
CSS // General
CSS Properties You'll Be Using
background-color
color
font-size
font-family
text-align
border
- changes the background-color of an element
- changes the type of font
- changes the alignment of your text
- changes the color of your text
- changes the size of your font
- changes the outline of your element
CSS // Images
CSS Properties You'll Be Using
width
border
height
- changes the width of your element
- changes the height of your element
- changes the outline of your element
CSS
How are we going to memorize all of this!?
😱
CSS
Fear not my friends! You don't have to 😅.
Check out this amazing reference guide:
http://www.w3schools.com/cssref/
CSS

Intro to GitHub Pages
GitHub
GitHub
GitHub is a web application where we can upload our code and publish our website.
GitHub // Step 1
Create an Account
https://github.com

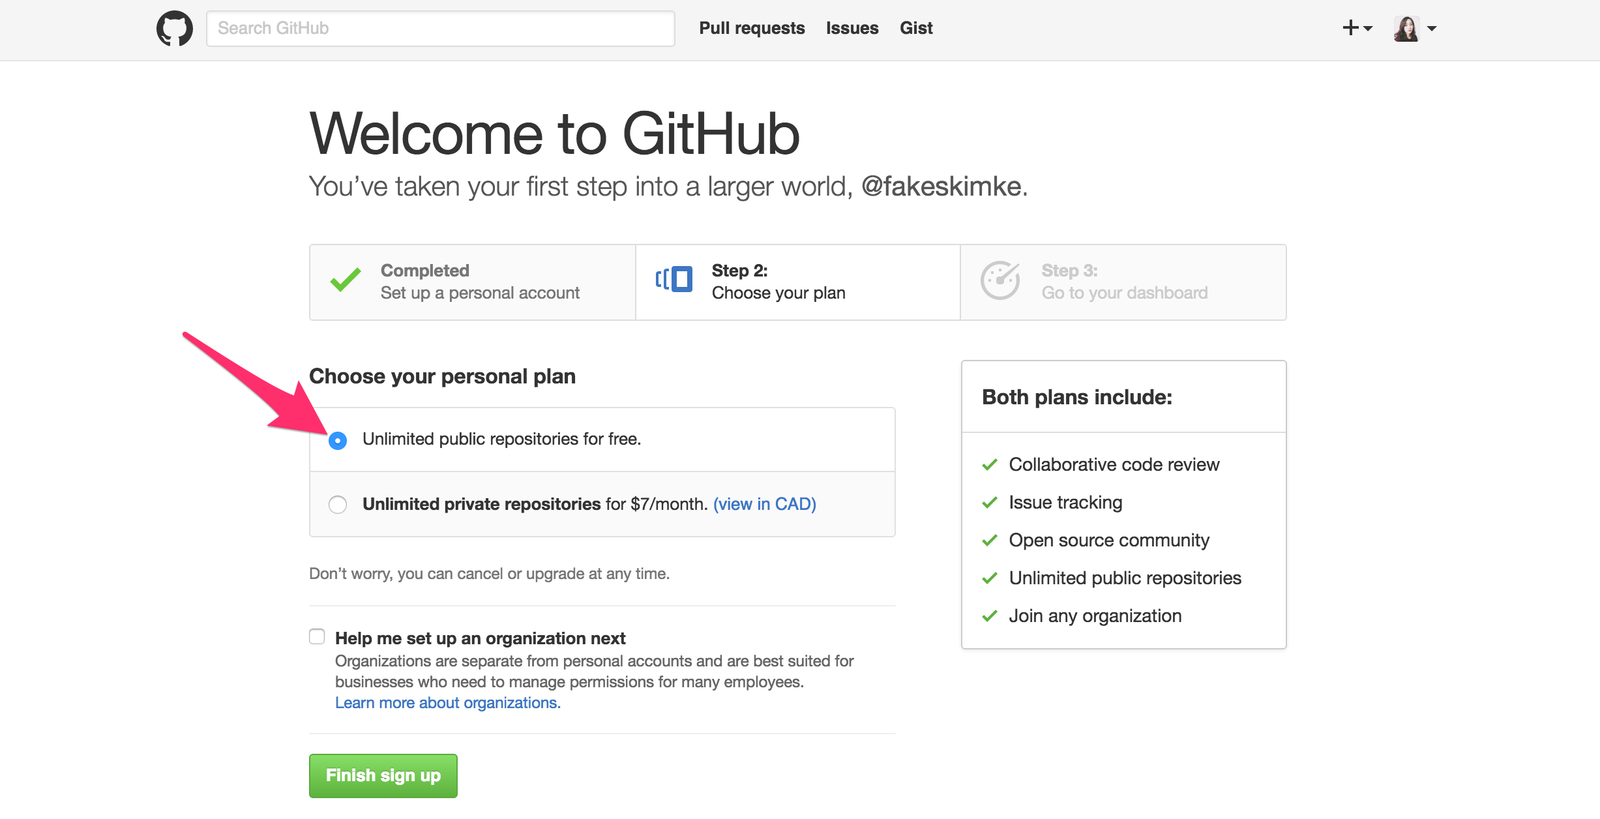
GitHub // Step 2
Select "Unlimited public repositories for free"
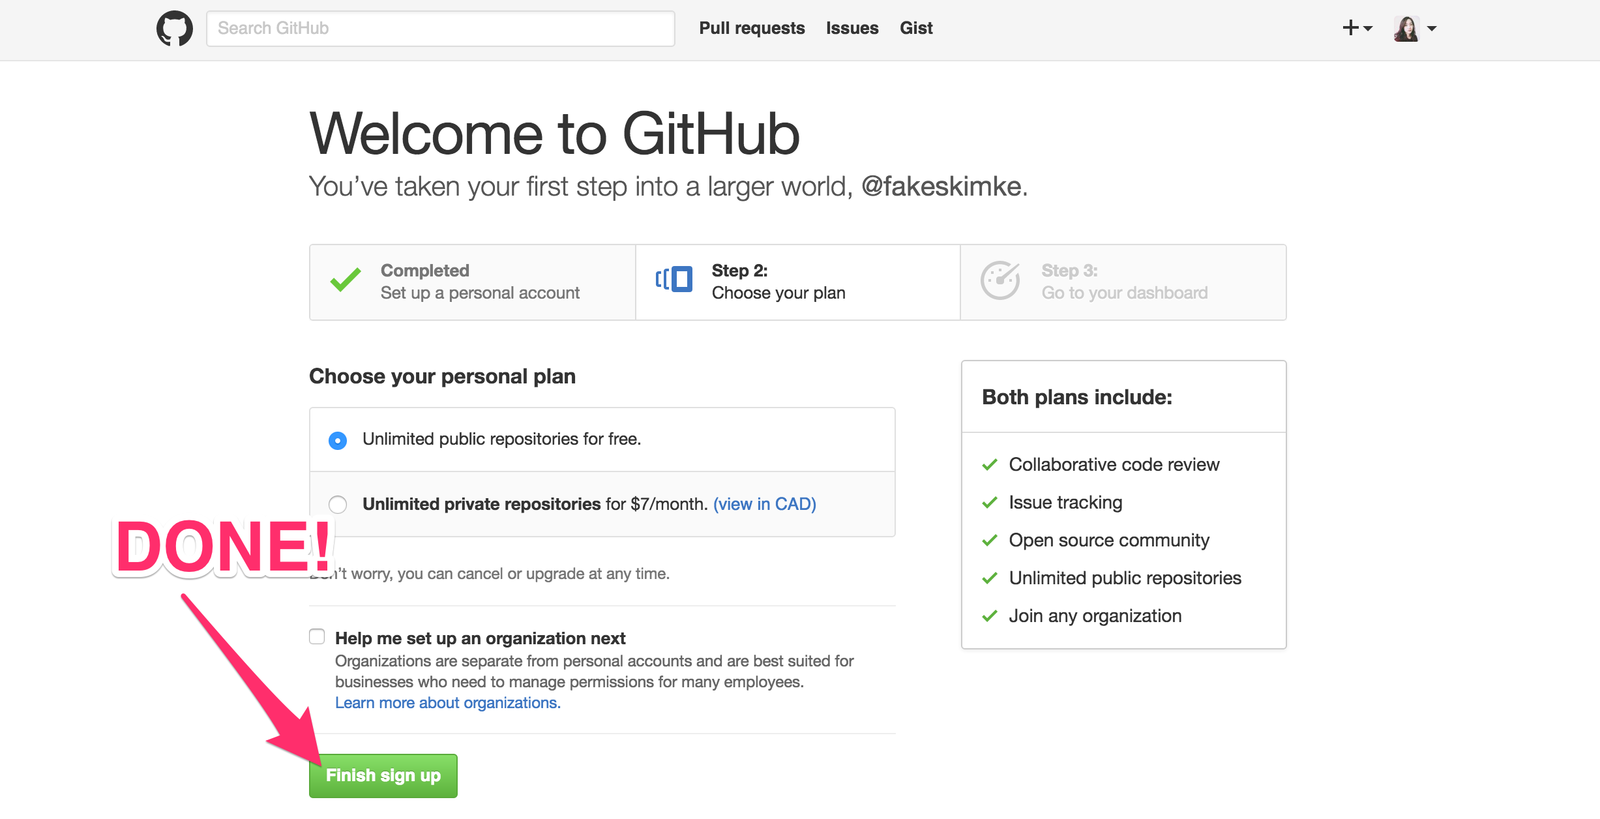
GitHub // Step 3
Click "Finish sign up"
GitHub // Step 4
Go to our project's URL
https://github.com/LothertonVillage/home
( we will need to add you as a collaborator )
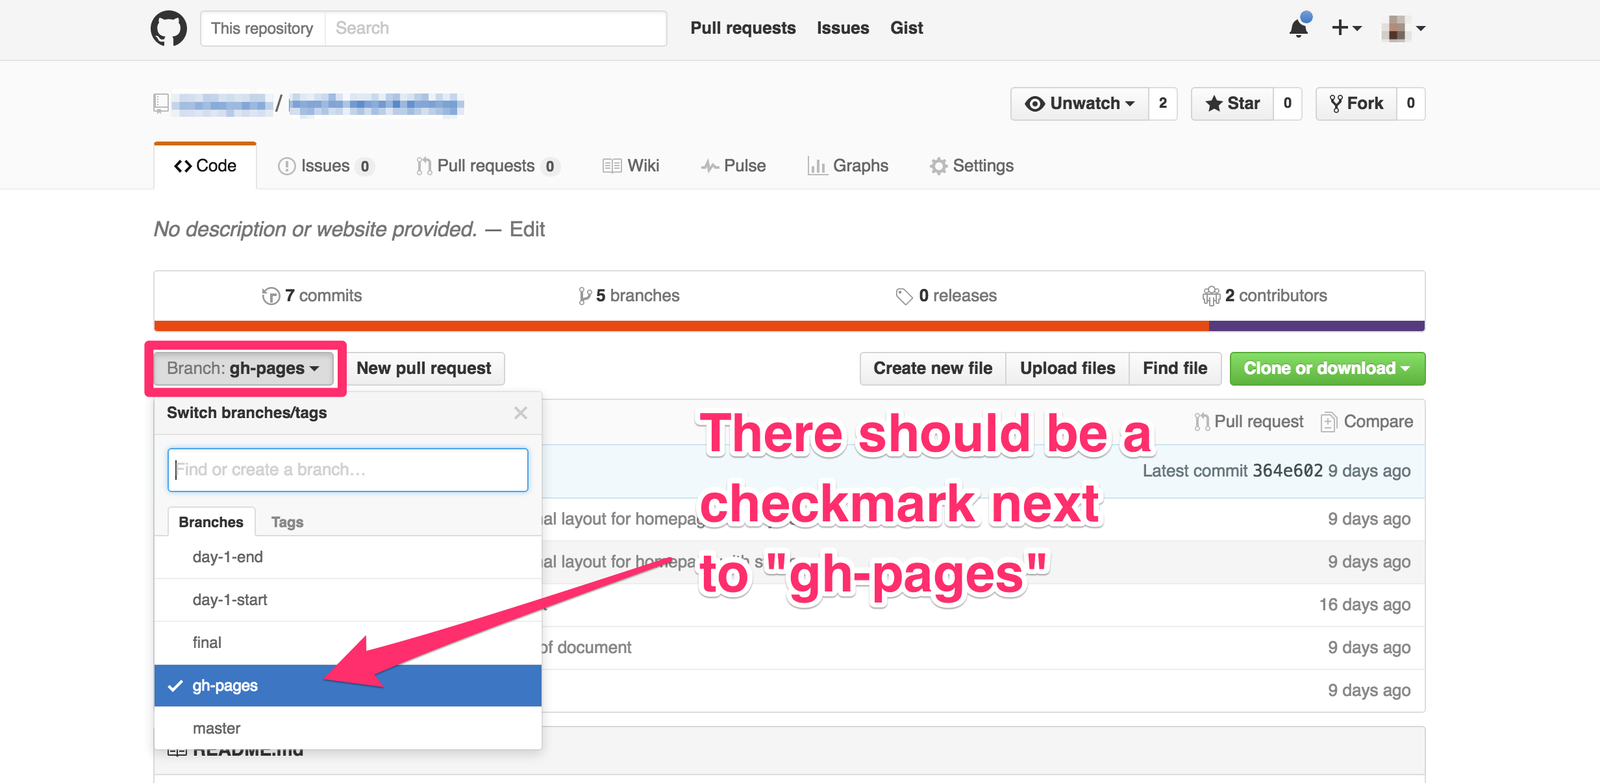
GitHub // Step 5
Ensure that the gh-pages branch is selected
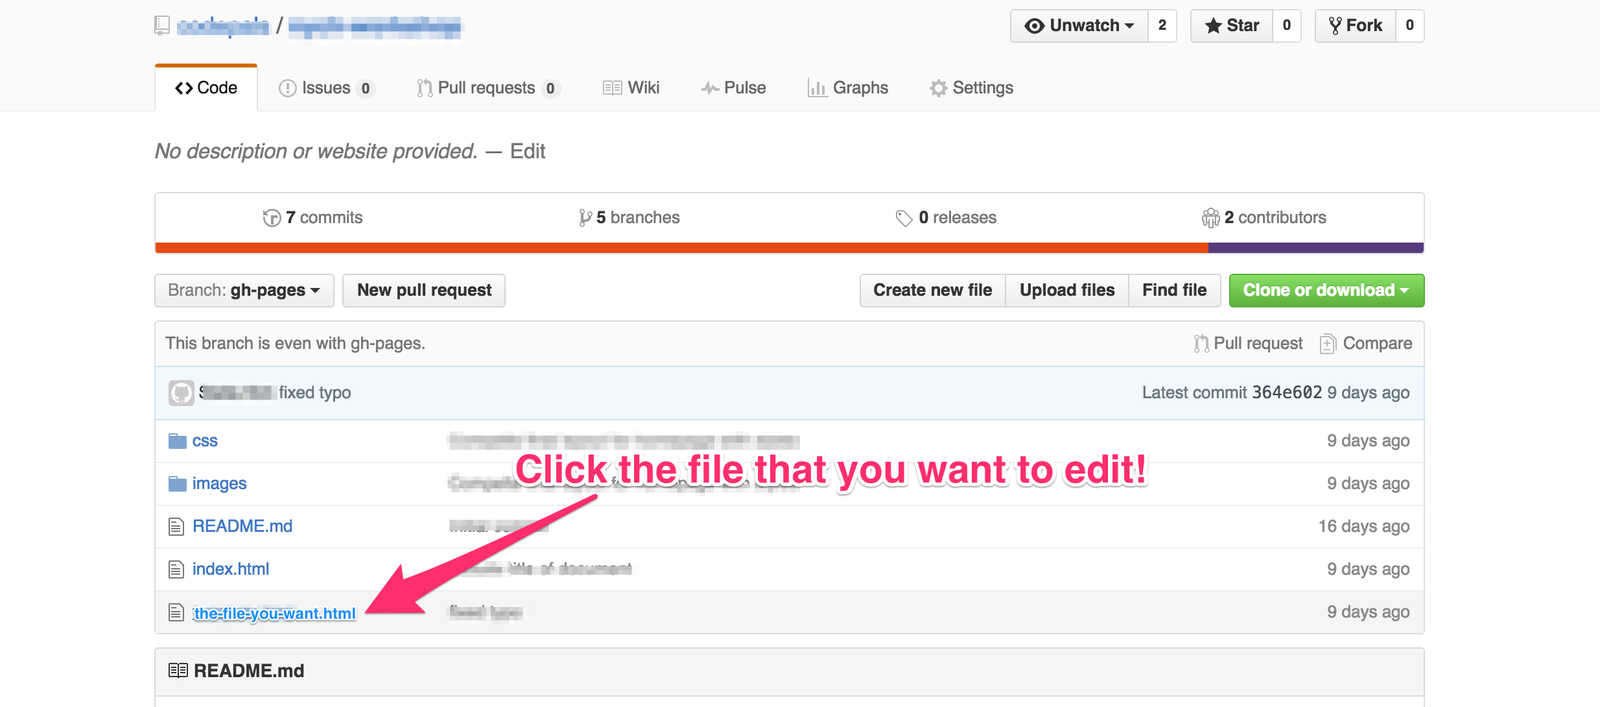
GitHub // Step 6
Select the file you want to edit (ie. some-file.html)
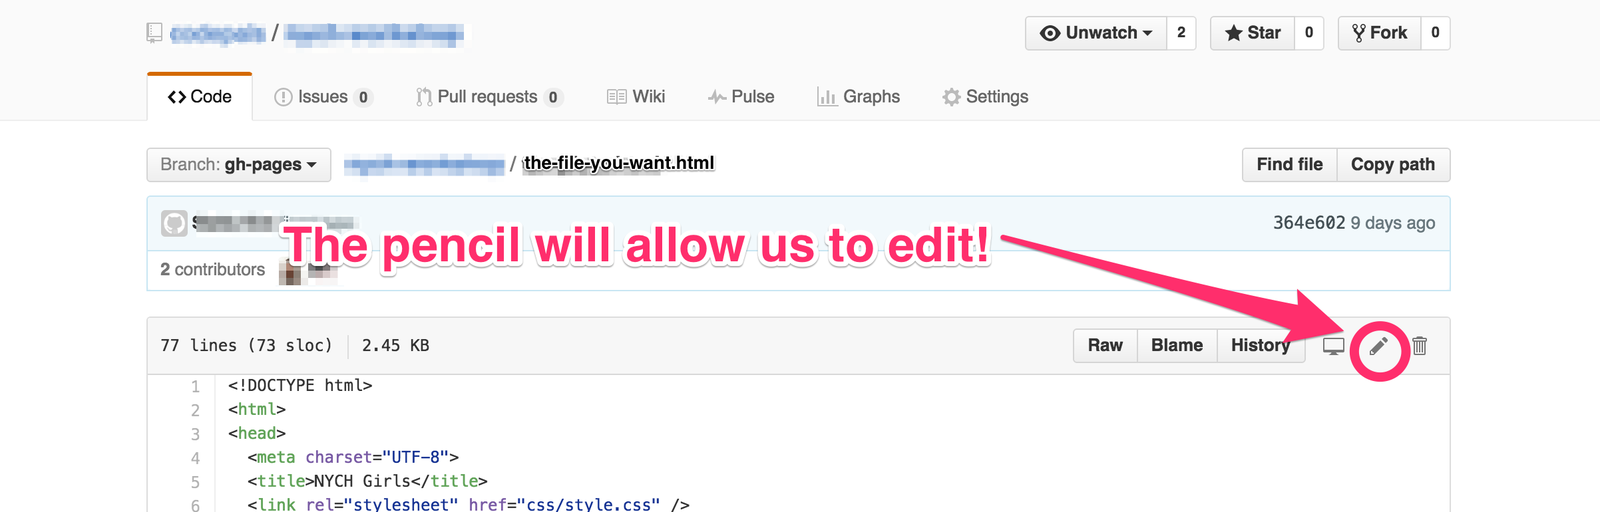
GitHub // Step 7
Click on the pencil icon to edit your file
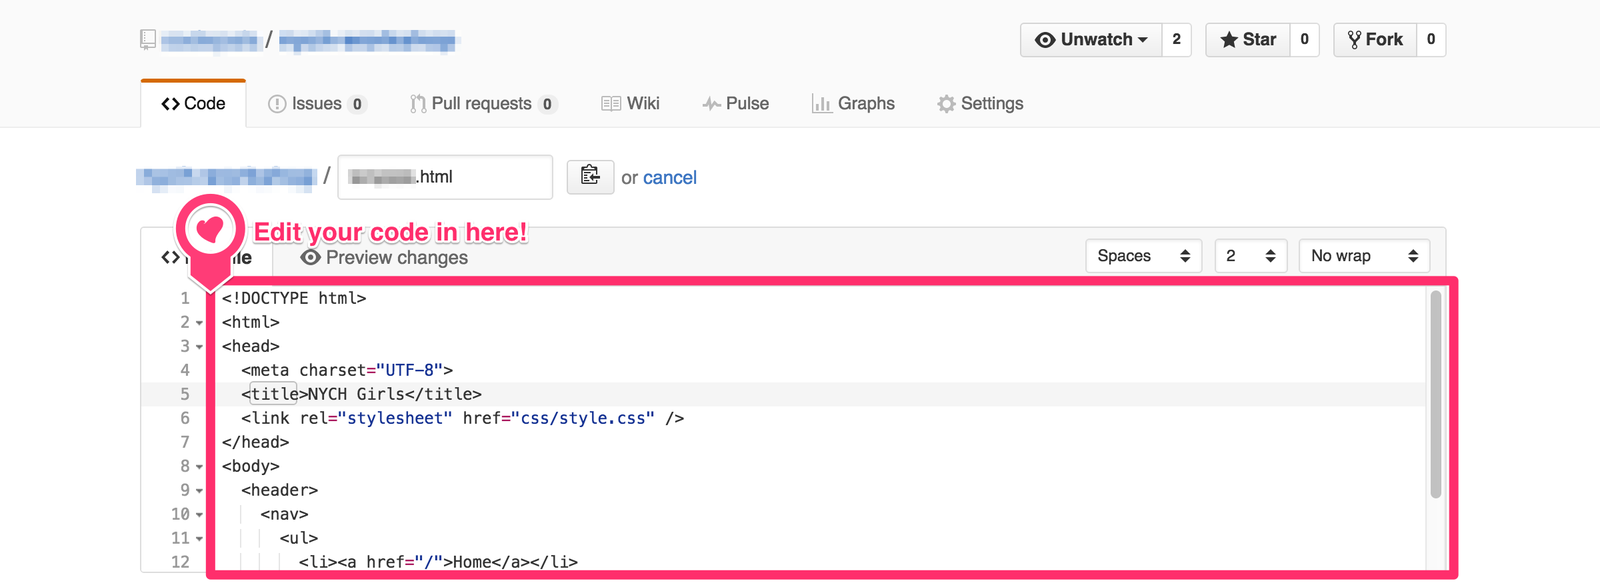
GitHub // Step 8
Copy and paste your code from Atom into this box
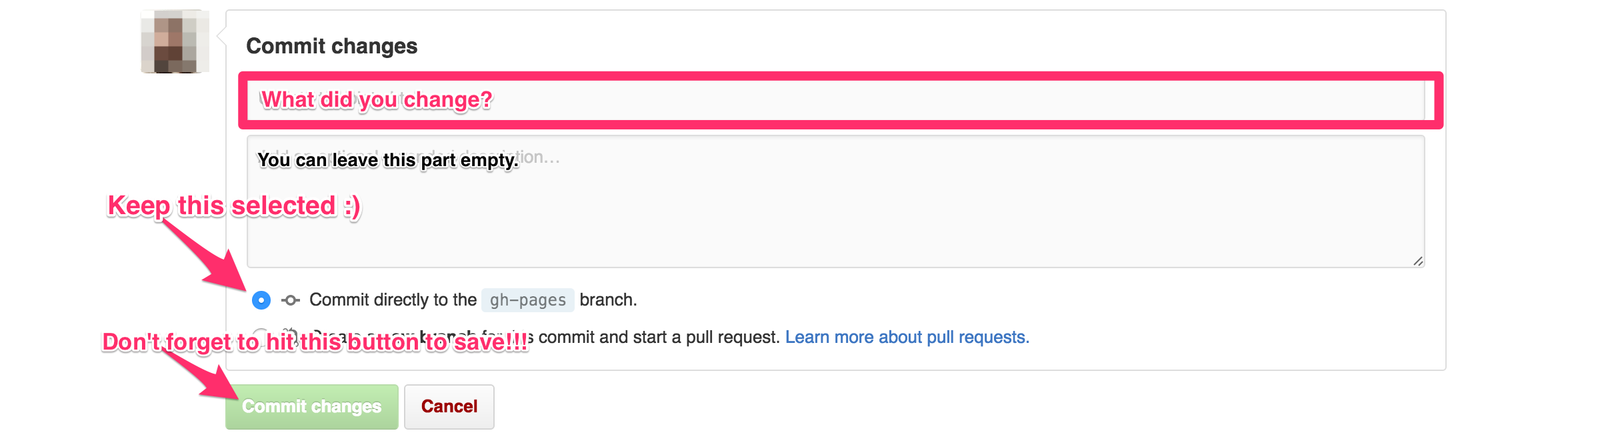
GitHub // Step 9
Write a summary about what you did and click on the "Commit changes" button
GitHub // Step 10
That's it! You did it :D!
Now, go to <the url> to see your site.

GitHub
The URL follows this structure:
https://username.github.io/
project-name/file-name.html
(Replace the red text with the appropriate information)
What's next?
NEXT STEPS
PRACTICE.
NEXT STEPS
PRACTICE.
PRACTICE.
NEXT STEPS
Reference Guides
( http://html5doctor.com/ )
( https://css-tricks.com/almanac/ )
NEXT STEPS
If you keep working hard, you'll be a master in no time!

NEXT STEPS
Continue learning with these free resources!
- Codecademy.com
- Lynda.com
- Khan Academy
NEXT STEPS
Keep Going!
In 2014, 26% of computing jobs were held by women – and that’s down from 36% in 1991.
http://themacro.com/articles/2016/06/women-who-code/
But you can solve real world problems with code!
NEXT STEPS
Keep Going!
Can you think of problems that
guys don't notice
but you would want to solve?
NEXT STEPS
Contact us if you need a hand :)

@skimke
@bettymakes
Find us on Twitter
NYCH HTML CSS Workshop - Part 2
By bettymakes
NYCH HTML CSS Workshop - Part 2
HTML Workshop - Stella & Betty