Sass and WordPress
Seattle WordPress Dev Meetup
July 2015
Darren Krape | @dkrape
What is Sass?
Preprocessor for CSS
Why?
- Organization
- Variables
- Nesting
- Math
- Mixins
Why? Organization
@import "base/reset";

//Helpers
@import "helpers/mixins";
@import "helpers/variables";

//Layout
@import "layout/grid";

//Components
@import "components/alerts";
@import "components/buttons";

//Sections
@import "sections/home"
@import "sections/contact"
Why? Variables
$margin-base: 1rem;
$color-primary: blue;

.navigation {
  background: $color-primary;
  margin-bottom: $margin-base;
}
.navigation {
background: blue;
margin-bottom: 1rem;
}SCSS
CSS
Why? Nesting
.article {
  background: white;
  border: 1px solid #ccc;

  h1 {
    font-size: 1.5rem;
    font-weight: bold;
    }
  }
.article {
background: white;
border: 1px solid #ccc;
}
.article h1 {
font-size: 1.5rem;
font-weight: bold;
}SCSS
CSS
Why? Math
$gutter: 10px;

.article {
  margin-bottom: $gutter * 2;
  }
.article {
margin-bottom: 20px;
}SCSS
CSS
Why? Mixins
@mixin border-radius($radius) {
  -webkit-border-radius: $radius;
     -moz-border-radius: $radius;
      -ms-border-radius: $radius;
          border-radius: $radius;
  }

.box { @include border-radius(10px); }
.box {
-webkit-border-radius: 10px;
-moz-border-radius: 10px;
-ms-border-radius: 10px;
border-radius: 10px;
}SCSS
CSS
Getting started
Starting: Options
- Command line (with Compass)
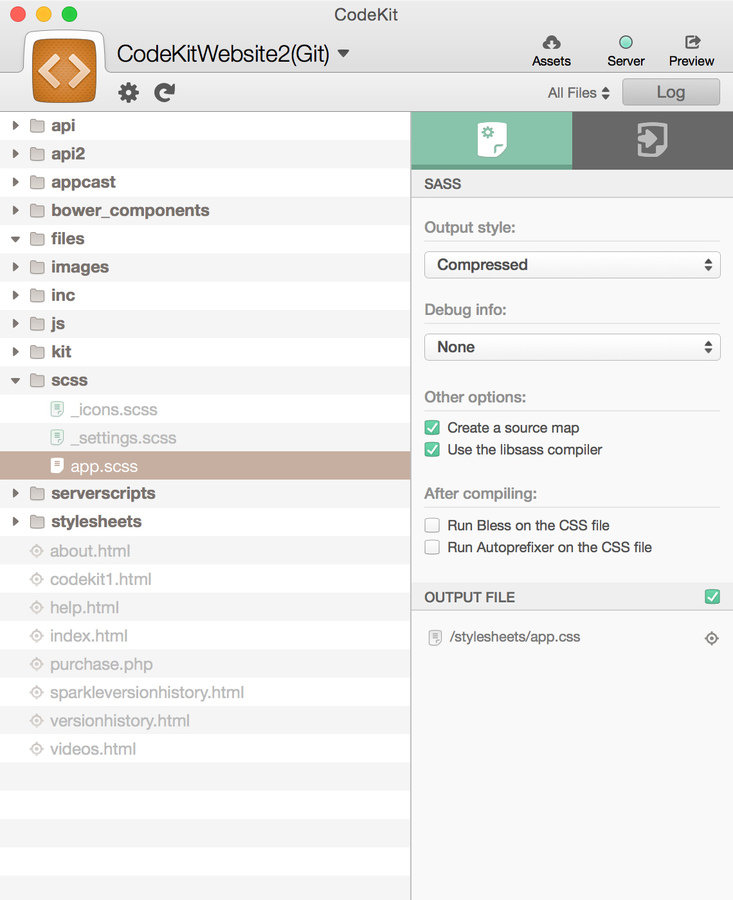
- CodeKit (Mac)
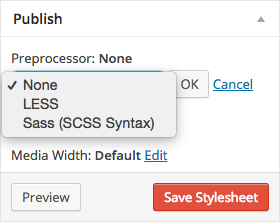
- Jetpack
- Whatever is on PCs...
Starting: Command Line
$ gem update --system
$ gem install sass
$ gem install compass
1. Terminal: Install Sass
If you get an error, add “sudo” before each command
Side note: Compass
CSS authoring framework
- Style reset
- CSS3 mixins (e.g., browser specific properties )
- Sprite helpers
Starting: Command Line
/config.rb
/style.css
/img/
/js/
/scss/
/scss/style.scss
2. Install your theme
3. Create folders and files in your theme
Side note: Formats
$margin: 16px

.content-navigation
  margin-bottom: $margin
$margin: 16px;
.content-navigation {
margin-bottom: $margin;
}.sass "indented syntax"
.scss "block format"
Starting: Command Line
http_path = "/" #root level target path
css_dir = "." #directory of default style.css file (root level of our theme)
sass_dir = "sass" #sass directory
images_dir = "img" #image directory
javascripts_dir = "js" #JavaScript directory

output_style = :expanded
4. Configure config.rb
Side note: Output style
.main {
  color: #fff;
  background-color: #000; }
  .main p {
    width: 10em; }
.main {
color: #fff;
background-color: #000;
}
.main p {
width: 10em;
}Nested (default)
Expanded
Side note: Output style
.main { color: #fff; background-color: #000; }
.main p { width: 10em; }.main{color:#fff;background-color:#000}.main p{width:10em}Compact
Compressed
Starting: Command Line
$ cd yoursite/wp-content/themes/yourtheme
$ compass watch
5. In terminal, "Watch" your project
6. Write some Sass, edit "sass/style.scss"
$background-color: red;

body {
  background: $background-color;
  }
Starting: Command Line
7. Save the file and see it compile

Starting: CodeKit

$32
- Super easy
- Good for dependancies
- Funny version history
Starting: Jetpack and PCs
Jetpack: "Appearance"
> "Edit CSS"

PCs: ...umm...

Let's write some
Sass...
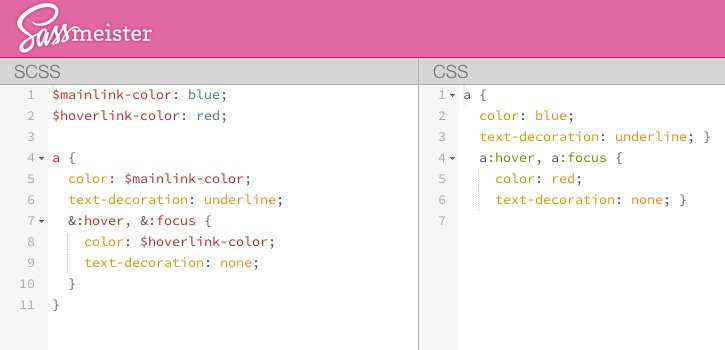
SassMeister

1. Organization
@import "css/components/buttons"CSS (not awesome)
Sass (awesome)
@import url('css/components/buttons.css');1. Organization
//Base
@import "compass/reset"

//Helpers
@import "helpers/mixins";
@import "helpers/variables";

//Typography
@import "base/typography";

//Layout
@import "layout/grid";
@import "layout/header";
@import "layout/footer";
//Components
@import "components/buttons";
@import "components/navigation";
@import "components/tables";
@import "components/widgets";
//Sections (pages)
@import "sections/home";
@import "sections/contact";
// Third-party
@import "vendor/jquery.ui.core";
//Refile
@import "junk";In "scss/style.scss"
1. Organization
- Do what works for you
- Nearly all @includes in root style.scss
- Use a “junk.scss” file
- Sass source maps
2. Variables: variables.scss
// Typography
$font__family--main: "Arial", sans-serif;
$font__family--secondary: "Roboto", serif;

$font__size--sm: 1rem;
$font__size--md: 1.5rem;
$font__size--lg: 2rem;
$font__size--xlg: 3rem;

// Sizing
$spacing--base: 3rem;

$spacing--sm: ( $spacing--base * 0.5 );
$spacing--md: $spacing--base;
$spacing--lg: ( $spacing--base * 1.5 );
$spacing--xlg: ( $spacing--base * 2.25 );
2. Variables: variables.scss
// Color: Primary (Peach)

$color__primary: #fb9e82;
$color__primary--dark: darken( $color__primary, 10% );
$color__primary--light: lighten( $color__primary, 5% );

// Color: Trim (Warm gray)

$color__trim: #97a0ab;
$color__trim--dark: #545a5f;
$color__trim--light: #b9bedb;

// Breakpoints

$breakpoint--full: 1000px;
$breakpoint--md: 600px;
$breakpint--sm: 300px;
3. Nesting
.widget {
  border: 1px solid #ccc;
  padding: 10px;

  h1 {
    font-size: 2rem;
    margin-bottom: 6px;
    }

  section {
    background: gray;
    }
  }
.widget {
border: 1px solid #ccc;
padding: 10px;
}
.widget h1 {
font-size: 2rem;
margin-bottom: 6px;
}
.widget section {
background: gray;
}Sass
CSS
3. Nesting: Be careful
.home {
  background: white;

  .content {
    font-size: 1rem;

    .sidebar {
      margin-left: 10px;

      .widget {
        border: 1px solid #ccc;
        }
      }
    }
  }
.home {
background: white;
}
.home .content {
font-size: 1rem;
}
.home .content .sidebar {
margin-left: 10px;
}
.home .content .sidebar .widget {
border: 1px solid #ccc;
}Sass
CSS
3. Nesting: Parent Selectors
a {
  color: blue;

  &:hover {
    color: red;
    }

  &:visited {
    color: purple;
    }

  &:after {
    content: "...";
    }
  }
a {
color: blue;
}
a:hover {
color: red;
}
a:visited {
color: purple;
}
a:after {
content: "...";
}
Sass
CSS
3. Nesting: Parent Selectors
.banner {
  background: gray;
  color: white;

  &.success {
    background: green;
    }
  }
.banner {
background: gray;
color: white;
}
.banner.success {
background: green;
}
Sass
CSS
3. Nesting: Parent Selectors
.header {
  padding: 10px;

  .theme-light & {
    background: white;
    color: black;
    }

  .theme-dark & {
    background: black;
    color: white;
    }
  }
.header {
padding: 10px;
}
.theme-light .header {
background: white;
color: black;
}
.theme-dark .header {
background: black;
color: white;
}
Sass
CSS
4. Math: Super Simple Grid
$col--width: 60px;
$gutter--width: 14px;

.row { clear: both; margin-bottom: 10px; overflow: hidden; }

.col { background: red; float: right; margin-right: $gutter--width; }

.col1 { width: $col--width; }

.col2 { width: ( $col--width * 2 ) + ( $gutter--width * 1 ); }

.col3 { width: ( $col--width * 3 ) + ( $gutter--width * 2 ); }
Sass
4. Math: Super Simple Grid
.row {
  clear: both;
  margin-bottom: 10px;
  overflow: hidden; }

.col {
  background: red;
  float: right;
  margin-right: 14px; }

.col1 {
  width: 60px; }

.col2 {
  width: 134px; }

.col3 {
  width: 208px; }
CSS
4. Math: Super Simple Grid
<div class="row">
  <div class="col col1"> </div>
  <div class="col col1"> </div>
  <div class="col col1"> </div>
</div>

<div class="row">
  <div class="col col1"> </div>
  <div class="col col2"> </div>
</div>

<div class="row">
  <div class="col col3"> </div>
</div>
5. Mixins: Super simple
@mixin border-radius($radius) {
  -webkit-border-radius: $radius;
     -moz-border-radius: $radius;
      -ms-border-radius: $radius;
          border-radius: $radius;
  }

.box {
  @include border-radius(10px);
  }
.box {
-webkit-border-radius: 10px;
-moz-border-radius: 10px;
-ms-border-radius: 10px;
border-radius: 10px;
}Sass
CSS
5. Mixins: Control directives
@if
@for
@while
@each
5. Mixins: Control directives
$col--count: 4;
$col--width: 60px;
$gutter--width: 14px;

.col {
  float: right;
  margin-right: $gutter--width;
  }

@for $i from 1 through $col--count {
  .col-#{$i} {
    width: ( $col--width * $i ) + ( $gutter--width * ( $i - 1  ) );
    @extend .col;
    }
}
Sass
5. Mixins: Control directives
.col, .col-1, .col-2, .col-3, .col-4 {
  float: right;
  margin-right: 14px; }

.col-1 {
  width: 60px; }

.col-2 {
  width: 134px; }

.col-3 {
  width: 208px; }

.col-4 {
  width: 282px; }
CSS
5. Mixins: Sass grid
@mixin grid( $col--width, $col--count, $gutter--width  ) {

  .col {
    float: right;
    margin-right: $gutter--width;
    }

  @for $i from 1 through $col--count {
    .col-#{$i} {
      width: ( $col--width * $i ) + ( $gutter--width * ( $i - 1  ) );
      @extend .col;
      }
  }

}

@include grid( 60px, 4, 14px  );
Sass
.col, .col-1, .col-2, .col-3, .col-4 {
  float: right;
  margin-right: 14px; }

.col-1 {
  width: 60px; }

.col-2 {
  width: 134px; }

.col-3 {
  width: 208px; }

.col-4 {
  width: 282px; }
CSS
5. Mixins: Sass grid
5. Mixins: @Each and lists
@mixin nav( $nav-items ) {

  .nav-item {
    float: left;
    height: 30px;
  }

  @each $curr-nav in $nav-items {
    .nav-#{$curr-nav} {
        background-image: url('../i/nav-icon-#{$curr-nav}');
    }
  }
}

$nav-items: 'home', 'services', 'contact';

@include nav( $nav-items );
Sass
5. Mixins: @Each and lists
.nav-item {
  float: left;
  height: 30px; }

.nav-home {
  background-image: url("../i/nav-icon-home"); }

.nav-services {
  background-image: url("../i/nav-icon-services"); }

.nav-contact {
  background-image: url("../i/nav-icon-contact"); }
CSS
Other goodies
Other goodies
-
Susy Grid
Powerful, flexible grid system -
Bourbon
Simple, lightweight mixin library -
Bootstrap Sass
Official Sass port
More resources
More resources
-
sass-guidelin.es
Opinionated Sass styleguide -
TheSassWay
Good tutorials, from beginner to advanced -
DN: How do you organize your Sass?
Real-world examples of Sass organization
Sass and WordPress
By Darren Krape
Sass and WordPress
An introduction to using Sass in your next WordPress project.
- 2,021
