
Elisa Beshero-Bondar PRO
Professor of Digital Humanities and Chair of the Digital Media, Arts, and Technology Program at Penn State Erie, The Behrend College.
Link to these slides: https://bit.ly/shellgit
Link to these slides: https://bit.ly/shellgit
space or tab to this section
cd [space]
cd directoryName
cd ..
ls -lh
change directory (go walking the directory tree up or down)
print working directory
(show me the full filepath location where I am right now)
list files and directories below me
("look see")
cd [space] takes you to the "home" directory of your computer. Try it, and then enter pwd to see where it takes you.
cd directoryName goes down a level into the directory you indicate
cd .. climbs UP to the parent directory
ls -lh adds a special flag to return lots of information about last-access dates and file sizes and more.
mkdir myNewDirectory
"make directory": Use this as a convenient way to create and name a new directory. Remember: do NOT put spaces in your directory or file names!
Spaces in folder and filenames makes it very difficult to navigate or share them!
Use this to create a new file. It will be empty until you edit it to add new content. You could, for example, start a new file named newFile.xml, open it in oXygen and edit it.
touch newFile.xml
grep -n "slime" Slime.xml
grep -r "string" .
grep "string" file.xml
grep literally means "global regular expression print". It means, go searching for a string in a file or a directory.
You can ignore case with -i.
You can plug in regex patterns with -E or egrep
literally, "concatenate", or just show all the contents of a file
cat Slime.xml
grep -E rec.p Slime.xml
wc Slime.xml
"word count". Gives you four columns:
numbers of lines, number of words, number of characters, filename
that reads:
ls "pipe" wc -"el"
This is handy way to count the files in a directory! ls sends a list of your files to the wc function, which counts their lines, giving you a file count.
These commands can rename a file, or move it to a new location. Indicate the source file and the destination directory. If renaming indicate the new name.ext
mv deletes the original. cp copies without deleting the original
Renaming a file: Navigate to its directory, and use mv to change the name:
eeb4@salamander textAnalysis-Hub % cp Class-Examples/XML/joeyClassPush.xml Sandbox/Copies the file without deleting the original. Use the [tab] key to autocomplete to help you be sure a directory or filename is where you think it is.
mv joeyClassPush.xml joeyExample.xml
Link to these slides: https://bit.ly/shellgit
space or tab to this section
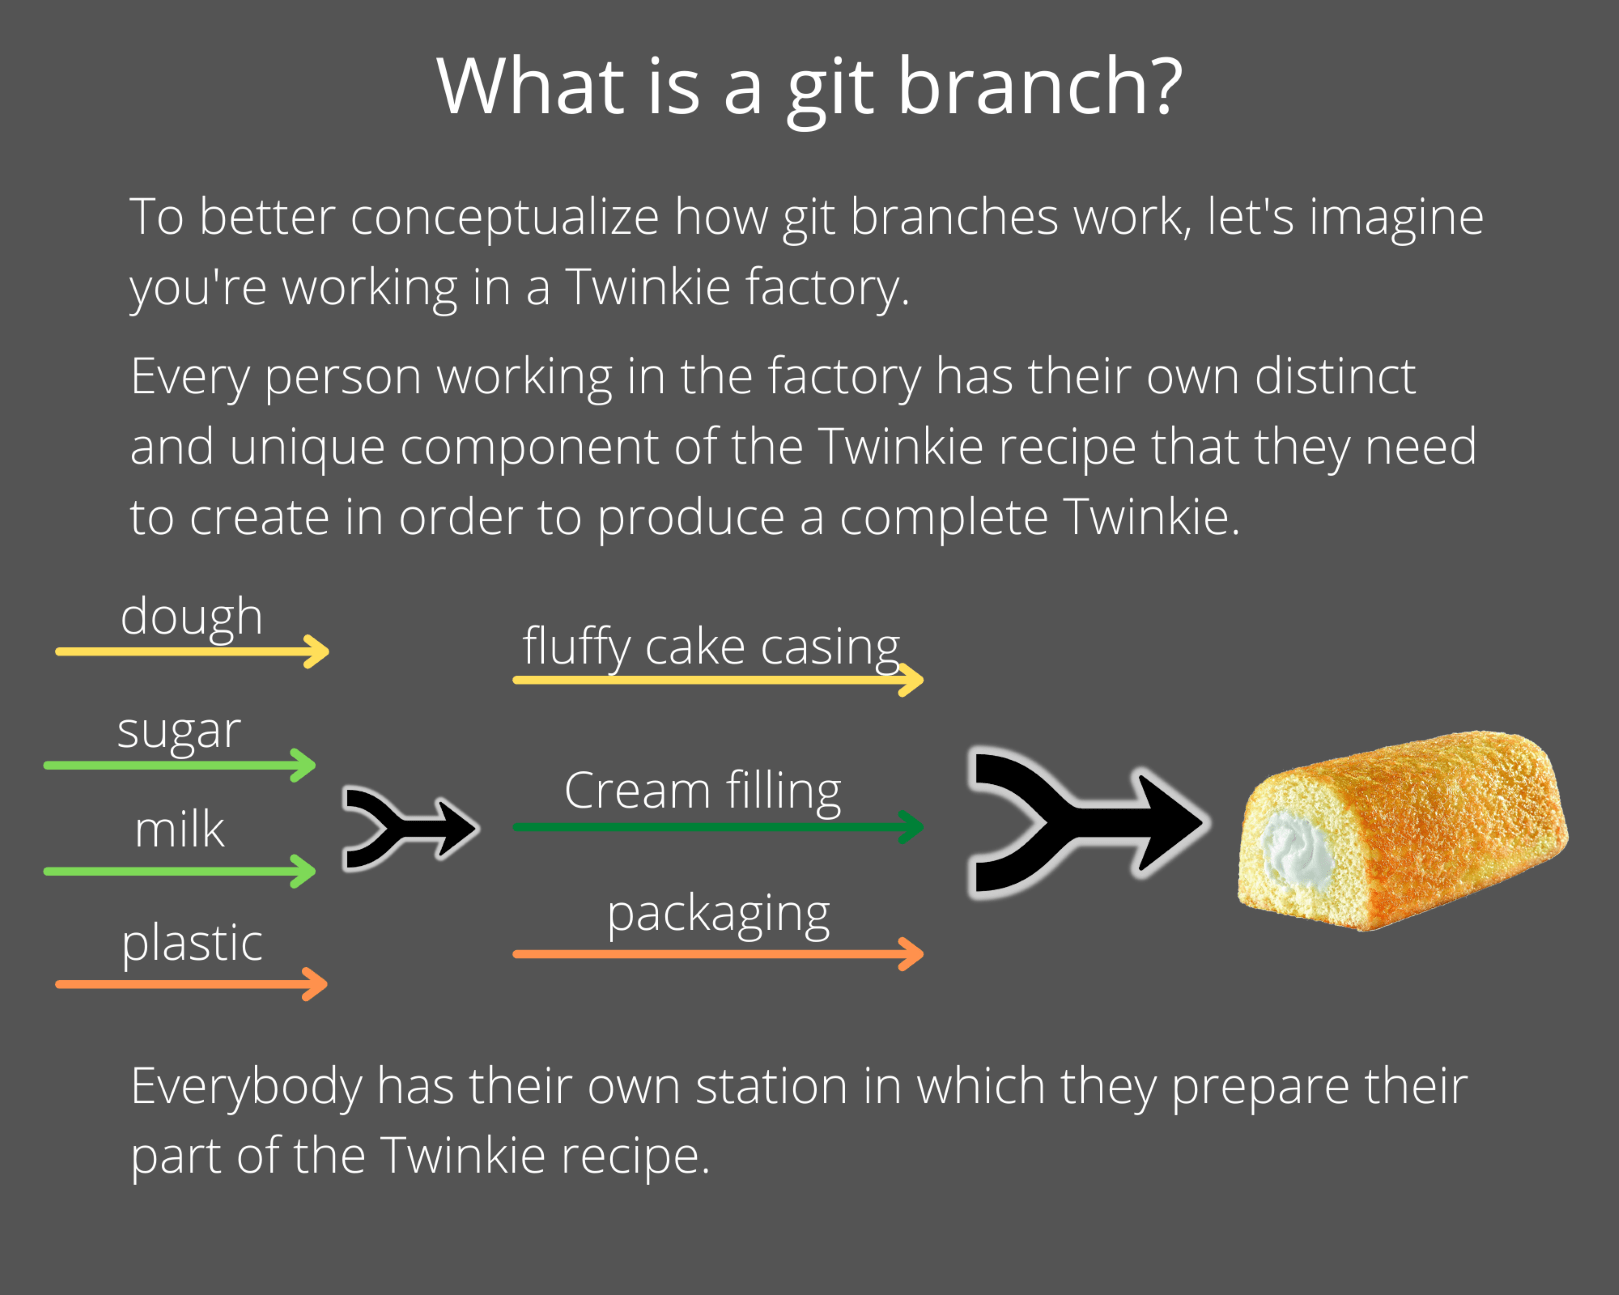
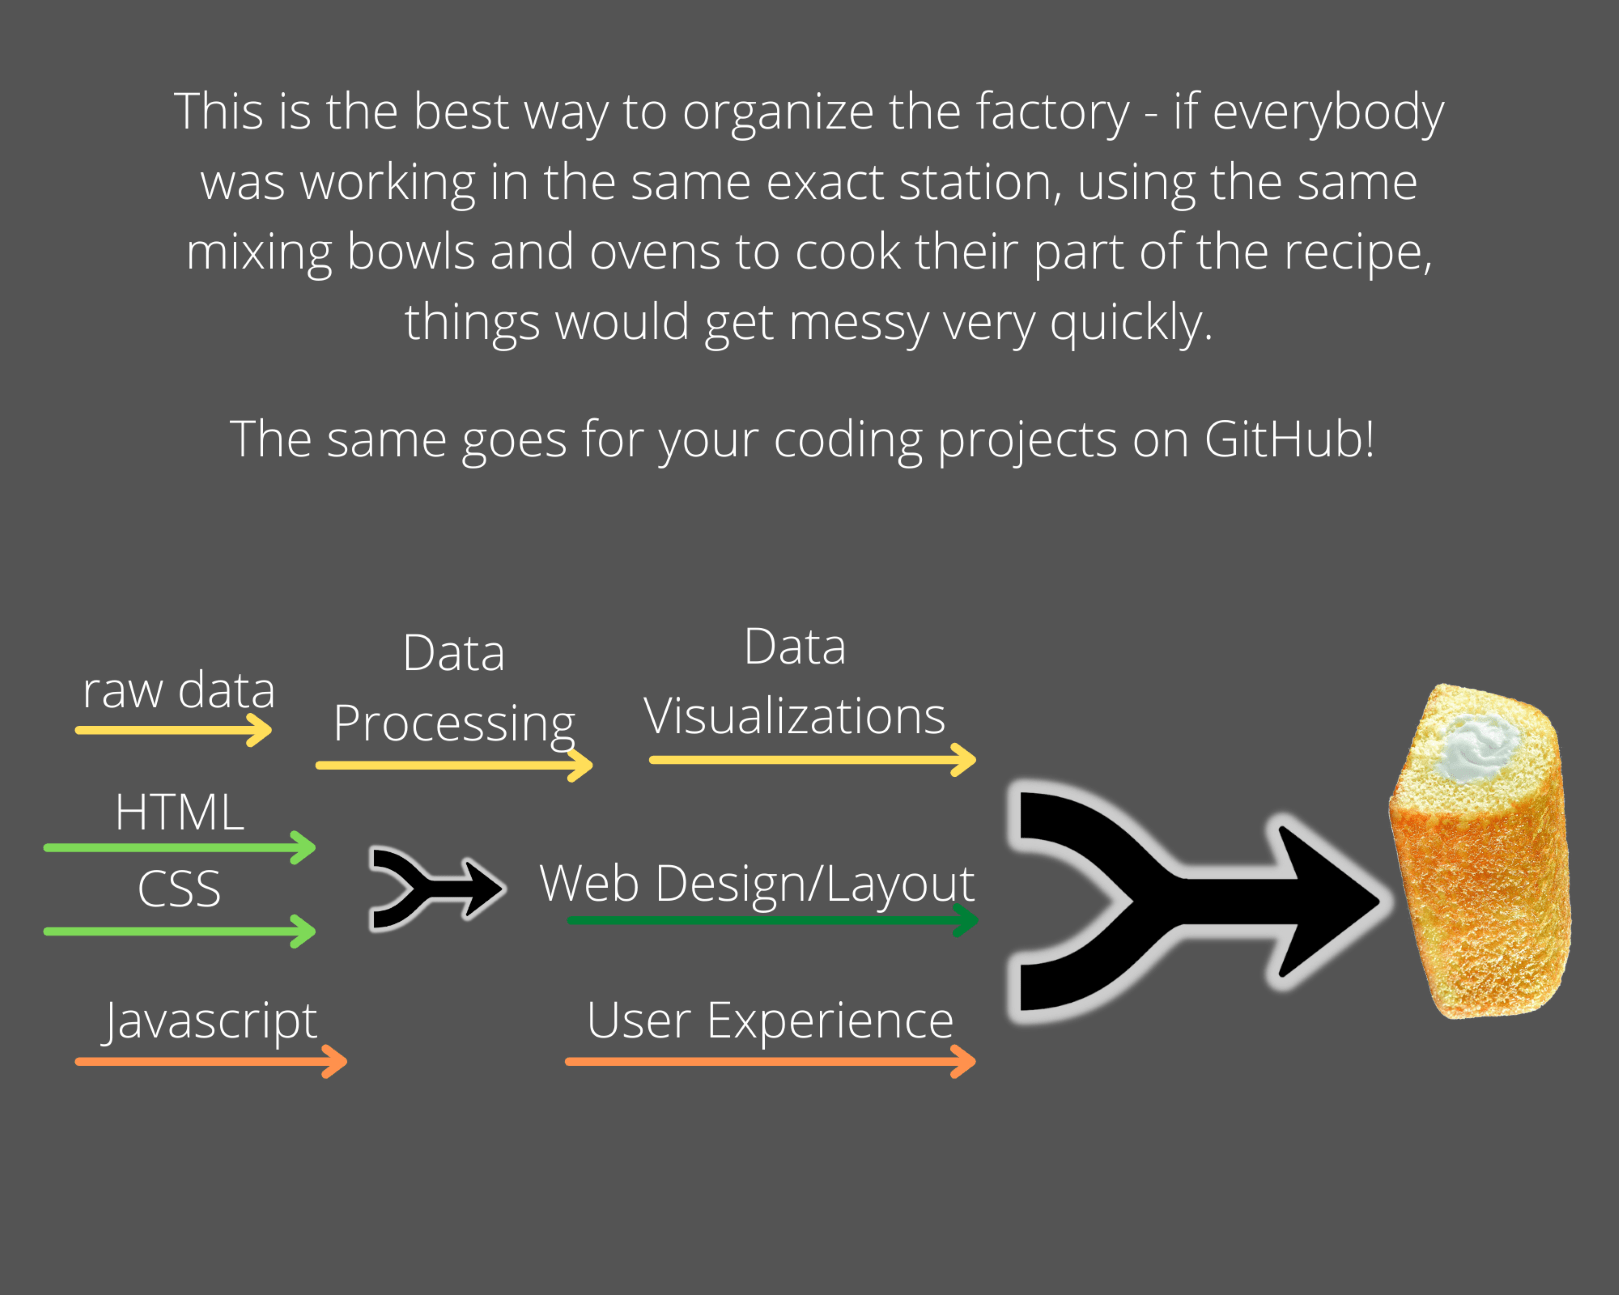
Thanks to Mia Borgia, (DIGIT grad, 2022) for the git twinkie visuals!
lists all of the branches on a repo
creates a new branch on your repo named elisaBranch, and "checks it out" by moving you to the branch. Name your branch something easy to distinguish from your peers!
Pushes the new branch (elisaBranch) up to the remote repo for tracking there.
pulls in new files committed to the branch you've checked out.
Scenario 1: Could you have pushed something to your remote repo from a school computer or the web interface? Are you at home now? Pull in your changes!
Scenario 2: Did your teammates or Dr. B push something to your branch the remote class or project repo? Pull in their changes!
Make sure you know what branch you want to be working in. Look and make sure you're on that branch. git branch lists the branches.
git checkout yourbranch
git checkout yourbranch switches you to the local branch that you indicate.
git fetch origin remotebranch
git checkout remotebranch
This pair of commands is how you access a branch that's on the remote repo and not your local computer yet. First you fetch the branch from the remote origin, then you can use the checkout command.
Usually you should git pull before you add, commit, and push anything new.
Exception to this: You have a change that you needed to commit but neglected. someone else added changes to the file. If you pulled in those changes, you'd lose your work. In this case, you should add the file first, with git add filename.ext
This tells you the status of your local repo only, whether there is anything new to be added, committed, or pushed.
Super useful command! git remote show origin provides information on the status of the remote repo on this branch by comparison with your local repo.
git add filename.ext
This "stages" your files or deletions in git's system to indicate that they are important and should not be overwritten when you do a git pull. You must git add your files before you can commit them. You can add every change with -A, or add only specific files.
You must remember to write a meaningful commit message (ideally short and clear). This will be logged in the git repo's history. Your message documents what this change is about.
Sends your commit to the remote repo's version of your branch.
After a pull request is merged in to the main branch:
Pull Request: Go to the remote repo and issue a pull request for your peers to merge your branch to the main branch
Git Courtesy: Do not approve your own pull requests. Someone else on your team should review and approve them. You will only approve other people's pull requests. Make a plan for this.
After someone has merged your pull request into the main branch on the remote repo, they should delete your remote branch
But your local branch will still persist in your local repo on your computer. You need to delete it.
You cannot delete a branch that you're currently using.
So switch to another branch before you delete.
If I need to delete a branch named elisaBranch, first I'll have a look at what branches are in my local repo with: git branch
eeb4@salamander XML % git branch
* elisaBranch
  main
This tells me I have two branches, elisaBranch and main. The asterisk (*) shows I'm currently in the elisaBranch.
To delete elisaBranch, switch to main with: git checkout main
eeb4@salamander XML % git checkout main
D	Class-Examples/XML/joeyClassPush.xml
Switched to branch 'main'
Your branch is up to date with 'origin/main'.
When you checkout the other local branch, git will show you that your files change. The other branch may not have the same files you worked on, so it will show these as deleted.
If you've had a pull request from your branch accepted, that's okay! You just need to pull in the changes to from the remote main branch.
So now that we've moved onto the local main branch, we should run: git pull
You might see something like this:
eeb4@salamander Class-Examples % git pull
remote: Enumerating objects: 8, done.
remote: Counting objects: 100% (8/8), done.
remote: Compressing objects: 100% (4/4), done.
remote: Total 8 (delta 4), reused 8 (delta 4), pack-reused 0
Unpacking objects: 100% (8/8), 343.71 KiB | 1.83 MiB/s, done.
Now that we're on the main branch and we've updated it from the accepted pull request, we can safely delete the local elisaBranch with:
git branch -d elisaBranch
The response shows us the branch was deleted. We can always confirm that by running: git branch
which displays the branches in your remote repo.
eeb4@salamander Class-Examples % git branch -d elisaBranch
Deleted branch elisaBranch (was c67ace1).
Be sure you are clear on:
You can also merge in changes from another branch to your own branch on your local computer. This can be tricky, but may be useful.
Again, be sure you are clear on:
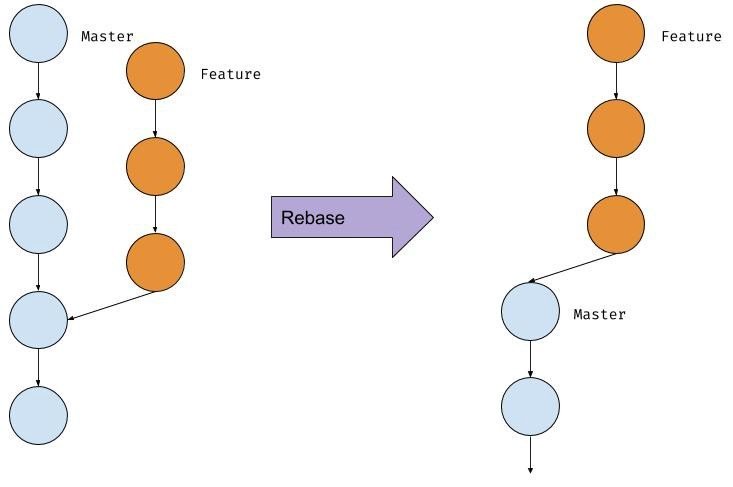
Think of it as weaving or interlacing the commits on your branches, keeping them in order and preserving their time-stamps
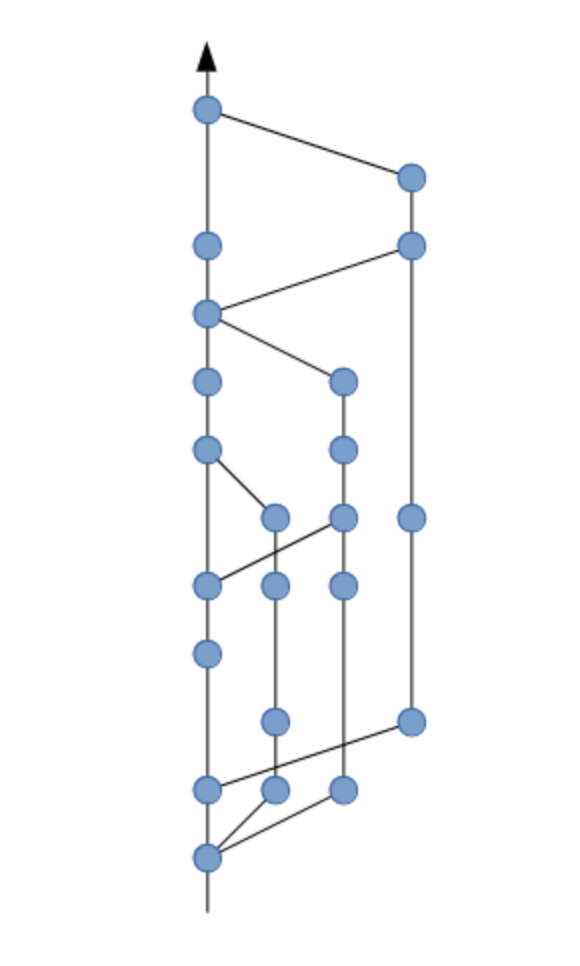
When you merge multiple branches, it starts to create a complicated web in your git repo history, maybe difficult to follow:
Image source: https://itnext.io/advantages-of-git-rebase-af3b5f5448c6
Remember:
By Elisa Beshero-Bondar
An orientation to the shell commands for working with git and GitHub.


