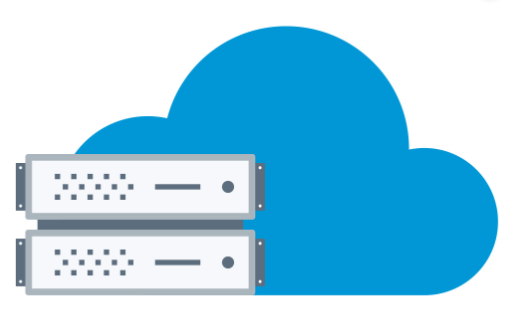
Distributed Node #4
CI / CD
$ whoami
Inna Ivashchuk
Senior Software Engineer
JS developer, music fan, movie-dependent and Star Wars fan 🤓
May the Force be with you!


$ guest
Dmytro Bielik
Senior Software Engineer
3+ years experience in DevOps
7+ years experience in IT engineering

Agenda:
- CI vs CD vs CD
- CI/CD tools
- What are the benefits of each practice?
- GitHub Actions in action

What is CI?

Continuous Integration
build
checks
developer

artifact
CI
VCS
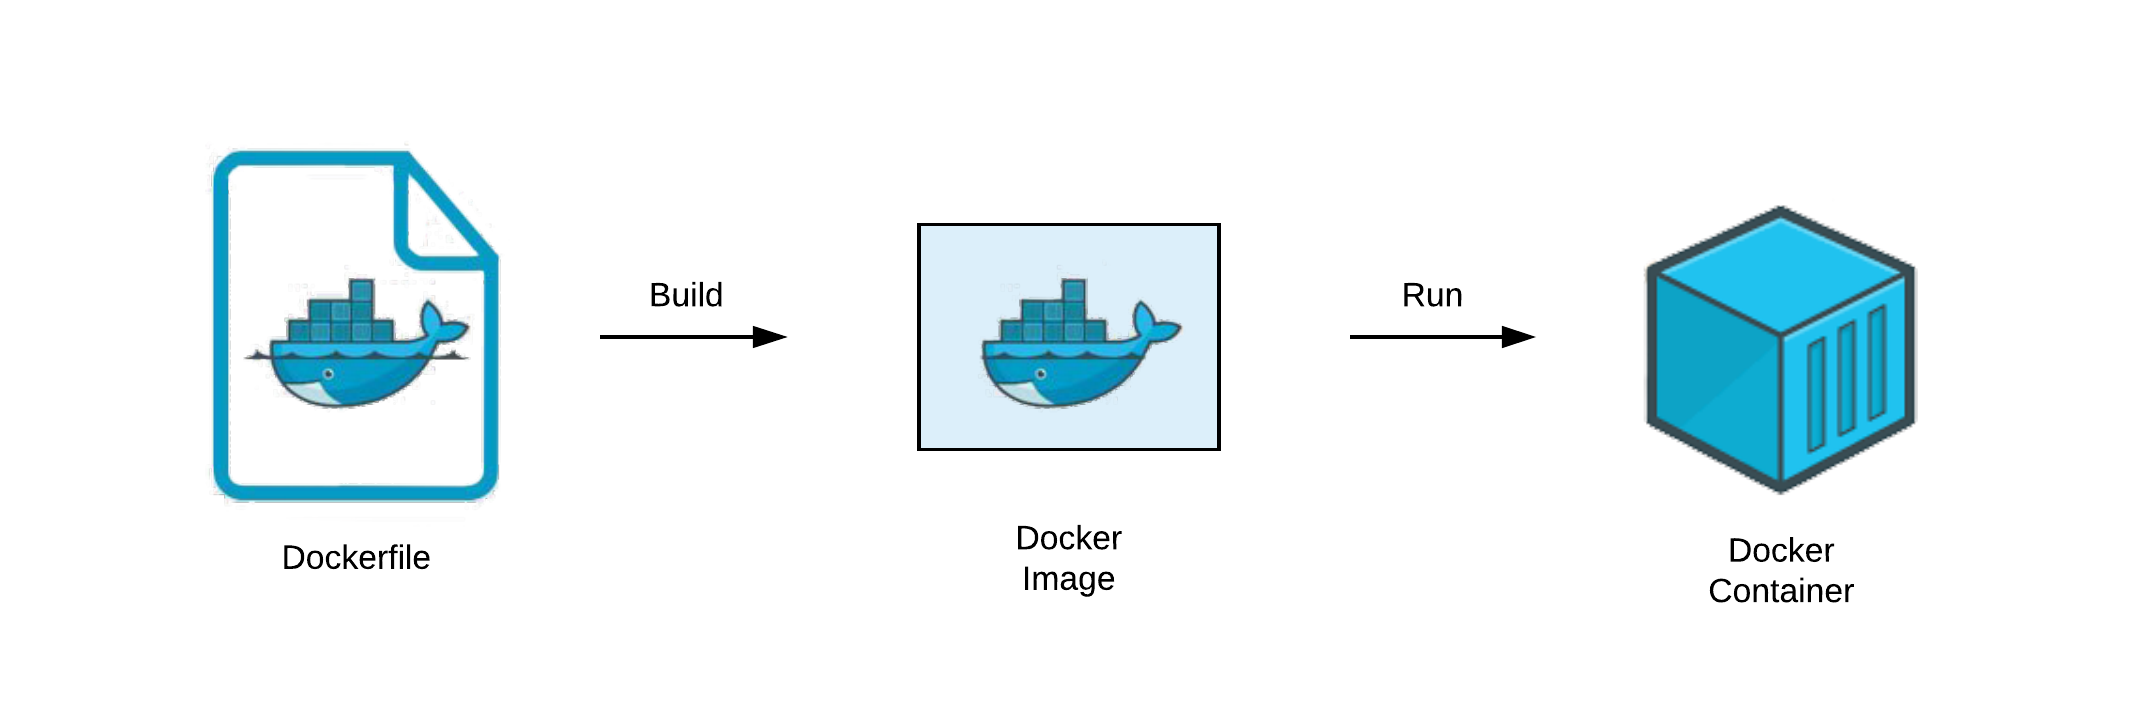
(Docker image)


- set up the environment
- install required dependencies
CI: preparation
Code checks using TypeScript ESLint:
CI: checks
- code styles
- typos
- missing symbols
- etc

CI: tests
Write and run tests is always a good idea


Time to build our application
CI: build
CI: useful tools

Danger runs during your CI process and gives teams the chance to automate common code review chores.
This provides another logical step in your build, through this Danger can help lint your rote tasks in daily code review.

CI: useful tools
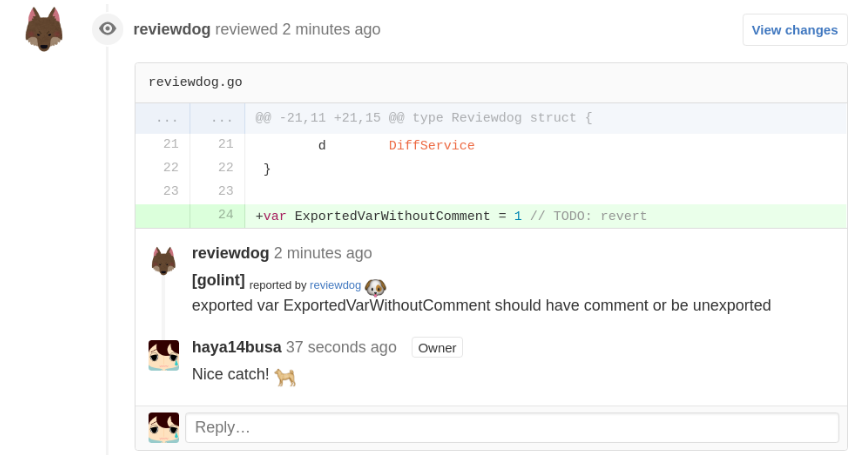
Reviewdog provides a way to post review comments to code hosting service, such as GitHub, automatically by integrating with any linter tools with ease. It uses an output of lint tools and posts them as a comment if findings are in diff of patches to review.

What is CD?

CD vs CD

Continuous Delivery/Deployment
artifact
CD
dev
production
(docker image)

Continuous Integration + Continuous Delivery || Continuous Deployment
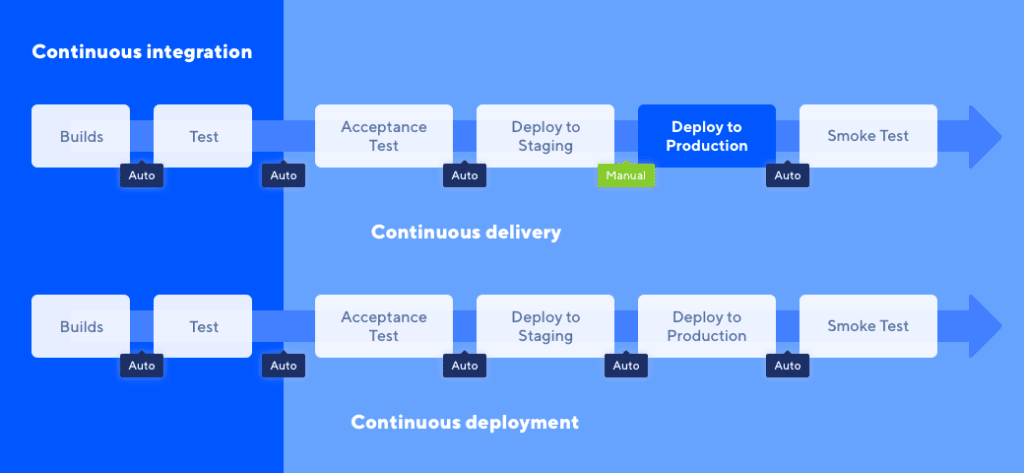
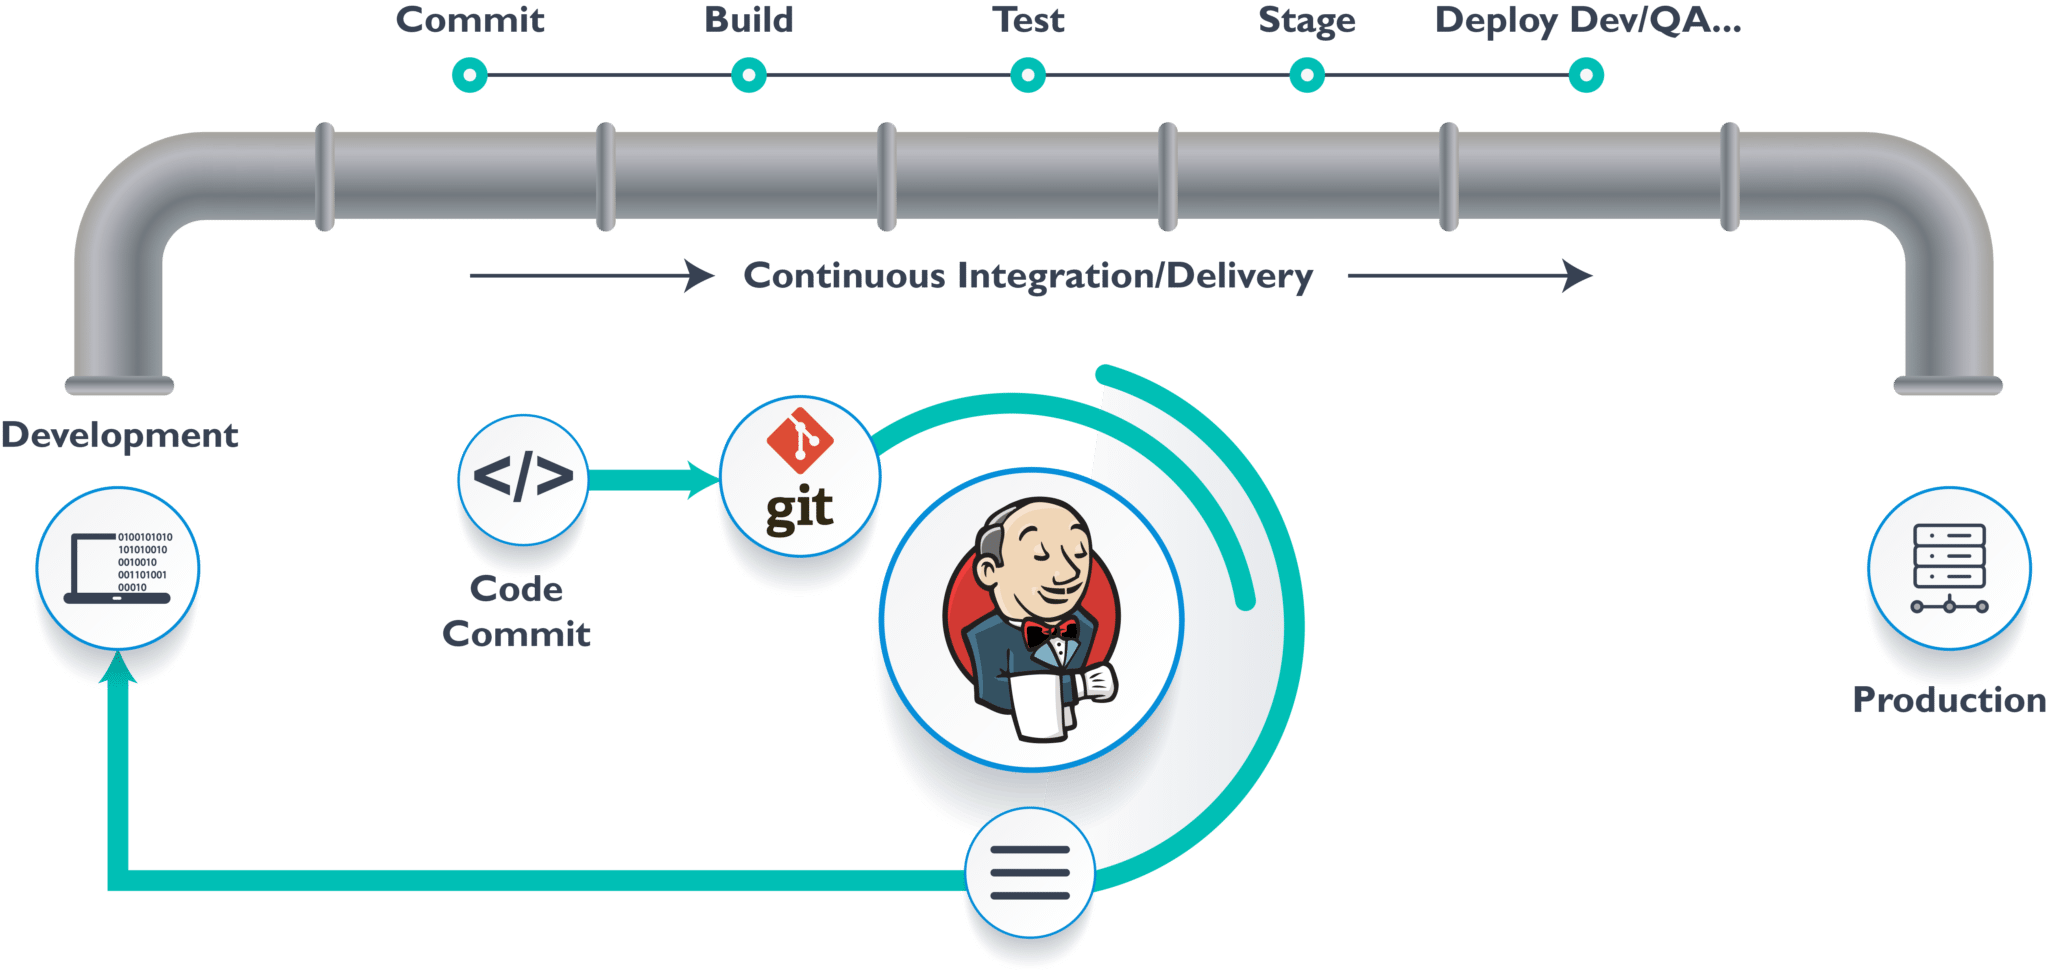
CI/CD pipeline
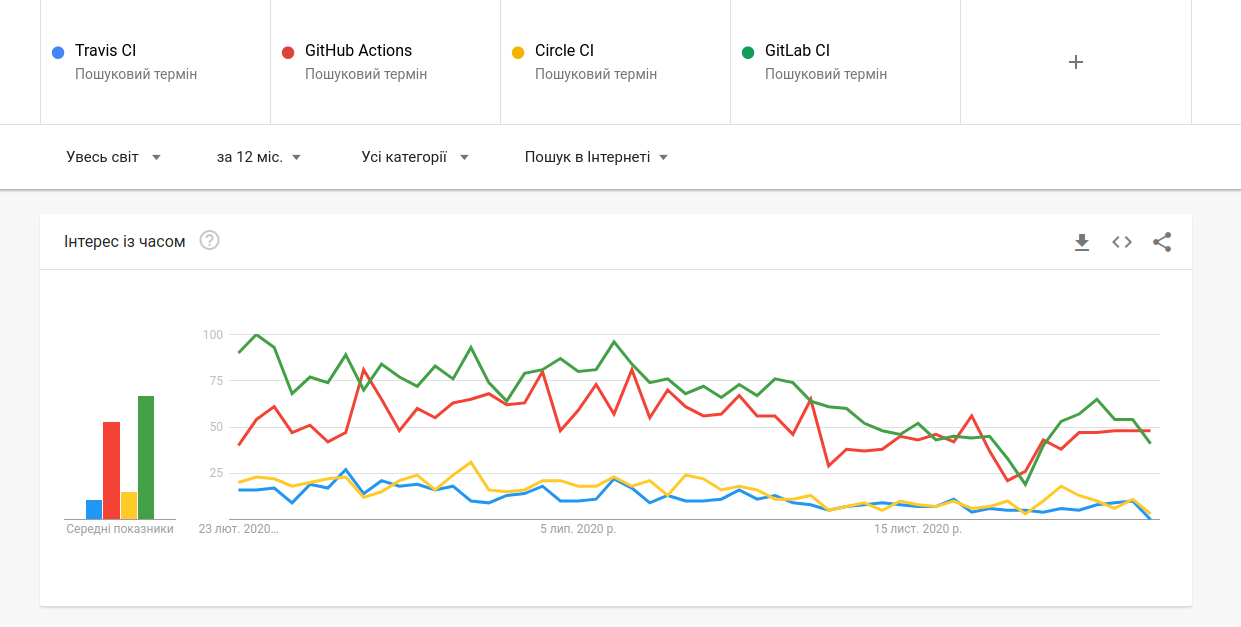
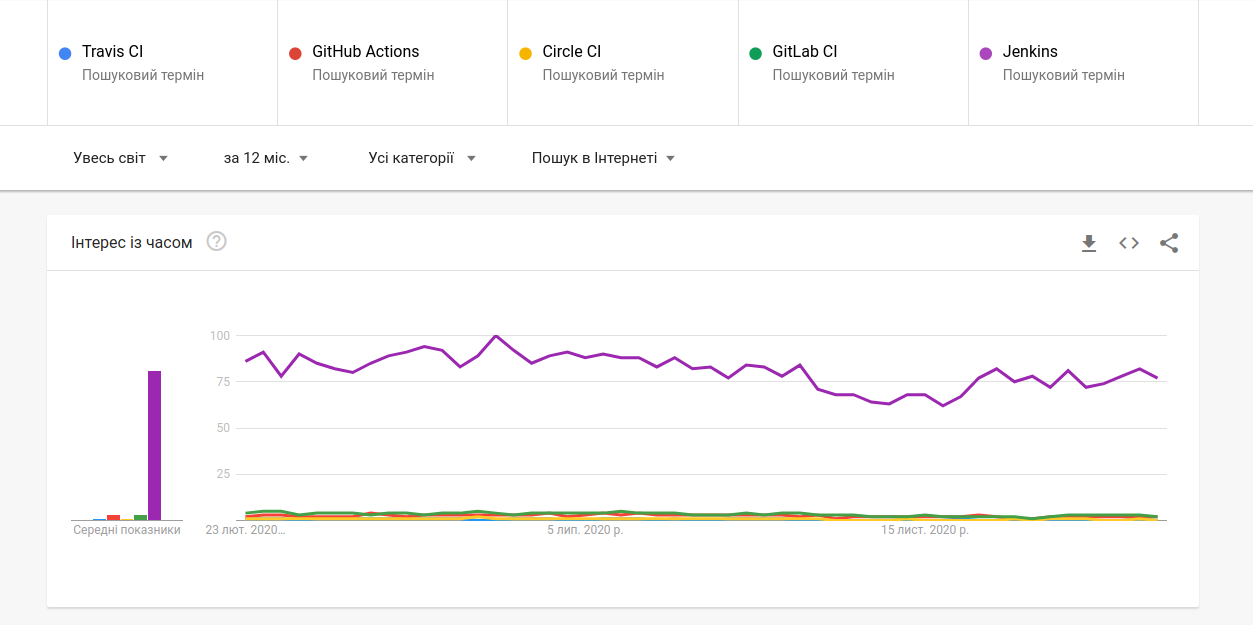
CI/CD tools

The most popular tools


Google Trends
... and with Jenkins

What are the benefits of each practice?

-
write automated tests
-
CI server/service to monitor the main repository and run the tests automatically for every new commits pushed
-
merge changes as often as possible, at least once a day
CI: What you need (cost)

CI: What you gain
-
less bugs get shipped to production
-
building the release is easy
-
less context switching as developers are alerted as soon as they break the build
-
testing costs are reduced – CI server can run hundreds of tests in a matter of seconds
-
QA team spend less time testing and can focus on significant improvements to the quality culture

-
a strong foundation in CI and test suite needs to cover enough of a codebase
-
deployments need to be automated
-
use feature flags so that incomplete features do not affect customers in production (Launch Darkly service)
Continuous Delivery: What you need (cost)

Continuous Delivery: What you gain
-
the complexity of deploying software has been taken away. Team doesn't have to spend days preparing for a release anymore
-
release more often
-
less pressure on decisions for small changes, hence encouraging iterating faster

Continuous Deployment: What you need
(cost)
- testing culture will determine the quality of your releases
- documentation process will need to keep up with the pace of deployments
- feature flags become an inherent part of the process of releasing significant changes

Continuous Deployment: What you gain
- develop faster as there's no need to pause development for releases
- releases are less risky and easier to fix in case of problem (small batches of changes)
- customers see a continuous stream of improvements, and quality increases every week, instead of every month, quarter or year

GitHub Actions in action

Why care about Github Actions?
-
Build into GitHub
-
fully integrated and doesn't require an external server/service
-
-
Multi-container testing
-
multiple templates for all kinds of CI
-
ability to create your own templates and publish it as an Action on the Github Marketplace
-
-
Great free plan
-
completely free for every open-source repository
-
2000 free build minutes per month for all your private repositories
-

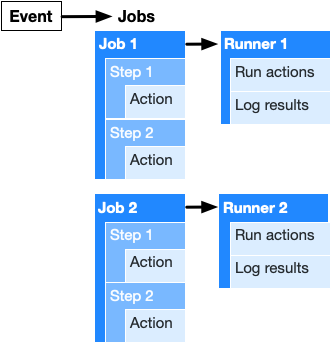
Core concepts
-
Actions - the smallest portable building block of a workflow and can be combined as steps to create a job
-
Events - specific activities that trigger a workflow run
-
Runner - a machine with the Github Actions runner application installed
-
Job - made up of multiple steps and runs in an instance of the virtual environment
-
Steps - a set of tasks that can be executed by a job. Steps can run commands or actions
-
Workflow - an automated process that is made up of one or multiple jobs and can be triggered by an event (defined using a YAML file)
The components of GitHub Actions
Events that trigger workflow
# Triggers the workflow on push or pull request events
on: [push, pull_request]
Let's create a workflow and action templates

Adding a workflow template:
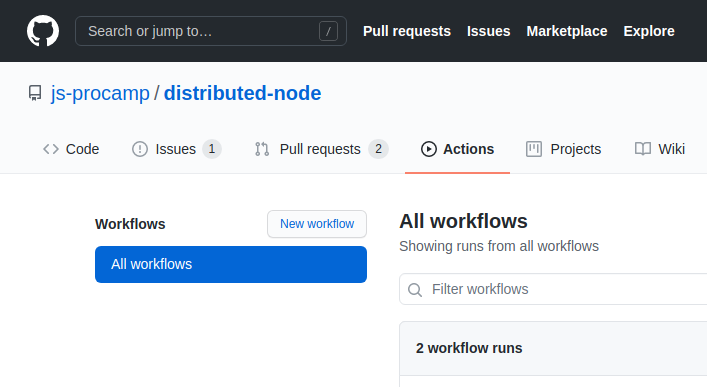
1. On the main page of a repository navigate to Actions.
Adding a workflow template:
2. Pick a template you would like to use and click Set up this workflow
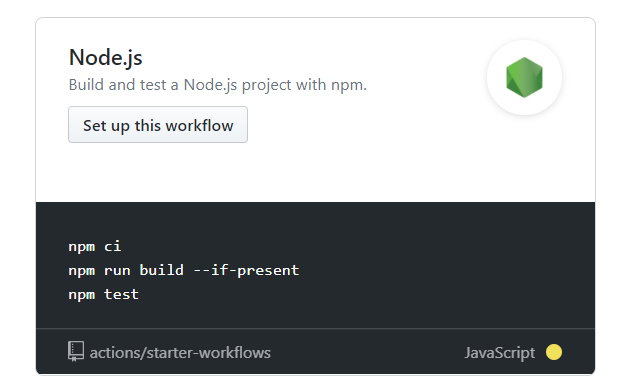
Adding a workflow template:
3. We can make changes in the editor and commit the action to your repository using the Start commit button

Adding an action template to your workflow:
Action templates can be found on the Github Marketplace or directly in the workflow editor on the far right side.
The template can be added by copying the code of the actions and pasting it into your .yml file. The unique action name and version number need to be defined with the uses keyword.

Let's run TS lint and tests
name: Test, build and Deploy

on:
  push:
    branches: [ main ]
  pull_request:
    branches: [ main ]

jobs:
  tests:

    runs-on: ubuntu-latest

    strategy:
      matrix:
        node-version: [16.x]

    steps:
    - uses: actions/checkout@v2
    - name: Use Node.js ${{ matrix.node-version }}
      uses: actions/setup-node@v1
      with:
        node-version: ${{ matrix.node-version }}

    # Install deps with Yarn
    - name: Install dependencies
      run: yarn
      working-directory: ./user-service

    # Run linter checks
    - name: Run TS lint
      run: yarn lint
      working-directory: ./user-service

    # Run tests
    - name: Run tests
      run: yarn test
      working-directory: ./user-service
Build, tag and push a Docker image
  deploy:
    if: github.event_name == 'push'

    runs-on: ubuntu-latest
    # only run if build job complte successfully
    needs: [tests]

    strategy:
      matrix:
        node-version: [16.x]

    steps:
    - uses: actions/checkout@v2
    - name: Docker login
      env:
        DOCKER_USER: ${{secrets.DOCKER_HUB_USERNAME}}
        DOCKER_PASSWORD: ${{secrets.DOCKER_HUB_PASSWORD}}
      run: |
        docker login -u ${{secrets.DOCKER_HUB_USERNAME}} -p ${{secrets.DOCKER_HUB_PASSWORD}}

    - name: Build the Docker image
      run: docker build ./user-service --file ./user-service/Dockerfile --tag innaifox/jsprocamp-user-service:latest

    - name: Docker Push
      run: docker push innaifox/jsprocamp-user-service
Workflow is ready - let's run it

Tips and tricks

Tips and tricks
There are many possible ways, how workflow can be configured. It helps us to make the build faster and more flexible.
Examples:
- based on branch name, run only part of tests
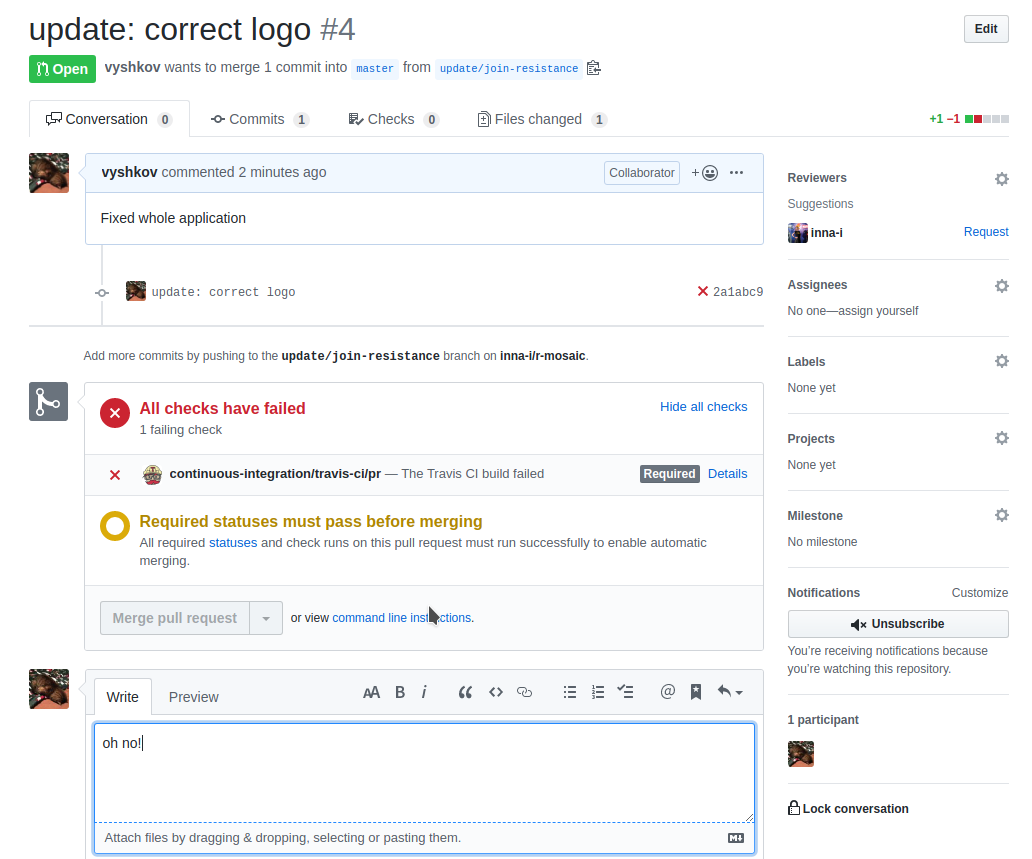
- trigger different checks, tests on a PR (MR) and merge into master
- do deployment only for the release branch (when all checks are ok)
Branch protection on GitHub
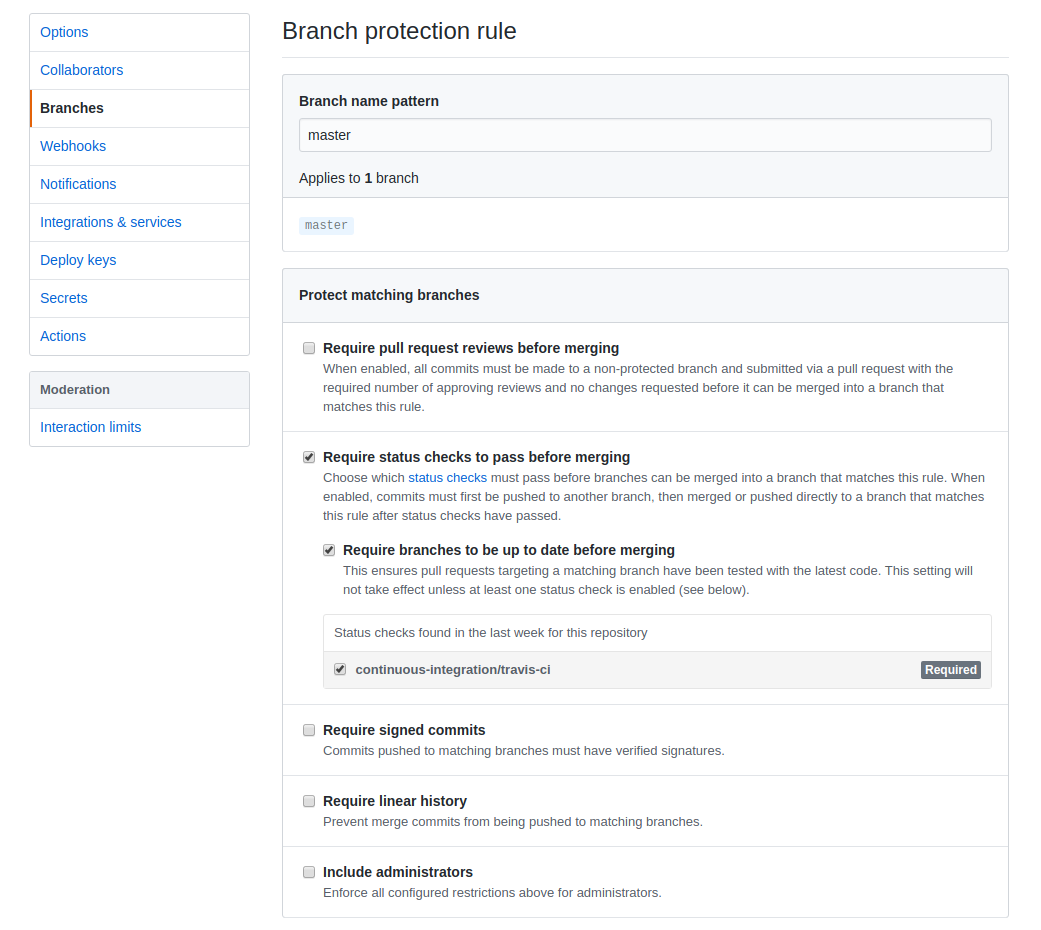
Branch protection example
Questions time

Easy start with Travis CI

To get started with Travis CI
-
Go to Travis-ci.com and Sign up with GitHub.
-
Accept the Authorization of Travis CI. You’ll be redirected to GitHub.
-
Click on your profile picture in the top right of your Travis Dashboard, click the green Activate button, and select the repositories you want to use with Travis CI.
-
Add a
.travis.ymlfile to your repository to tell Travis CI what to do.

Let's configure .travis.yml
# CONFIGURATION

# specify programming language
language: node_js
node_js: 10.15.0
cache: npm

# installation phase
install:
  - npm i

# tasks phase
script:
  - npm run lint
  - npm run test
  - npm run test:cov
Configuration with deployment
# CONFIGURATION

# specify programming language
language: node_js
node_js: 10.15.0
cache: npm

branches:
  only:
  - master

# installation phase
install:
  - npm i

# tasks phase
script:
  - npm run lint
  - npm run test:cov
  - npm run build

# deployment phase
deploy:
  provider: surge
  skip_cleanup: true
  project: ./dist/
  domain: rmosaic.surge.sh
Deployment with Surge
# install surge globally
$ npm i -g surge


# init surge in your working directory
$ surge


# get your token and add it as a Travis envs
$ surge token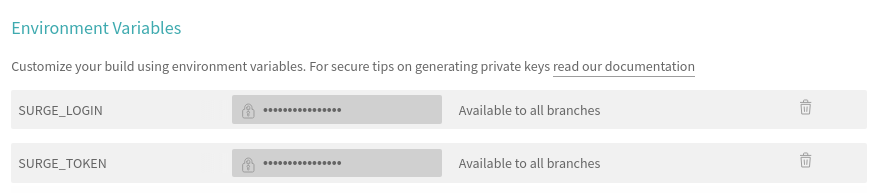
Specify env. variables one the page settings in Travis
Build stages using Travis CI
# CONFIGURATION
language: node_js
node_js: 12.16.3
cache: npm

# run tasks
jobs:
  include:
    - stage: install
      script: npm install

    - stage: lint
      script: npm run lint

    - stage: test
      script: npm run test

    - stage: pushDockerImage
      if: (type = push AND branch = master)
      script: npm run dockerLogin
      	&& npm run buildDocker
        && npm run dockerTag
        && npm run dockerPush
Build stages is a way to group jobs, and run jobs in each stage in parallel, but run one stage after another sequentially.
Conditional jobs, stages using Travis CI
# stages
# require the branch name to be master
# (note for PRs this is the base branch name)
stages:
  - name: deploy
    if: branch = master

# jobs
jobs:
  include:
    - # require the branch name to be master
      if: branch = master
      env: FOO=foo
You can filter out and reject builds, stages and jobs by specifying conditions in your build configuration (your .travis.yml file).
Distributed Node #4
By Inna Ivashchuk
Distributed Node #4
CI/CD


