Distributed Node #3
Docker
$ whoami
Inna Ivashchuk
Senior Software Engineer
JS developer, music fan, movie-dependent and Star Wars fan 🤓
May the Force be with you!


$ guest
Dmytro Bielik
Senior Software Engineer
3+ years experience in DevOps
7+ years experience in IT engineering

Agenda:
- Clouds and containers
- What is Docker? Basic usages
- Docker network
- Wrap User service in a Docker container
- docker-compose
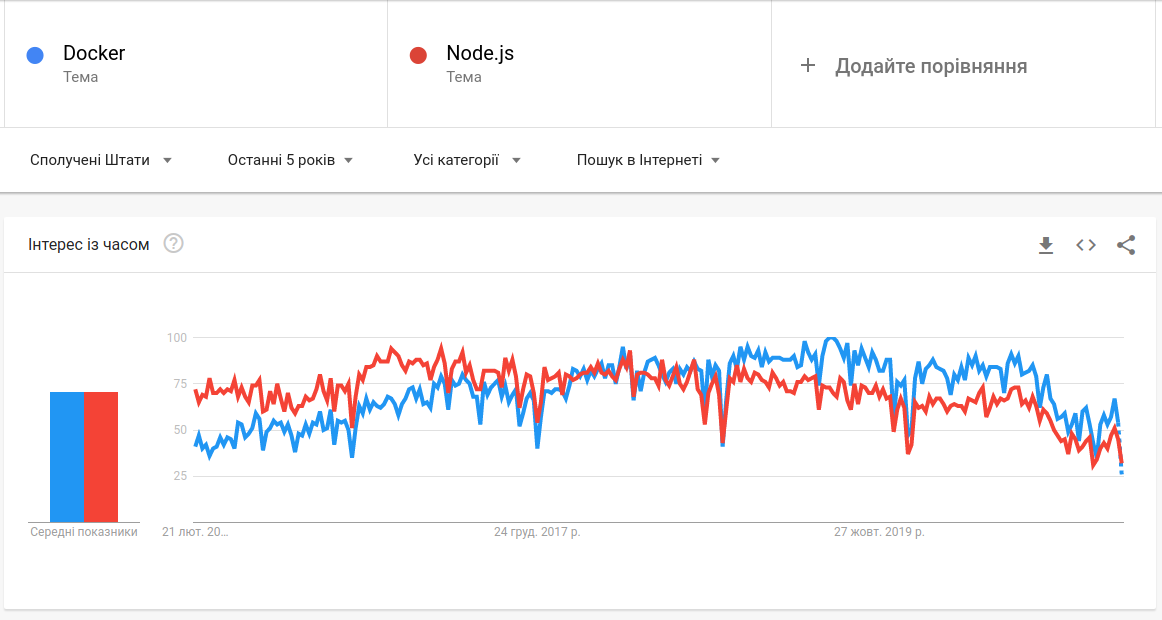
In case you haven't used Docker yet

Docker vs NodeJS in Google Trends
Web Development
Docker
+
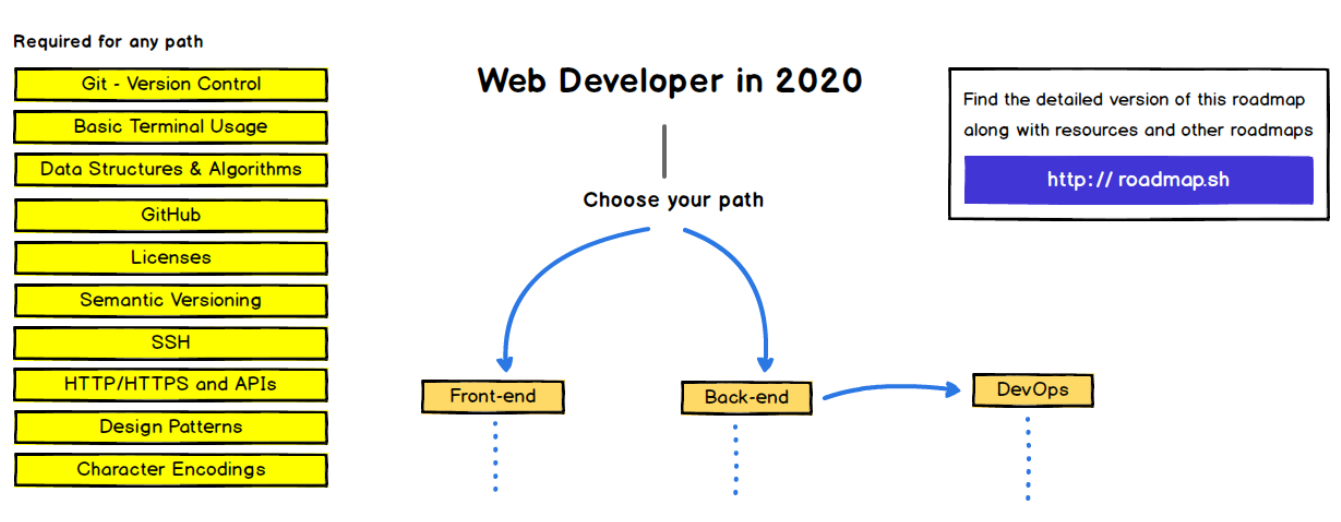
Web Developer in 2022
The possible situation in a new project

Requested changes
Use new API for authentication
Login
What should be done to apply changes?
- install all backend related stuff locally (Java, Gradle, Maven, Mongo, PostgreSQL and etc)
- do changes in JavaScript files
- test your changes locally with backend API
- finally - commit changes

What can happen next
- Changes deployed/published
- QAs do validation, but your change is not working correctly

How it can be done
- Install Docker
- Pull Docker images with latest version of backend API
- Run it locally
- Apply and test your changes
- Profit 🤩

It's how Docker was born


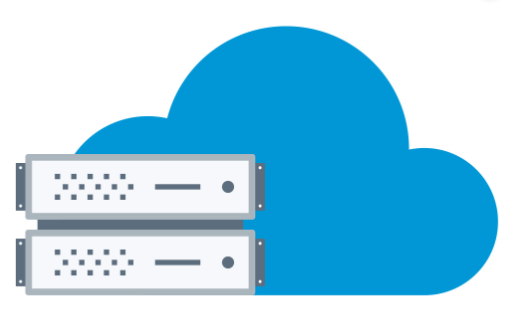
Clouds and containers

What are the cloud based technologies?
A cloud system or cloud computing technology refers to the computing components (hardware, software, and infrastructure) that enable the delivery of cloud computing services such as SaaS (software as a service), PaaS (platform as a service), and IaaS (infrastructure as service) via a network (i.e. the Internet).
Cloud-based technologies magic
Microsoft was able to push 2.5 petabytes worth of Bing Maps satellite photo data through Azure machine learning to construct the virtual world of Flight Simulator. You could say it's really the cloud that brings the game to life. Azure also helps to model real-time weather.

Cloud Providers


Nowadays SDLC with CI/CD, containers, orchestration and clouds


Cloud Providers and Containers
Deploy
Deploy
Deploy
Deploy
What is Docker?

About Docker
Docker is an open platform for developing, shipping, and running applications.
- enables you to separate your applications from your infrastructure so you can deliver software quickly
- you can manage your infrastructure in the same ways you manage your applications
- you can shipping, testing, and deploying code quickly
- you can significantly reduce the delay between writing code and running it in production
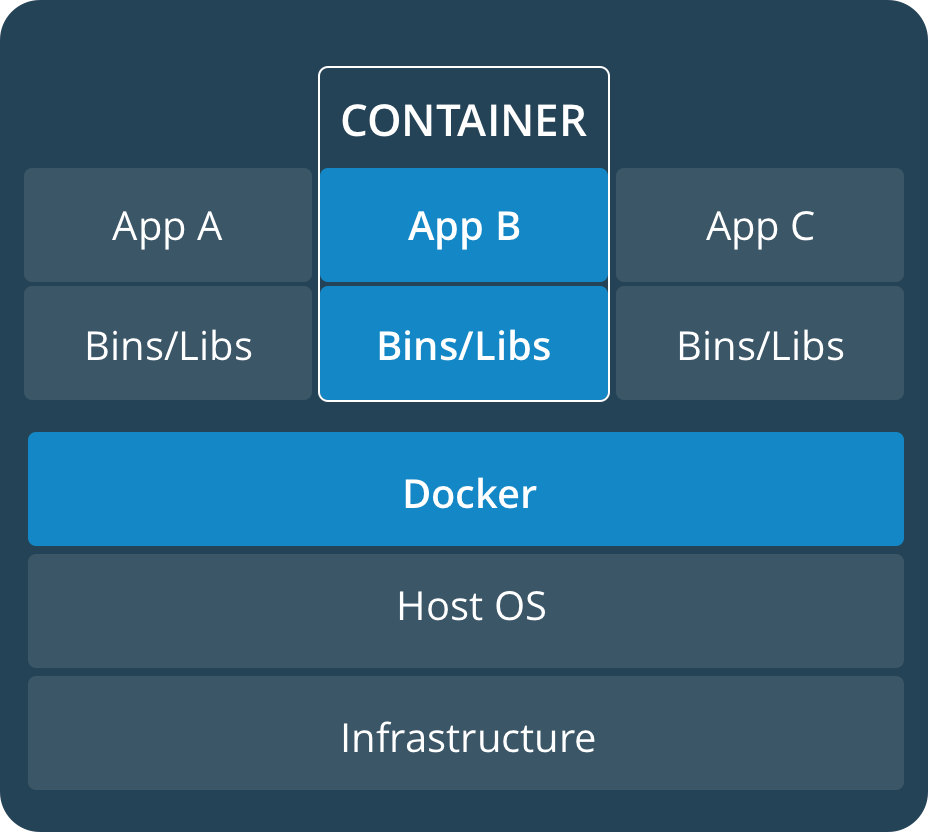
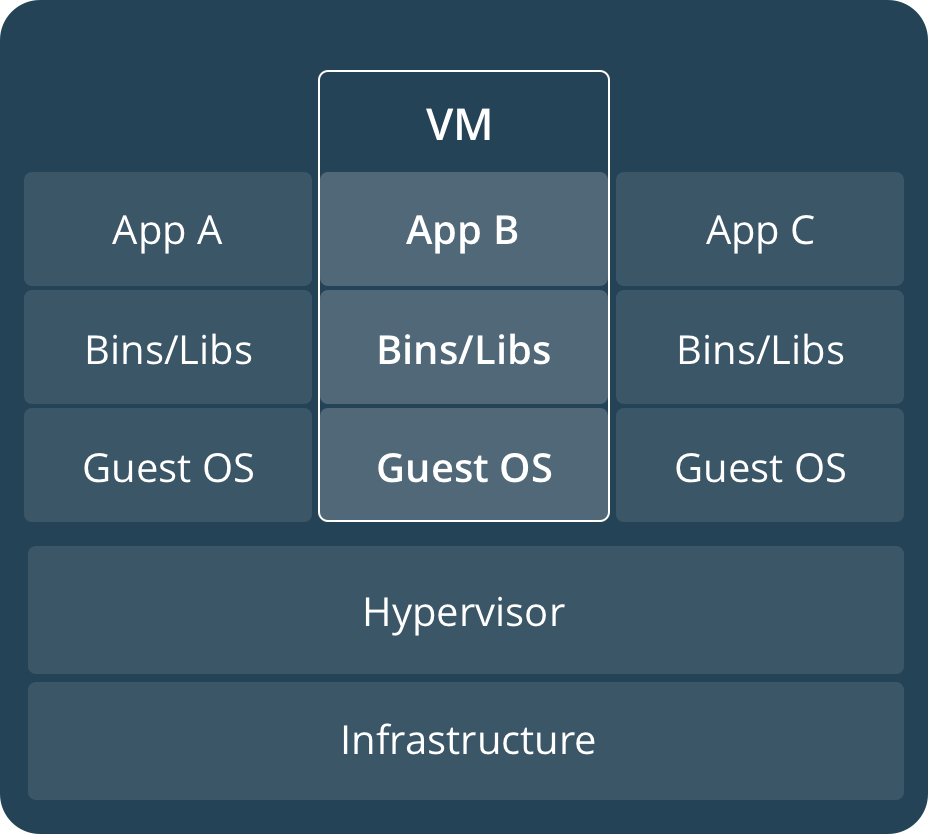
Containers and virtual machines
A container runs natively on Linux and shares the kernel of the host machine with other containers. It runs a discrete process, taking no more memory than any other executable, making it lightweight.
By contrast, a virtual machine (VM) runs a full-blown “guest” operating system with virtual access to host resources through a hypervisor. In general, VMs incur a lot of overhead beyond what is being consumed by your application logic.
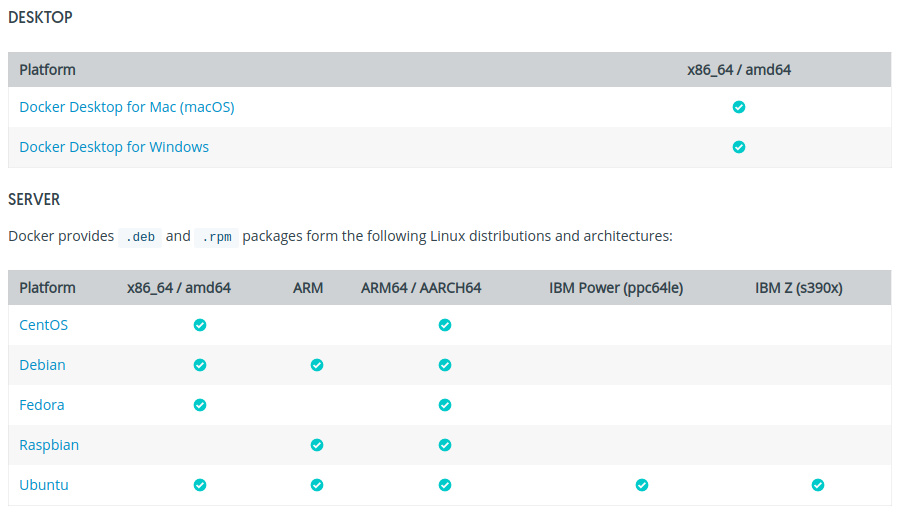
Docker and supported platforms
Docker Engine is available on a variety of Linux platforms, macOS and Windows 10 through Docker Desktop, and as a static binary installation. Find your preferred operating system below.
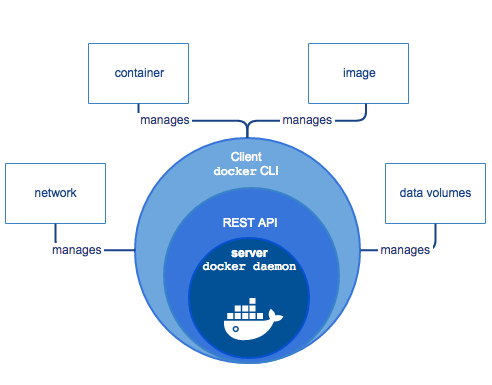
Docker Engine
Docker Engine is a client-server application with 3 major components:
-
A server is a type of long-running program called a daemon process (the dockerd command).
-
A REST API that specifies interfaces that programs can use to talk to the daemon and instruct it on what to do.
-
A command-line interface (CLI) client (the docker command).
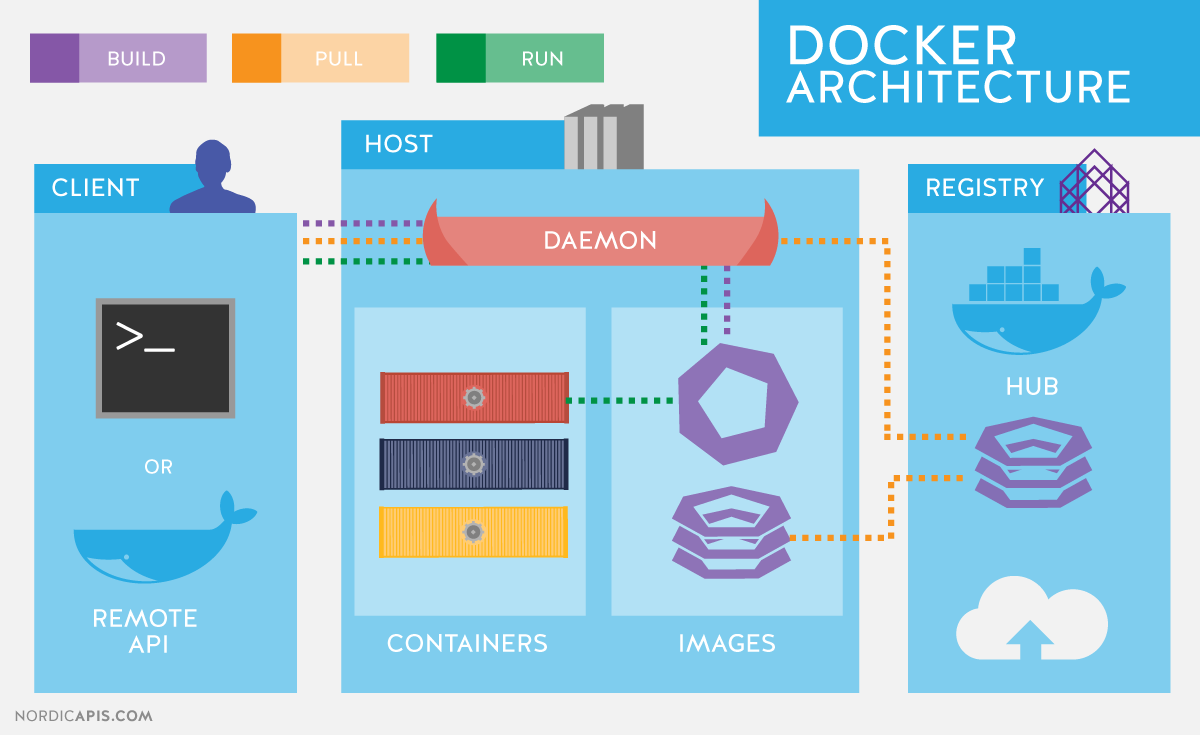
Docker architecture 🐳
Docker uses a client-server architecture.
- The Docker daemon (dockerd) listens for Docker API requests and manages Docker objects such as images, containers, networks, and volumes. A daemon can also communicate with other daemons to manage Docker services.
- The Docker client (docker) is the primary way that many Docker users interact with Docker. The docker command uses the Docker API
- A Docker registry stores Docker images. Can be public or your own private.
Docker objects - IMAGES
IMAGES
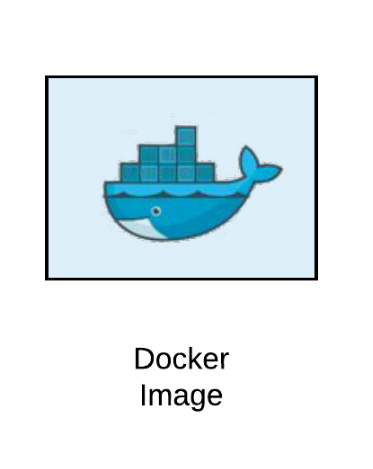
An image is a read-only template with instructions for creating a Docker container. Often, an image is based on another image, with some additional customization.
To build your own image, you create a Dockerfile with a simple syntax for defining the steps needed to create the image and run it. Each instruction in a Dockerfile creates a layer in the image. When you change the Dockerfile and rebuild the image, only those layers which have changed are rebuilt. This is part of what makes images so lightweight, small, and fast when compared to other virtualization technologies.

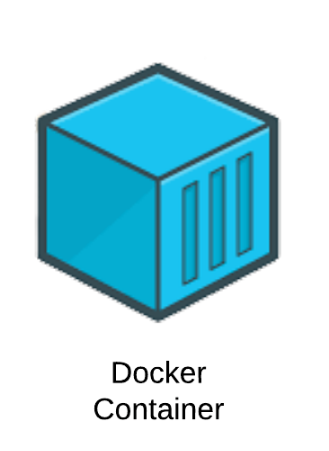
Docker objects - CONTAINERS
CONTAINERS
A container is a runnable instance of an image. You can create, start, stop, move, or delete a container using the Docker API or CLI. You can connect a container to one or more networks, attach storage to it, or even create a new image based on its current state. You can control how isolated a container’s network, storage, or other underlying subsystems are from other containers or from the host machine.
A container is defined by its image as well as any configuration options you provide to it when you create or start it.
Docker architecture: Docker objects
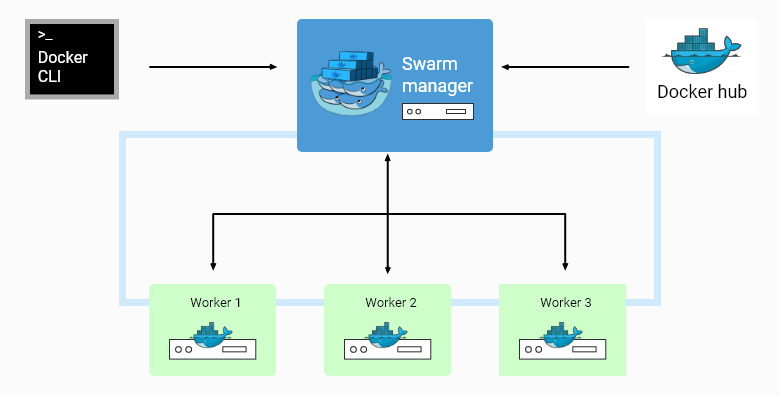
SERVICES
Services allow you to scale containers across multiple Docker daemons, which all work together as a swarm with multiple managers and workers. Each member of a swarm is a Docker daemon, and all the daemons communicate using the Docker API. A service allows you to define the desired state, such as the number of replicas of the service that must be available at any given time.
Docker Swarm vs. Kubernetes
Docker Swarm benefits:
- overlay networking,
- load balancing,
- high availability, and several scalability features
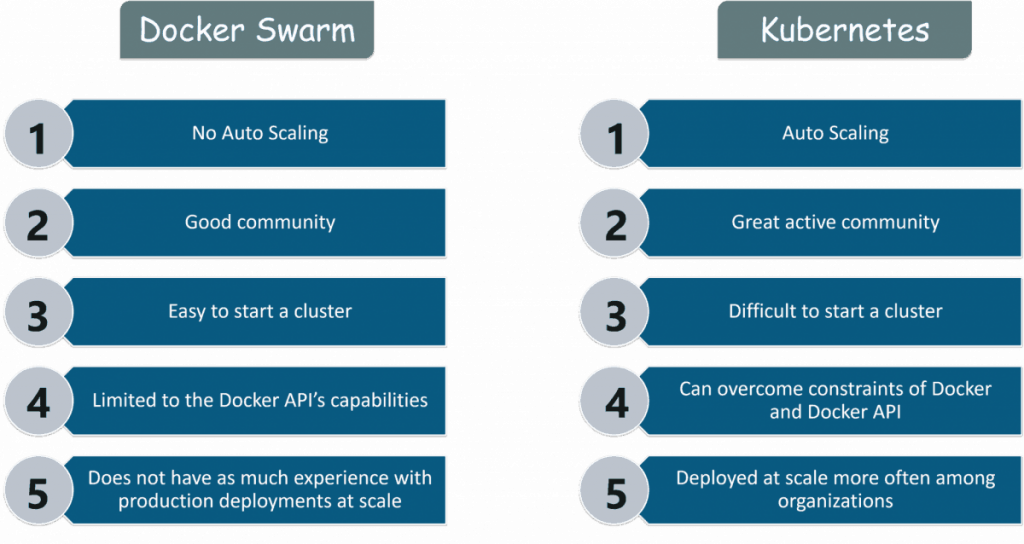
Docker Swarm disadvantages:
- native monitoring tools;
- the Docker API limits functionality
- requires a third-party tool such as Portainer.io to manage the UI conveniently
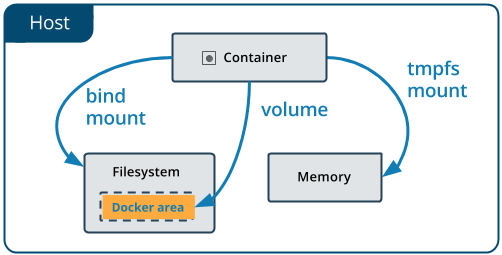
Docker Volumes
- easier to back up or migrate than bind mounts
- can be managed using Docker CLI commands or the Docker API
- work on both Linux and Windows containers
- can be more safely shared among multiple containers
- let you store volumes on remote hosts or cloud providers, encrypt the contents of volumes, or add other functionality
- new volumes can have their content pre-populated by a container
- on Docker Desktop have much higher performance than bind mounts from Mac and Windows hosts
List of Docker commands
$ docker run – runs a command in a new container
$ docker start – starts one or more stopped containers
$ docker stop – stops one or more running containers
$ docker build – builds an image from a Docker file
$ docker pull – pulls an image or a repository from a registry
$ docker push – pushes an image or a repository to a registry
$ docker ps - list containers
$ docker images - list images
$ docker exec – runs a command in a run-time container
$ docker search – searches the Docker Hub for images
$ docker commit – creates a new image from a container’s changes
$ docker stats – display a live stream of container(s) resource usage statistics
Check out the complete list of commands in the Docker documentation
$ docker stop $(docker ps -a -q) – stop all containers
$ docker rm $(docker ps -a -q) – remove all stopped containers
$ docker rm container-id – remove container by ID
$ docker rmi $(docker images -q) – remove all images
$ docker rmi image-id – remove an image by ID
List of Docker commands
Docker network

Networking overview
One of the reasons Docker containers and services are so powerful is that you can connect them together, or connect them to non-Docker workloads. Docker containers and services do not even need to be aware that they are deployed on Docker, or whether their peers are also Docker workloads or not.
Whether your Docker hosts run Linux, Windows, or a mix of the two, you can use Docker to manage them in a platform-agnostic way.

Network drivers
Docker’s networking subsystem is pluggable, using drivers. Several drivers exist by default, and provide core networking functionality:
bridge
host
overlay
macvlan
none
Network drivers: Bridge
172.18.0.1
172.18.0.2
172.18.0.3
Network drivers: Host
Docker host
port:8080
Network drivers: Overlay
Docker host 1
Docker host 2
Network drivers: macvlan
Docker host
LAN
Network driver summary
- User-defined bridge networks are best when you need multiple containers to communicate on the same Docker host.
- host networks are best when the network stack should not be isolated from the Docker host, but you want other aspects of the container to be isolated.
- overlay networks are best when you need containers running on different Docker hosts to communicate, or when multiple applications work together using swarm services.
- macvlan networks are best when you are migrating from a VM setup or need your containers to look like physical hosts on your network, each with a unique MAC address.
- and one more - third-party network plugins allow you to integrate Docker with specialized network stacks.
Network details
- NETWORK ID — network identifier, that's assigned during creation
- NAME — network name, can be customized
- DRIVER — driver used for network creation
- SCOPE — where is in use
$ docker network ls

NETWORK ID          NAME                DRIVER              SCOPE
6df045e07b11        bridge              bridge              local
9d45c14e604a        host                host                local
b285e48f2c94        none                null                local
To check network details:
Create a network
$ docker network create bridge-network
There are several ways to create a network:
- the easiest way
$ docker network create --driver=bridge bridge-network- examples with overlay creation
$ docker network create -d overlay my-multihost-network

$ docker network create --driver overlay overlay_network
$ docker network create -d macvlan \
> --subnet=172.16.86.0/24 \
> --gateway=172.16.86.1 \
> -o parent=eth0 \
> my-macvlan-net- macvlan creation
Let's try to wrap User Service in a Docker container

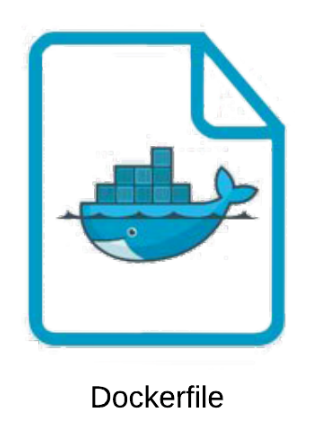
Create a Dockerfile
Create a Dockerfile in the app directory
FROM node:16

# Create app directory
WORKDIR /usr/src/app

# A wildcard is used to ensure both package.json
# AND package-lock.json are copied
COPY package*.json ./

# Install app dependencies
RUN yarn

# Bundle app source
COPY . .

# Build the app
RUN yarn build

EXPOSE 8080

# run CMD command "yarn start:prod"
CMD [ "yarn", "start:prod" ]
Create a .dockerignore
Add .dockerignore file in the same directory
node_modules
npm-debug.log
We can build our image
Go to the directory that has your Dockerfile and run the following command to build the Docker image. The -t flag lets you tag your image so it's easier to find later using the docker images command:
docker build -t myapp/user-service .The image will now be listed by Docker:
$ docker images

# Example
REPOSITORY                      TAG        ID              CREATED
node                            12         1934b0b038d1    5 days ago
myapp/user-service              latest     d64d3505b0d2    1 minute ago
Run the image
Running your image with -d runs the container in detached mode, leaving the container running in the background. The -p flag redirects a public port to a private port inside the container. Run the image you previously built:
docker run -p 3030:8080 -d my/node-web-appPrint the output of our app:
# Get container ID
$ docker ps

# Print app output
$ docker logs <container id>

# Example
Running on http://localhost:8080
Check container
To test your app, get the port of your app that Docker mapped:
$ docker ps

# Example
ID            IMAGE                                COMMAND    ...   PORTS
ecce33b30ebf  myapp/node-web-app:latest            npm start  ...   3030->8080
In the example above, Docker mapped the 8080 port inside of the container to the port 3030 on your machine.
What about MondoDB?

docker-compose will help us with this task
docker-compose

What is docker-compose?
Compose is a tool for defining and running multi-container Docker applications.
With Compose, you use a YAML file to configure your application’s services. Then, with a single command, you create and start all the services from your configuration.
Compose works in all environments: production, staging, development, testing, as well as CI workflows.
Using Compose is basically a three-step process:
-
Define your app’s environment with a Dockerfile so it can be reproduced anywhere.
-
Define the services that make up your app in docker-compose.yml so they can be run together in an isolated environment.
-
Run docker-compose up and Compose starts and runs your entire app.

Step 1: Create a Dockerfile
In this step, you write a Dockerfile that builds a Docker image. The image contains all the dependencies the NodeJS application requires, including NodeJS itself.
FROM node:16

# Create app directory
WORKDIR /usr/src/app

# A wildcard is used to ensure both package.json
# AND package-lock.json are copied
COPY package*.json ./

# Install app dependencies
RUN yarn

# Bundle app source
COPY . .

# Build the app
RUN yarn build

EXPOSE 8080

# run CMD command "yarn start:prod"
CMD [ "yarn", "start:prod" ]

Step 2: Define services in a Compose file
Create a file called docker-compose.yml in your project directory.
version: '3.3'
services:
  user-api:
    container_name: nest-user-service
    restart: always
    build: .
    ports:
      - '8080:3000'
    links:
      - mongo
  mongo:
    container_name: mongo
    image: mongo
    ports:
      - '27017:27017'
This Compose file defines two services: user-api and mongo:
- the user-api service uses an image that’s built from the Dockerfile in the current directory. It then binds the container and the host machine to the exposed port, 8080
- the mongo service uses a public Mongo image pulled from the Docker Hub registry.
Step 3: Build and run your app with Compose
From the project directory, start up an application by running -
Now we can enter http://localhost:8080/ in a browser to see the application running.
To list local images:
$ docker-compose up
docker image ls
Step 5: Edit the Compose file to add environment variables
version: '3.3'
services:
  user-api:
    container_name: nest-user-service
    restart: always
    build: .
    ports:
      - '8080:3000'
    links:
      - mongo
    environment:
      - PORT=3000
      - DATABASE_URL=mongodb://mongo:27017/users
  mongo:
    container_name: mongo
    image: mongo
    ports:
      - '27017:27017'
Let's do it

A common question - "How to rebuild only one service?"
$ docker-compose up -d --force-recreate --no-deps --build user-api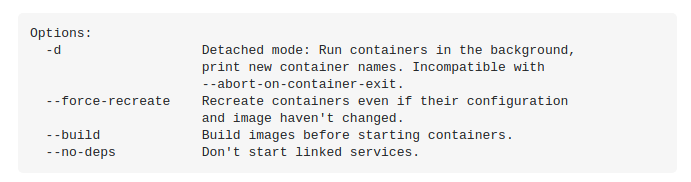
Q & A

Distributed Node #3
By Inna Ivashchuk
Distributed Node #3
Docker & docker-compose


