Angular

jon rojí


github.com/jroji
1joroji@gmail.com
@jnroji
CONTENT
- Introducción
- Typescript + ECMAScript
- Gestión de dependencias
- Componentes
- Sintaxis
- Ciclo de vida de un componente
- Flujo de comunicación entre componentes
- RxJs
- Modularización
-
- Forms
- Construcción
- Unit testing en Angular 2
Background
Angular 1 is one of the most used
frameworks in the industry until now
Main advantages
> Dependency injection
> Scopes
> Two-way data binding
Main disadvantages
> Reusability low level
> Performance
> Strong hierarchy structure
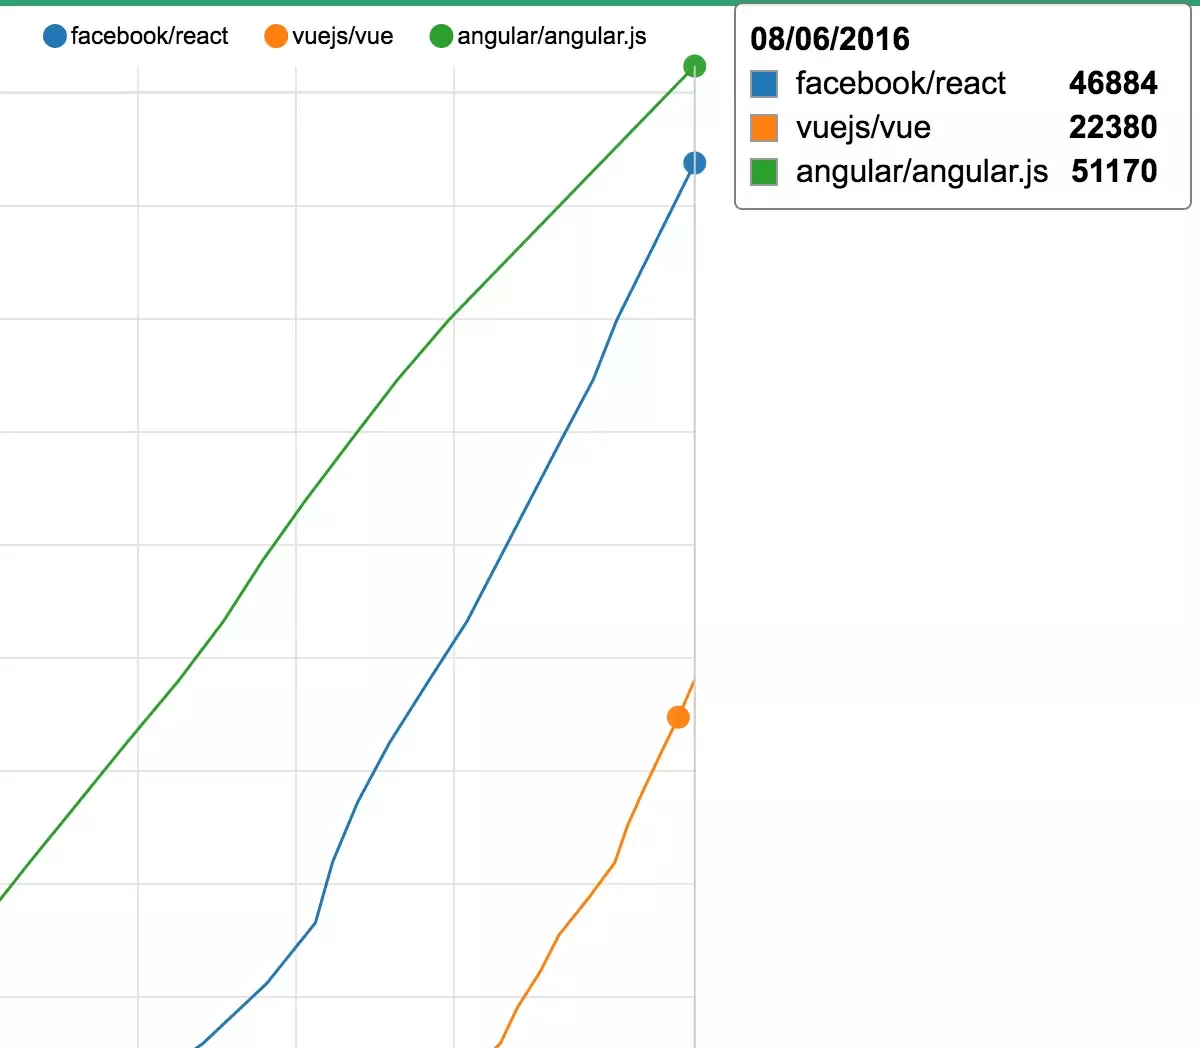
Evolution
Due to the comments of the community and the new tools provided by the browsers, the Angular Team decided to full rethink the new version of the framework
Scopes
Two-way data binding
ES5
Directives, services, factories

SCOPE VALUES
COMPONENT CLASS PROPERTIES
angular.module('scopeExample', [])
.controller('MyController', ['$scope', function($scope) {
  $scope.username = 'World';

  $scope.sayHello = function() {
    $scope.greeting = 'Hello ' + $scope.username + '!';
  };
}]);
@Component({selector: 'greet', template: 'Hello {{name}}!'})
class Greet {
name: string = 'World';
}aNGULAR IS A COMPONENT-BASED SPA FRAMEWORK
custom elements
shadow dom
templates
class AppDrawer extends HTMLElement {...}

window.customElements.define('app-drawer', AppDrawer);
custom elements
shadow dom
templates
const header = document.createElement('header');
const shadowRoot = header.attachShadow({mode: 'open'});custom elements
shadow dom
templates
<template id="sdtemplate">
  <style>
    p { color: orange; }
  </style>
  <p>Hello</p>
</template>COMPONENTS: VISUAL AND LOGICAL COMPONENTS TO CONSTRUCT THE VIEWS
@Component({
  selector: 'my-component',
  template: `<div>
                Hello my name is {{name}}.
                <button (click)="sayMyName()">Say my name</button>
            </div>`
})

export class MyComponent {
  constructor() {
    this.name = 'Max'
  }
  sayMyName() {
    console.log('My name is', this.name)
  }
}
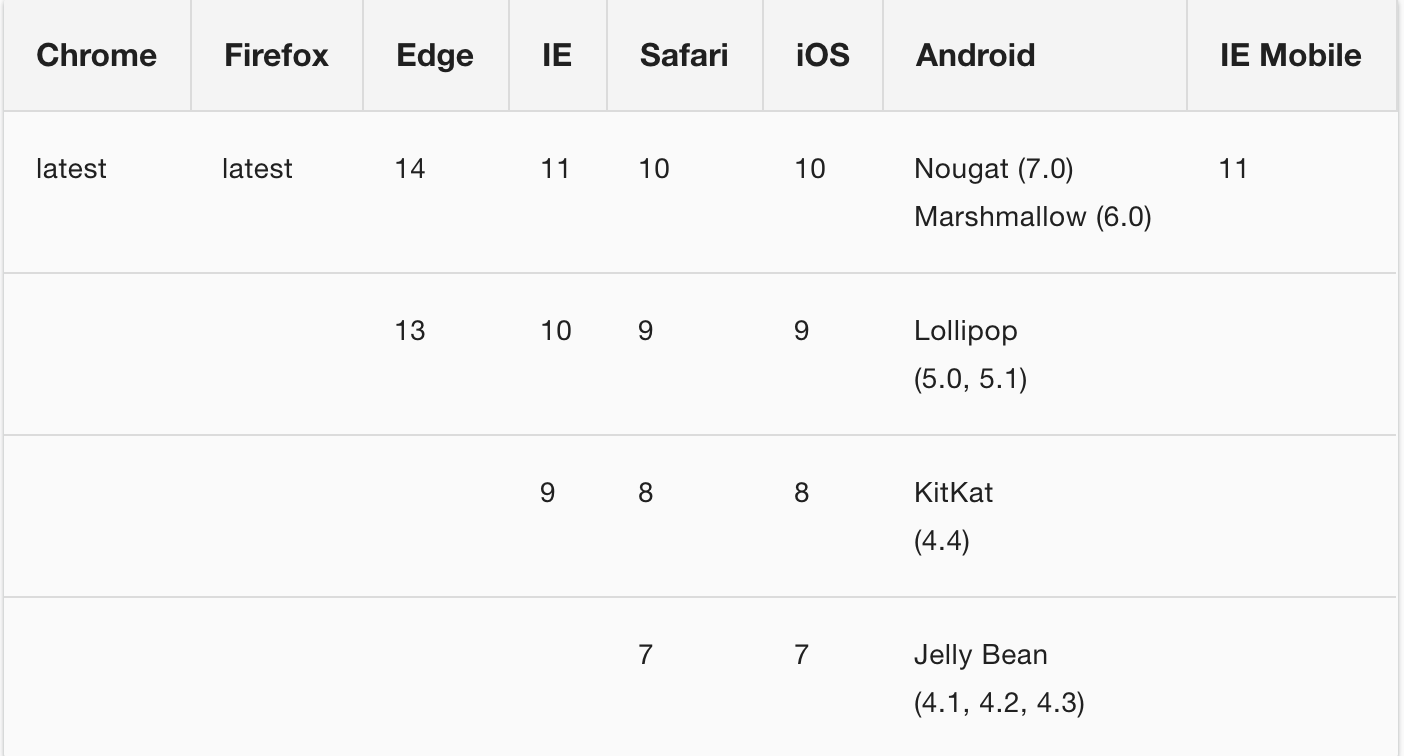
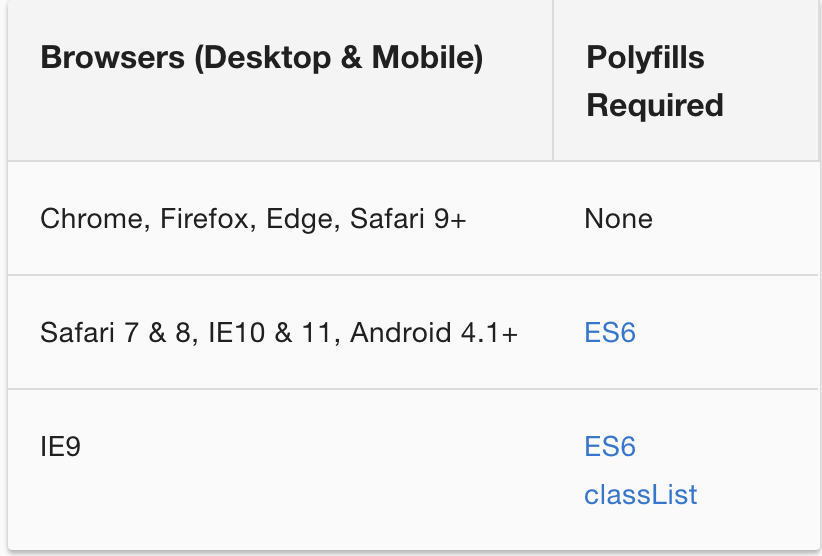
browser support
FULL FRAMEWORK
COMPONENTS!
TYPESCRIPT!
JIT / AOT!
DEPENDENCY INJECTION!
Routing
Lazy Load
HTTP
much more!
ECMASCRIPT6

let / const
let declares a local scopped var
The scope of a variable defined with var is function scope or declared outside any function, global.
The scope of a variable defined with let is block scope.

const declares an "inmutable" var

let / const
//ES5
(function() {
    console.log(x); // x not defined yet.
    if(true) {
        var x = "hello world";
    }
    console.log(x);
    // Paints "hello world", because "var" make it global
})();

//ES6
(function() {
    if(true) {
        let x = "hello world";
    }
    console.log(x);
    //Error, because x has been defined inside the if scope
})();
fat arrows
two main purposes: more concise syntax and sharing lexical this with the parent scope.
// BEFORE
var self = this;
function () { return self.quantity + 1; }

//  AFTER
() => { return this.quantity + 1; }
() => this.quantity + 1
Default values
We can define default values for our parameters in functions definition
// ES5
function test(x, y) {
if(x == null) {
x = 5;
}
...
}
// ES6
function test(x = 5, y) {
...
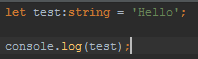
}STRINGS INTERPOLATION
With ES6, we don't need anymore the '' + '' syntax. We can use ${myVar} inside the code
// ES5
var x = 'Mr.' + name;

// ES6
let x = `Mr.${name}`;
And it supports multiline!
Object properties
We can define functions and properties easier in a object (object-like syntax)
// ES5
obj = {
foo: function (a, b) {
…
},
bar: function (x, y) {
…
}
};
// ES6
obj = {
foo(a, b) {
…
},
bar(x, y) {
…
}
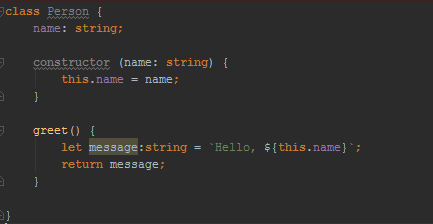
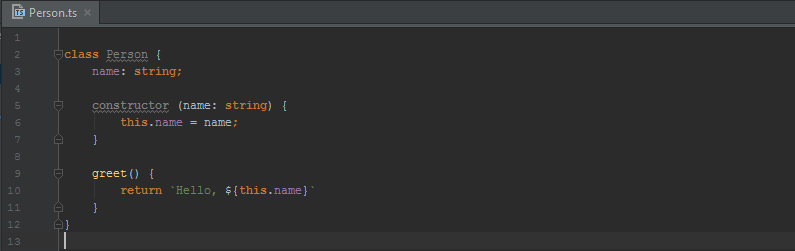
};classes (with ts)
scoping (ts)
private
public
protected
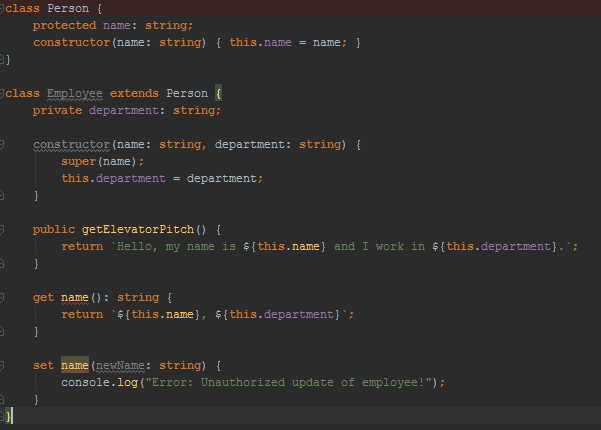
inheritance
constructor
getter / setter
inmutable prop
JS MODULES
export interface StringValidator {
    isAcceptable(s: string): boolean;
}
import { StringValidator } from "./StringValidator";
// import { ZipCodeValidator as ZCV } from "./ZipCodeValidator";
// import * as validator from "./StringValidator";


let myValidator = new StringValidator();
StringValidator.ts
App.ts
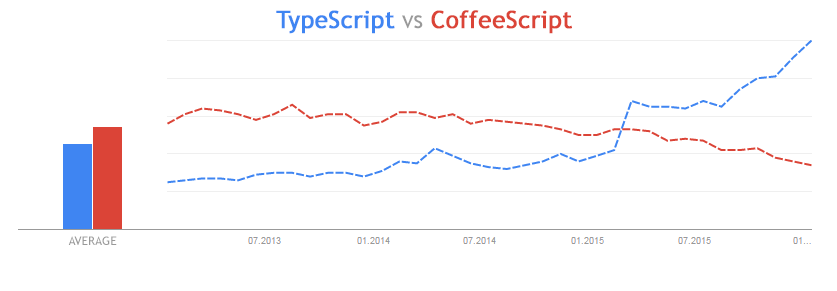
Typescript

open source JAVASCRIPT SUPERSET
by microsoft
why typescript?
JAVASCRIPT SUPERSET
STATIC TYPING
ECMASCRIPT 6 TRANSPILER
OBJECT ORIENTED
ERROR DETECTION BEFORE RUNTIME
MORE ROBUST CODE
BACKENDERS TECHNOLOGIES LIKE
SAME SYNTAX
strong typing
don't be afraid
why typescript?
JAVASCRIPT SUPERSET
STATIC TYPING
ECMASCRIPT 6 TRANSPILER
OBJECT ORIENTED
ERROR DETECTION BEFORE RUNTIME
MORE ROBUST CODE
BACKENDERS TECHNOLOGIES LIKE
OOP
ES6
why typescript?
JAVASCRIPT SUPERSET
STATIC TYPING
ECMASCRIPT 6 TRANSPILER
OBJECT ORIENTED
ERROR DETECTION BEFORE RUNTIME
MORE ROBUST CODE
BACKENDERS TECHNOLOGIES LIKE
ts > js
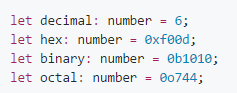
Boolean
number
STRING

array

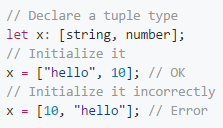
tuple
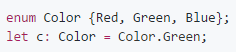
enum
any

both?
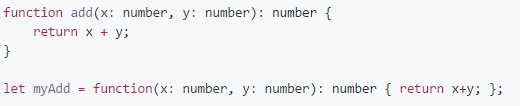
let notSure: number|string;functions
lets use types in the input/output parameters
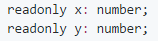
readonly props

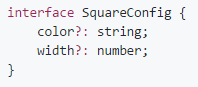
interfaces
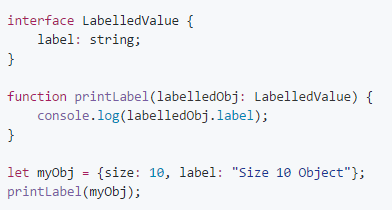
Specifies methods and properties without implementation. Usefull for require a concrete structure on a method
classes mixins
We can create a bigger class ussing more little classes. Usefull for a cleaner structure and cleaner code, even to improve the tests organization and execution

decorators
Decorators use the form @expression, where expression must evaluate to a function that will be called at runtime with information about the decorated declaration.
function sealed(constructor: Function) {
    Object.seal(constructor);
    Object.seal(constructor.prototype);
}
@sealed
class Greeter {
greeting: string;
constructor(message: string) {
this.greeting = message;
}
greet() {
return "Hello, " + this.greeting;
}
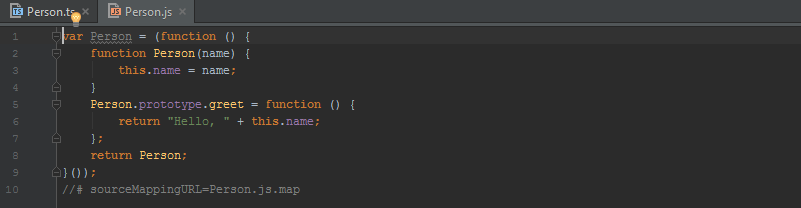
}tsconfig.json
configuration file in our project
{
  "compilerOptions": {
    "sourceMap": true,
    "outDir": "dist"
  },
  "files": [
    "src/Person.ts"
  ]
}
is just me?

why npm
dependency management
our internal dependencies
biggest repository of modules
npm packages
-
version Must match version exactly
-
'>'version Must be greater than version
-
'>'=version etc
-
'<'version
-
'<'=version
-
~version "Approximately equivalent to version"
-
^version "Compatible with version"
-
1.2.x 1.2.0, 1.2.1, etc., but not 1.3.0
-
"" (just an empty string) Same as *
-
version1 - version2 Same as >=version1 <=version2.
-
range1 || range2 Passes if either range1 or range2 are satisfied.
-
tag A specific version tagged and published as tag See npm-tag

starting with npm
$ mkdir npm-proj && cd npm-proj

$ npm init

$ npm install typescript
// OR
$ npm install typescript@2.2.0
// OR
$ npm install --save typescript
// OR
$ npm install --save-dev typescript
// OR
$ npm install -g typescript
let's try!

components

COMPONENTS: VISUAL AND LOGICAL COMPONENTS TO CONSTRUCT THE VIEWS
@Component({
  selector: 'my-component',
  template: `<div>
                Hello my name is {{name}}.
                <button (click)="sayMyName()">Say my name</button>
            </div>`
})

export class MyComponent {
  constructor() {
    this.name = 'Max'
  }
  sayMyName() {
    console.log('My name is', this.name)
  }
}
dissection of a component
import { Component } from '@angular/core';
import { MyService } from './MyService';

@Component({
  selector: 'my-component',
  template: `<div>
                Hello my name is {{name}}
            </div>`,
  providers: [ MyService ]
})
export class MyComponent {
  constructor() {
    this.name = 'Max'
  }
  sayMyName() {
    console.log('My name is', this.name)
  }
}
Import Component decorator from angular/core
Specify properties
selector, template...
Component controller
Component functions
use it
import { Component } from '@angular/core';

@Component({
  selector: 'my-component',
  template: `<div>
                Hello my name is {{name}}
            </div>`
})
export class MyComponent {
  constructor() {
    this.name = 'Max'
  }
  sayMyName() {
    console.log('My name is', this.name)
  }
}
<body>
    <div>
        <my-component></my-component>
    </div>
</body>
properties
selector
specifies the custom tag for our component. It will be registered in the DOM when the <my-component> tag is used
selector: 'my-component'template
specifies the template of the component that will be rendered in the browser. A external template can be referenced by templateUrl, that will be compiled in execution / compilation time, depending on build system
  template: '<h1>Hello</h1>',
  templateUrl: './myComponent.html'
properties
styles
specifies the styles applyed to this component. External css files can be referenced using stylesUrl. These CSS are encapsulated by default with "emulated" strategy. The encapsulation strategy can be configured with the "encapsulation" property and can have any of the following values:
- Emulated
- Native
- None
  styles: `.test { color: red; }`,
  stylesUrl: './myComponent.css'
import ViewEncapsulation from @angular/core
...
encapsulation: ViewEncapsulation.nativeLIFE CYCLE
export class PeekABoo implements OnInit {
constructor(private logger: LoggerService) { }
// implement OnInit's `ngOnInit` method
ngOnInit() { this.logIt(`OnInit`); }
logIt(msg: string) {
this.logger.log(`#${nextId++} ${msg}`);
}
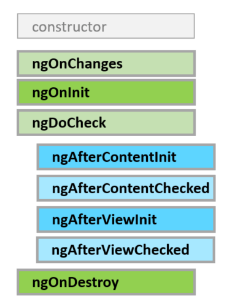
}life cycle
ngOnInit
Initialize the directive/component after Angular first displays the data-bound properties and sets the directive/component's input properties.
ngAfterContentInit
Respond after Angular projects external content into the component's view.
life cycle
ngAfterViewInit
Respond after Angular initializes the component's views and child views.
ngOnDestroy
Cleanup just before Angular destroys the directive/component. Unsubscribe observables and detach event handlers to avoid memory leaks.
data flow

DATA / CLASS
my-component
binding
events
Angular component
quick syntax
<img [src] = "heroImageUrl">Access to Angular context with [ ]
<h1> {{ title }} </h1>Render information with {{ }}
<button (click)="myFunc()">Listen to events with ( )
data flow
import { Component, Input } from '@angular/core';

@Component({
  selector: 'hero-child',
  template: `<p>I am at your service, {{masterName}}.</p>`
})

export class HeroChildComponent {
  @Input() name: string;
  @Input('master') masterName: string;
}
input
define properties that can be setted by the parent
the Inputs can have an input alias
<hero-child [master]="heroName"></hero-child>data flow
import { Component, EventEmitter, Input, Output } from '@angular/core';

@Component({
  selector: 'my-voter',
  template: `<button (click)="vote(true)">Agree</button>`
})

export class VoterComponent {
  @Output() onVoted = new EventEmitter<boolean>();
  vote(agreed: boolean) {
    this.onVoted.emit(agreed);
  }
}
OUTPUt
define and send events to child-parent communication
<my-voter (onVoted)="myFunction"></my-voter>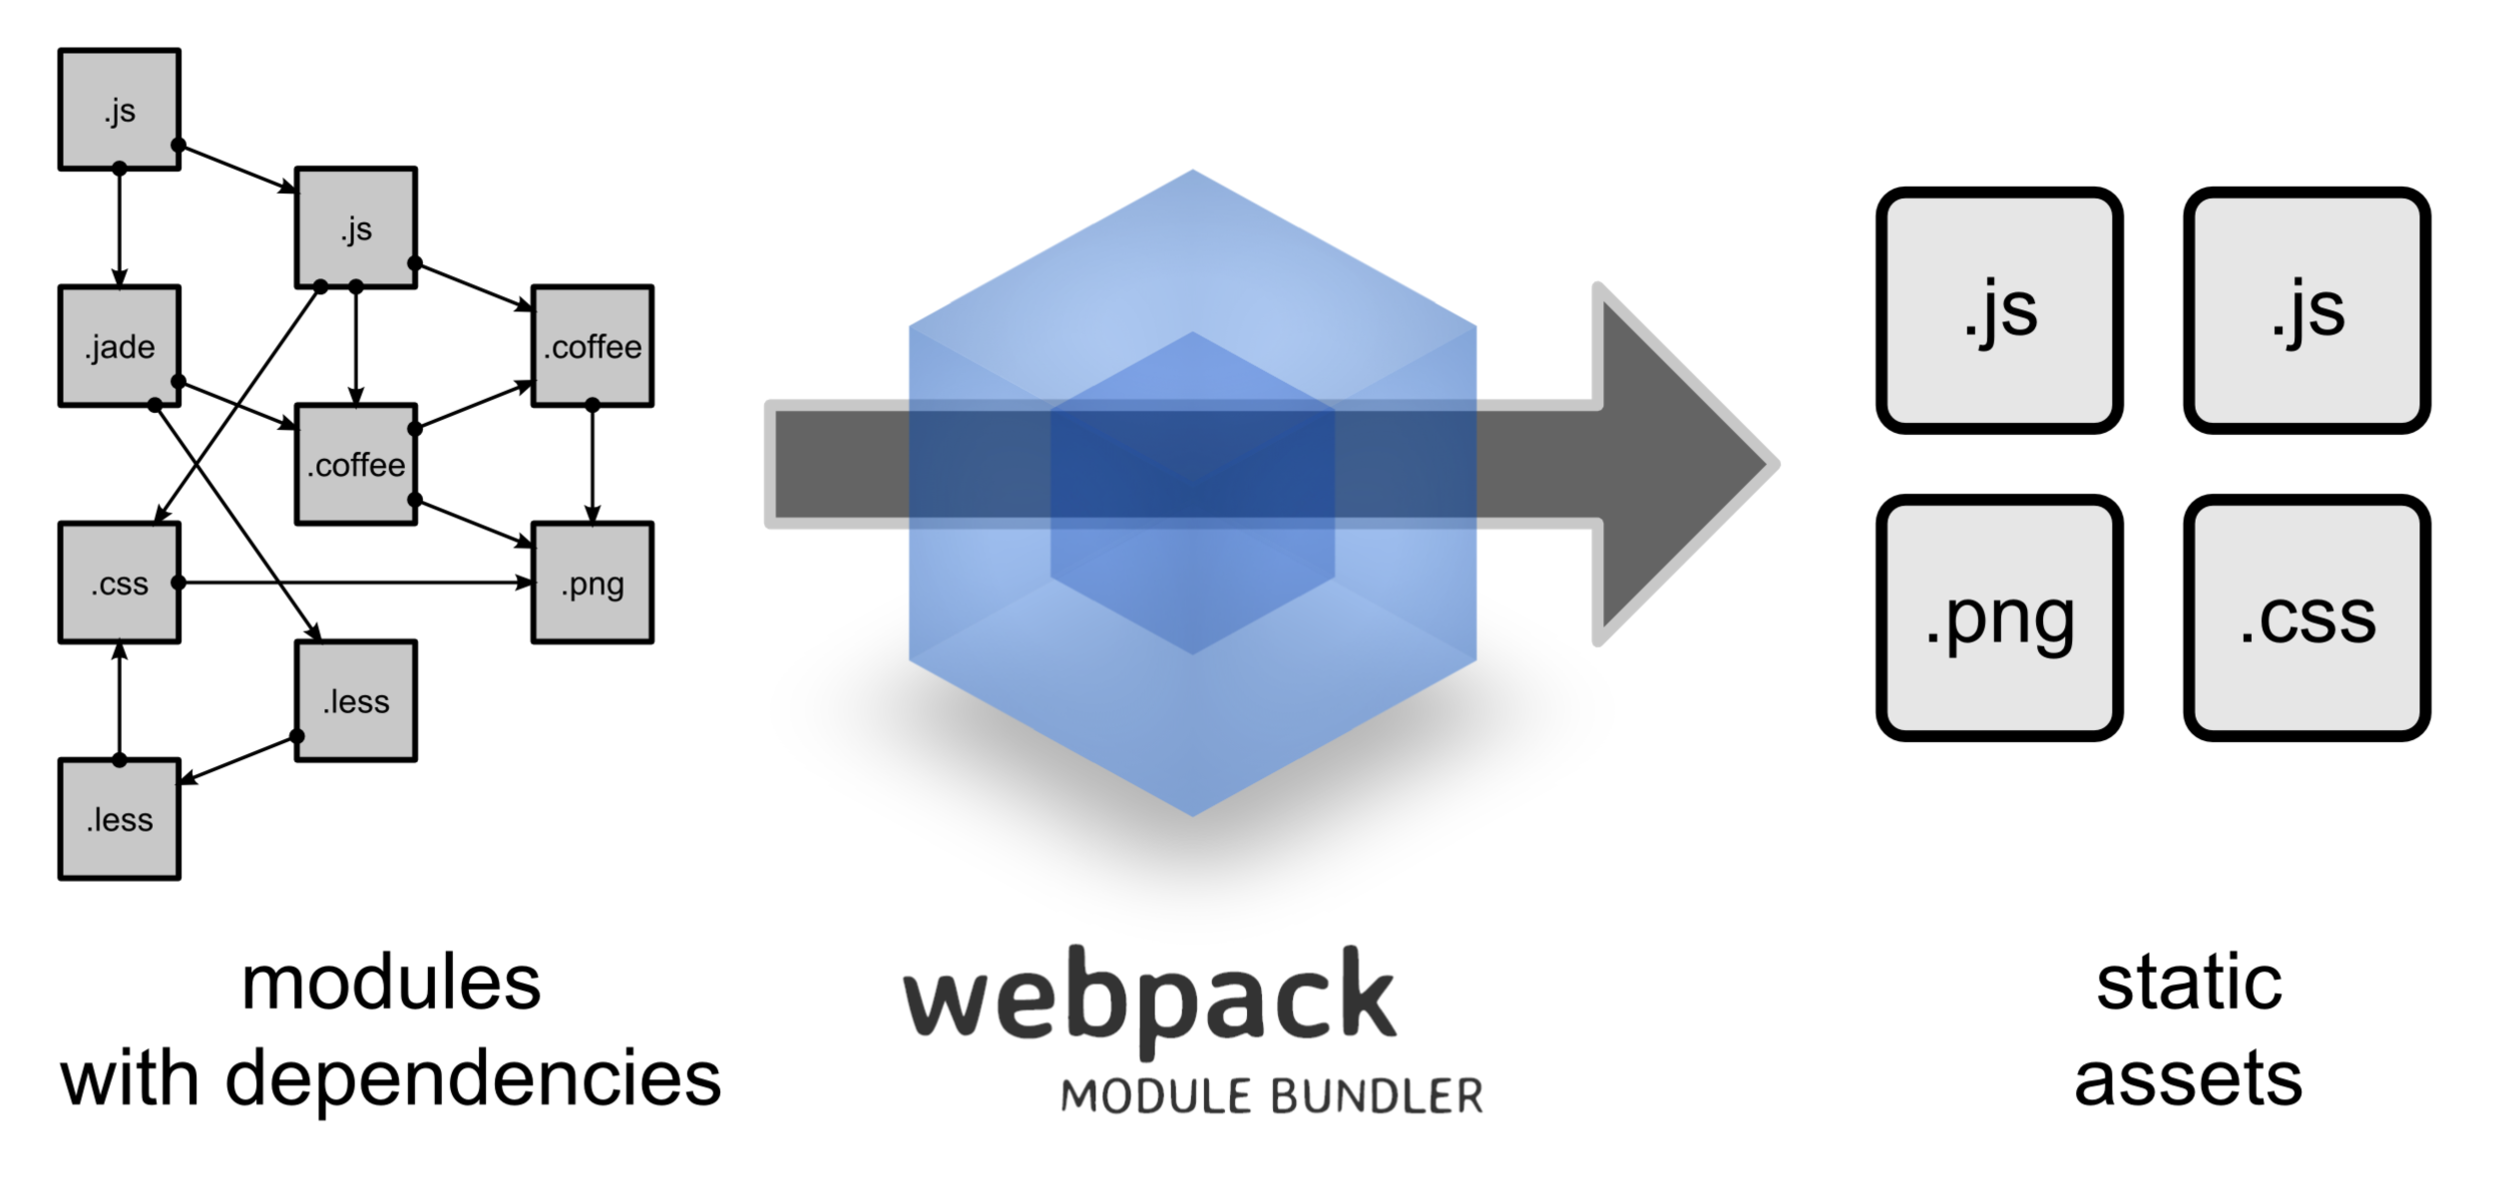
webpack
angular-cli
$ npm install -g @angular/cli$ ng new test-app$ cd test-app$ ng serve$ ng g component my-new-componentlet's try!

templating
templating
data binding
Basic way of data binding. We can use expressions or
call controller class methods
<p>The sum of 1 + 1 is {{1+1}}</p>


<p>The sum of 1 + 1 is not {{1 + 1 + getVal()}}</p>
templating
data binding
Things that we can't do
- assignments (=, +=, -=, ...)
- new
- chaining expressions with ; or ,
- increment and decrement operators (++ and --)
- no support for the bitwise operators | and &
- new template expression operators, such as | and ?.
templating
DATA BINDING
prop="text"
prop has "text" value
[PROP]="TEXT"
prop has context's text property value
templating
DATA BINDING
QUICK EXECUTION
don`t mess with the app performance
NO VISIBLE SIDE EFFECTS
expression doesn't change app state
SIMPLICITY
put the logic in the component if is too complex
EVENTS
<button (click)="readRainbow($event)"> NOT JUST CLICK
We can listen to ANY event created by the browser or developers on children
components
templating
DATA BINDING
<input [(ngModel)]="name" >
<input [ngModel]="name" (ngModelChange)="name=$event">
equals to
templating
conditional class binding
<div [class.my-class]="isActive"> Hello </div>

<div [ngClass]="{active: isActive}"> Hello </div>
setCurrentClasses() {
// CSS classes: added/removed per current state of component properties
this.currentClasses = {
saveable: this.canSave,
modified: !this.isUnchanged,
special: this.isSpecial
};
}
<div [ngClass]="currentClasses"></div>or as an object of classes
on template
templating
conditional style binding
<div [style.font-size]="isSpecial ? 'x-large' : 'smaller'" >
  This div is x-large or smaller.
</div>
setCurrentStyles() {
// CSS styles: set per current state of component properties
this.currentStyles = {
'font-style': this.canSave ? 'italic' : 'normal',
'font-weight': !this.isUnchanged ? 'bold' : 'normal',
'font-size': this.isSpecial ? '24px' : '12px'
};
}or as an object of classes
on template
templating
STRUCTURAL DIRECTIVES
<for-example *ngFor="let episode of episodes" [episode]="episode">
    {{episode.title}}
</for-example>*ngIf
Hiding an element is quite different from removing an element with NgIf.
<div *ngIf="errorCount > 0" class="error">
  {{errorCount}} errors detected
</div>

<hero-detail *ngIf="isActive"></hero-detail>
*ngFor
templating
STRUCTURAL DIRECTIVES
*ngSwitch
<div [ngSwitch]="hero?.emotion">
<happy-hero *ngSwitchCase="'happy'" [hero]="hero"></happy-hero>
<sad-hero *ngSwitchCase="'sad'" [hero]="hero"></sad-hero>
<confused-hero *ngSwitchCase="'confused'" [hero]="hero"></confused-hero>
<unknown-hero *ngSwitchDefault [hero]="hero"></unknown-hero>
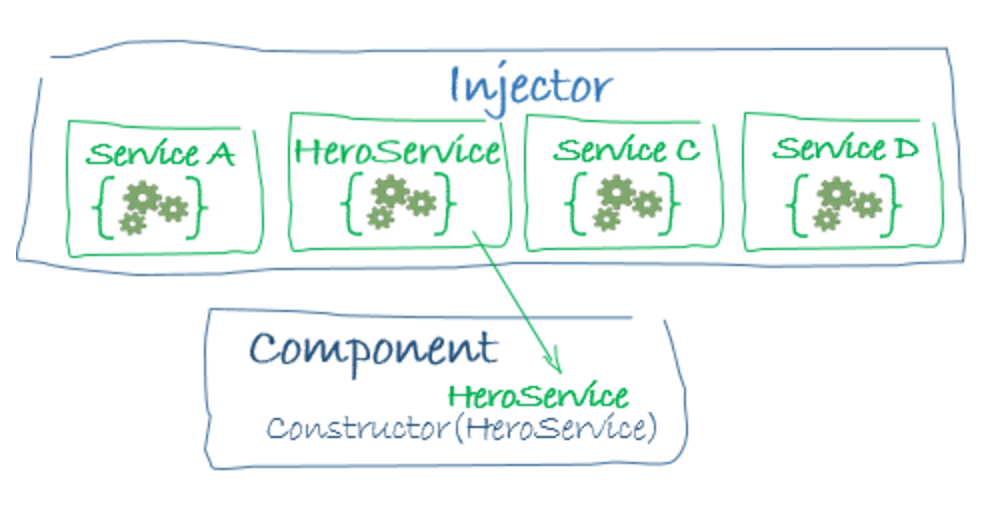
</div>injectables
injectables: declares services or values in order to be used by components
import { HEROES } from './mock-heroes';

@Injectable()
export class HeroService {
  getHeroes(): Hero[] {
    return HEROES;
  }
}
// Component
constructor(private heroService: HeroService) { }Angular stores the instance of the injectable service
Simplify and reduce the necessary information that a dependency needs in order to simplify our component
import { Component } from '@angular/core';
import { Hamburger } from '../services/hamburger';
@Component({
  selector: 'app',
  template: `Bun Type: {{ bunType }}`
})
export class App {
  bunType: string;
  constructor(h: Hamburger) {
    this.bunType = h.bun.type;
  }
}
providers: [{ provide:Logger, useClass: TimestampLogger}]Can use an alias in order to update the provider avoiding change it in the application
We can use the @Optional decorator in order to make that dependency not critical
import { Optional } from '@angular/core';

class AnotherService{
    constructor(@Optional() private logger: Logger) {
      if (this.logger) {
        this.logger.log("I can log!!");
      }
    }
}
Very usefull in order to use dev dependencies without modifying code
Using an injectable
import { Injectable } from '@angular/core';

@Injectable()
export class ChatService {
  private messages: Array<Object>;

  getMessages(): Array<Object> {
    return this.messages;
  }
}
import { ChatService } from '../chat.service.ts';
@Component({
selector: <chat-component></chat-component>,
template: '...'
})
export class ChatComponent {
private messages: Array<Object>;
constructor(private chatService:ChatService) {
this.messages = this.chatService.getMessages();
}
}HTTP SERVICE
import { Http } from '@angular/http';
    ...

  constructor (private http: HttpClient) {}

  getHeroes (): Promise<Hero[]> {
    return this.http.get(this.heroesUrl)
                  .toPromise();
  }

  // OR WITH OBSERVABLES

  getHeroes (): Observable<Hero[]> {
    return this.http.get(this.heroesUrl)
  }
¿PROMISES OR OBSERVABLES?
https://angular.io/docs/ts/latest/guide/server-communication.html#!#promises
Observable is preferred over Promise because it provides the features of Promise and more. Doesn't matter if you want to handle 0, 1, or multiple events.
Observable also has the advantage over Promise to be cancelable
An Observable emits items or sends notifications to its observers when the observed item is modified
import { Observable } from 'rxjs/Observable';


// Create the observable
const data = new Observable(observer => {
  setTimeout(function() {
    observer.next(40);
  }, 2000
});

....

// Subscribe the observable
data.subscribe(value => {
    console.log(value);
});
Modules
module: declaration of components, directives, providers and schemas
import { NgModule }      from '@angular/core';
import { BrowserModule } from '@angular/platform-browser';

import { AppComponent }  from './app.component';

@NgModule({
  imports: [ BrowserModule ],
  declarations: [ AppComponent ],
  bootstrap:    [ AppComponent ]
})
export class AppModule { }
Every Angular app has at least one module, the root module, conventionally named AppModule.
declarations - the view classes that belong to this module. Angular has three kinds of view classes: components, directives, and pipes.
exports - the subset of declarations that should be visible and usable in the component templates of other modules.
imports - other modules whose exported classes are needed by component templates declared in this module.
providers - creators of services that this module contributes to the global collection of services; they become accessible in all parts of the app.
FOR EACH PROVIDER, A NEW INSTANCE OF THE DEPENDENCY IS CREATED
bootstrap - the main application view, called the root component, that hosts all other app views. Only the root module should set this bootstrap property. (Solo para el mainmodule).
providers - creators of services that this module contributes to the global collection of services; they become accessible in all parts of the app.
bootstrap - the main application view, called the root component, that hosts all other app views. Only the root module should set this bootstrap property. (Solo para el mainmodule).
root module
feature module
import { platformBrowserDynamic } from '@angular/platform-browser-dynamic';
import { AppModule } from './app/app.module';

platformBrowserDynamic().bootstrapModule(AppModule);
Modules imported dinamically or statically for other sections or functionalities
let's try!

ROUTER
background
Multiple pages
Load same resources in every page
section
resources
section
resources
section
resources

background
One page
Brings all resources
section 1
resources
section 2
section 3
background
One page
Brings CRITICAL resources
Brings resources on demand
section 1
resources
section 2
section 3
Angular router
The first and more important step!
Add the base tag to your index.html in order to tell your angular application where to look for static resources
<base href="/">Angular router
Second! lets create our routes object
We can import the Routes interface in order to define the routes. The order matters!
import { RouterModule, Routes } from '@angular/router';

const appRoutes: Routes = [
  { path: 'crisis-center', component: CrisisListComponent },
  { path: 'hero/:id',      component: HeroDetailComponent },
  {
    path: 'heroes',
    component: HeroListComponent,
    data: { title: 'Heroes List' }
  },
  { path: '',
    redirectTo: '/heroes',
    pathMatch: 'full'
  },
  { path: '**', component: PageNotFoundComponent }
];
-
Each Route maps a URL path to a component. There are no leading slashes in the path. The router parses and builds the final URL for you, allowing you to use both relative and absolute paths when navigating between application views.
-
The :id in the first route is a token for a route parameter. In a URL such as /hero/42, "42" is the value of the id parameter. The corresponding HeroDetailComponent will use that value to find and present the hero whose id is 42.
  { path: 'crisis-center', component: CrisisListComponent },
  { path: 'hero/:id',      component: HeroDetailComponent },
- The data property is a place to store arbitrary data associated with this specific route. The data property is accessible within each activated route. Use it to store items such as page titles, breadcrumb text, and other read-only, static data.
- The empty path represents the default path for the application, the place to go when the path in the URL is empty, as it typically is at the start.
  {
    path: 'heroes',
    component: HeroListComponent,
    data: { title: 'Heroes List' }
  },
  { path: '',
    redirectTo: '/heroes',
    pathMatch: 'full'
  },
{ path: '**', component: PageNotFoundComponent }- We can use a children object in order to add new subroutes. Those routes will be displayed in the "father" component <router-outlet></router-outlet>
  {
    path: 'heroes',
    component: HeroListComponent,
    data: { title: 'Heroes List' },
    children: {
        path: 'Test',
        component: TestComponent
    }
  }
Angular router
The selected router will be displayed on the <router-outlet> tag of the "bootstrap component" in the root component, or the father component if we are using "children" routes
<router-outlet></router-outlet>Angular router
And finally, we add the routes object to our module, and we can define a "bootstrap" for contain our components
const routes: Routes = [
    { path: 'component-one', component: ComponentOne },
    { path: 'component-two', component: ComponentTwo }
];
export const routing = RouterModule.forRoot(routes);


@NgModule({
    ...
    imports: [
        BrowserModule,
        routing
    ],
    bootstrap: [ AppComponent ]
    ...
}
Angular router
Now, we can use routerLink directive in our a elements to set the current url
<a routerLink="/heroes" routerLinkActive="active">Heroes</a>We can use the routerLinkActive to tell Angular to add an active class by himself
LET'S THINK IN MODULES
Module
cmp
cmp
cmp
ROUTES
INJ
Module
cmp
cmp
cmp
ROUTES
INJ
Module 1
Module 2
Module 3
javascript presents
LAZY LOAD
Do less. Be lazy
Lazy load
$ ng g module lazy
$ ng g component lazy-info
Lets create a new module in our application and a new component for the new module
Lazy load
  {
    path: 'lazy',
    loadChildren: './lazy/lazy.module#LazyModule'
  },
Modify the app.routes.ts in order to add a new route with "loadChildren"
Remove lazy-info component from the app.module declarations
Lazy load
import {Routes} from "@angular/router";
import {LazyInfoComponent} from "../lazy-info/lazy-info.component";

export const lazyRoutes: Routes = [
  {
    path: '',
    component: LazyInfoComponent
  }
]
Now lets create a lazy.routes.ts in the lazy module directory with the relative routes
Lazy load
import { NgModule } from '@angular/core';
import { CommonModule } from '@angular/common';
import {LazyInfoComponent} from "../lazy-info/lazy-info.component";
import {RouterModule} from "@angular/router";
import {lazyRoutes} from "./lazy.routes";

@NgModule({
  imports: [
    CommonModule,
    RouterModule.forChild(lazyRoutes)
  ],
  declarations: [
    LazyInfoComponent
  ]
})
export class LazyModule { }
And import them into our new module. But CAREFUL!, now we will use the forChild function
preloading modules
With the previous steps, we will have an application loading only the critical resources in the first load, and the feature modules loading by request
preloading modules
@NgModule({
  bootstrap: [TestComponent],
  imports: [RouterModule.forRoot(ROUTES,
    {preloadingStrategy: PreloadAllModules})]
})
class TestModule {}
We can use preloadingStrategy in order to preload modules
preloading modules
We can create custom preload strategies!
export class PreloadSelectedModulesList implements PreloadingStrategy {
  preload(route: Route, load: Function): Observable<any> {
    return route.data && route.data.preload ? load() : of(null);
  }
}
[
{
path: 'moduleA',
loadChildren: './moduleA.module',
data: {preload: true}
}
]guards
Any user can navigate wherever he wants by our web and our modules. But maybe
- Maybe the user must login (authenticate) first.
- Maybe you should fetch some data before you display the target component.
- You might want to save pending changes before leaving a component.
guards
In order to handle those scenarios, we can use guards. These mechanism allow us to "do things" before the state loads, such as prevent the module load based on the user role, or get some data before the component initialize
guards
CanActivate executes to mediate in a navigation. Can prevent the navigation if the guard returns false.
CanDeactivate similar to the previous one but executes on the "away" navigation from state. Useful for unsuscribe observables, or stop watching certain vars
guards
Resolve executes a function in order to get some data, required by the loading component.
CanLoad a executes a function in order to decide if the asynchronous module should be loaded or not.
guards
import { Injectable }     from '@angular/core';
import { CanActivate }    from '@angular/router';

@Injectable()
export class AuthGuard implements CanActivate {
  canActivate() {
    console.log('AuthGuard#canActivate called');
    return true;
  }
}
import { AuthGuard } from '../auth-guard.service';
const adminRoutes: Routes = [
{
path: 'admin',
component: AdminComponent,
canActivate: [AuthGuard]
}
]CanActivate
guards
import { Injectable }             from '@angular/core';
import { Router, Resolve, RouterStateSnapshot,
         ActivatedRouteSnapshot } from '@angular/router';
import { Crisis, CrisisService } from './crisis.service';

@Injectable()
export class CrisisDetailResolver implements Resolve<Crisis> {
  constructor(private cs: CrisisService, private router: Router) {}

  resolve(route: ActivatedRouteSnapshot, state: RouterStateSnapshot): Promise<Crisis> {
    let id = route.params['id'];
    // get data from a service
    return this.cs.getCrisis(id).then(crisis => {
      if (crisis) {
        return crisis;
      } else { // id not found
        this.router.navigate(['/crisis-center']);
        return null;
      }
    });
  }
}
Resolver
guards
// On my component

ngOnInit() {
  this.route.data
    .subscribe((data: { crisis: Crisis }) => {
      this.editName = data.crisis.name;
      this.crisis = data.crisis;
    });
}
Resolver
NGRX/STORE
NGRX/STORE
@ngrx/store is a controlled state container designed to help write performant, consistent applications on top of Angular. Core tenets:
- State is a single immutable data structure
- Actions describe state changes
- Pure functions called reducers take previous slices of state and the next action to compute the new state
- State accessed with the Store, an observable of state and an observer of actions
NGRX/STORE
$ ng new store-appnpm install @ngrx/store --save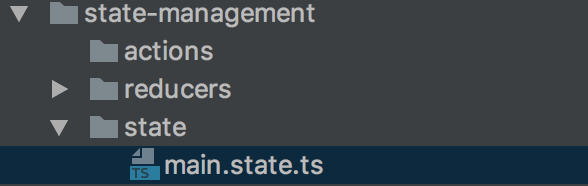
NGRX/STORE
//main.state.ts
export interface State {
  counter: number;
};

export const intitialState: State = {
  counter: 10
};
Inside of the state folder let’s create a new file
NGRX/STORE
import {ActionReducer, Action} from "@ngrx/store";
import {State, intitialState} from "../state/main-state";

export const mainStoreReducer: ActionReducer<State> = (state = intitialState, action: Action) => {
    switch (action.type) {
      case 'INCREMENT': {
        return {
          counter: state.counter + 1
        }
      }
      case 'EVENT_FROM_EFFECT': {
        return {
          counter: 4
        }
      }
      default: {
        return state;
      }
    }
  };
The reducer is the thing that catches and handles the actions that are dispatched from your smart components (or from your action reducers), and it is also the thing that actually resets the state to a new, modified state
NGRX/STORE
//app.module.ts
import { BrowserModule } from '@angular/platform-browser';
import { NgModule } from '@angular/core';
import { FormsModule } from '@angular/forms';
import { HttpModule } from '@angular/http';
import { AppComponent } from './app.component';
import { mainStoreReducer } from "./state-management/reducers/main.reducer";
import { StoreModule } from "@ngrx/store";

const reducers = { counter: mainStoreReducer };

@NgModule({
  declarations: [
    AppComponent
  ],
  imports: [
    BrowserModule,
    FormsModule,
    HttpModule,
    StoreModule.forRoot(reducers)
  ],
  providers: [],
  bootstrap: [AppComponent]
})
export class AppModule { }
NGRX/STORE
import { Component } from '@angular/core';
import { Store } from "@ngrx/store";
import { State } from "./state-management/state/main.state";

@Component({
  selector: 'app-root',
  templateUrl: './app.component.html',
  styleUrls: ['./app.component.css']
})
export class AppComponent {
  title = 'app works!';
  constructor (private store:Store<State>) {
    console.log('We have a store! ' + store);
  }
}
NGRX/STORE
import { Component } from '@angular/core';
import { Store } from "@ngrx/store";
import { State } from "./state-management/state/main.state";

@Component({
  selector: 'app-root',
  templateUrl: './app.component.html',
  styleUrls: ['./app.component.css']
})
export class AppComponent {
  title = 'app works!';
  data = '';
  constructor (private store:Store<State>) {
    store.select('counter')
      .subscribe( (data:State )=> {
        this.data = 'data is' + data;
      });

  }
}
Reading data
NGRX/STORE
import { Component } from '@angular/core';
import { Store } from "@ngrx/store";
import { State } from "./state-management/state/main.state";

@Component({
  selector: 'app-root',
  templateUrl: './app.component.html',
  styleUrls: ['./app.component.css']
})
export class AppComponent {
  title = 'app works!';
  data = '';
  constructor (private store:Store<State>) {
    store.select('mainStoreReducer')
      .subscribe( (data:State )=> {
        this.data = 'data is ' + data;
      });
  }

  public increment() {
    this.store.dispatch({ type: 'INCREMENT' });
  }
}
Calling reducer actions
NGRX/STORE
//app.component.html
<h1>
  {{title}}
</h1>
<h2>
  {{data}}
</h2>
<button (click)="increment()"> + 1 </button>
Angular + firebase

firebase database
"Firebase provides a realtime database and backend as a service. The service provides application developers an API that allows application data to be synchronized across clients and stored on Firebase's cloud."
firebase


firebase
// environment/environment.ts
export const environment = {
  production: false,
  firebase: {
    apiKey: '<your-key>',
    authDomain: '<your-project-authdomain>',
    databaseURL: '<your-database-URL>',
    projectId: '<your-project-id>',
    storageBucket: '<your-storage-bucket>',
    messagingSenderId: '<your-messaging-sender-id>'
  }
};
configure the environment
firebase
import { AngularFireModule } from '@angular/fire';
import { AngularFirestoreModule } from '@angular/fire/firestore';

...

@NgModule({
  imports: [
    BrowserModule,
    AngularFireModule.initializeApp(environment.firebase),
    AngularFirestoreModule
  ],
  declarations: [ AppComponent ],
  bootstrap: [ AppComponent ]
})
import the module
import {Component} from '@angular/core';
import {AngularFireDatabase, FirebaseListObservable} from 'angularfire2/database';

@Component({
  selector: 'project-name-app',
  template: `
  <ul>
    <li *ngFor="let item of items | async">
      {{ item.name }}
    </li>
  </ul>
  `
})
export class MyApp {
  items$;

  constructor(private db: AngularFirestore) {
    this.items$ = this.db.collection('messages').valueChanges();
  }
}
firebase
import {Component} from '@angular/core';
import { AngularFirestore } from 'angularfire2/firestore';

@Component({
  selector: 'project-name-app',
  template: `
  <ul>
    <li *ngFor="let item of items | async">
      {{ item.name }}
    </li>
  </ul>
  `
})
export class MyApp {
 fbMessages: any;

 constructor(private db: AngularFirestore) {
    this.fbMessages = this.db.collection('messages');
    this.fbMessages.add(message);
  }
}
firebase
FORMS
FORMS
 <label for="name">Name</label>
 <input type="text" id="name" required [(ngModel)]="model.name" name="name">
Angular forms module allow us to handle and attach easily the model of our inputs
FORMS
<form #heroForm="ngForm">
     <div>
       <label for="name">Name</label>
       <input type="text" id="name" required
   		[(ngModel)]=“myModel.name"
   		name="name">
	     <button type="submit">Submit</button>

</form>
ngModel directive, used in order to synchronize our model with the data inputted. Under the hood, Angular is making a two-way data binding, using the “Banana-in-a-box” notation [()]
The name attribute is always required, not just because of a11y. Although, Angular uses it in the model binding
FORMS
<form>
  <input [(ngModel)]="form.name" name="name">
  <input [(ngModel)]="form.mail" name="mail">
</form>
We can handle an object with all the form data
FORMS
<form #loginForm="ngForm">
  <input name="name" required [(ngModel)]="form.name">
  <input name="password" type="password" required [(ngModel)]="form.password">
  <button type="submit"></button>
</form>
<p *ngIf="!loginForm.valid"> Fill all the fields</p>
We can create references to the full form in order to validate it fully
#loginForm = "ngForm"
FORMS
import {Component, ViewChild} from 'angular2/core';
...
@ViewChild('loginForm') public form: NgForm;
...
public showFrm(): void{
    console.log(this.form);
}
We can access to an Angular reference from the controller with
@ViewChild('frm')
FORMS
<form #loginForm="ngForm" (ngSubmit)="login(loginForm.value)">
  <input name="name" required [(ngModel)]="form.name" >
  <input name="password" type="password" required [(ngModel)]="form.password">
  <button type="submit"></button>
</form>
<p *ngIf="!loginForm.valid"> Fill all the fields</p>
An use (ngSubmit) to handle the form submission
FORMS
<form #heroForm="ngForm">
     <div>
       <label for="name">Name</label>
       <input type="text" id="name" required
   		[(ngModel)]=“myModel.name"
   		name="name">
	     <button type="submit">Submit</button>

</form>
Internally Angular creates FormControls and registers them with an NgForm directive that Angular attached to the
tag. Each FormControl is registered under the name we assigned to the name attribute
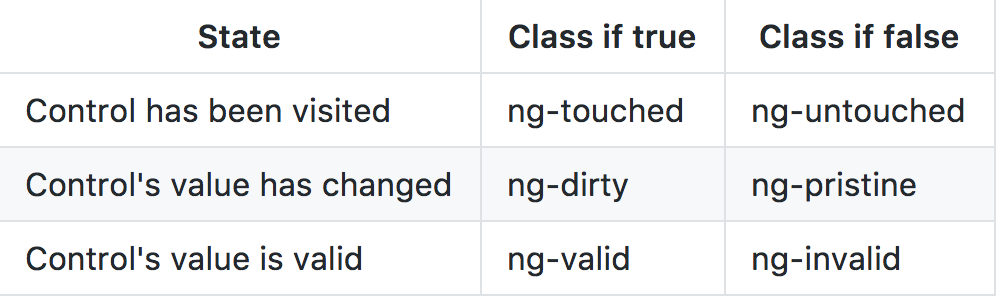
FORMS
When using ngModel on an input, Angular modifies automatically the className attribute of the element, adding the followings based on the element`s state
FORMS
We can use features in order to show error messages
<input type="text" id="name"
       required
       [(ngModel)]="model.name"
       name="name"
       #name="ngModel" >

<div [hidden]="name.valid || name.pristine"
     class="alert alert-danger"> Name is required </div>
FORMS
And we can add a ngSubmit to the form, using a custom action defined in our class
<form (ngSubmit)="onSubmit()" #heroForm="ngForm">Now, the form is associated to the heroForm var, allowing us to reset it (heroForm.reset()), validate(heroForm.valid), or accessing (heroForm)
reactive FORMS
With reactive forms, you create a tree of Angular form control objects in the component class and bind them to native form control elements in the component template
Create and manipulate form control objects directly in the component class. As the component class has immediate access to both the data model and the form control structure, you can push data model values into the form controls and pull user-changed values back out
reactive FORMS
IMPORTANT!
We have to import the
ReactiveFormsModule
reactive FORMS
FormControl tracks the value and validity status of an individual form control. It corresponds to an HTML form control such as an input box or selector.
FormGroup tracks the value and validity state of a group. The group's properties include its child controls. The top-level form in your component is a FormGroup.
reactive FORMS
Imagine that we want to validate a new User
export interface User {
    name: string; // required with minimum 5 chracters
    address?: {
        street?: string; // required
        postcode?: string;
    }
}reactive FORMS
We can use FormGroup and FormControl to create validators and bind to the forms
this.myForm = new FormGroup({
    name: new FormControl('', [<any>Validators.required, <any>Validators.minLength(5)]),
    address: new FormGroup({
        street: new FormControl('', <any>Validators.required),
        postcode: new FormControl('8000')
    })
});reactive FORMS
Or use FormBuilder to the "short" way
constructor(private formBuilder: FormBuilder) {


    this.myForm = this.formBuilder.group({
        name: ['', [<any>Validators.required, <any>Validators.minLength(5)]],
        address: this.formBuilder.group({
            street: ['', <any>Validators.required],
            postcode: ['']
        })
    });

}reactive FORMS
And we can link class and view
<form [formGroup]="myForm">
    <div>
        <label>Name</label>
        <input type="text" formControlName="name">
    </div>
    <div formGroupName="address">
        <label>Address</label>
        <input type="text" formControlName="street">
        <small [hidden]="myForm.get('address.street').valid">
            street not valid
        </small>
    </div>
    <div formGroupName="address">
        <label>Postcode</label>
        <input type="text" formControlName="postcode">
    </div>
</form>
reactive FORMS
We can use setValue to set one input, or the whole form!
const people = {
            name: 'Jane',
            address: {
                street: 'High street',
                postcode: '94043'
            }
    };

this.myForm.setValue(people, { onlySelf: true });reactive FORMS
And we can subscribe to the form too!
// subscribe to the stream
this.myForm.valueChanges.subscribe(x => this.events
    .push({ event: ‘STATUS CHANGED’, object: x }));

...

this.myForm.get('name').valueChanges.subscribe((data) => {
  console.log(data);
});reactive FORMS
Or create custom validators
import { FormControl } from '@angular/forms';

function validateEmail(c: FormControl) {
  let EMAIL_REGEXP = ...

  return EMAIL_REGEXP.test(c.value) ? null : {
    validateEmail: {
      valid: false
    }
  };
}
https://angular-maps.com/
animations
animations
Angular's animation system lets you build animations that run with the same kind of native performance found in pure CSS animations
Angular animations are built on top of the standard Web Animations API and run natively on browsers that support it
For other browsers, a polyfill is required
animations
import {
  trigger,
  state,
  style,
  animate,
  transition
} from '@angular/animations';
Lets start importing the animations module from @angular/animations
animations
 animations: [
    trigger('heroState', [
      state('inactive', style({
        backgroundColor: '#eee',
        transform: 'scale(1)'
      })),
      state('active',   style({
        backgroundColor: '#cfd8dc',
        transform: 'scale(1.1)'
      })),
      transition('inactive => active', animate('100ms ease-in')),
      transition('active => inactive', animate('100ms ease-out'))
    ])
  ]
The angular animations module allow us to define transitions between states. The states are defined with the value of a binded var
animations
// "void" is a reserved name for a state and is used to represent
// the state in which an element is detached from from the application.
state("void", style({ height: 0 }))

// user-defined states
state("closed", style({ height: 0 }))
state("open, visible", style({ height: "*" }))
We can define multiple states
animations
And now, we can use it in the template to bind the animation to a concrete element
  <ul>
    <li *ngFor="let hero of heroes"
        [@heroState]="hero.state"
        (click)="hero.toggleState()">
      {{hero.name}}
    </li>
  </ul>
The hero.state will define the value of the animation state
animations
  transition('inactive => active', animate('100ms ease-in')),
  transition('active => inactive', animate('100ms ease-out')),
  transition('* => inactive', animate('100ms ease-out')),
  transition('* => *', animate('100ms ease-out')),
  transition('* => void', animate('100ms ease-out')),
  transition('void => in', animate('100ms ease-out')),
We can define multiple type of transitions, with diferent animations
animations
animations: [
  trigger('shrinkOut', [
    state('in', style({height: '*'})),
    transition('* => void', [
      style({height: '*'}),
      animate(250, style({height: 0}))
    ])
  ])
]
If we don't know the value of a dimensional style property, you can use a special * property value so that the value of the property is computed at runtime and then plugged into the animation.
animations
animations: [
  trigger('flyInOut', [
    state('in', style({width: 120, transform: 'translateX(0)', opacity: 1})),
    transition('void => *', [
      style({width: 10, transform: 'translateX(50px)', opacity: 0}),
      group([
        animate('0.3s 0.1s ease', style({
          transform: 'translateX(0)',
          width: 120
        })),
        animate('0.3s ease', style({
          opacity: 1
        }))
      ])
    ])
We can make parallel executed animations using group
animations
  <ul>
    <li *ngFor="let hero of heroes"
        (@flyInOut.start)="animationStarted($event)"
        (@flyInOut.done)="animationDone($event)"
        [@flyInOut]="'in'">
      {{hero.name}}
    </li>
  </ul>
One of the greates advantages of angular animations is that we can use callbacks in order to "do things" when the animation is complete
universal
universal
Normally, a SPA web page spend a lot of time interpreting and taking control of the view, and it takes a lot of time to see useful content on a web
rail
Response Input latency (from tap to paint) < 100ms.
rail
Animation Each frame's work (from JS to paint) completes < 16ms.
rail
Idle Main thread JS work chunked no larger than 50ms.
rail
Load: deliver content under 1000ms
Old devices can browse our site because the application returns HTML, which differs from common Single Page Applications (SPA), where the tag contains JavaScript.
The first page request is fast and subsequent ones are even faster; as opposed to common SPAs, where the first request is used to load the application and then a round trip is made to fetch what was requested.
universal
Better Perceived Performance
Optimized for Search Engines
universal
The Angular Universal project consists of the base platform API and the surrounding tools that enables developer to do server side rendering(or pre-rendering) of Angular application
CONSTRUCTION & DEPLOYMENT

Webpack is a module bundler, a simple tool that takes just the needed resources of our app, transforms them based on our configuration files, and put them together in order to minimize the application modules and files
cONSTRUCTION
We can install webpack trough npm
cONSTRUCTION
npm install -D webpack ts-loader html-webpack-plugin tslint-loaderThis way, we are installing some importante dependencies for the Angular development, such as the ts compiler for webpack, an html loader in order to minimize an “inlining” the html, and validate our code style with the tslint-loader
cONSTRUCTION
We can split our app in “bundles”, which means a composition of modules. For example, we can have a bundle for the external dependencies, another one for our main module, and one more by each lazy load module.
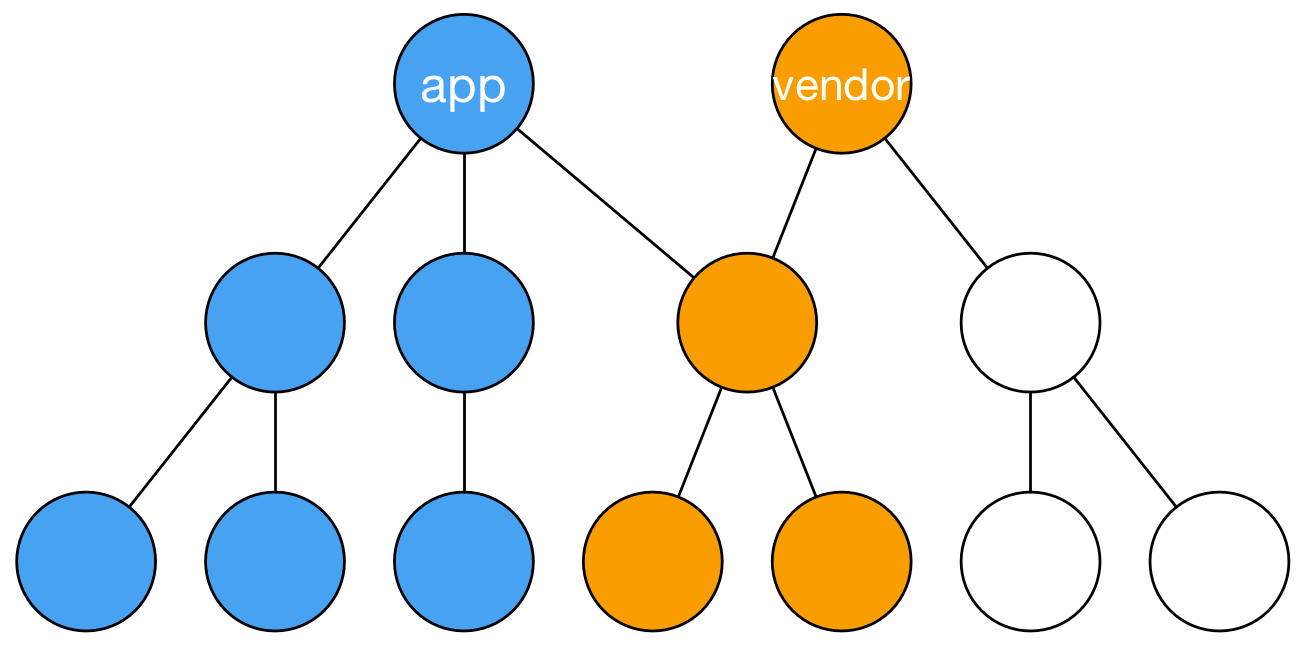
cONSTRUCTION
In webpack, we define the output bundles, and how are they constructed with the “entry” object
{
  entry: {
    app: './src/app/main.ts',
    vendor: [
        'es6-shim',
        'angular2/bundles/angular2-polyfills',
        'angular2/bootstrap',
        'angular2/platform/browser',
        'angular2/platform/common_dom',
        '@angular/core',
        'angular2/router',
        'angular2/http',
      ]
    }
}
cONSTRUCTION
And now, we can define how our bundles gonna be transformed, with loaders or plugins. For example, we are gonna use a loader, in order to compile typescript to javascript
{
  test: /\.ts$/,
  loader: 'ts-loader',
  exclude: /node_modules/
}
cONSTRUCTION
We can use plugins too, in order to add some actions to the web pack bundler process, such as insert automatically the output bundlers in our app
new HtmlWebpackPlugin({
  template: './src/index.html',
  inject: 'body',
  minify: false
});
cONSTRUCTION
Lets check of looks a webpack file
Compilation
Angular applications are built with templates, which may be .html or .css files, or may be inline template attributes on Decorators like @Component.
These templates are compiled into executable JS at application runtime.
Compilation
Compile all of this resources in runtime requires the angular compiler as part of the final bundle, and can be slow to compile huge amount of data, templating and necessary files.
This is known as JiT (Just In Time)
Compilation - JIT
JiT is the simpler compilation method. We can use the angular cli to do it with
ng build --prod
Compilation - JIT
If we look closer at the entry point of our app, we will se something like this
import { ViewEncapsulation } from '@angular/core';
import { platformBrowserDynamic } from '@angular/platform-browser-dynamic';

import { AppModule } from './app';

platformBrowserDynamic()
  .bootstrapModule(AppModule);
We can see that we are importing AppModule directing from app, without compiling. Webpack will transform it with loaders and plugins
Compilation - aot
In order to minimize compilation time on runtime, and improve performance, Angular team has created a runtime compilation in order to avoid this process on the browser.
This compilation reduces the bundles size in 60%, and improves a lot the performance in the pages load
This is known as AoT (Ahead of time)
Compilation - aot
AoT is the "before browser" compilation method. We can use the angular cli to do it with
ng build --aot --prodCompilation - aot
AoT is the "before browser" compilation method. We can use the angular cli to do it with
ng build --aot --prodCompilation - aot
In order to use this kind of compilation without the cli, we should have something like this entrypoint
/*
 * Angular bootstraping
 */
import { AppModuleNgFactory } from '../compiled/src/app/app.module.ngfactory';
import { platformBrowser } from '@angular/platform-browser';

platformBrowser()
  .bootstrapModuleFactory(AppModuleNgFactory);
We can see that the import of AppModule comes from a "compiled" dir. This is the entry point of the AoT compiled modules.
Compilation - aot
In order to add this compilation step in our typescript config file, we can add a new "angularCompilerOptions" option
  "angularCompilerOptions": {
   "genDir": "aot",
   "skipMetadataEmit" : true
 }
This way we can tell our application to create compiled aot modules
Testing
UNIT TESTING
Unit testing refers to the practice of testing certain functions and areas – or units – of our code. This gives us the ability to verify that our functions work as expected. That is to say that for any function and given a set of inputs, we can determine if the function is returning the proper values and will gracefully handle failures during the course of execution should invalid input be provided.
UNIT TESTING
- Helps identifying failures in our logic
- Write code "easy to test"
- Prevent future "build breaks"
- Simplifies integration & reusability
- Can work as functionality doc validation
UNIT TESTING


JavaScript test runner
Testing framework
UNIT TESTING - jasmine
suite: collection of test cases that are intended to be used to test a software program to show that it has some specified set of behaviours
spec: test case for a concrete specification of the component / file to test
UNIT TESTING - jasmine
describe("AppComponent", function() {
  var a;

  it("a should be true", function() {
    a = true;

    expect(a).toBe(true);
  });
});
This is a basic test with Jasmine
UNIT TESTING - ANGULAR
Angular recomends this stack in order to test our componentss, and provide some tools to help us configuring our dependencies on our tests
import { ComponentFixture, TestBed } from '@angular/core/testing';

import { By }              from '@angular/platform-browser';

import { DebugElement }    from '@angular/core';
UNIT TESTING - ANGULAR
TestBed
It creates an Angular testing module—an @NgModule class—that you configure with the configureTestingModule method to produce the module environment for the class you want to test.
In effect, you detach the tested component from its own application module and re-attach it to a dynamically-constructed Angular test module tailored specifically for this battery of tests.
UNIT TESTING - ANGULAR
TestBed
TestBed.configureTestingModule({
  declarations: [ BannerComponent ], // declare the test component
});
UNIT TESTING - ANGULAR
createComponent
After configuring TestBed, you tell it to create an instance of the component-under-test. We will use TestBed.createComponent to create an instance of a Component and returns a component test fixture.
The createComponent method closes the current TestBed instance to further configuration
UNIT TESTING - ANGULAR
TestBed
fixture = TestBed.createComponent(BannerComponent);
comp = fixture.componentInstance; // BannerComponent test instance
The Fixture, is a handle on the test environment surrounding the created component. It provides access to the component instance itself and to the DebugElement, which is a handle on the component's DOM element.
UNIT TESTING - ANGULAR
Basic test with angular
  it('should increment number', async(() => {
    const fixture = TestBed.createComponent(AppComponent);
    fixture.detectChanges();
    const elm = fixture.componentInstance;
    expect(elm.value).toBe(5);
    elm.testFuncion();
    expect(elm.value).toBe(6);
  }));
The automatic change detection is disabled in angular testing by default, in order to give the developer more control over the asynchronous and no controlled changes
UNIT TESTING - ANGULAR
Basic test with angular
import { ComponentFixtureAutoDetect } from '@angular/core/testing';

TestBed.configureTestingModule({
  declarations: [ BannerComponent ],
  providers: [
    { provide: ComponentFixtureAutoDetect, useValue: true }
  ]
})
We can activate automatic detection importing ComponentFixtureAutoDetect and adding it to providers
UNIT TESTING - ANGULAR
The automatic change detection is disabled in angular testing by default, in order to give the developer more control over the asynchronous and no controlled changes
it('should still see original title after comp.title change', () => {
  const oldTitle = comp.title;
  comp.title = 'Test Title';
  // Displayed title is old because Angular didn't hear the change :(
  expect(el.textContent).toContain(oldTitle);
});

it('should display updated title after detectChanges', () => {
  comp.title = 'Test Title';
  fixture.detectChanges(); // detect changes explicitly
  expect(el.textContent).toContain(comp.title);
});
UNIT TESTING - ANGULAR
If we need to inject a service, we should use a copy, in order to no create or depends on a external element
const userServiceStub = {
  isLoggedIn: true,
  user: { name: 'Test User'}
};

TestBed.configureTestingModule({
   declarations: [ WelcomeComponent ],
   providers:    [ {provide: UserService, useValue: userServiceStub } ]
});

userService = TestBed.get(UserService);
UNIT TESTING - ANGULAR
If we want to test an event, an async service or a service petition, we can use spies.
A spy can stub any function and tracks calls to it and all arguments. There are special matchers for interacting with spies. The toHaveBeenCalled matcher will return true if the spy was called
UNIT TESTING - ANGULAR
We can use a different value for a service in order to test it
let mockRouter = {
    navigate: jasmine.createSpy('navigate')
};

beforeEach(() => {
  TestBed.configureTestingModule({
  declarations: [ NavToolComponent ],
  providers: [
    { provide: Router, useValue: mockRouter }
  ]})
})

...

expect(mockRouter).toHaveBeenCallWith(['/home']);
UNIT TESTING - ANGULAR
spyOn(callToService, 'getUsers').andReturn(fakeHttpPromise);

component.updateUser();

expect(callToService.getUsers).toHaveBeenCalled();

component.updateUser('admin');

expect(callToService.getUsers).toHaveBeenCalledWith('admin');
UNIT TESTING - ANGULAR
  it('should emit on filter click', inject([], () => {
    let valueAfterClick;

    productListComp.itemClicked.subscribe(item => {
        console.log(item);
        valueAfterClick = item;
    });

    let el = fixture.debugElement.children[0];
    let card = el.query(By.css('.global-position__personal')).nativeElement;

    card.click();
    expect(valueAfterClick).toBe('profile');
  }));
Testing events
UNIT TESTING - ANGULAR
import {async, ComponentFixture, TestBed} from '@angular/core/testing';

import {TeoLoginComponent} from './teo-login.component';

describe('TeoLoginComponent', () => {
  let component: TeoLoginComponent;
  let fixture: ComponentFixture<TeoLoginComponent>;

  beforeEach(async(() => {
    TestBed.configureTestingModule({
      declarations: [ TeoLoginComponent ]
    })
    .compileComponents();
  }));

  beforeEach(() => {
    fixture = TestBed.createComponent(TeoLoginComponent);
    component = fixture.componentInstance;
    fixture.detectChanges();
  });

  it('should create', () => {
    expect(component).toBeTruthy();
  });
});
testing providers - ANGULAR
let httpClientSpy: { get: jasmine.Spy };
let heroService: HeroService;

beforeEach(() => {
  // TODO: spy on other methods too
  httpClientSpy = jasmine.createSpyObj('HttpClient', ['get']);
  heroService = new HeroService(<any> httpClientSpy);
});

it('should return expected heroes (HttpClient called once)', () => {
  const expectedHeroes: Hero[] =
    [{ id: 1, name: 'A' }, { id: 2, name: 'B' }];

  httpClientSpy.get.and.returnValue(asyncData(expectedHeroes));

  heroService.getHeroes().subscribe(
    heroes => expect(heroes).toEqual(expectedHeroes, 'expected heroes')
  );
})
UNIT TESTING - ANGULAR
We can test our components with the cli
$ ng testor test generating coverage report
$ ng test --code-coverageAngular
By Jon Rojí
Angular
Angular 2 starting slides


