1年間本番運用してわかった、
スタートアップこそAWS Copilot CLIを使うべきNつの理由
Leaner Technologies Inc.
黒曜
(@kokuyouwind)
$ whoami
-
黒曜 / @kokuyouwind
-
名古屋在住
-
Leaner Technologies Inc. 所属
-
Railsエンジニア
-
Next.js とか AWS 周りも触ってる

We're Hiring!!!
1年間本番運用してわかった、
スタートアップこそAWS Copilot CLIを使うべきNつの理由
Copilot?
そっちじゃないです
AWS Copilot CLI
AWS上でコンテナアプリを構築するツール
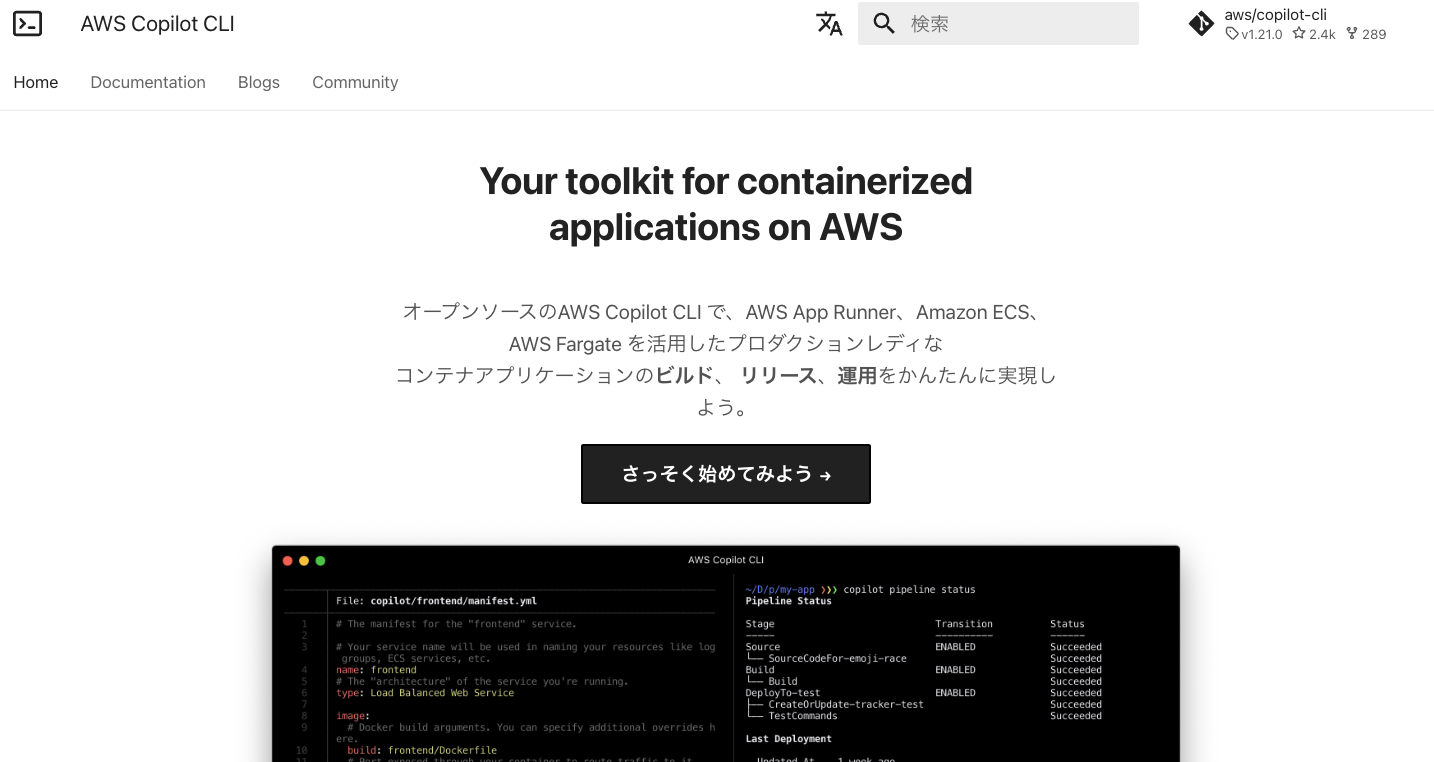
Leaner では昨年5月に EC2 -> ECS 移行で採用
1年間本番運用してわかった、
スタートアップこそAWS Copilot CLIを使うべきNつの理由
🤔
「Nつ」とは…?
タイトル決めるときに考えてなかった
少し癖や制約のあるツールなので、
フェーズやサービス特性によって
合うかどうか異なる(Nが変わる)
AWS Copilot CLIの向き・不向き
-
新規でのWebアプリ構築に最も向いている
-
ベストプラクティスに沿った構成が一気通貫で作れる
-
-
既存環境の移行にも使えるが、やや旨みが減る
-
DNS・VPC周りは既存のものを使い回すほうが楽
-
-
用途や現状構成によってはCopilotが適さない可能性
-
厳密なBlue/Greenデプロイはできない
-
マルチAWSアカウントの構成によっては使いづらい
-
AWS Copilot CLI で何ができるか、
どういう点が便利なのか、
どんな癖があるのかを紹介します
1年間本番運用してわかった、
スタートアップこそAWS Copilot CLIを使うべきNつの理由
具体的なNの値は
最後のスライドで!
アジェンダ
-
AWS Copilot CLIの概要と特徴
-
各Copilotリソースの作り方と詳細
-
Copilot CLIの便利な点・癖のある点
-
Leanerでの事例紹介とTips
-
まとめ
アジェンダ
-
AWS Copilot CLIの概要と特徴
-
各Copilotリソースの作り方と詳細
-
Copilot CLIの便利な点・癖のある点
-
Leanerでの事例紹介とTips
-
まとめ
AWS Copilot CLI(再掲)
AWS上でコンテナアプリを構築するツール
こういう構成が簡単に作れる

一番簡単な使い方
$ copilot init
📢 お知らせ
チュートリアル目的以外では
copilot init はオススメしません
copilot init の功罪
-
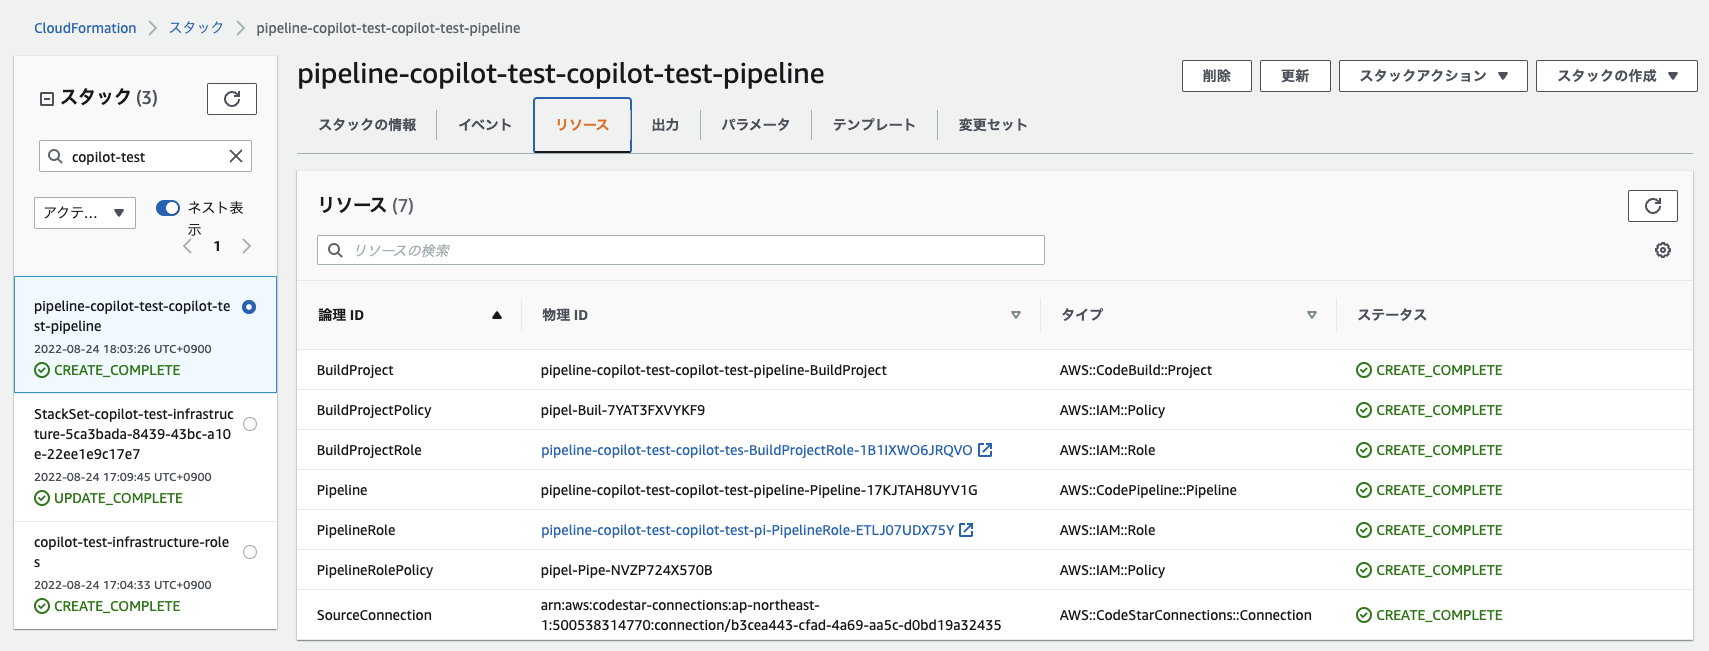
copilot init では複数のCopilotリソースがまとめて作られる
-
Copilotの特徴的な概念が隠蔽されてしまい理解しづらい
-
-
細かいオプションが制御できない
-
ドメイン名の紐付け
-
環境を構築するAWSアカウントの指定
-
-
Copilotリソースごとの init サブコマンドを使うとよい
-
copilot app init, copilot svc init など
-
Copilot のリソース構成
Application: MyApp
Test
Production
Stage
WebAPI
Worker
(Environment)
(Service)
Container
Container
Container
Container
Container
Container
Copilotリソース: Application
Application: MyApp
Test
Production
Stage
WebAPI
Worker
(Environment)
(Service)
Container
Container
Container
Container
Container
Container
1つのWebアプリケーションを表現
Copilotリソース: Environment
Application: MyApp
Test
Production
Stage
WebAPI
Worker
(Environment)
(Service)
Container
Container
Container
Container
Container
Container
1つのWebアプリケーションを表現
サービスの
動作環境を表現
Copilotリソース: Service
Application: MyApp
Test
Production
Stage
WebAPI
Worker
(Environment)
(Service)
Container
Container
Container
Container
Container
Container
サービスの
動作環境を表現
サービスの
動作環境を表現
1つのWebアプリケーションを表現
コンテナで動く
サービスを表現
Env, Service と実際のコンテナの関係
Application: MyApp
Test
Production
Stage
WebAPI
Worker
(Environment)
(Service)
Container
Container
Container
Container
Container
Container
Env × Service ごとにコンテナが作られる
(これはCopilot管理リソースではない)
🤔
コンテナのデプロイは…?
$ copilot deploy --env test
Application: MyApp
Test
Production
Stage
WebAPI
Worker
(Environment)
(Service)
Container
Container
Container
Container
Container
Container
この2箇所が
デプロイ対象になる
😣
手作業でデプロイしたくない!
Copilotリソース: Pipeline
Application: MyApp
Test
Prod
Stage
WebAPI
Worker
(Environment)
(Service)
Container
Container
Container
Container
Container
Container
DevPipeline
(Pipeline)
ProdPipeline

developブランチ
mainブランチ
Test Envにデプロイ
Stage Envにデプロイ
E2Eテストが通ったら
Productionにデプロイ
AWS Copilot CLIの概要: まとめ
-
Copilotでは独自の単位でリソースを管理する
-
Application: Webアプリケーション全体を表現
-
Environment: テスト・本番などの環境を表現
-
Service: APIサーバ・Workerなどのサービスを表現
-
Pipeline: デプロイパイプラインを表現
-
-
Environment × Service ごとにコンテナなどが作られる
-
Environment単位でデプロイされる
-
Pipelineからは複数のEnvironmentを順に更新できる
-
アジェンダ
-
AWS Copilot CLIの概要と特徴
-
各Copilotリソースの作り方と詳細
-
Copilot CLIの便利な点・癖のある点
-
Leanerでの事例紹介とTips
-
まとめ
各Copilotリソースの init コマンドの使い方と、
具体的に何のAWSリソースが作られるかを
紹介していきます
Copilotリソース: Application
Application: MyApp
Test
Production
Stage
WebAPI
Worker
(Environment)
(Service)
Container
Container
Container
Container
Container
Container
Applicationの詳細
-
copilot app init で Application を作成できる
-
Parameter Store上にメタデータが格納される
-
ローカルに copilot/.workspace が作られる
-
-
このコマンド実行時のAWS Profileが
Copilot CLI利用時の中央アカウントを規定する-
以降のコマンド実行時は同じProfile指定が必要
-
ECRやCodePipelineなど、環境横断のAWSリソースは
このAWSアカウントに作成される
-
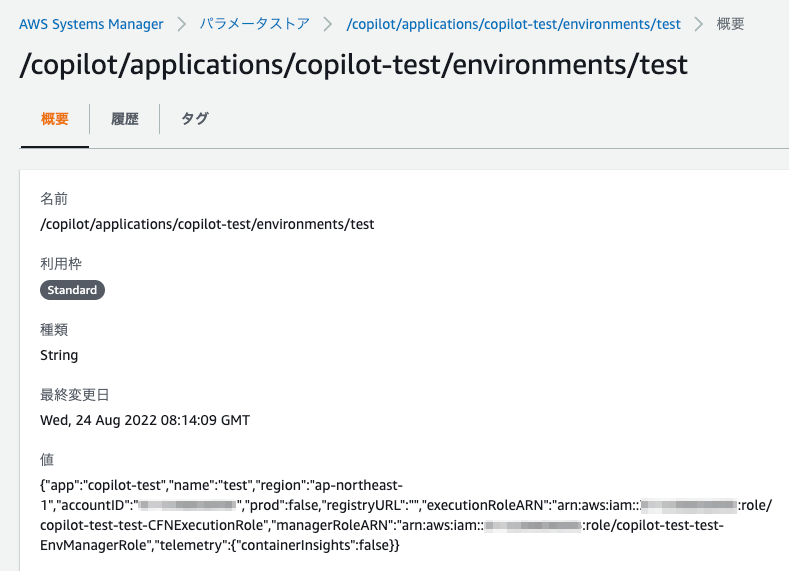
Application の生成
❯ copilot app init

Use existing application: No
Application name: copilot-test

✔ Created the infrastructure to manage services and jobs under
application copilot-test.

✔ The directory copilot will hold service manifests for application
copilot-test.


❯ copilot app ls
copilot-test
Parameter Store
copilot/.workspace
❯ cat copilot/.workspace
application: copilot-test
path: ""
ドメインの紐付け
-
copilot app init --domain 'leaner.jp'
-
api.test.copilot-test.leaner.jp のように、
[svcName].[envName].[appName].[domain] を紐付ける
-
-
Route 53 に上記ドメインのホストゾーンが必要
-
leaner.jp のホストゾーンに copilot-test.leaner.jp に向ける
NSレコードが追加される -
copilot-test.leaner.jp のホストゾーンが作成される
-
ここまでの構成
Application
中央アカウント

Metadata
リポジトリ内
ファイル
.workspace


Route 53
HostZone
Copilotリソース: Environment
Application: MyApp
Test
Production
Stage
WebAPI
Worker
(Service)
Container
Container
Container
Container
Container
Container
Environmentの詳細
-
copilot env init で Environment を作成できる
-
環境を作るAWSアカウントを指定できる
-
VPCとSubnetが作成される
(既存のリソースを使うこともできる) -
[envName].[appName].[domain] の
Route 53 ホストゾーンが作られる -
Environmentのメタ情報が中央アカウントの
Parameter Storeに格納される
-
Environment の生成 (1)
❯ copilot env init
Environment name: test

  Which credentials would you like to use to create test?
  [Use arrows to move, type to filter, ? for more help]

  > Enter temporary credentials
    [profile default]
    [profile env-test]
Environment の生成 (2)
❯ copilot env init
Environment name: test
Credential source: [profile env-test]

  Would you like to use the default configuration for
  a new environment?
    - A new VPC with 2 AZs, 2 public subnets and 2 private subnets
    - A new ECS Cluster
    - New IAM Roles to manage services and jobs in your environment
  [Use arrows to move, type to filter]
  > Yes, use default.
    Yes, but I'd like configure the default resources
      (CIDR ranges, AZs).
    No, I'd like to import existing resources (VPC, subnets).
Environment の生成 (3)
❯ copilot env init
Environment name: test
Credential source: [profile env-test]
Default environment configuration? Yes, use default.
✔ Linked account xxxxxxxxx and region ap-northeast-1 to application copilot-test.

✔ Proposing infrastructure changes for the copilot-test-test environment.
- Creating the infrastructure for the copilot-test-test environment.          [create complete]  [105.3s]
  - An IAM Role for AWS CloudFormation to manage resources                    [create complete]  [36.1s]
  - An ECS cluster to group your services                                     [create complete]  [8.7s]
  - An IAM Role to describe resources in your environment                     [create complete]  [37.7s]
  - A security group to allow your containers to talk to each other           [create complete]  [6.0s]
  - An Internet Gateway to connect to the public internet                     [create complete]  [18.0s]
  - Private subnet 1 for resources with no internet access                    [create complete]  [6.0s]
  - Private subnet 2 for resources with no internet access                    [create complete]  [6.0s]
  - A custom route table that directs network traffic for the public subnets  [create complete]  [15.1s]
  - Public subnet 1 for resources that can access the internet                [create complete]  [6.0s]
  - Public subnet 2 for resources that can access the internet                [create complete]  [6.0s]
  - A private DNS namespace for discovering services within the environment   [create complete]  [49.2s]
  - A Virtual Private Cloud to control networking of your AWS resources       [create complete]  [12.6s]
✔ Created environment test in region ap-northeast-1 under application copilot-test.
CloudFormation Stack (VPC)
Parameter Store
ここまでの構成
Application
Environment
中央アカウント
Test環境用
アカウント
Metadata
リポジトリ内
ファイル
Metadata
.workspace
Route 53
HostZone
Route 53
HostZone
VPC
Copilotリソース: Service
Application: MyApp
Test
Production
Stage
WebAPI
Worker
(Environment)
(Service)
Container
Container
Container
Container
Container
Container
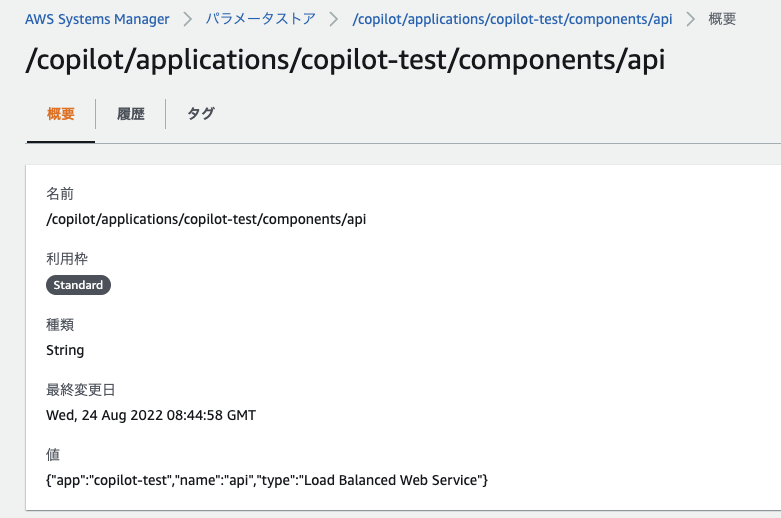
Serviceの詳細
-
copilot svc init で Service を作成できる
-
Service のタイプなどを対話的に入力する
(今回はLoad Balanced Web Serviceを選択) -
copilot/[svcName]/manifest.yml ファイルが作られる
-
Service用のECR RepoとメタデータParameter Storeが
中央アカウントに作られる -
ALBがEnvironmentに紐付いて作られる
-
-
別途デプロイしない限りコンテナは起動しない
Service の生成(1)
❯ copilot svc init
Note: It's best to run this command in the root of your workspace.

  Which service type best represents your service's architecture?
  [Use arrows to move, type to filter, ? for more help]

    Request-Driven Web Service  (App Runner)
  > Load Balanced Web Service   (Internet to ECS on Fargate)
    Backend Service             (ECS on Fargate)
    Worker Service              (Events to SQS to ECS on Fargate)
Service の生成(2)
❯ copilot svc init
Note: It's best to run this command in the root of your workspace.
Service type: Load Balanced Web Service
Service name: api

  Which Dockerfile would you like to use for api?
  [Use arrows to move, type to filter, ? for more help]

  > docker/Dockerfile
    Enter custom path for your Dockerfile
    Use an existing image instead
Service の生成(3)
❯ copilot svc init
Note: It's best to run this command in the root of your workspace.
Service type: Load Balanced Web Service
Service name: api
Dockerfile: docker/Dockerfile
parse EXPOSE: no EXPOSE statements in Dockerfile docker/Dockerfile
Port: 80
✔ Wrote the manifest for service api at copilot/api/manifest.yml
Your manifest contains configurations like your container size and port (:80).

✔ Created ECR repositories for service api.
copilot/api/manifest.yml
name: api
type: Load Balanced Web Service

http:
  path: '/'

image:
  build: docker/Dockerfile
  port: 80

cpu: 256
memory: 512
platform: linux/x86_64
count: 1
exec: true
CloudFormation Stack (ECR)
Parameter Store
ここまでの構成
Application
Environment
Service
中央アカウント
Test環境用
アカウント
Metadata
リポジトリ内
ファイル
Metadata
Metadata
manifest.yml
.workspace

ECR Repo
Route 53
HostZone
Route 53
HostZone

ALB
VPC
Copilotリソース: Pipeline
Application: MyApp
Test
Prod
Stage
WebAPI
Worker
(Environment)
(Service)
Container
Container
Container
Container
Container
Container
DevPipeline
(Pipeline)
ProdPipeline
developブランチ
mainブランチ
Test Envにデプロイ
Stage Envにデプロイ
E2Eテストが通ったら
Productionにデプロイ
Pipelineの詳細
-
copilot pipeline init で設定ファイルを作成
-
copilot/pipelines/[pipelineName] 以下に
manifest.yml と buildspec.yml が作られる -
この時点ではAWSリソースは作られない
-
-
copilot pipeline deploy で AWS リソースを作成
-
manifest.yml を元に CodePipeline と関連リソースが
中央アカウントに作られる
-
Pipeline の初期化 (1)
❯ copilot pipeline init
Only one git remote detected.
Your pipeline will follow 'git@github.com:leaner-co-jp/copilot-test'.

Your pipeline will follow branch 'develop'.
Pipeline name: copilot-test-pipeline

  Which environment would you like to add to your pipeline?
  [Use arrows to move, type to filter, ? for more help]

> test
  [No additional environments]
Pipeline の初期化 (2)
❯ copilot pipeline init
Only one git remote detected.
Your pipeline will follow 'git@github.com:leaner-co-jp/copilot-test'.

Your pipeline will follow branch 'develop'.
Pipeline name: copilot-test-pipeline
1st stage: test

✔ Wrote the pipeline manifest for copilot-test at
'copilot/pipelines/copilot-test-pipeline/manifest.yml'
The manifest contains configurations for your pipeline.
Update the file to add stages, change the tracked branch,
add test commands or manual approval actions.

✔ Wrote the buildspec for the pipeline's build stage at
'copilot/pipelines/copilot-test-pipeline/buildspec.yml'
The buildspec contains the commands to push your container images,
and generate CloudFormation templates.
Update the "build" phase to unit test your services before pushing the images.
copilot/pipelines/.../manifest.yml
name: copilot-test-pipeline
version: 1

source:
  provider: GitHub
  properties:
    branch: develop
    repository: https://github.com/leaner-co-jp/copilot-test

stages:
      name: test
      # Optional: flag for manual approval action before deployment.
      # requires_approval: true
      # Optional: use test commands to validate this stage of your build.
      # test_commands: [echo 'running tests', make test]
copilot/pipelines/.../buildspec.yml
長いので割愛
自動生成ファイルなので、
基本的には手を加えない
Pipeline の作成 (1)
❯ copilot pipeline deploy
Only found one pipeline; defaulting to: copilot-test-pipeline
✔ Successfully added pipeline resources to your application: copilot-test
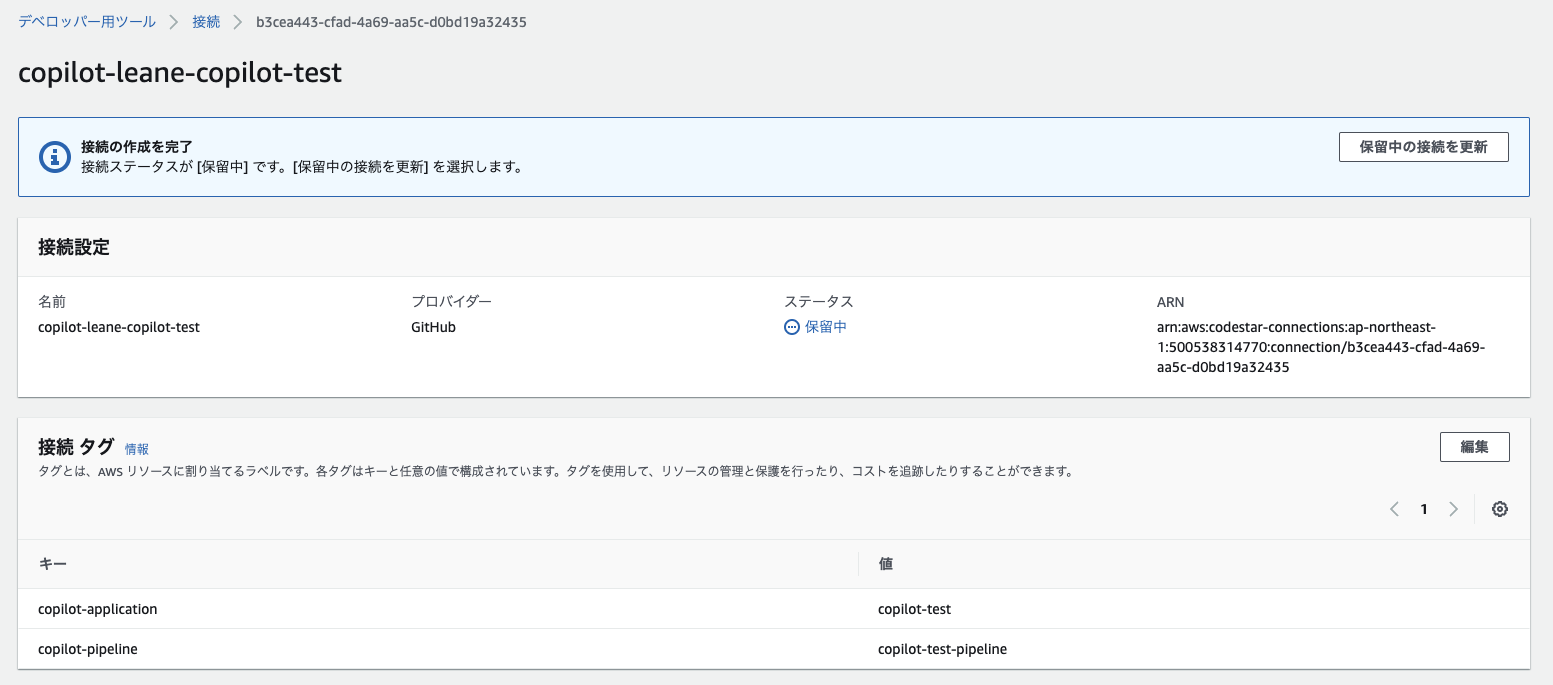
⠋ Creating a new pipeline: copilot-test-pipelineACTION REQUIRED!
Go to https://console.aws.amazon.com/codesuite/settings/connections to
update the status of connection copilot-leane-leaner-purchasing- from PENDING to
AVAILABLE.
⠸ Creating a new pipeline: copilot-test-pipelinePipeline の作成 (2)
Pipeline の作成 (3)
❯ copilot pipeline deploy
Only found one pipeline; defaulting to: copilot-test-pipeline
✔ Successfully added pipeline resources to your application: copilot-test
⠋ Creating a new pipeline: copilot-test-pipelineACTION REQUIRED!
Go to https://console.aws.amazon.com/codesuite/settings/connections to
update the status of connection copilot-leane-leaner-purchasing- from PENDING to
AVAILABLE.
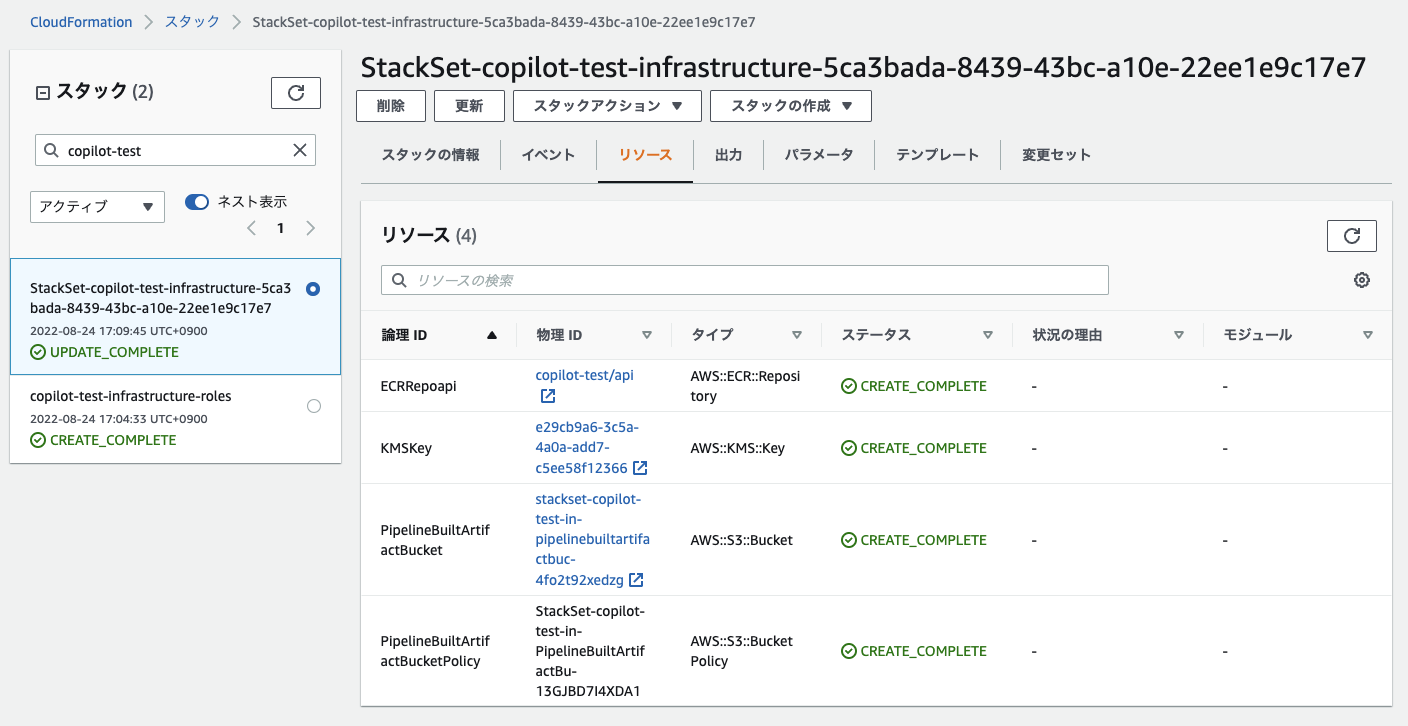
✔ Successfully created a new pipeline: copilot-test-pipelineCloudFormation Stack (Pipeline)
ここまでの構成
Application
Environment
Service
Pipeline
中央アカウント
Test環境用
アカウント
Metadata
リポジトリ内
ファイル
Metadata
Metadata
manifest.yml
manifest.yml
buildspec.yml
.workspace

CodePipeline
ECR Repo
Route 53
HostZone
Route 53
HostZone
ALB
VPC

CodeBuild
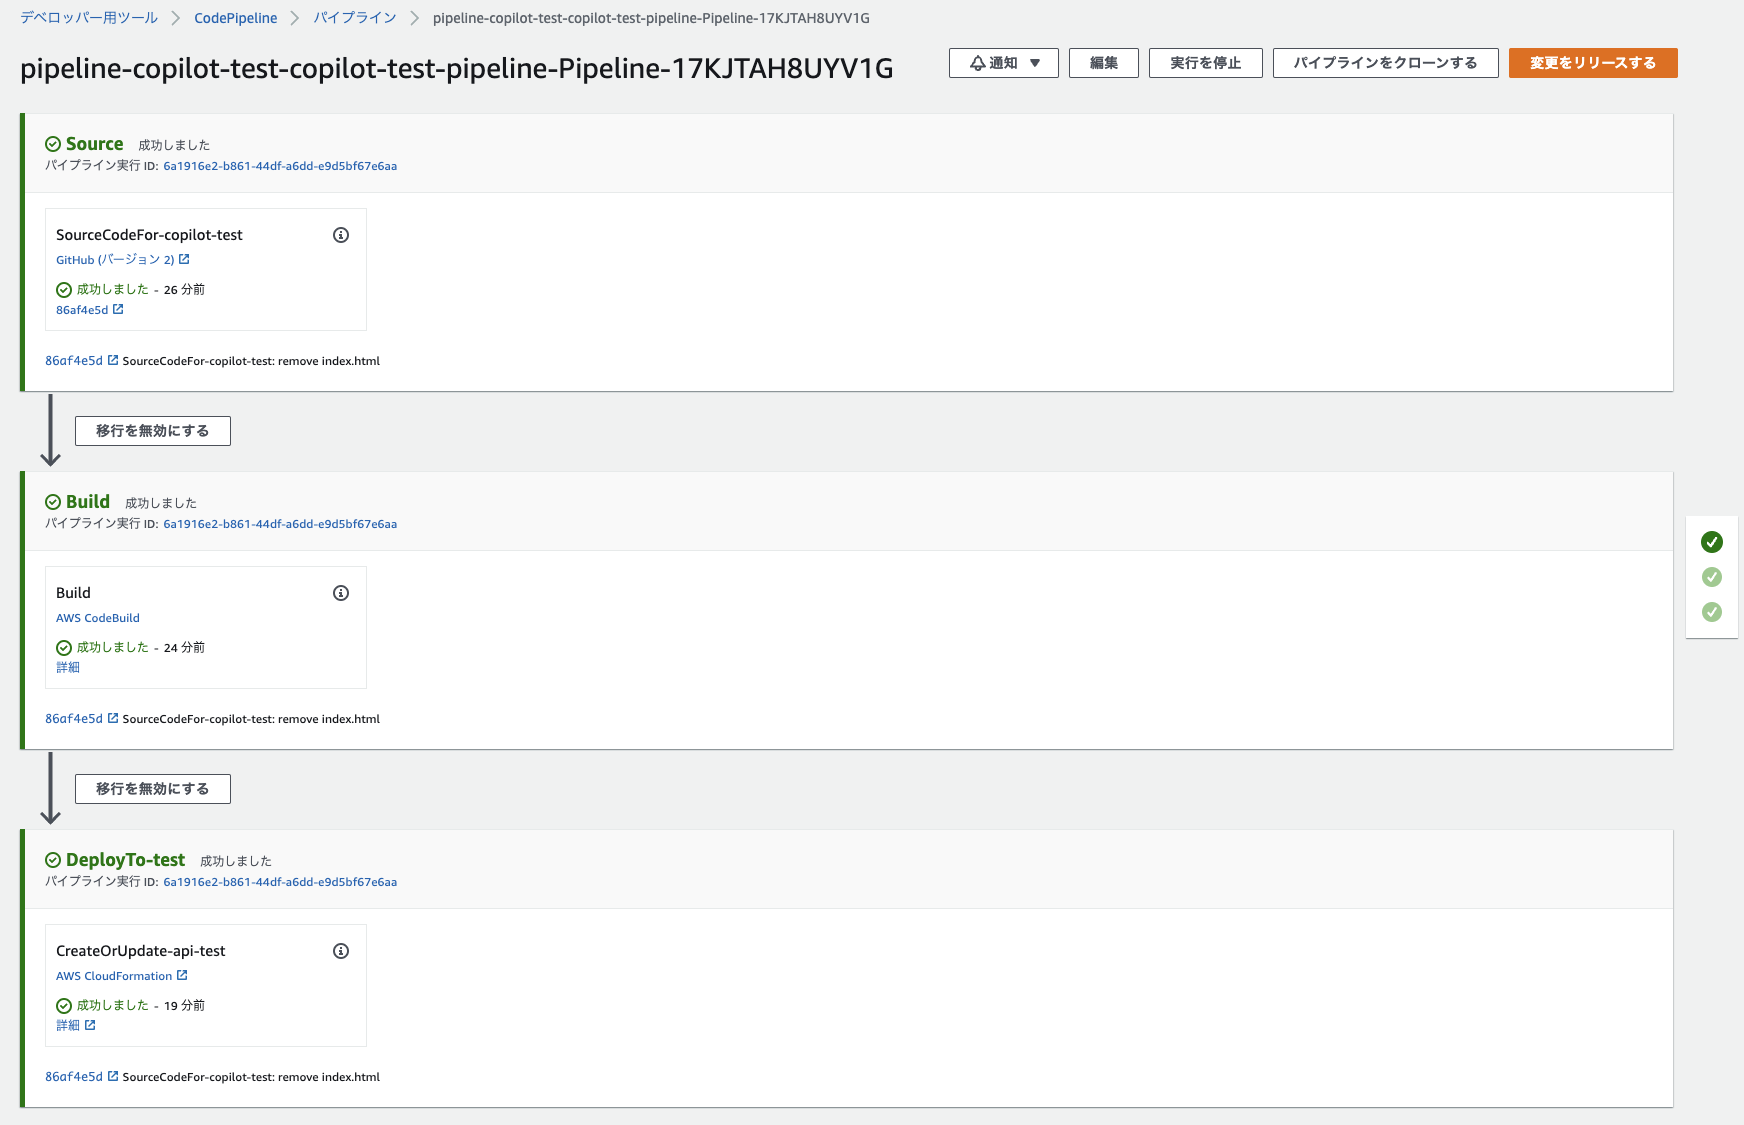
CodePipelineからのデプロイ
-
CodeBuildで docker build を行い、ECR Repoにpushする
-
複数環境にデプロイする場合でもDockerイメージは
サービスごとに共通
-
-
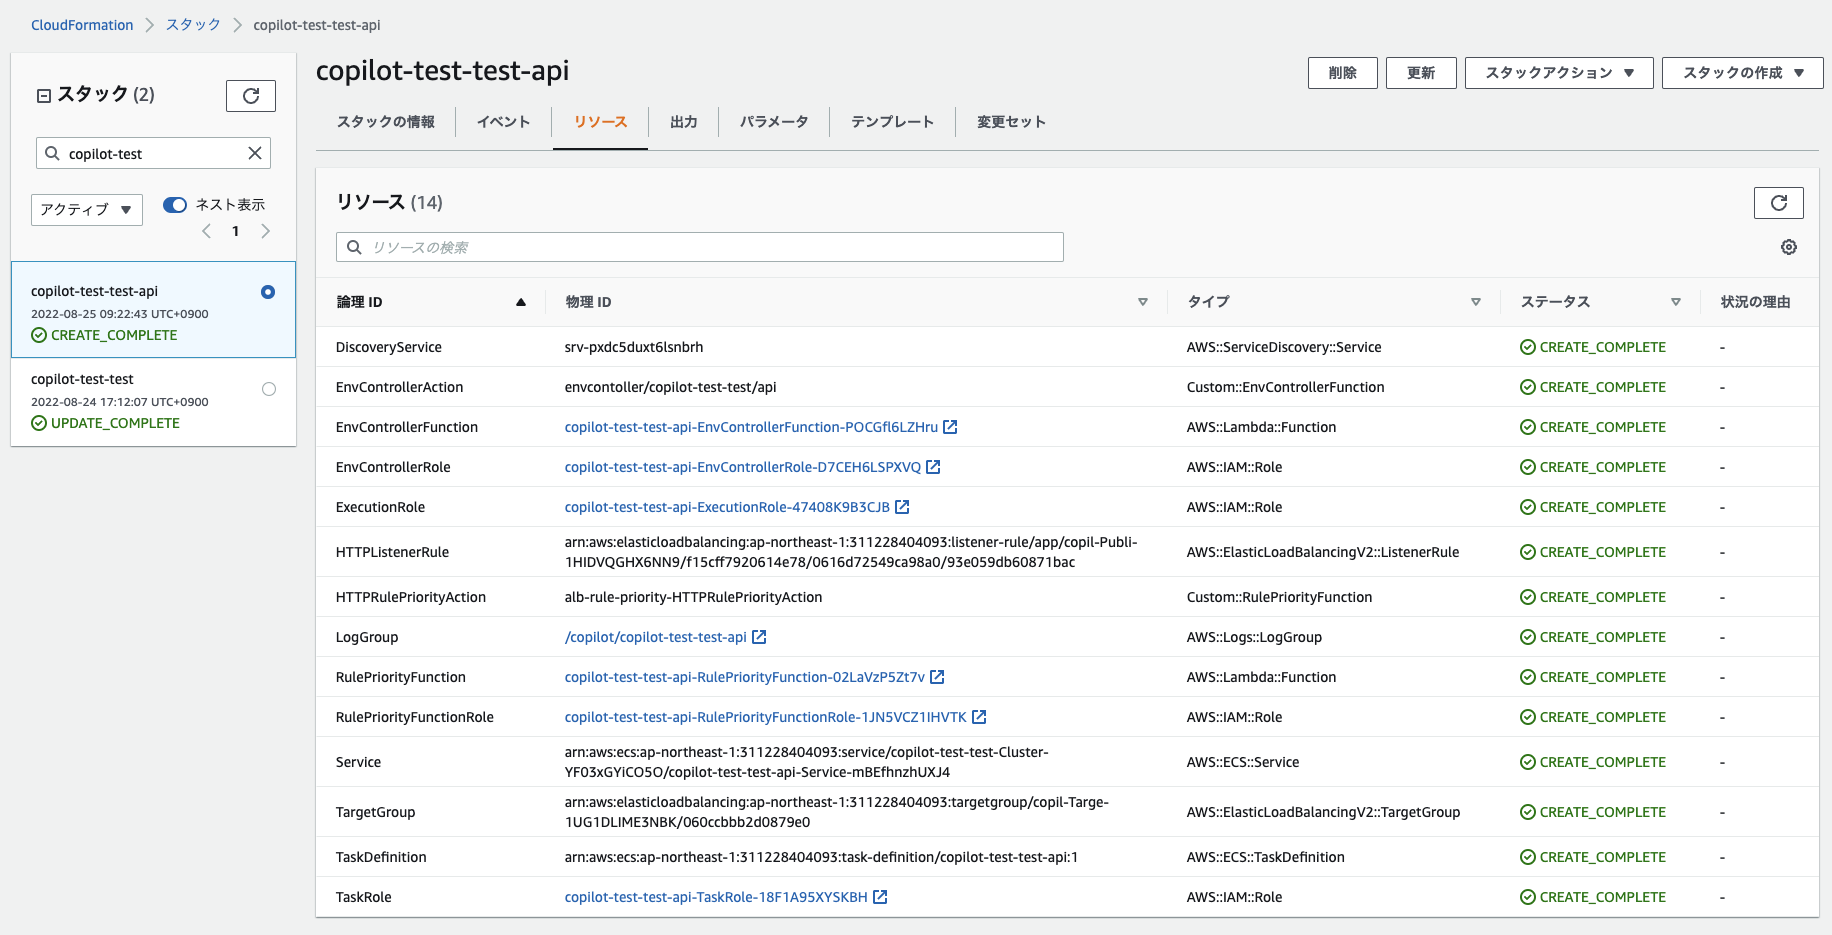
各ServiceのCloudFormation StackをCreateOrUpdate する
-
ECS Serviceや関連リソースの他、
ALB Listener Rule や Target Group なども作られる -
更新はローリングアップデートで行われる
-
CodePipeline からのデプロイ
CloudFormation Stack(ECS Service)
ここまでの構成
Application
Environment
Service
Pipeline
中央アカウント
Test環境用
アカウント
Metadata
リポジトリ内
ファイル
Metadata
Metadata
manifest.yml
manifest.yml
buildspec.yml
.workspace
CodePipeline
ECR Repo
Route 53
HostZone
Route 53
HostZone

ECS Service
ALB
VPC
CodeBuild
最終的な構成
Application
Environment
Service
Pipeline
中央アカウント
Test環境用
アカウント
Metadata
リポジトリ内
ファイル
Metadata
Metadata
manifest.yml
manifest.yml
buildspec.yml
.workspace
CodePipeline
ECR Repo
Route 53
HostZone
Route 53
HostZone
ECS Service
ALB
VPC
CodeBuild
各Copilotリソースの詳細: まとめ (1)
-
application init 時のAWS Profile指定が重要
-
メタデータのParameterStoreやCodePipeline,
ECRなどがこのアカウントに作られる -
以降のcopilotコマンド実行時もこのProfileを指定する
-
-
environment init 時にAWSアカウントを指定することで
環境ごとのAWSアカウント分割が簡単に行える -
service init 時には copilot/[serviceName]/manifest.ymlに
サービスマニフェストが生成される-
環境ごとのデプロイは別途行う必要がある
-
各Copilotリソースの詳細: まとめ (2)
-
pipeline init 時にはファイルだけ作成され、
AWSリソースは作られない-
pipeline deploy で CodePipeline などが実際に作成される
-
-
initコマンド実行結果がParameter Store, CloudFormation,
ローカルファイルの最大3箇所に反映される-
copilot コマンドを経由せずに削除すると
不整合になる可能性があるため注意
-
アジェンダ
-
AWS Copilot CLIの概要と特徴
-
各Copilotリソースの作り方と詳細
-
Copilot CLIの便利な点・癖のある点
-
Leanerでの事例紹介とTips
-
まとめ
😆 Copilot CLI の便利な点
-
ベストプラクティスに沿った構成を簡単に作れる
-
直感的な単位でリソースを管理できる
-
デフォルトでセキュリティ設定が担保される
-
Manifestファイルで簡易的なIaCが行える
-
定期実行ジョブもServiceとして一元管理できる
-
copilot svc exec で簡単にコンテナ内作業が行える
-
Addonで追加のAWSリソースを管理できる
-
AWSサービスを組み合わせた標準Webアプリ構成
-
Route 53での環境ごとのDNSホストゾーン分割
-
ALBでのHTTPリクエスト受付・ECSへのルーティング
-
ECS Fargateでのサービス起動・ローリングアップデート
-
CodePipelineでのソース変更検知と自動デプロイ
-
-
環境ごとのAWSアカウント分割
-
Multi-AZ構成
ベストプラクティスに沿った構成を簡単に作れる
直感的な単位でリソースを管理できる
Application: MyApp
Test
Prod
Stage
WebAPI
Worker
(Environment)
(Service)
Container
Container
Container
Container
Container
Container
DevPipeline
(Pipeline)
ProdPipeline
developブランチ
mainブランチ
Test Envにデプロイ
Stage Envにデプロイ
E2Eテストが通ったら
Productionにデプロイ
デフォルトでセキュリティ設定が担保される
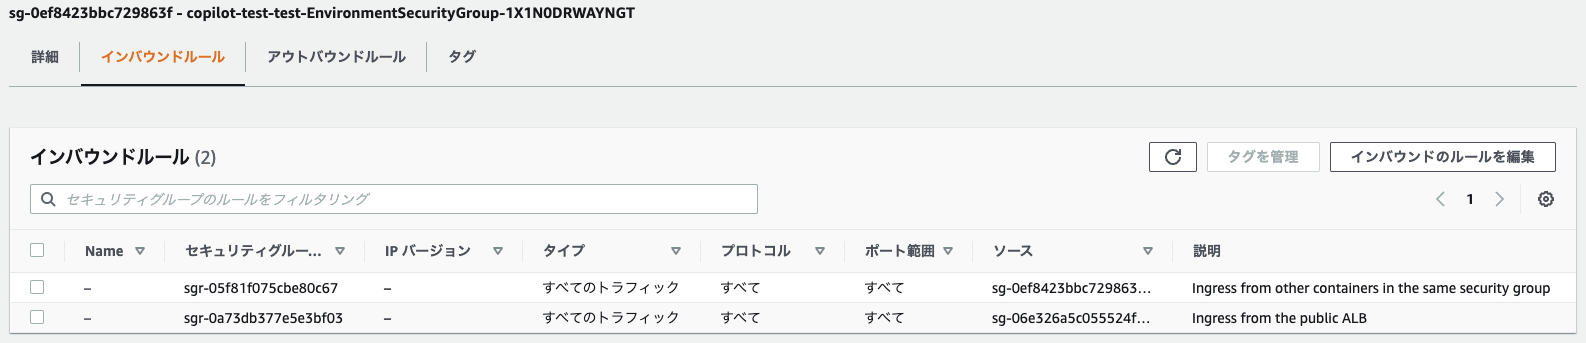
ECSコンテナはALBと他のサービスコンテナからのみ
接続が通るセキュリティグループが設定されるなど、
デフォルトで十分なセキュリティ設定が担保される
Manifestファイルで簡易的なIaCが行える
http:
  path: '/'
  healthcheck:
    path: '/health'
    healthy_threshold: 3
    unhealthy_threshold: 2
    interval: 10s
    timeout: 5s
    grace_period: 300s
  deregistration_delay: 10s

network:
  vpc:
    placement: 'private'
Service ManifestでALBのHealth Check設定や
ネットワーク配置設定(private化)などが指定できる
定期実行ジョブもServiceとして一元管理できる
name: daily-batch
type: Scheduled Job

on:
  # JST 9:00 -> UTC 0:00
  schedule: "0 0 * * *"
retries: 0
timeout: 1h

image:
  build:
    context: .
    dockerfile: ./docker/Dockerfile
command: "bundle exec rake app:daily_batch"
Service Type: Scheduled Job でスケジュール実行できる
(AWS上では Step Function + ECS OneShot Task で実行される)
copilot svc exec で簡単にコンテナ内作業が行える
❯ copilot svc exec

  Into which service would you like to execute?
  [Use arrows to move, type to filter, ? for more help]
    api (staging)
    api (production)
  > api (develop)

  Service: api
Execute `/bin/sh` in container api in task
  03020538d7b1482790d362faa1979d9a.

Starting session with SessionId:
  ecs-execute-command-00e6b3ab703b08eb1
#
サービスと環境を選んで、そのコンテナ内でコマンド実行できる
(内部的にはSessonManagerで接続する)
Addonで追加のAWSリソースを管理できる
Resources:
  FireLensPolicy:
    Type: AWS::IAM::ManagedPolicy
    Properties:
      PolicyDocument:
        Version: 2012-10-17
        Statement:
          - Effect: Allow
            Action:
              - logs:CreateLogStream
              - logs:CreateLogGroup
              - logs:DescribeLogStreams
              - logs:PutLogEvents
            Resource:
              - "arn:aws:logs:*:*:log-group:/ecs/logs/copilot-test"
              - "arn:aws:logs:*:*:log-group:/ecs/logs/copilot-test:log-stream:*"
copilot/[svcName]/addons/[addonName].yml に
CloudFormation YAMLで任意のAWSリソースを追加できる
🤔 Copilot CLI の癖のある点
-
Copilotリソースの単位で何が作られるかを知らないと、
トラブルシューティングが非常に難しい -
ドメイン紐付けが Application init 時にしかできない
-
意識しないとデフォルトAWSアカウントに色々作られてしまう
-
ルートドメインのホストゾーンとApplication用のホストゾーンを
別のAWSアカウントに分けることができない -
サービスごとにDocker BuildやECR Repo Pushが行われるため
同じビルド設定で複数サービス・ジョブが必要だと非効率 -
デプロイがCloudFormation更新で行われるため、
ローリングアップデート固定でBlue-Green Deployできない
アジェンダ
-
AWS Copilot CLIの概要と特徴
-
各Copilotリソースの作り方と詳細
-
Copilot CLIの便利な点・癖のある点
-
Leanerでの事例紹介とTips
-
まとめ
移行事例
尺足りなさそうなのでブログ読んで!
Copilot CLI Tips (1)
-
既存環境移行時はドメイン紐付けを動作環境用と割り切って、
全く別のドメインを紐付けて置くと動作確認が楽-
問題なければALB Listener Ruleに既存ドメイン設定入れた上で
hosts弄って既存ドメインでの挙動を改めて確認する -
それも良ければ既存DNSレコード弄ってCopilot ALBに向ける
-
-
healthcheck周りの設定を入れるとデプロイが速くなる
-
healthy_threshold, interval, deregistration_delay あたり
-
-
platformをlinux/arm64にする場合はCodeBuild環境もarmに変更する
-
ここを直さないとビルドに失敗するか、
イメージ形式が合わずECS Taskの起動に失敗する
-
Copilot CLI Tips (2)
-
サービス初回デプロイでデプロイ失敗した場合は、
ECS Service含むCloudFormation Stackの削除が必要-
イメージとECS Taskでplatform不一致のときなどに発生
-
CREATE_FAILED になるので以降のCreateOrUpdateが必ず失敗
-
一度作成に成功していれば、以降はRollbackになるので大丈夫
-
-
vpc.placementをprivateにするとセキュリティ的には安心だが、
NAT Gatewayが作られるのでコストは高くなる-
コストを抑えたいなら本番環境のみ設定を入れるのがおすすめ
-
-
DockerfileのFROMイメージはECR Public Repositoryにするとよい
-
DockerHubだと上限引っかかることがよくある
-
アジェンダ
-
AWS Copilot CLIの概要と特徴
-
各Copilotリソースの作り方と詳細
-
Copilot CLIの便利な点・癖のある点
-
Leanerでの事例紹介とTips
-
まとめ
1年間本番運用してわかった、
スタートアップこそAWS Copilot CLIを使うべきNつの理由
😆 Copilot CLI の便利な点(再掲)
-
ベストプラクティスに沿った構成を簡単に作れる
-
直感的な単位でリソースを管理できる
-
copilot svc exec で簡単にコンテナ内作業が行える
-
Manifestファイルで簡易的なIaCが行える
-
定期実行ジョブもServiceとして一元管理できる
-
デフォルトでセキュリティ設定が担保される
-
Addonで追加のAWSリソースを管理できる
まとめ
-
少なくとも 7 個 のおすすめポイントがある(多分もっとある)
-
癖はあるが、リソース管理単位が直感的で扱いやすい
-
スタートアップ規模なら制限要件も特に気にならないはず
-
-
AWSマルチアカウント構成は最初に考えておくとよい
-
ルートホストゾーンを含むCopilot用の中央アカウントと、
App × Envごとのアカウントを作るのがおすすめ -
ルートホストゾーンのあるアカウントの共有が厳しい場合は、
Copilot割当を冗長なドメインにしてしまうのも手
( api.develop.myapp.copilot-myapp.leaner.jp など)
-
質疑応答や
移行事例・Tipsなどを聞きたい方は
oVice会場かMeetyでお話しましょう!
1年間本番運用してわかった、スタートアップこそAWS Copilot CLIを使うべきNつの理由
By 黒曜
1年間本番運用してわかった、スタートアップこそAWS Copilot CLIを使うべきNつの理由
AWS Startup Communityの「スタートアップ事例祭り 〜監視・モニタリング・セキュリティ編〜」で発表した資料です。 https://aws-startup-community.connpass.com/event/241721/


