React Native Intro + Firebase
(Basic)
About Instructor
👨💻 8 years of experience in full-stack development, system architecture & cloud engineering
🧠 Specializing in cloud-native systems, intelligent APIs, and rapid prototyping
🎓 Certified in ITIL, Google Cloud Architecture, and Web Security
🚀 Journey So Far
Since 2015, I’ve been crafting scalable digital systems across aviation, energy, and government sectors — from backup airline control systems to slope monitoring platforms with AI. My full-stack journey spans backend-heavy architecture with Node.js, serverless deployment on GCP/Azure, mobile apps with React Native, and everything in between.
I’ve served as:
• Software Engineer at AirAsia SEA, building mission-critical airline systems on GCP
• System Architect at OFO Tech, delivering IoT-enabled solutions for public infrastructure
• Instructor & Trainer, sharing my knowledge through workshops on Python, Laravel, CV, and cloud servicesFirdaus (neonexxa)

Course Outline
Session 1
- Intro ReactNative
- Data Feed Firebase & Todo List
Session 2
- Firebase Authentication
- Google Maps & Marker
- Building Your App
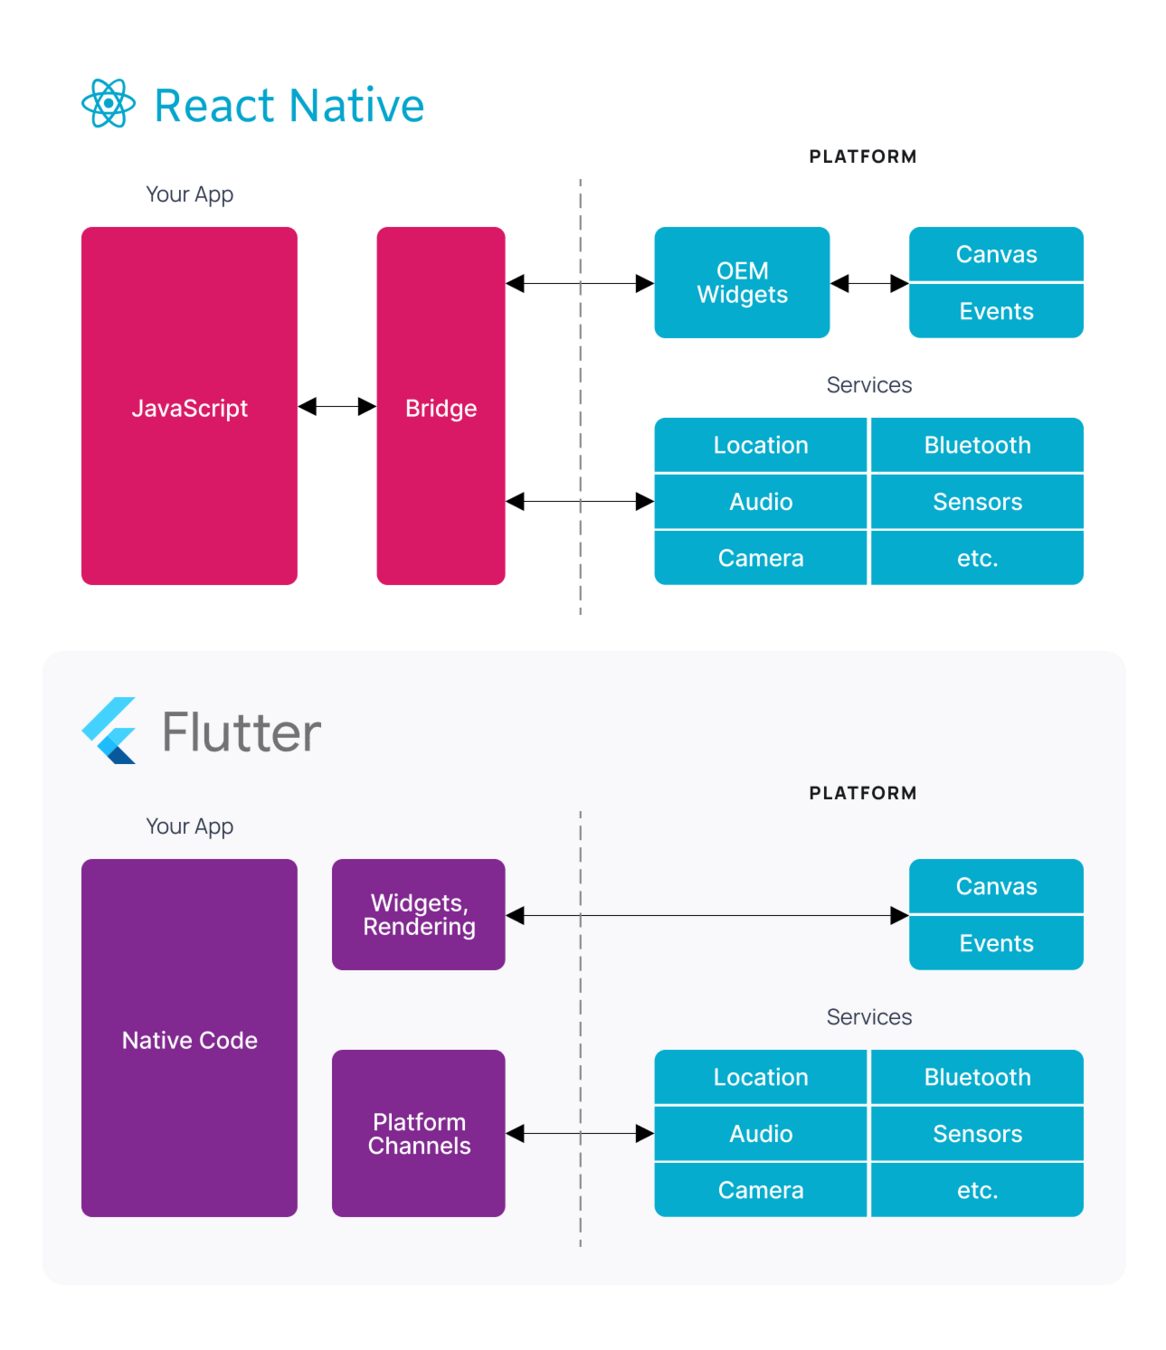
General Theory
ReactNative
https://reactnative.dev/docs/environment-setup
Practical
Part 1
Requirement
Installation
- Nodejs (v22)
- JDK JAVA (23)
- Android Studio (Emulator/Real Device)
- React Native (0.78)
•	ANDROID_HOME
C:\Users\username\AppData\Local\Android\Sdk
•	JAVA_HOME
C:\Program Files\Java\jdk-23
•	Add to PATH
%LOCALAPPDATA%\Android\Sdk\platform-tools
Windows Setup After Installing Java & Android Studio
Install Nodejs https://nodejs.org/en or use NVM if you have
Install JAVA JDK (21/23) https://www.oracle.com/java/technologies/downloads/#java23
Install Android Studio https://developer.android.com/studio
Install Android Emulator (or can connect android device if you want to) should be atleast google os/ pixel related
📁 Environment Variables
# Powershell Config If Necessary
Set-ExecutionPolicy RemoteSigned
Set-ExecutionPolicy Unrestricted


# Use this to check if ANDROID_HOME and JAVA_HOME are properly set.
Get-ChildItem -Path Env:\
🧪 Validate Environment Variables
Quick Start
npx @react-native-community/cli init AwesomeProject --version 0.78.0Create New Project
Development overview
- Run Metro Server
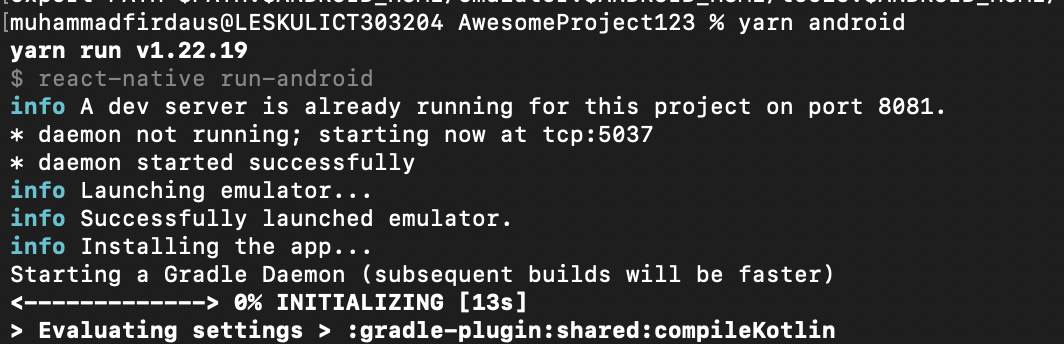
- Build Your App

cd myapp
yarn && yarn start
yarn androidHellow Worlde
Screens
login/home/profile/etc
import React from 'react';
import { Text, View } from 'react-native';

export default () => {
    return (
        <View>
            <Text>Home</Text>
        </View>
    )
}
import React from 'react';
import { Text, View } from 'react-native';

export default () => {
    return (
        <View>
            <Text>Hellow Worlde</Text>
        </View>
    )
}
App.js
import App from './App';

export default () => {
    return <App/>
}
index.js
Multi Screens & Navigation
Installing React Navigation
Stack & Screens
import * as React from 'react';
import {NavigationContainer} from '@react-navigation/native';
import {createNativeStackNavigator} from '@react-navigation/native-stack';

const Stack = createNativeStackNavigator();

const MyStack = () => {
  return (
    <NavigationContainer>
      <Stack.Navigator>
        <Stack.Screen
          name="Home"
          component={HomeScreen}
          options={{title: 'Welcome'}}
        />
        <Stack.Screen name="Profile" component={ProfileScreen} />
      </Stack.Navigator>
    </NavigationContainer>
  );
};
yarn add react-native-screens react-native-safe-area-context
#or
npm i react-native-screens react-native-safe-area-context yarn add @react-navigation/native @react-navigation/native-stack
# or
npm i @react-navigation/native @react-navigation/native-stackReact Native Builtins Component
List, Button, TouchableOpacity, etc..

Material UI Element
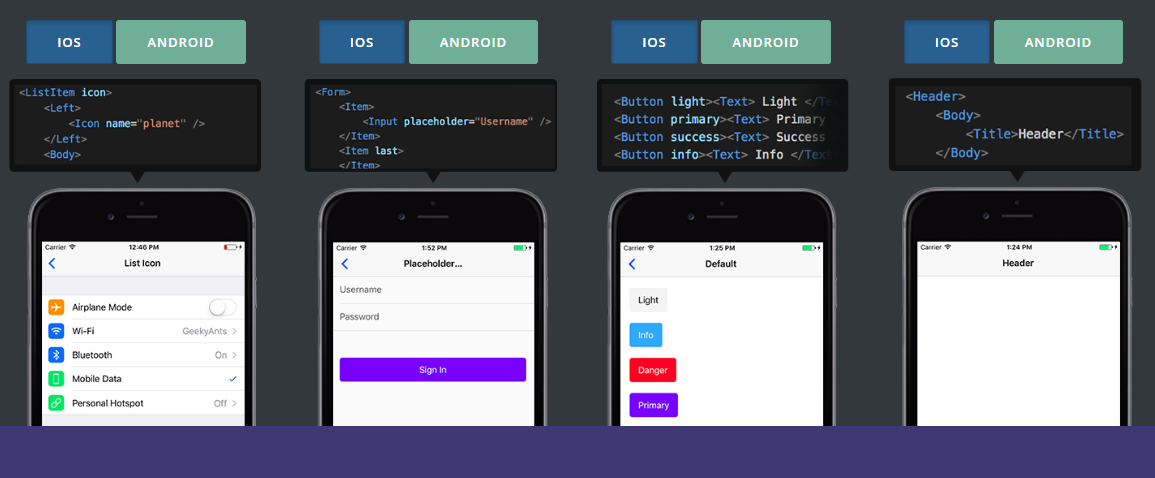
https://mui.com
Folder Architecting
Index.js && hook.js
import { useState } from 'react';

export default () => {
  const [pressed, setPressed] = useState(false);

  return { pressed, setPressed };
};
Example hook.js (useHook)
import React from 'react';
import { Text, View } from 'react-native';
import { TextInput,Button } from 'react-native-paper';
import useHook from './hook.js';

export default () => {
	const h = useHook();
	return (
	    <View>
          <Button icon="camera" mode="contained" onPress={() => h.setPressed(true)}>
                      Login
          </Button>
        </View>
    )
};
Example index.js

Practical
Part 2 (Firebase)
Firebase
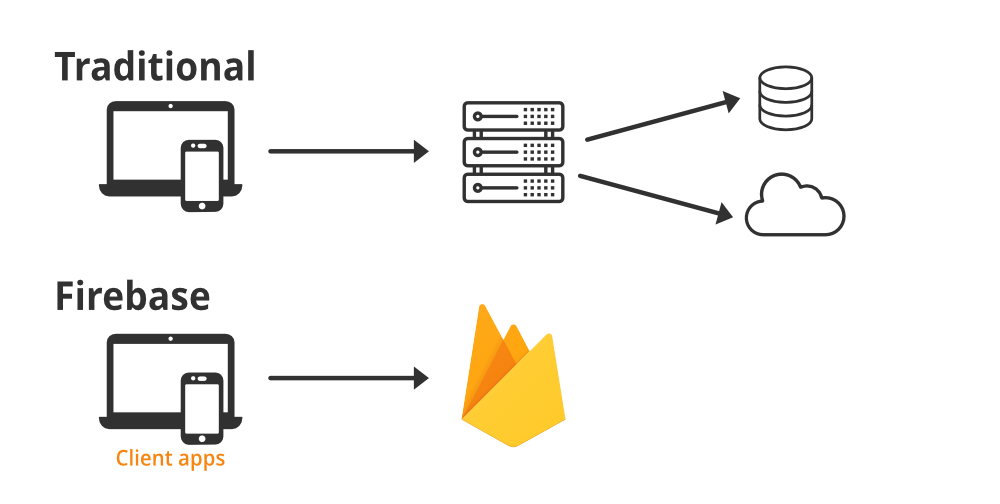

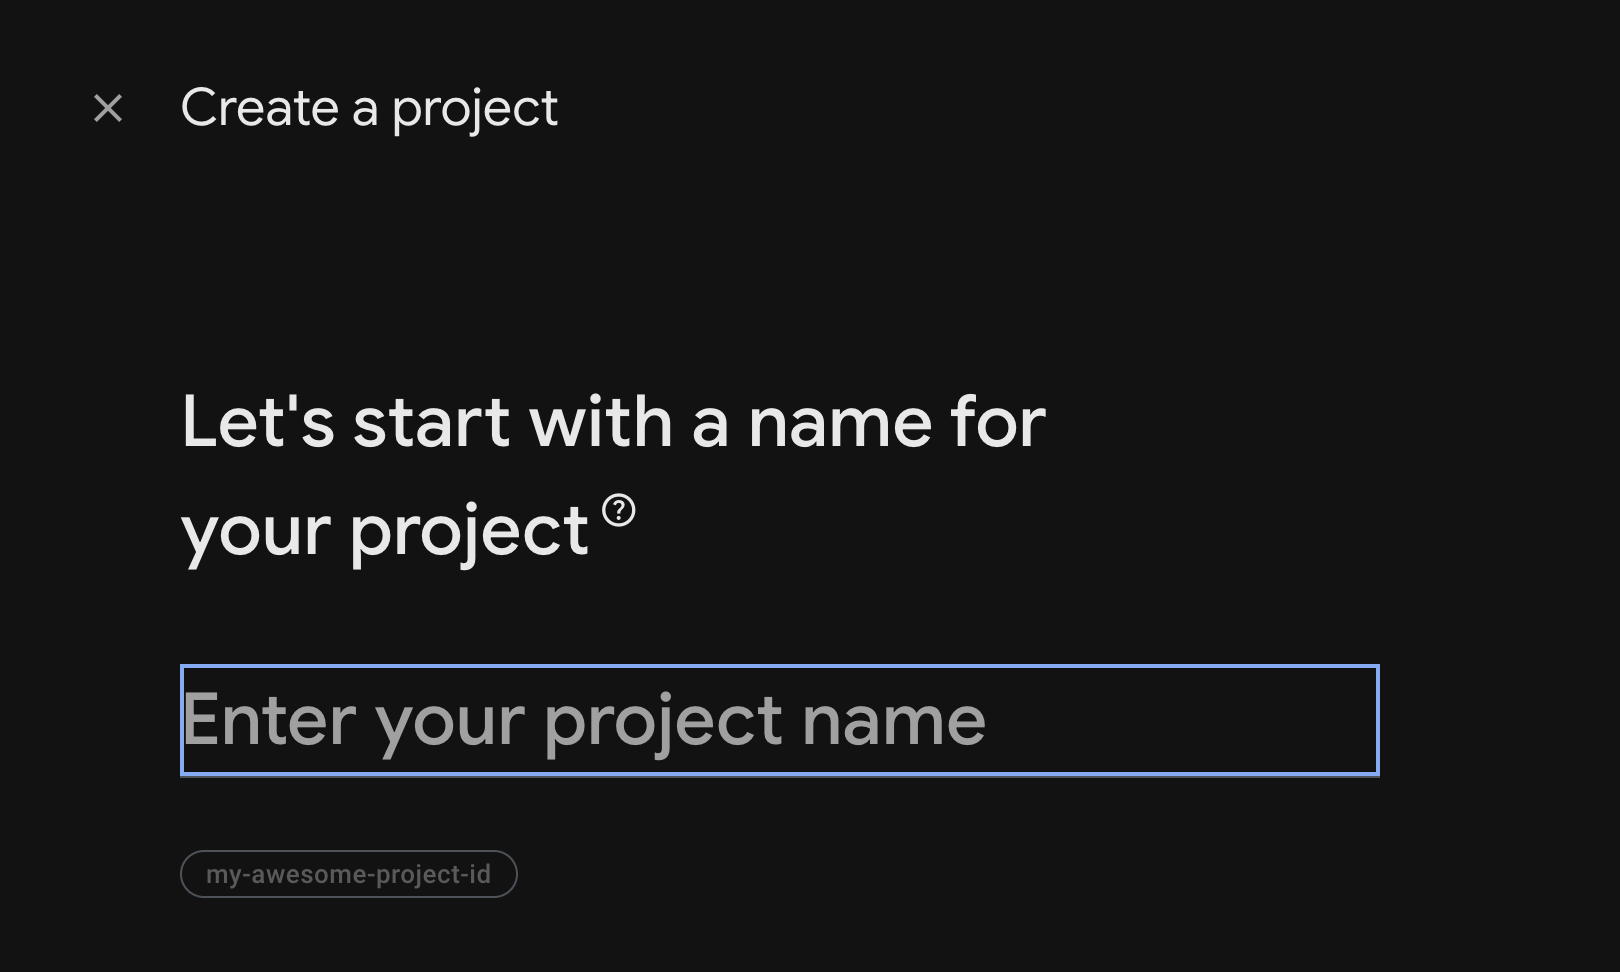
Setup Firebase
Adding Firebase SDK To Android
dependencies {
        classpath("com.google.gms:google-services:4.4.2") // Use the latest version
}

apply plugin: "com.google.gms.google-services"
/android/build.gradle
apply plugin: "com.google.gms.google-services"

dependencies {
	implementation platform('com.google.firebase:firebase-bom:33.10.0')
    implementation 'com.google.firebase:firebase-analytics'
}
/android/app/build.gradle
Download the google-services.json file and place it inside of your project at the following location: /android/app/google-services.json
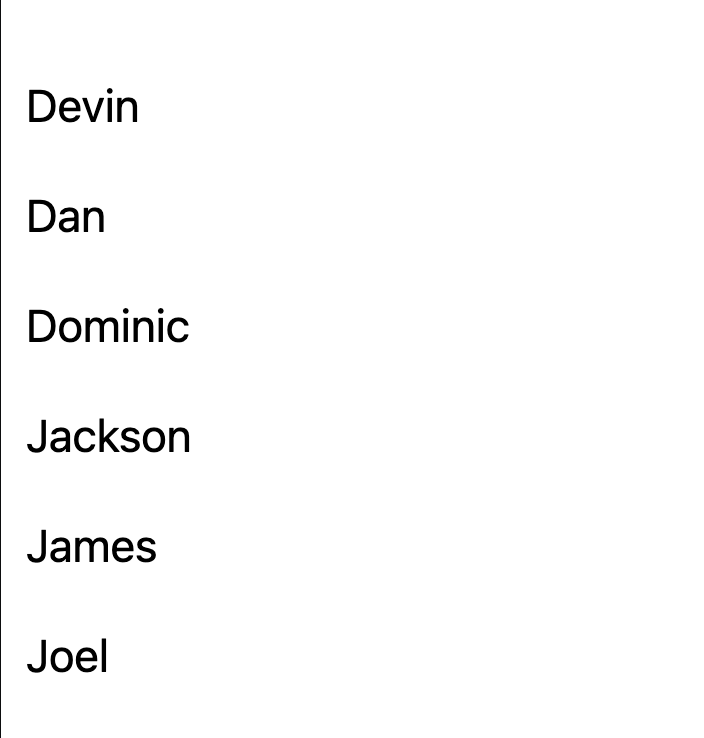
Feeding Items From Firebase
import React, { useEffect, useState } from 'react';
import { Text, View, FlatList } from 'react-native';
import { useNavigation } from '@react-navigation/native';
import database from '@react-native-firebase/database';

export default () => {
    const navigation = useNavigation();

    const [todos, setTodos] = useState([]);

    useEffect(() => {
            const fetchData = async () => {
            try {
                const snapshot = await database().ref('/todos').once('value');
                if (snapshot.exists()) setTodos(snapshot.val());
            } catch (error) {
                console.error("Firebase Database Error:", error);
            }
            };

        fetchData();
    }, []);
    return (
        <View>
            <Text>Books</Text>
            <FlatList
                data={todos}
                renderItem={({item}) => <Text children={item.name}/>}
            />
        </View>
    )
}
Fetching Data From Firbbase
https://rnfirebase.io/database/usageExploring more on firebase
Practical
Part 3 (Authentication)
Authentication Flow
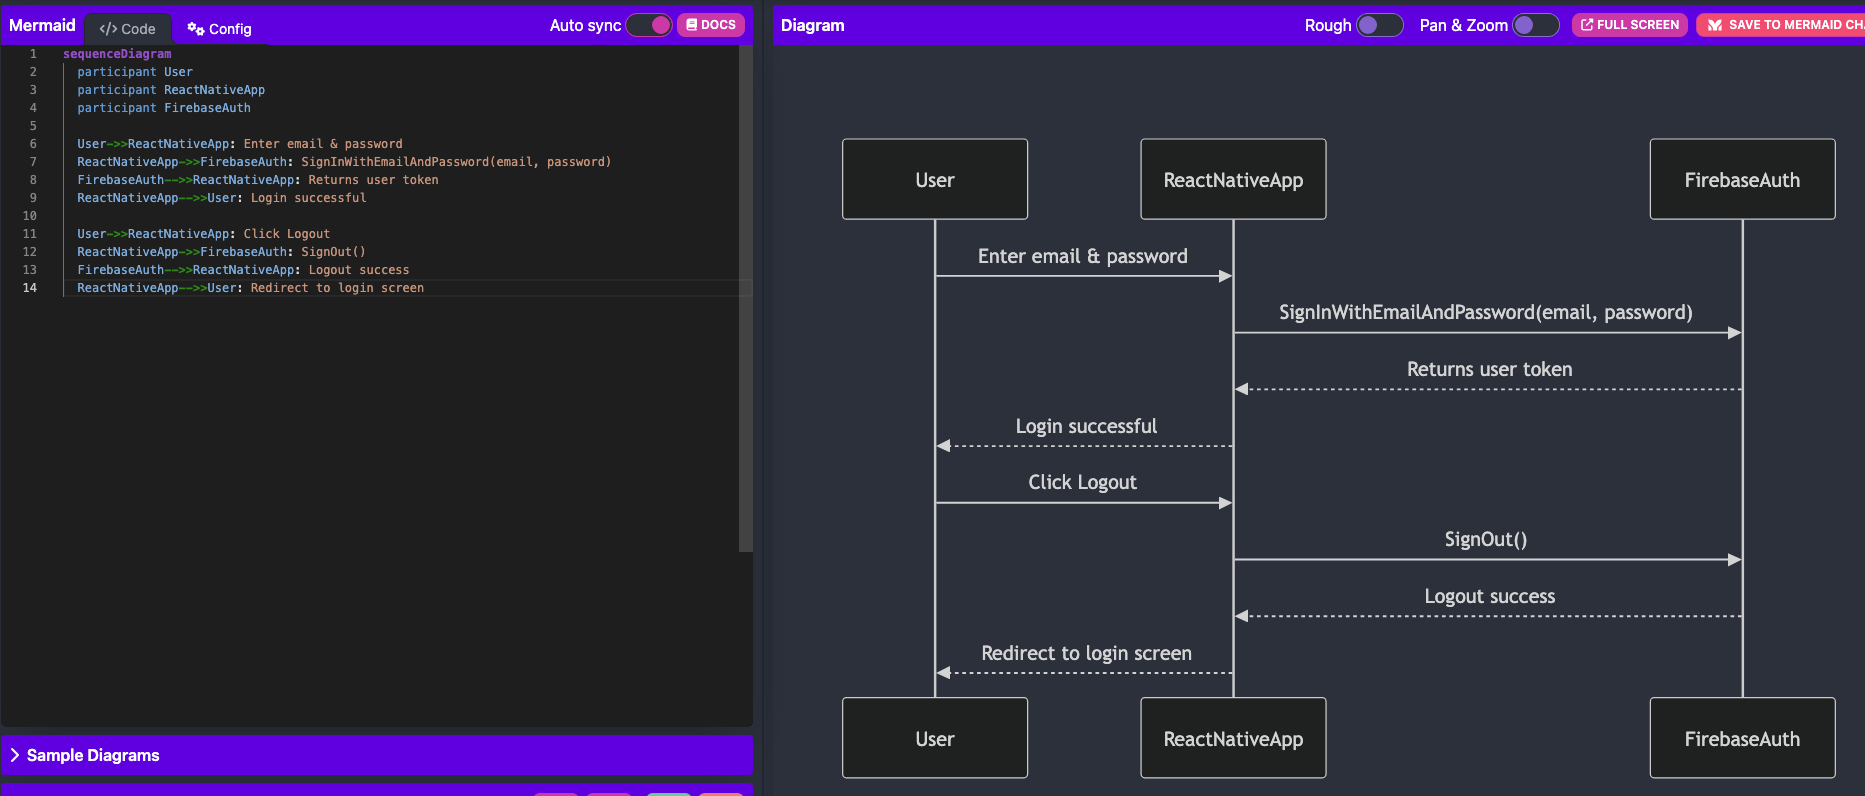
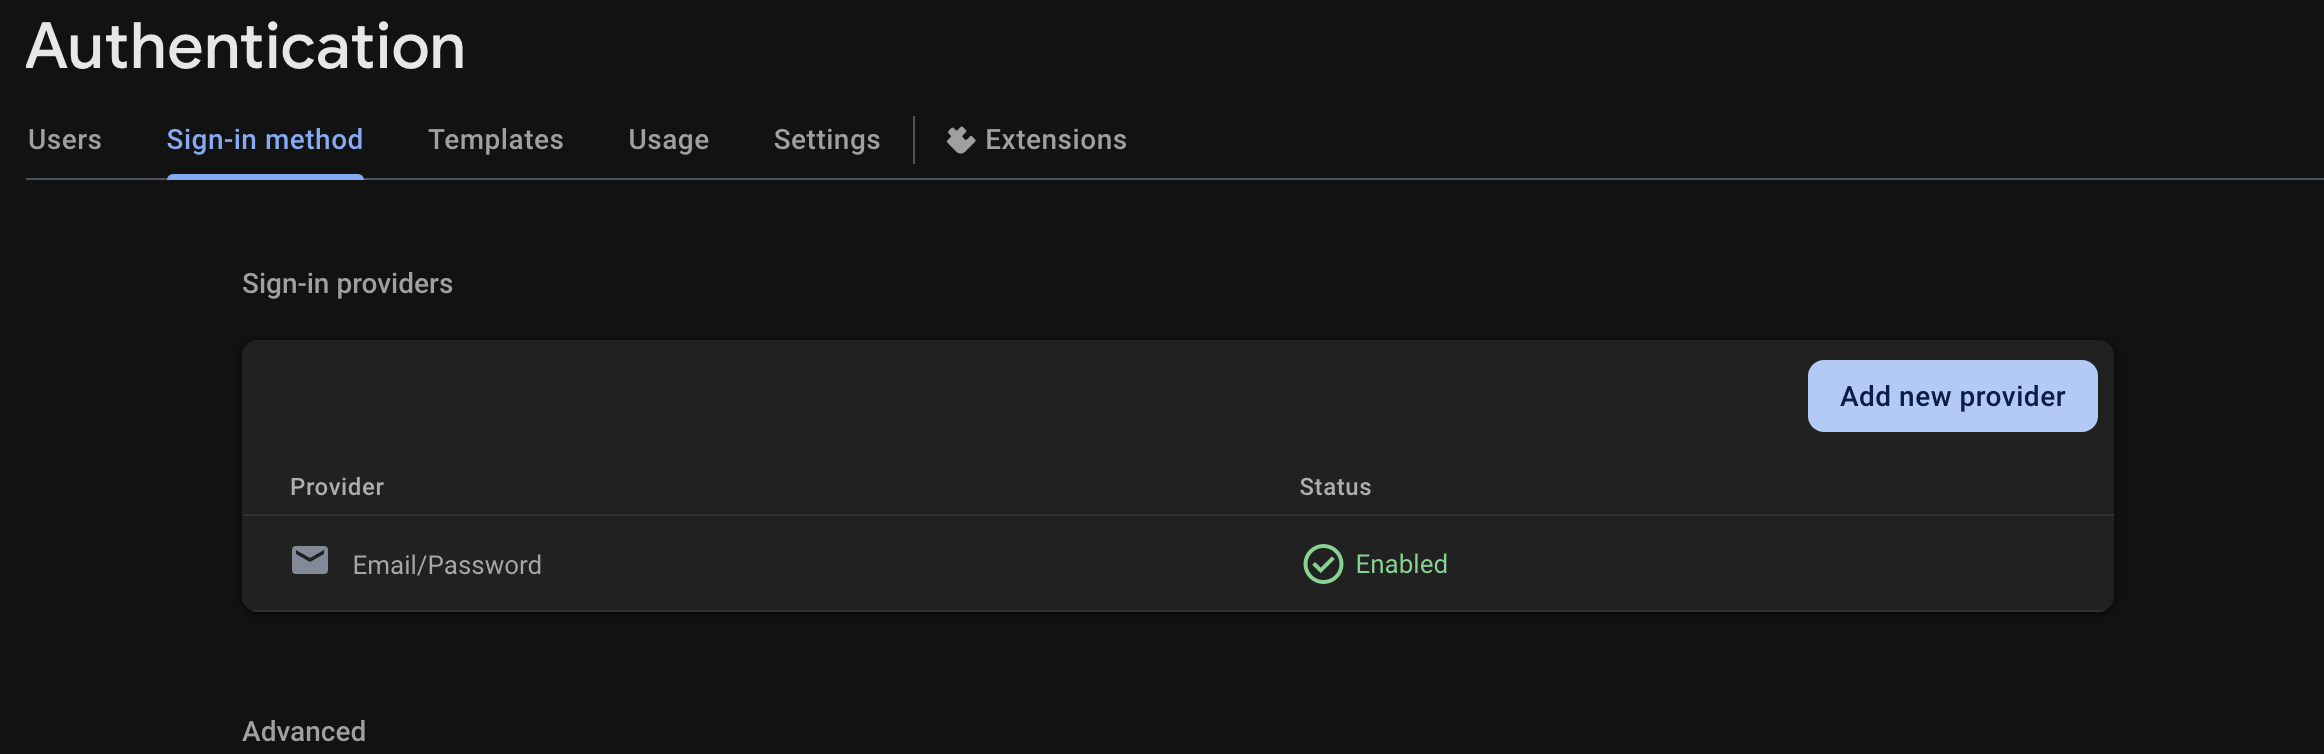
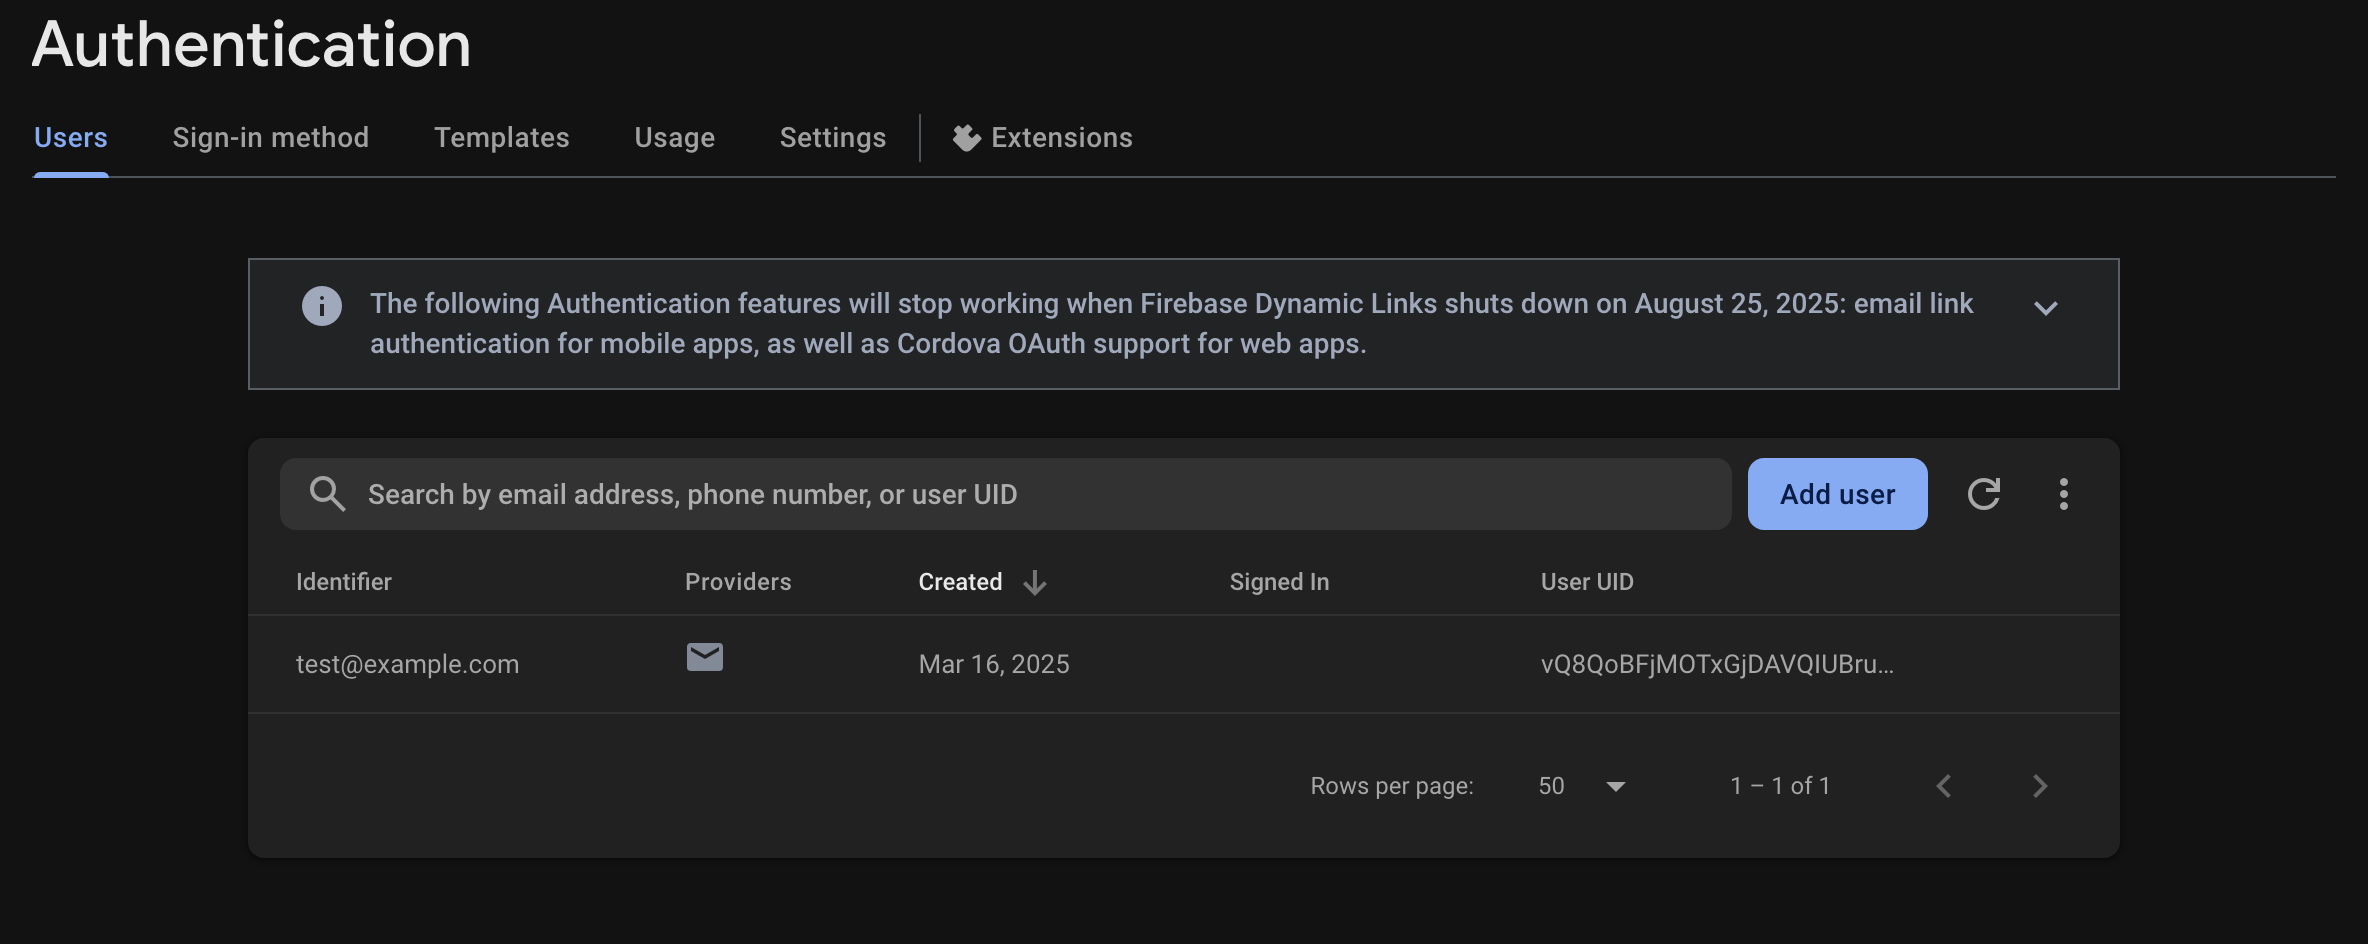
1. Enable Email & Password Provider
2. Add a user
Firebase Auth React Native
# install packages
npm install @react-native-firebase/app @react-native-firebase/auth
# Modify Your RootStack
function RootStack({ user }) {
return (
<Stack.Navigator>
{user ? (
<Stack.Screen name="Main" component={BottomTabs} options={{ headerShown: false }} />
) : (
<Stack.Screen name="Login" component={LoginScreen} options={{ headerShown: false }} />
)}
</Stack.Navigator>
);
}
# pass the loggedin user
<RootStack user={user} />
# setup an default null user state
const [user, setUser] = useState(null);
# setup a useeffect to listen to state user logged in
useEffect(() => {
const unsubscribe = auth().onAuthStateChanged((user) => {
setUser(user);
});
return () => unsubscribe();
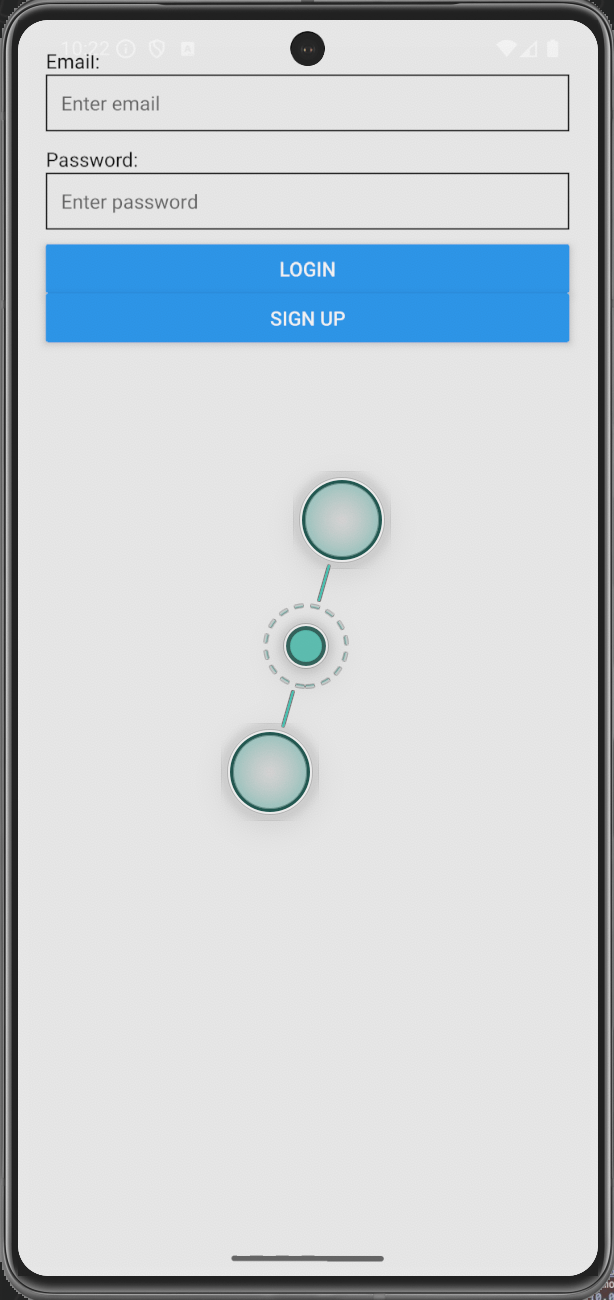
}, []);Firebase Login Method
import auth from '@react-native-firebase/auth';
# login method
await auth().signInWithEmailAndPassword(email, password);
# create user method
await auth().createUserWithEmailAndPassword(email, password);
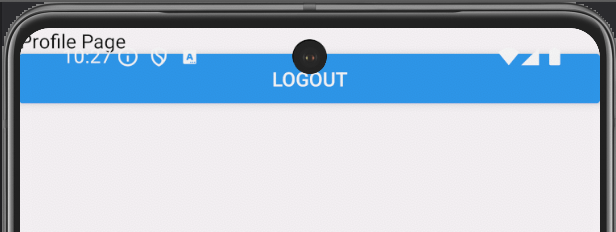
# logout user method
await auth().signOut()
Practical
Part - 4 Extra (Maps)
Maps
android/app/src/main/AndroidManifest.xml
<application>
   <!-- You will only need to add this meta-data tag, but make sure it's a child of application -->
   <meta-data
     android:name="com.google.android.geo.API_KEY"
     android:value="Your Google maps API Key Here"/>
</application>android/app/src/main/res/values/google_maps_api.xml
<application>
<!-- You will only need to add this meta-data tag, but make sure it's a child of application -->
<meta-data
android:name="com.google.android.geo.API_KEY"
android:value="Your Google maps API Key Here"/>
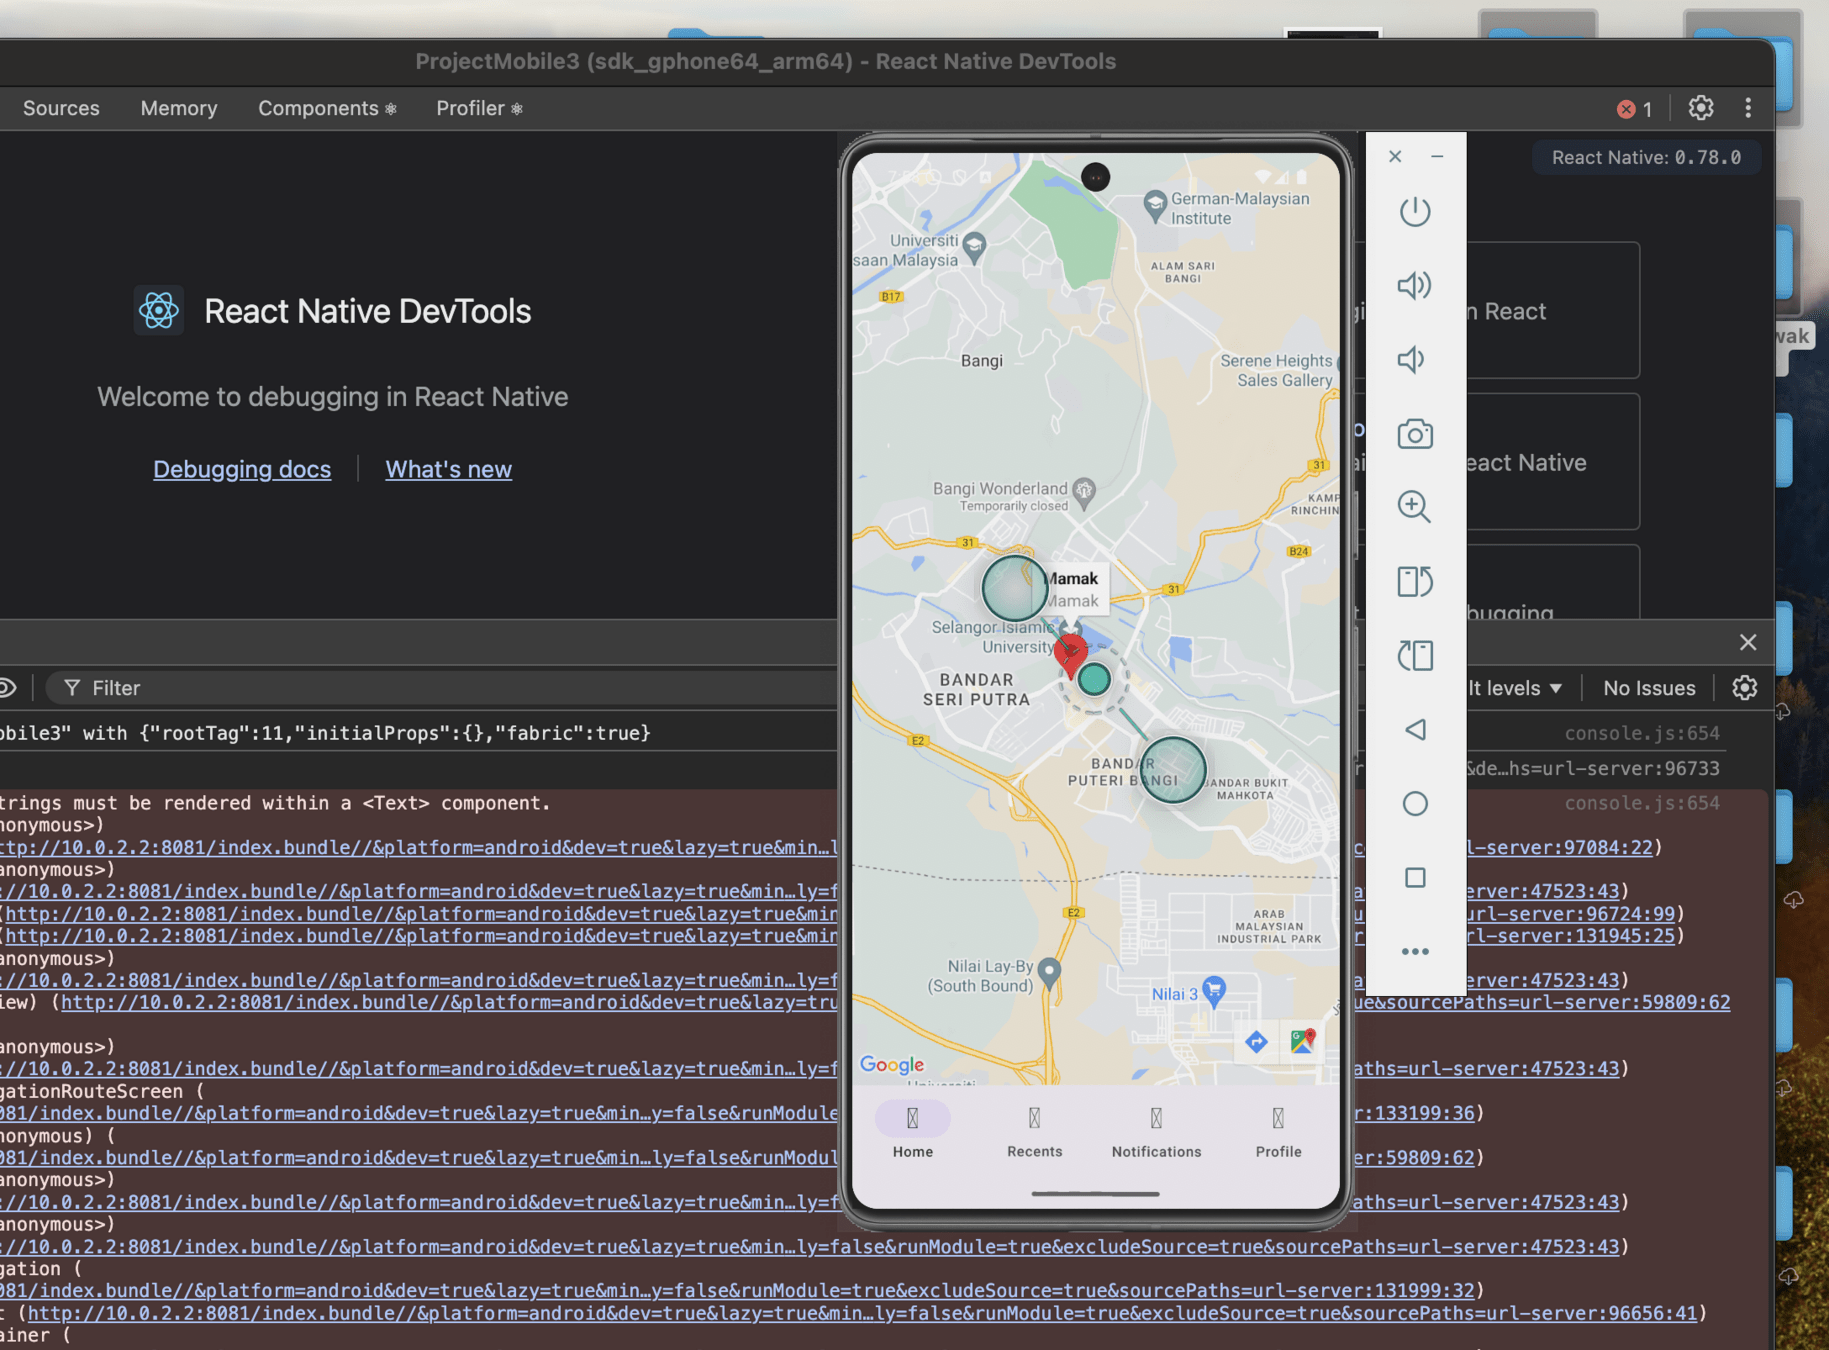
</application>Markers From Firebase
{markers.length && markers.map((marker, index) => (
                    <Marker
                    key={index}
                    coordinate={{latitude: marker.latitude, longitude: marker.longitude}}
                    title={marker.name}
                    description={marker.name}
                    />
                ))}
src/screens/home.js
import database from '@react-native-firebase/database';


const [markers, setMarkers] = useState([]);
    useEffect(() => {
        const fetchData = async () => {
          try {
            const snapshot = await database().ref('/locations').once('value');
            if (snapshot.exists()) setMarkers(snapshot.val())
          } catch (error) {
            console.error("Firebase Database Error:", error);
          }
        };
        fetchData();
      }, []);
loop your markers state in MapView Component
Practical
Part - 5 (Building App)
🛠️ Step-by-step: Build APK
# Go to your project directory:
cd AwesomeProject

# Open Android folder and sync Gradle dependencies:
cd android
./gradlew clean
./gradlew assembleRelease

# After build completes, you’ll find the APK at:
android/app/build/outputs/apk/release/app-release.apk
Happy Meal
Reference
https://rnfirebase.io/auth/usage
https://www.mermaidchart.com
https://reactnative.dev/
https://reactnavigation.org/
React Native Intro
By nexxa
React Native Intro
React Native Intro


