
Staffconnect
STAFF
Quick Start Guide
This guide is no longer monitored or updated - please visit the help tab of your StaffConnect login for more up to date support
Getting Started
StaffConnect works best with a modern browser.
Google Chrome & Mozilla Firefox are recommended, but you can use just about anything!
You can download them for free!


Click an image to download
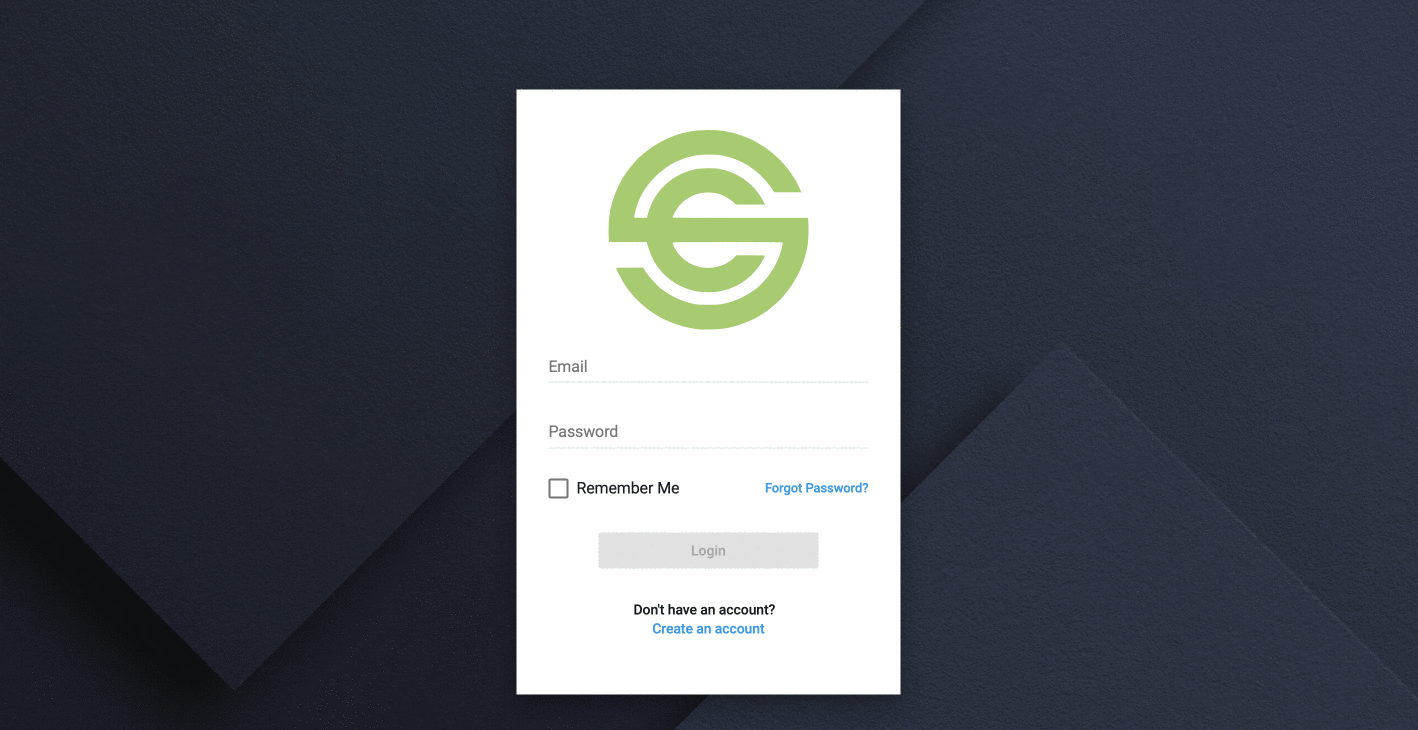
REGISTER
Go to your Agency’s StaffConnect page and select Create an Account to register
The address will look something like this:
http://youragency.staffconnect.net
If you already have an account, you can login with your email and password!
Approval
After you have completed your registration, you will need to wait for your account to be approved by the Agency.
In the mean time, you can login with your email and password to update your registration at anytime!
You will be notified via email once your registration has been approved!

Logging In
Once your registration has been approved, use your email and password to log in to the system.
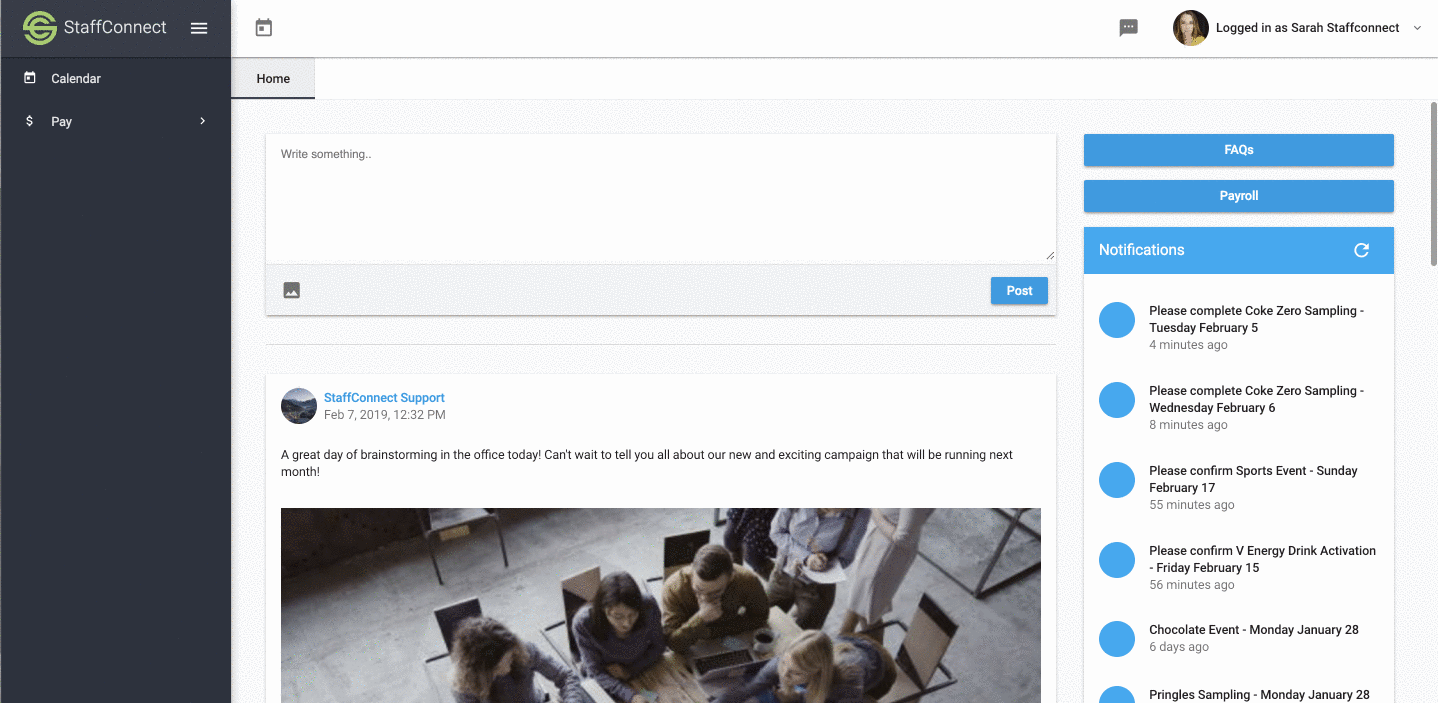
Home Page
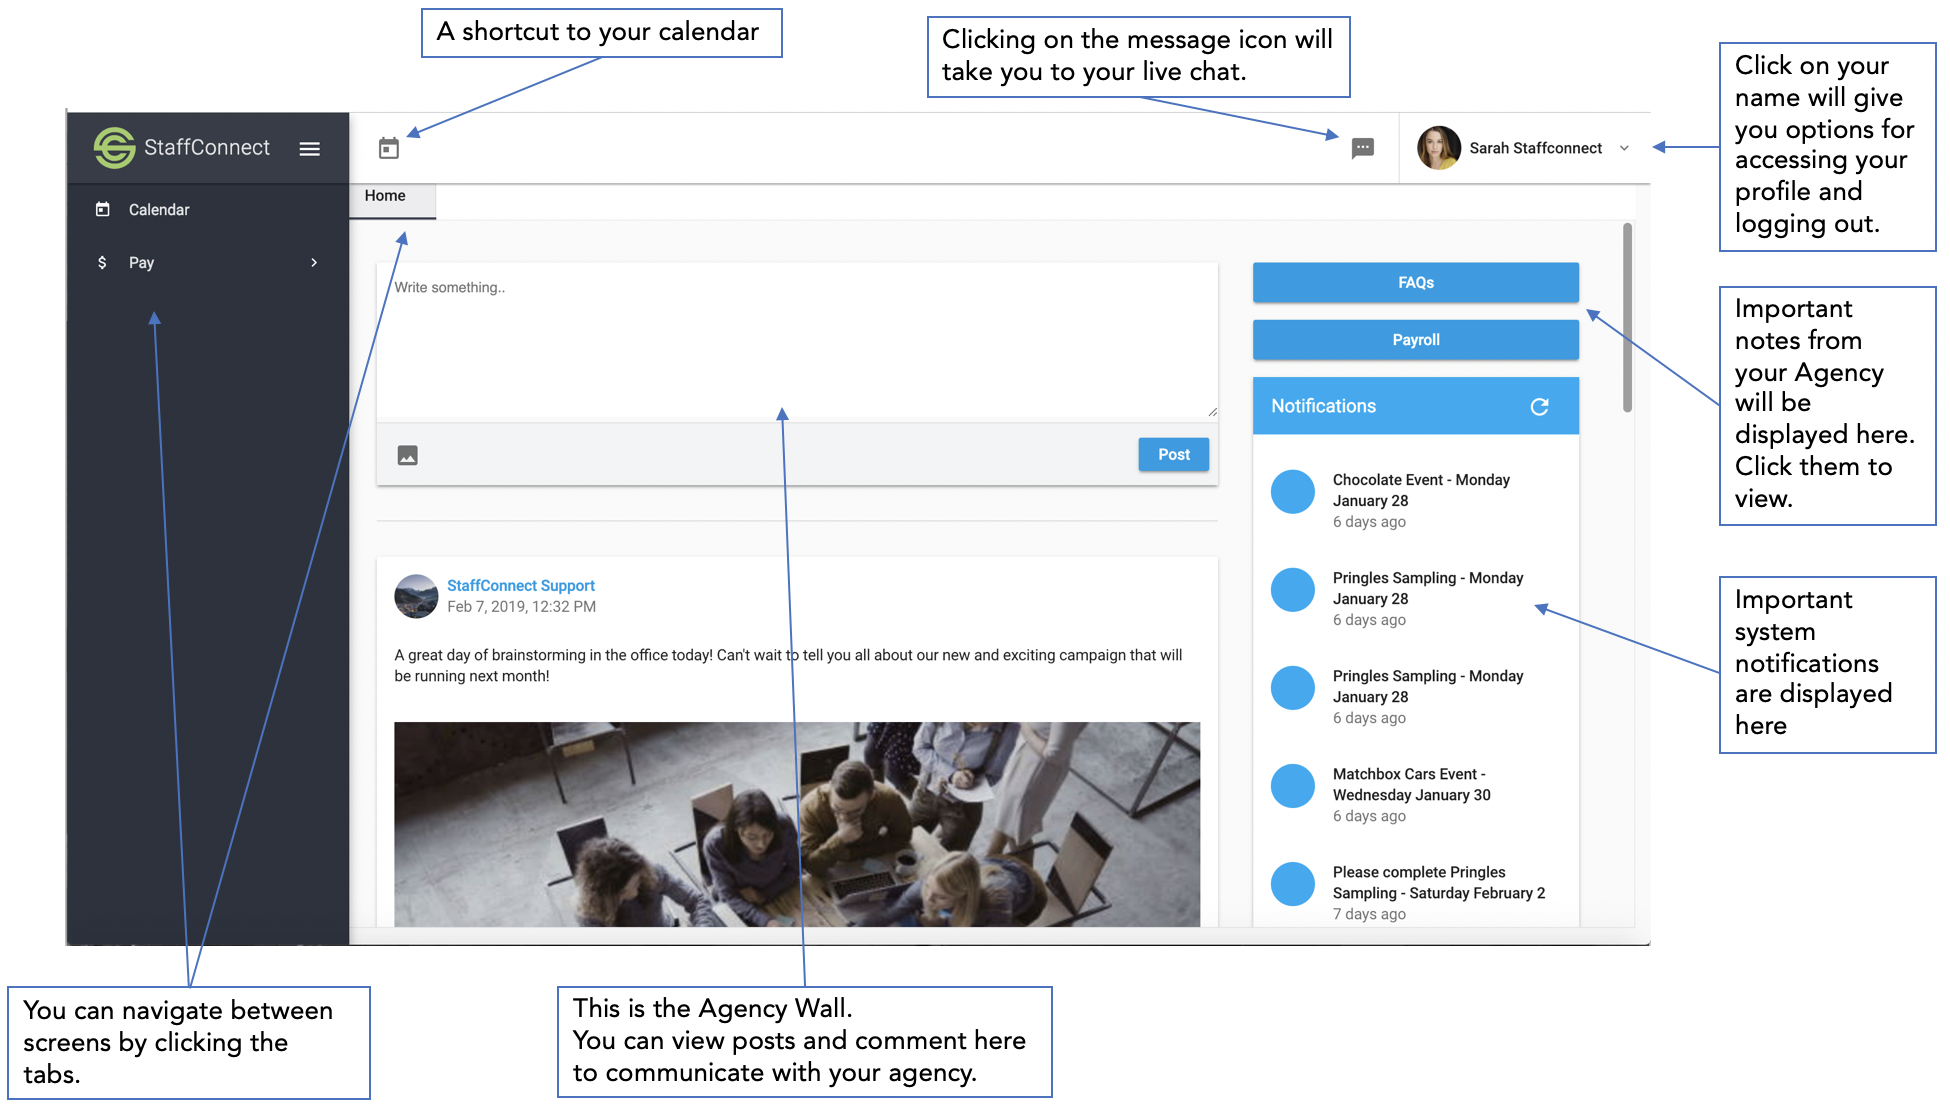
When you log in, you will be presented with the Home Page
Your Profile
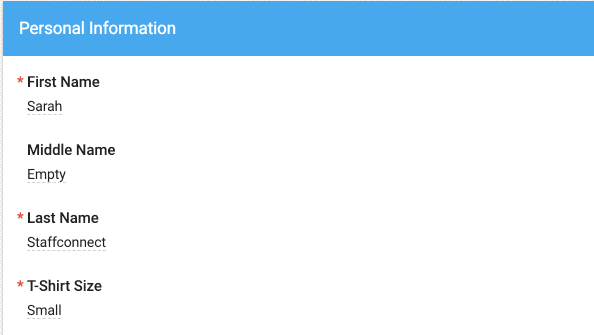
Editing your online profile is easy!
1. Access your own profile by clicking on your name in the top right corner
2. Click on a field to edit.
3. Complete the field and click or push enter to save.

Upload Files
To upload files or photos , select Upload and select the file you wish to upload.
To remove, click on the Trash Can under the file.
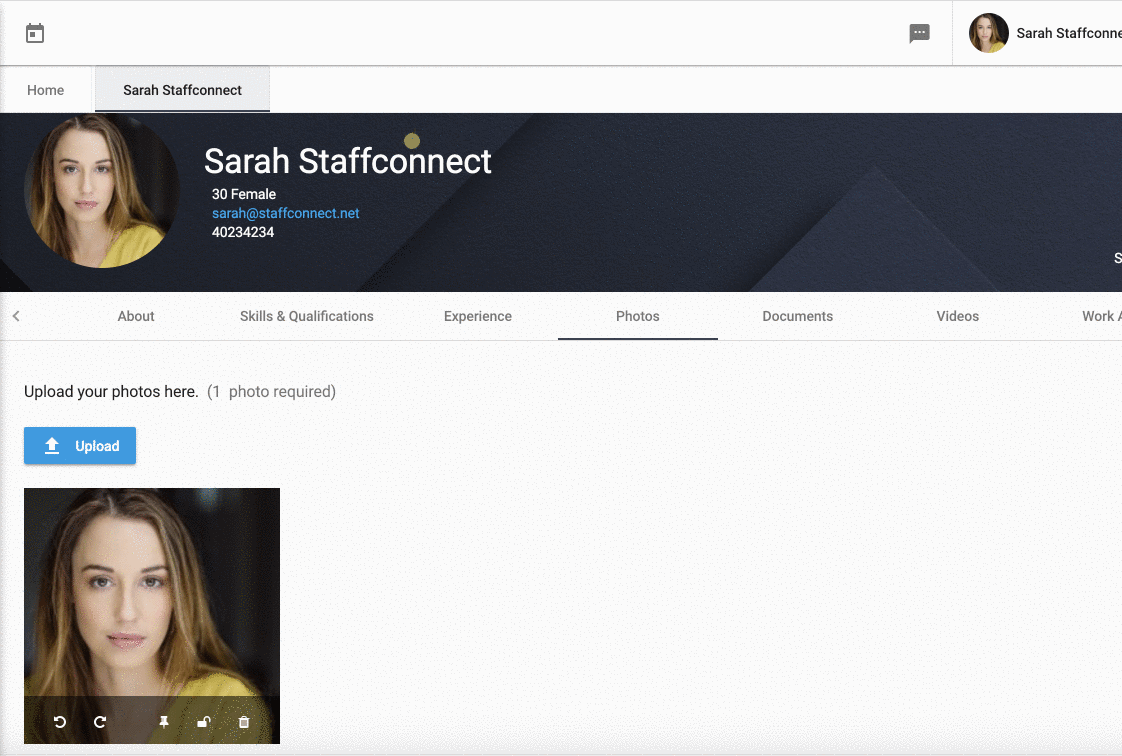
Click the pin icon under your photo to set this as your profile picture.
UNAvailability
This is a useful tool if you have a regular commitment, such as a class, or for one off irregular events such as going on holiday
Simply go to the Unavailability tab in your Profile and click Add and then enter in the details.
You unavailability will then also display in your calendar so you don't book onto a conflicting shift.
Note: This option may be disabled on your system

You can enter your unavailability to let your agency know when you cannot work.
LIVE CHAT
To access, click the icon in the top right of your screen.
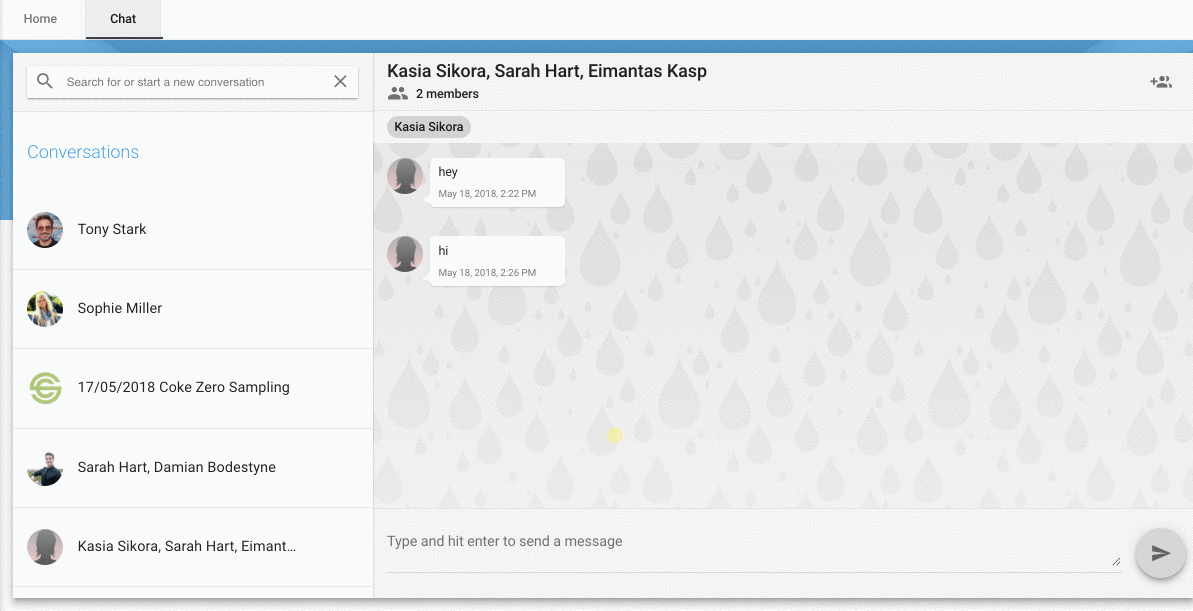

StaffConnect has Live Chat where you can contact your Agency, or be invited to a group chat with others working your shift, making communication a breeze!
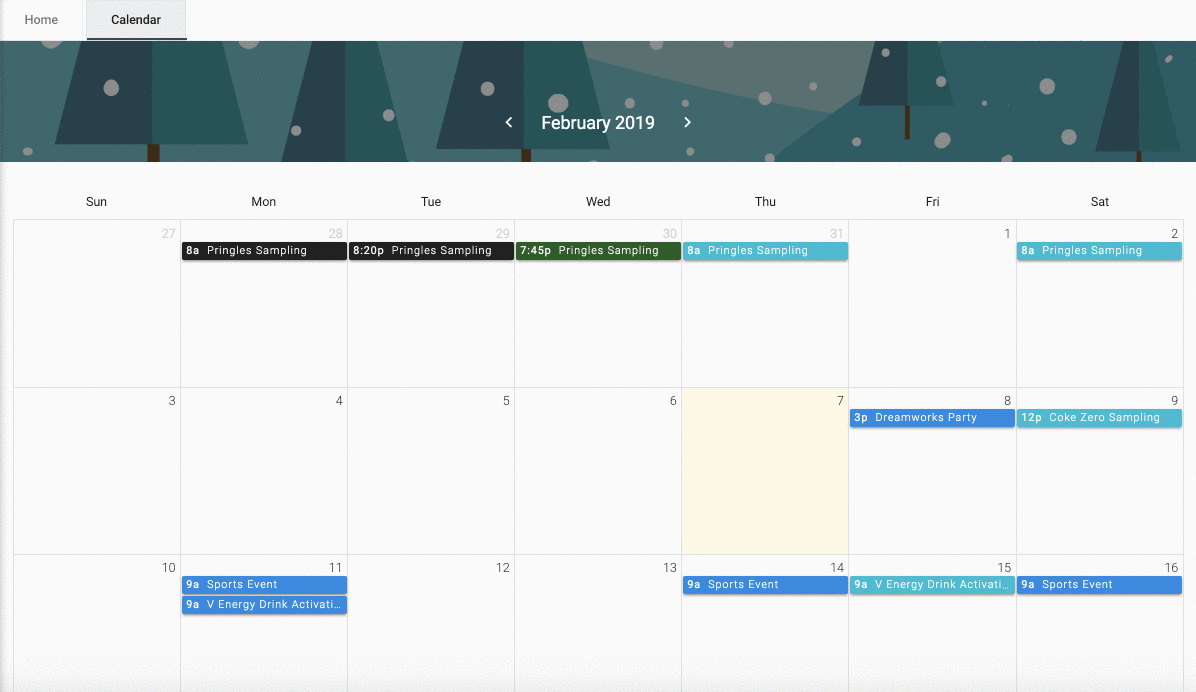
Calendar
Here is where you can view and apply for the work available to you and tell the shifts status by its colour.
You will find information such as where the event will take place, what the work involves, payment and the hours the event will be.
You will also be able to upload any documents after your shift is completed, as well as complete Surveys and add photos!

The Calendar where you will be able to view your Agency’s events.
View a Shift
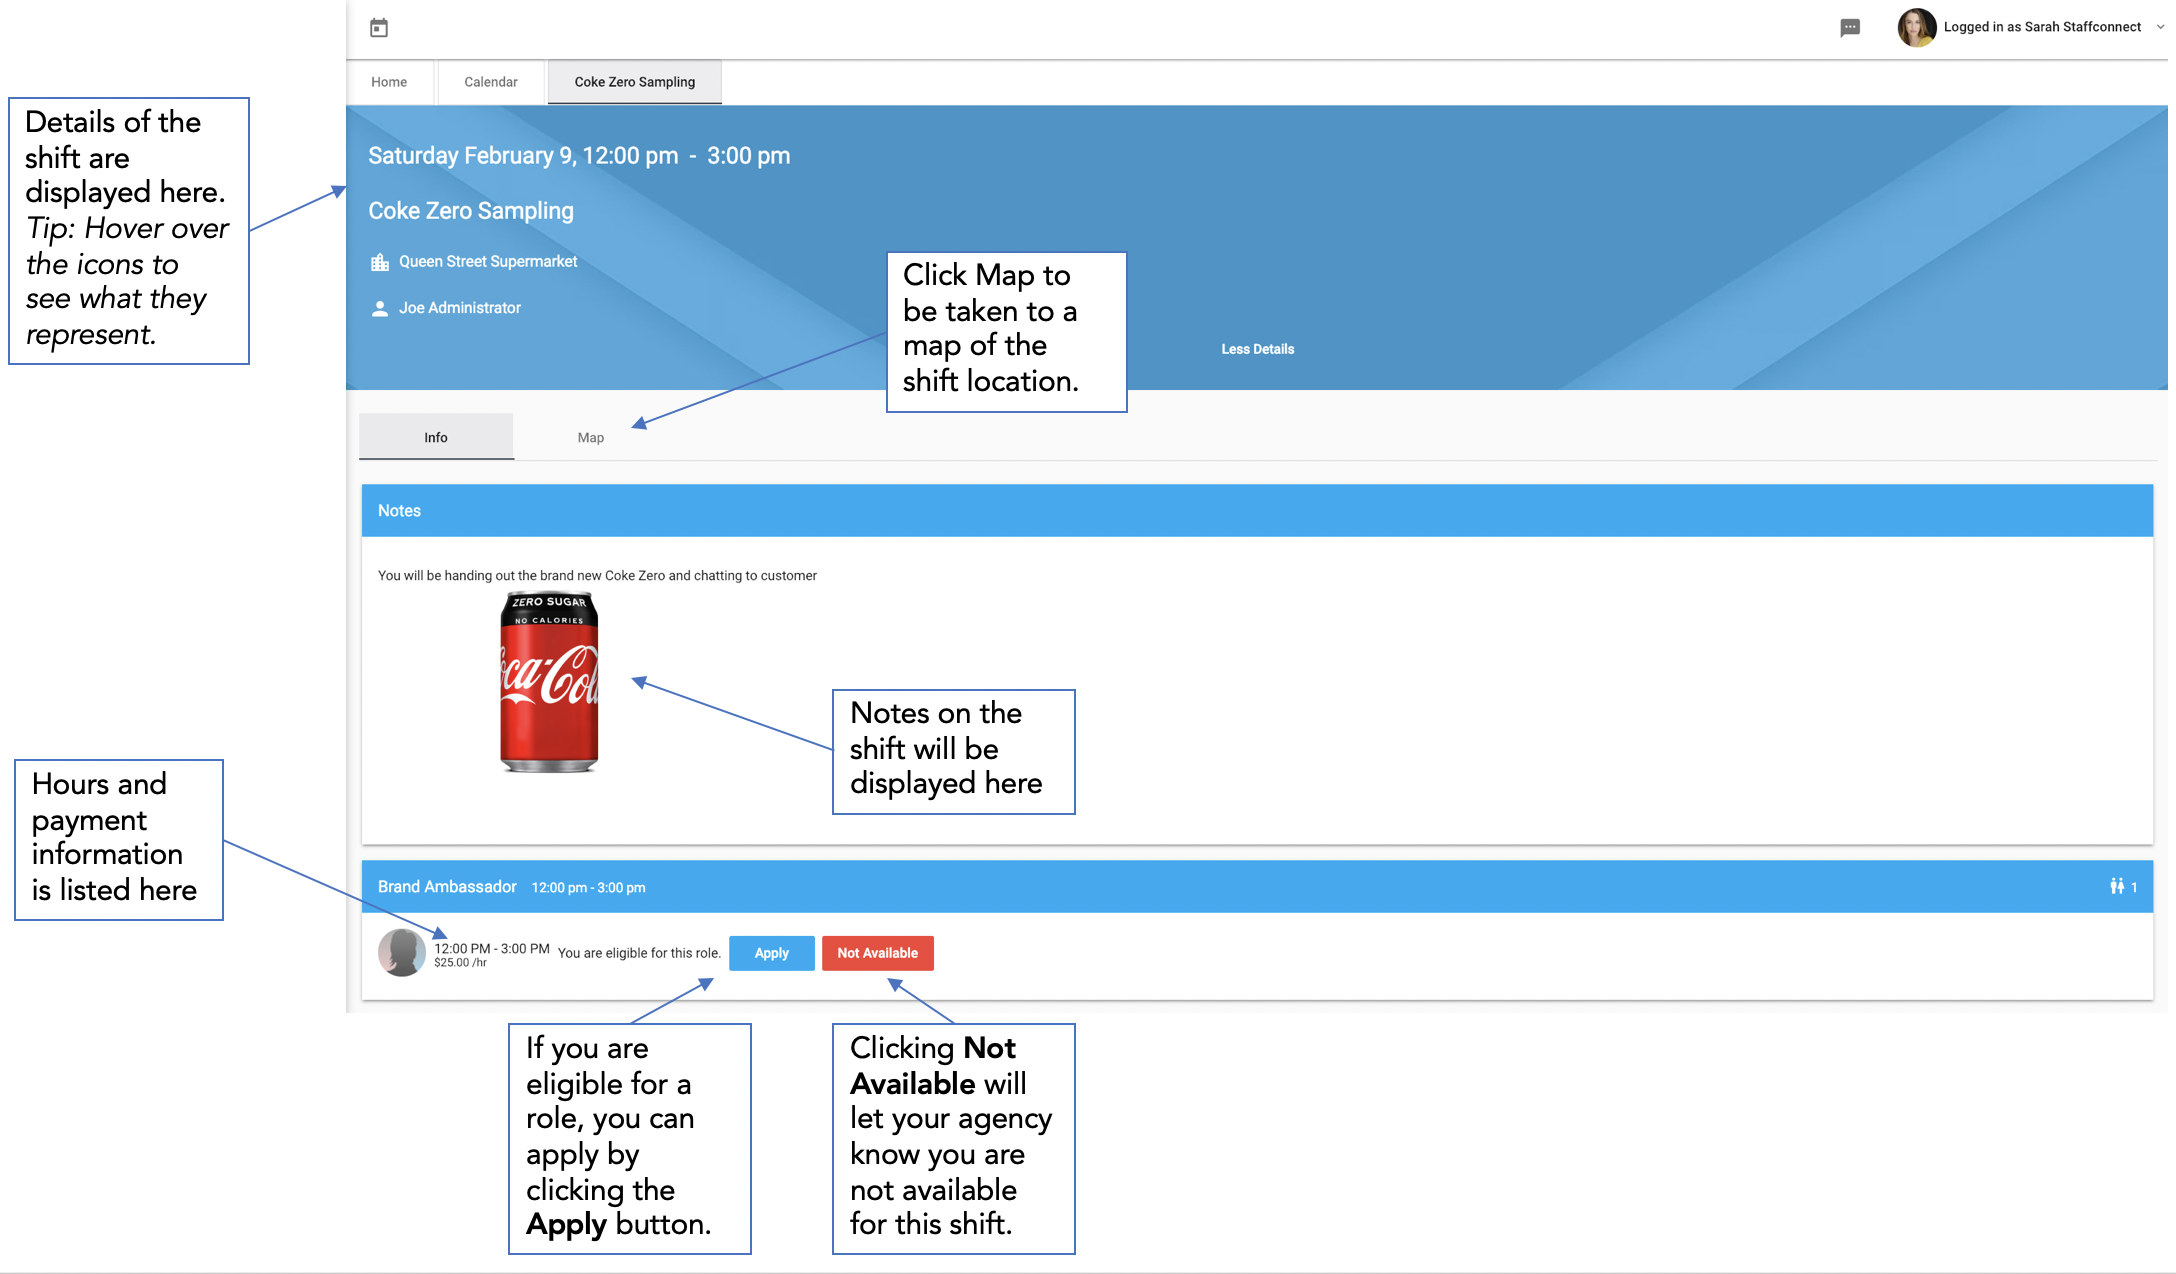
Click on a shift in your calendar to view the events information.
Confirm a Shift
Once you have been selected for an event, you will need to confirm you are indeed available to complete this role.
Request a Replacement
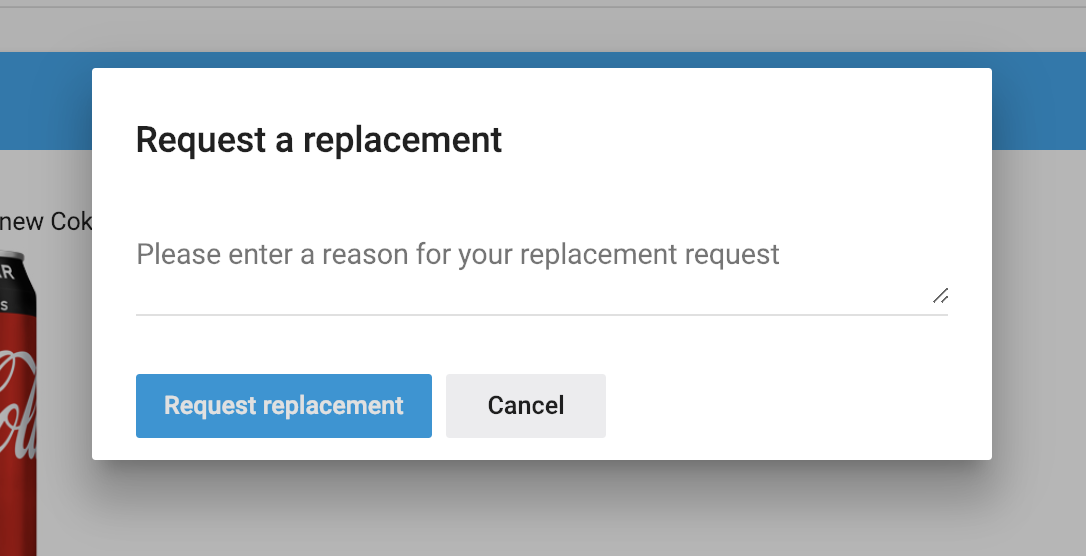
Should you no longer be available, you can request for a replacement.
This option may not be available if you are requesting a replacement too close to the start time of your shift.
Ensure you check the required notice time frame with your agency.
Staff Check In
You do this by clicking a ‘Check In’ button on your shift, which will be available from 1 hour before your start time.
Location tracking must be allowed in your browser settings for this to work. Those who do not allow StaffConnect access to their location will not be able to check in and will see an error message should they try.
Your distance to the shift is recorded in the shift and you may also be asked to upload a photo.
Once you have checked in, your user status will be 'Checked in', indicated by a change in status colour.
You can then check out at the end of your shift, using the same method.
You can check-in to shifts to indicate that you have arrived.

Complete a Shift
Once your shift is complete, you will need to log in to StaffConnect to mark as complete.
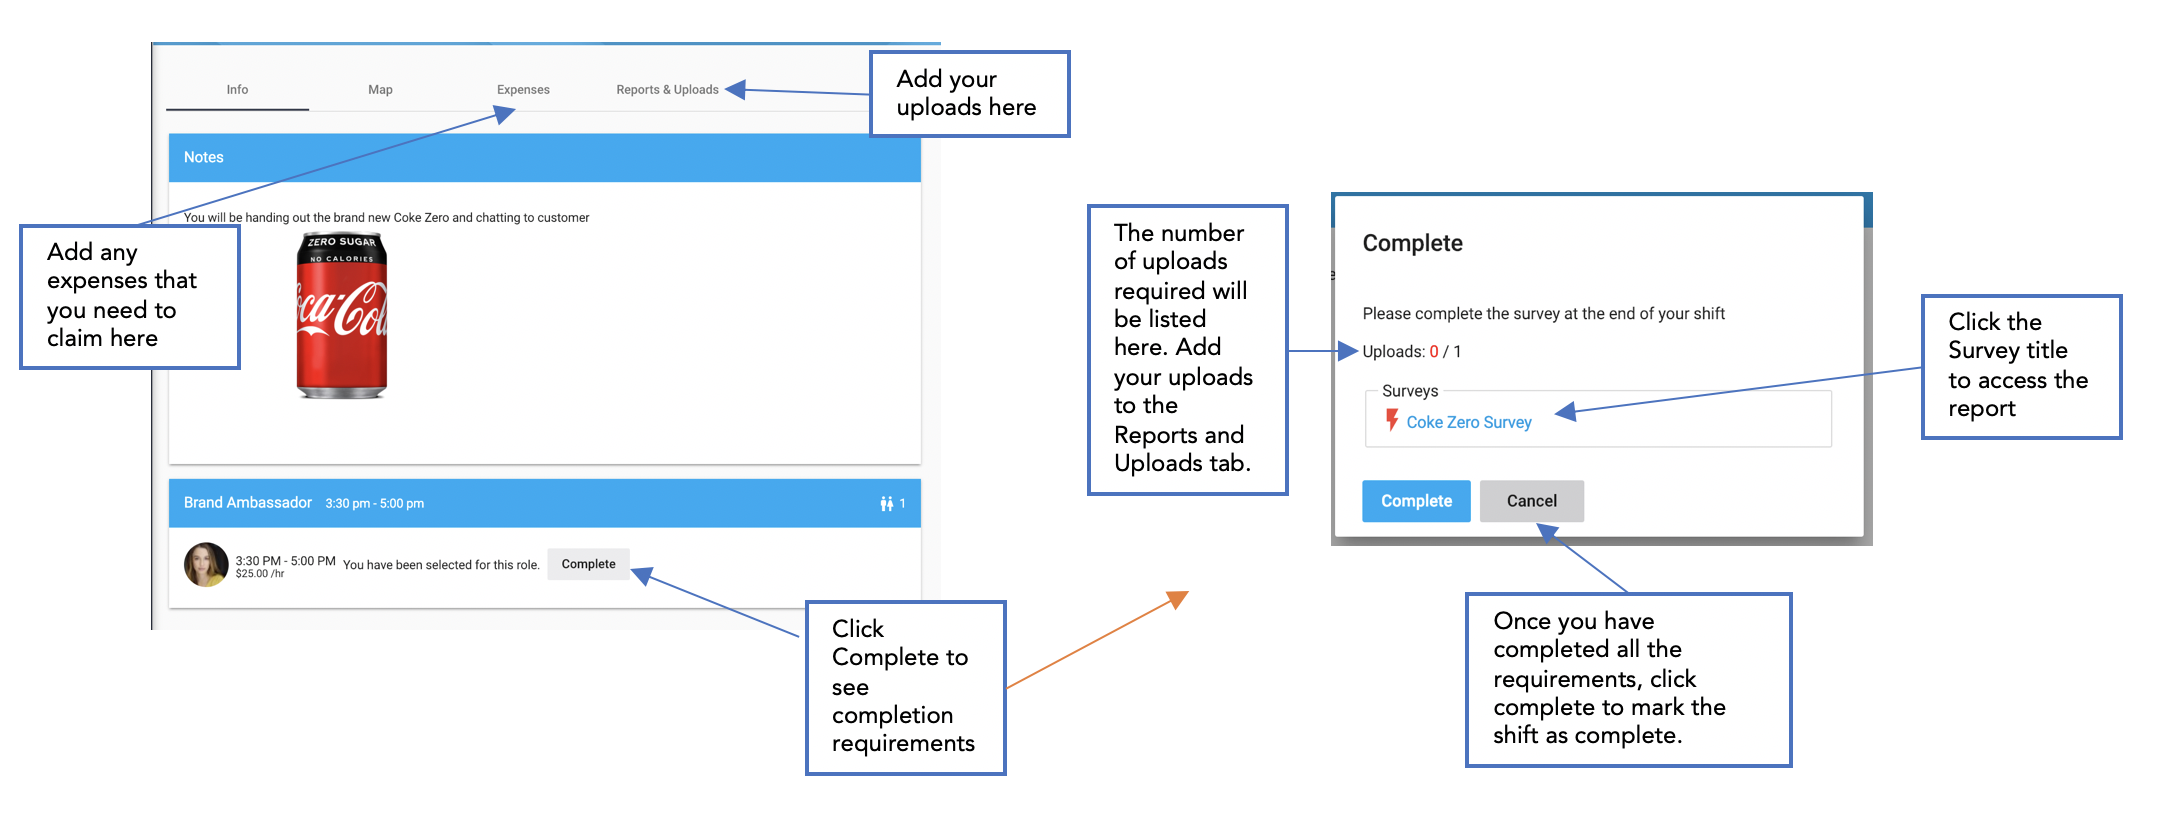
Expenses

- Click the Expenses tab within your shift.
- Click the Blue + icon to add an expense
-Add details of expenses in these boxes
-Upload an image of your receipt.
- Click Save
- To add another expense, click the + sign again.
- To remove an expense, click the trash can.
- To edit an expense, click the pencil icon.
- The status of your expenses is indicated next to the edit pencil.
If your agency requires you to claim any expenses that you have accrued during your shift, you can do so by following the below steps:
Information entered in the Claim Expenses section will automatically be added to your invoice for this event, if approved by your agency.
Invoicing
If your agency requires you to invoice them, you may use the system to manage your invoices.
Navigate to Pay from the menu to create and view invoices
- Click Generate Invoice
- Set the date range
- Select Generate
- Review and click Save to send the invoice to your agency.
View an Invoice
Once you have created an invoice, you can view it by clicking on the View tab.
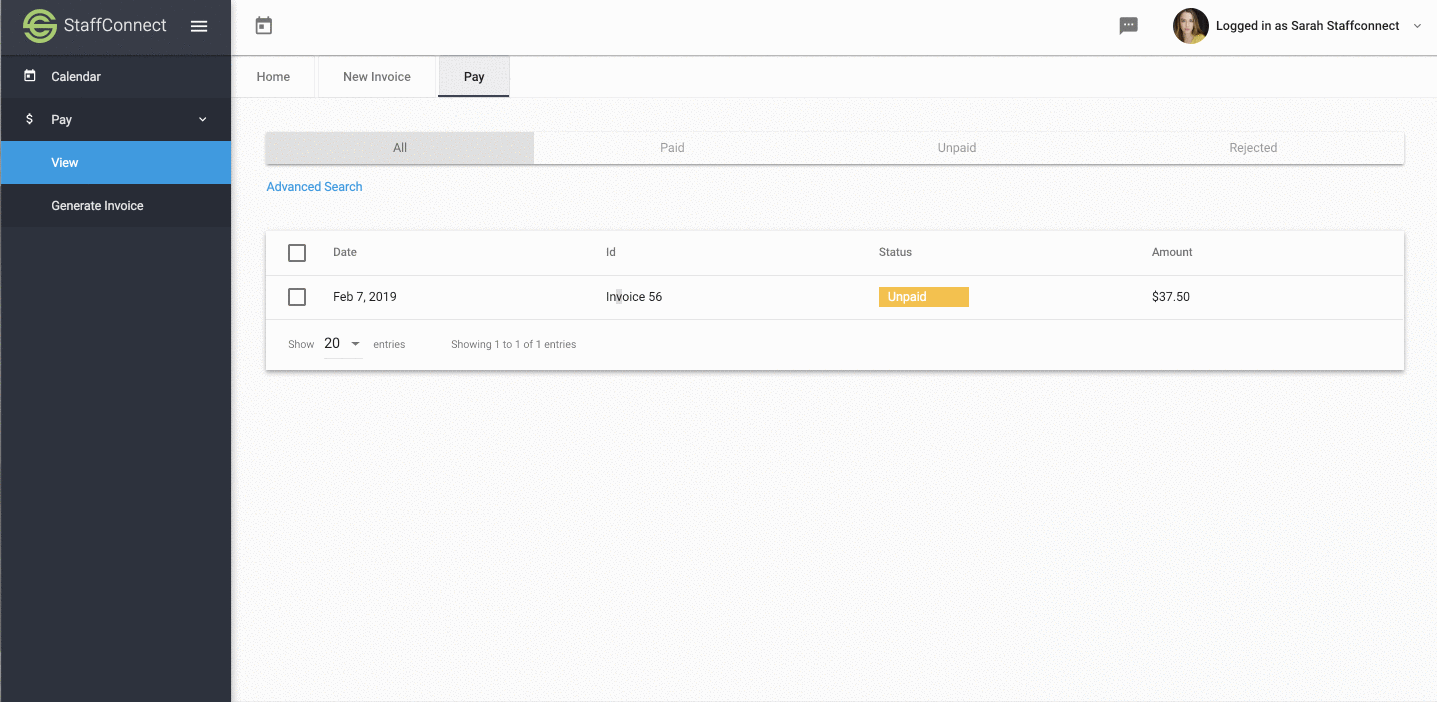
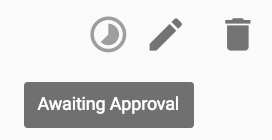
- The status of your invoice will be displayed in the Status column
- Click the tick button to open or download an invoice. You can also click on an invoice number to open that invoice.
- You can only delete an invoice if it has not been approved yet, or if it has been rejected. To do this, open the invoice and then click Cancel
Rejected Invoice
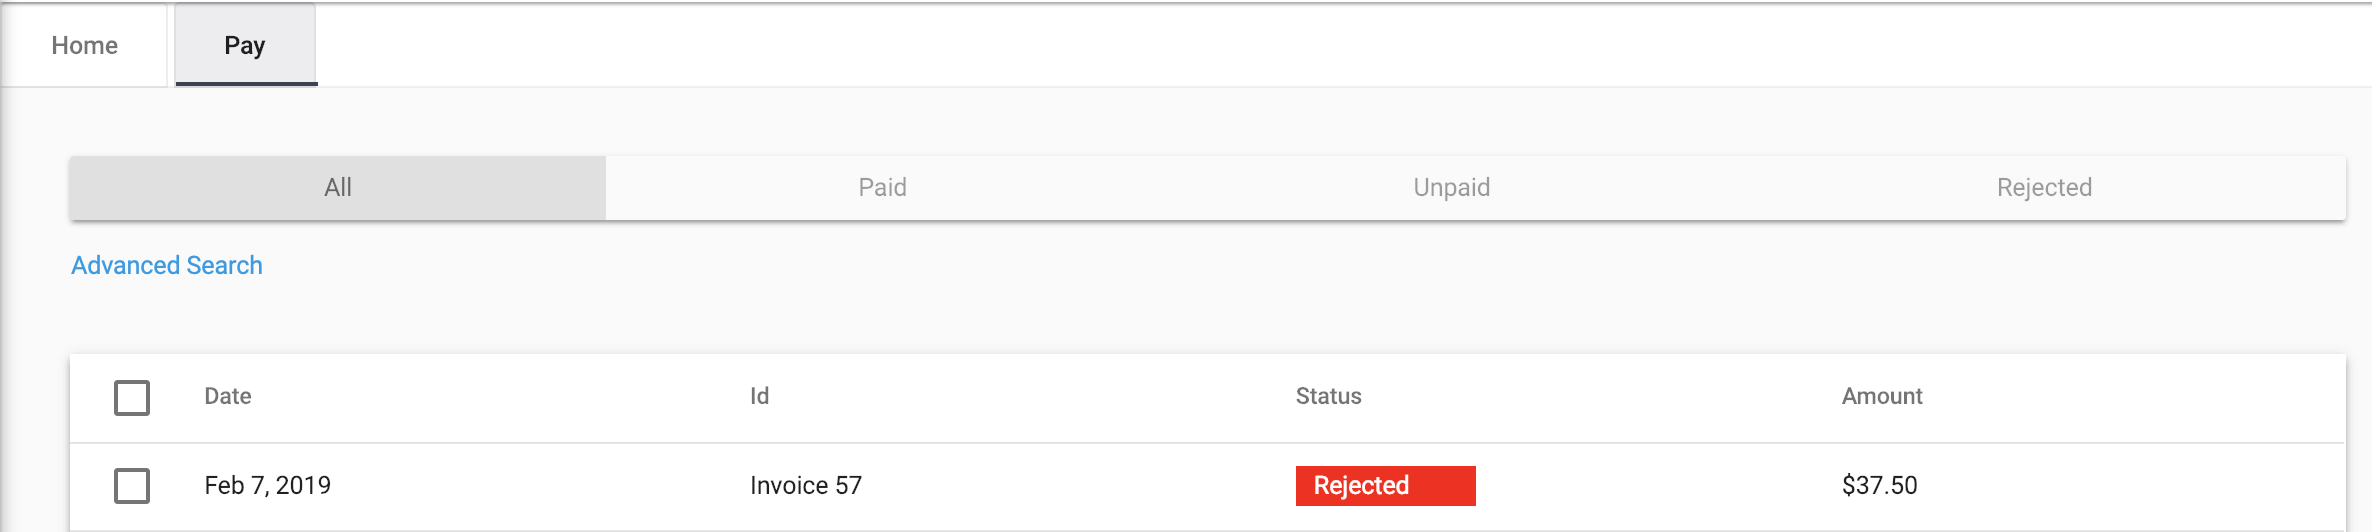
If your invoice is rejected from your agency, you will be emailed the reason why.
You can then:
- Work with your agency to make any required changes to the shift.
- Re-create invoice
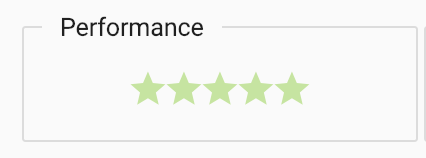
Rating
The system gives you a Performance Rating which is visible to your Manager.
Receiving good reviews from Clients or Admins, applying for and completing shifts improves your rating, while requesting replacements or ‘no shows’ will have a negative effect on your rating.
SUMMARY
1) You apply or are selected for a shift
2) You log on to either confirm or reject the shift.
3) You check In at the start of your shift.
4) You work the shift.
5) You check out at the end of your shift.
6) You log in to upload pictures, complete surveys, claim expenses and mark the shift as complete.
7) You send an invoice for the shift. If this step is required by your agency
8) You apply for more shifts!
If you have any issues, first ensure your are using a modern browser.
For additional technical support, please contact your agency.
v4 Staff Quick Start Guide
By staffconnect


