


David Lu
Software Developer
陸勇盛 (David Lu)
yungshenglu1994@gmail.com
@CS.NCTU
AUG 14, 2018
Graduated student @CS.NCTU
SDN/NFV, Wireless Sensing.
Speaker, ModernWeb'18 & DigitalOcean Hsinchu
以嘗試 結合不同的工具 為樂!
對 土砲 很有興趣!
e.g., TaiwanEX, docoGen, papoGen, CrossyRoad EX etc.
Recent in P4 and Neural Network
“趕快想辦法畢業!”
Slides Link
陸勇盛 (David Lu)
yungshenglu1994@gmail.com
問題來了!
最新版是哪一個?
除了自己,還有誰知道這些檔案的差別?
分組共作怎麼辦?
以前,你是區分不同版本的檔案呢?
檔名? e.g., Report_latest.txt, Report_new.txt, Report_new1.txt, Report_final.txt, etc.
日期? e.g., Report_0820.txt, Report_08201.txt, Report_082001.txt, etc.
為此而生!
分散式版本控制系統
為了方便管理 Linux kernel 而開發的
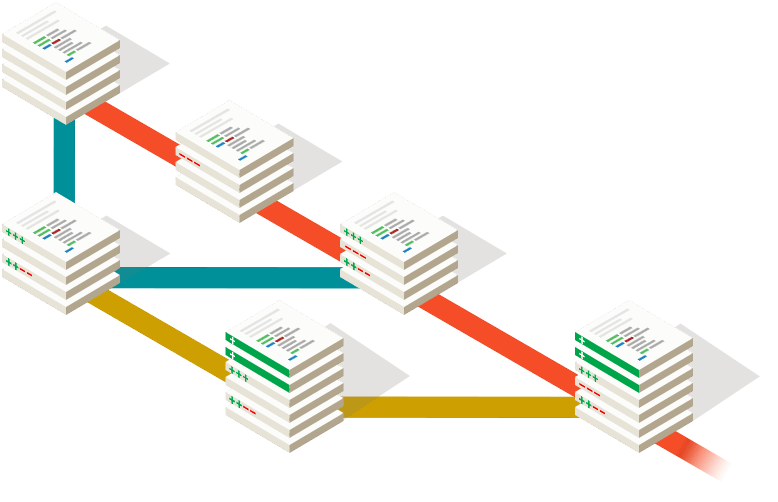
樹狀概念,保存所有修改紀錄
回覆過去的狀態
版本之間的差異比較
友善的共作環境
i.e., 避免覆蓋別人修改的悲劇
團隊合作不衝突!
「貢獻度」
備份與追蹤
不要在 式的命名
開源世代
分享與改進才能不段進步!
Report_new1.txtAnd so on...
Repository 字典解釋:倉庫;知識庫。
記錄檔案或目錄狀態的地方!
儲存修改的歷史記錄
Git 上的基本單位
Local v.s. Remote
Local - 個人使用,存在於個人機器上
Remote - 多人共享,存在於專用的伺服器上
e.g., GitHub, GitLab, Bitbucket, etc.
Commit 字典解釋:做 (違法或錯誤的事);犯 (罪、錯);提交。
記錄修正處 以示負責!
以文字說明 (i.e., commit message) 修改的地方
養成寫好 commit message 的習慣!
以時間序排列儲存到 repository 中
產生一組識別碼 (i.e., commit ID) 作為 commit 的命名
e.g., 14123c8877e6ebdc220e205d92fc70feaf06dab1
詳細請參考:Git官方文件
Windows / MacOS
下載 Git:連結在此
安裝過程「全部選取預設」即可
Linux
Git 版本
# For Debian / Ubuntu install command
$ sudo apt-get install git-all
# For Fedora / CentOS install command
$ sudo yum install git-all$ git --version
git version 2.7.1開啟終端機 (terminal)
Windows - 開啟 Git Bash
Mac / Linux - 開啟終端機
Git config
記錄在用戶的目錄下的 檔案
設定使用者名字與電子信箱
$ git config --global user.name "<NAME>"
$ git config --global user.email "<EMAIL>"
# List your Git config
$ git config -l
user.name=<NAME>
user.email=<EMAIL>Tips - control + T / ctrl + T
.gitconfigTips - 查看 Git config 使用
$ git config -l以終端機操作為例!
更多 Git config 設定 (optional)
設定 Git 輸出顏色
設定 Git 指令別名 (e.g, "checkout" 省略為 "co")
中文檔名顯示修正 (For Git Bash on Windows)
# Set output color on Git
$ git config --global color.ui auto
# Set the alias of command "checkout" as "co"
$ git config --global alias.co checkout
# Fix the display of filename in Chinese on Git
$ git config --global core.quotepath off以終端機操作為例!
初始化專案
新建一個資料夾作為專案資料夾,並切換至該資料夾下
建立 Git repository
# Create a folder for demo and change directory
$ mkdir Git_demo && cd Git_demo
# Initialize git repository
$ git init
Initialized empty Git repository in .../Git_demo/.git/以終端機操作為例!
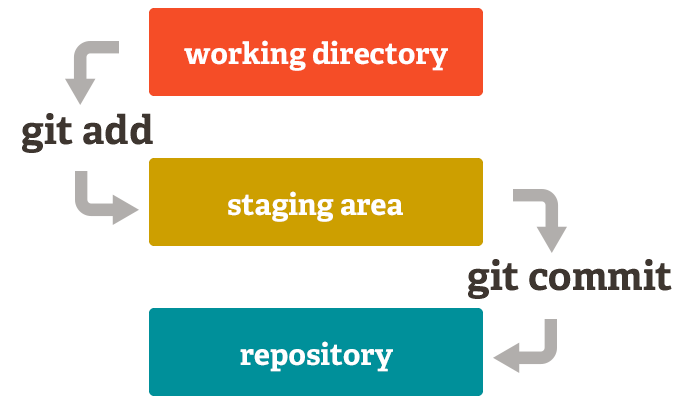
Local Git status
目前的 workspace
i.e., 還沒存檔
準備進入 repository
i.e., 暫存區
進入 repository
i.e., 存檔
README.md# Git DEMO
This is my first repository using Git.$ git status
On branch master
Initial commit
Untracked files:
(use "git add <file>..." to include in what will be committed)
README.md
nothing added to commit but untracked files present (use "git add" to track)Tips - Untracked files 是未被 Git 追蹤的檔案
以終端機操作為例!
Git add
加入 至 Git repository
查看目前 Git repository 狀態
# git add <FILENAME>
$ git add README.mdREADME.md$ git status
On branch master
Initial commit
Changes to be committed:
(use "git rm --cached <file>..." to unstage)
new file: README.mdTips - 已加至 Git repository 的檔案
Tips - 加入所有檔案
$ git add .以終端機操作為例!
Git commit
撰寫提交訊息 (commit message)
查看目前 Git repository 狀態
# git commit -m "<COMMIT_MESSAGE>"
$ git commit -m "Initial commit"
[master (root-commit) e83c8d6] Initial commit
 1 file changed, 2 insertions(+)
 create mode 100644 README.md
$ git status
On branch master
nothing to commit, working directory cleanTips - 目前無其他更新需要提交
Tips - 目前在 master branch 上
以終端機操作為例!
Git log
查看提交紀錄
$ git log
commit e83c8d6eed726b1bb8e83e58a53934c035759482
Author: <NAME> <<EMAIL>>
Date:   Tue Aug 16 09:57:47 2018 +0800

    Initial commit
Tips - 提交時間與訊息
Tips - 識別碼 (Commit ID)
以終端機操作為例!
接下來,如何上傳到遠端?
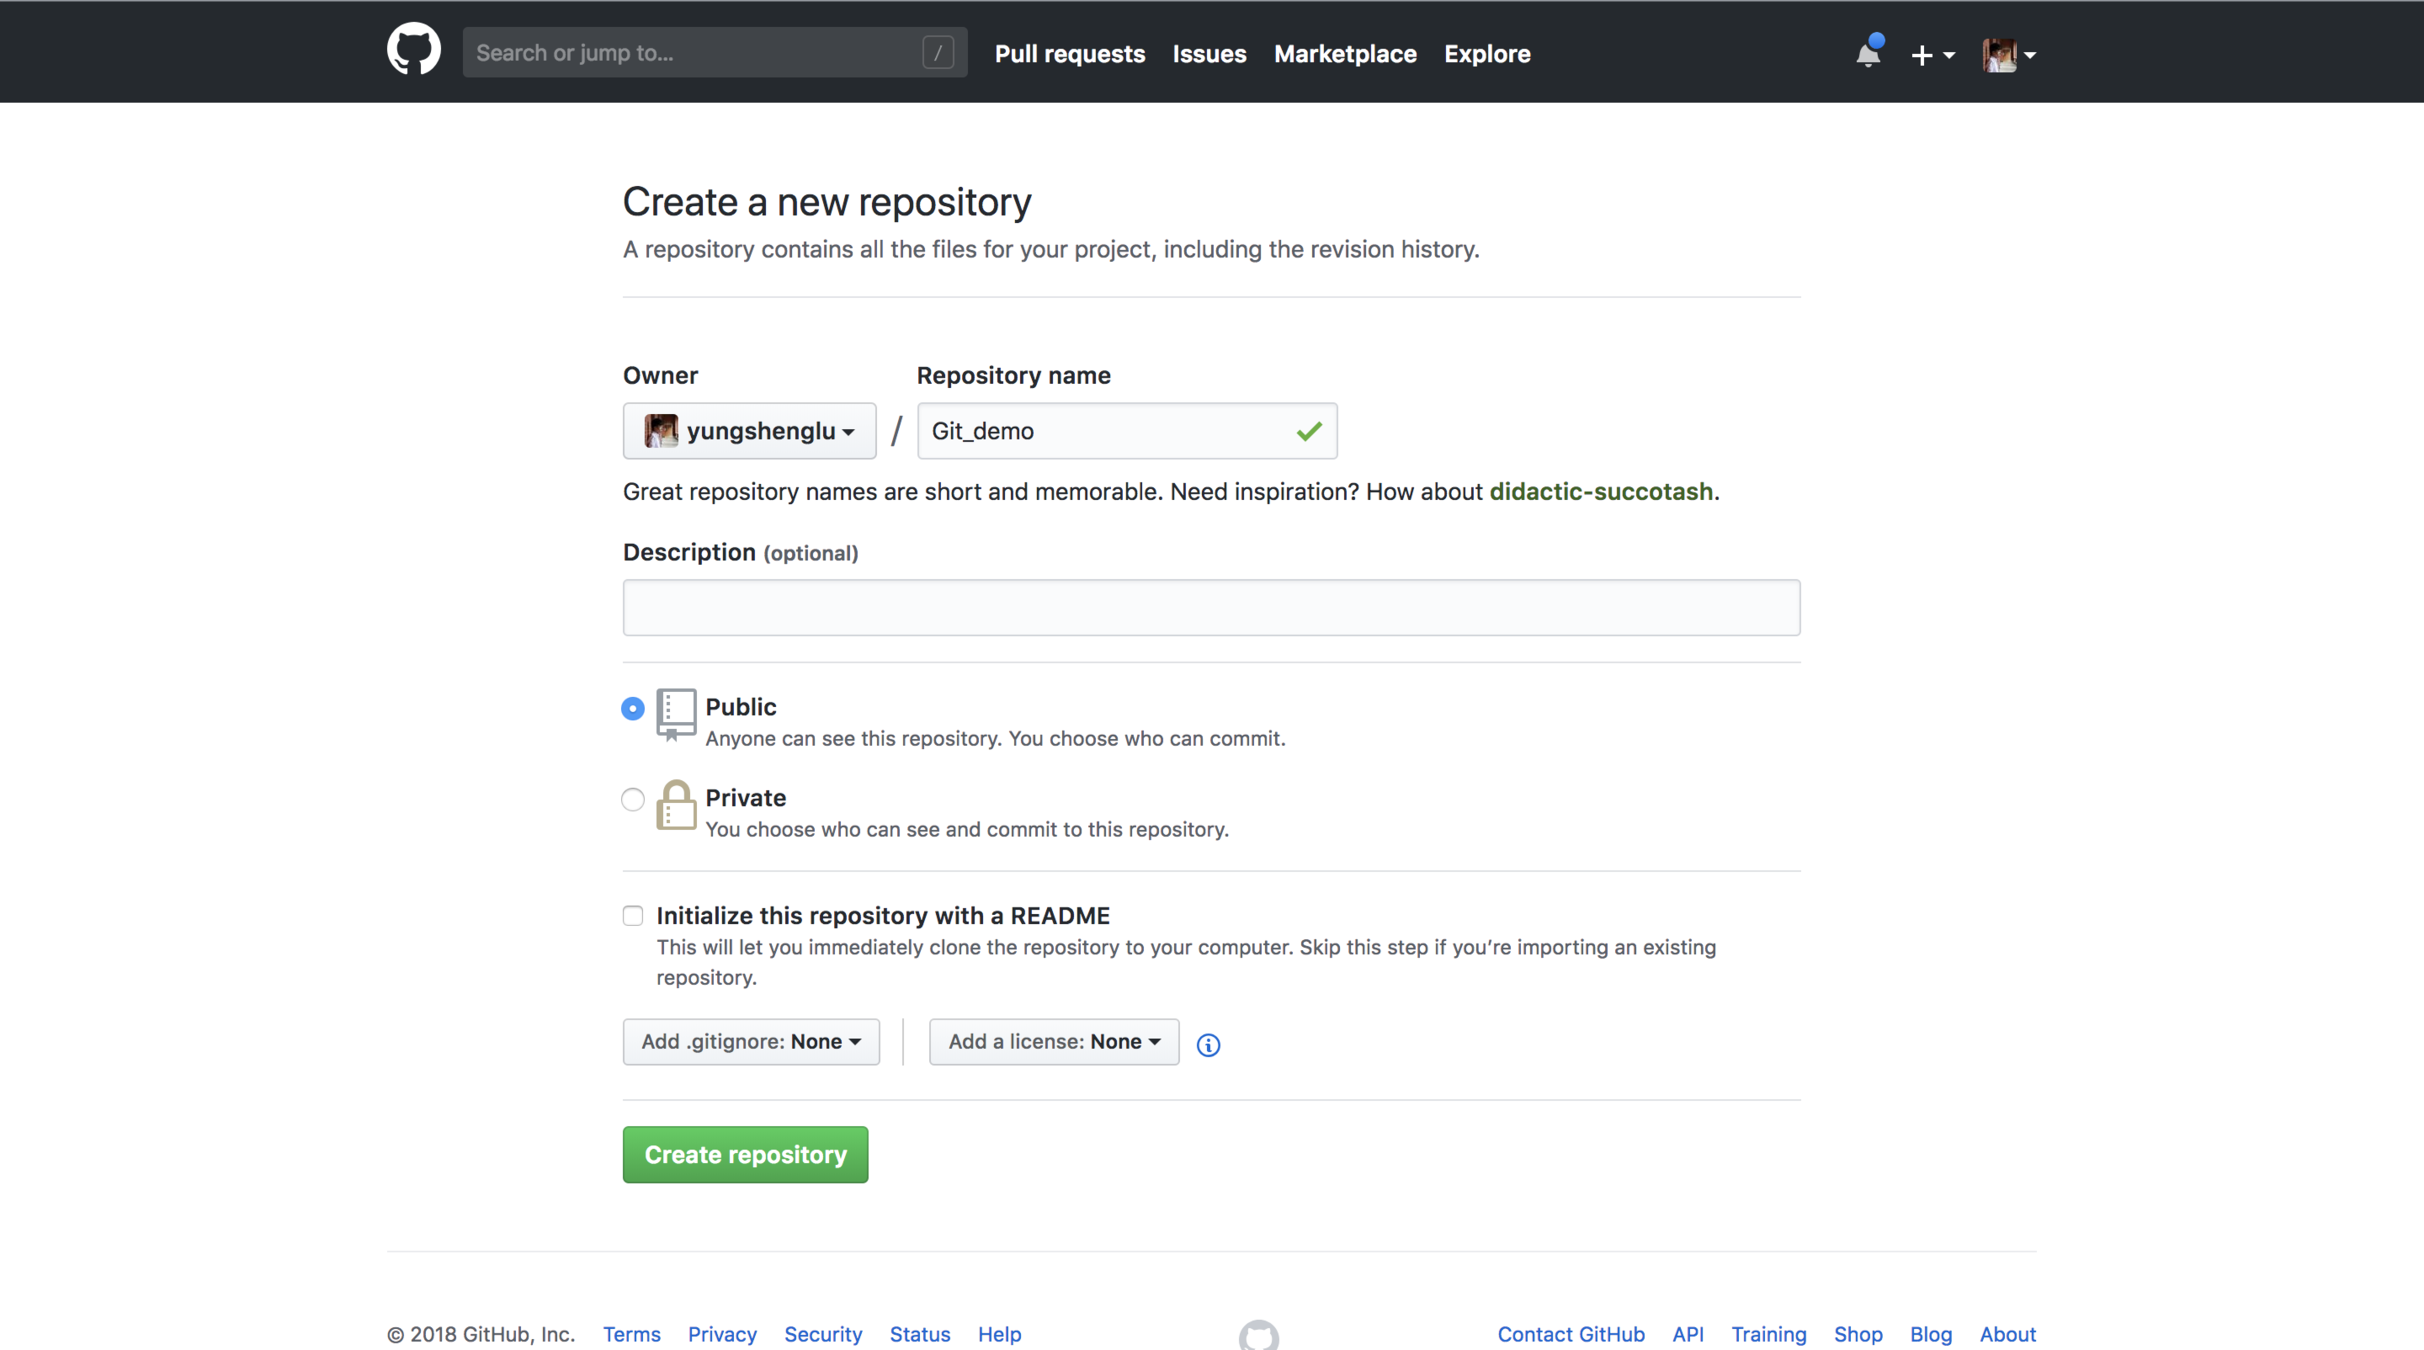
以 GitHub 為例!
以 GitHub 為例!
Tips - 使用學校信箱申請
Tips - 示範用公開或私密都可以
Tips - 一般為專案名稱
Git_demoTips - 描述專案的主旨
Tips - 示範用不要勾選
Tips - 示範用都設為 "None"
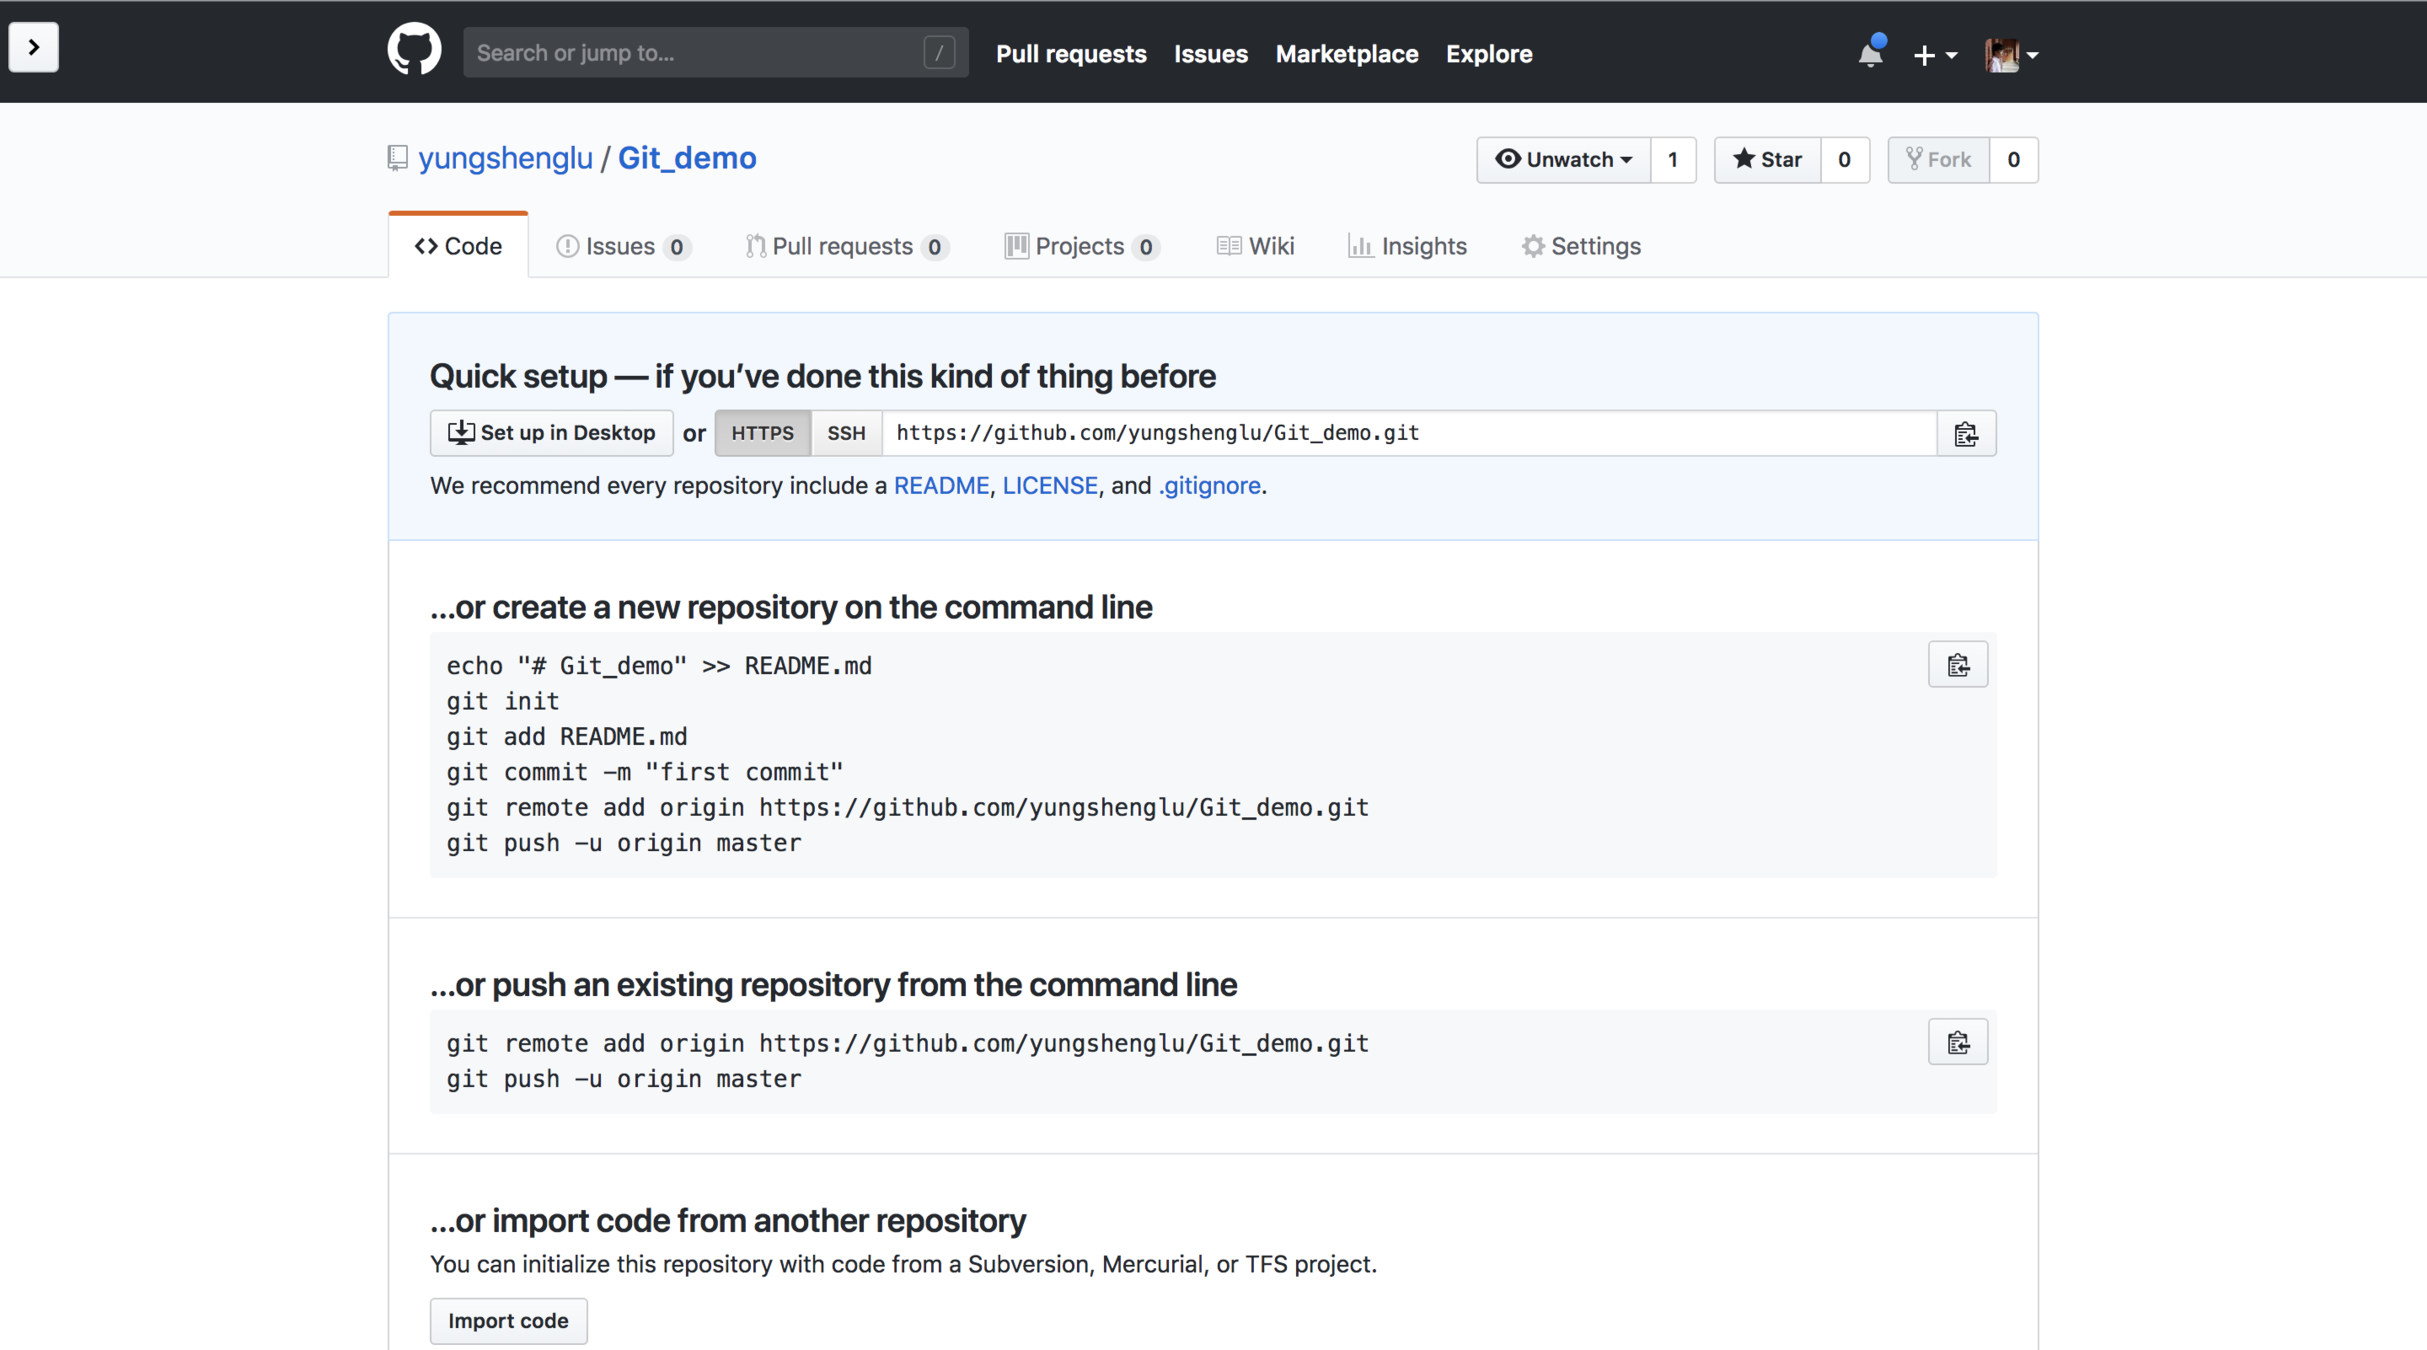
1
2
3
4
5
Tips - 按下即可複製
Tips - 尚未建立 local repository 用
Tips - 已存在 local repository
Tips - 從其他平台匯入程式碼
Git remote
在本地端註冊遠端的 repository
可註冊多個遠端的 repository
可將程式碼放不同平台 (e.g., GitLab, Bitbucket, etc.)
同一平台的不同遠端 repository
# git remote add origin <REPO_URL>
$ git remote add origin https://github.com/yungshenglu/Git_demo.git
以終端機操作為例!
Tips - 貼上從 GitHub 複製的位址
Tips - 通常第一個上傳的遠端 repository 會命名為 origin
以終端機操作為例!
其他 Git remote 指令 (optional)
顯示已註冊的遠端 repository
顯示已註冊的遠端 repository 位址
重新命名已註冊的遠端 repository 名稱
修改已註冊的遠端 repository 位址
# git remote rename <OLD_NAME> <NEW_NAME>
$ git remote rename origin develop
# git remote set-url <REPO_NAME> <REPO_URL>
$ git remote set-url origin https://github.com/yungshenglu/git-demo-dev.git$ git remote# git remote get-url <REPO_NAME>
$ git remote get-url originGit push
同步 本地端 與 遠端 的修改歷史紀錄
以下操作以終端機為主!
# git push <REMOTE_REPO> <LOCAL_BRANCH>
$ git push origin master
Username: <USERNAME>
Password: <PASSWORD>
Counting objects: 3, done.
Writing objects: 100% (3/3), 270 bytes | 0 bytes/s, done.
Total 3 (delta 0), reused 0 (delta 0)
To https://github.com/yungshenglu/Git_demo.git
 * [new branch]      master -> master
Tips - 在 remote repository 建立 master branch 同步 local 與 remote
Tips - 輸入 GitHub 帳號與密碼
Tips - Push 其實就是上傳
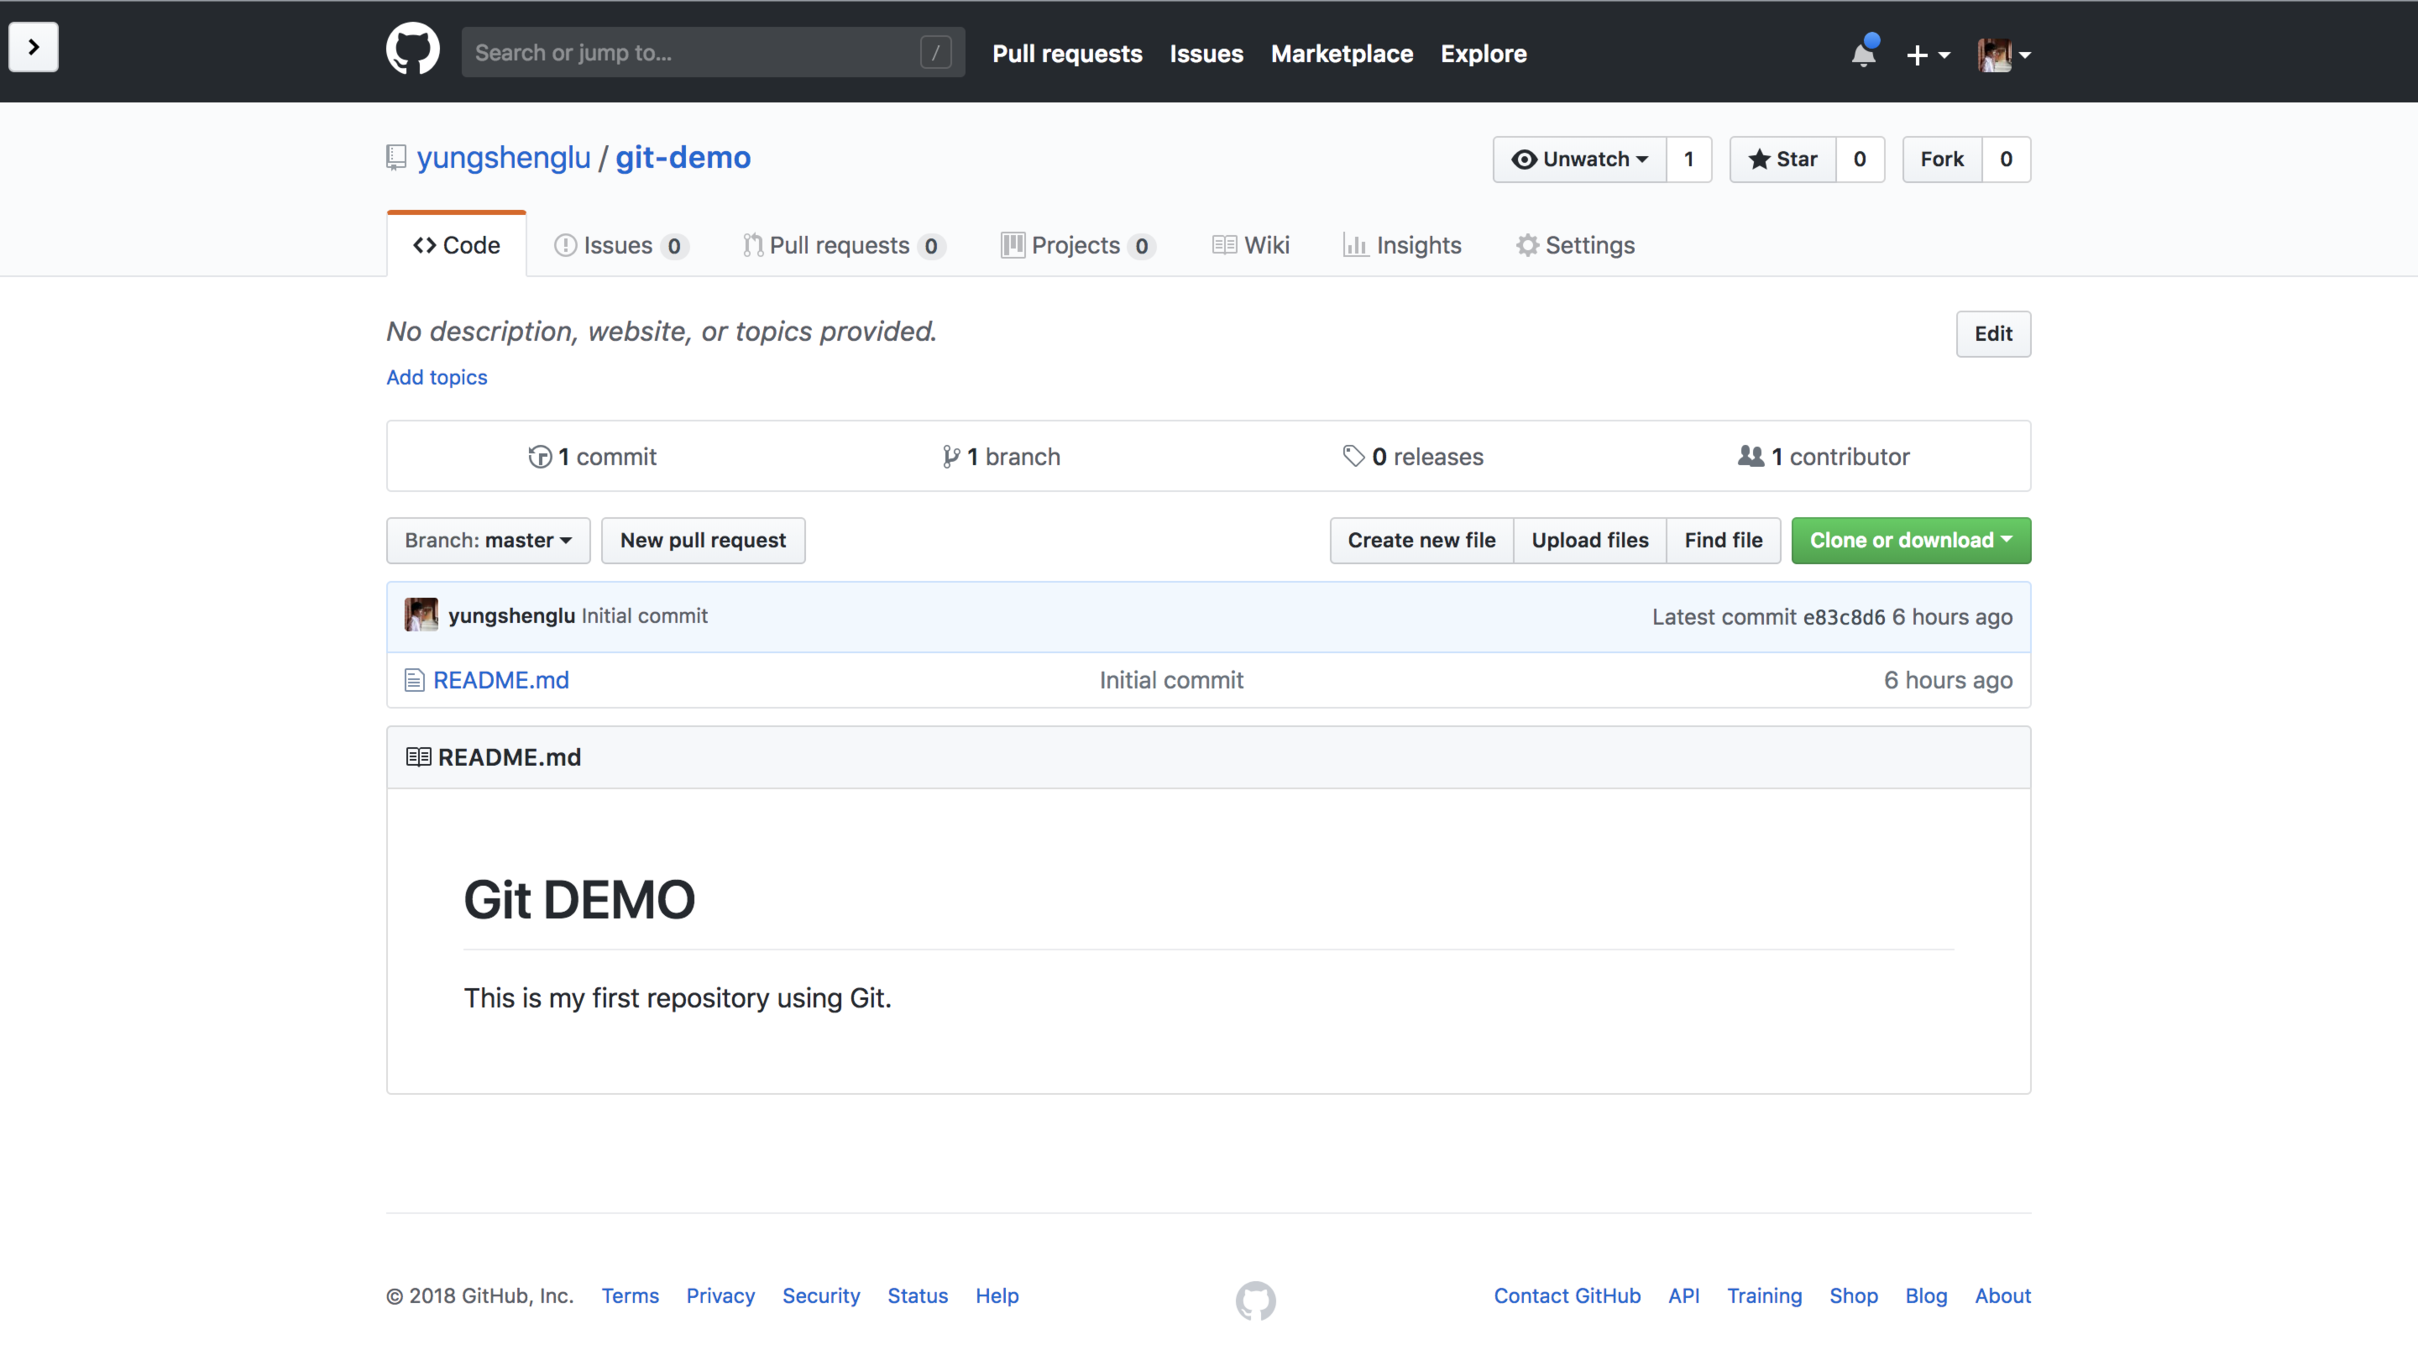
Tips - 成功推送後,可到 GitHub 查看結果。
Git clone
切換路徑至與 同層
複製遠端的 repository 至本地端
以 GitHub 為範例!
# git clone <REPO_URL>
$ git clone https://github.com/yungshenglu/Git_practice.git
# Clone others repository may be asked to enter username and password
Username: <USERNAME>
Password: <PASSWORD>
...Git_demo$ cd ../ && ls
Git_demo如果發生衝突怎麼辦?
不同步問題
Remote repository
Local repository
A
B
C
D
A
B
C
08/10
08/10
08/11
08/11
08/12
08/12
08/13
08/14
檔案已被修改過!
解法:Git pull
Remote repository
Local repository
A
B
C
D
A
B
C
08/10
08/10
08/11
08/11
08/12
08/12
08/13
08/13
08/14
D
08/14
衝突發生?
自動合併
解決衝突
不是每次都可以合併
本地端與遠端在相同地方發生修改記錄
Git 無法自動合併
<<<<<<< HEAD
# Git DEMO
=======
# Git DEMO 中文說明
>>>>>>>
This is my first repository using Git.
Tips - 在 == 上方的是本地端的修改內容
Tips - 在 == 下方的是遠端的修改內容
Lab 1
開啟終端機 (terminal)
Windows - 開啟 Git Bash
Mac / Linux - 開啟終端機
Git clone
複製以下遠端的 repository 至本地端
提示:複製遠端 repository
Tips - control + T / ctrl + T
https://github.com/yungshenglu/Git_intro以下操作以終端機為主!
$ git clone <REPO_URL>在 下新增一個檔案 ,寫入以下內容:
提示:查看目前 Git repository 的狀態
Git add
加入 至 Git repository
提示:查看目前 Git repository 的狀態
Git commit
撰寫提交訊息 (commit message)
提示:查看目前 Git repository 的狀態
README-CN.md# Git DEMO 中文說明
* [YOUR_NAME](YOUR_GITHUB)Git_introREADME-CN.md以下操作以終端機為主!
登入 GitHub 帳號,並新增 repository -
新增 repository 中的其他選項都使用預設即可。
Git remote
修改本地端註冊遠端的 repository -
提示 1:顯示已註冊的遠端 repository
提示 2:遠端 repository 至本地端
以 GitHub 為例!
Git_intro$ git remote add <REMOTE_REPO> <REMOTE_REPO>Git_intro$ git remoteGit push
同步本地端與遠端的修改歷史紀錄
提示:推送本地端至遠端
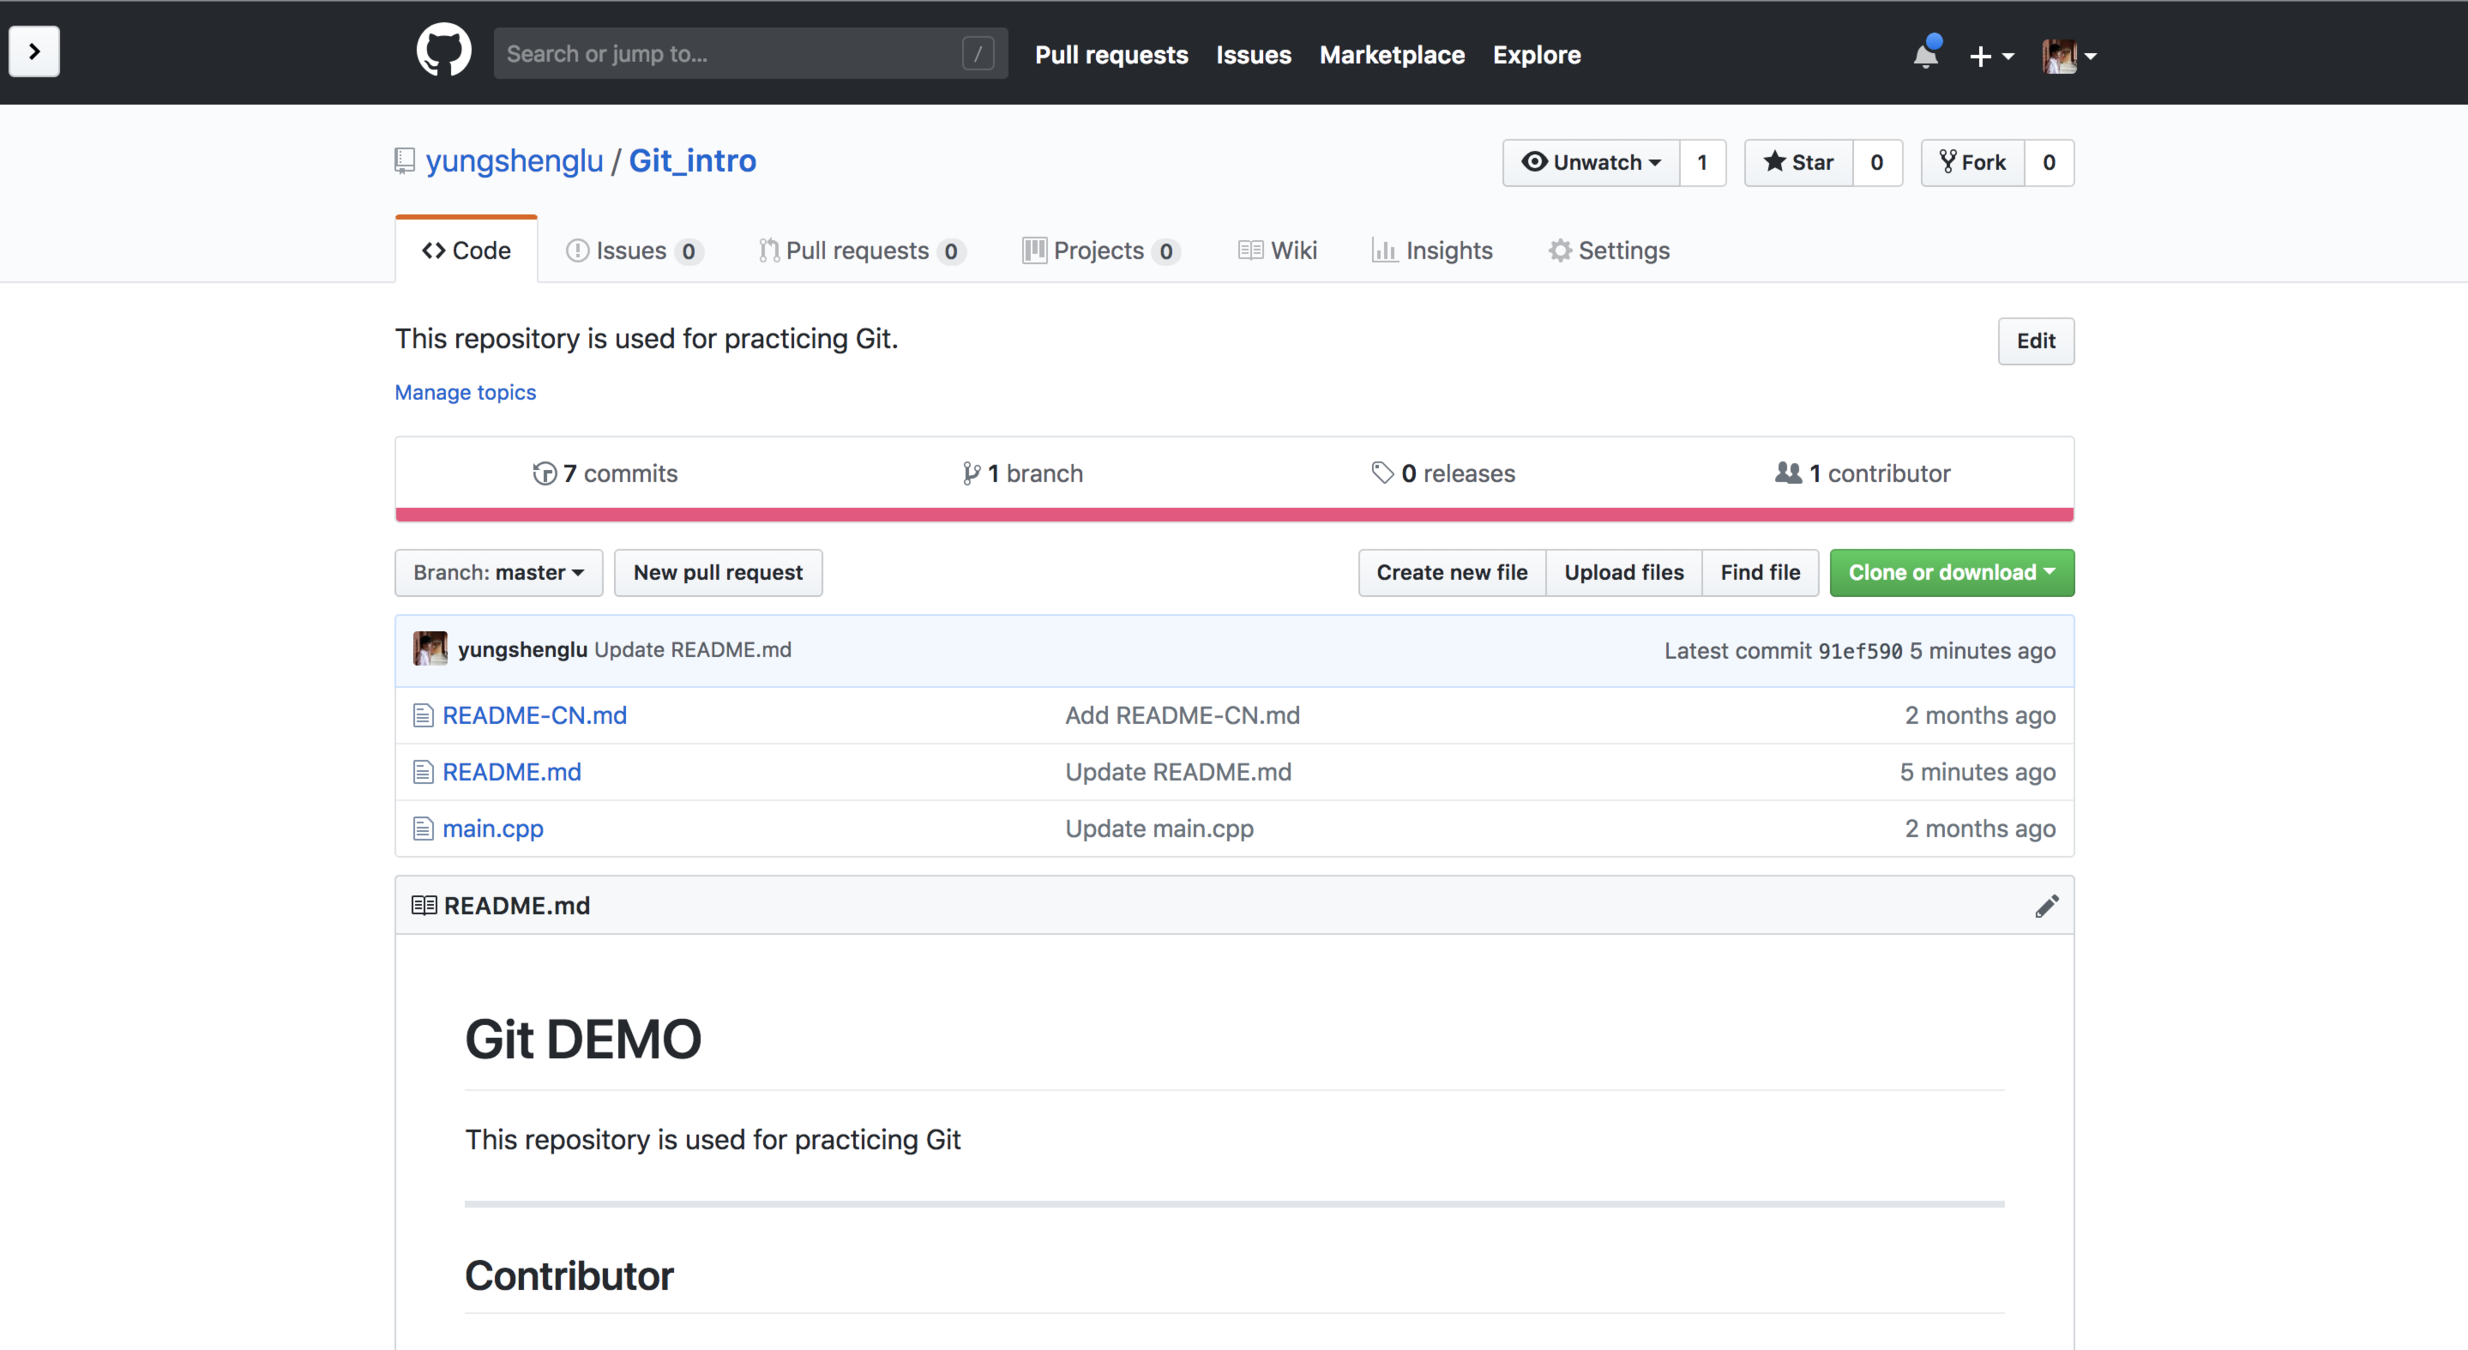
至 GitHub 查看結果
以下操作以終端機為主!
$ git push <REMOTE_REPO> <BRANSH_NAME>Lab 2
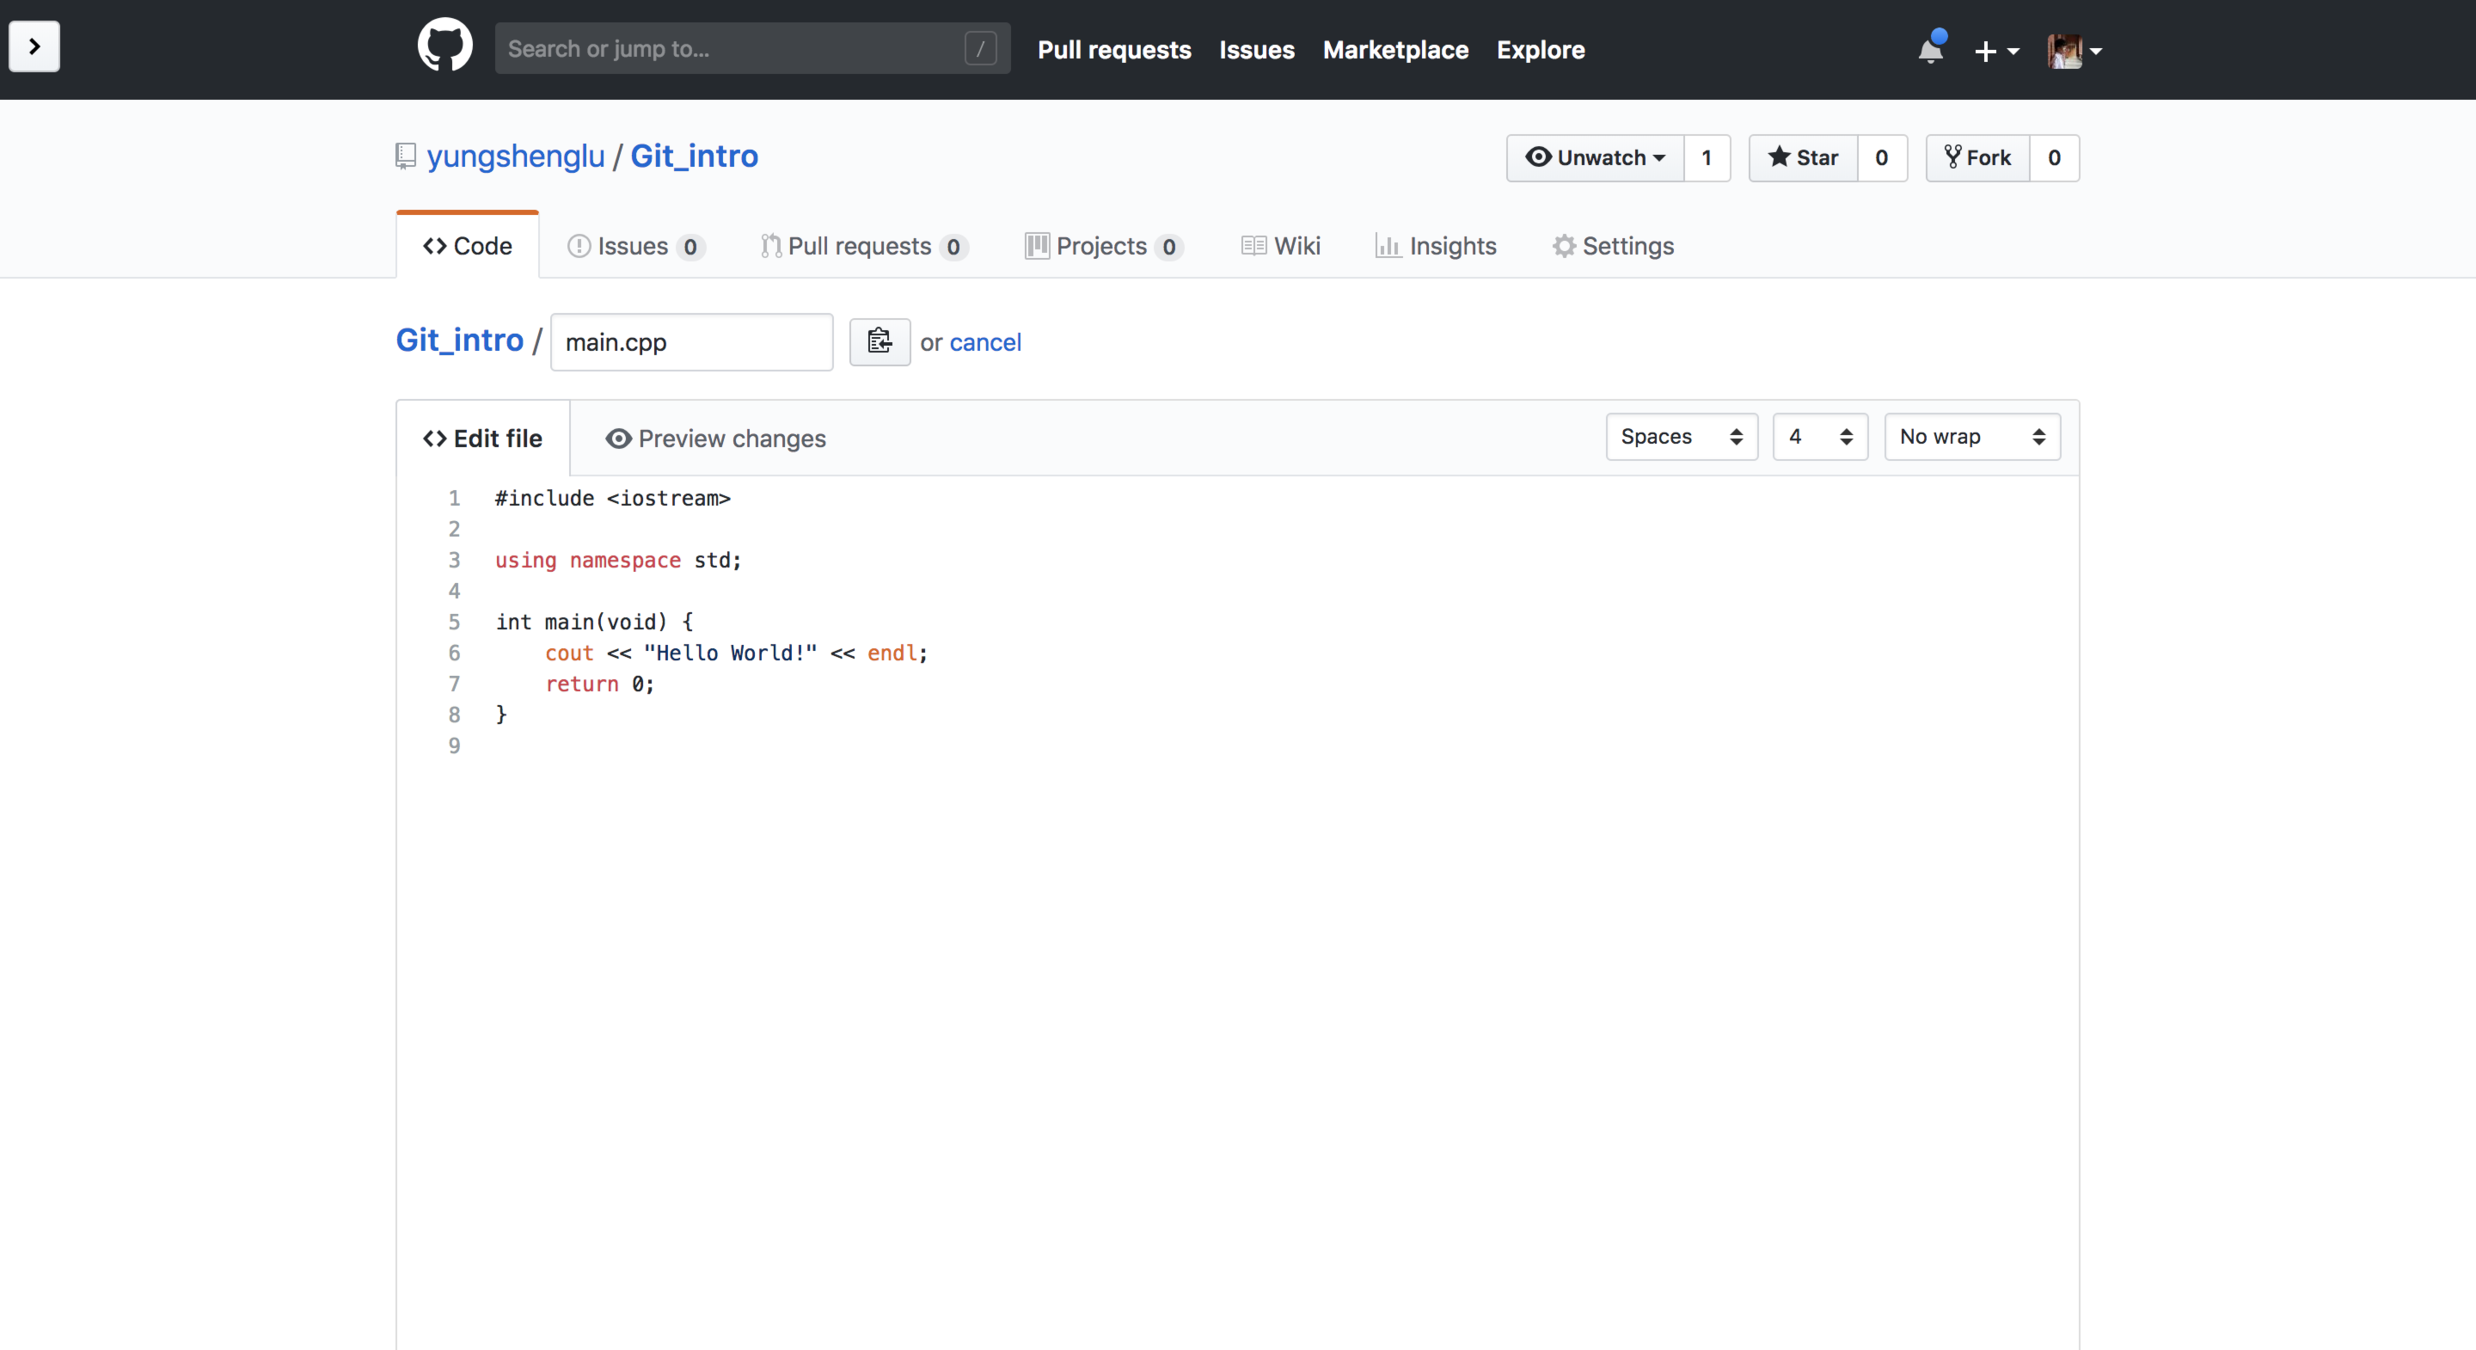
以 GitHub 為例!
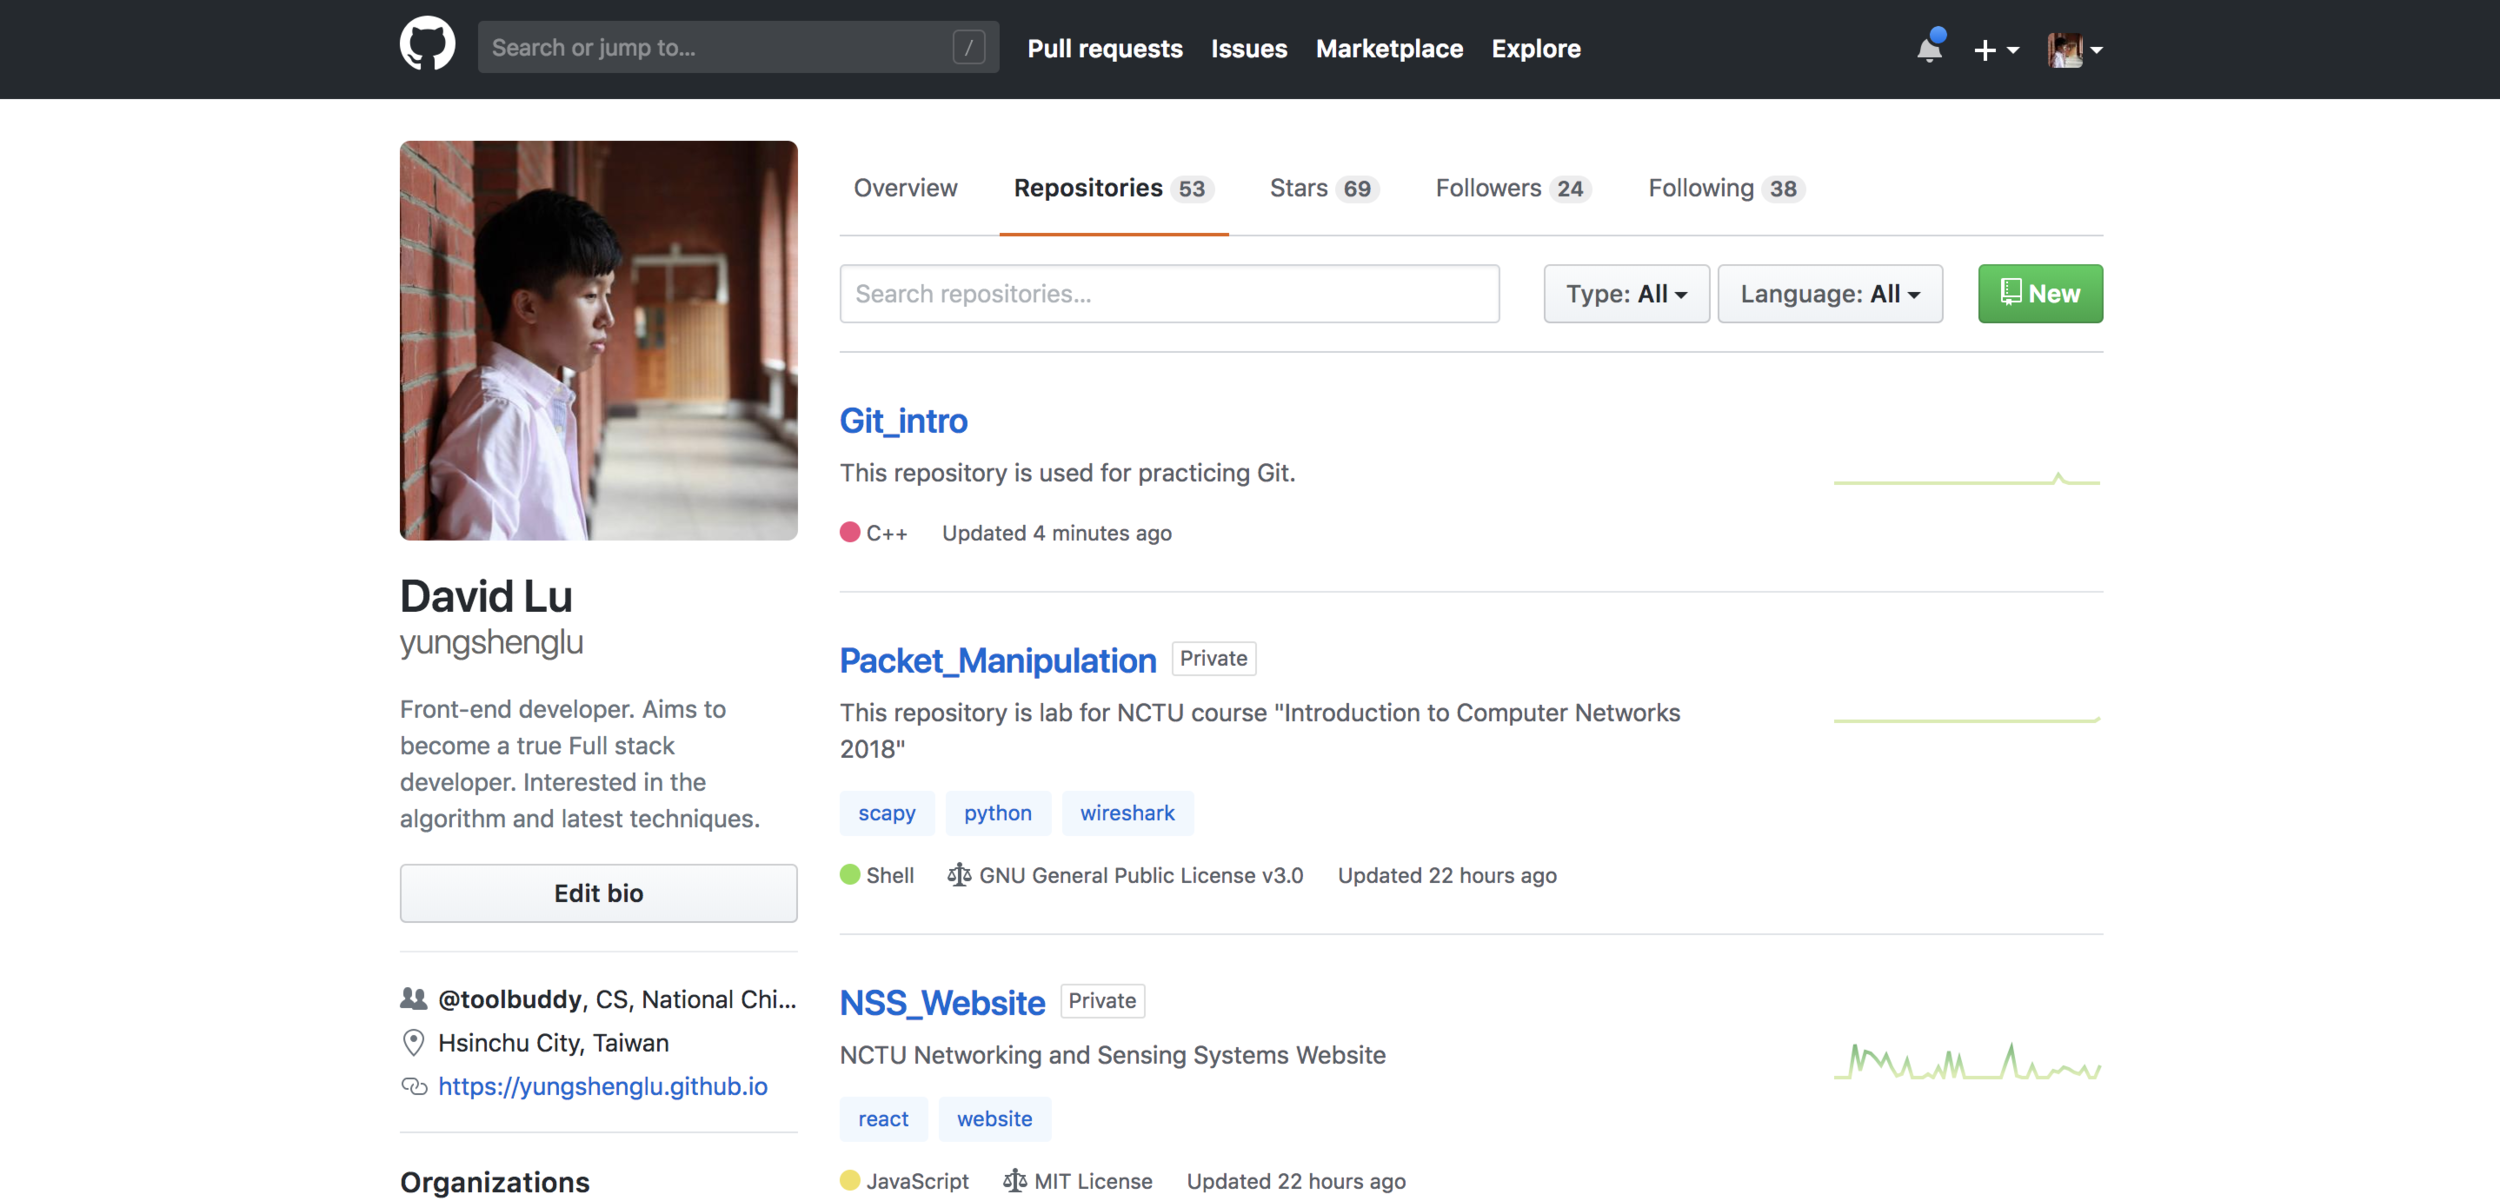
開啟個人的 GitHub 並點開個人的 repository -
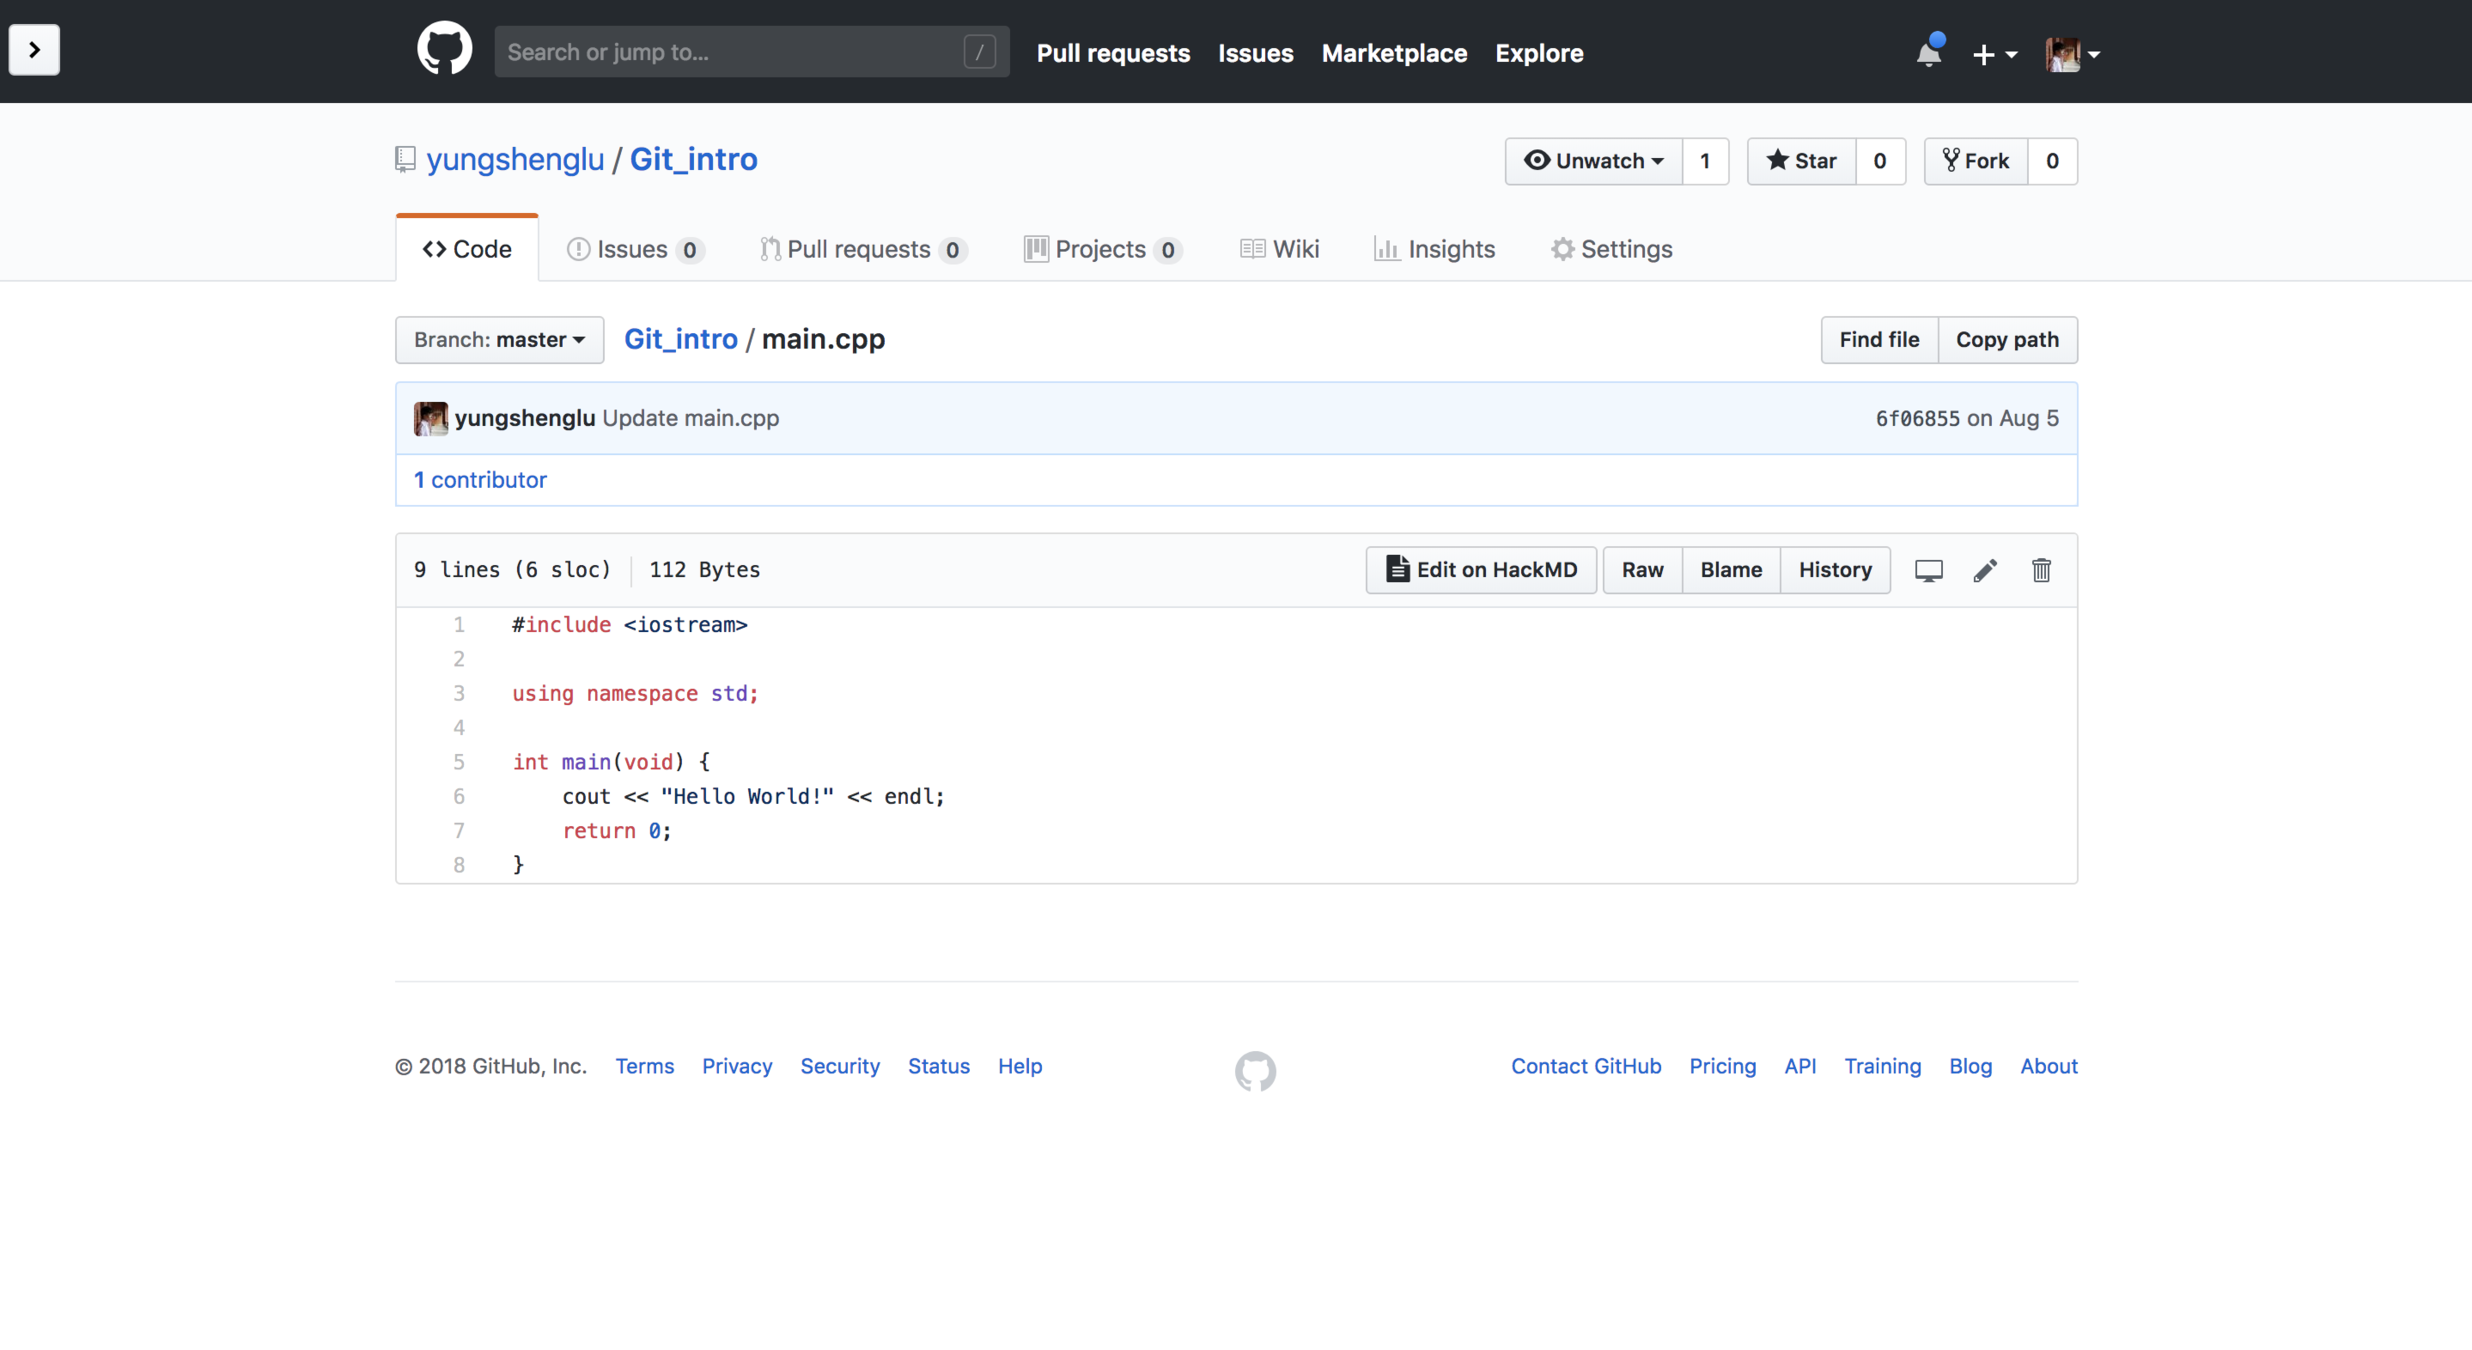
Git_intro修改第 6 行為:
cout << "Hello NSS!" << endl;Tips - 提交訊息 (commit message)
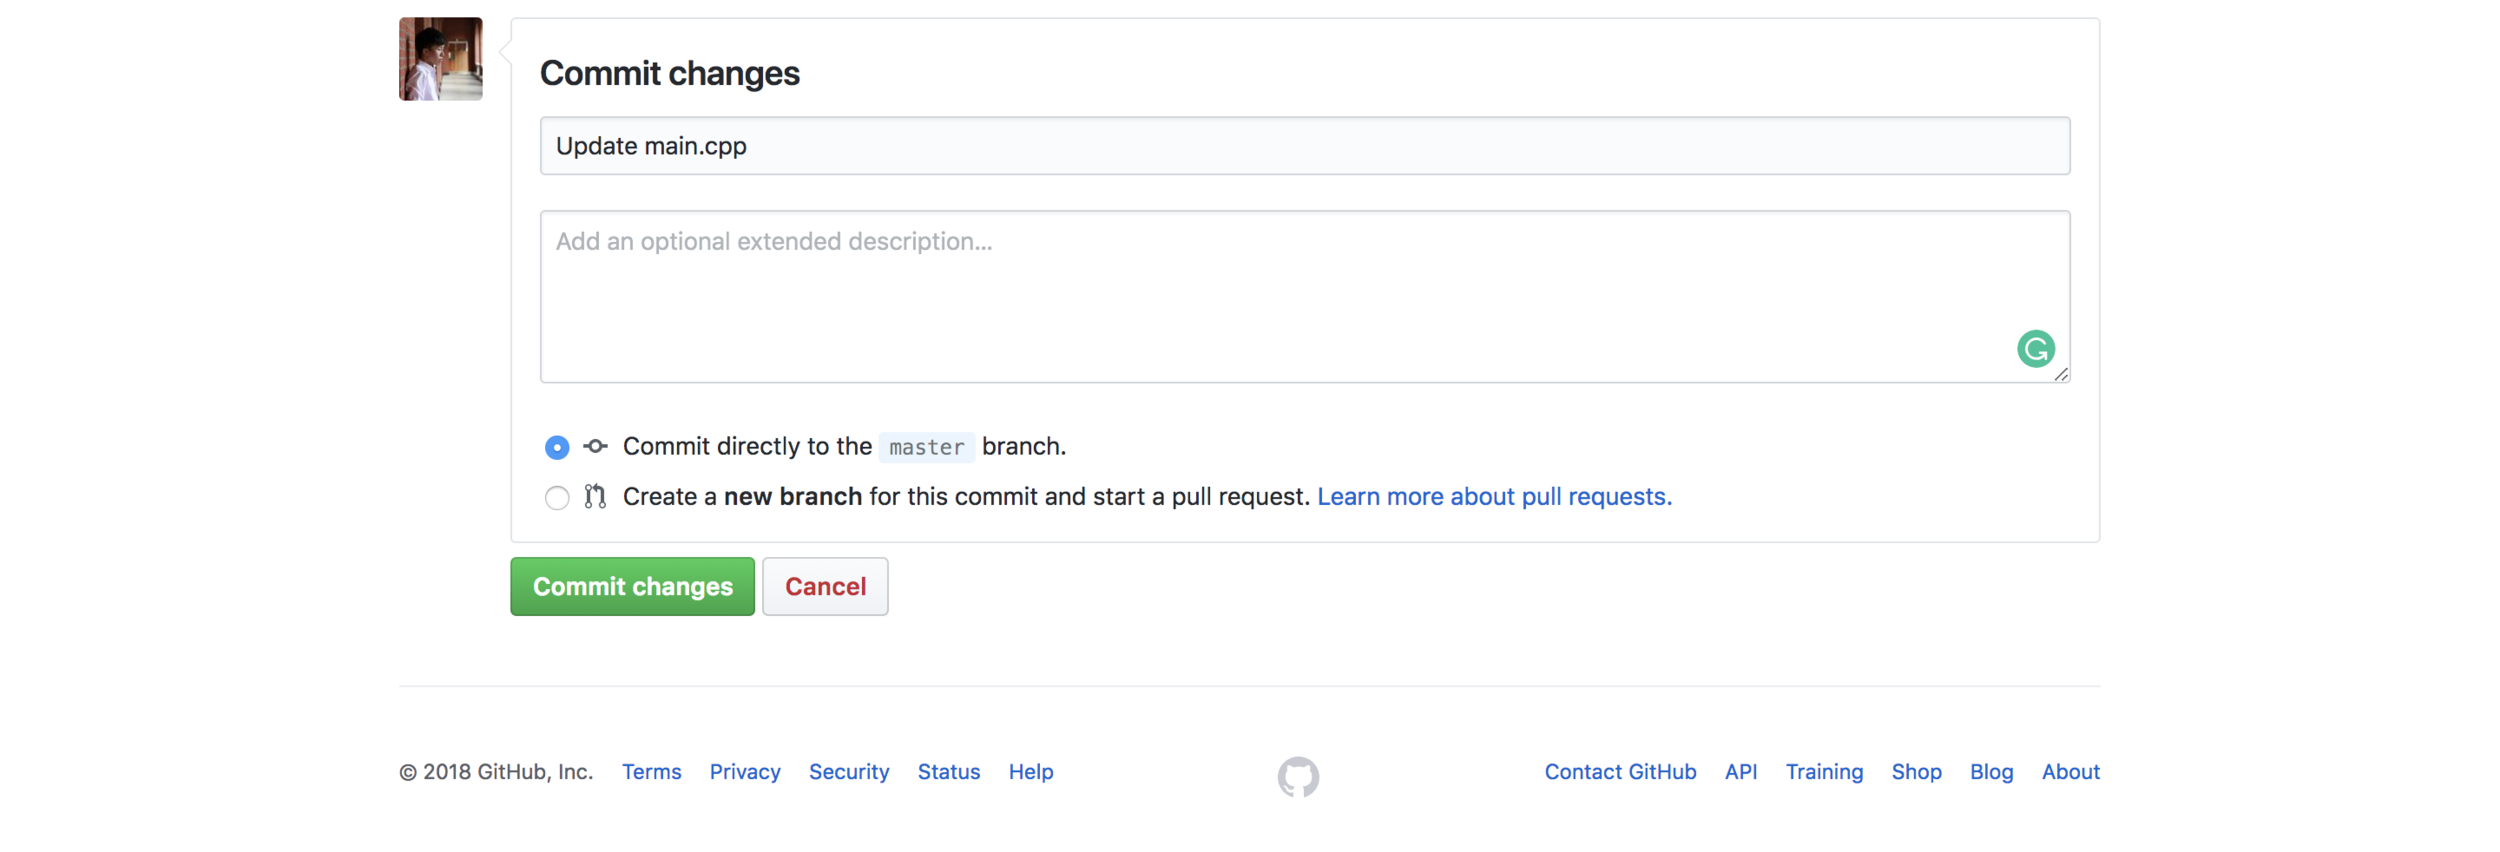
1
2
Tips - 撰寫較詳細的描述
Update main.cpp3
Tips - 示範用使用預設
開啟 repository 中的
編輯成以下內容
本地端提交流程
提示:Git add / Git commit / Git push
Git_intro以下操作以終端機為主!
main.cpp#include <iostream>
using namespace std;
int main(void) {
cout << "Hello" << endl;
return 0;
}Tips - 將 "Hello World!" 改為 "Hello"
衝突發生!
以下操作以終端機為主!
To https://github.com/<USERNAME>/Git_intro.git
 ! [rejected]        master -> master (fetch first)
error: failed to push some refs to 'https://github.com/<USERNAME>/Git_intro.git'
hint: Updates were rejected because the remote contains work that you do
hint: not have locally. This is usually caused by another repository pushing
hint: to the same ref. You may want to first integrate the remote changes
hint: (e.g., 'git pull ...') before pushing again.
hint: See the 'Note about fast-forwards' in 'git push --help' for details.
Tips - 不同步,拒絕推送遠端
Tips - 使用 Git pull
衝突發生點
以下操作以終端機為主!
Tips - 衝突檔案是
remote: Counting objects: 3, done.
remote: Compressing objects: 100% (3/3), done.
remote: Total 3 (delta 0), reused 0 (delta 0), pack-reused 0
Unpacking objects: 100% (3/3), done.
From https://github.com/yungshenglu/Git_intro
 * branch            master     -> FETCH_HEAD
   d197eb9..e969789  master     -> origin/master
Auto-merging main.cpp
CONFLICT (content): Merge conflict in main.cpp
Automatic merge failed; fix conflicts and then commit the result.main.cpp開啟檔案 並修正衝突
提示:在 === 上方是本地端的修改內容,在 === 下方是遠端的修改內容
本地端提交流程
以下操作以終端機為主!
main.cpp#include <iostream>
using namespace std;
int main(void) {
<<<<<<< HEAD
cout << "Hello" << endl;
=======
cout << "Hello NSS!" << endl;
>>>>>>> e9697890f37e175c55ebca2447314a79e5b0c390
return 0;
}Branch 字典解釋:分支;支流;岔路。
分開儲存修改記錄,彼此不影響
同一 repository 能同時進行多個修改
第一次 commit 預設為 master branch
Branch 能再分開,也能合併
當發生問題時,更容易找到問題的源頭
Source: http://diagram.premamaz.com/github-workflow-diagram/
Integration branch
主要的分支,即為「樹幹」
Topic branch
Source: http://diagram.premamaz.com/github-workflow-diagram/
Tips - master 為 integration
Git branch
開啟終端機並切換路徑至 下
建立 issue 分支
# git branch <BRANCH_NAME>
$ git branch issue
以終端機操作為例!
git-demo/$ git branch
issue
* mastermaster
issue
HEAD
Git checkout
切換到 issue 分支
如何建立新分支後並切換過去?
# git checkout <BRANCH_NAME>
$ git checkout issue
Switched to branch 'issue'
以終端機操作為例!
master
issue
HEAD
HEAD
# git checkout -b <BRANCH_NAME>
$ git checkout -b issue
issue
Switched to branch 'issue'Git add
新增 並加入至 Git repository
Git commit
撰寫提交訊息 (commit message)
# git add <FILENAME>
$ git add test.cpptest.cpp以終端機操作為例!
# git commit -m "<COMMIT_MESSAGE>"
$ git commit -m "Add test.cpp"
master
issue
HEAD
issue
HEAD
Git merge
切換至 master 分支
合併其他分支至當前所在的分支
# git merge <BRANCH_NAME>
$ git merge issue
Updating a08f752..9922f03
Fast-forward
 test.cpp | 0
 1 file changed, 0 insertions(+), 0
deletions(-)
 create mode 100644 test.cpp
以終端機操作為例!
master
HEAD
issue
HEAD
# git checkout <BRANCH_NAME>
$ git checkout master
master
HEAD
Tips - Fast-forward 快轉合併
以終端機操作為例!
issue1
master
HEAD
建立兩個新的分支為 issue1 和 issue2
切換至 issue1 分支
查看目前所有的分支
$ git branch -d issue1
$ git branch -d issue2
$ git checkout issue1
Switched to branch 'issue1'$ git branch
* issue1
issue2
masterissue2
HEAD
以終端機操作為例!
issue1
master
修改 為以下內容
將 的修改加至 repository 並提交
#include <iostream>
using namespace std;

int main(void) {
    cout << "Hello world!" << endl;
    return 0;
}
issue2
HEAD
test.cpptest.cpp$ git add test.cpp
$ git commit -m "Hello world"issue1
以終端機操作為例!
master
切換至 issue2 分支
修改 為以下內容
將 的修改加至 repository 並提交
#include <iostream>
using namespace std;

int main(void) {
    cout << "Hello NSS!" << endl;
    return 0;
}
issue2
HEAD
test.cpptest.cpp$ git add test.cpp
$ git commit -m "Hello NSS"issue1
$ git checkout issue2issue2
以終端機操作為例!
master
切換至 master 分支
合併 issue1 分支至 master 分支
合併 issue2 分支至 master 分支
$ git merge issue1HEAD
$ git merge issue2
Auto-merging test.cpp
CONFLICT (content): Merge conflict in test.cpp
Automatic merge failed; fix conflicts and then
 commit the result.
issue1
$ git checkout masterissue2
HEAD
master
HEAD
Tips - 合併衝突訊息 (conflict message)
以終端機操作為例!
開啟 會看到以下內容
刪除 中的以下內容
#include <iostream>
using namespace std;

int main(void) {
<<<<<<< HEAD
    cout << "Hello world!" << endl;
=======
    cout << "Hello NSS!" << endl;
>>>>>>> issue2
    return 0;
}test.cppTips - 在 == 上方是master修改內容
Tips - 在 == 下方是issue2修改內容
test.cpp<<<<<<< HEAD
=======
>>>>>>> issue2以終端機操作為例!
加入並再次提交
issue1
$ git add .
$ git commit -m "Merge issue2"
# On branch master
nothing to commit (working directory clean)
issue2
master
HEAD
master
HEAD
Tips - non fast-forward 非快轉合併
以終端機操作為例!
Git rebase
取消上一步的合併,切換至 issue2 分支
對 master 分支進行 rebase
$ git reset --hard HEAD~
$ git checkout issue2
$ git rebase masterFirst, rewinding head to replay your work on top of it...
Applying: Hello world
Using index info to reconstruct a base tree...
<stdin>:13: new blank line at EOF.
+
warning: 1 line adds whitespace errors.
Falling back to patching base and 3-way merge...
Auto-merging test.cpp
CONFLICT (content): Merge conflict in test.cpp
Failed to merge in the changes.
Patch failed at 0001 Hello world
When you have resolved this problem run "git rebase --continue".
If you would prefer to skip this patch, instead run "git rebase --skip".
To check out the original branch and stop rebasing run "git rebase --abort".Tips - 合併衝突訊息 (conflict message)
以終端機操作為例!
開啟 會看到以下內容
刪除 中的以下內容
#include <iostream>
using namespace std;

int main(void) {
<<<<<<< HEAD
    cout << "Hello world!" << endl;
=======
    cout << "Hello NSS!" << endl;
>>>>>>> issue2
    return 0;
}test.cpptest.cpp<<<<<<< HEAD
=======
>>>>>>> issue2Tips - 在 == 上方是master修改內容
Tips - 在 == 下方是issue2修改內容
以終端機操作為例!
Git rebase --continue
加入並繼續 rebase 動作
指令說明
繼續 rebase 動作,使用
取消 rebase 動作,使用
$ git add .
$ git rebase --continue
Applying: Hello world--continue--abortissue1
issue2
master
HEAD
issue2
HEAD
以終端機操作為例!
切換至 master 分支並合併 issue2 分支
issue1
master
HEAD
issue2
HEAD
$ git checkout master
Switched to branch 'master'
$ git merge issue2
master
接下來,遠端的分支如何操作呢?
不同步問題 - 遠端超前本地端,沒衝突直接合併
Remote repository
A
B
M
N
Local repository
A
B
master
origin/master
Remote repository
A
B
M
N
Local repository
A
B
master
origin/master
M
N
Git pull
自動合併
不同步問題 - 遠端超前本地端,沒衝突直接合併
Remote repository
A
B
M
N
Local repository
A
B
master
origin/master
Remote repository
A
B
M
N
Local repository
A
B
master
origin/master
C
D
Git pull
Tips - 若有衝突,需先解決衝突再手動提交
沒有衝突?
C
D
E
master
Local repository
不同步問題 - 遠端超前本地端,本地端建立遠端分支
Remote repository
A
B
M
N
Local repository
A
B
origin/master
Git fetch
Tips - pull = fetch + merge
master
C
D
HEAD
Local repository
M
N
A
B
master
origin/master
C
D
E
master
FETCH_HEAD
Fast-forward 合併
當衝突發生,push 會被拒絕
Non fast-forward 合併
Push 會被拒絕,以防止覆蓋
必須先 pull 最新的遠端變更,在進行 push
還有嗎?
當然有!
但是,等用到再自己學吧!
Git tag 的操作
Git commit 進階操作
e.g., 修改, 取消, 刪除, 提取, etc.
當然不只這些...
等有用到在自己學吧!
Official Documentation
中文說明教學
Online Practice
Society
GitHub with MathJax
Renders GitHub equations with MathJax
Isometric Contributions
Renders an isometric pixel view of GitHub contribution graphs
Email
yungshenglu1994@gmail.com
GitHub
@yungshenglu
Q & A
By David Lu
This slide is using for sharing basic tutorial on Git


