Node.js Development In Windows
Álvaro José Agámez Licha
Fullstack Developer at Zagalabs
Ok, so, are you here to tell me good things about that horrible M$cro$oft operative system?

Let's Start
Windows is not horrible, yes it's true, and it's not perfect, yes it's also true, it's simply different from other operating systems, although it was not the most friendly for developers, but...
Windows 10 has implemented several useful tools for developers and users, and third-party tools help make developers' lives easier, more productive, and more comfortable.
Motivation
Windows was my second operative system, my first one was MS-DOS, so I have 26 years working with Windows, from Windows 3.1 to Windows 10.
I also worked with OSX (2 years aprox) and 100% of my time on Linux (4 years aprox) so I have experience with other operative system too.
Motivation
I always wanted to work on Windows in the most easy and comfortable way, but until WSL this was a titanic job and sometimes a impossible one, specially when I had to work with native Node.js modules or Ruby.
But with my efforts to learn how to work on Windows I learned how to overcome some problems and learn more about inner Windows functionalities.
Motivation
In recent years I was working 100% on Linux and this was a completely traumatic experience the first days (maybe weeks) but I forced to myself to learn Linux, so with time I was used to solve the common problems on Linux (drivers, VPNs, missing dependencies, etc), but I leave something important behind, my gamer spirit, because to play on Linux is possible, but not the most pleasant experience.
Motivation
After regaining my gamer spirit, I double boot my current laptop so I could play video games (I travel, sometimes for months, so carrying two laptops is not an option), but while working on my last project, the client VPN was really complicated to set up. At the same time my Linux boot system stopped working so I decide to go back to Windows again and after the WSL 2 release I just don't want to go back to Linux again.
Advices
- Learn about Windows, especially Powershell and how to perform tasks that sometimes you can't do through the user interface or maybe are easier in the console.
- NEVER, EVER use a user with administrator privileges to work; most security issues are mitigated using a standard user.
- Always use WSL 2, except if you are working on Windows applications.
- Learn to use the shortcuts.
- Use the Windows tools, there are a lot preinstalled.
- Easy to use Package Manager.
- Multiple virtual desktops.
- Easy to use Window Snapping.
- Easy to use Snipping Tool (yes, we always will need some screenshots).
- Timeline.
- Windows Terminal.
- Windows Subsytem For Linux Version 2 (WSL2 for the friends).
- Docker.
- Microsoft PowerToys.
Agenda

And you can also do it in Windows
An Easy to use Package Manager
Developers love package managers to quickly find and install third-party applications. In Windows the developers have at their disposal different package managers, Chocolatey and Scoop are very good options, in this talk I will show you Scoop.
PS C:\> Set-ExecutionPolicy RemoteSigned -scope CurrentUser
PS C:\> iwr -useb get.scoop.sh | iex
An Easy to use Package Manager
PS C:\> scoop install git nvm
PS C:\> scoop uninstall git nvm
PS C:\> scoop list
Scoop is really easy to use, and you can install a lot of useful packages.
An Easy to use Package Manager
PS > & "C:/path/to/the/script/scoop-environment-setup.ps1"You can use an automatic script with all the packages you need to install and configurate your development environment in a breeze.
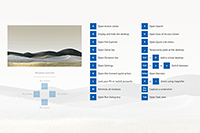
Multiple Virtual Desktops
I find this feature extremely useful. Imagine that you want to have multiple desktops configured with certain apps, etc and be able to toggle through them as needed.
Virtual desktops are very straightforward in Windows, you can use the keyboard or the mouse to use them.
Multiple Virtual Desktops
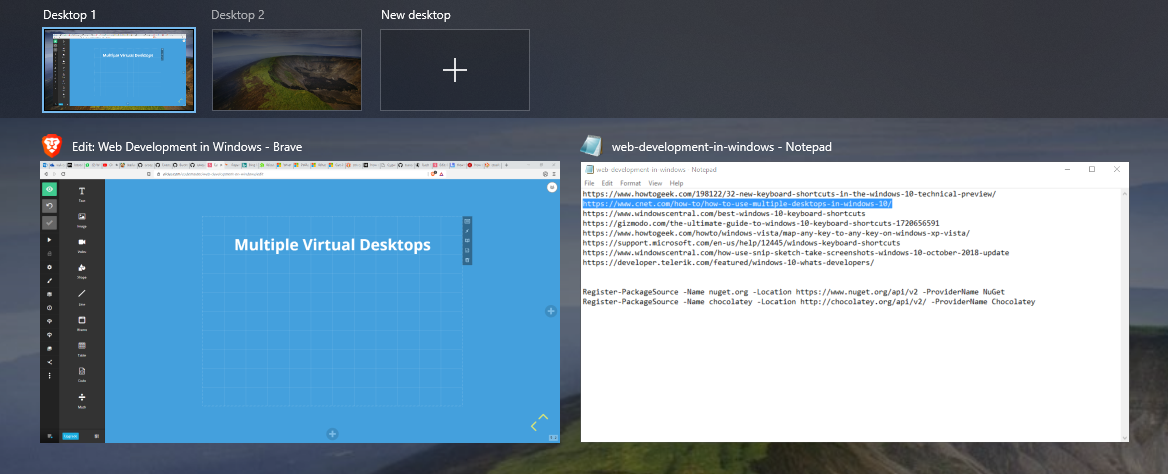
You can click in the Task View icon in the taskbar (or use Windows Key + Tab) to access the virtual desktops panel, and create, modify or delete them.
Multiple Virtual Desktops
But I really prefer to do it with the keyboard, to add a Virtual Desktop use the shortcut Windows Key + Ctrl + D.
To Delete a virtual desktop with the keyboard you can use Windows Key + Ctrl + F4.
To switch from one virtual desktop to another you can use Windows Key + CTRL + Left arrow and Windows key + CTRL + Right arrow.
Multiple Virtual Desktops

To move application between virtual desktop, you have to do it through the Task View panel.
Window Snapping
Snap, a windows management technique, has some cool new features in Windows 10. You can now snap windows vertically—one on top of each other, instead of side-by-side—or snap windows to a 2×2 grid.
Window Snapping
- Windows Key + Left arrow: Snap current window to the left side of the screen.
- Windows Key + Right arrow: Snap current window the the right side of the screen.
- Windows Key + Up arrow: Snap current window to the top of the screen.
- Windows Key + Down arrow: Snap current window to the bottom of the screen.
Snipping Tool
Sometimes we need some screenshots, for example to share it with a colleague or to report some bug; Windows have a cool an easy to use Snipping tool. Just type snipping with the global search option (like Synapse in Linux or Alfred or Spotlight in OS X); use Windows key + S to access the global search option.
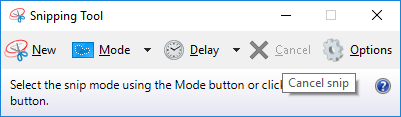
Snipping Tool
At this point, you should know that there are four types of snips provided by the tool.
- Free Form Snip: You can draw a line or anything as per your need around the area that you want to capture.
- Rectangular Snip: Here you have to hold and drag the cursor around the area to form a rectangular snip.
- Window Snip: This option will allow you to capture a dialog box or a browser window.
- Full – Screen Snip: It will capture the full screen.
Snipping Tool
But there is more, if this Snipping tool is good, the new Windows 10 Snipping tool is even better, to access it you must press Windows key + Shift + S or searching by the name Snip & Sketch; this is the ultimate Snipping tool in Windows.
Timeline
Windows 10’s Timeline feature helps answer the question: what was I working on? This handy, optional feature can track what documents and Web pages you’ve been working on over the past weeks and months, organizing them into a collection of documents you can quickly open to pick up where you left off.
Timeline
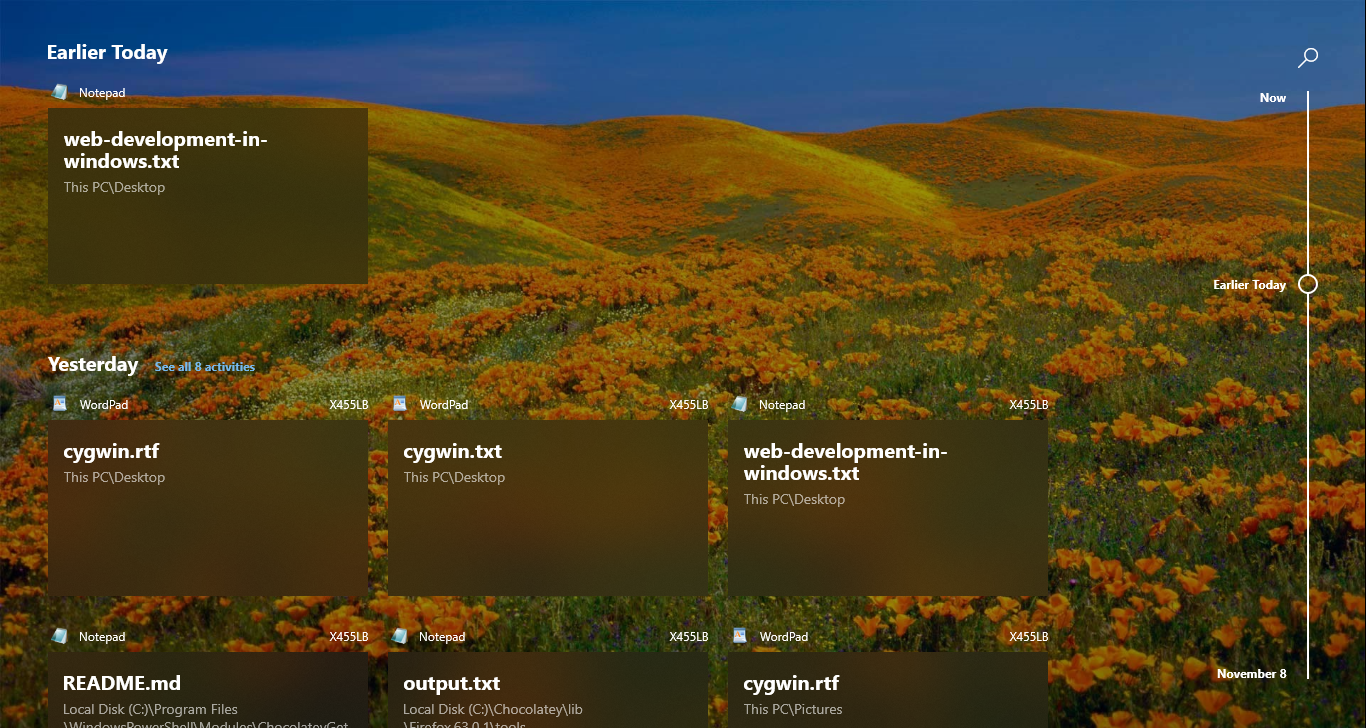
To use Timeline you have to click Task View icon in the taskbar (or use Windows Key + Tab).
How to enable and disable Timeline
Windows assumes that you want Timeline turned on. If you don’t, or you’d like to manage how Microsoft uses your information, visit the Settings menu at Settings > Privacy > Activity History.
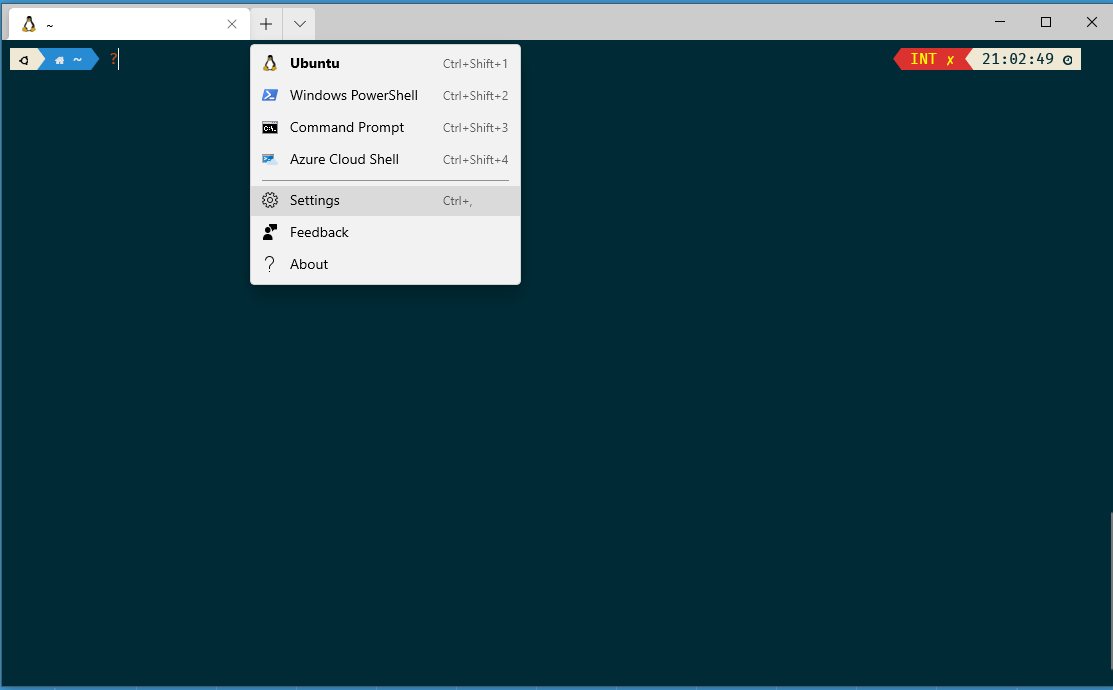
Windows Terminal
Windows Terminal is a new, modern, feature-rich, productive terminal application for command-line users. It includes many of the features most frequently requested by the Windows command-line community including support for tabs, rich text, globalization, configurability, theming & styling, and more.
Windows Terminal
Configuring Windows Terminal is not the most pleasant task, you have to do it directly in the configuration file, although this will change in future versions.
Windows Terminal
Go to the dropdown menu and choose the Settings option.
Windows Terminal
// For documentation on these settings, see: https://aka.ms/terminal-documentation
{
  "$schema": "https://aka.ms/terminal-profiles-schema",
  // I set WSL like my default profile - aagamezl
  "defaultProfile": "{2c4de342-38b7-51cf-b940-2309a097f518}",
  "profiles": {
    "defaults": {
    },
    "list": [
      {
        // Make changes here to the wsl.exe profile.
        "guid": "{2c4de342-38b7-51cf-b940-2309a097f518}",
        "hidden": false,
        "name": "Ubuntu",
        // We need to set a good color scheme - aagamezl
        "colorScheme": "Solarized Dark",
        // We need to set our cool font - aagamezl
        "fontFace": "FuraMono Nerd Font",
        "fontSize": 11,
        "source": "Windows.Terminal.Wsl",
        // This line set the initial path to the user's home directory - aagamezl
        "commandline": "wsl.exe ~"
      },
    ]
  },
}
Windows Terminal
To see the available color schemes and also to learn how to create our own color schemes, you have to go to the default settings section, for this we must press the Alt key before selecting the Settings option.
Additionally we can obtain new color schemes at _TerminalSplash.
Windows Subsytem For Linux
The Windows Subsystem for Linux lets developers run GNU/Linux environment (including most command-line tools, utilities, and applications) directly on Windows, unmodified, without the overhead of a virtual machine.
-
Enable-WindowsOptionalFeature -Online -FeatureName Microsoft-Windows-Subsystem-Linux
-
dism.exe /online /enable-feature /featurename:VirtualMachinePlatform /all
-
Download and install WSL 2 Linux Kernel.
-
wsl.exe --set-default-version 2
-
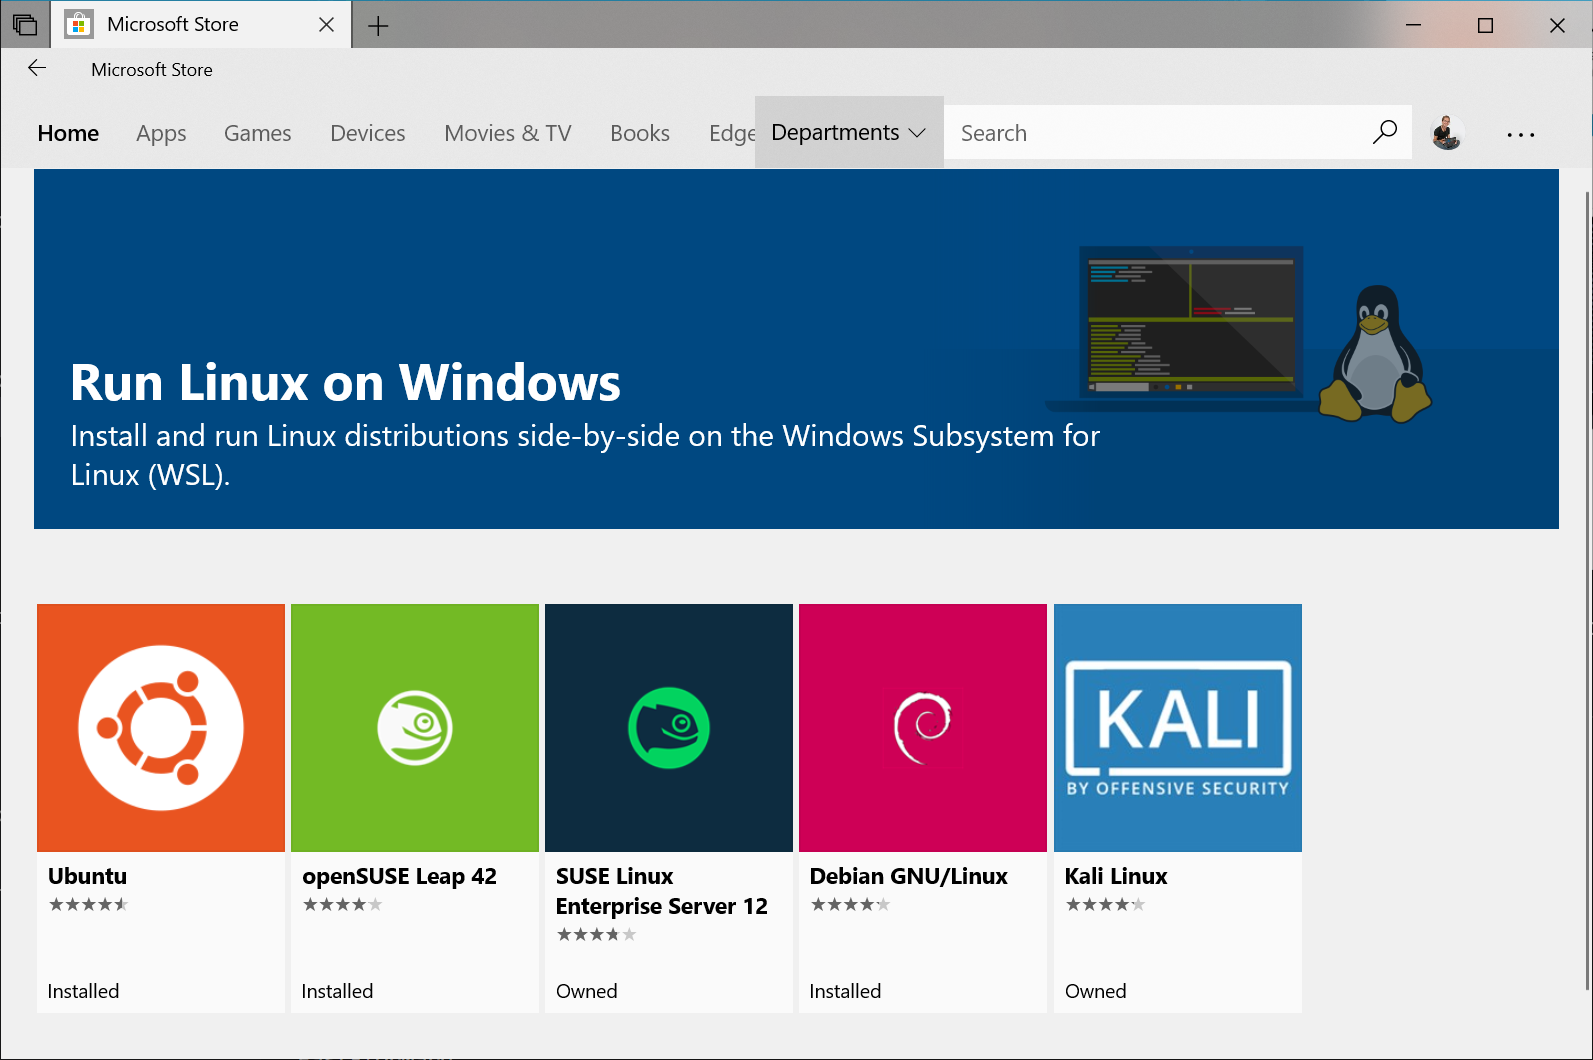
Download a Linux Distro from Windows Store (I use Ubuntu LTS).
-
Lauch your Distro and create you user in WSL (If you get error "WslRegisterDistribution failed with error: 0x8000000d", execute step 1 again).
-
Verify if the installed version is running in version 2 with wsl -l -v, if not, execute this command: wsl.exe --set-version Ubuntu 2
WSL 2
WSL
Open the Microsoft Store and choose your favorite Linux distribution.
WSL
$ sudo apt-get install tmux zshIf you like tmux too and want more information about how to use it, this tutorial is a good starting point.
WSL
To make zsh your default shell you have to edit the ~/.bashrc file and add the following to the beginning of the file:
$ vim ~/.bashrc

# if running in terminal...
if test -t 1; then
    # ...start zsh
    exec zsh
fi

$ source ~/.bashrc
WSL
Now we need to install and configure Oh My Zsh, powerlevel10k theme, FuraMono font and some plugins:
$ sh -c "$(curl -fsSL https://raw.github.com/ohmyzsh/ohmyzsh/master/tools/install.sh)"

$ git clone https://github.com/romkatv/powerlevel10k.git ~/.oh-my-zsh/themes/powerlevel10k

$ git clone https://github.com/zsh-users/zsh-autosuggestions.git ~/.oh-my-zsh/plugins/zsh-autosuggestions

$ git clone https://github.com/zsh-users/zsh-syntax-highlighting.git ~/.oh-my-zsh/plugins/zsh-syntax-highlighting
WSL
Now we need to assign our theme, plugins and later we configure the theme inself.
$ vim ~/.zshrc
export TERM="xterm-256color"
ZSH_THEME="powerlevel10k/powerlevel10k"
POWERLEVEL9K_MODE="nerdfont-complete"

ENABLE_CORRECTION="true"

plugins=(git zsh-autosuggestions zsh-syntax-highlighting)

$ source ~/.zshrc
$ p10k configure
WSL
Now we can install and use different versions of Node.js using NVM.
$ curl -o- https://raw.githubusercontent.com/nvm-sh/nvm/v0.35.3/install.sh | bash

$ vim ~/.zshrc

export NVM_DIR="$HOME/.nvm"
[ -s "$NVM_DIR/nvm.sh" ] && \. "$NVM_DIR/nvm.sh"  # This loads nvm
[ -s "$NVM_DIR/bash_completion" ] && \. "$NVM_DIR/bash_completion"  # This loads nvm bash_completion

$ source ~/.zshrc
WSL
Now we need to configure VS Code, a mandatory extension is Remote - WSL, this extension is necessary to work with WSL, but personally I recommend Settings Sync and Project Dashboard, the first to synchronize our configuration and the last to create shortcuts to our projects.
WSL
Sometimes the network between WSL image and Windows stop to work, please execute this command to fix this:
PS > wsl --shutdownDocker
Before WSL 2, working with Docker on Windows was not a very easy option, but now everything works like a charm, thanks to the fact that WSL 2 actually includes a full Linux kernel and Microsoft worked hand by hand with the Docker Team to make this integration possible.
The first step is download and install Docker Desktop 2.3.0.2 or a later release and restart your computer.
Docker
Now we need to add our local user to the docker-users group to be able to run Docker Desktop. To do this we need to run the following commands in a Powershell console with administrator privileges.
# With this Powershell command we get our username
PS > Get-LocalGroupMember -Group "Users"

PS > Add-LocalGroupMember -Group "docker-users" -Member "COMPUTER-ID\username"
Docker
Because we will Docker with a standard user, we need to execute docker-compose with sudo inside WSL.
$ sudo docker-compose up -dPowerToys
Microsoft PowerToys is a set of utilities for power users to tune and streamline their Windows experience for greater productivity. Inspired by the Windows 95 era PowerToys project, this reboot provides power users with ways to squeeze more efficiency out of the Windows 10 shell and customize it for individual workflows.
PowerToys
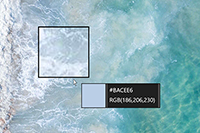

ColorPicker is a simple and quick color picker with Win+Shift+C. Color Picker allows to pick colors from any currently running application and automatically copies the HEX or RGB values to your clipboard.
FancyZones is a window manager that makes it easy to create complex window layouts and quickly position windows into those layouts.
File Explorer add-ons will enable SVG icon rendering and Preview Pane additions for File Explorer.
PowerToys
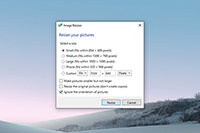
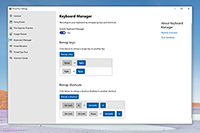
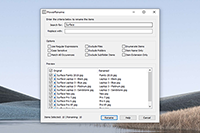
Image Resizer is a Windows Shell Extension for quickly resizing images. With a simple right click from File Explorer, resize one or many images instantly.
Keyboard Manager allows you to customize the keyboard to be more productive by remapping keys and creating your own keyboard shortcuts.
PowerRename is a Windows Shell Extension for advanced bulk renaming using search and replace or regular expressions.
PowerToys
PowerToys Run is a new toy in PowerToys that can help you search and launch your app instantly with a simple Alt+Space and start typing! It is open source and modular for additional plugins.
Windows key shortcut guide appears when a user holds the Windows key down for more than one second and shows the available shortcuts for the current state of the desktop.

Ready to Write Some Great Code
Node.js Development In Windows
By Alvaro Agamez
Node.js Development In Windows
Developing Node.js projects on Windows has not always been welcomed by many developers, sometimes due to inexperience with the operating system; my goal is to demystify this concept and show how this aspect has changed in recent years, showing the necessary tools to do it in the best way.


