iOS200
iOS Platform Development - Intermediate
Day 2
In the last class we learned...
- How to implement objective-c protocols & delegates
- Prebuilt Foundation Library Protocols
- UITextview
- UITableView
- Defined our own custom protocol
- Dexter Delegate
- How UITableView works in iOS
- Protocols & Delegates
-
UITableViewDataSource
- UITableViewDelegate
- Prototype Cells
Quiz
- (UITableViewCell *)tableView:(UITableView *)tableView cellForRowAtIndexPath:(NSIndexPath *)indexPath;Is an example of a... ?
Quiz
- (UITableViewCell *)tableView:(UITableView *)tableView cellForRowAtIndexPath:(NSIndexPath *)indexPath;Uses the ... protocol
Quiz
All methods declared in a protocol are required to be implemented by their delegates.
True or false?
Quiz
How does one assign a class to use a specific protocol?
Quiz
What does the following method do?
UITableViewCell *cell = [tableView dequeueReusableCellWithIdentifier:@"IconCell" forIndexPath:indexPath];Todays Agenda
- Learn how to implement
- Storyboards
- Segues
- UINavigationController
- UITabBarController
- UITableViewController
- Prototype Cells
- Custom Cells
- UITableViewCell Subclassing
- Single Table Views
What is a Storyboard?
- Allows multiple screen interfaces to be created and edited in a single view
- Provides developers a graphical interface for linking multiple views and interface elements to establish the apps flow
- Provides a simple way to create unique interfaces for universal apps
Storyboards Cont.
- Storyboards make working with table views a lot easier with the new prototype cells and static cells features. You can design your table views almost completely in the storyboard editor, something else that cuts down on the amount of code you have to write.
- The storyboard describes the transitions between the various screens. These transitions are called “segues” and you create them by simply ctrl-dragging (or right clicking) from one view controller to the next. Thanks to segues you need less code to take care of your UI.
What is a segue?
- A segue is the transition from one scene (view) to another within a storyboard
- Instantiate the destination view controller
- Present the destination view controller with the chosen transition style
- Transition Styles:
- Push
- Modal
- Custom
- Can be triggered:
- On a specific event (button push)
- On demand (programmatically)
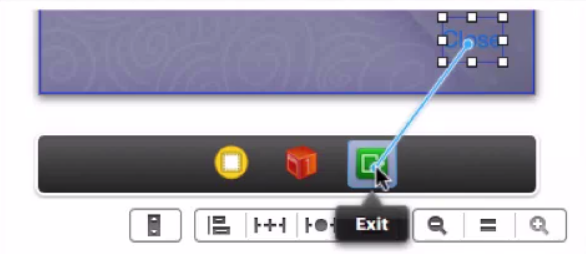
Exit Segues
- Special type of segue
- Dismisses the current view controller
- Calls a method on the parent view controller
- Special green button in View Controller to connect
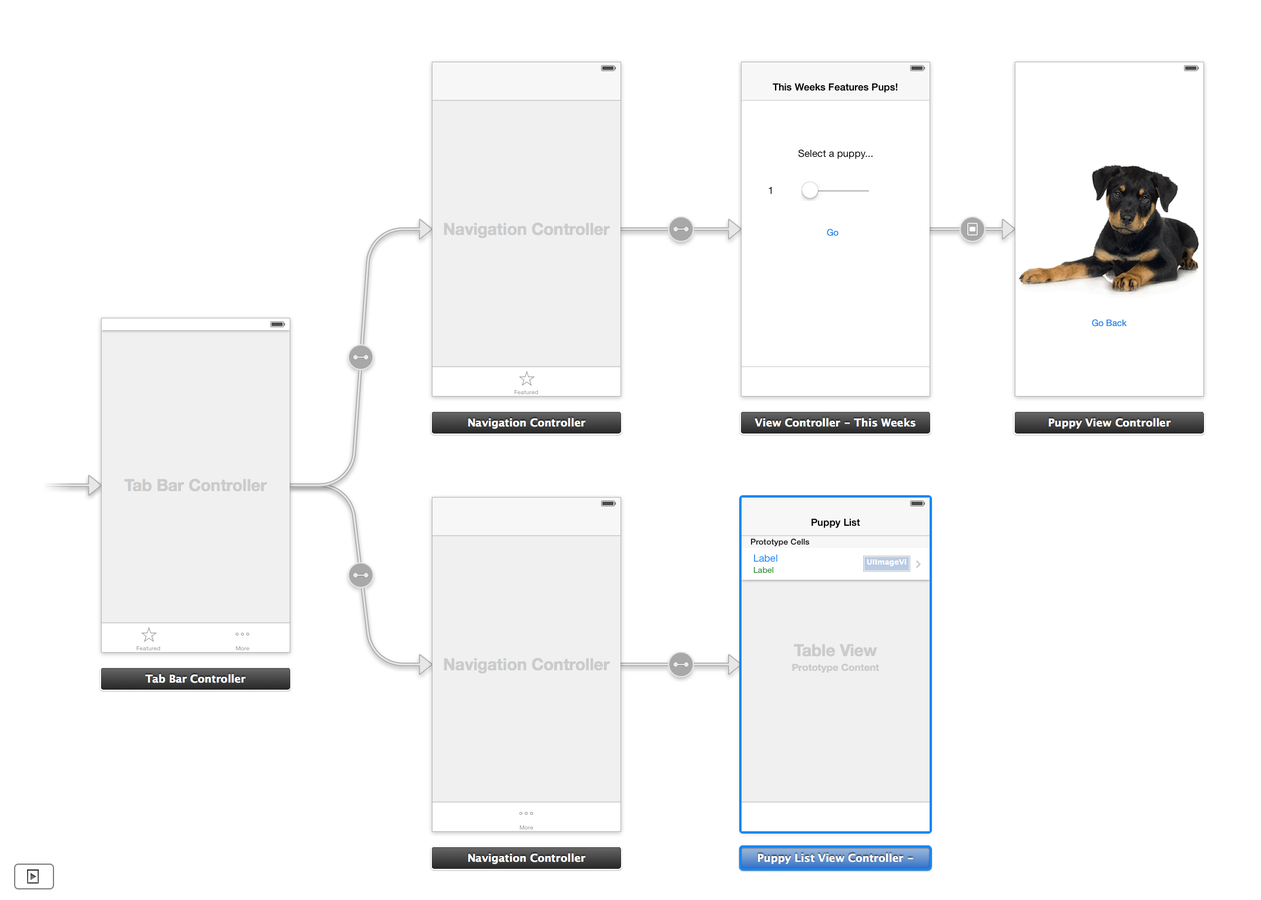
Exercise 2:
"PuppyPicker"
Download the code:
Goal
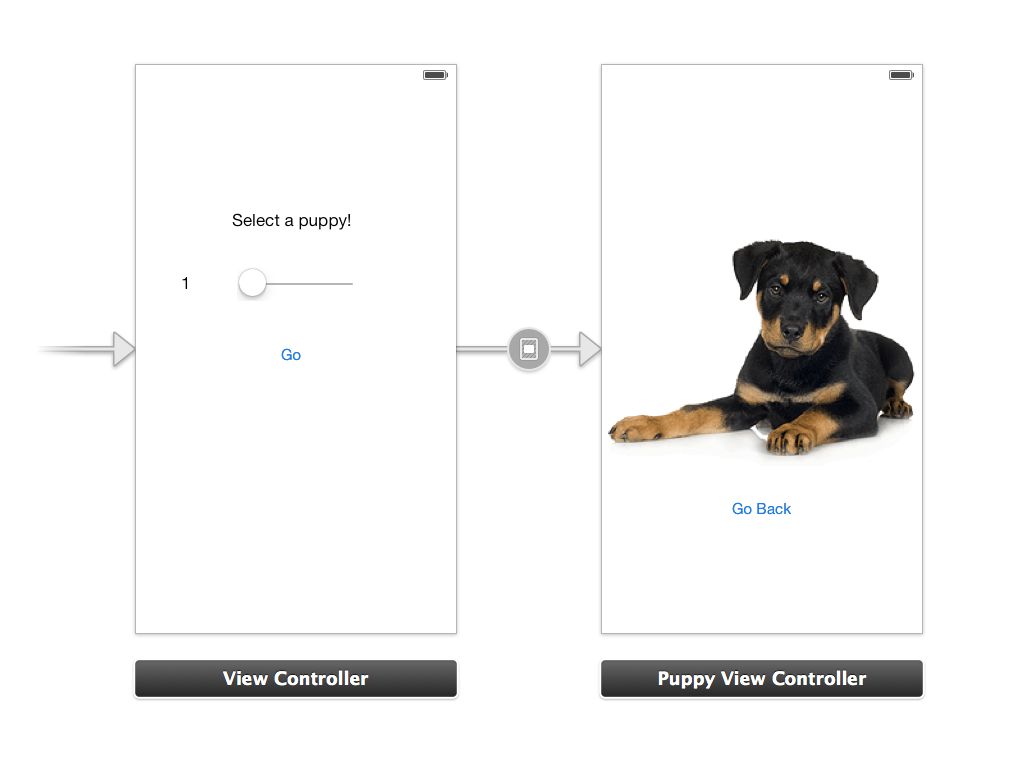
Be able to display a unique puppy in a separate view based on the slider value
Navigation Controllers
- Allow developers to create a hierarchy of views and "drill down" into different levels of an app
- Setup with root view controller
- FIFO Stack
- PushViewController
- PopViewController
- Push Segue
Navigation Controllers Cont.
- ViewController have access to parts of their navigation controller
- self.navigationViewController
- self.navigationItem.title
- self.navigationItem.leftBarButtonItem
- self.navigationItem.rightBarButtonItem
- And more...
Exercise 2 Continued:
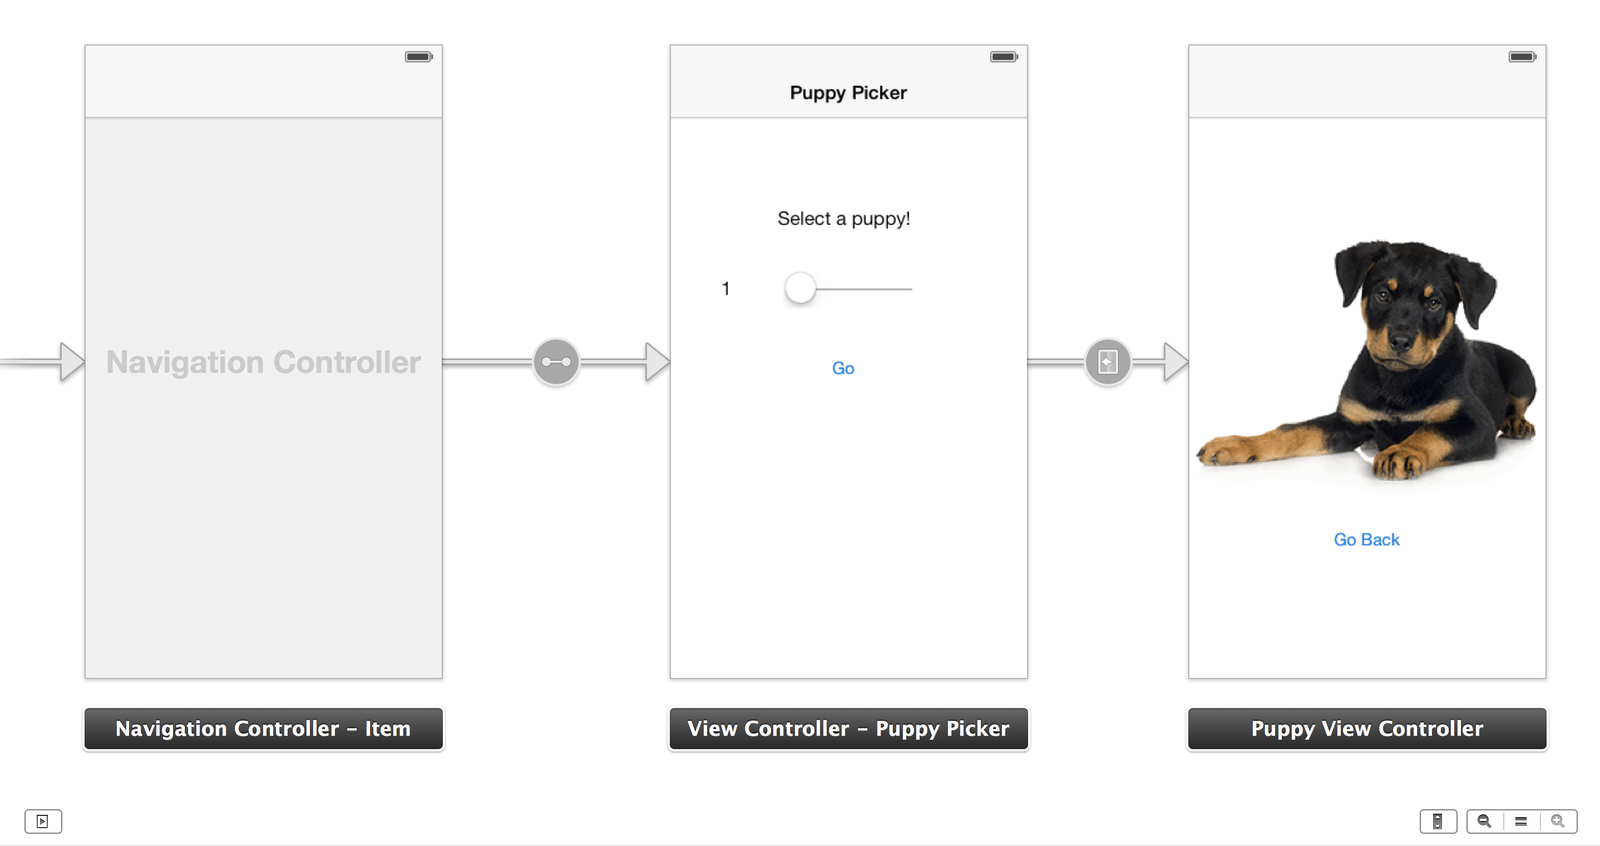
Lets add a navigation controller to PuppyPicker and give each puppy a name that shows in the navigation bar title
Tab Bar Controller
- Give you access to multiple peer views
- Should always be used as the initial view controller
- Limit of tab bar items is 5
- If you connect more than five scenes to the Tab Bar Controller, it automatically gets a More "…" tab when you run the app.
- Tabs can have badges
Tab Bar Controllers Cont.
- UIViewControllers have access to parts of their Tab Bar Controller
- self.tabBarController
- self.tabBarItem.title
- self.tabBarItem.image
- self.tabBarItem.badgeValue
- And more...
Exercise 2 Continued
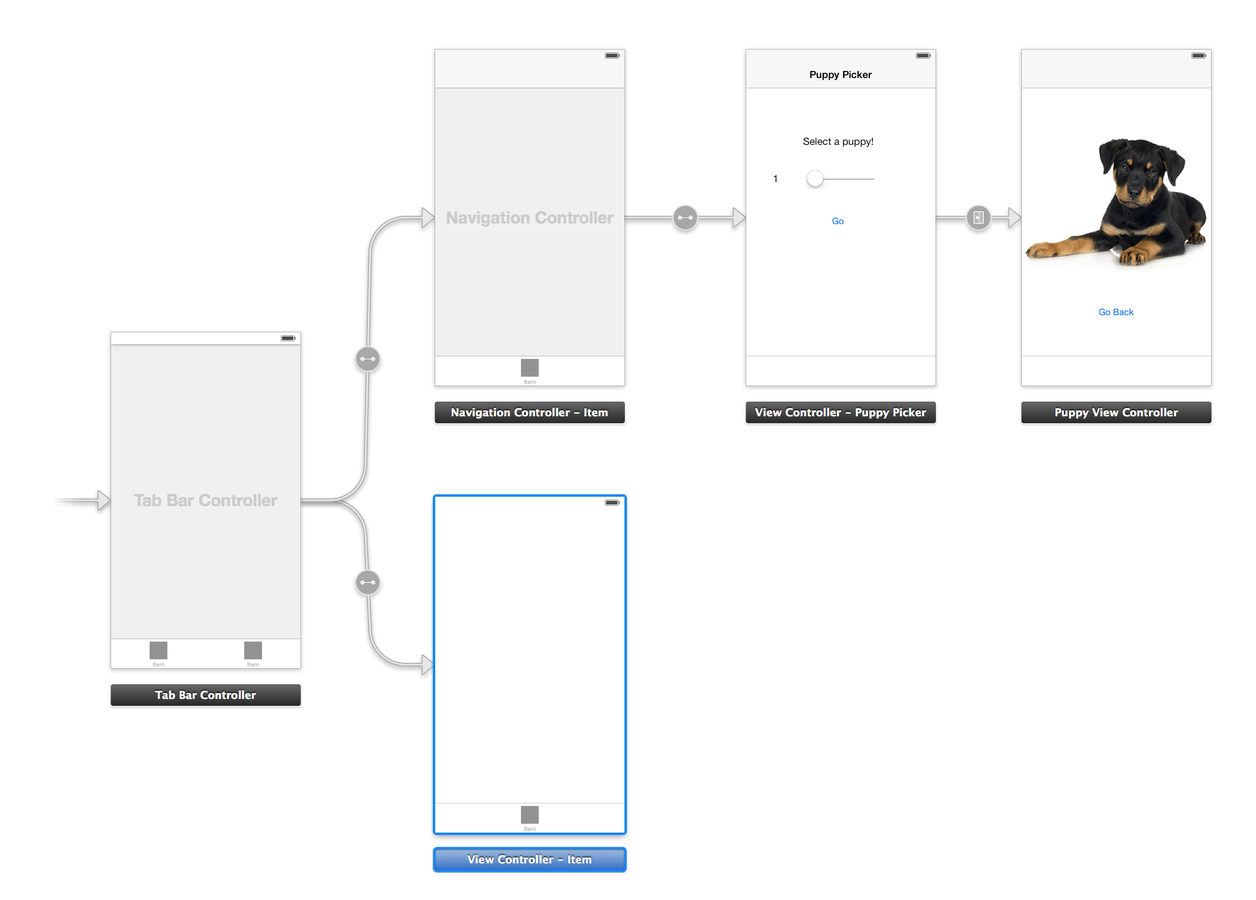
Lets add a tab bar controller to PuppyPicker
UITableView Review
-
There are two types of table views: plain and grouped.
- A plain table view consists of a single list of items.
- A grouped table view can have multiple sections, with customizable section headers and footers.
- Uses 2 Protocols:
- UITableViewDataSource: What is your data?
- UITableViewDelegate: Events & Customizations
Exercise 2 Continued
Lets add a second tab that contains a plain table view
Getting Started...
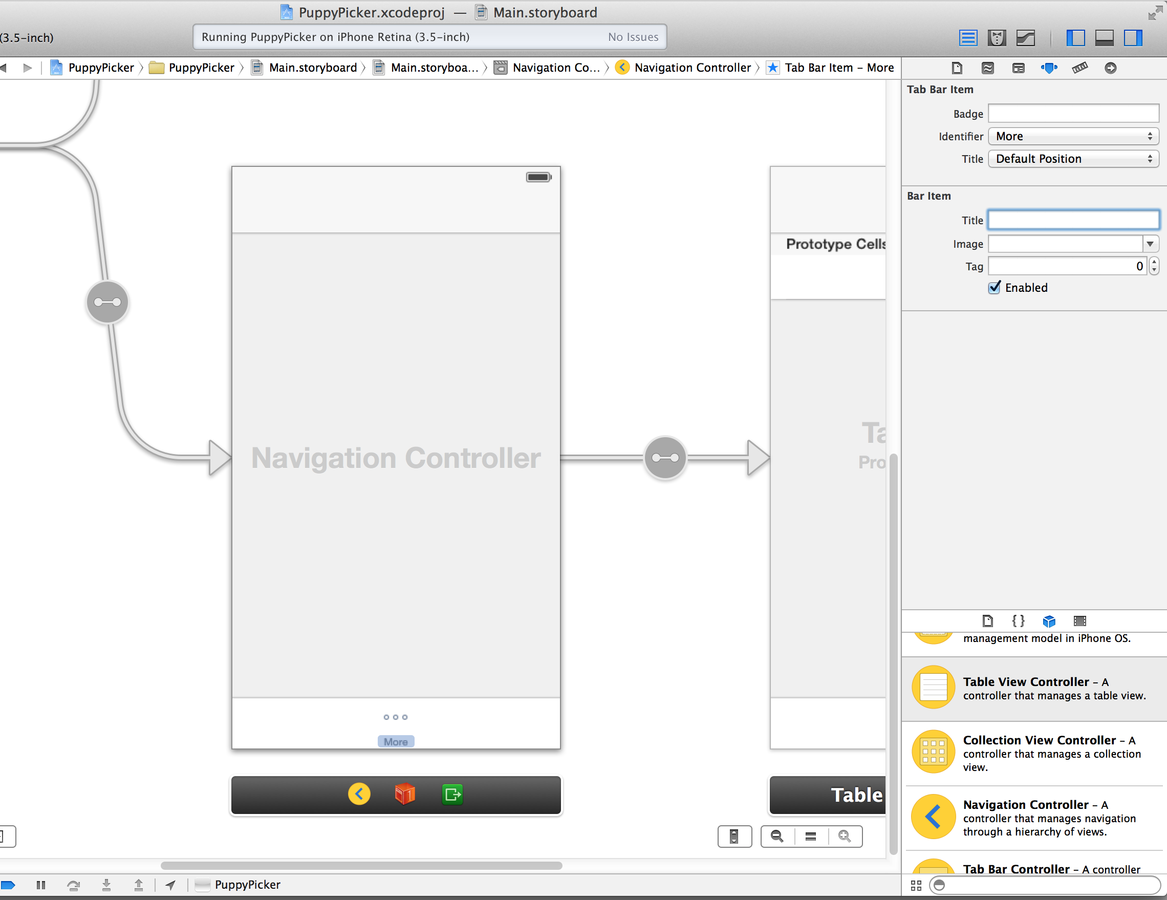
The two scenes that are currently attached to the Tab Bar Controller are both regular UIViewControllers. You are going to replace the scene from the second tab with a UITableViewController instead.
Click on that second view controller to select it, and then delete it. From the Object Library drag a new Table View Controller into the canvas in the place where that previous scene used to be
With the Table View Controller selected, choose Editor -> Embed In -> Navigation Controller from Xcode’s menubar.
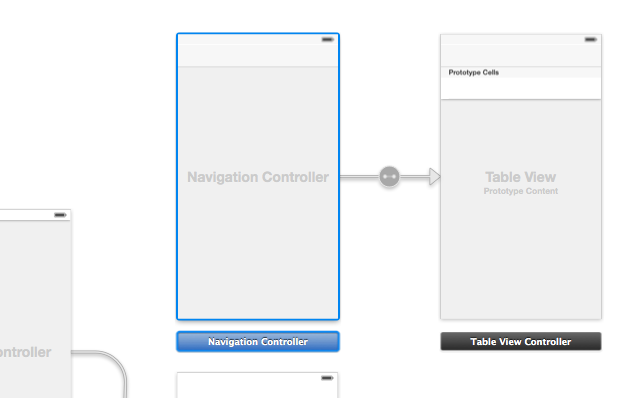
This adds yet another view controller to the canvas
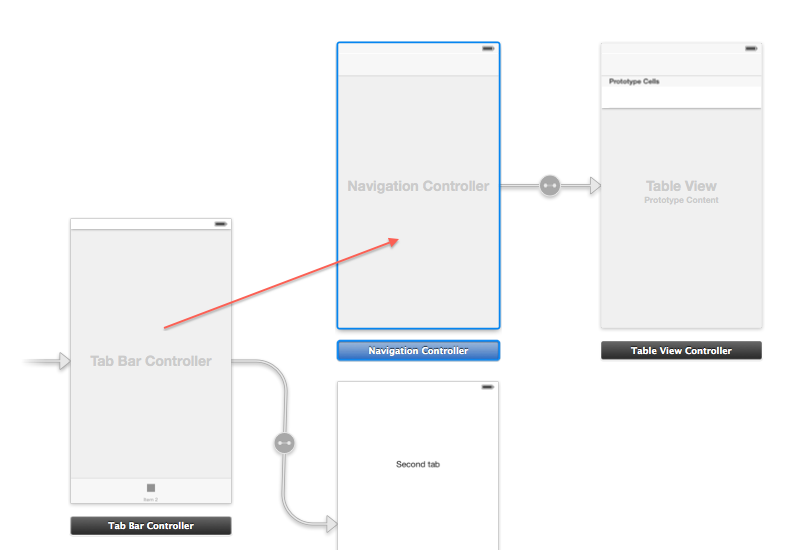
Connect these two new scenes to the Tab Bar Controller. Ctrl-drag (or right click) from the Tab Bar Controller to the Navigation Controller
When you let go, a small popup menu appears
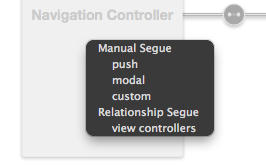
Choose the "Relationship Segue - view controllers" option. This creates a new relationship arrow between the two scenes:
Change the new navigation controllers identifier to "More"
Prototype Cells
-
Allow you to easily design a custom layout for your table view cells directly from within the storyboard editor
- The Table View Controller comes with a blank prototype cell. In the storyboard, click on that cell to select it and in the Attributes inspector set the Style option to Subtitle. This immediately changes the appearance of the cell to include two labels.
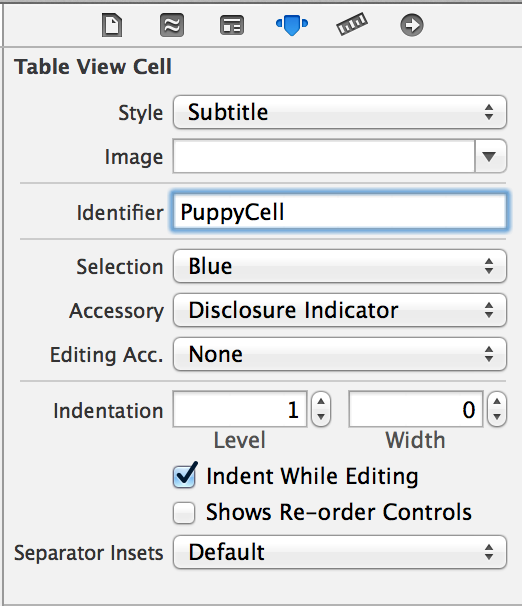
Set the Accessory attribute to Disclosure Indicator and in the Identifier field type PuppyCell.
(All prototype cells are still regular UITableViewCell objects and therefore should have a reuse identifier.)
Add a new file to the project. Choose the cocoa class template. Name the class PuppyListViewController and make it a subclass of UITableViewController.
Go back to the storyboard and select the Table View Controller (make sure you select the actual view controller and not one of the views inside it)
In the Identity inspector, set its Class to PuppyListViewController. (See next slide)
This is the essential step for hooking up your scene from the storyboard with your own view controller subclass.
Don’t forget this or your class won’t be used!

Add a mutable array property to PuppyListViewController.h
@property (nonatomic, strong) NSMutableArray *pups;
This array will contain the main data model for the app, an array that contains Puppy objects.
Add a new file to the project using the Objective-C class template. Name it Puppy, subclass of NSObject.
Add the following properties to the class
@interface Puppy : NSObject

@property (nonatomic) NSString *name;
@property (nonatomic) NSString *age;
@property (nonatomic) int popularity;

@end
In AppDelegate.m, add an #import for the Puppy and PuppyListViewController classes at the top of the file
Add a new instance variable named puppies
#import "AppDelegate.h"
#import "Puppy.h"
#import "PuppyListViewController.h"

@implementation AppDelegate
{
    NSMutableArray *puppies;
}
Add three puppy objects into the puppies array
- (BOOL)application:(UIApplication *)application didFinishLaunchingWithOptions:(NSDictionary *)launchOptions { puppies = [NSMutableArray arrayWithCapacity:3]; Puppy *puppy = [[Puppy alloc] init]; puppy.name = @"Rocky"; puppy.age = @"2 Months"; puppy.popularity = 5; [puppies addObject:puppy];// ADD TWO MORE PUPPIES HERE...return YES; }
Paste the following code immediately after...
UITabBarController *tabBarController = (UITabBarController *)self.window.rootViewController;UINavigationController *navigationController = [tabBarController viewControllers][1]; PuppyListViewController *puppyListVC = [navigationController viewControllers][0];puppyListVC.pups = puppies;
(Before the "return YES;")
Now the we have some data, lets implement our table view data source methods!
Update the data source methods in PuppyListViewController to...
 - (NSInteger)numberOfSectionsInTableView:(UITableView *)tableView
{
    return 1;
}

- (NSInteger)tableView:(UITableView *)tableView numberOfRowsInSection:(NSInteger)section
{
    return [self.pups count];
}
Don't forget to put your data into your table cells!
- (UITableViewCell *)tableView:(UITableView *)tableView cellForRowAtIndexPath:(NSIndexPath *)indexPath
{
    UITableViewCell *cell = [tableView dequeueReusableCellWithIdentifier:@"PuppyCell"];

    Puppy *pup = (self.pups)[indexPath.row];
    cell.textLabel.text = pup.name;
    cell.detailTextLabel.text = pup.age;

    return cell;
}
Creating Custom Prototype Cells
Switch back to Main.storyboard, select the prototype cell in the table view, and set its Style attribute to Custom. The default labels now disappear.
First make the cell a little taller. Either drag its handle at the bottom or change the Row Height value in the Size inspector. Make the cell 55 points high.
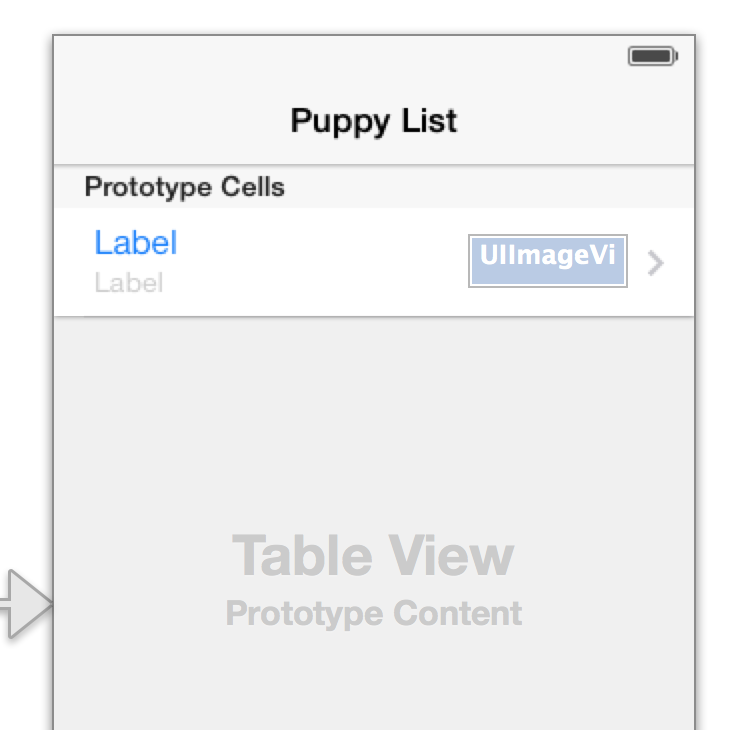
Drag two Label objects from the Objects Library into the cell and place them roughly where the standard labels were previously. Just play with the font and colors and pick something you like.
Drag an Image View into the cell and place it on the right, next to the disclosure indicator. Make it 80 points wide.
Set its Mode to Center (under View in the Attributes inspector) so that whatever image you put into this view is not stretched.
Make the labels 190 points wide so they don’t overlap with the image view.
The final design for the prototype cell looks something like this...
Because this is a custom designed cell, you can no longer use UITableViewCell’s textLabel and detailTextLabel properties to put text into the labels.
These properties refer to labels that aren’t on this cell anymore; they are only valid for the standard cell types.
Time to subclass UITableViewCell!
Add a new file to the project, with the Objective-C class template. Name it PuppyCell and make it a subclass of UITableViewCell.
Update PuppyCell.h to have three properties
@interface PuppyCell : UITableViewCell

@property (weak, nonatomic) IBOutlet UILabel *nameLabel;
@property (weak, nonatomic) IBOutlet UILabel *ageLabel;
@property (weak, nonatomic) IBOutlet UIImageView *popularity;

@end
In Main.storyboard, select the prototype cell and change its Class to PuppyCell on the Identity inspector.
Now whenever you ask the table view for a new cell with dequeueReusableCellWithIdentifier:, it returns a PuppyCell instance instead of a regular UITableViewCell.
Don't forget to connect your outlets and update the cellForRowAtIndexPath method in PuppyListViewController!
PuppyCell *cell = (PuppyCell *)[tableView dequeueReusableCellWithIdentifier:@"PuppyCell"];

    Puppy *puppy = (self.pups)[indexPath.row];
    cell.nameLabel.text = puppy.name;
    cell.ageLabel.text = puppy.age;
    cell.popularity.image = [self imageForPopularityRating:puppy.popularity];
Last but not least...
Add the imageForPopularityRating method to PuppyListViewController
- (UIImage *)imageForPopularityRating:(int)rating
{
switch (rating) {
case 1: return [UIImage imageNamed:@"1StarSmall"];
case 2: return [UIImage imageNamed:@"2StarsSmall"];
case 3: return [UIImage imageNamed:@"3StarsSmall"];
case 4: return [UIImage imageNamed:@"4StarsSmall"];
case 5: return [UIImage imageNamed:@"5StarsSmall"];
}
return nil;
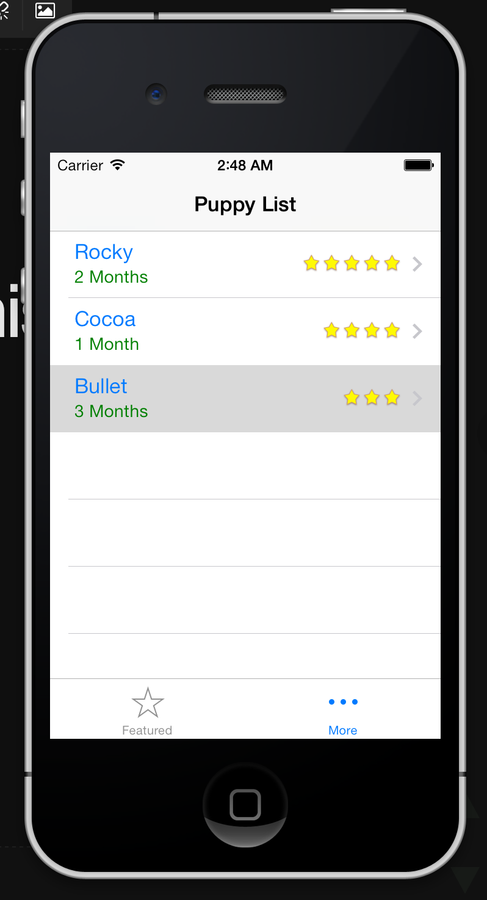
}Run your app!
You should end up with this...
BONUS
- Create a "PuppyDetailViewController" that lives inside of the navigation controller stack (after your tableview controller) and appears when you tap a table cell.
- Pass the information of the puppy that was tapped to the new view detail view using "prepareForSegue" then output it in the new view.
-
Match the name of the puppy to its image and display it.
iOS200 - iOS Platform Development Intermediate - Day 2
By Alex Rodriguez
iOS200 - iOS Platform Development Intermediate - Day 2
Today we will learn how to implement: Storyboards, Segues, UINavigationControllers, UITabBarControllers, Prototype Cells, Custom Cells, UITableViewCell Subclassing


