Let's Make Our Own Twitter!

You can build it!
You now have the coding skills (skillz?) to create your own version of one of the most popular sites on the Internet...
TWITTER!
Twitter itself was originally built using Ruby on Rails.
It may seem like a daunting task to create an app that mimics one of the top social media sites, but we'll take it step-by-step.

Let's Outline our project
- Create the Project
- Add Bootstrap
- Add to your Gemfile (Devise, Paperclip)
- Set Up Devise User & add User attributes
- Construct Tweet scaffold
- Set up Associations between User & Tweets
- Validations for Users & Tweets
- How do we go about "Following" another User?

from nothing,
a twitter app ascends...
$ rails new twitter_talent_south

$ rails new tech_talent_twitter

$ rails new better_than_twitter
I'll give you a few ideas for project names:

Bootstrapin'
Let's get it in our project right away, so we can utilize as we go.
#in the head, above the current css & js links:
<link rel="stylesheet" href="https://maxcdn.bootstrapcdn.com/bootstrap/3.3.1/css/bootstrap.min.css">
<script src="https://maxcdn.bootstrapcdn.com/bootstrap/3.3.1/js/bootstrap.min.js"></script>
layouts/application.html.erb
Gem up the works
gem 'devise'

gem "paperclip", :git => "git://github.com/thoughtbot/paperclip.git"
Let's add the Devise and Paperclip gems to our Gemfile:
We'll continue with Devise set-up, and add Paperclip functionality a little later on.
Remember to run bundle install!

devise a User
$ rails g devise:install

$ rails g devise User

$ rake db:migrate

$ rails g devise:views
Let's just blow through all the Terminal commands to set-up Devise and be done with!

tell us about yourself...
Let's let the User add a little more data about themselves.
$ rails g migration AddValuesToUsers name:string username:string bio:text location:string"Username" will be the @-fronted handle.
"Bio" and "location" will be optional fields the User can fill in once signed-in/registered (in a "Profile" page).
Remember that because there is no User controller, we need to use the application_controller.rb:
 before_action :configure_permitted_parameters, if: :devise_controller?

  protected

  def configure_permitted_parameters

    devise_parameter_sanitizer.for(:sign_up) { |u| u.permit({ roles: [] }, :email, :password, :password_confirmation,
      :name, :username, :bio, :location) }

    devise_parameter_sanitizer.for(:account_update) { |u| u.permit(:email, :password, :password_confirmation,
      :current_password, :name, :username, :bio, :location) }

  end
Tweet Scaffolding
It's time to build the scaffold for your Tweet resource!
$ rails g scaffold Tweet message:string user_id:integerBut hold your horses:
We need to think about Association first!
Remember that we want to Associate Users with Tweets, using a Foreign Key.
This would be a One-to-Many relationship, so one User would have many Tweets.
With that in mind, have at it:
In the models: Association set-up
Let's add the association definitions to our models...
class Tweet < ActiveRecord::Base

	belongs_to :user

end
class User < ActiveRecord::Base
# Include default devise modules. Others available are:
# :confirmable, :lockable, :timeoutable and :omniauthable
devise :database_authenticatable, :registerable,
:recoverable, :rememberable, :trackable, :validatable
has_many :tweets
endtweet.rb
user.rb
Keeping the riff-raff out
  #below the "before_action" line:
  before_filter :authenticate_user!
Let's put the Tweet pages behind Devise's wall of protection.
Add to your tweets_controller.rb:
This will keep those who are not signed-in out of our app for the most part.
And forcing a sign-in before tweeting will give us access to 'current_user'!
Time to test
It's high time we fired up our server and made sure at least some of this stuff we set up is working!
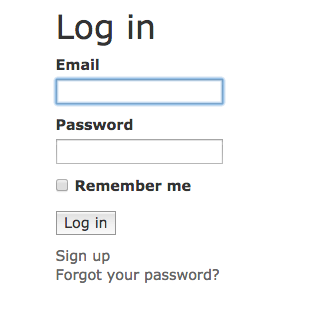
We haven't set up a root page yet, so go to localhost:3000/tweets, and we should be met with this screen:
validations all around
Devise has built-in presence validations on email and password,
let's add one for username, and a uniqueness validation on email.
In user.rb:
  validates :username, presence: true
  validates :email, uniqueness: true
We also need validation on the Tweets - not just presence, but also: what makes a Tweet a Tweet? It's length!
In tweet.rb:
  validates :message, presence: true
  validates :message, length: {maximum: 140,
too_long: "A tweet is only 140 max. Everybody knows that!"}
you're user #1!
Now click on "Sign up" and register a user!
You can test to make sure the current_user methods are working by adding some code to the top of your Tweets page.
<h1>Listing tweets</h1>

<p>
  Welcome, <%= current_user.name %>!
</p>
<p>
  Your e-mail is: <%= current_user.email %>.
</p>
<p>
  Your id number is: <%= current_user.id %>
</p>

<table>
tweets/index.html.erb

localhost:3000/tweets
Using current_user
We can use current_user to help us properly create a new tweet.
current_user.id is the ID # we'll looking to populate our FK (tweet.user_id) with!
  <div class="field">
    <%= f.label :message %><br>
    <%= f.text_field :message %>
  </div>
  <div class="field invisible">
    <%= f.label :user_id %><br>
    <%= f.number_field :user_id, current_user.id %>
  </div>
  <div class="actions">
    <%= f.submit %>
  </div>
You may remember the class "invisible" (defined in application.css) as something I have used in past projects to hide certain divs and spans.
Creating a new tweet
Here's what we should see in
localhost:3000/tweets/new
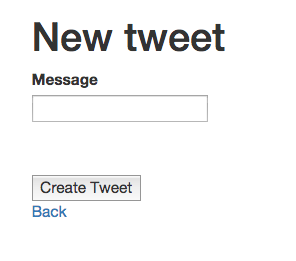
An entry for user_id will be passed, just not shown.
Time to test association!
Let's modify the Show page to display the username behind this new tweet!
<p id="notice"><%= notice %></p>

<p>
  <strong>Message:</strong>
  <%= @tweet.message %>
</p>

<p>
  <strong>User:</strong>
  <%= @tweet.user.username %>
</p>

<%= link_to 'Edit', edit_tweet_path(@tweet) %> |
<%= link_to 'Back', tweets_path %>
tweets/show.html.erb
localhost:3000/tweets/1
Attracting followers
One of the major functions of Twitter is that you "follow" other users and their tweets show up on your "feed".
Let's first create a controller that will contain views that house your feed and allow you "follow" another User.

epicenter controller
I'm calling this controller the "Epicenter" - both because it's going to be the focal point of our site, and because I'm tired of calling this sort of thing the "Welcome" controller.
$ rails g controller Epicenter feed show_user now_followingThe "feed" page will be similar to those "welcome/index" pages we've done in past projects - we'll make it the root page in our Routes file.
"show_user" will do just what it says: show individual user's profile and tweets (since we used Devise to create the User, we were given no "users/show" page).
"now_following" will be a Post-routed page, confirming that the selected User is now in the current_user's "following" attribute.
another attribute for user
Speaking of, we need to add this "following" attribute to the User.
$ rails g migration AddFollowingToUsers following:textWhy did I set the data-type as text?
You may remember a trick I showed you a couple projects ago...
user.rb
  # placed around line 7:
  serialize :following, Array
The "following" attribute is now an Array, and we can push other User id's into it!
Modify your routes
We want to modify one of our routes to a Post, and set our Root, so let's head on over to routes.rb...
Rails.application.routes.draw do

  root 'epicenter#feed'

  get 'user_profile' => 'epicenter#show_user'

  post 'now_following' => 'epicenter#now_following'

  resources :tweets

  devise_for :users

end
The 'feed' page is set as the Root, we shorten some URLs, and the 'now_following' page is changed from Get to Post.
The Feed Page
The 'feed' page will be fairly simple:
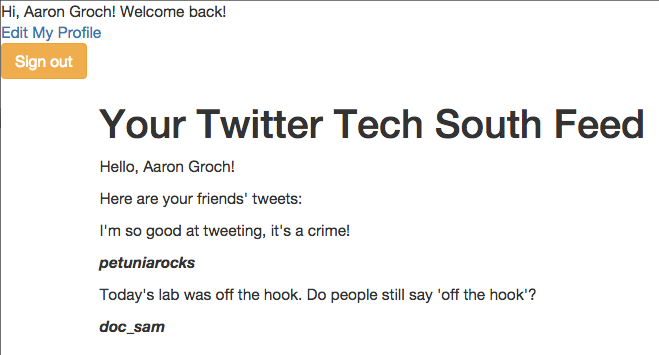
a greeting to the current_user, and then a loop through that tweets associated with the current_user's 'following' array.
<h1>Your Twitter Tech South Feed</h1>
<p>Hello, <%= current_user.name %>!</p>
<p>Here are your friends' tweets:</p>

<div>
  <% @following_tweets.each do |f| %>
    <div>
      <p><%= f.message %></p>
      <p><strong><em><%= f.user.username %></em></strong></p>
    </div>
  <% end %>
</div>
So this @following_tweets variable...it's an array...but where'd that come from?
We're gonna make it in the Controller!
epicenter/feed.html.erb
In the Controller:
The Feed Action
  def feed

  	# Here we initialize the array that will
  	# hold tweets from the current_user's
  	# following list.
  	@following_tweets = []

  	# We pull in all the tweets...
  	@tweets = Tweet.all

  	# Then we sort through the tweets
  	# to find the ones associated with
  	# users from the current_user's
  	# following array.
  	@tweets.each do |tweet|
  		current_user.following.each do |f|
  			if tweet.user_id == f
  				@following_tweets.push(tweet)
  				# And those tweets are pushed
  				# into the @following_tweets array
  				# we saw back in the view.
  			end
  		end
  	end

  end
epicenter_controller.rb
The Show user Page
This page shows the profile and tweets of a single User, and includes a form-powered button which enables the current_user to follow them.
<h1><%= @user.username %></h1>
<h3><%= @user.location %></h3>
<h3>Bio:</h3>
<p><%= @user.bio %></p>


<table class="table">
  <thead>
    <tr>
      <th>Message</th>
    </tr>
  </thead>

  <tbody>
    <% @user.tweets.each do |tweet| %>
      <tr>
        <td><%= tweet.message %></td>
      </tr>
    <% end %>
  </tbody>
</table>

<%= form_tag('/now_following') do %>
	<span class="invisible">
		<%= text_field_tag :follow_id, @user.id %>
	</span><br />
	<%= submit_tag "Follow", class: "btn btn-primary" %>
<% end %>
epicenter/show_user.html.erb
In the Controller:
The show_User Action
  def show_user
  	@user = User.find(params[:id])
  end
epicenter_controller.rb
Yeah...that's all we need in there!
Thing is, to reach this page, we need to follow this link:
<%= link_to @tweet.user.username, user_profile_path(id: @tweet.user.id) %>For testing purposes, you may want to have it on your Tweets index or show pages.
The now following page
For the view, this is just a confirmation page, which may only be around for our testing phase
<p>You are now following: <%= @user.username %></p>epicenter/now_following.html.erb
  def now_following
  	# This line is just for displaying purposes:
  	@user = User.find(params[:follow_id])

  	# Here is where some back-end
  	# work really happens:

  	current_user.following.push(params[:follow_id].to_i)
  	# What we're doing is added the user.id of
  	# the User you want to follow to your
  	# 'following' array attribute.

  	current_user.save
  	# Then we save it in our database.

  end
epicenter_controller.rb
The real work is done in the controller...
Now to test this out...
We're gonna need some data to see if all this code we just wrote really works.
But before you jump into singing in and tweeting, I have two suggestions:
1. Add a "Log Out" link available at the top of every page.
application.html.erb
<% if user_signed_in? %>

	Hi, <%= current_user.name %>! Welcome back!<br />

	<%= link_to "Edit My Profile", edit_user_registration_path %><br />
  <%= link_to "Sign out",destroy_user_session_path, method: :delete, class: "btn btn-warning" %>

<% else %>

  <%= link_to "Sign in",new_user_session_path %>

<% end %>
2. Move the "before_filter :authenticate_user!" line to the application_controller.rb, so you have to sign in to get anywhere in the app.
Here we go...
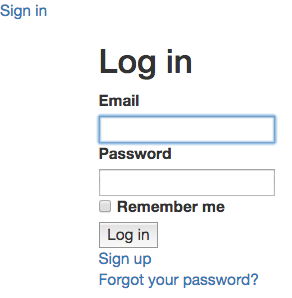
Any Page Before Sign-In
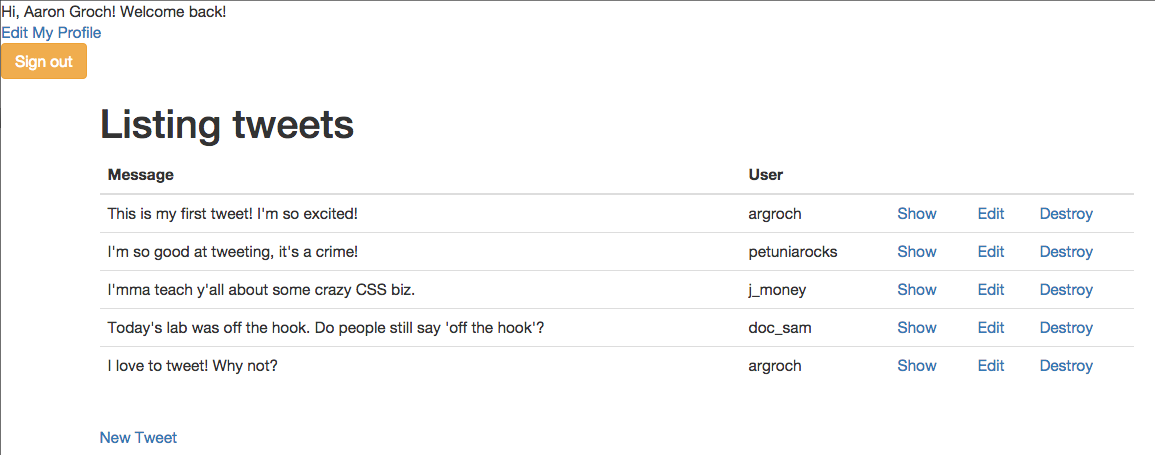
localhost:3000/tweets
And there's more...

localhost:3000/show_user
localhost:3000/now_following

And finally...
localhost:3000/feed
We're not done:
Where to go next
So the app is working! But...
Let's face it, this site right now...it's got a face only a coder could love.
We added Bootstrap, but we're barely using it.
Let's pretty this site up!
And while we're at it, let's see if we can find a better way to navigate throughout the site.
Twitter Project
By argroch
Twitter Project
Using all the skills we've learned in class so far to but together our own version of Twitter.
- 1,438


