Minecraft Mod
Forge with 1.16.5
Introduction
模組的本質其實就是對原版Minecraft的程式碼做修改
所以,任何形式的修改都可以視為模組
MCP
最原始的模組開發方式
依靠傳說中的反編譯和反混淆來實現修改Minecraft
在當時,有分所謂的客戶端模組與伺服器端模組
客戶端模組就是如今常說的"模組"
而伺服器端模組則是發展成"插件"與"伺服器端模組"
Modloader
最初
用MCP寫的模組是不能互相兼容的
白話文就是你只能裝一個模組
這就讓模組開發者與玩家感到十分可惜
於是,Risugami就搞出了名為Risugami's Modloader的東東
實現動態載入模組
解決了只能裝一個模組的問題
後來
Risugami就漸漸地不再更新他的Modloader
這讓Forge決定自己寫一個
於是
FML(Forge Mod Loader)
出現了
後來,隨時間推移
Forge決定將Forge與FML合併
於是
現在你在網路上下載的Forge就是自帶Modloader的咚咚了
至於後來出現的Fabric
那又是另一回事了
你只需要知道
現在可以用來寫模組的有:
- MCP
- Forge
- Fabric
而Forge、Fabric則是主流選項
MCP則是模組的始祖
現在
讓我們來了解你需要有的基本能力
好方便你可以繼續學習
基本能力
學過至少一種程式語言(不限Java)
國文沒被死當
可以看懂圖片
會"一個指令一個動作"的學習技能(也就是依樣畫葫蘆)
有比小學弟弟還要高水平的智商
知道Google的存在與使用方式
建議能力
學過Java與物件導向
英文及格
持有基礎通靈術、舉一反三的技能
知道StackOverFlow、Forge論壇的存在
知道Gradle是啥
熟練Google的使用方式
頂級能力配置
熟悉Java與物件導向,有開發經驗
持有"滿等潛解昇華滿的通靈術"真理之書
英文就是你的母語
熟悉Gradle
精通Google的正確使用方式
授課時,我會假定你有滿足基本能力需求
但你要是真的沒有滿足全部需求
有問題你還是可以發問
大家會包容你的
別害羞
開發環境設定
JDK
如果你是使用 Eclipse 的玩家
我的建議是:
別用 Eclipse,IDEA 真的比較好用
功能方便到哭(我絕對不會說我是覺得 Eclipse 介面很醜)
以下教學都會以IDEA為準
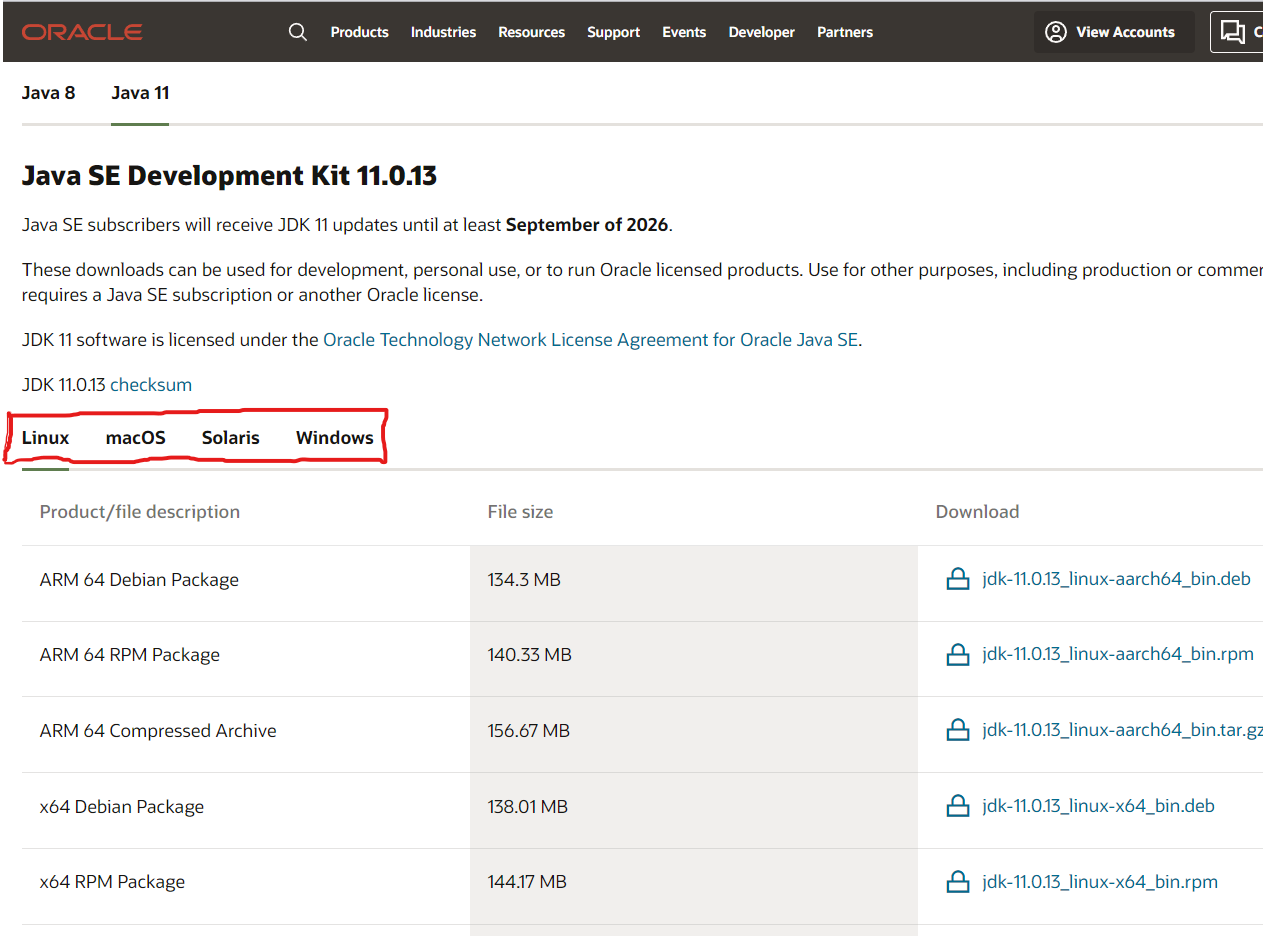
根據你的電腦作業系統選擇版本,我會以 Windows 為例
如果是 macOS 玩家
請自行研究設定 Java 環境變數教學(我就窮,沒玩過 macOS)
這是安裝用可執行檔
下面的是安裝用的壓縮檔
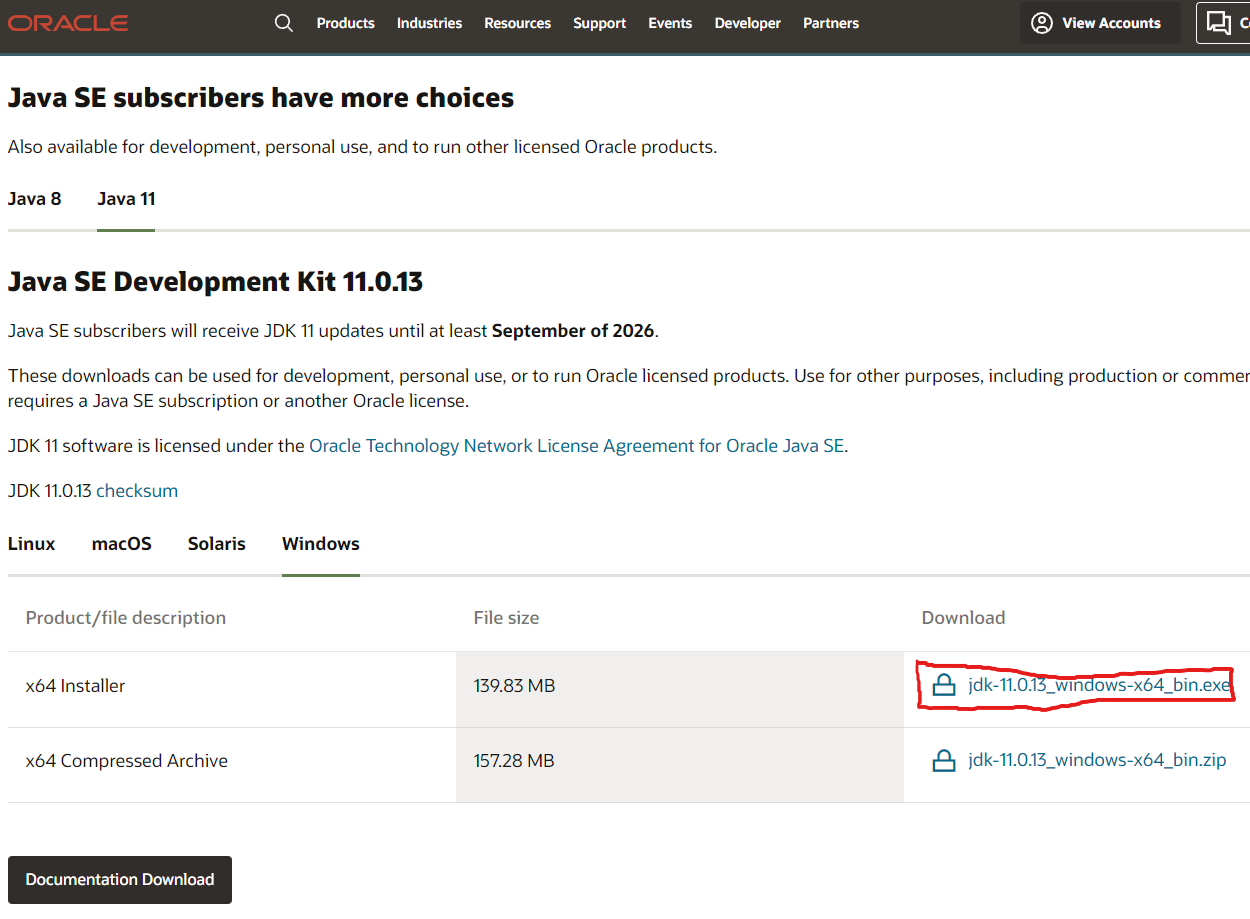
記得打勾,然後按
Download jdk-11.0.13_windows-x64_bin.exe

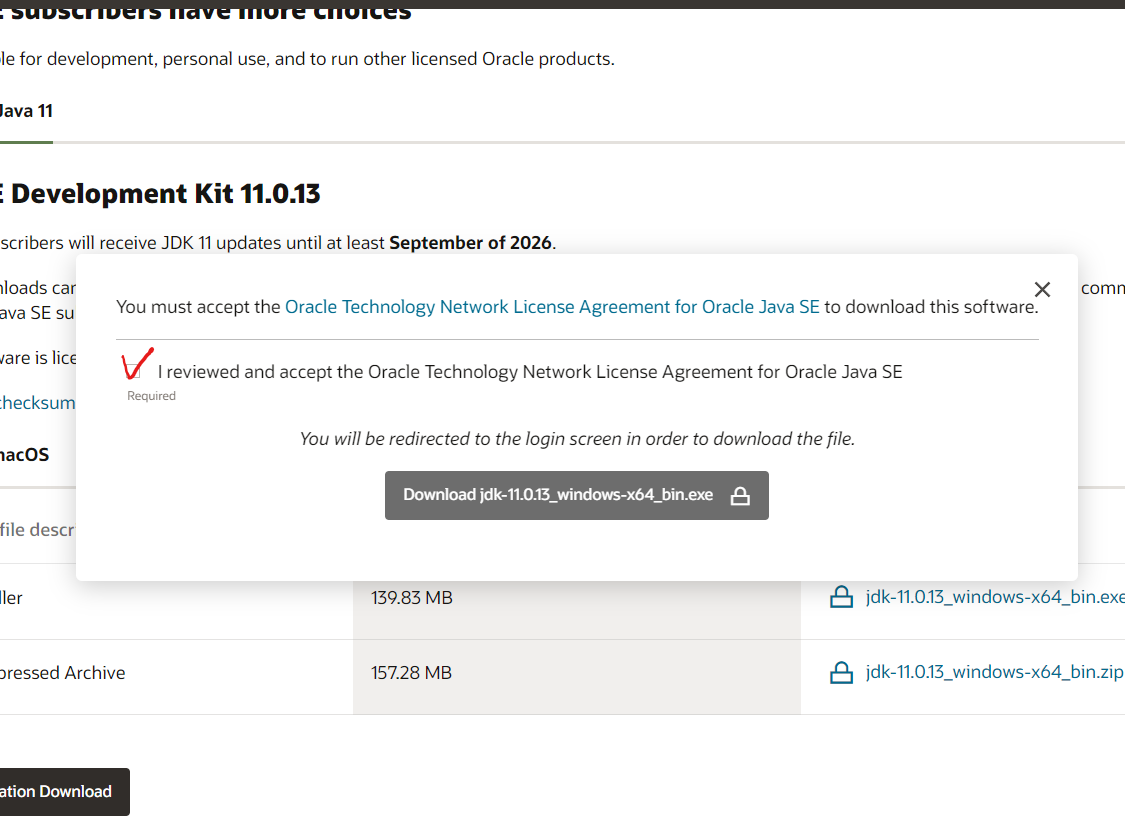
他這個時候會要求你要使用甲骨文帳號登陸方可下載
如果沒有甲骨文帳號,可以註冊一個
除了 email 要填真實 email 來收驗證信之外,其他亂填都可以
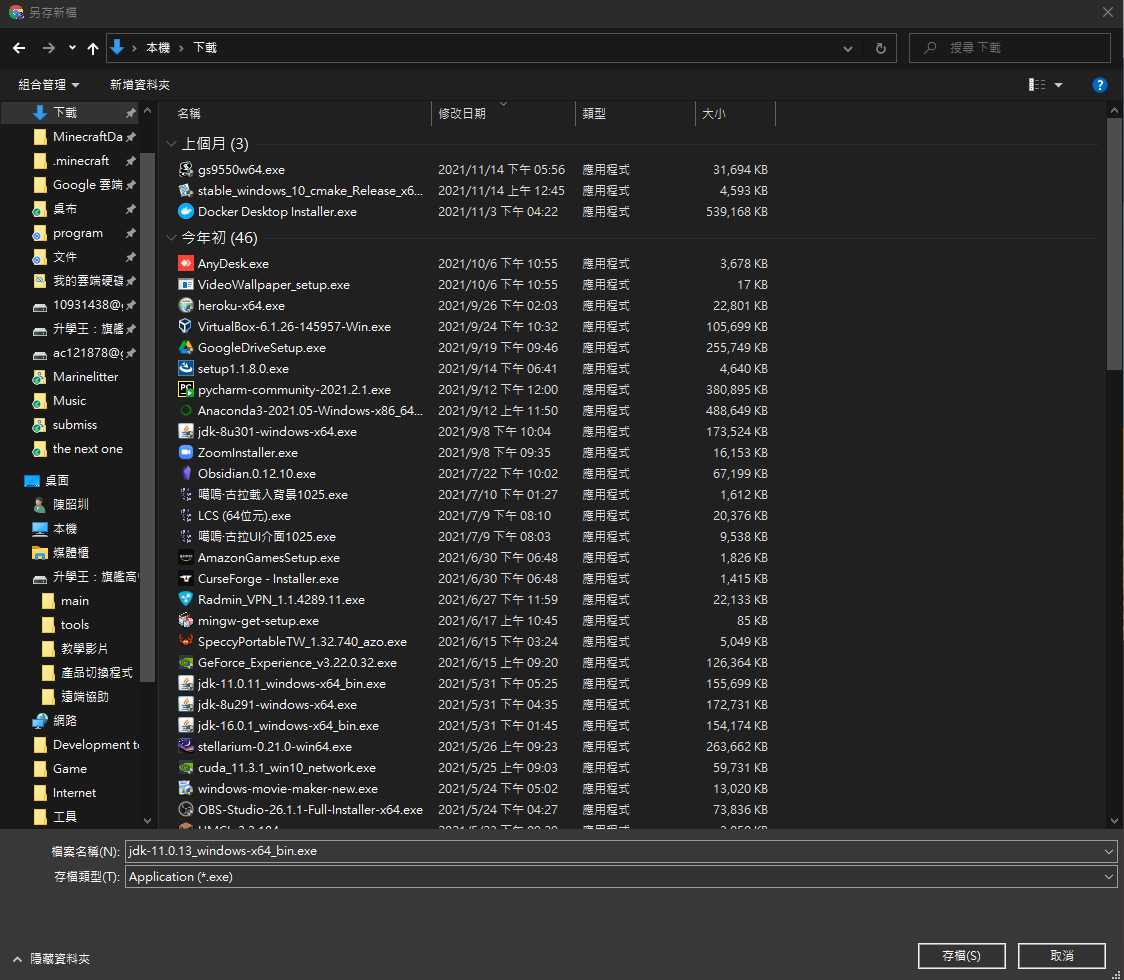
登錄後會自動下載
等他下載完然後就可以打開來開始安裝了
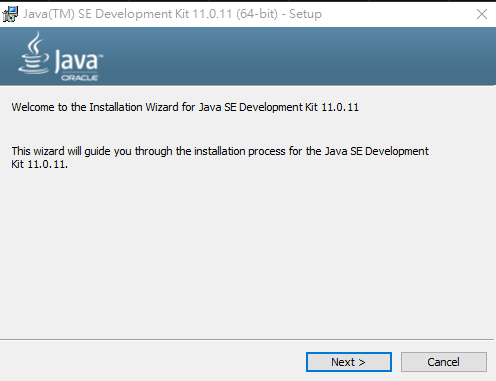
打開來
按 next 即可
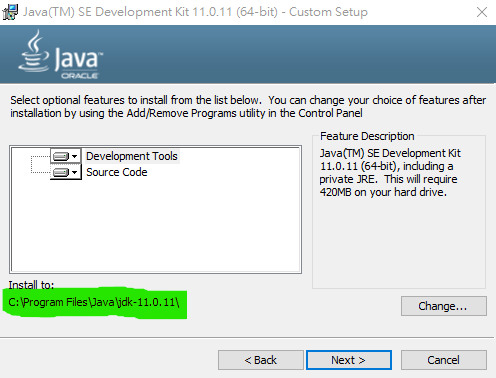
記下圖中的路徑
然後繼續按 next
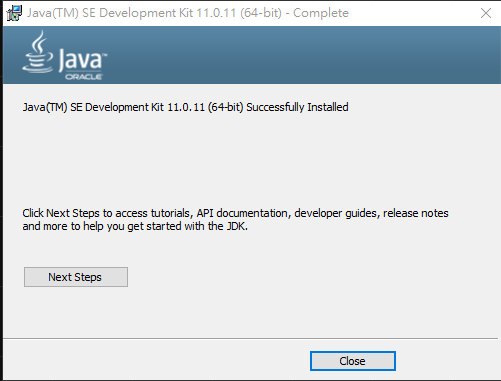
出現這個就代表安裝完成
接下來就是設定環境變數了
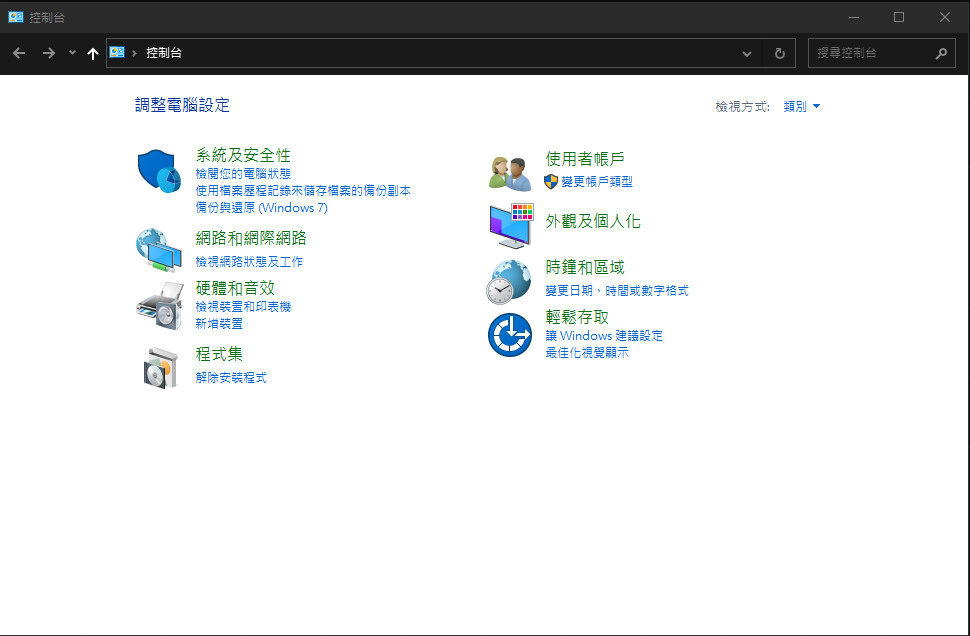
打開你的控制台
我們要設定 JAVA_HOME 環境變數
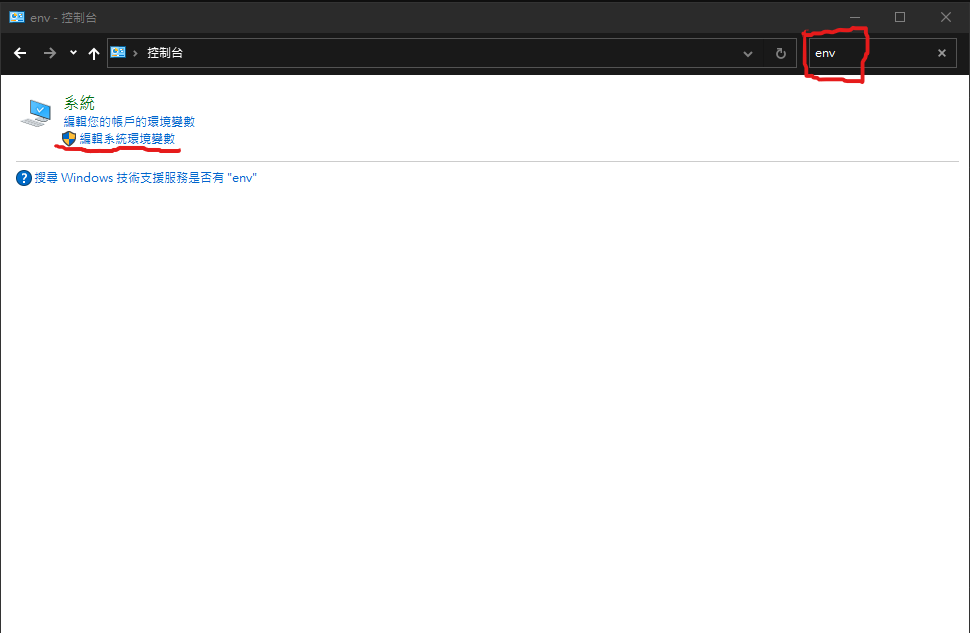
搜尋 "env"
然後點擊"編輯系統環境變數"
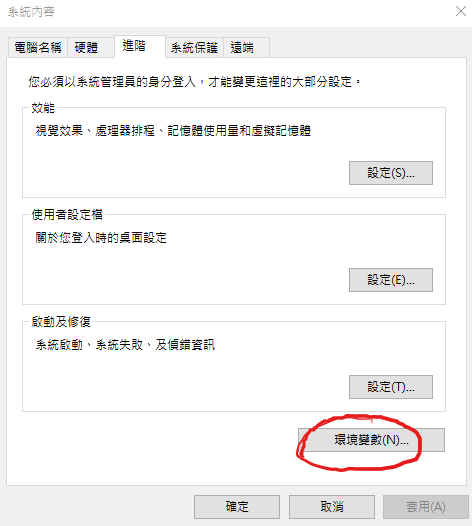
點擊"環境變數"
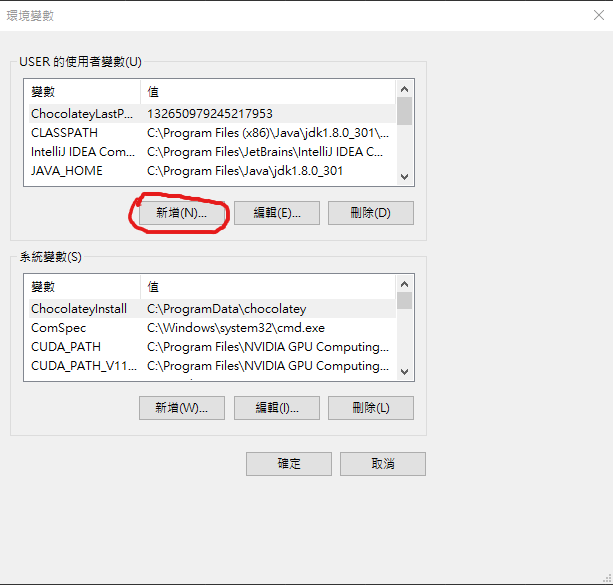
點擊"新增(N)..."
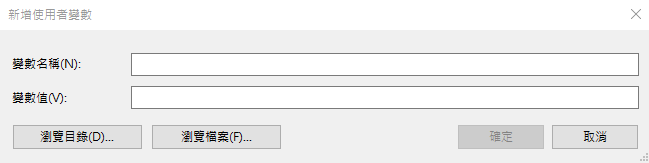
變數名稱:
JAVA_HOME
變數值:
你剛剛記下來的 Java 安裝路徑
記得按"確定"
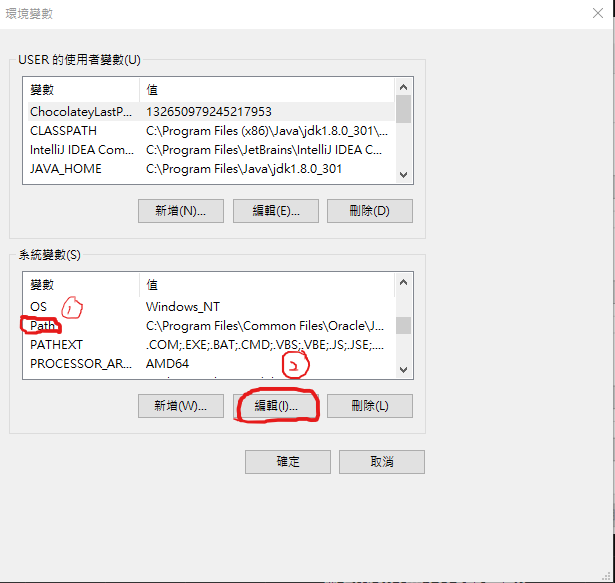
再來,選擇"Path"變數
然後按"編輯(I)..."
點擊"新增(N)"

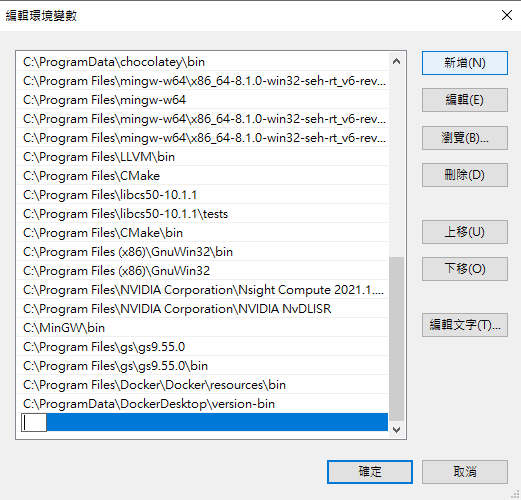
輸入"%JAVA_HOME%\bin"
然後按下確定儲存變更
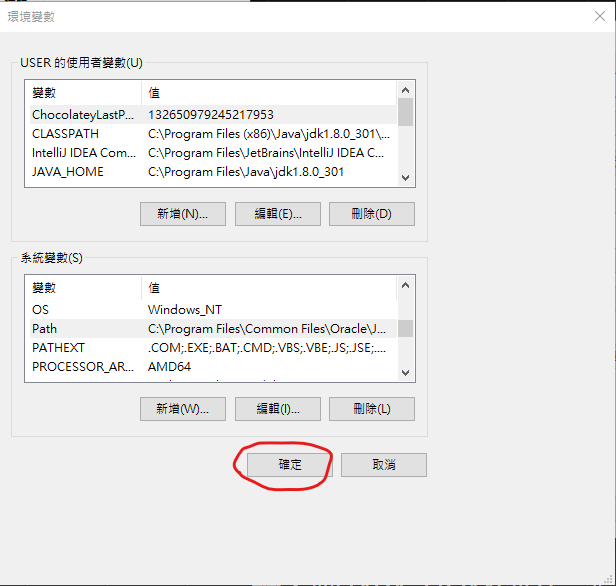
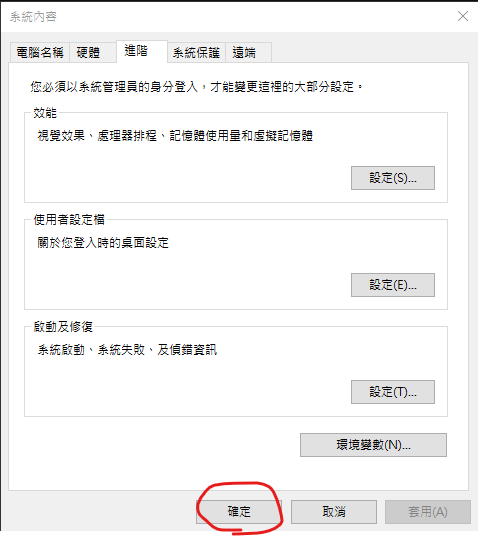
點擊"確定"
儲存變更
點擊"確定"
儲存變更
重新啟動電腦
打開"命令提示及字元"
輸入"javac --version"並執行
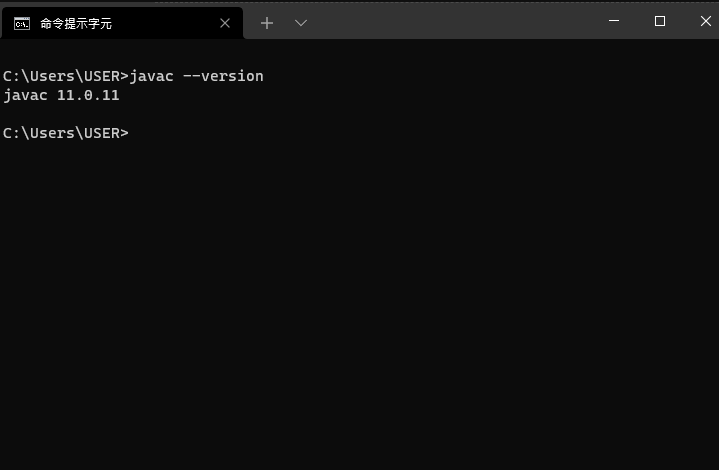
出現 "javac 11.x.xx" 的版本資訊
沒出現錯誤訊息就成功了
IDEA 安裝
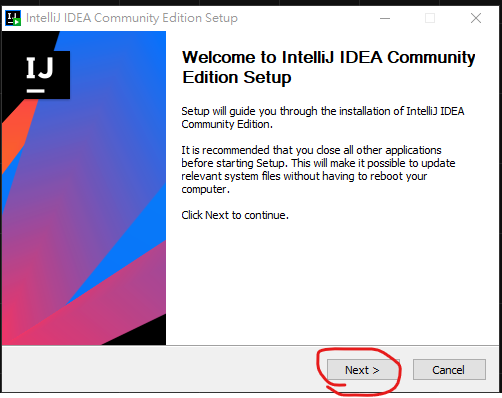
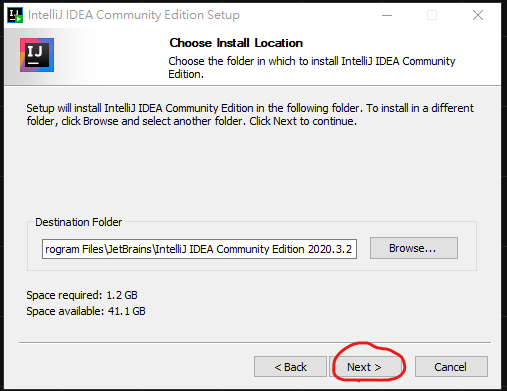
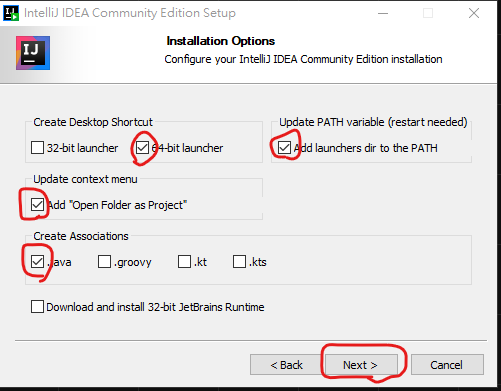
記得勾選完再按"next"
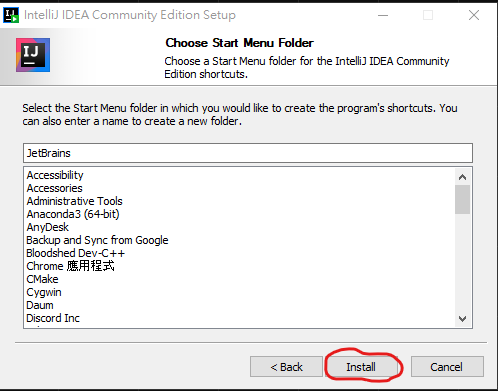
按下去,然後耐心等待一段時間
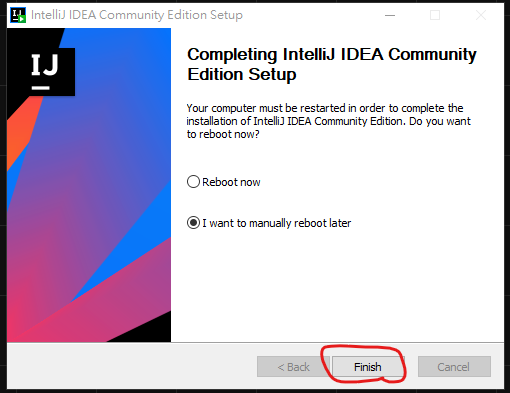
看到這個就表示安裝完成
等等記得重啟
讓 IDEA 的環境變數生效
開發環境設定
Minecraft Forge
Minecraft Forge 載點:
https://files.minecraftforge.net/net/minecraftforge/forge/index_1.16.5.html
根據Forge論壇上官方的說法
Forge對於模組的開發支援僅支援一個LTS與最新版本
其餘版本的開發所需的建構資源官方並不會作保留
因此
若以後1.16.5不再支援
你可以選擇用舊有、建構好的環境繼續開發
或者是選擇新版本的模組來開發

我們需要下載 MDK 作為我們專案的環境

等待 5 秒後,記得按 Skip
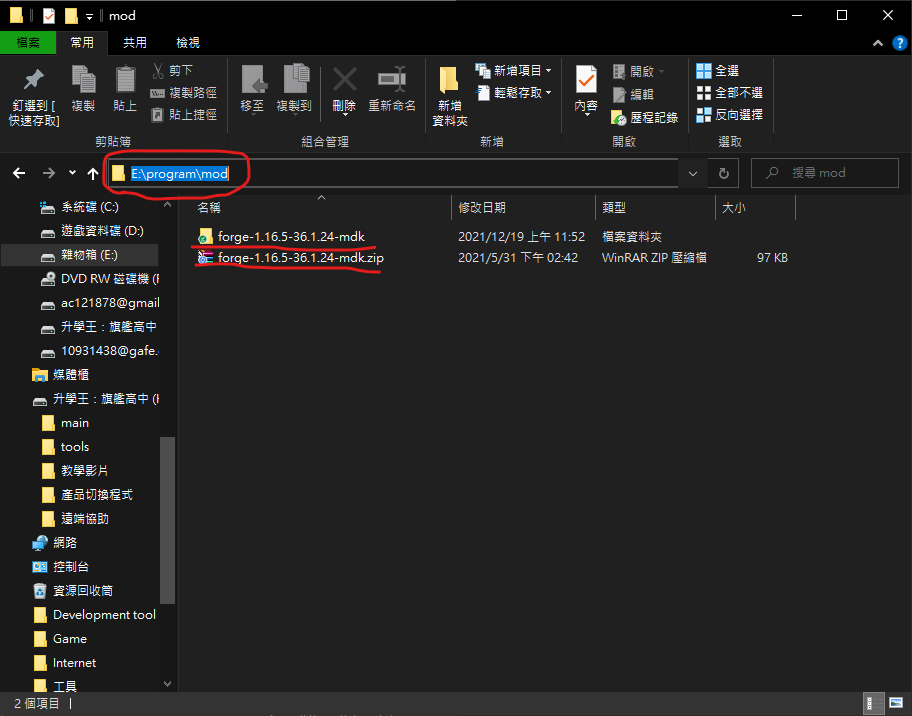
挑選風水寶地來解壓縮檔案
注意,路徑不可有中文
只能全英文
不然各種神奇的編譯錯誤會玩死各位
記好路徑
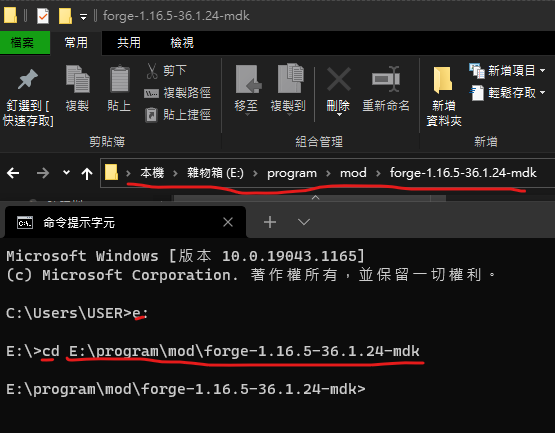
我們接下來要用"命令提示及字元"了
d:
// 切換到 D 槽

cd dir
// 進入 dir 資料夾
使用以上指令想辦法進入到剛剛的路徑
我的範例:
gradlew genIntellijRuns輸入以下指令:
Eclipse 玩家改輸入以下指令:
gradlew genEclipseRuns只要出現
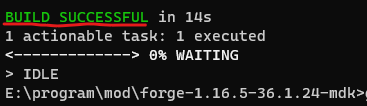
就完工了
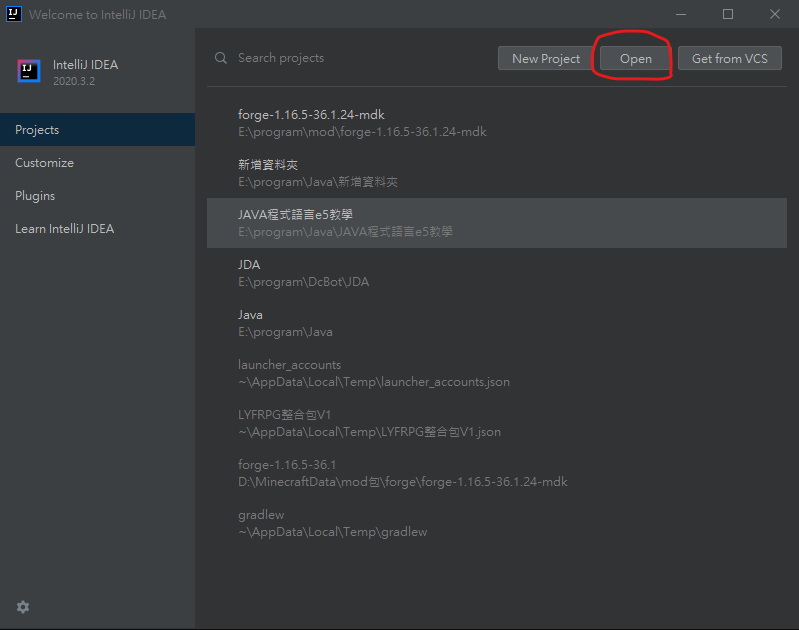
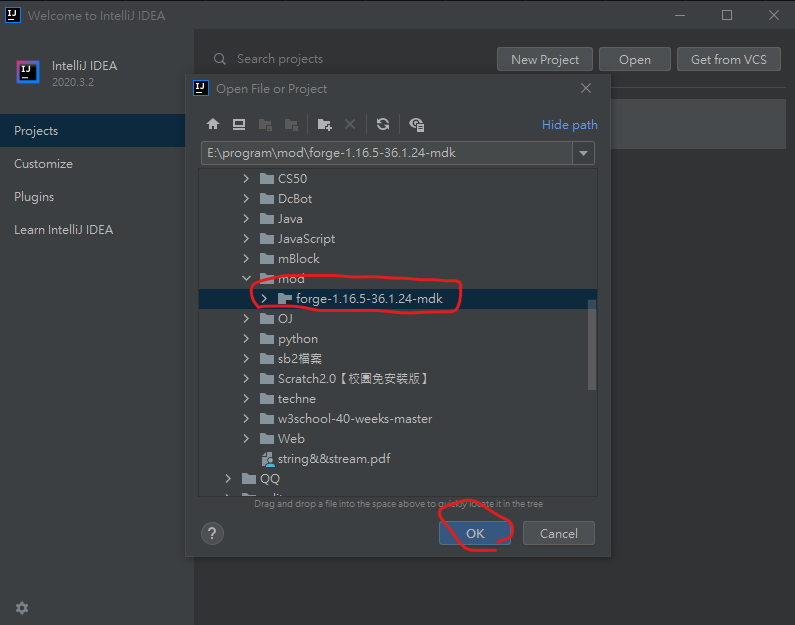
打開 IDEA
選擇你的資料夾
別忘記按"OK"

點擊右上角的 Gradle
點擊 "runClient"
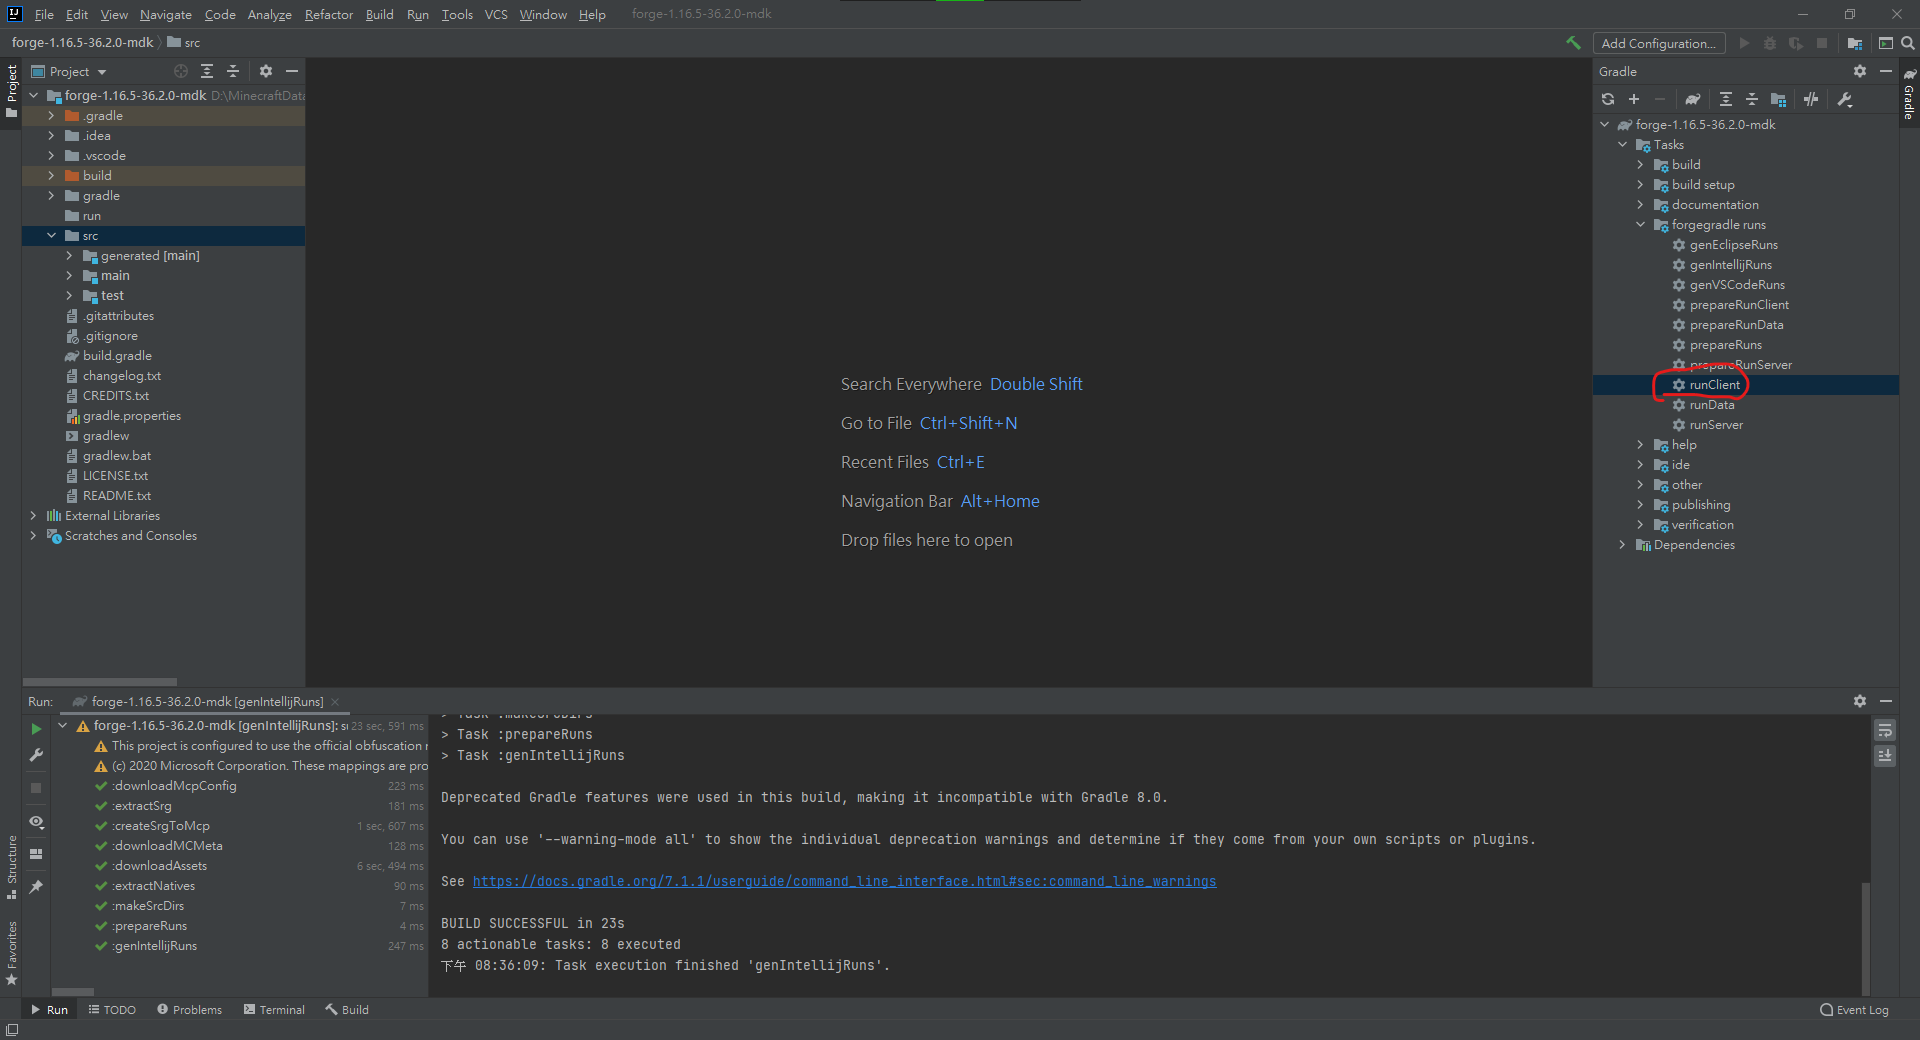
像這樣
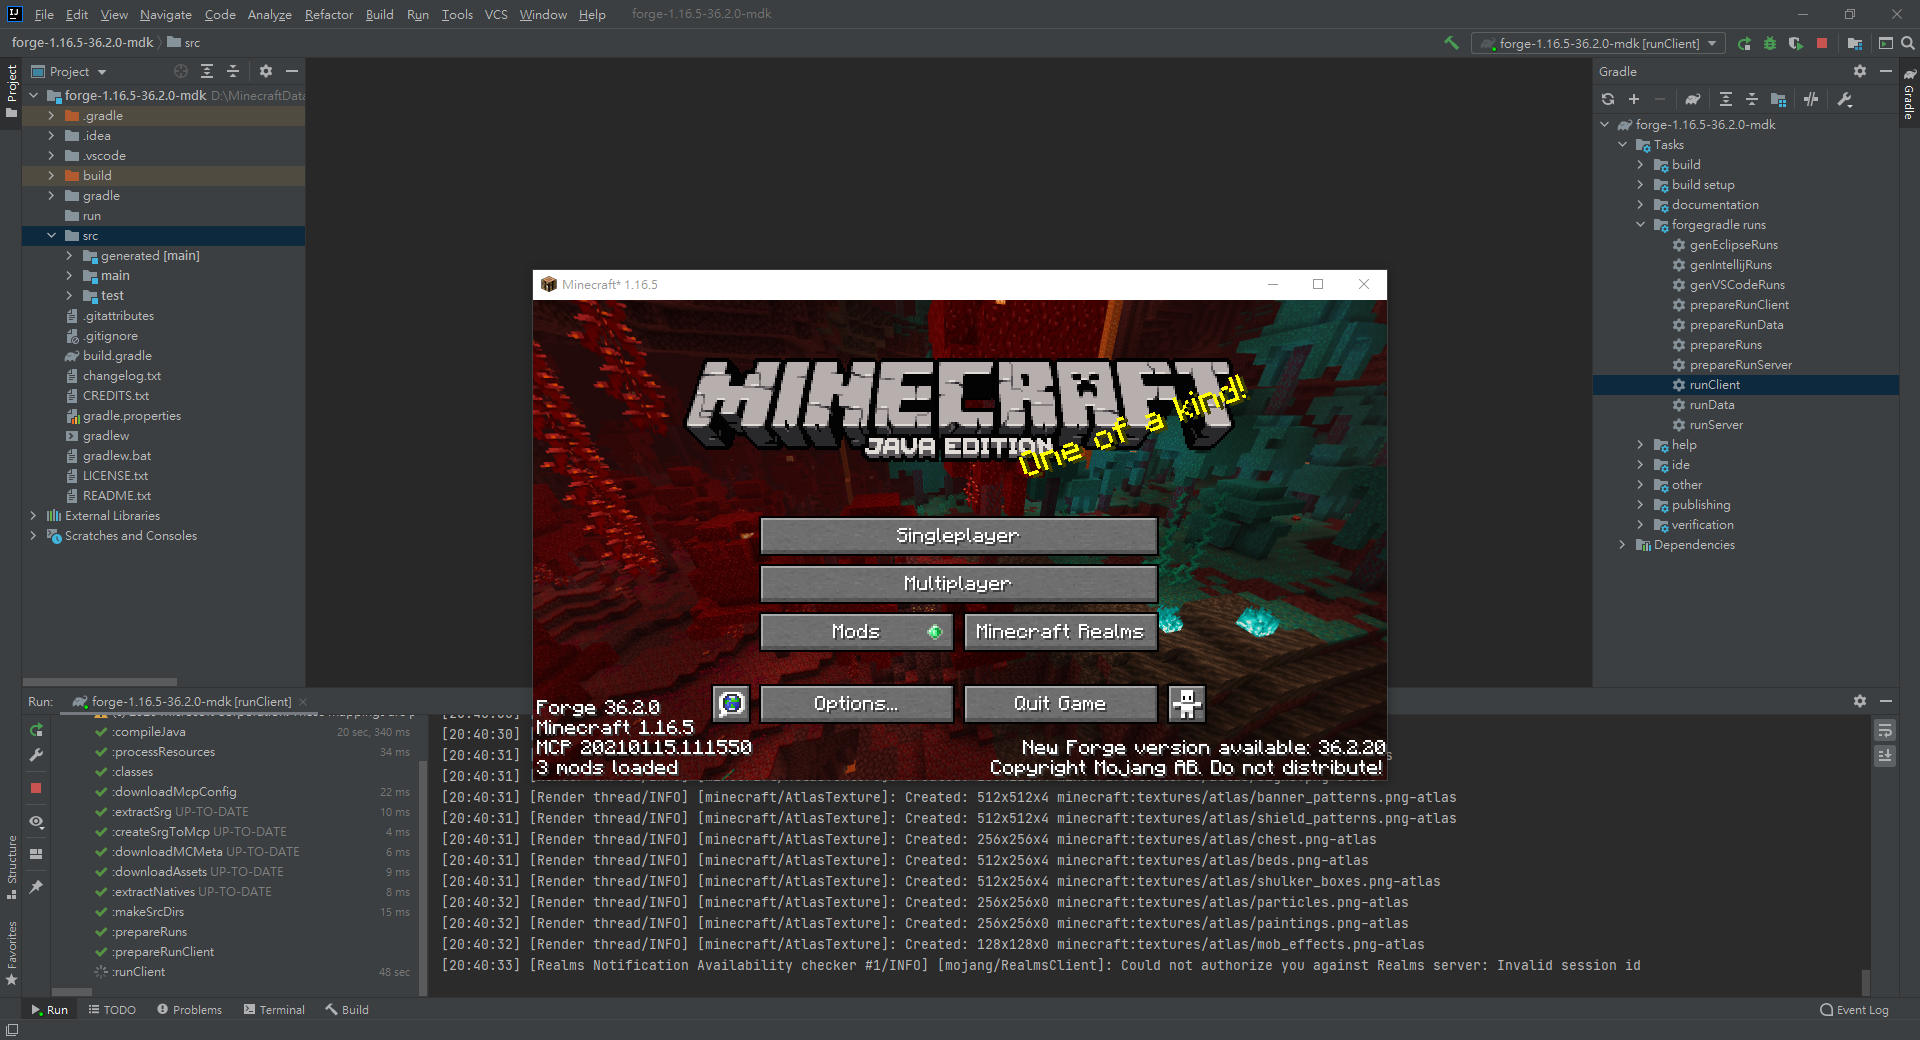
成功開好 Minecraft 就成功了!
接下來,要為自己的模組做設定
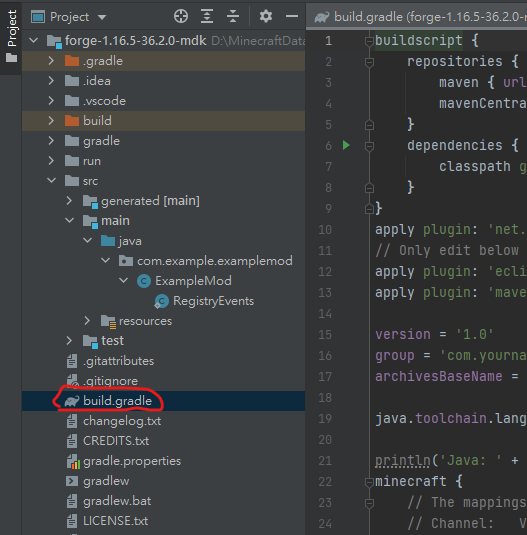
打開這個檔案
version = '1.0'
group = 'com.yourname.modid' // http://maven.apache.org/guides/mini/guide-naming-conventions.html
archivesBaseName = 'modid'
檔案當中,這 3 行是我們第一個要改的東西
version = 你的模組版本資訊
不可以有 "_" 但可以用 "-"
group = 模組所在套件路徑
聽不懂不重要
看不懂就別改
archivesBaseName = 模組的 ID
模組 ID 是 Forge 用來區別不同模組的東西
自己取個好 ID
build.gradle
我改成這樣
version = '1.16.5-1.0'
group = 'com.example.examplemod' // http://maven.apache.org/guides/mini/guide-naming-conventions.html
archivesBaseName = 'tutorial'
build.gradle
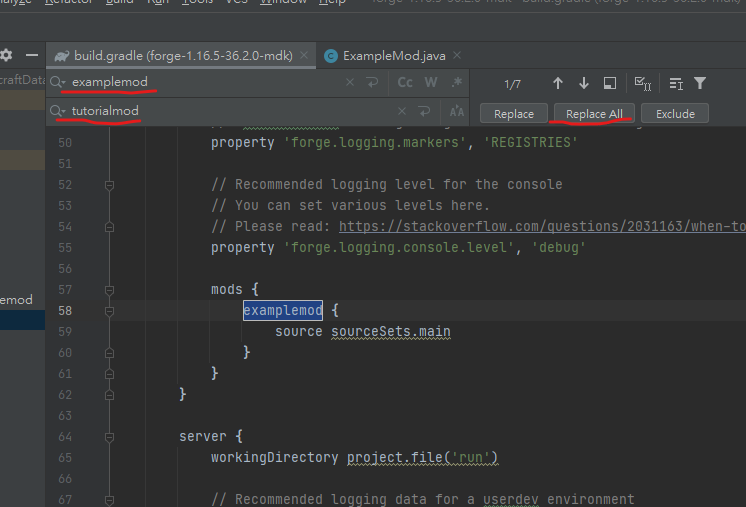
使用 Ctrl + R 搜尋 "examplemod"
然後取代為你的模組 ID
build.gradle

修改這裡的映射文件資訊
本教學是使用 MCP 的映射文件
mappings channel: 'snapshot', version: '20210309-1.16.5'build.gradle
接下來,再來修改這個檔案
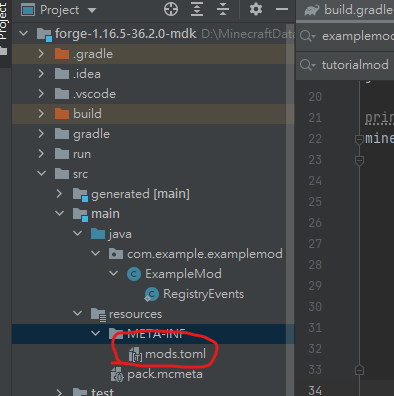
打開檔案
loaderVersion="[36,)" #mandatory This is typically bumped every Minecraft version by Forge. See our download page for lists of versions.

license="All rights reserved"

[[mods]] #mandatory
# The modid of the mod
modId="examplemod" #mandatory

version="${file.jarVersion}" #mandatory
 # A display name for the mod
displayName="Example Mod" #mandatory

description='''
This is a long form description of the mod. You can write whatever you want here

Have some lorem ipsum.

Lorem ipsum dolor sit amet, consectetur adipiscing elit. Sed mollis lacinia magna. Orci varius natoque penatibus et magnis dis parturient montes, nascetur ridiculus mus. Sed sagittis luctus odio eu tempus. Interdum et malesuada fames ac ante ipsum primis in faucibus. Pellentesque volutpat ligula eget lacus auctor sagittis. In hac habitasse platea dictumst. Nunc gravida elit vitae sem vehicula efficitur. Donec mattis ipsum et arcu lobortis, eleifend sagittis sem rutrum. Cras pharetra quam eget posuere fermentum. Sed id tincidunt justo. Lorem ipsum dolor sit amet, consectetur adipiscing elit.
'''
mods.toml
要改的不多,我一行一行說
loaderVersion="[36,)" #mandatory This is typically bumped every Minecraft version by Forge. See our download page for lists of versions.mods.toml
這是設定可以執行本模組適用的 Forge 子版本
聽不懂就預設
使用區間符號
license="All rights reserved"mods.toml
模組許可權聲明
[[mods]] #mandatory
# The modid of the mod
modId="examplemod" #mandatory

version="${file.jarVersion}" #mandatory
 # A display name for the mod
displayName="Example Mod" #mandatory

description='''
This is a long form description of the mod. You can write whatever you want here

Have some lorem ipsum.

Lorem ipsum dolor sit amet, consectetur adipiscing elit. Sed mollis lacinia magna. Orci varius natoque penatibus et magnis dis parturient montes, nascetur ridiculus mus. Sed sagittis luctus odio eu tempus. Interdum et malesuada fames ac ante ipsum primis in faucibus. Pellentesque volutpat ligula eget lacus auctor sagittis. In hac habitasse platea dictumst. Nunc gravida elit vitae sem vehicula efficitur. Donec mattis ipsum et arcu lobortis, eleifend sagittis sem rutrum. Cras pharetra quam eget posuere fermentum. Sed id tincidunt justo. Lorem ipsum dolor sit amet, consectetur adipiscing elit.
'''
mods.toml
這是模組資訊
modId=你的模組ID
version=你的模組版本資訊
displayName=遊戲中的模組名稱
description=模組資訊
使用 ''' xxx ''' 的文字格式
可以換行
loaderVersion="[36,)"

license="All rights reserved"

[[mods]] #mandatory
# The modid of the mod
modId="tutorial" #mandatory

version="1.16.5-1.0" #mandatory ${file.jarVersion}

displayName="My Mod" #mandatory

description='''
My Frist Mod.
'''
mods.toml
我的改法
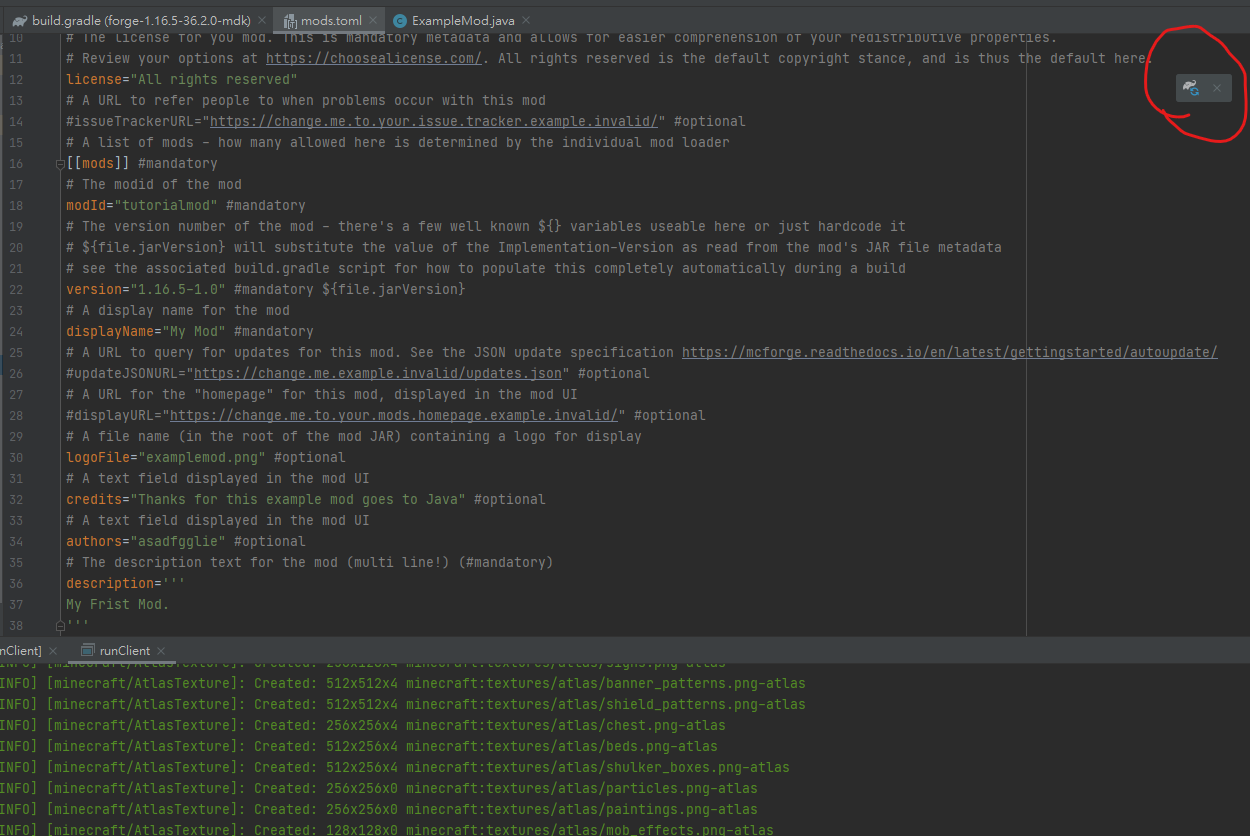
改完記得按這個
以載入變更

當初沒有改 group 的可以跳過
當初沒有改 group 的可以跳過

輸入當初改的 group
當初沒有改 group 的可以跳過
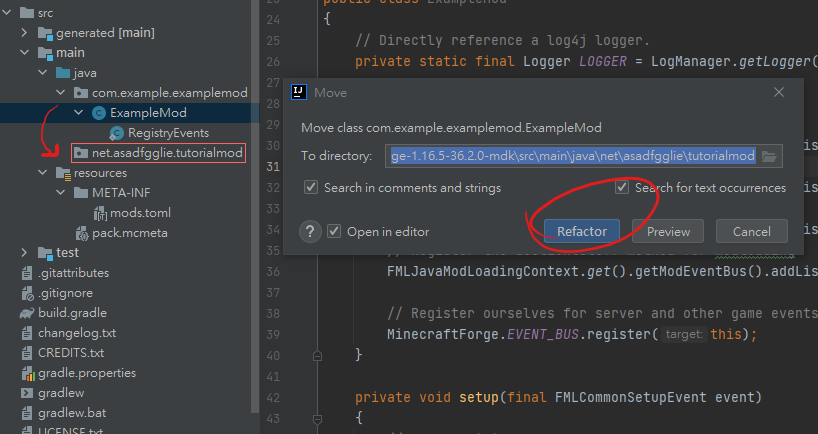
把 ExampleMod 拖到你剛剛新增的套件
然後按 "Refactor"
當初沒有改 group 的可以跳過
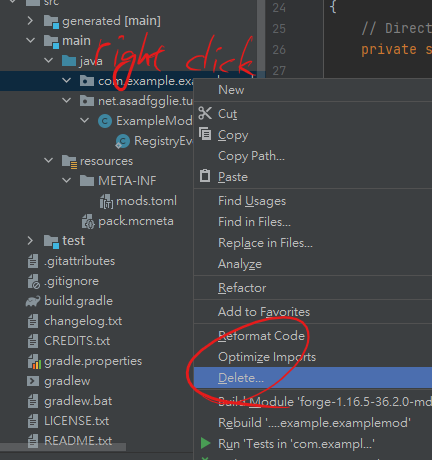
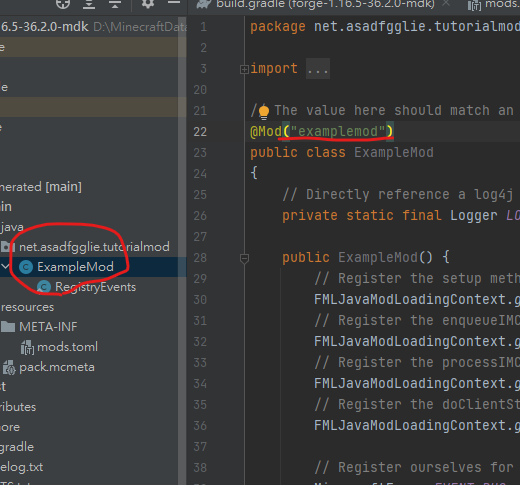
打開 ExampleMod
將裡面的 "examplemod" 改為你的模組 ID
打開 ExampleMod
將裡面的 "examplemod" 改為你的模組 ID
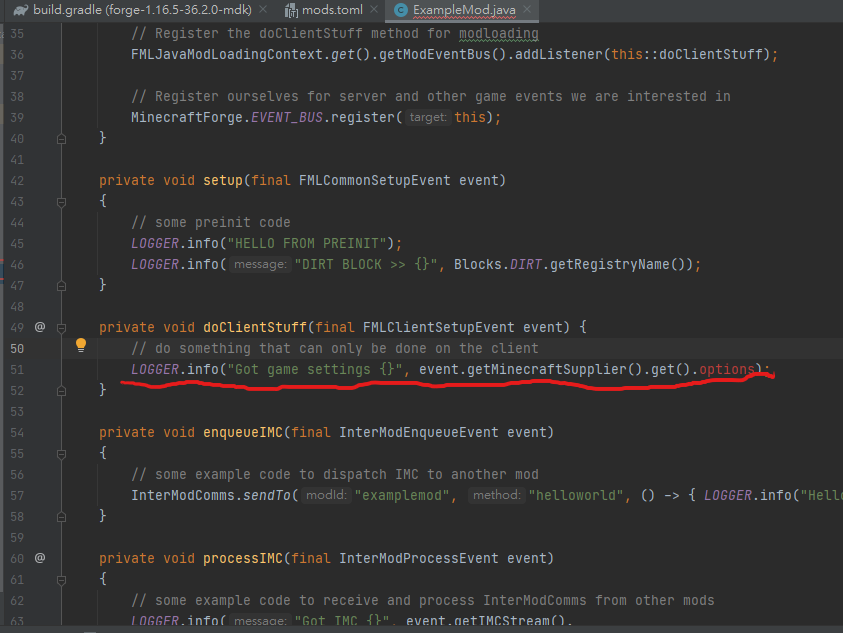
如果你是用MCP映射會有錯誤訊息
刪掉這一行就可以了
再次執行 "runClient"
順利打開就表示環境架設成功

可以在這裡看你所裝的模組資訊
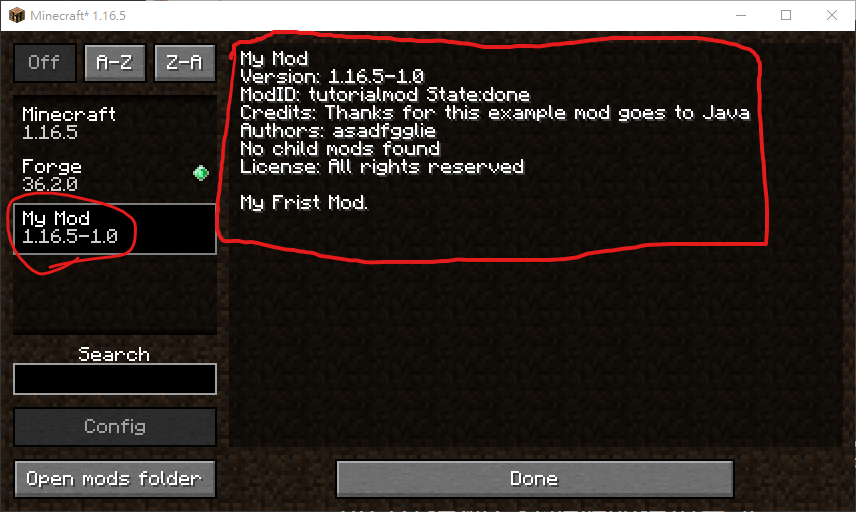
可以在這裡看到你的模組資訊
接下來
我們會一邊製作我們的模組
一邊學習我們所需的基本語法
由於時間與篇幅因素
簡報與教學可能不會非常詳盡
因此若想深入的學習Java
可以參考我的社課講義
這個講義是寫給想要自學同時沒人教的同學
要是有不明白的部分可以來問我
基本概念
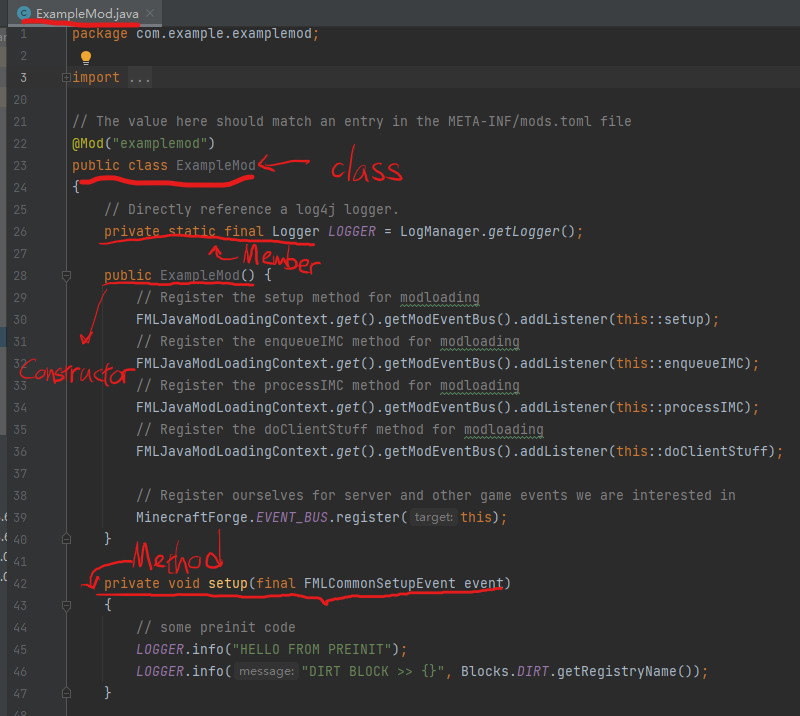
來看看Forge官方給你的Example mod
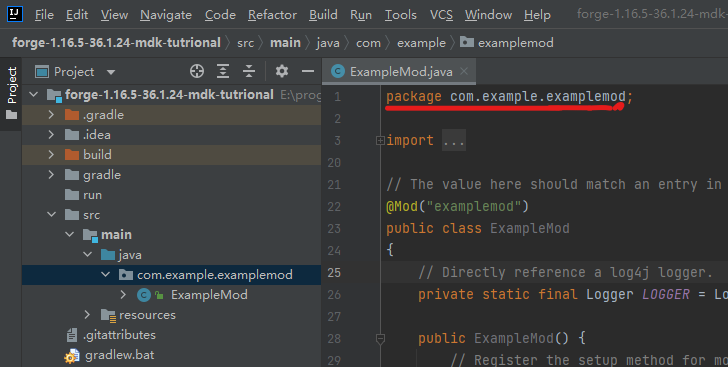
package
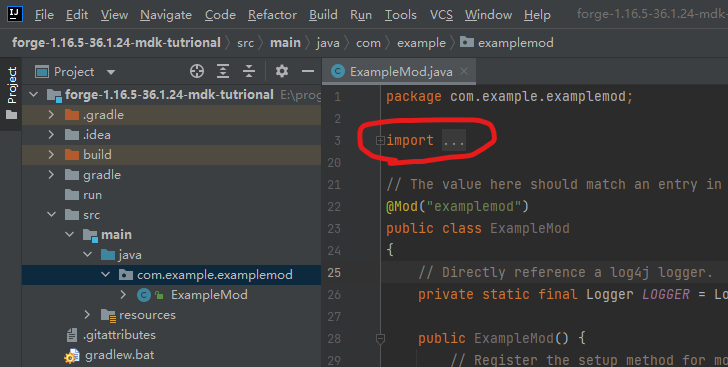
import
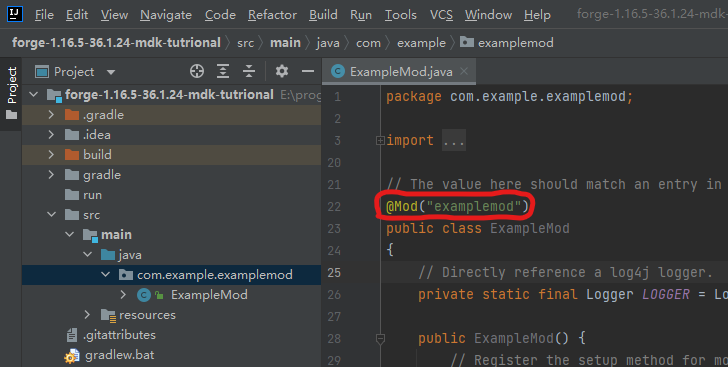
Annotation
Class, Member, Method, and Constructor
Event Bus
模組的核心,一切事物(方塊、怪物、道具、事件...)都圍繞著這東西轉
所有自定義(也就是你寫的模組內容)都要註冊到Event Bus上
New Item
DeferredRegister<Item>: 道具總註冊表
RegistryObject<Item>: 道具註冊物件
register(IEventBus eventBus): 統一註冊方法
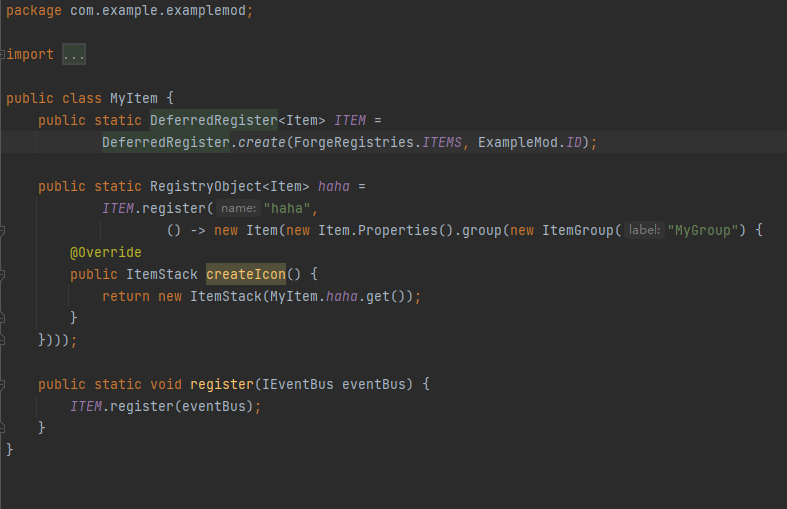
道具內部名稱
標籤內部名稱
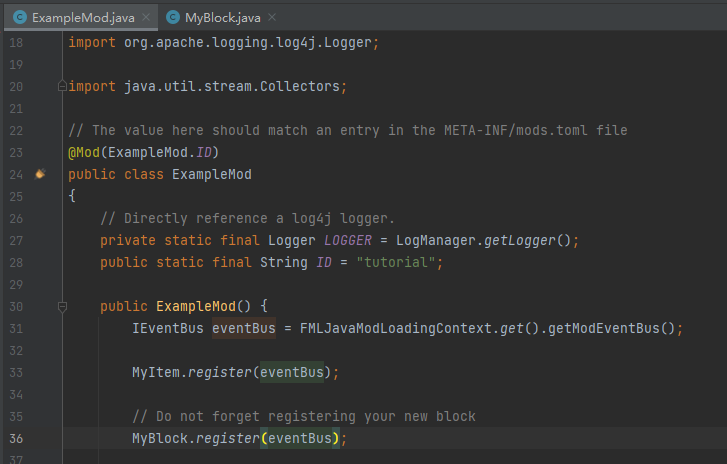
記得回到你的Mod本體去註冊他

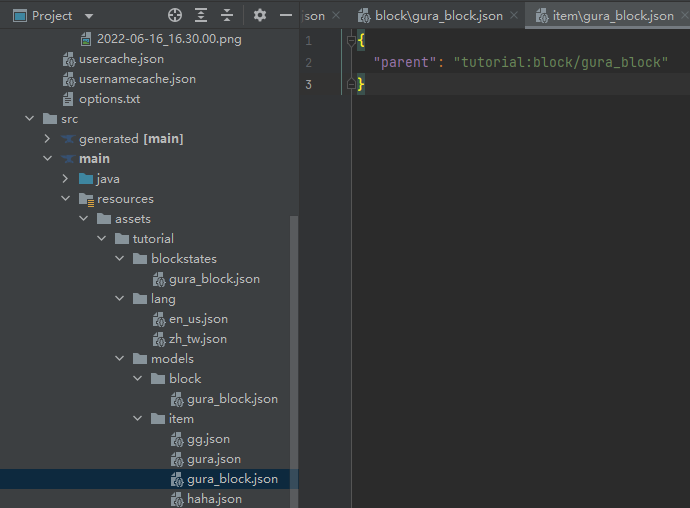
為物品上材質與本地化名稱
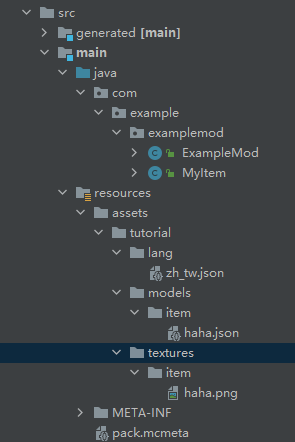
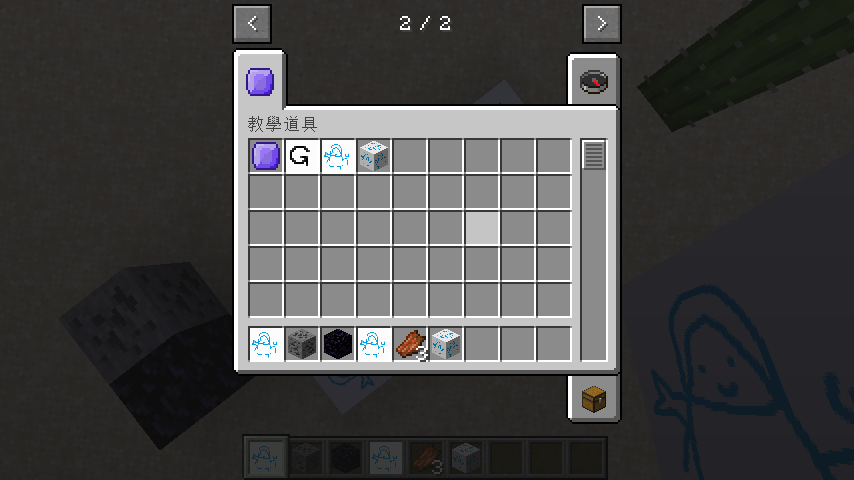
建立如左的資料夾結構
副檔名請務必一致
zh_tw.json
{
  "item.MOD_ID.ITEM_LABLE": "A",
  "itemGroup.GROUP_LABLE": "Tutorial Item"
}
MOD_ID改成你的mod ID
ITEM_LABLE改成你道具的內部名稱
GROUP_LABLE改成你的標籤內部名稱
等等進到遊戲時記得改成繁體中文
不然看不到
haha.json
{
  "parent": "item/generated",
  "textures": {
    "layer0": "tutorial:item/NAME"
  }
}
NAME需要與檔案名稱、道具內部名稱一致
不可有大寫
haha.png
必須為正方形圖檔
檔名必須等於道具的內部名稱
最好是16*16
可以大一點(32*32、64*64...)
最好不要在小了
一定、必須、不可以不是png檔
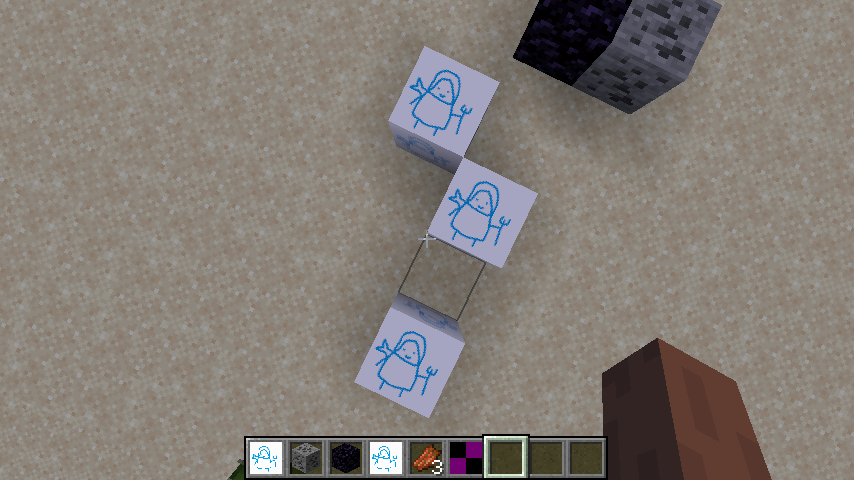
Custom item
public class CustomItemA extends Item {
    int count;

    public CustomItemA (Properties properties) {
        super(properties);
        count = 0;
    }

    @Override
    public ActionResult<ItemStack> onItemRightClick (World worldIn, PlayerEntity playerIn, Hand handIn) {
        if(worldIn.isRemote()){
            ClientPlayerEntity playerEntity = (ClientPlayerEntity) playerIn;
            count++;
            String tmp = "";
            for(int i = 0; i < count; i++){
                tmp += " SO";
            }
            playerEntity.sendChatMessage("I" + tmp + " LIKE GAWR GURA!");
            return ActionResult.resultPass(new ItemStack(this));
        }
        return ActionResult.resultPass(new ItemStack(this));
    }

    @Override
    public void addInformation (ItemStack stack, @Nullable World worldIn, List<ITextComponent> tooltip, ITooltipFlag flagIn) {
        if(Screen.hasShiftDown())
            tooltip.add(new TranslationTextComponent("tooltip.tuitionmod.gura_shift"));
        else
            tooltip.add(new TranslationTextComponent("tooltip.tuitionmod.gura"));
    }
}
extends Item
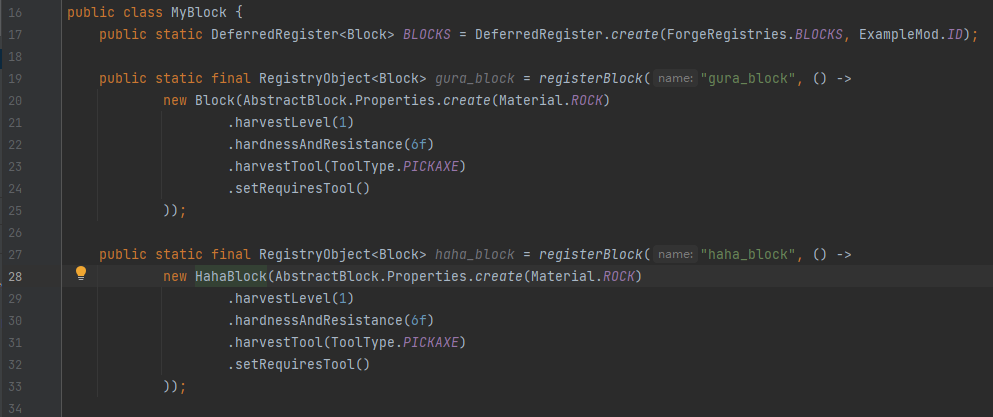
new Block
public class MyBlock {
    public static final DeferredRegister<Block> BLOCKS
    = DeferredRegister.create(ForgeRegistries.BLOCKS, ExampleMod.ID);

    // Register Block instance
    public static void register(IEventBus eventBus){
        BLOCKS.register(eventBus);
    }
}
MyBlock register list
Register your new block list
an new block
public class MyBlock {
    public static final DeferredRegister<Block> BLOCKS = DeferredRegister.create(ForgeRegistries.BLOCKS, ExampleMod.ID);

    public static final RegistryObject<Block> gura_block = BLOCKS.register("gura_block", () ->
            new Block(AbstractBlock.Properties.create(Material.ROCK)
                    .harvestLevel(1)
                    .hardnessAndResistance(6f)
                    .harvestTool(ToolType.PICKAXE)
                    .setRequiresTool()
            ));

    // Register Block instance
    public static void register(IEventBus eventBus){
        BLOCKS.register(eventBus);
    }
}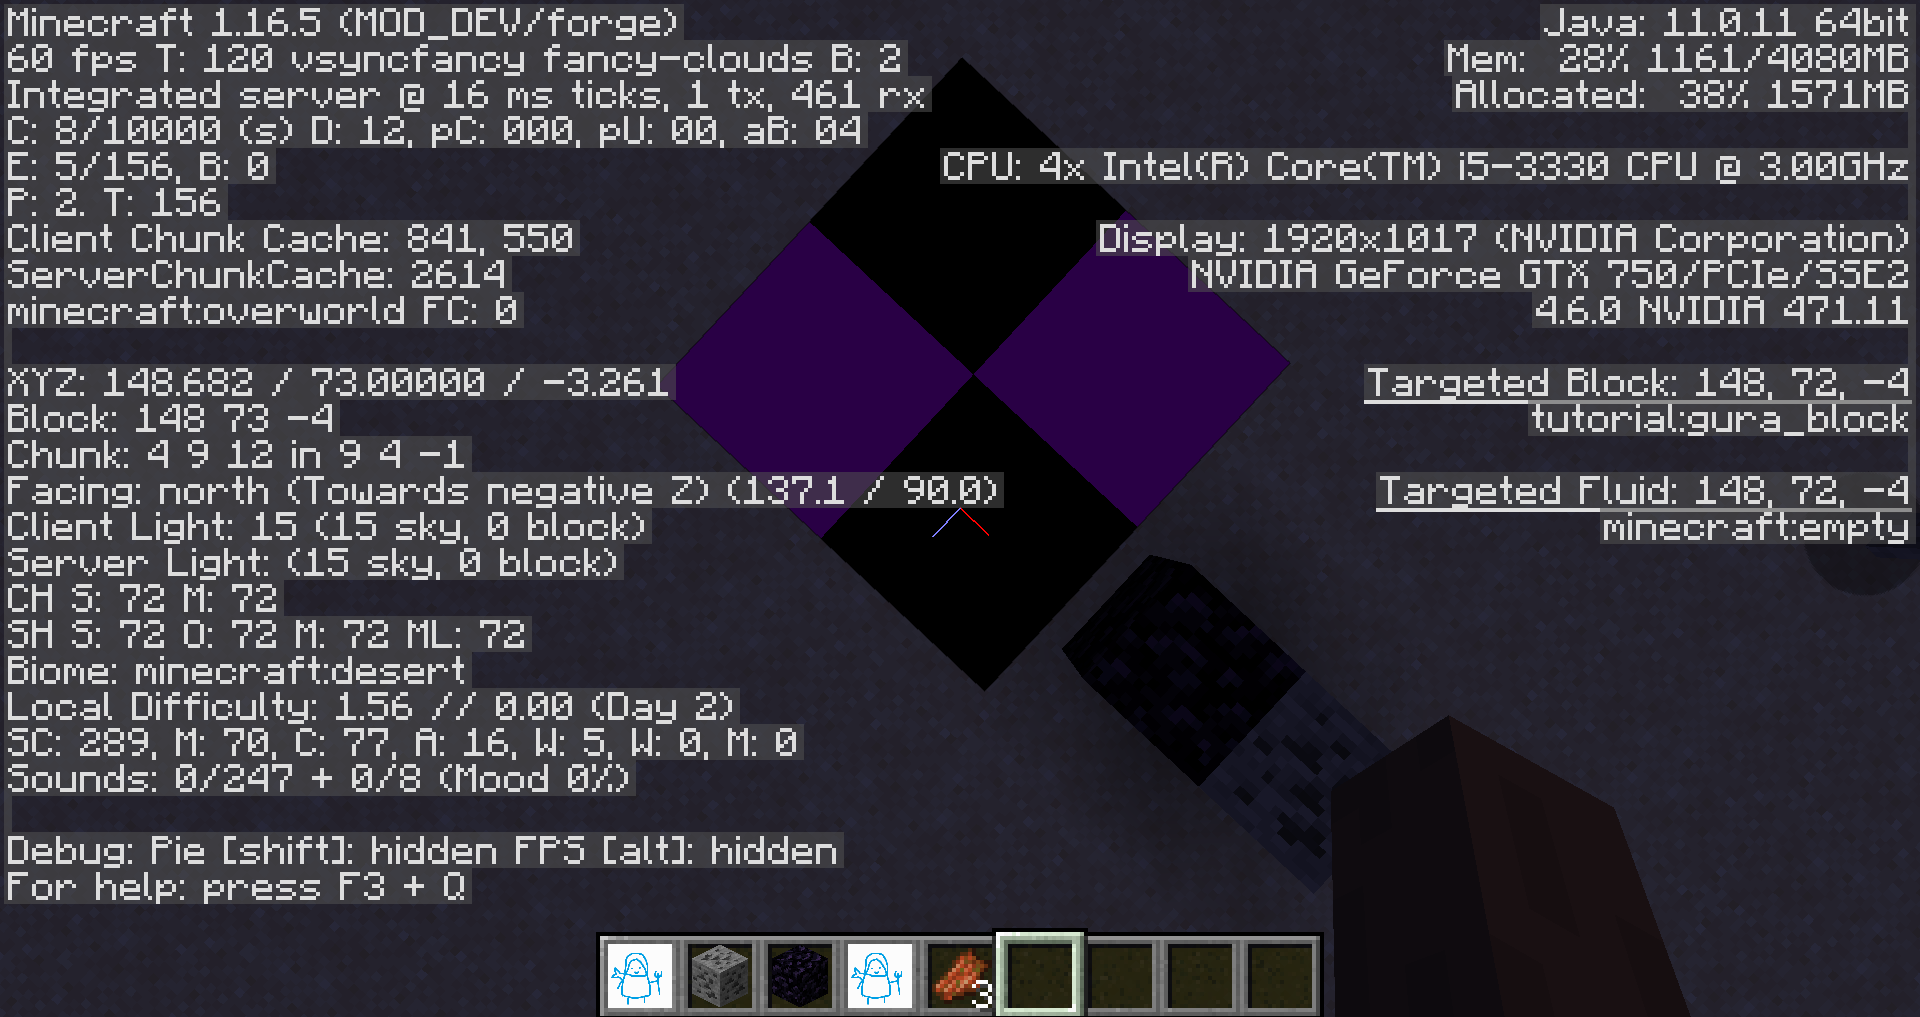
/setblock ~ ~-1 ~ tutorial:gura_block
add block to creative mod group
public class MyBlock {
    public static final DeferredRegister<Block> BLOCKS = DeferredRegister.create(ForgeRegistries.BLOCKS, ExampleMod.ID);

    // use new register method
    public static final RegistryObject<Block> gura_block = registerBlock("gura_block", () ->
            new Block(AbstractBlock.Properties.create(Material.ROCK)
                    .harvestLevel(1)
                    .hardnessAndResistance(6f)
                    .harvestTool(ToolType.PICKAXE)
                    .setRequiresTool()
            ));

    private static <T extends Block>RegistryObject<T> registerBlock(String name, Supplier<T> block) {
        // register block to eventBus
        RegistryObject<T> tmp = BLOCKS.register(name, block);

        // register blockItem to eventBus
        MyItem.ITEM.register(name, () -> new BlockItem(tmp.get(), new Item.Properties().group(MyItemGroup.group)));

        return tmp;
    }

    // Register Block instance
    public static void register(IEventBus eventBus){
        BLOCKS.register(eventBus);
    }
}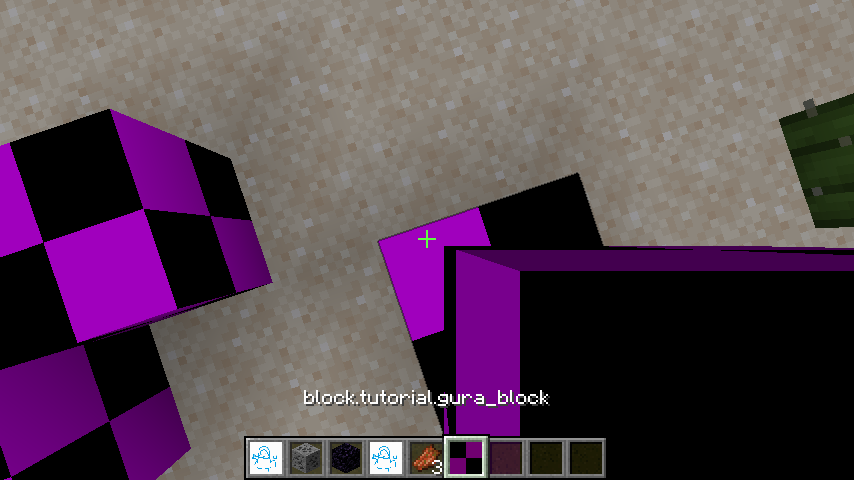
set texture
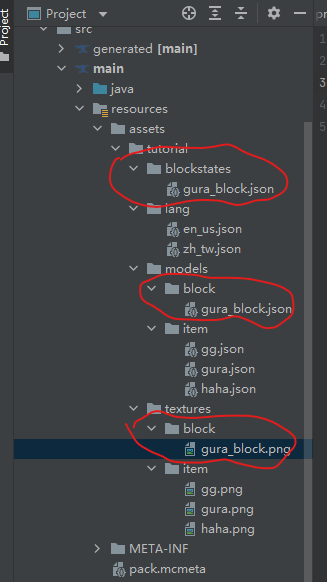
add those files and directory
名字必須和遊戲內名稱相同
blockstates/gura_block.json
{
  "variants": {
    "": { "model": "tutorial:block/gura_block" }
  }
}
models/block/gura_block.json
{
  "parent": "block/cube_all",
  "textures": {
    "all": "tutorial:block/gura_block"
  }
}
textures/block/gura_block.png
必須是正方形
邊長為
2^n, n\in\N

add blockItem textures
add file gura_block.json in models/item
DONE!
Custom Block
import net.minecraft.block.Block;

public class HahaBlock extends Block {
    public HahaBlock (AbstractBlock.Properties properties) {
        super(properties);
    }
}
開一個新的 class
要記得 extends Block
別 import 錯了
記得寫一個引數是 AbstractBlock.Properties的建構子
然後直接使用 super 使用父類別的建構子
別忘了去 MyBlock register 你的新方塊
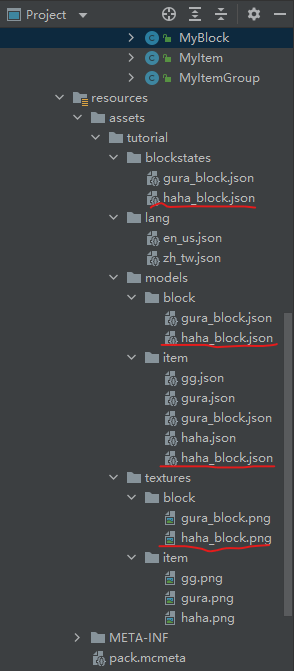
別忘了上材質
json檔案需要的東西可以參考 New Block 章節
回到HahaBlock.java
讓我們來給它專屬的新能力
我們來一個一個方法細說
public class HahaBlock extends Block {

    public HahaBlock (AbstractBlock.Properties properties) {
        super(properties);
    }

    @Override
    @SuppressWarnings("deprecation") // remove warning
    // When player left-clicked this block
    public void onBlockClicked (BlockState state, World worldIn, BlockPos pos, PlayerEntity player) {
        if(!worldIn.isRemote()){
            player.sendStatusMessage(new TranslationTextComponent("message.tutorial.haha_block_left-clicked"), false);
        }
    }

    @Override
    @SuppressWarnings("deprecation")
    // When player right-clicked this block
    public ActionResultType onBlockActivated (BlockState state, World worldIn, BlockPos pos, PlayerEntity player, Hand handIn, BlockRayTraceResult hit) {
        if(!worldIn.isRemote() && handIn == Hand.MAIN_HAND){
            HahaBlockTileEntity tile = (HahaBlockTileEntity) worldIn.getTileEntity(pos);

            player.dropItem(new ItemStack(MyItem.haha.get()), false, false).setNoPickupDelay();
            player.sendStatusMessage(new TranslationTextComponent("message.tutorial.haha_block_right-clicked"), false);

            return ActionResultType.SUCCESS;
        }
        return ActionResultType.PASS;
    }

    @Override
    public void onEntityWalk (World worldIn, BlockPos pos, Entity entityIn) {
        if(!worldIn.isRemote() && entityIn instanceof PlayerEntity){
            ((PlayerEntity) entityIn).sendStatusMessage(new TranslationTextComponent("message.tutorial.haha_block_onWalk"), false);
        }
    }
}
@Override
@SuppressWarnings("deprecation") // remove warning
// When player left-clicked this block
public void onBlockClicked (BlockState state, World worldIn, BlockPos pos, PlayerEntity player) {
if(!worldIn.isRemote()){
player.sendStatusMessage(new TranslationTextComponent("message.tutorial.haha_block_left-clicked"), false);
}
}@SuppressWarnings("deprecation") : 關掉警告訊息,其實不是很重要
onBlockClicked 是在當玩家用左鍵點擊/破壞方塊時觸發
BlockState : 裡面存放著方塊properties,可以用get開頭的方法去取得對應值
BlockPos : 方塊所在座標資訊,可以用 getX()、getY()、getZ() 取得
PlayerEntity : 玩家實體
player.sendStatusMessage()是另外一種向玩家傳訊息的方式
他需要用本地化名稱方式來傳遞文字
可以參考之前Custom Item的用法
@Override
@SuppressWarnings("deprecation")
// When player right-clicked this block
public ActionResultType onBlockActivated (BlockState state, World worldIn, BlockPos pos, PlayerEntity player, Hand handIn, BlockRayTraceResult hit) {
    if(!worldIn.isRemote() && handIn == Hand.MAIN_HAND){
        player.dropItem(new ItemStack(MyItem.haha.get(), 1), false, false).setNoPickupDelay();
        player.sendStatusMessage(new TranslationTextComponent("message.tutorial.haha_block_right-clicked"), false);

        return ActionResultType.SUCCESS;
    }
    return ActionResultType.PASS;
}
onBlockActivated : 在玩家右鍵點擊方塊時觸發
Hand : 告訴你玩家是用"左手"還是"右手"點擊方塊(其實在點下去時會判定兩次,一次是左手,一次是右手)
他有回傳值,代表這一次"玩家右鍵點擊"事件有沒有執行成功
請注意
"玩家右鍵點擊"若沒有成功將會繼續接著呼叫其他事件
ex:當你拿著方塊右鍵點擊我們的新方塊時,若回傳值是ActionResultType.SUCCESS 那就不會把你手中的方塊放出來
player.dropItem()用來給玩家道具用
其中ItemStack物件中的count參數決定物品數量
@Override
public void onEntityWalk (World worldIn, BlockPos pos, Entity entityIn) {
    if(!worldIn.isRemote() && entityIn instanceof PlayerEntity){
    	((PlayerEntity) entityIn).sendStatusMessage(new TranslationTextComponent("message.tutorial.haha_block_onWalk"), false);
    }
}
onEntityWalk : 當有實體站/走在這個方塊"上面"時觸發
裡面用到 entityIn instanceof PlayerEntity 來檢查是不是玩家走/站在上面
請注意
Minecraft 世界是以 Tick 作為單位計算時間
20 ticks = 1 sec
這代表著玩家站/走在這個方塊上時
每一秒都會觸發這個事件20次
因此,當玩家一旦站/走在這個方塊上時...
Ok
我們得到了無情洗頻機
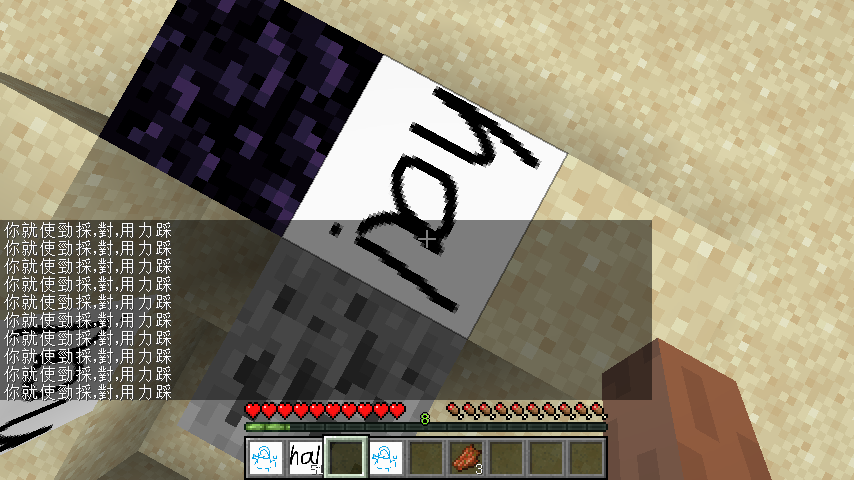
How to fix it??
下一章我們就要來講用什麼解決這種破事
- TileEntity : 解決剛剛所提到的破事
- BlockState : Minecraft 世界中用來表示"每一個方塊"的物件
- ItemStack : 同 BlockState,但表示的是"每一個物品欄裡的物品"
Minecraft Mod 教學
By asadfgglie


