Game Development
by: 呂家睿
What is game development?
- drawing, coding
- designing, testing, debuging, releasing

Game Engine
Game Framework


Graphic API


Comparison
| difficulty | limit | editor/GUI | |
|---|---|---|---|
| Game Engine | dependent, large | full set | |
| Game Framework | fine but depend on libraries | no or minimal | |
| Graphic API | same but free-er | not at all |

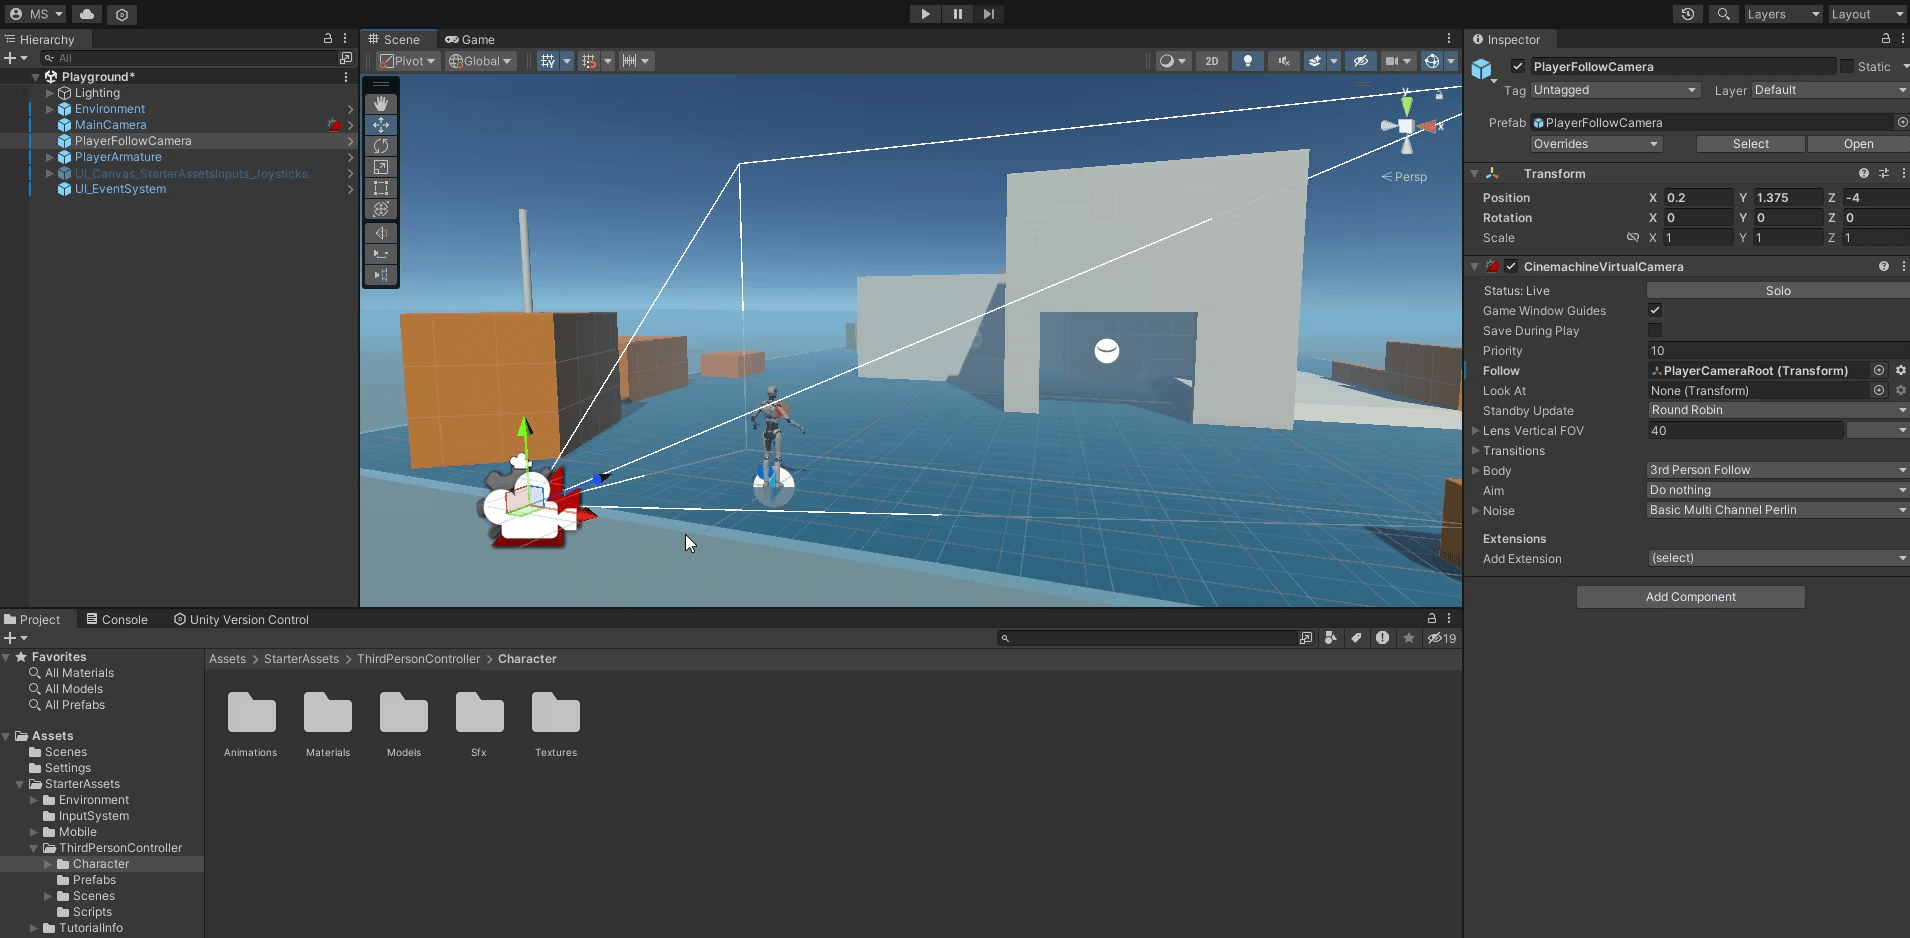
Game Engine(Unity)
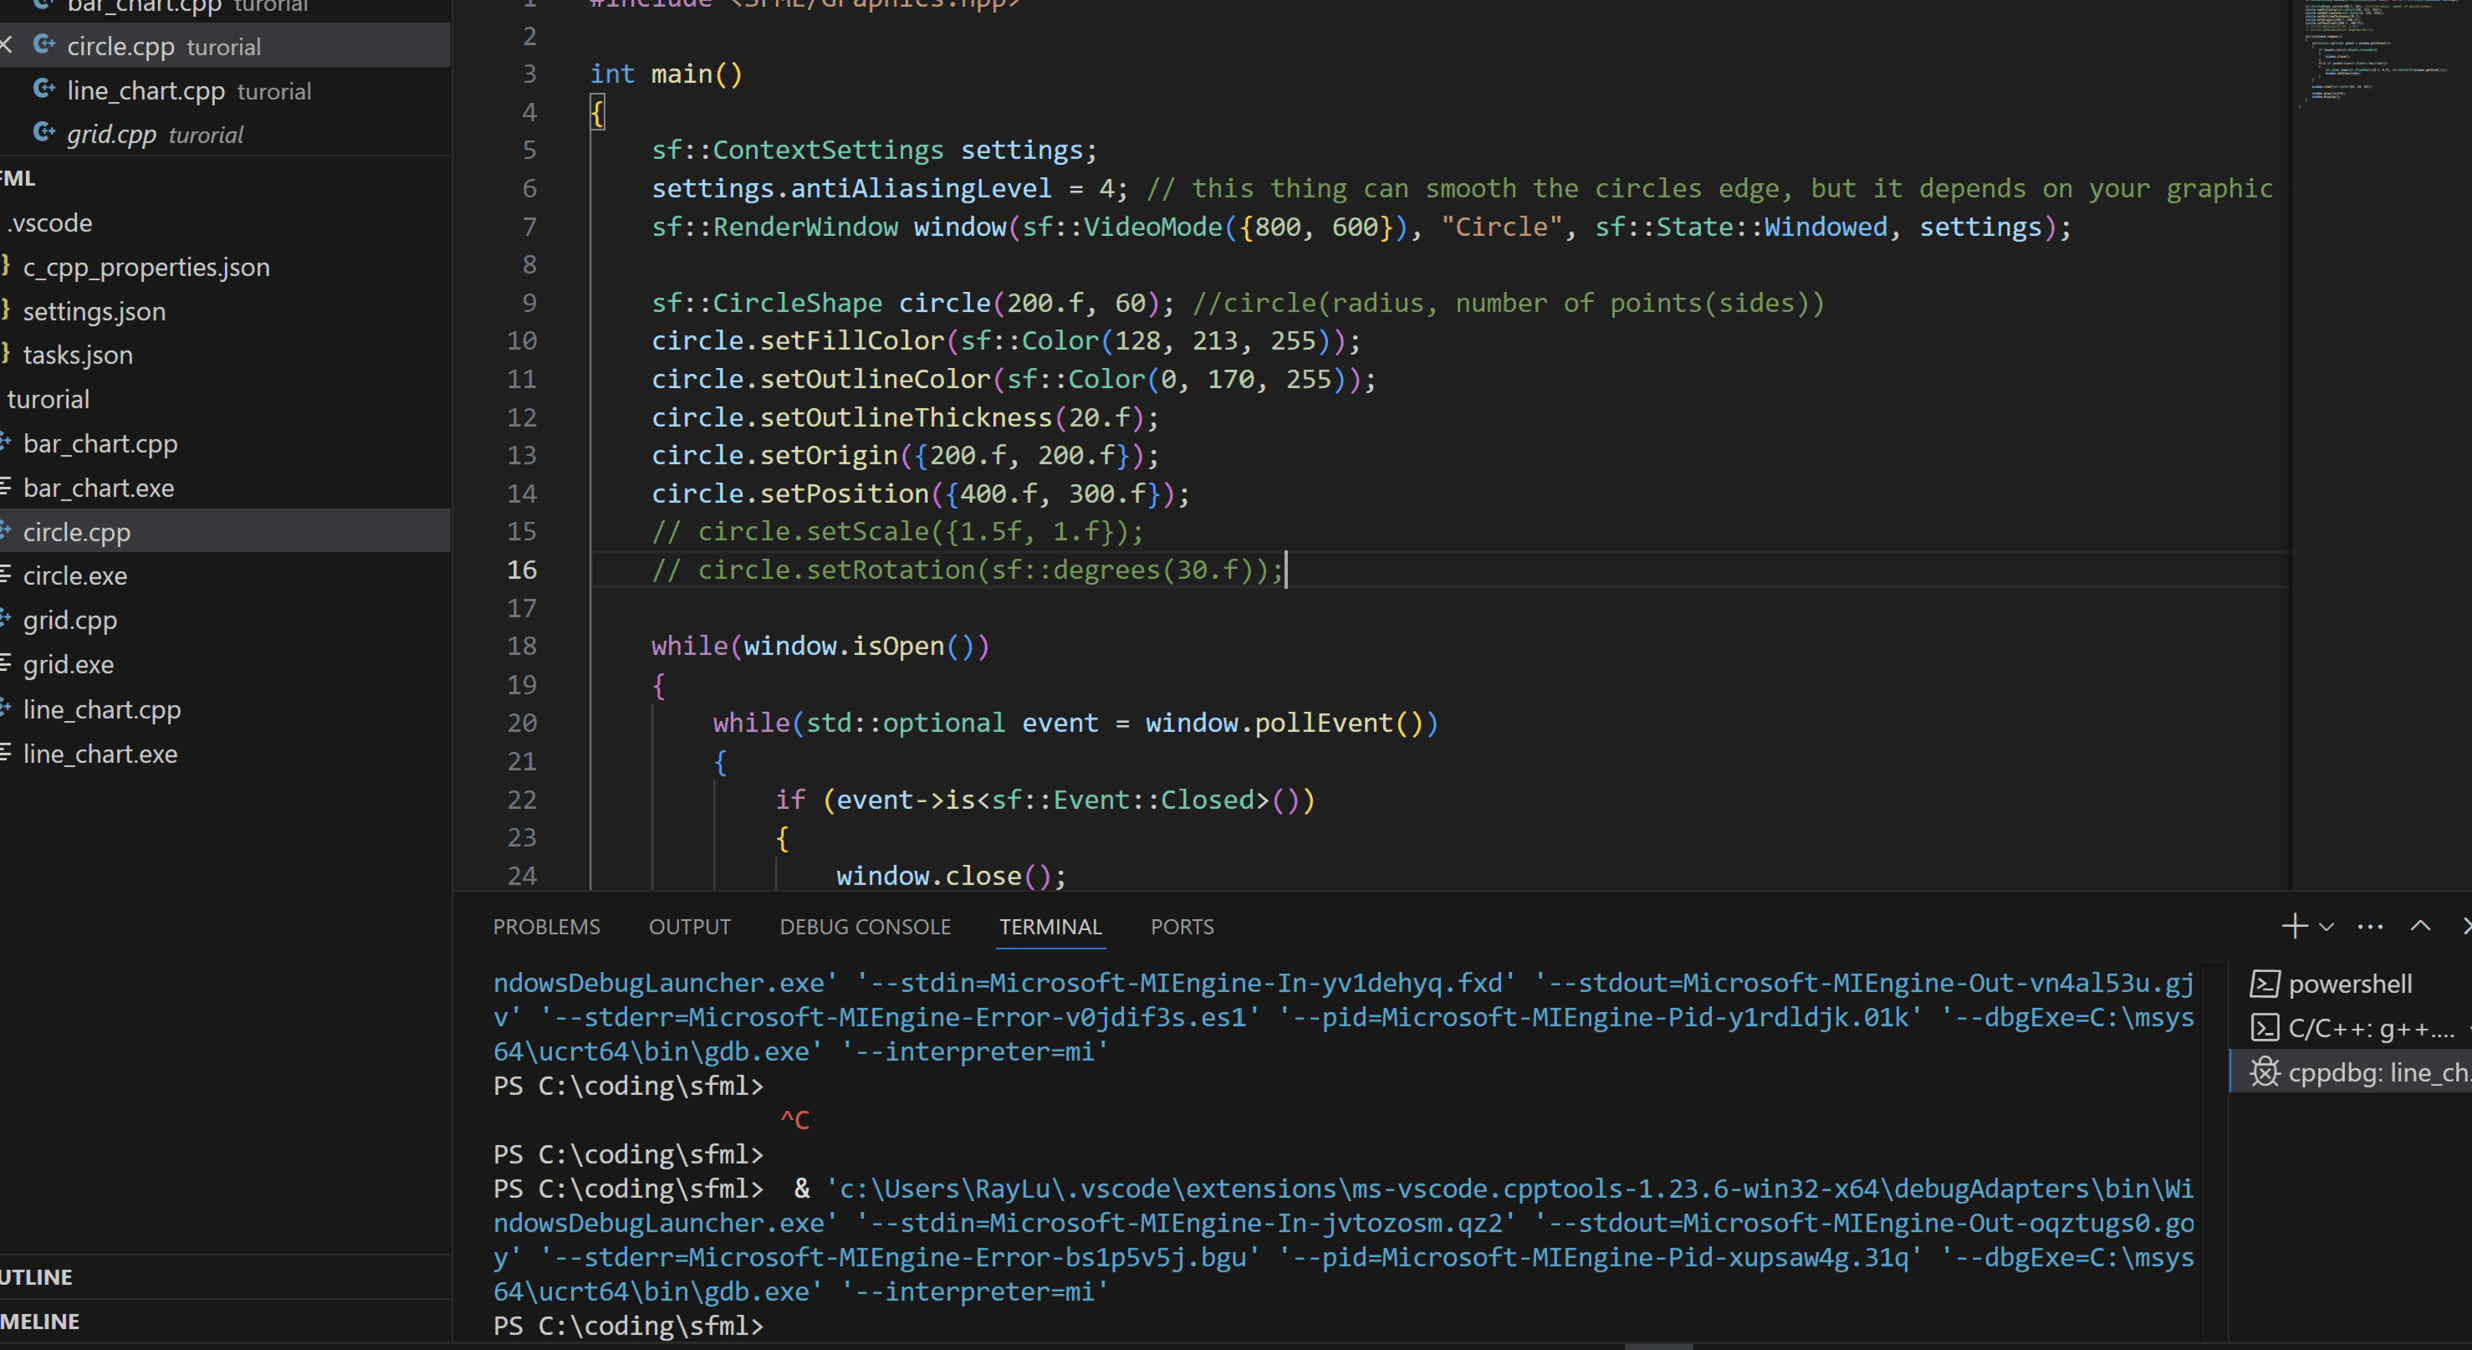
Game Framework(SFML)
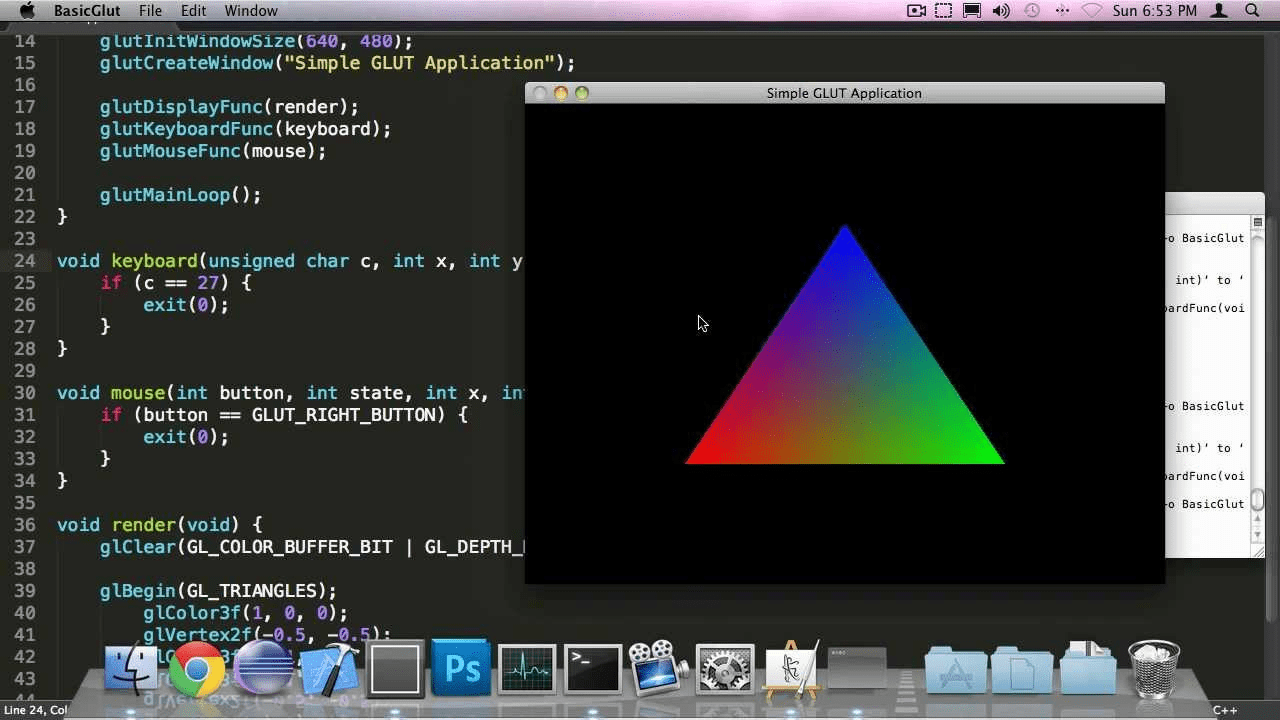
Graphic API(OpenGL)
SFML
Simple Fast Multimedia Library
WHY SFML????
-
based on C99(a version of C)
-
can do both 2D and 3D
- based on C
- for 2D only
- a bit lower level
- based on C++
- for 2D only
- clean and has more stuff
More Details For SFML
- Simple, fast, and lightway
- Good for 2D but not 3D
- raylib and graphic api for 3D
- Good for beginners
- Good for practicing object oriented programming
- powerful libraries for audio, networking, window......
Setting up SFML


(can skip for school)
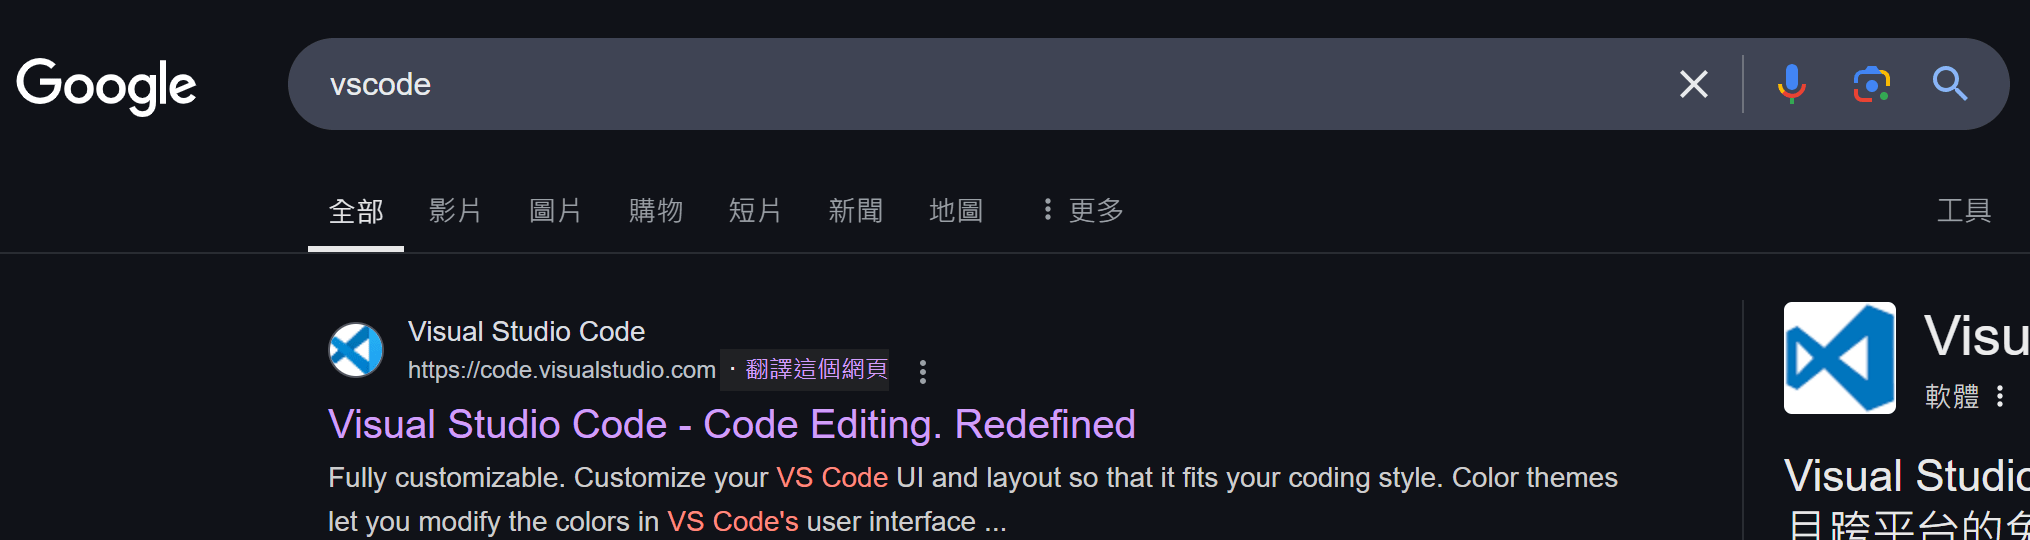
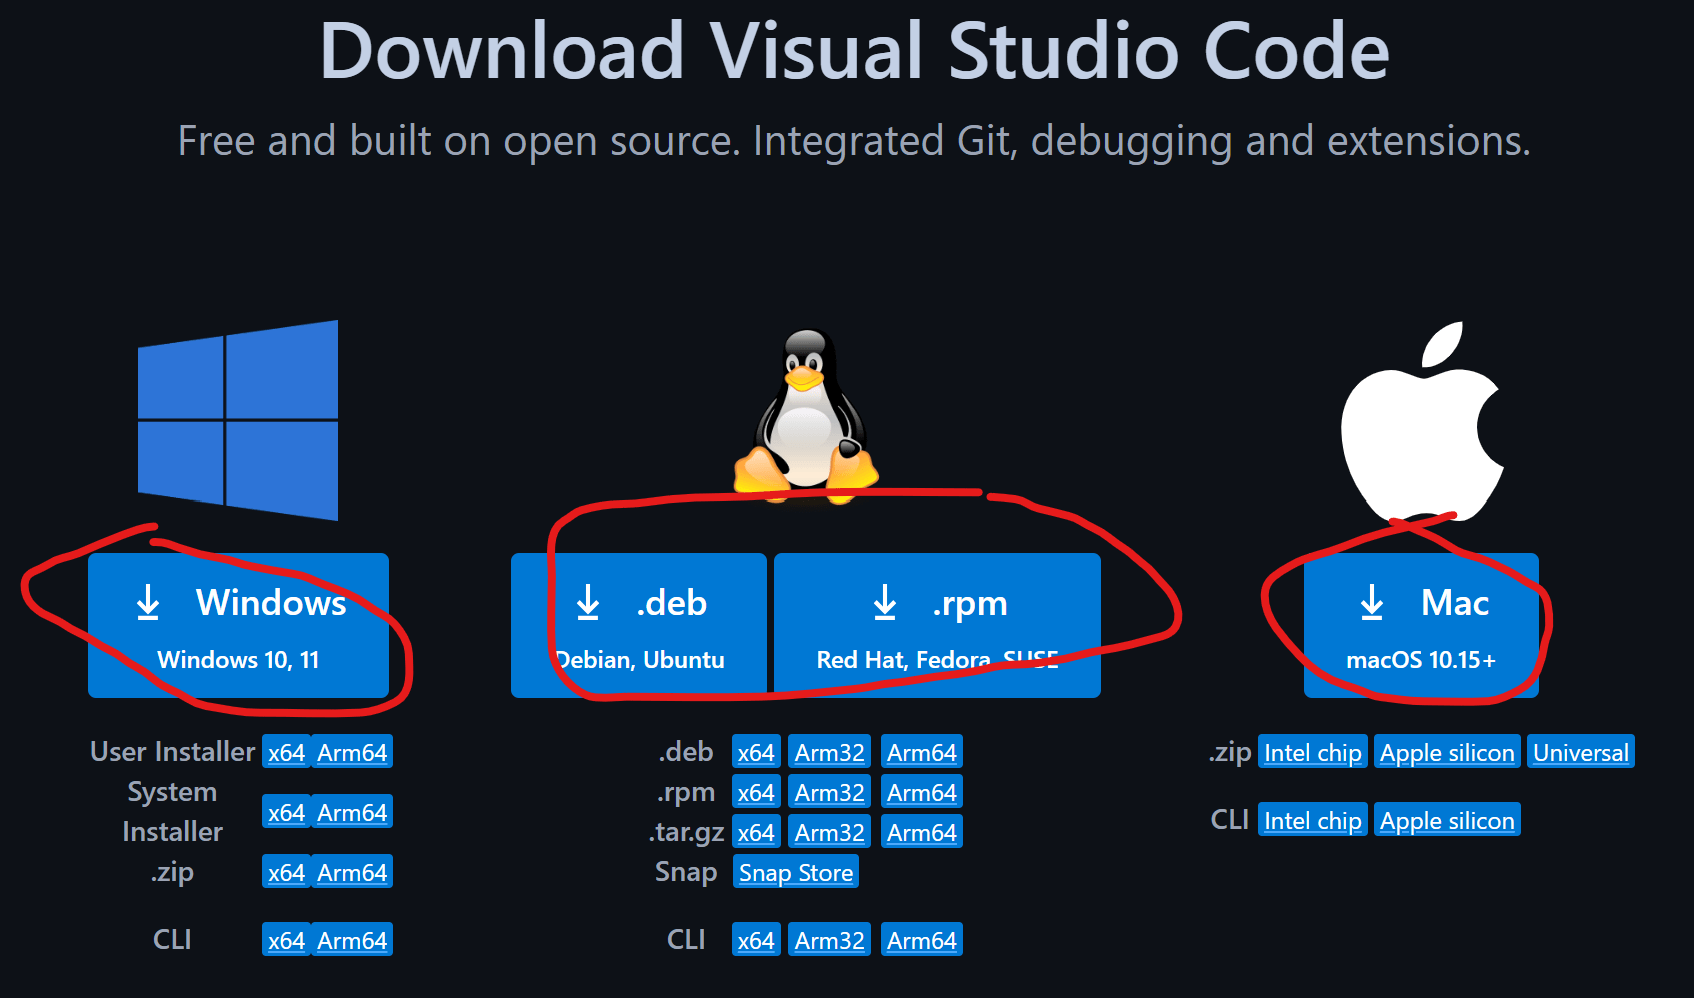
1-1. search "vscode" and click the website
1-2. click the download button on the top right
Setting up SFML
(can skip for school)
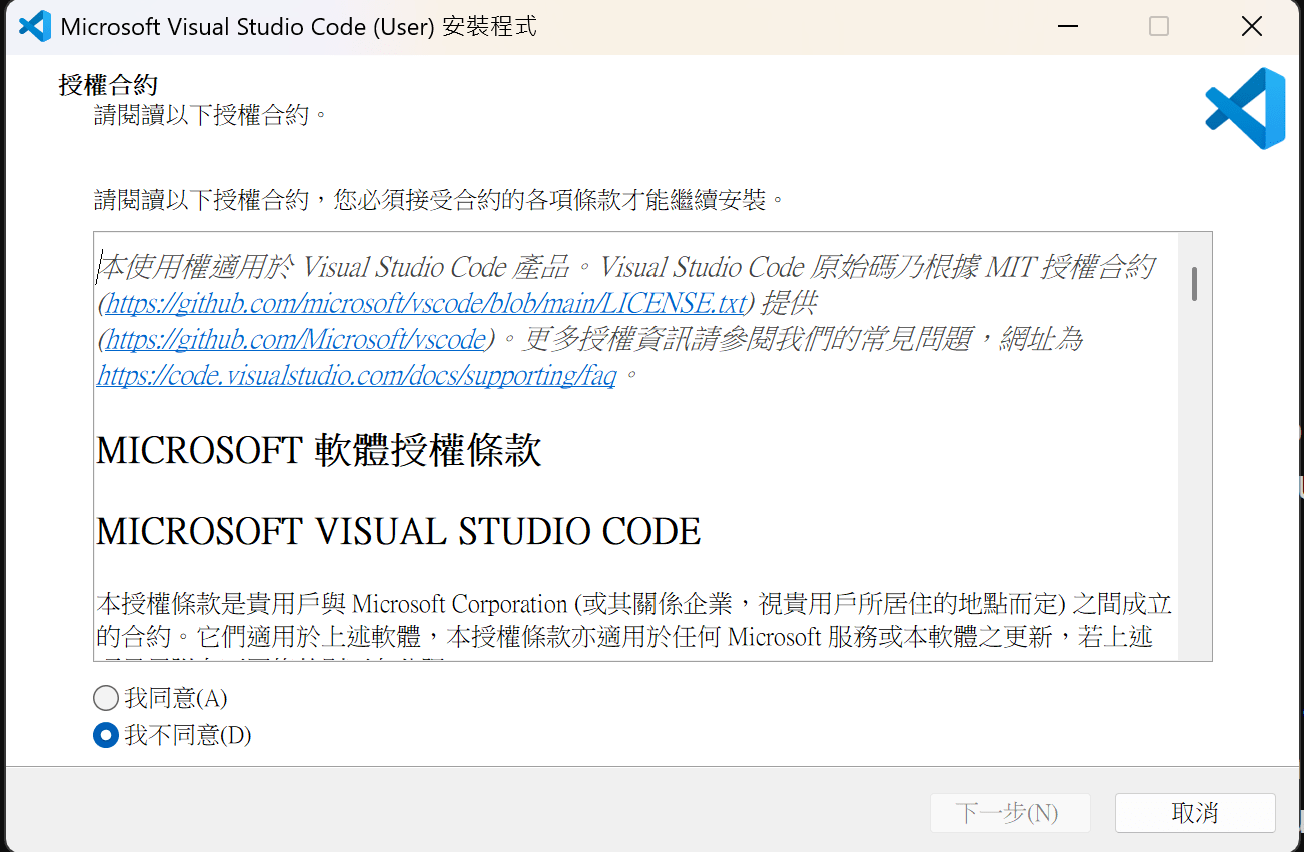
1-3. download the one for your OS
1-4. open the thing you downloaded, hit agree, and just keep going next step, and finally hit install
Setting up SFML

(can skip for school)
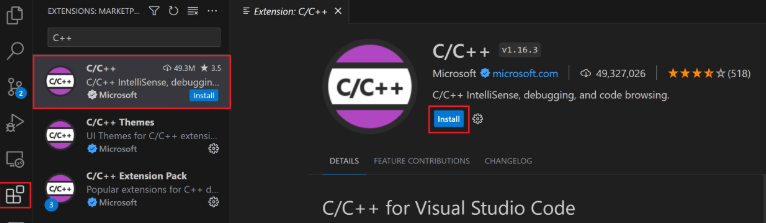
2-1. install c++ extensions in vscode
2-2. install MinGW-x64 on windows
basically, just open the installer and follow it.
**This is for windows OS only**
Setting up SFML
(can skip for school)
2-3.MinGW command prompt stuff
once you finished the download, a command prompt will appear
do the following:
- enter this command
- follow its instructions
- basically press enter twice
- enter "Y"
- press enter
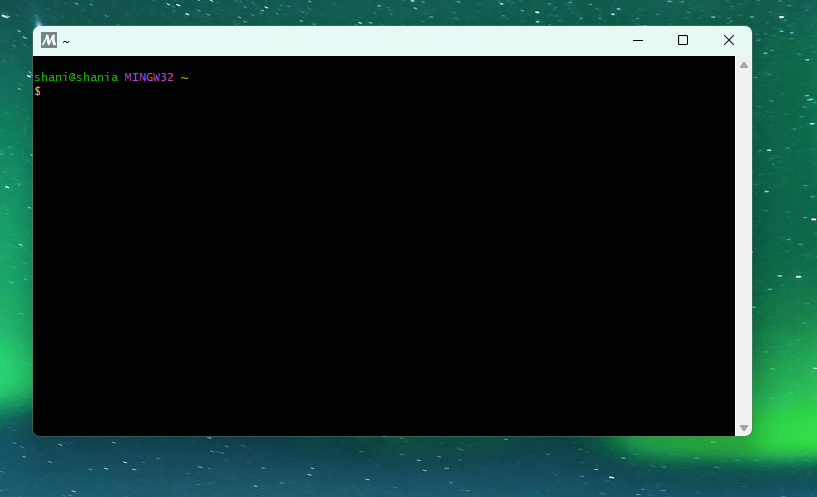
pacman -S --needed base-devel mingw-w64-ucrt-x86_64-toolchain
Setting up SFML
(can skip for school)
2-4.adding path
- open "settings"
- search for "Edit environment variables for your account"
- select path and click edit
- click new and add the destination folder of migw-w64
- click Ok and click Ok in the environment variable window
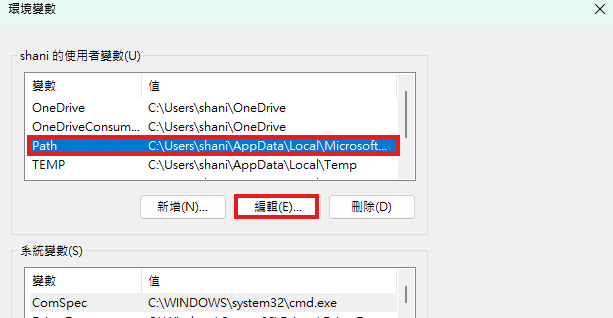
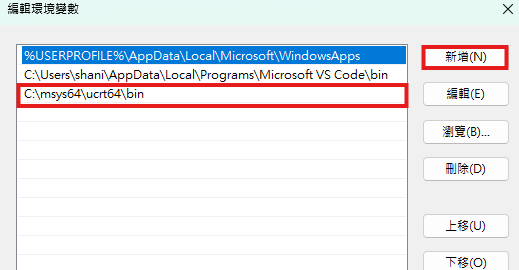
//the path for default settings will be:
C:\msys64\ucrt64\bin
Setting up SFML
(can skip for school)
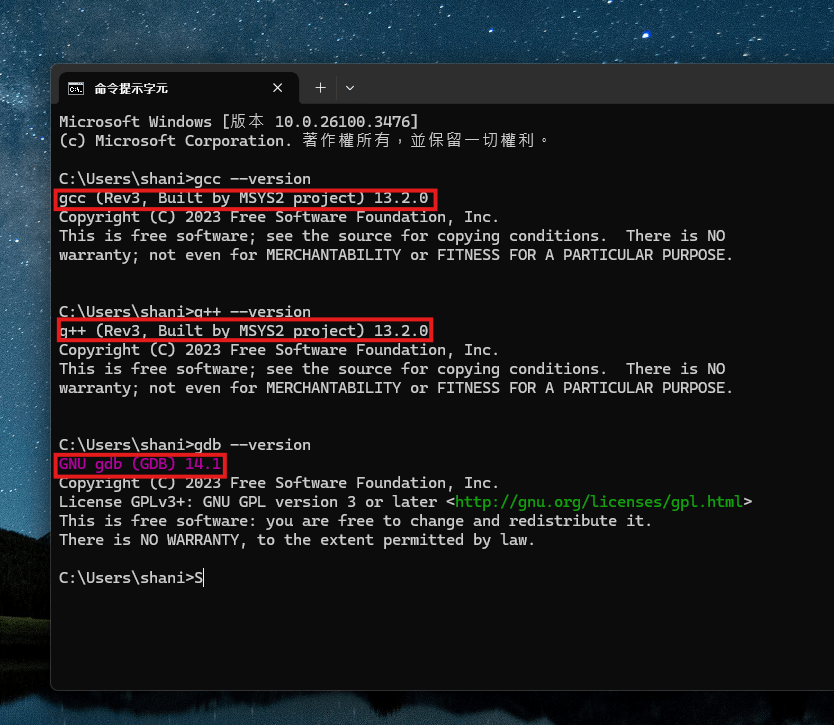
2-5.checking
- open "command prompt"
- type in:
gcc --version
g++ --version
gdb --version- you should see the version of each of them if installed correctly
- if you don't, well, you did something wrong. But its fine just try to check what step you missed
still can't figure out?
Setting up SFML
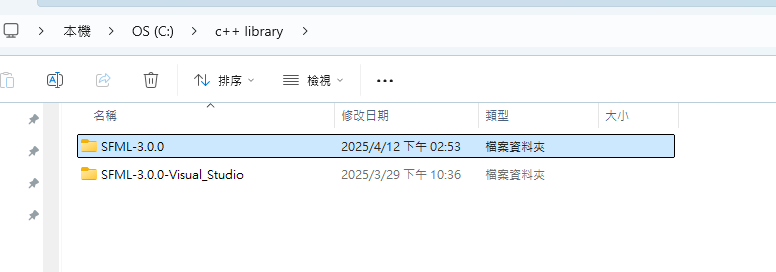
Step 3. Install the library
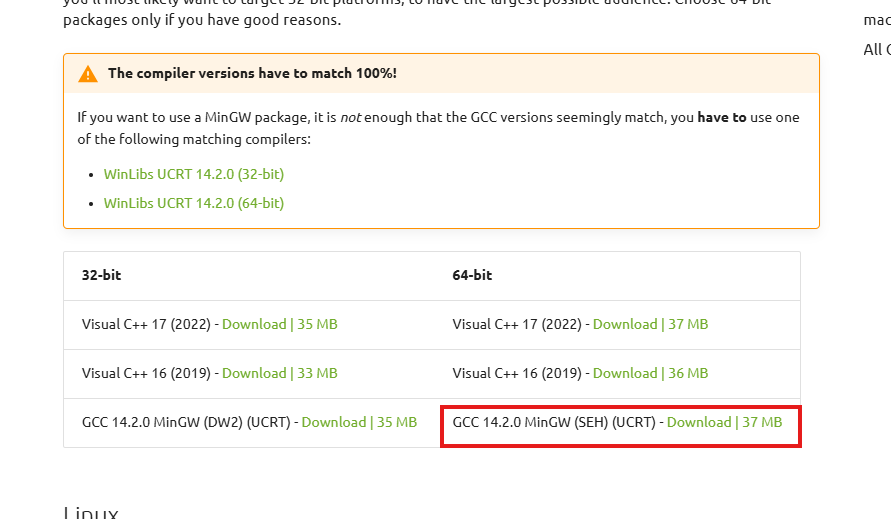
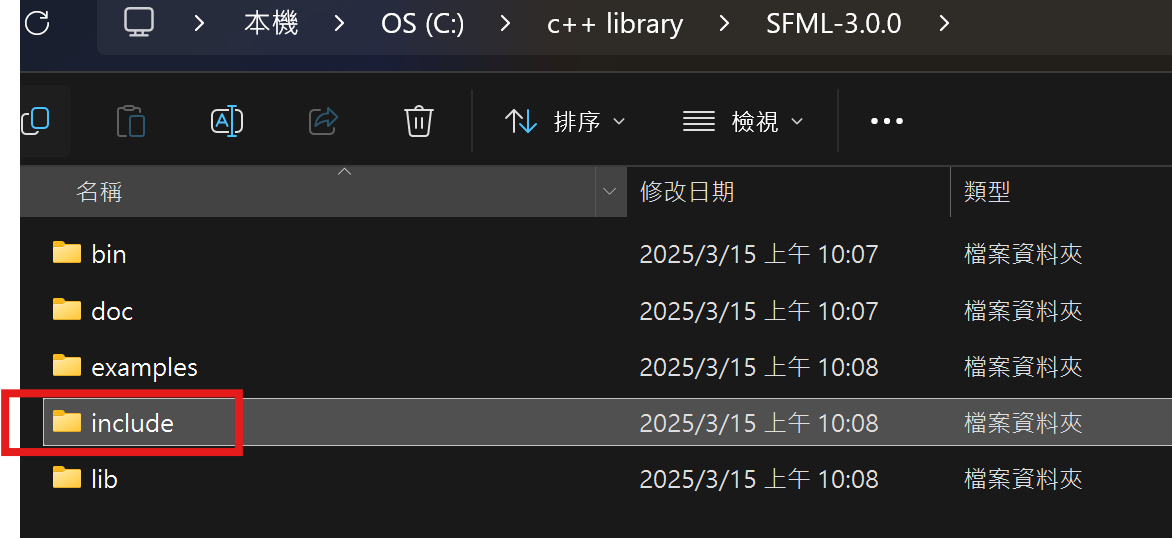
3-2. unzip the file you downloaded to a location you will remember
3-3. create a folder for sfml project
inside the folder create a main.cpp file
run it
Yes you can also use visual studio
its good but not for this class
Setting up SFML
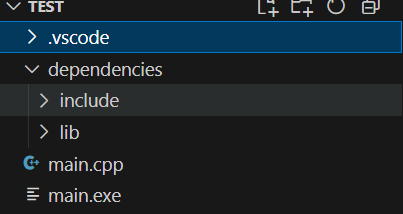
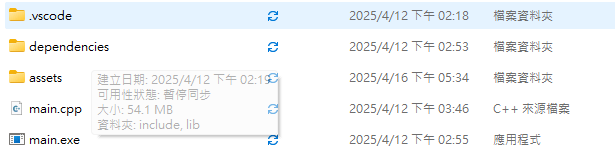
4-1. dependencies
inside your sfml project folder create a folder called dependencies and paste your include and lib folders inside it.
ignore this

Setting up SFML
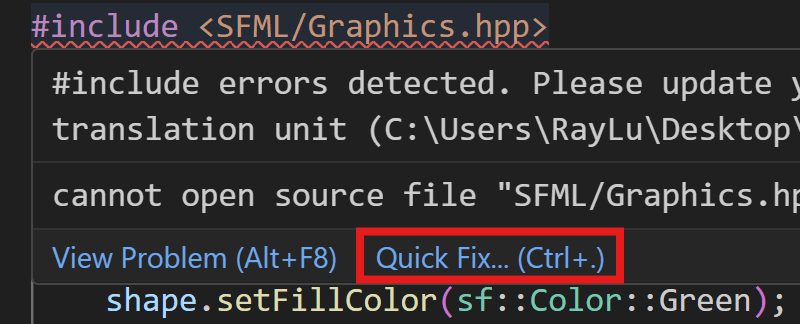
4-2.paste the tutorial code in your main.cpp file (it's normal that you see an error)
//this is the tutorial code
#include <SFML/Graphics.hpp>

int main()
{
    sf::RenderWindow window(sf::VideoMode({200, 200}), "SFML works!");
    sf::CircleShape shape(100.f);
    shape.setFillColor(sf::Color::Green);

    while (window.isOpen())
    {
        while (const std::optional event = window.pollEvent())
        {
            if (event->is<sf::Event::Closed>())
                window.close();
        }

        window.clear();
        window.draw(shape);
        window.display();
    }
}
4-3.put your mouse on the error
vscode will show a recommendation
click quick fix -> include path settings
-> c_cpp_properties.json
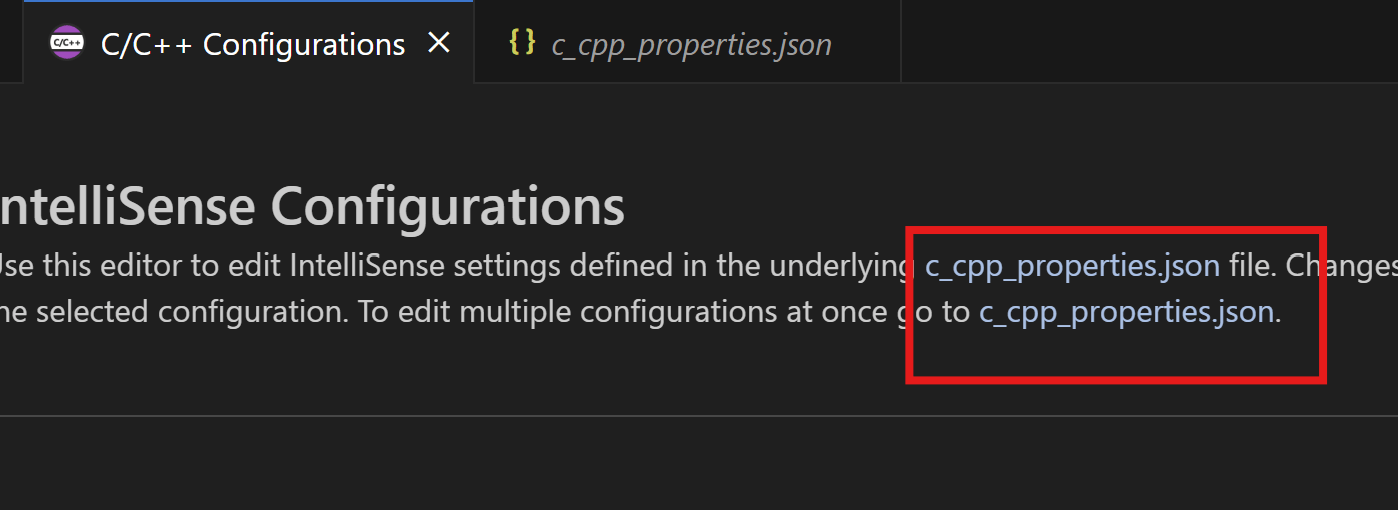
Setting up SFML
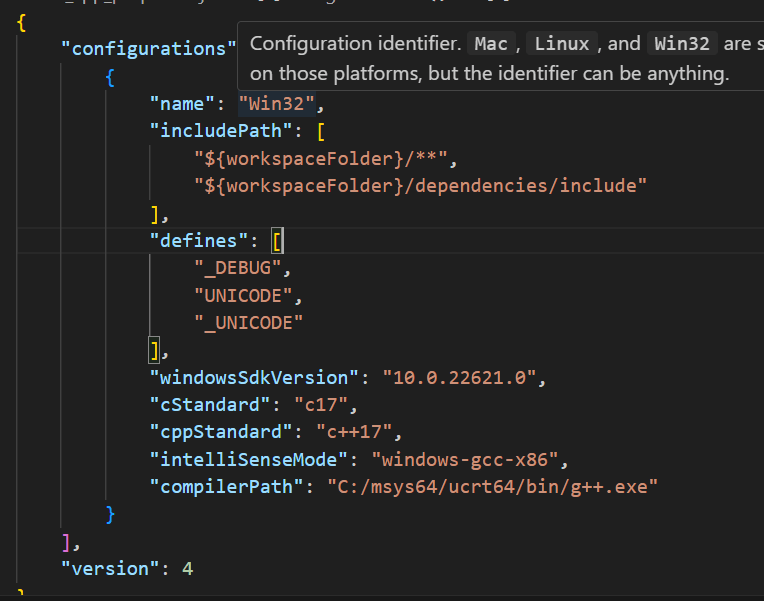
4-4. in the c_cpp_properties json file
there's an "includePath" section
add in this:
"${workspaceFolder}/dependencies/include"
don't forget the comma and to save
Setting up SFML
4-4.open the tasks.json file
<------paste this in the arg section
"-fdiagnostics-color=always",
"-g",
"${file}",
"-I\"${workspaceFolder}/dependencies/include\"",
"-DSFML_STATIC",
"-o",
"${fileDirname}\\${fileBasenameNoExtension}.exe",
"-L\"${workspaceFolder}/dependencies/lib\"",
"-lsfml-graphics-s",
"-lsfml-window-s",
"-lsfml-audio-s",
"-lsfml-network-s",
"-lsfml-system-s",
"-lfreetype",
"-lopengl32",
"-lwinmm",
"-lgdi32",
"-lflac",
"-lvorbisenc",
"-lvorbisfile",
"-lvorbis",
"-logg",
"-lws2_32"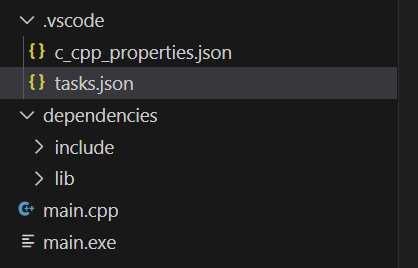
you should find your tasks.json here
final step - run main.cpp
If you did it, congrats!!!
if you didn't, its normal to fail at first,
be sure to follow the steps, if you still can't figure it out, check out the videos and resources


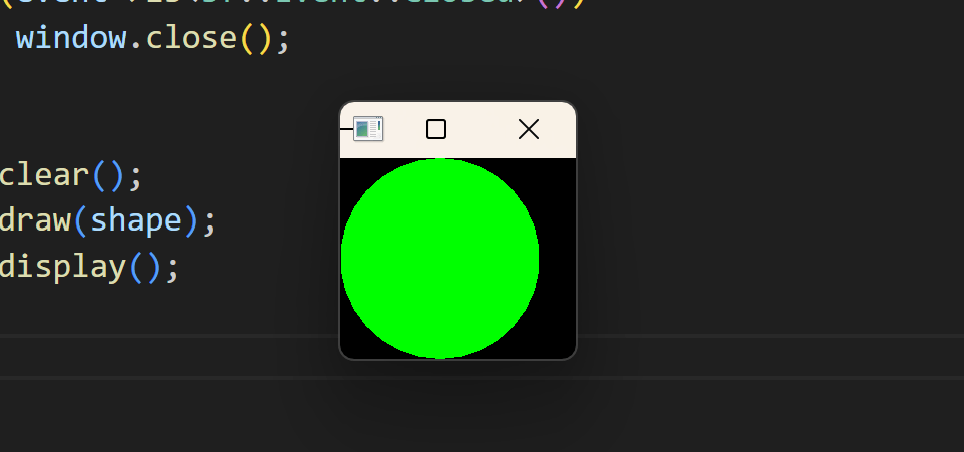
This window should pop out after you run main.cpp
The simple stuff
(maybe not that simple)
C++ basics
- IO
- Variables
- loops
- if statement
- data types
- array
- math operation
Practice!!!!
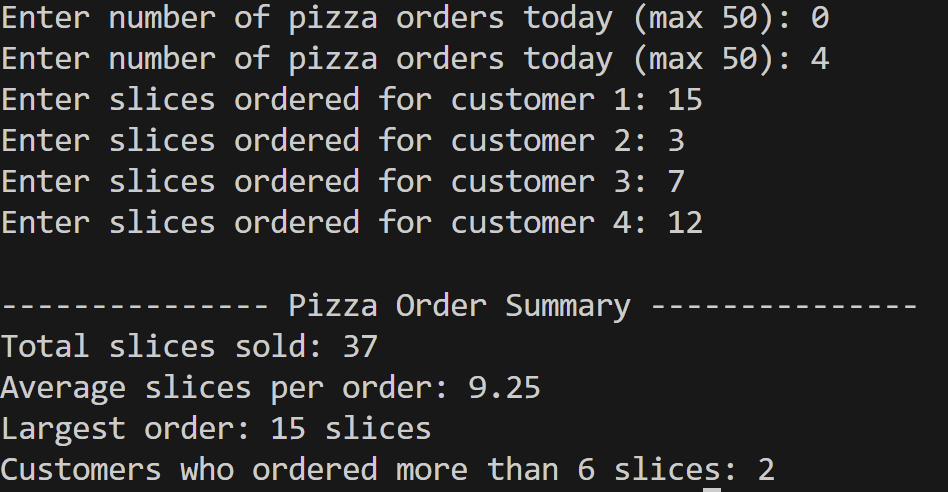
Pizza ordering program:
You’re running a small pizza shop and want to analyze your daily orders. Write a program that:
-
Asks how many pizza orders were made that day (max 50).
-
For each order, enter how many slices the customer ordered.
-
After all orders:
-
Calculate total slices sold
-
Calculate average slices
-
Find the largest single order
-
Count how many customers ordered more than 10 slices
-
C++ basics
Sample Answer:
#include <iostream>

int main()
{
    const int MAX_ORDERS = 50;
    int order_count;
    int slices[MAX_ORDERS];
    int total_slices = 0;
    int max_slices = 0;
    int eat_a_lot = 0;

    do
    {
        std::cout << "Enter number of pizza orders today (max 50): ";
        std::cin >> order_count;
    } while (order_count < 1 || order_count > MAX_ORDERS);


    for (int i = 0; i < order_count; i++)
    {
        std::cout << "Enter slices ordered for customer " << (i + 1) << ": ";
        std::cin >> slices[i];
        total_slices += slices[i];

        if (slices[i] > max_slices)
        {
            max_slices = slices[i];
        }

        if (slices[i] > 10)
        {
            eat_a_lot++;
        }
    }

    float average_slices = static_cast<float>(total_slices) / order_count;

    std::cout << "\n--------------- Pizza Order Summary ---------------\n";
    std::cout << "Total slices sold: " << total_slices << '\n';
    std::cout << "Average slices per order: " << average_slices << '\n';
    std::cout << "Largest order: " << max_slices << " slices\n";
    std::cout << "Customers who ordered more than 6 slices: " << eat_a_lot << '\n';

    return 0;
}
functions
-
a chunk of code that can do sth
-
can be used repeatedly
-
makes your code neat
-
arguments and parameters
-
ex: printf(), sum()
#include <iostream>
#include <cmath>

double hypotenuse(double side_1, double side_2)//declaration
{
    //definition
    double hyp = sqrt(side_1*side_1 + side_2*side_2);
    return hyp;
}

void hello()//declaration
{
	//definition
    std::cout << "Hello~~~!\n";
}

int main()
{
    double a, b;
    hello();
    std::cout << "Enter side a of the right triangle: ";
    std::cin >> a;
    std::cout << "Enter side b of the right triangle: ";
    std::cin >> b;
    std::cout << "The hypotenuse of the triangle is " << hypotenuse(a,b);
    return 0;
}
built in library, just using it for the square root funciton
function's return type
function's name
parameters ( or variables declared inside a function) are used to pass arguments into the function
things that you do inside the function
return's the value(hyp in this case) and ends the function
the void type means the function returns nothing
a and b are arguments passed into the function
#include <iostream>
#include <cmath>

double hypotenuse(double side_1, double side_2);
void hello();

int main()
{
    double a, b;
    hello();
    std::cout << "Enter side a of the right triangle: ";
    std::cin >> a;
    std::cout << "Enter side b of the right triangle: ";
    std::cin >> b;
    std::cout << "The hypotenuse of the triangle is " << hypotenuse(a,b);
}

double hypotenuse(  double side_1,  double side_2)
{
    double hyp = sqrt(side_1*side_1 + side_2*side_2);
    return hyp;
}

void hello()
{
    std::cout << "Hello~~~!\n";
}
You can also define them below the main function
But remember to declare them at the top or an error will occur
class
- like a type or a blueprint
- can have variables and functions (members)
- object oriented programming
- ex: string , RenderWindow
writing a class
#include <iostream>

class Car
{
    public:
        std::string brand;
        std::string color;
        int price = 0;
        int horse_power = 0;

        void check();
};

void Car::check()
{
    std::cout << "This is a " << color << ' ' << brand << '\n';
    std::cout << "It is " << price << "$ "<< "and has a horse power of " << horse_power << '\n';
}

int main()
{
    Car a;
    a.brand = "Toyota";
    a.color = "red";
    a.price = 500000;
    a.horse_power = 100;

    Car b;
    b.brand = "Benz";
    b.color = "white";
    b.price = 3000000;
    b.horse_power = 250;

    a.check();
    b.check();

    return 0;
}
Defining a class
the class' (Car's) variable
the class' (Car's)
function
let a be an object of the Car class
an object can has its own variable(it needs to be in the class)
defining Car's check function
constructor function
#include <iostream>

class Cup
{
    public:
        Cup(std::string c, std::string s);
        std::string color;
        std::string size;
};

Cup::Cup(std::string c = "white", std::string s = "big")
{
    color = c;
    size = s;
    std::cout << "Hmm seems like you have a " << size << " " << color << " cup!\n";
}

int main(){
    Cup glass_cup("red", "big");
    std::cout << glass_cup.color << '\n';

    return 0;
}
the constructor function
the constructor function has the same name as the class
creating an object
it doesn't have a type(not even void)
#include <iostream>

class Cup
{
    public:
        Cup(std::string c, std::string s);
        ~Cup();
        std::string color;
        std::string size;
};

Cup::Cup(std::string c , std::string s)
{
    color = c;
    size = s;
    std::cout << "Hmm seems like you have a " << size << " " << color << " cup!\n";
}

Cup::~Cup()
{
    std::cout << "Nooooo~~~\n";
    std::cout << "You killed a " << size << " " << color << " cup\n";
}

int main()
{
    Cup glass_cup("red", "big");
    std::cout << glass_cup.color << '\n';

    return 0;
}
the destructor function
~(class name)
cannot take arguments
also no return type
math
(just a little bit)
- algebra
- trigonometry(a bit)
- vector(a bit)

Game Core Logic
Initialization
Game Loop
Cleanup
Game Loop
- Handle Inputs
-
Update
- physics, game logic, collision....
-
Draw
- clear draw display
-
Handle Timing
- FPS --Vsync & delta time
- Check for Exit
Cleanup
- Saving Game Data
- Free Memory
- Ending Program
Simple Sample
#include <SFML/Graphics.hpp>

int main()
{
    sf::RenderWindow window(sf::VideoMode({800, 600}), "Makin Shapes");

    sf::CircleShape circle(100.f);

    while (window.isOpen())
    {
        window.clear(sf::Color(0, 170, 255, 100));
        window.draw(circle);
        window.display();
    }
}
Creating a window
class
object
size of window
name of window
Creating a shape
radius
Game Loop
clear window
draw on buffer
display(switch buffer)
Initialization
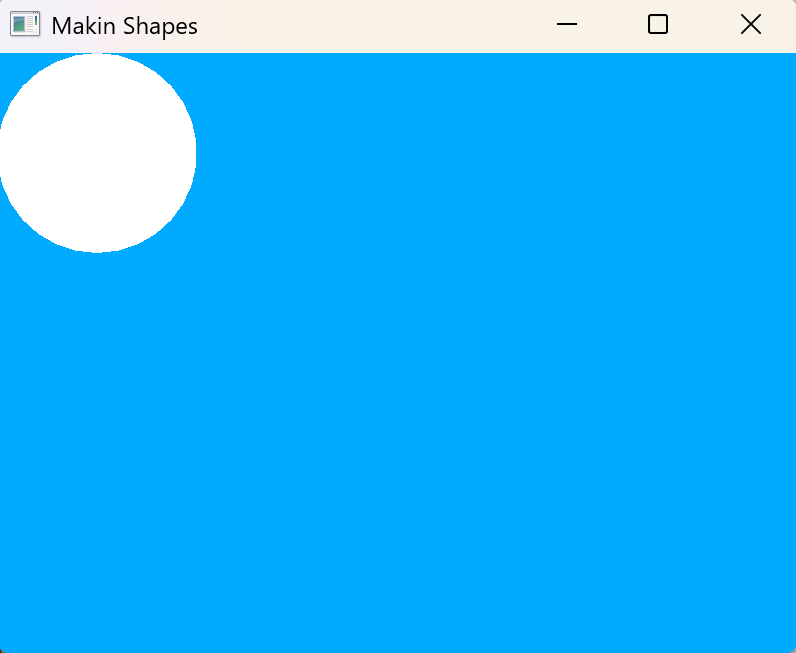
Code Result
Circle
sf::CircleShape circle(100.f);

circle.setPosition({200.f, 300.f});
circle.setFillColor(sf::Color(0, 150, 150));
circle.setOutlineColor(sf::Color::Black);
circle.setOutlineThickness(10.f);
circle.setScale({2.f, 1.f});
circle.setRotation(sf::degrees(45));
sf::CircleShape circle(100.f);
circle.setPosition({200.f, 300.f});
circle.setOrigin({100.f, 100.f});
circle.setFillColor(sf::Color(0, 150, 150));
circle.setOutlineColor(sf::Color::Black);
circle.setScale({2.f, 1.f});
circle.setOutlineThickness(10.f);
circle.setRotation(sf::degrees(45));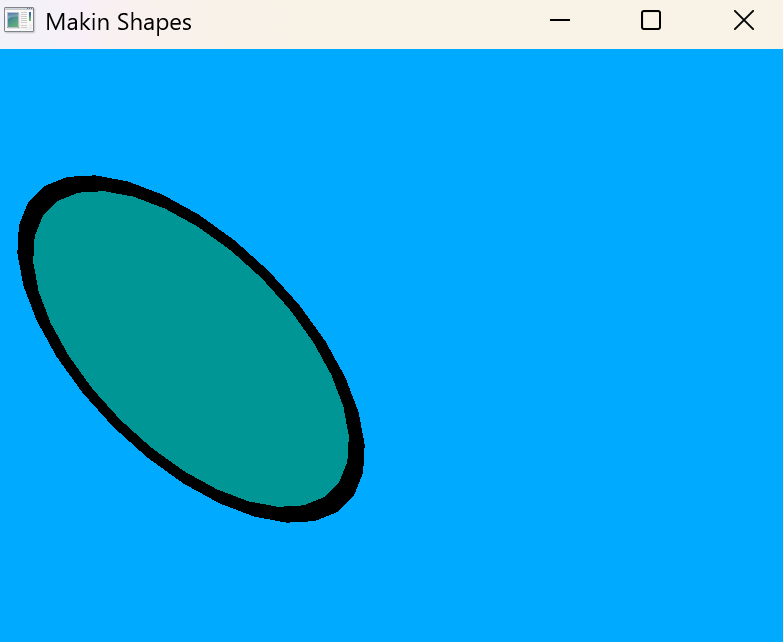
(200,300)
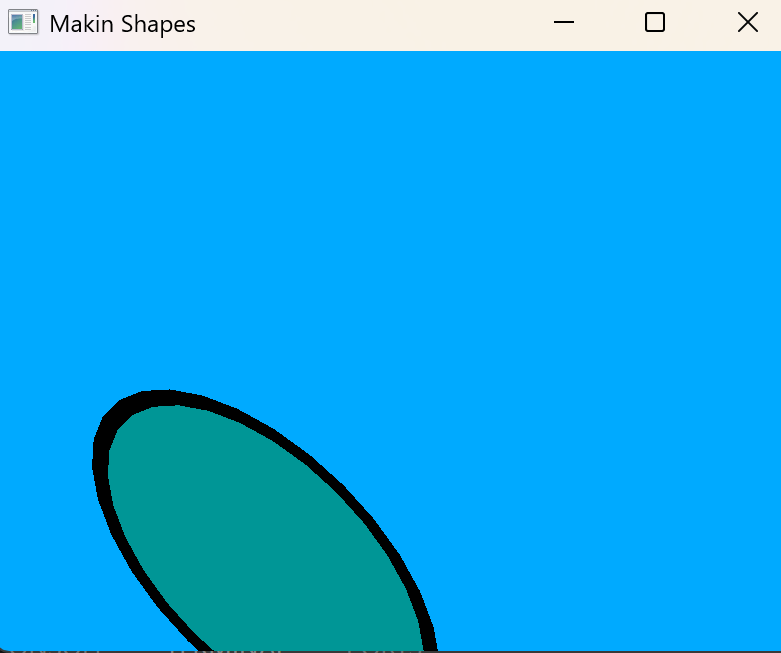
(200,300)
Rectangle
sf::RectangleShape rect({200.f, 100.f});
rect.setOrigin({100.f, 50.f});
rect.setFillColor(sf::Color(255,215,0));
rect.setOutlineColor(sf::Color::Yellow);
rect.setOutlineThickness(-5.f);
// rect.setScale({0.5f, 1.5f});
// rect.setRotation(sf::degrees(90));
rect.setPosition({400.f, 300.f});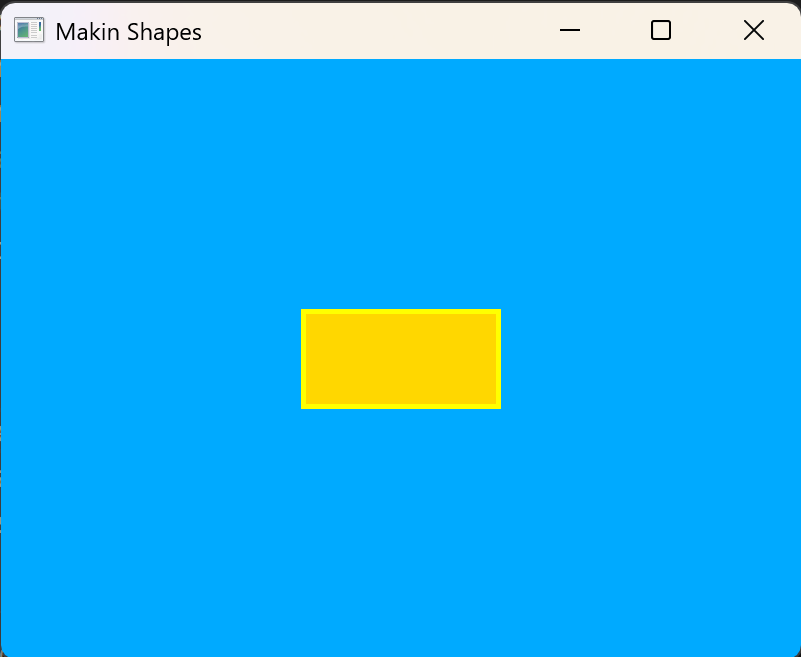
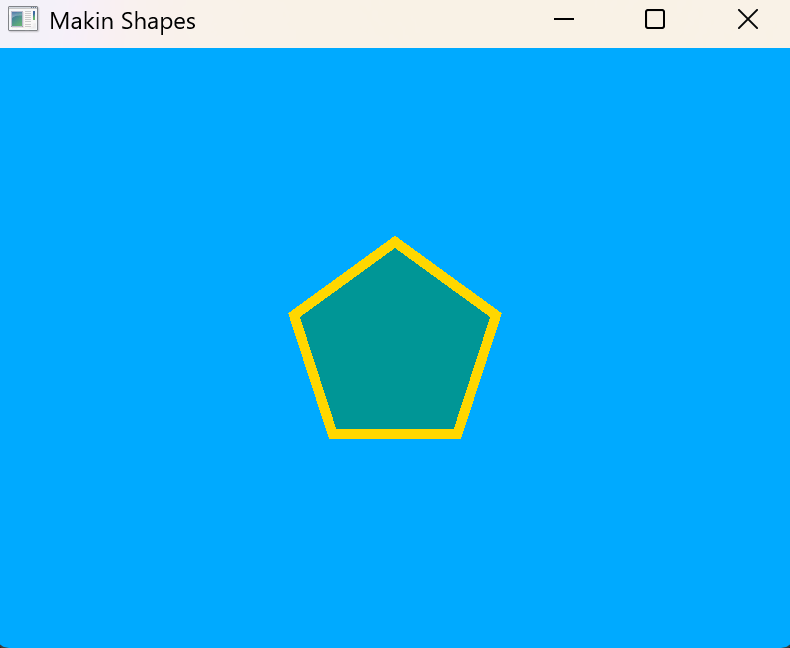
Polygons
sf::CircleShape pentagon(100.f, 5);

pentagon.setPosition({400.f, 300.f});
pentagon.setOrigin({100.f, 100.f});
pentagon.setFillColor(sf::Color(0, 150, 150));
pentagon.setOutlineColor(sf::Color(255, 215, 0));
pentagon.setOutlineThickness(10.f);
number of vertice
sf::CircleShape circle(100.f, 20);
circle.setPosition({400.f, 300.f});
circle.setOrigin({100.f, 100.f});
sf::CircleShape rounder_circle(100.f);
rounder_circle.setPosition({400.f, 300.f});
rounder_circle.setOrigin({100.f, 100.f});

Convex Shapes
sf::ConvexShape shape;
shape.setPointCount(5);
shape.setPoint(0, {60.f, 20.f});
shape.setPoint(1, {20.f, 100.f});
shape.setPoint(2, {100.f, 100.f});
shape.setPoint(3, {150.f, 60.f});
shape.setPoint(4, {100.f, 20.f});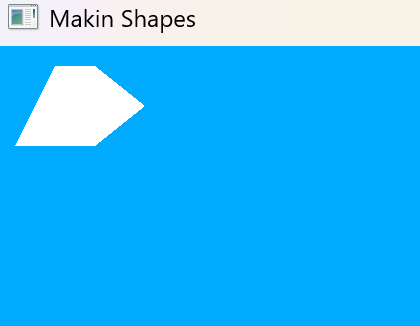
Order!!!
Point number
coords
Antialiasing
sf::ConvexShape triangle;
triangle.setPointCount(3);
triangle.setPoint(0, {60.f, 20.f});
triangle.setPoint(1, {500.f, 100.f});
triangle.setPoint(2, {100.f, 350.f});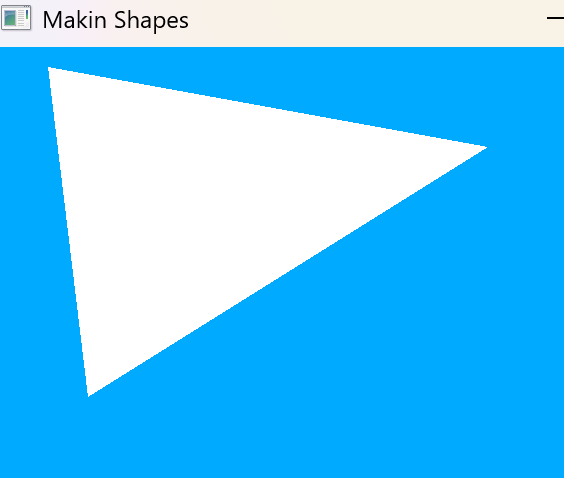

sf::ContextSettings settings;
settings.antiAliasingLevel = 8;
sf::RenderWindow window(sf::VideoMode({800, 600}), "Makin Shapes", sf::Style::Default, sf::State::Windowed, settings);
Player

Texture
- moves
- scales
- rotates
- has a texture
+

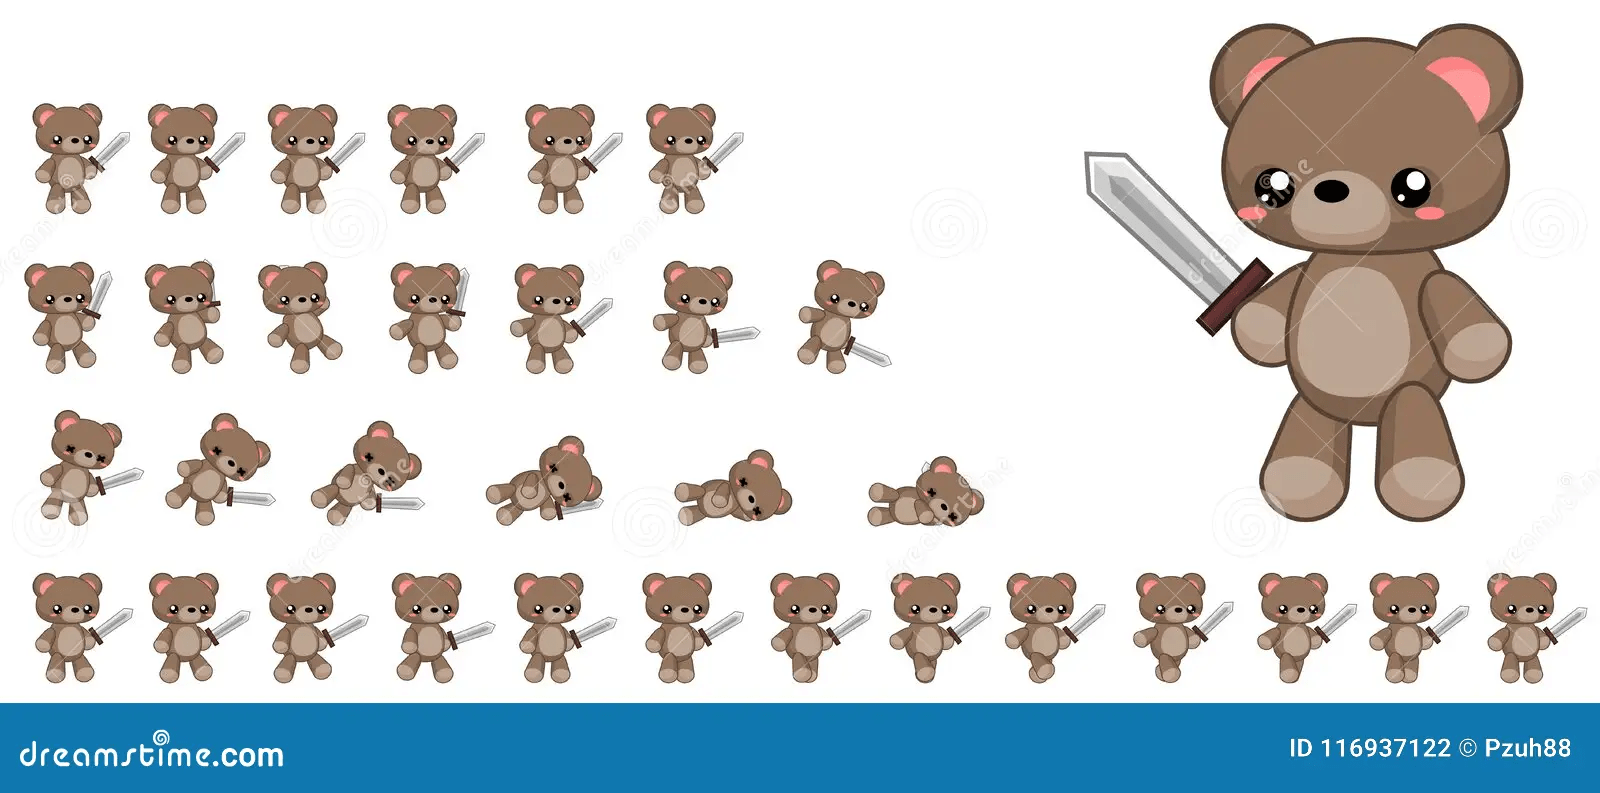
Sprite Sheet
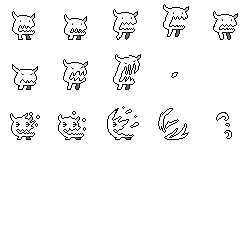
- for animation
- multiple frames
- all in one


Making a Sprite
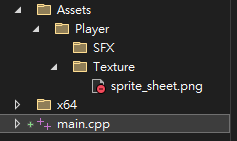
Location
same layer
sf::Texture player_texture;
player_texture.loadFromFile("Assets/Player/Texture/sprite_sheet.png");
sf::Sprite player_sprite(player_texture);
Location
bool
Better pic maybe?
Making a Sprite
sf::Texture player_texture;
sf::Sprite player_sprite(player_texture);

if(player_texture.loadFromFile("Assets/sprite_sheet.png"))
{
  std::cout << "Player Image Loaded\n";
  player_sprite.setTexture(player_texture);
  player_sprite.setTextureRect(sf::IntRect({0, 0}, {64, 64}));
  player_sprite.setScale({2.f, 2.f});
}
else
{
	std::cout << "Player Image Failed to Load\n";
}
No default constructor
(0, 0)
64px
64px
for debugging
Making a Sprite
#include <SFML/Graphics.hpp>
#include <iostream>
int main()
{
    sf::ContextSettings settings;
    settings.antiAliasingLevel = 8;
    sf::RenderWindow window(sf::VideoMode({800, 600}), "Makin Shapes", sf::Style::Default, sf::State::Windowed, settings);
    sf::Texture player_texture;
    sf::Sprite player_sprite(player_texture);

    if(player_texture.loadFromFile("Assets/sprite_sheet.png"))
    {
        std::cout << "Player Image Loaded\n";
        player_sprite.setTexture(player_texture);
        player_sprite.setTextureRect(sf::IntRect({0, 0}, {64, 64}));
        player_sprite.setScale({2.f, 2.f});
    }
    else
    {
        std::cout << "Player Image Failed to Load\n";
    }

    while (window.isOpen())
    {
        window.clear(sf::Color(0, 170, 255, 100));
        window.draw(player_sprite);
        window.display();
    }
}
Loop
clear
draw
display
Init
window
player

Move a Sprite
Input


Update

while (window.isOpen())
{
  while (std::optional event = window.pollEvent())
  {
    if (event->is<sf::Event::Closed>())
    {
    	window.close();
    }
  }
  window.clear(sf::Color(0, 170, 255, 100));
  window.draw(player_sprite);
  window.display();
}
Closed
Resized
Poll Event

if (const auto* keyPressed = event->getIf<sf::Event::KeyPressed>())
{
	if (keyPressed->scancode == sf::Keyboard::Scan::D)
    {
    	sf::Vector2f player_position = player_sprite.getPosition();
    	player_sprite.setPosition(player_position + sf::Vector2f(1.f, 0.f));
    }
}
Slow
Polling Rate
Event
while (window.isOpen())
{
    while (const std::optional event = window.pollEvent())
    {
        if (event->is<sf::Event::Closed>())
        {
            window.close();
        }

    }
    if (sf::Keyboard::Key::D)
    {
        sf::Vector2f player_position = player_sprite.getPosition();
        player_sprite.setPosition(player_position + sf::Vector2f(1.f, 0.f));
    }
    window.clear(sf::Color(0, 170, 255, 100));
    window.draw(player_sprite);
    window.display();
}
Fast & Smooth
Full Code
#include <SFML/Graphics.hpp>
#include <iostream>
int main()
{
    sf::ContextSettings settings;
    settings.antiAliasingLevel = 8;
    sf::RenderWindow window(sf::VideoMode({800, 600}), "Makin Shapes", sf::Style::Default, sf::State::Windowed, settings);
    window.setVerticalSyncEnabled(true);

    sf::Texture player_texture;
    sf::Sprite player_sprite(player_texture);

    if(player_texture.loadFromFile("Assets/sprite_sheet.png"))
    {
        std::cout << "Player Image Loaded\n";
        player_sprite.setTexture(player_texture);
        player_sprite.setTextureRect(sf::IntRect({0, 0}, {64, 64}));
        player_sprite.setScale({2.f, 2.f});
    }
    else
    {
        std::cout << "Player Image Failed to Load\n";
    }

    while (window.isOpen())
    {
        while (const std::optional event = window.pollEvent())
        {
            if (event->is<sf::Event::Closed>())
            {
                window.close();
            }
        }
        if (sf::Keyboard::isKeyPressed(sf::Keyboard::Key::D))
        {
            sf::Vector2f player_position = player_sprite.getPosition();
            player_sprite.setPosition(player_position + sf::Vector2f(1.f, 0.f));
        }
        window.clear(sf::Color(0, 170, 255, 100));
        window.draw(player_sprite);
        window.display();
    }
}
Frame Rate Control
Congratulations!

Resources
sfml simple stuff - video
sfml rpg game(visual studio) - video
sfml tutorial -official website
OpenGameArt- open access game art
**remember to pay attention to every information's version**
Copy of Game Developing
By ck11300111呂家睿


