



Content ITV PRO
This is Itvedant Content department
Business Scenario
Hello talented developers!
We have got an exciting new project for you!
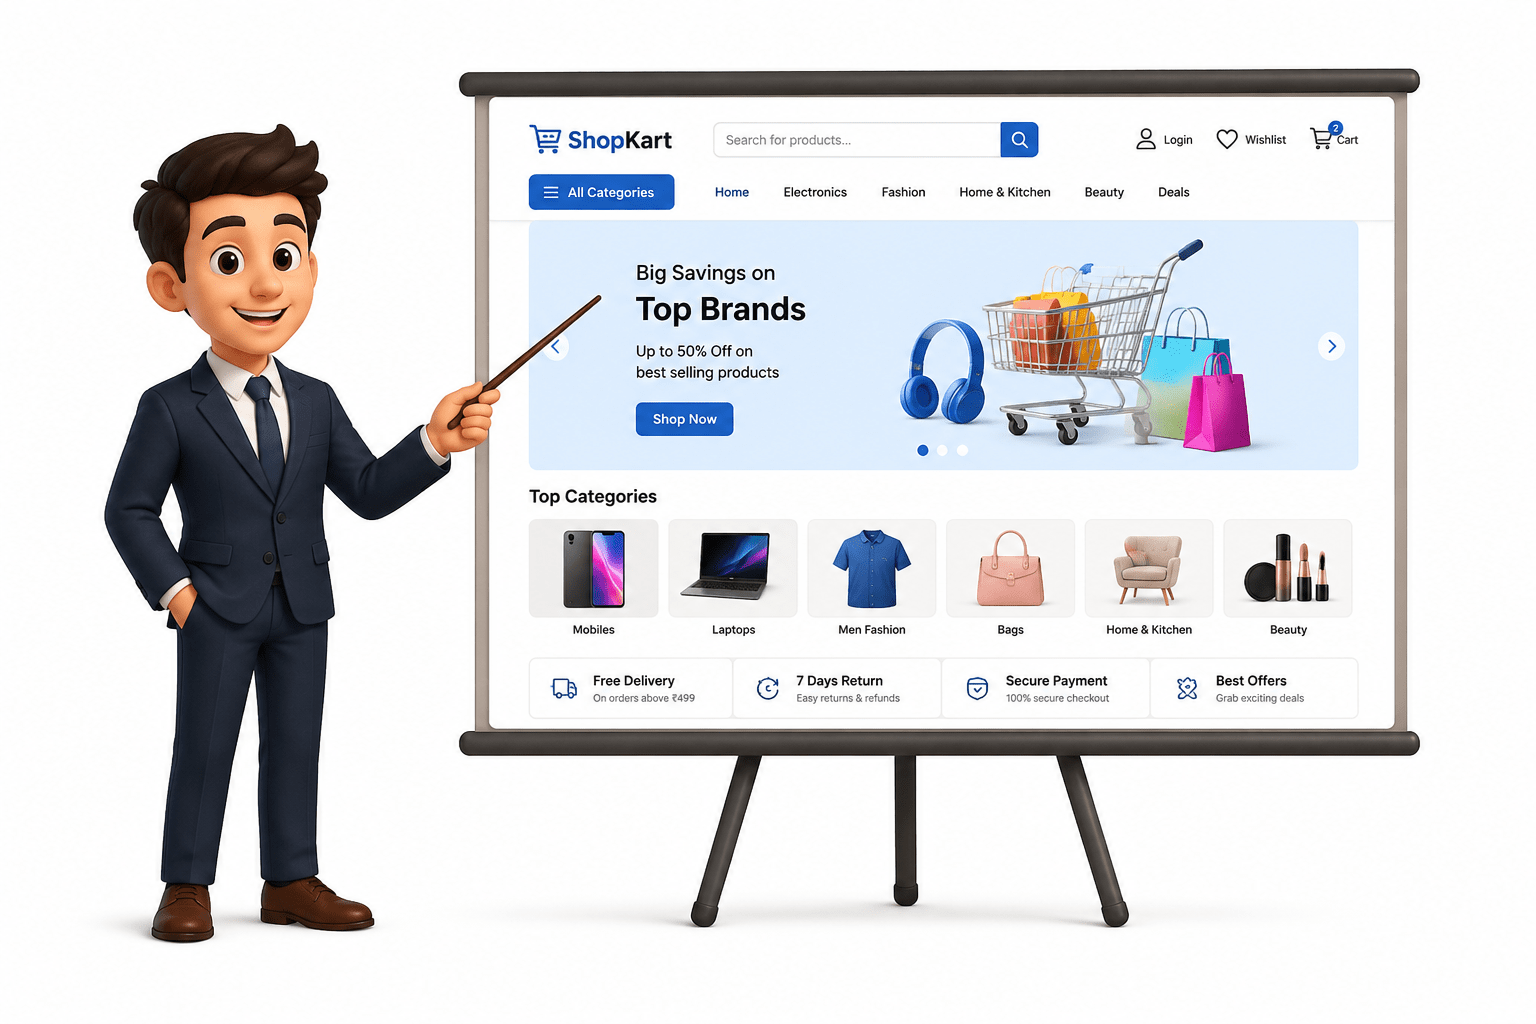
Our client wants to build a modern e-commerce web application where customers can browse products, view product details, manage their shopping cart, and eventually complete their shopping journey online.
The project is called ShopKart.
Before we start building the actual e-commerce features, we need to prepare our development environment and create the foundation of our application using React and Vite.
Pre-Lab Preparation
Module: React Introduction
1) Kickstart React: Basics, Benefits, and Key Concepts
2) Getting Started: Setting Up React and Creating Your First Element
git pull origin branchNameGit Pull
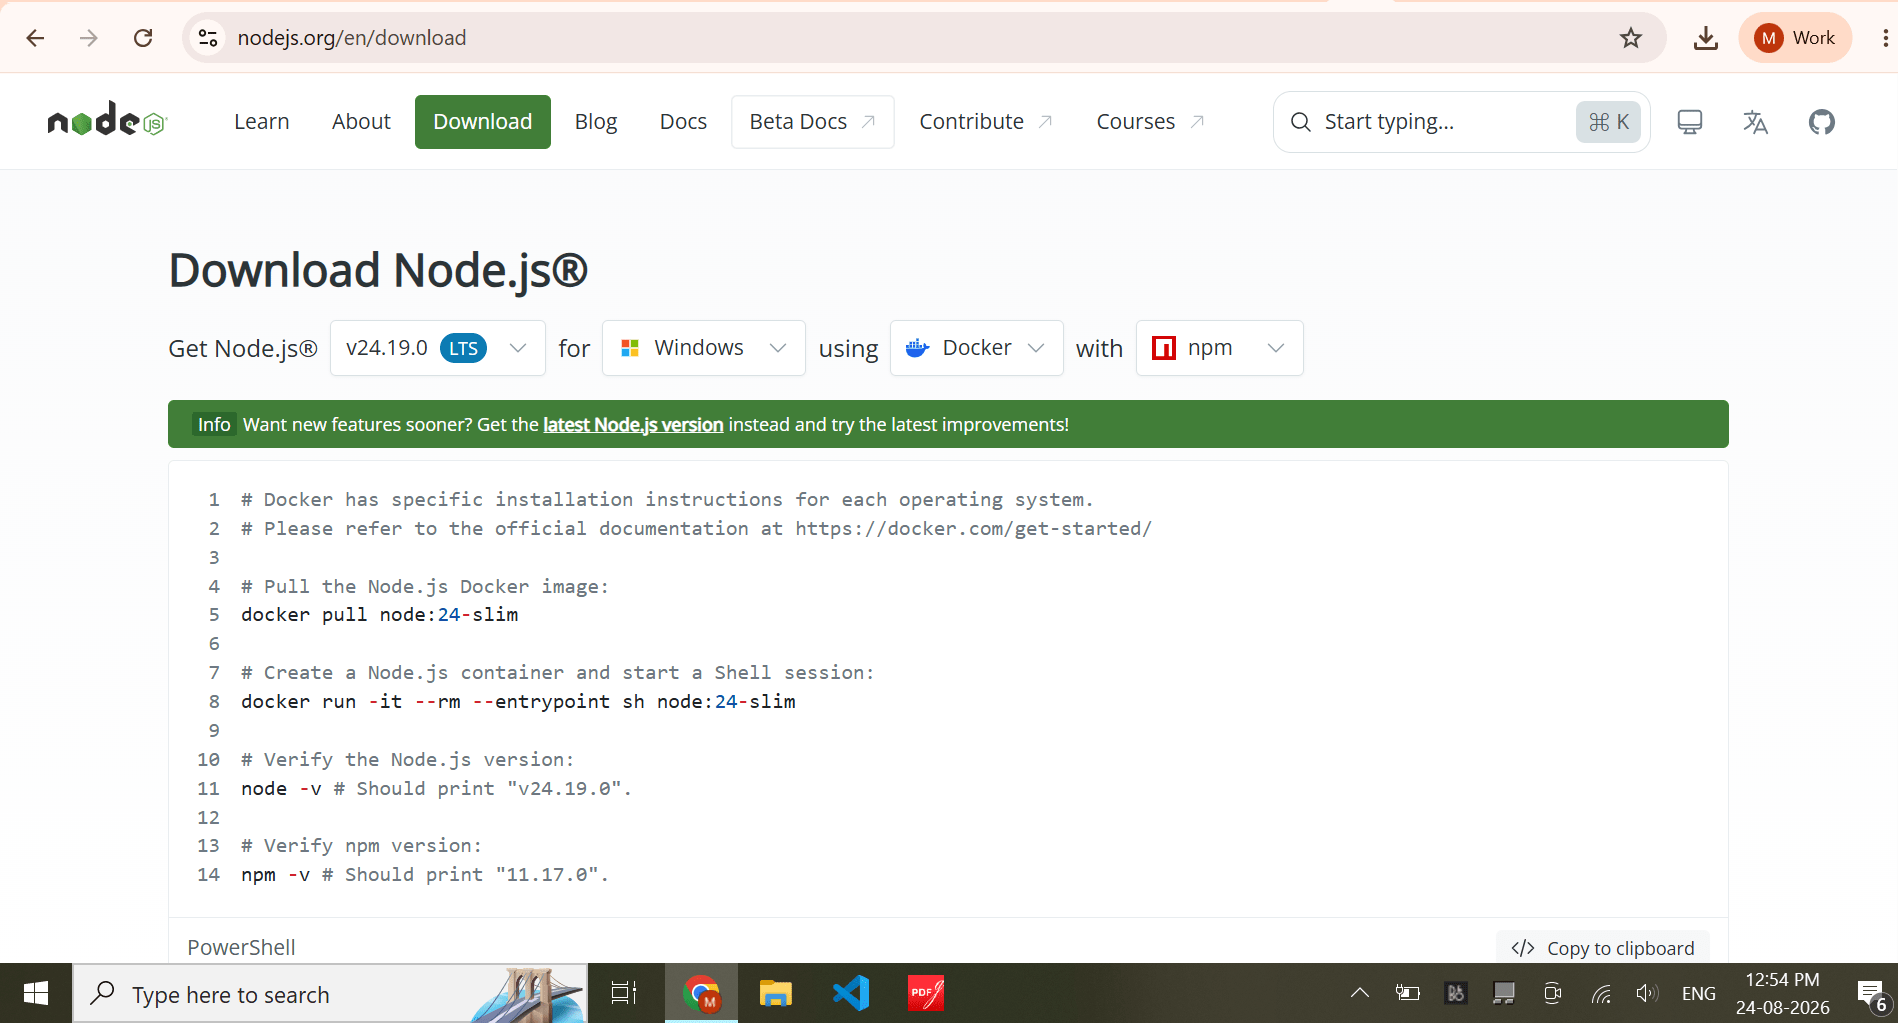
Task 1: Installing Node.js
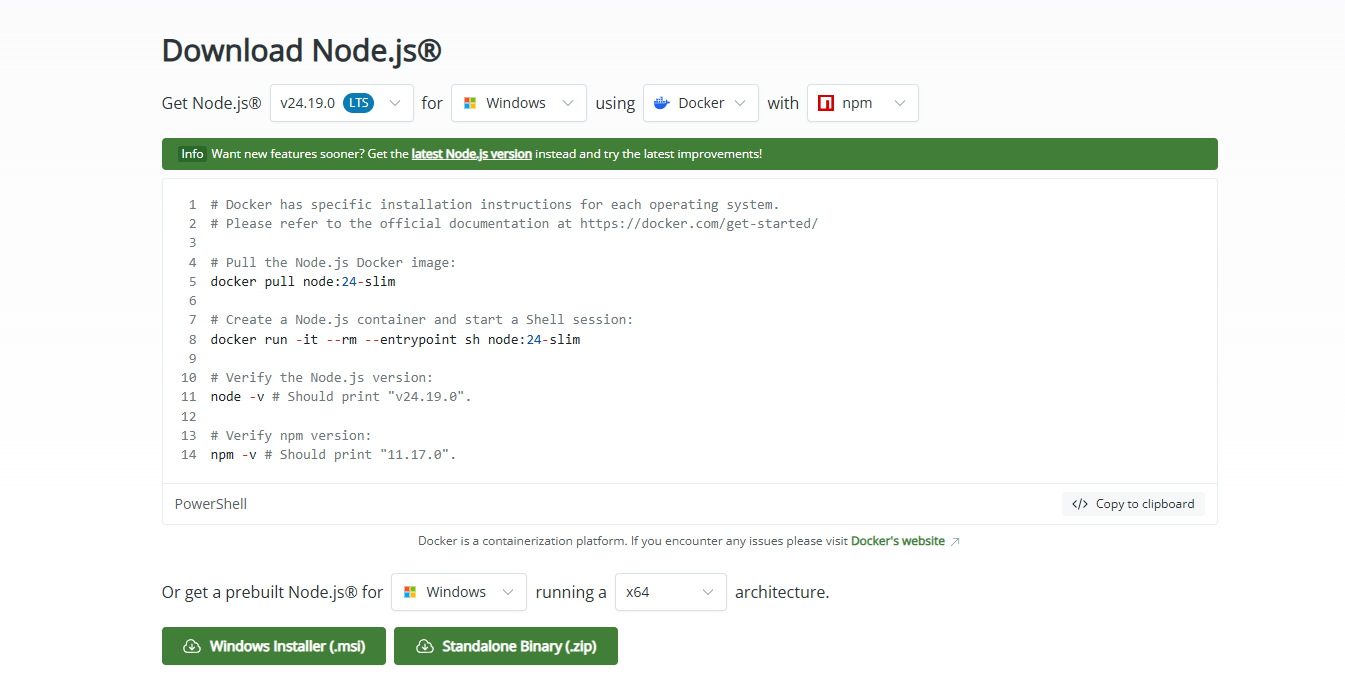
Go to the official Node.js website and download the LTS (Long-Term Support) version
of Node.js.
1
Link : https://nodejs.org/en/download
Click on - Windows Installer (msi) installer
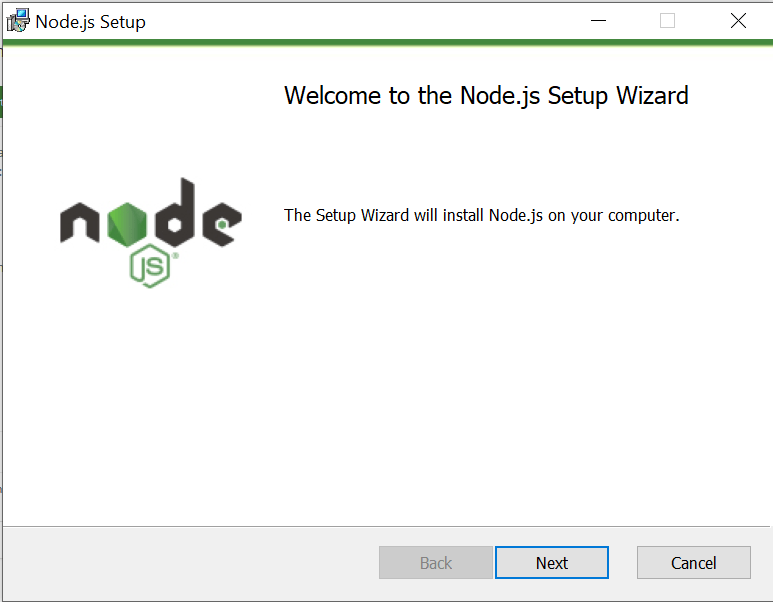
Once the download is complete, open the downloaded Node.js installer.
2
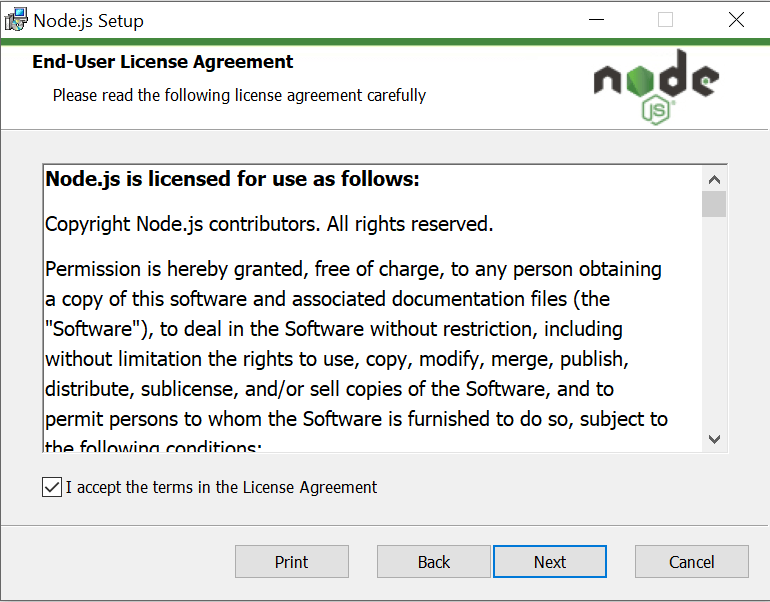
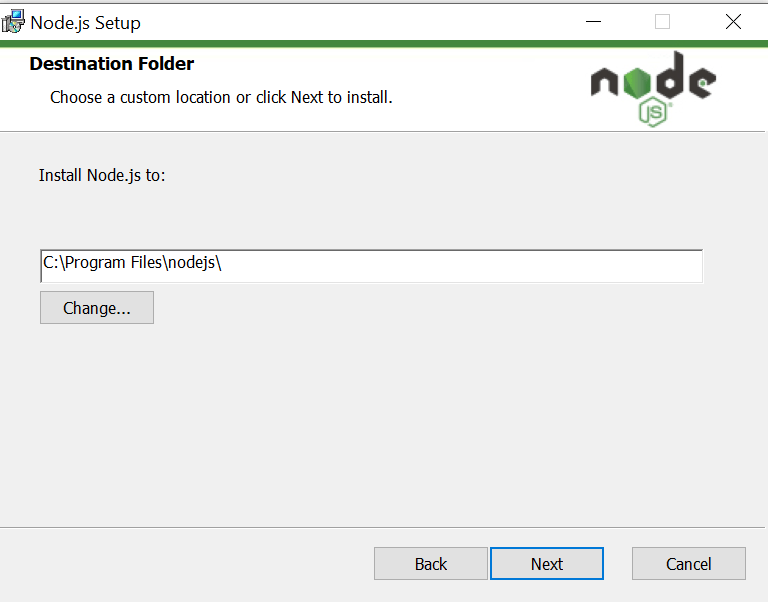
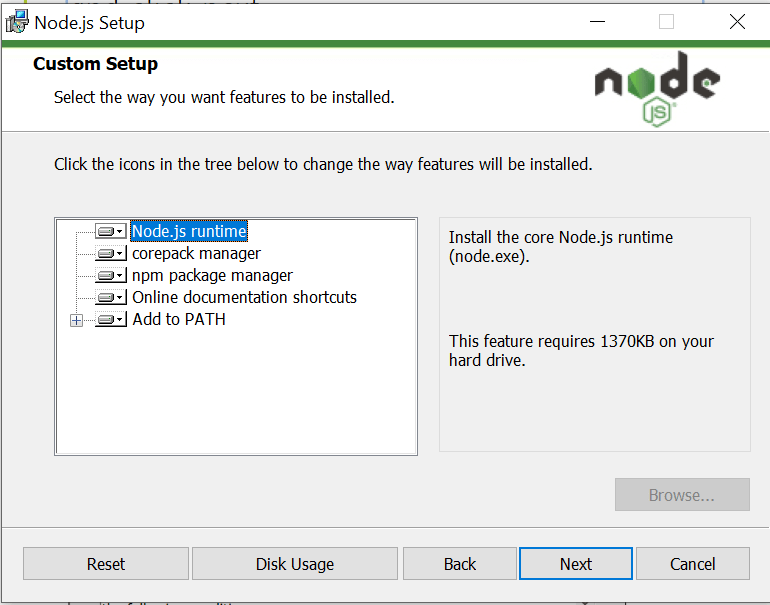
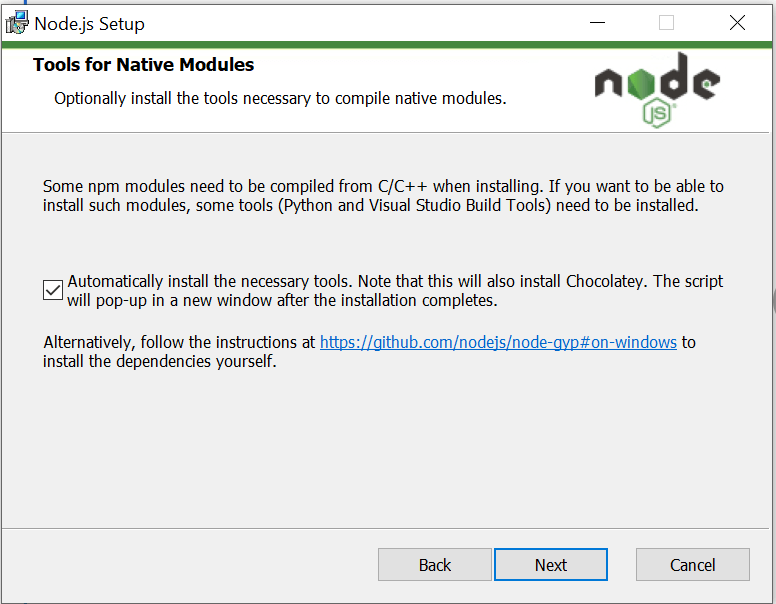
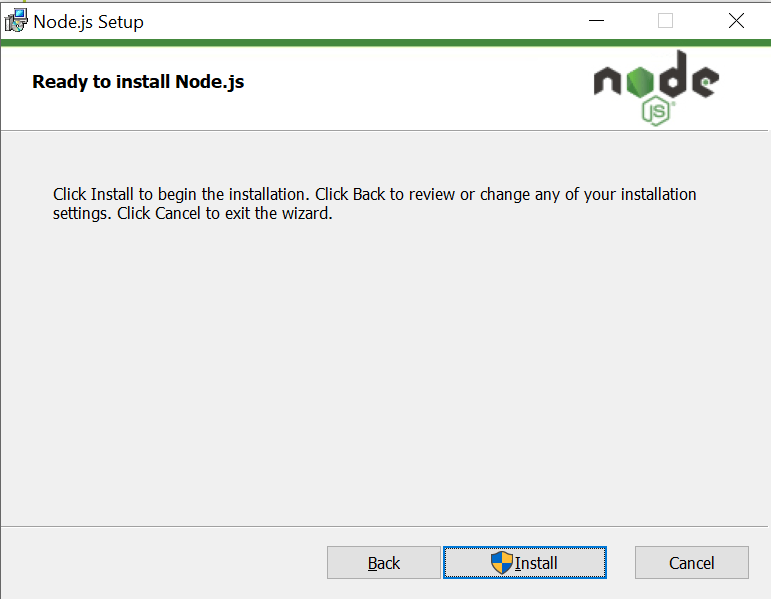
Follow the installation wizard using the default settings.
3
1. Click next :
2. Accept the terms in the license aggrement and click next
3. Select the destination folder
4. Click next
5. Click the check box and click next
6. Click Install
Press Any Key and Hit Enter.
Wait For 10- 15 Minutes then Press Enter to Exit
4
4
5
Style the Wrapper and Add Menu Button
3
Style the wrapper so that the existing search bar and the new Add Menu Item button stay properly aligned and close to each other.
.menu-controls {
    display: flex;
    align-items: center;
    justify-content: center;
    gap: 10px;
    width: 100%;
    margin: 30px auto;
}

 #add-menu-btn {
    width: 150px;
    height: 44px;
    padding: 0 15px;
    background-color: #ff3b30;
    color: white;
    border: none;
border-radius: 8px;
font-size: 12px;
font-weight: 600;
cursor: pointer;
transition: 0.3s ease;
}
#add-menu-btn:hover {
background-color: #e62e25;
transform: translateY(-2px);
}Note :
Our existing menu-search container has margin : 30px auto;
Change it to :
margin : 0;
Create the Add Menu Item Form
4
Add this after the .menu-controls section
<div id="menu-modal" class="menu-modal">
      <div class="menu-modal-content">
        <div class="modal-header">
          <h2>Add Menu Item</h2>
        </div>

        <form id="menu-form">

          <div class="form-row">
            <div class="form-group">
              <label for="menu-name"> Menu Item Name </label>
              <input type="text" id="menu-name" placeholder="Enter item name" required>
            </div>

            <div class="form-group">
              <label for="menu-price"> Price (₹) </label>
              <input type="number" id="menu-price" placeholder="Enter price" required>
            </div>

          </div>

          <div class="form-row">
            <div class="form-group">
              <label for="menu-category"> Category </label>
              <input type="text" id="menu-category" placeholder="Enter category" required>
            </div>
            <div class="form-group">
              <label for="menu-rating"> Rating (0 - 5) </label>
              <input type="text" id="menu-rating" placeholder="★★★★★" required>
            </div>

          </div>

          <div class="form-row">
            <div class="form-group">
              <label for="menu-reviews"> Number of Reviews </label>
              <input type="number" id="menu-reviews" placeholder="Enter number of reviews"
              required>
            </div>

            <div class="form-group">
              <label for="menu-image"> Image URL / Path </label>
              <input type="text" id="menu-image" placeholder="Enter image URL or path"
              required>
            </div>
          </div>

          <div class="form-actions">
            <button type="button" id="cancel-menu-form"> Cancel </button>
            <button type="submit"> Add Menu Item </button>
          </div>
        </form>
      </div>
    </div>
Style the form
5
You can apply your own stylings or click here to download form style that we will use for bitebox :
Open and Close the Add Menu Item Modal
6
Now that the modal is hidden by default, Step 6 is to make it open only when the user clicks + Add Menu Item and close when Cancel is clicked.
const addMenuBtn = document.getElementById("add-menu-btn");
const menuModal = document.getElementById("menu-modal");
const cancelMenuForm = document.getElementById("cancel-menu-form");

addMenuBtn.addEventListener("click", function () {
    menuModal.classList.add("show");
});
cancelMenuForm.addEventListener("click", function () {
menuModal.classList.remove("show");
});Capture Menu Item Form Data
7
Now that the Add Menu Item modal opens and closes correctly, we will capture all the values entered by the user when the form is submitted.
const menuForm = document.getElementById("menu-form");

menuForm.addEventListener("submit", function (event) {

    event.preventDefault();

    const name = document.getElementById("menu-name").value;
    const price = document.getElementById("menu-price").value;
    const category = document.getElementById("menu-category").value;
    const rating = document.getElementById("menu-rating").value;
    const reviews = document.getElementById("menu-reviews").value;
    const image = document.getElementById("menu-image").value;
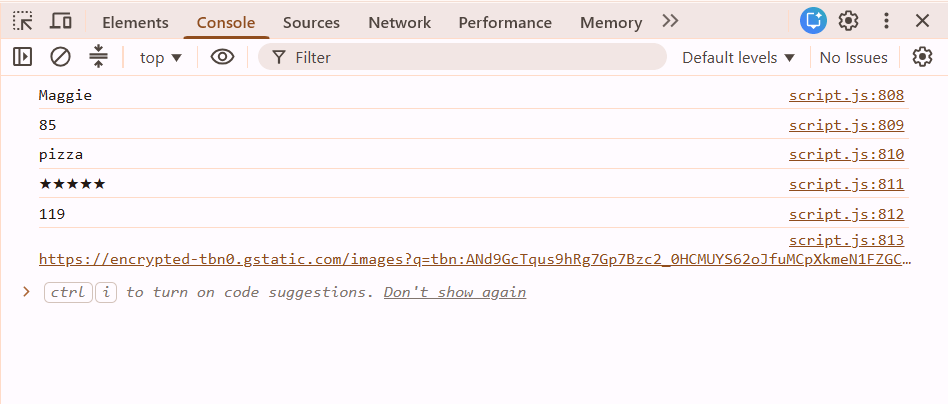
console.log(name);
console.log(price);
console.log(category);
console.log(rating);
console.log(reviews);
console.log(image);
});Create the Menu Item Object
8
Now that we can successfully capture all the form values, we will combine them into one JavaScript object.
Add this inside your existing submit event, after the form values are captured
const menuItem = {
    name: name,
    price: price,
    category: category,
    rating: rating,
    reviews: reviews,
    image: image
};

console.log(menuItem);
Create the MockAPI Resource
9
What is mock api ?
MockAPI is a service that provides a fake online API and database that we can use while developing and testing a frontend application.
Now we will create the MockAPI resource where all our BiteBox menu items will be stored.
Steps to create the project
Open the MockAPI website in your browser.
Sign in or create an account if required.
From the dashboard, choose Create Project / New Project.
Enter the project name: Bitebox
Create the project.
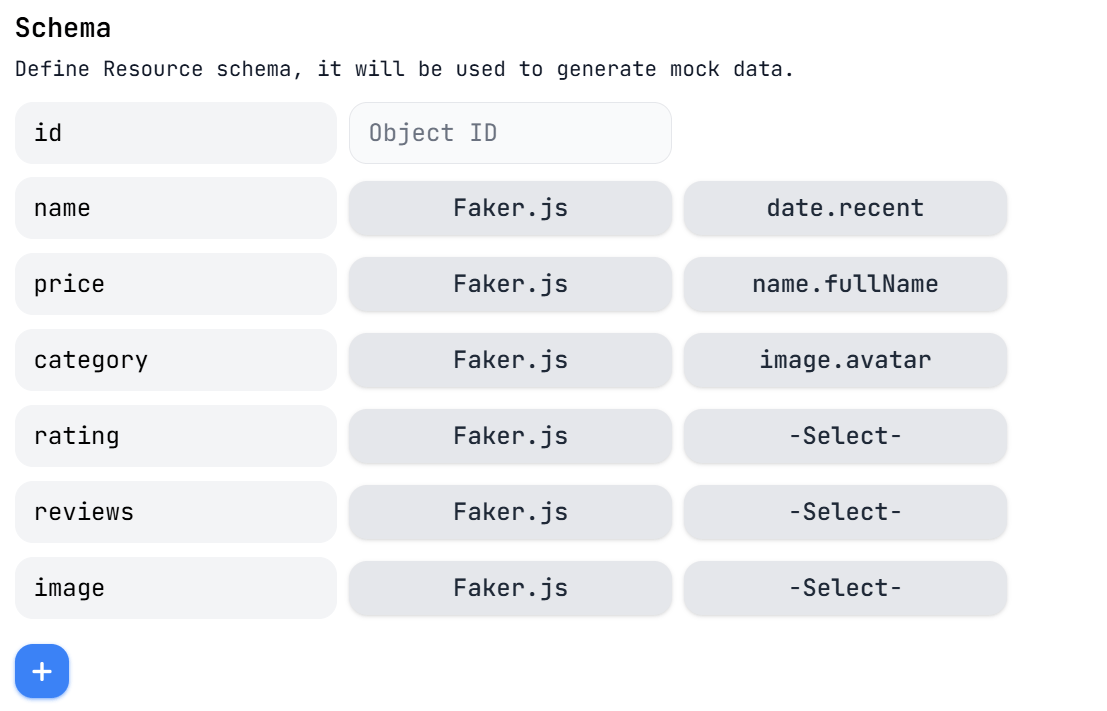
Add the following fields
After creating the menu resource, MockAPI will provide an API endpoint for that resource.
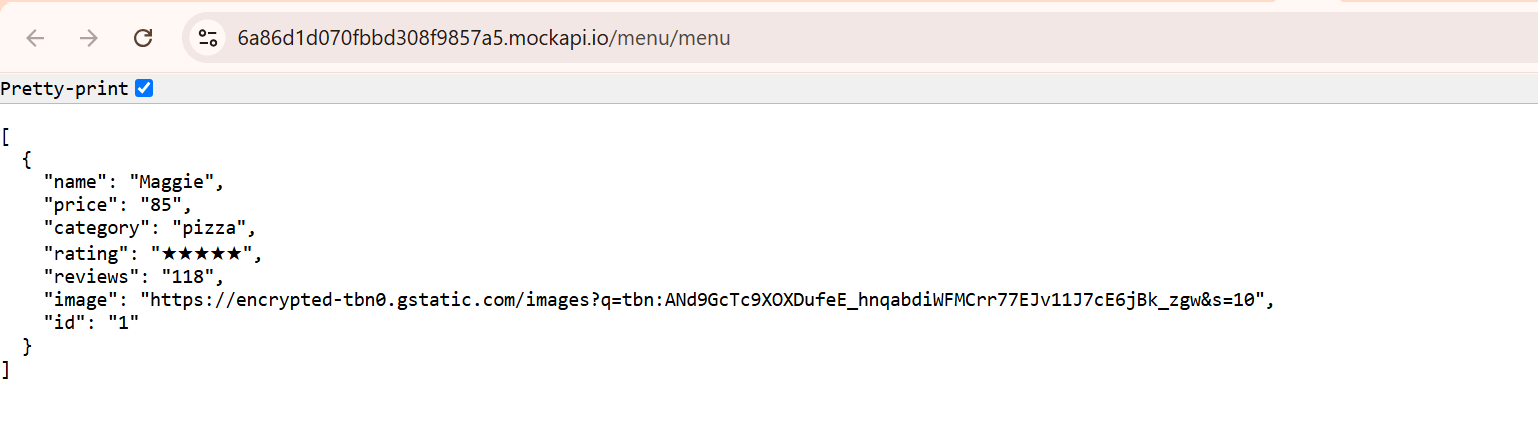
Copy your API endpoint and keep it ready. We will use this URL in the next step with fetch() to send our menu item data to MockAPI.
Send Menu Item Data to MockAPI Using Fetch API
10
Now we will send the menu item data from our form to the MockAPI server using the fetch() method and the POST request.
First, store the MockAPI endpoint in a variable:
Then use :
const API_URL = "https://6a86d1d070fbbd308f9857a5.mockapi.io/menu/menu";Here, API_URL stores the URL of our MockAPI resource where the menu items will be stored.
fetch(API_URL, {
    method: "POST",
    headers: {
        "Content-Type": "application/json"
    },
    body: JSON.stringify(menuItem)
})
.then(response => response.json())
.then(data => {
console.log("Menu item added:", data);
})
.catch(error => {
console.error("Error adding menu item:", error);
});Now verify by adding new menu item through the form
After submitting the form, check the MockAPI resource to confirm that the menu item has been successfully stored.
Use Async/Await with Fetch API
11
Now that our POST request is working successfully, we will rewrite it using async/await.
async/await makes asynchronous code easier to read and understand compared to using .then() and .catch().
Replace your current fetch() section with:
const menuForm = document.getElementById("menu-form");

menuForm.addEventListener("submit", async function (event) {

    event.preventDefault();

    const name = document.getElementById("menu-name").value;
    const price = document.getElementById("menu-price").value;
const category = document.getElementById("menu-category").value;
const rating = document.getElementById("menu-rating").value;
const reviews = document.getElementById("menu-reviews").value;
const image = document.getElementById("menu-image").value;
const menuItem = {
name: name,
price: price,
category: category,
rating: rating,
reviews: reviews,
image: image
};
const API_URL ="https://6a86d1d070fbbd308f9857a5.mockapi.io/menu/menu"
try {
const response = await fetch(API_URL, {
method: "POST",
headers: {
"Content-Type": "application/json"
},
body: JSON.stringify(menuItem)
}); const data = await response.json();
console.log("Menu item added:", data);
} catch (error) {
console.error("Error adding menu item:", error);
}
});Fetch Menu Items from MockAPI Using GET
12
Now that we can add menu items to MockAPI, we will fetch the stored menu items using the GET request.
async function fetchMenuItems() {
    try {
        const response = await fetch(API_URL);
        const menuItems = await response.json();
        console.log("Menu items fetched:", menuItems);
    } catch (error) {
        console.error("Error fetching menu items:", error);
    } }
Create a Container for Dynamic Menu Cards
13
In our existing menu page, all the menu items are currently placed inside a common <div> container. We will give this container an ID so that JavaScript can easily identify it and add new menu cards dynamically.
<div id="menu-container">
      <article data-category="pizza">
        <span class="tag">Bestseller</span>
        <img src="assets/images/margherita-pizza.png" alt="Margherita Pizza">
        <h3>Margherita Pizza</h3>
        <p class="rating"> ★★★★★<small>(120)</small> </p>
        <p class="price">₹249</p>
        <button>  <img src="assets/icons/cart-button.png" alt="Cart" width="14" height="14">
          Add to Cart </button>
      </article>
      .....
      .....
</div>
Display the Fetched Menu Items
14
Now that we have the menu-container, we will use the data fetched from MockAPI to create menu cards dynamically instead of writing each new card manually in HTML.
Add this function after your fetchMenuItems() function:
function displayMenuItems(menuItems) {

    const menuContainer = document.getElementById("menu-container");

    menuItems.forEach(menuItem => {

        const card = document.createElement("article");

        card.innerHTML = `
            <img src="${menuItem.image}" alt="${menuItem.name}">
            <h3>${menuItem.name}</h3>
            <p class="rating">
                ${menuItem.rating}
                <small>(${menuItem.reviews})</small>
            </p>
<p class="price">₹${menuItem.price}</p>
<button>
<img src="assets/icons/cart-button.png" alt="Cart" width="14" height="14">
Add to Cart
</button>
`;
menuContainer.appendChild(card);
});
}
fetchMenuItems();Display the Newly Added Menu Item and Close the Form
15
 try {

        const response = await fetch(API_URL, {
            method: "POST",
            headers: {
                "Content-Type": "application/json"
            },
            body: JSON.stringify(menuItem)
        });

        const data = await response.json();
        console.log("Menu item added:", data);
        displayMenuItems([data]);
        menuModal.classList.remove("show");
        menuForm.reset();
    }
Style the toggle theme button
2
Update the try block in your existing submit event:
Task 2: Update Existing Menu Items
Add Update and Delete Icons to Menu Cards
1
Since we are keeping the existing hard-coded menu cards, we will add the Update and Delete icons to both the hard-coded cards and the dynamically generated API cards.
For the hard-coded cards, place this just above the existing Add to Cart button:
 <div class="menu-actions">
          <button type="button" class="update-menu-btn">
            <img src="assets/icons/edit.png">
          </button>
          <button type="button" class="delete-menu-btn">
             <img src="assets/icons/delete.png">
          </button>
        </div>
For the dynamic API cards, add the same section inside your displayMenuItems() function, just before the Add to Cart button:
function displayMenuItems(menuItems) {
    const menuContainer = document.getElementById("menu-container");
    menuItems.forEach(menuItem => {
        const card = document.createElement("article");
        card.dataset.category = menuItem.category;
        card.innerHTML = `
            <img src="${menuItem.image}" alt="${menuItem.name}">
            <h3>${menuItem.name}</h3>
            <p class="rating">${menuItem.rating}
            <small>(${menuItem.reviews})</small>
            </p>
            <p class="price">₹${menuItem.price}</p>
         <div class="menu-actions">
          <button type="button" class="update-menu-btn">
            <img src="assets/icons/edit.png">
          </button>
<button type="button" class="delete-menu-btn">
<img src="assets/icons/delete.png">
</button>
</div>
<button>
<img src="assets/icons/cart-button.png" alt="Cart"
width="14" height="14">
Add to Cart
</button>
`;
menuContainer.appendChild(card);
});
}Style the Update and Delete Icons
2
#menu-items article {
    position: relative;
}
#menu-items article .menu-actions {
position: absolute;
right: 20px;
bottom: 68px;
display: flex;
align-items: center;
gap: 12px;
margin: 0;
}
#menu-items article .menu-actions button {
width: auto;
height: auto;
margin: 0;
padding: 0;
border: none;
background: transparent;
border-radius: 0;
cursor: pointer;
}
#menu-items article .menu-actions button img {
width: 22px;
height: 22px;
object-fit: contain;
}
#menu-items article .menu-actions button:hover {
background: transparent;
}
Connect the Update Button to the Selected Menu Item
3
document.getElementById("menu-container").addEventListener("click", function (event) {
    if (event.target.closest(".update-menu-btn")) {
        const button = event.target.closest(".update-menu-btn");
        const card = button.closest("article");
        const menuName = card.querySelector("h3").textContent;
        const price = card.querySelector(".price").textContent.replace("₹", "").trim();
        const rating = card.querySelector(".rating").childNodes[0].textContent.trim();
        const reviews = card.querySelector(".rating small").textContent.replace("(", "")
        .replace(")", "").trim();
        const category = card.dataset.category;
        const image = card.querySelector("img").src;

        console.log("Update clicked for:", menuName);
        console.log("Price:", price);
        console.log("Category:", category);
        console.log("Rating:", rating);
        console.log("Reviews:", reviews);
        console.log("Image:", image);
    }
});
Open the Update Form with Existing Data
4
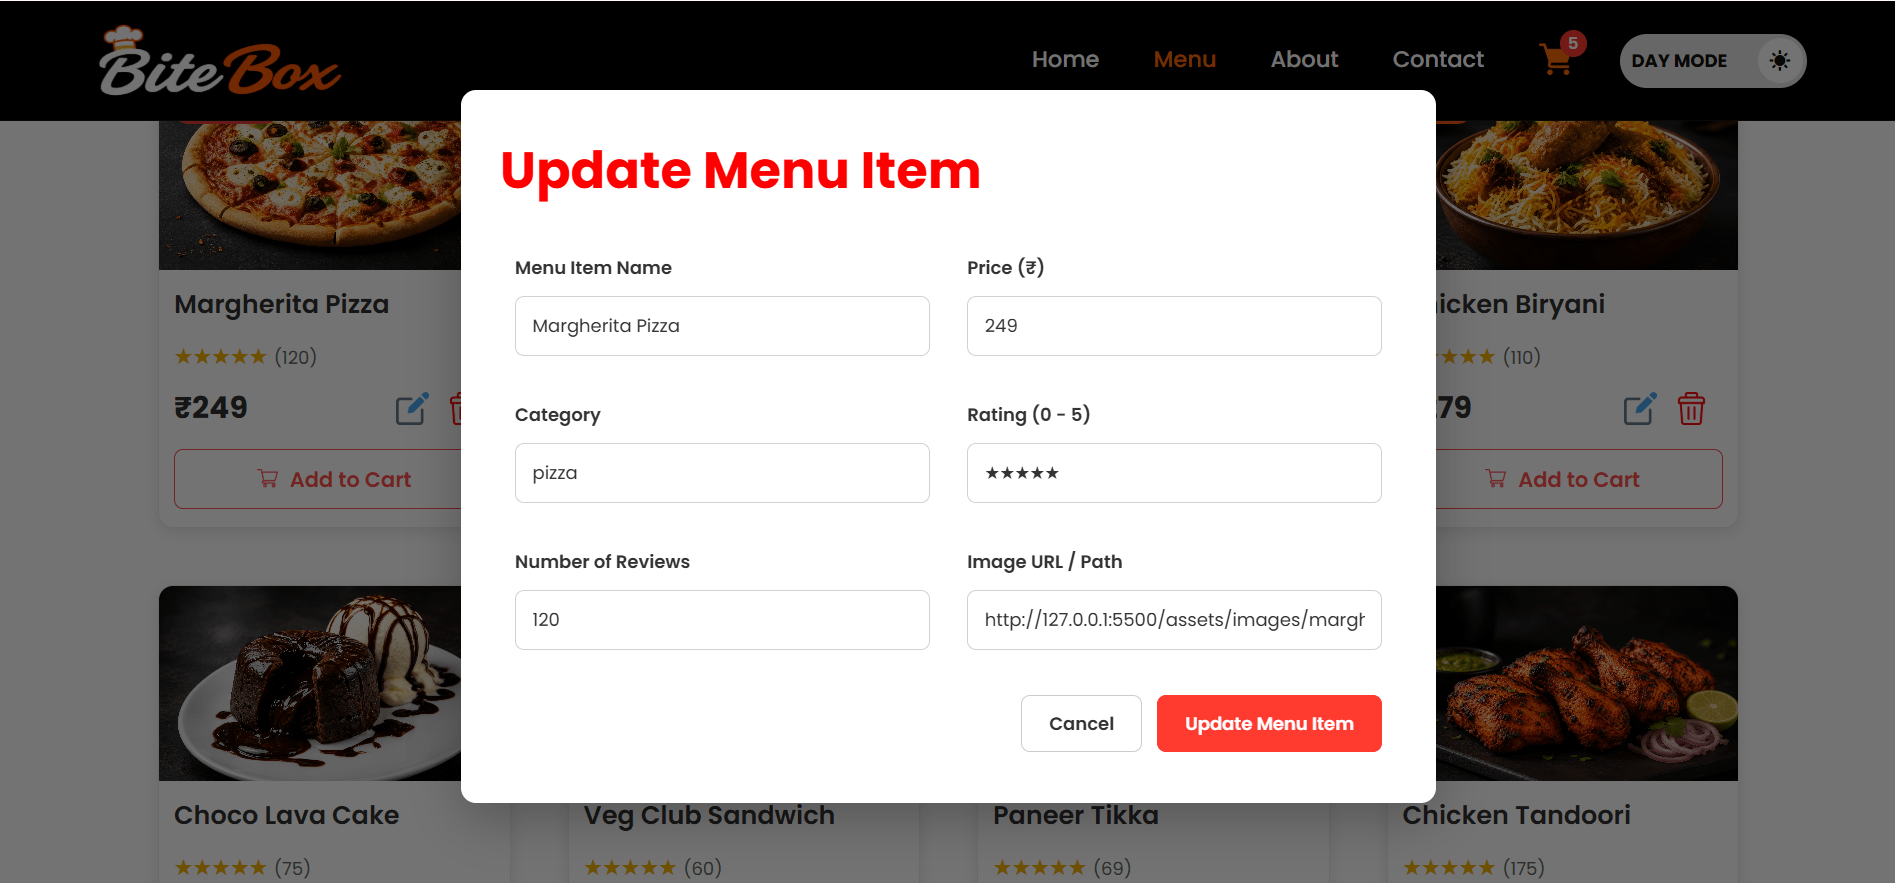
Note : Since the same modal is being used for both Add and Update, the heading and submit button should change when the user clicks
document.getElementById("menu-container").addEventListener("click", function (event) {

    if (event.target.closest(".update-menu-btn")) {

        const button = event.target.closest(".update-menu-btn");
        const card = button.closest("article");


        const menuName = card.querySelector("h3").textContent;

        const price = card.querySelector(".price").textContent
            .replace("₹", "")
            .trim();

        const rating = card.querySelector(".rating").childNodes[0]
            .textContent.trim();

        const reviews = card.querySelector(".rating small").textContent
            .replace("(", "")
            .replace(")", "")
            .trim();

        const category = card.dataset.category;

        const image = card.querySelector("img").src;


        document.getElementById("menu-name").value = menuName;

        document.getElementById("menu-price").value = price;

        document.getElementById("menu-category").value = category;

        document.getElementById("menu-rating").value = rating;

        document.getElementById("menu-reviews").value = reviews;

        document.getElementById("menu-image").value = image;


        document.querySelector(".modal-header h2").textContent =
            "Update Menu Item";

        document.querySelector("#menu-form button[type='submit']").textContent =
            "Update Menu Item";


        menuModal.classList.add("show");

    }

});
const menuName = card.querySelector("h3").textContent;
const price = card.querySelector(".price").textContent.replace("₹", "") .trim();
const rating = card.querySelector(".rating").childNodes[0].textContent.trim();
const reviews = card.querySelector(".rating small").textContent
.replace("(", "").replace(")", "").trim();
const category = card.dataset.category;
const image = card.querySelector("img").src;
document.getElementById("menu-name").value = menuName;
document.getElementById("menu-price").value = price;
document.getElementById("menu-category").value = category;
document.getElementById("menu-rating").value = rating;
document.getElementById("menu-reviews").value = reviews;
document.getElementById("menu-image").value = image;
document.querySelector(".modal-header h2").textContent ="Update Menu Item";
document.querySelector("#menu-form button[type='submit']")
.textContent = "Update Menu Item";
menuModal.classList.add("show");
}
});Store the MockAPI ID of the Selected Menu Item
5
id to know which record to update.In your existing displayMenuItems() function, you already have:
const card = document.createElement("article");
card.dataset.category = menuItem.category;
Immediately after that, add:
card.classList.add("api-menu-card");
card.dataset.id = menuItem.id;
Now read the ID when Update is clicked
In your Update event code, after:
const card = button.closest("article");Add :
const menuId = card.dataset.id;
console.log("Menu ID:", menuId);
Update the Menu Item in MockAPI
6
Now we will make the Update Menu Item button actually send the edited data to MockAPI.
Add this near your API_URL:
const card = button.closest("article");Now, inside your existing Update click event, you already have: const menuId = card.dataset.id;
Immediately after it, add:
updateMenuId = menuId;Now create a separate function for the PUT request:
async function updateMenuItem(menuId, menuItem) {

    try {
        const response = await fetch(API_URL + "/" + menuId, {

            method: "PUT",
            headers: {
                "Content-Type": "application/json"
            },
            body: JSON.stringify(menuItem)

        });

        const data = await response.json();
        console.log("Menu item updated:", data);

    } catch (error) {
        console.error("Error updating menu item:", error);
    }
}
Connect the Form to POST and PUT
7
Now we will update the existing form submit listener so the same form can handle both operations:
Replace the current POST submit listener with:
We will not create another submit listener. This prevents both POST and PUT from running at the same time.
menuForm.addEventListener("submit", async function (event) {
    event.preventDefault();
    const name = document.getElementById("menu-name").value;
const price = document.getElementById("menu-price").value;
const category = document.getElementById("menu-category").value;
const rating = document.getElementById("menu-rating").value;
const reviews = document.getElementById("menu-reviews").value;
const image = document.getElementById("menu-image").value;
const menuItem = {
name: name,
price: price,
category: category,
rating: rating,
reviews: reviews,
image: image
};
try {
if (updateMenuId !== null) {
await updateMenuItem(updateMenuId, menuItem);
updateMenuId = null;
} else {
const response = await fetch(API_URL, {
method: "POST",
headers: {
"Content-Type": "application/json"
},
body: JSON.stringify(menuItem)
});
const data = await response.json();
console.log("Menu item added:", data); displayMenuItems([data]);
}
menuModal.classList.remove("show");
menuForm.reset();
} catch (error) {
console.error("Error saving menu item:", error);
}
});Refresh the Menu After Updating
8
Now we will refresh the menu after a successful update without removing the hard-coded menu items.
Update your updateMenuItem() function
Your current function already receives the updated response :
const data = await response.json();
console.log("Menu item updated:", data);
After the console statements, add:
        const menuContainer = document.getElementById("menu-container");
        const apiCards = menuContainer.querySelectorAll(".api-menu-card");
        apiCards.forEach(card => {
            card.remove();
        });

        fetchMenuItems();
Reset the Form to Add Mode
9
After you update a menu item, the form changes to:
Update Menu ItemUpdate Menu ItemIf you later click + Add Menu Item, the form should switch back to Add mode.
Update the Add Menu Item button :
Find your existing code
addMenuBtn.addEventListener("click", function () {
    menuModal.classList.add("show");
});
Replace it with:
addMenuBtn.addEventListener("click", function () {
    updateMenuId = null;
menuForm.reset();
document.querySelector(".modal-header h2").textContent =
"Add Menu Item";
document.querySelector("#menu-form button[type='submit']").textContent =
"Add Menu Item";
menuModal.classList.add("show");
});Create the DELETE Function
10
Now we will add the DELETE functionality for dynamically added menu items.
Add this code after your existing updateMenuItem() function:
    menuForm.reset();
    document.querySelector(".modal-header h2").textContent =
        "Add Menu Item";
    document.querySelector("#menu-form button[type='submit']").textContent =
        "Add Menu Item";
    menuModal.classList.add("show");
});Connect the Delete Button
11
Add this inside your existing menu-container click event
document.getElementById("menu-container").addEventListener("click", function (event) {

    if (event.target.closest(".update-menu-btn")) {

        // existing update code...

    }

});
You currently have:
After the existing Update if block, but before the final });, add:
if (event.target.closest(".delete-menu-btn")) {

    const button =
        event.target.closest(".delete-menu-btn");

    const card =
        button.closest("article");

    const menuId =
        card.dataset.id;

    console.log("Delete Menu ID:", menuId);
     deleteMenuItem(menuId);
}
Remove the Deleted Item from the UI
12
In the previous step, the DELETE request was connected to the Delete button. Now we will make the deleted menu card disappear from the webpage immediately after the DELETE request succeeds.
async function deleteMenuItem(menuId) {Update deleteMenuItem()
In your existing code, change:
to:
async function deleteMenuItem(menuId, card) {Then, after:
const data = await response.json();
console.log("Menu item deleted:", data);card.remove();Add :
Now , Pass the card when calling the function
In your existing Delete button code, you should have:
deleteMenuItem(menuId, card);Task 3: Update Search for API Menu Items
Remove the old menuCards variable
1
Find:
let menuCards = document.querySelectorAll("#menu-items article");
let searchInput = document.getElementById("menu-search");
let searchButton = document.getElementById("search-button");
Change it to:
let searchInput = document.getElementById("menu-search");

let searchButton = document.getElementById("search-button");
Update searchMenu()
2
Replace the entire searchMenu() function with:
function searchMenu(searchText) {
    let searchValue = searchText.trim().toLowerCase();
    const menuCards = document.querySelectorAll("#menu-items article");

    menuCards.forEach(function (card) {

        let foodName = card.querySelector("h3").textContent
            .trim().toLowerCase();

        if (foodName.includes(searchValue)) {
            card.style.display = "";
        } else {
            card.style.display = "none";
        }
    });
}
Update Category Filter for API Menu
3
Replace your current filterMenu() function with:
function filterMenu(category) {

    const menuCards = document.querySelectorAll("#menu-items article");

    menuCards.forEach(function (card) {

        let cardCategory =
            card.dataset.category.toLowerCase();

        if (cardCategory === category) {

            card.style.display = "";

        } else {
            card.style.display = "none";
        }
    });
}You have successfully completed the BiteBox Restaurant Food Ordering Website! 🍕🍔🍝
Throughout this project, you built a complete and interactive food-ordering experience with:
✅ Attractive, responsive, and user-friendly UI
✅ Dynamic menu with CRUD operations using GET, POST, PUT & DELETE
✅ Search, category filtering, and add-to-cart functionality
✅ Login/Signup with form validation and Day/Night theme
✅ MockAPI integration with interactive menu management 🚀
We are done with this lab. The latest source code has been uploaded to GitHub. You can access the latest commit using the link below:
By Content ITV