Terminal & Git


What is the command line?
A command line interface (CLI), also called a terminal, is a program we can use to access our computers files and directories (folders).
Students using MacOS will use the built in terminal application, while students using Windows will use GitBash (previously installed during environment setup).
Terminal Commands
pwd - Shows where you are in your file tree.
ls - Shows all available scripts from your current location.
cd - Navigates you through your file tree.
mkdir - Creates a directory (folder) at your current location.
touch - This command creates a file at your current location.
rm - Removes a specified file.
rm -rf - Removes a specified directory.
Using Git with GitHub
When working with Git & GitHub, we are often working in one of two scenarios:
1. Bringing an existing GitHub repository to your computer.
2. Connecting a new project from your computer to a new repository on GitHub.
GitHub Scenario One: Part One
Step one: Fork the repository you wish to work with. This creates a copy of the repository to your own account.
Step two: Copy the url found by clicking the green 'Code' button.
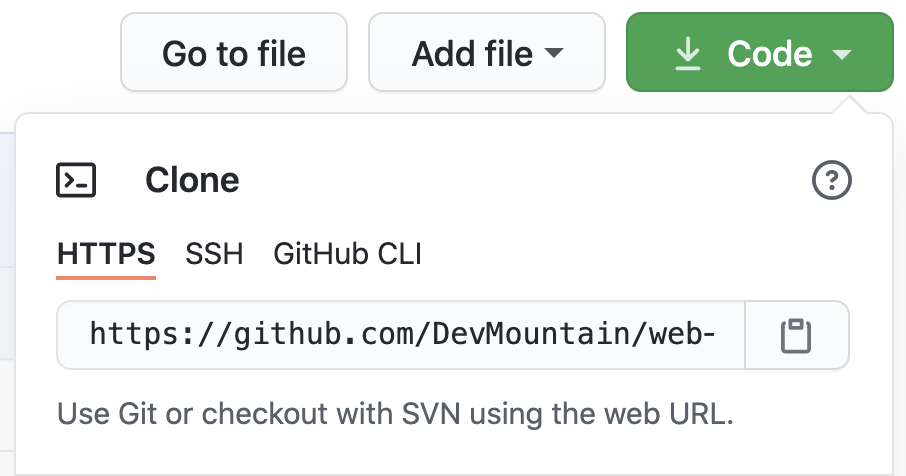
Step three: Using the terminal, navigate to where you would like this repository to live, and run the command: git clone <GitHub URL here>
After you have made changes to the project in your code editor, you need to push those changes to your repository on GitHub.
Step Four
GitHub Scenario One: Part Two
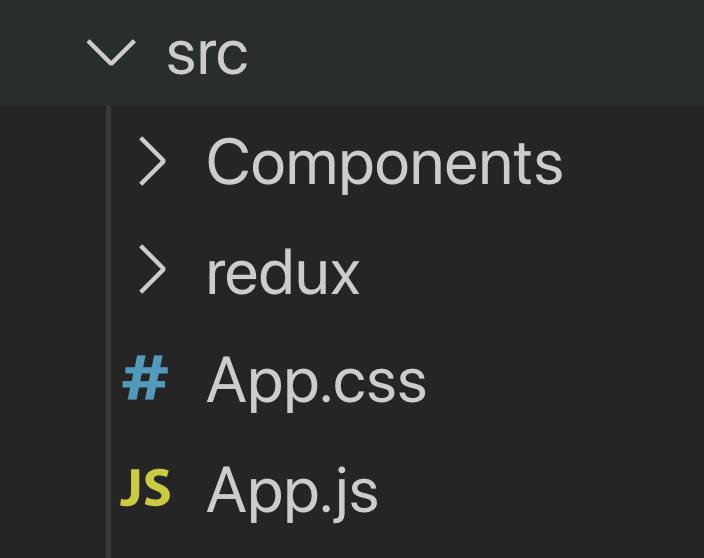
Redux Setup
Redux set-up involves two kinds of files: reducer files (can have multiple), and a store file.
Reducers are where state can be stored, as well as actions to change the state.
The store makes the state from our reducers available to our application.
Reducers
Reducer files will hold their own state, as well as action creator functions, and a reducer function that will work together to change the application state.
Their setup looks like the following:
const initialState = {
    user: {}
};

const LOGIN_USER = 'LOGIN_USER';

export function loginUser(user){
    return {
        type: LOGIN_USER,
        payload: user
    };
};

export default function userReducer(state = initialState, action){
    switch(action.type){
        case LOGIN_USER:
            return {...state, user: action.payload};
        default:
            return state;
    };
};
initial state values
action creator function
reducer function
Action Creators
Action creators are functions that allow changes to the redux state.
They return an action object with two properties: a type and a payload.
The type is used in the reducer's switch statement, and the payload contains the new values to assign on state.
export function loginUser(user){
    return {
        type: LOGIN_USER,
        payload: user
    };
};
Reducer Function
The reducer function contains a switch statement that helps change the state.
The action type returned from an action creator is used as the case for the switch, to determine how state should change.
export default function userReducer(state = initialState, action){
    switch(action.type){
        case LOGIN_USER:
            return Object.assign({}, state, {user: action.payload});
            // spread operator: return {...state, user: action.payload}
        default:
            return state;
    };
};
Redux Store
The redux store is the place where we keep the application's state.
The store is a place other components can connect to in order to receive updates about information they might need.
The set up for a redux store is as follows:
import {createStore} from 'redux';
import userReducer from './reducer';

export default createStore(userReducer);
import {createStore}
import reducer file(s)
pass reducer into createStore
React Redux Setup
Now that the store and reducer are setup, we can now use React Redux to connect the store to our application.
To enable access to the store, we first need to wrap a Provider component around our application.
import React from 'react';
import ReactDOM from 'react-dom';
import App from './App';

import store from './redux/store';
import {Provider} from 'react-redux';

ReactDOM.render(
<Provider store={store}>
    <App />
</Provider>
, document.getElementById('root'));
wrap App with Provider, passing in store as a prop
import store and Provider
React Redux Setup
Once Provider has been wrapped around the application, we can now pass information from our store state to any component that needs it by using a connect function, and a mapStateToProps function.
These two functions will work together to populate the props object of the component with information from the store state. This process is known as subscribing.

React Redux Setup
import React, { Component } from 'react'
import {connect} from 'react-redux';

class App extends Component {
  render() {
    return (
      <div>

      </div>
    )
  }
};

const mapStateToProps = (state) => state

export default connect(mapStateToProps)(App);
import connect
makes the redux store state available to the props object
pass mapStateToProps into connect
Using Actions
import React, { Component } from 'react'
import {connect} from 'react-redux';
import {actionName} from './redux/reducer';

class App extends Component {
  render() {
    return (
      <div>

      </div>
    )
  }
};

const mapStateToProps = (state) => state

export default connect(mapStateToProps, {actionName})(App);
import action creator
pass action into connect as the second argument
Note: If you aren't using redux state, but are using an action, the first argument of connect needs to be null.
Using Multiple Reducers
When using multiple reducers, we need to 'bundle' them to make each of their states available on the store state.
We can do this using the combineReducers method that comes with the redux package.
import {createStore, combineReducers} from 'redux';
import userReducer from './reducer';
import carReducer from './carReducer'

const rootReducer = combineReducers({
    userReducer,
    carReducer
});

export default createStore(rootReducer);
Redux Promise Middleware
redux-promise-middleware is a package that enables asynchronous code to work inside of redux.
This means we can make axios calls to a server from within redux.
To use it, install redux-promise-middleware from NPM:
npm install redux-promise-middlewareThen make the following changes to your store file:
// import the store and apply middleware
import {createStore, applyMiddleware} from 'redux';
import userReducer from './reducer';
// import promise middleware
import promiseMiddleware from 'redux-promise-middleware';
export default createStore(userReducer, applyMiddleware(promiseMiddleware));
Redux Promise Middleware
Now that the setup is complete, we can make asynchronous code work in our action creators:
export function getRandomUser(){
    const randomUser = axios.get('https://randomuser.me/api/')

    return {
        type: GET_USER,
        payload: randomUser
    };
}
Note: Promises have three states: Pending, Fulfilled, and Rejected. Redux-promise-middleware allows us to use these in our switch statement in the reducer function...
Redux Promise Middleware
export default function userReducer(state = initialState, action){
    switch(action.type){
        case GET_USER + '_PENDING':
            return Object.assign({}, state, {laoding: true});
        case GET_USER + '_FULFILLED':
                return Object.assign({}, state, {user: action.payload, loading: false});
        case GET_USER + '_REJECTED':
            return Object.assign({}, state, {errorMessage: action.payload});
        default:
            return state;
    };
};
React-promise-middleware will append a promise-related status to any asynchronous actions that are fired from within redux.
Redux Dataflow (Advanced)
WORK IN PROGRESS - Command Line & Git Commands
By Devmountain
WORK IN PROGRESS - Command Line & Git Commands
React Redux


