React Native
跨平台App開發培訓課程
簡報: https://goo.gl/HPpyka
Wifi SSID: trunk-studio
Wifi 密碼 8 個 0
上課環境:ftp://192.168.23.1
- 基本介紹
- 特色、優缺點
- 其他類似的框架
- RN 環境安裝、介紹
About Me
-
傅耀德 (Dan、FuD、FuYaoDe)
- 創科資訊全端工程師
- 專注於 Node 生態體系
-
教學 / 經歷
- 經營 React Natvie Taiwan 社群
- 2017 第 8 屆iT 邦鐵人賽 佳作
- GitHub 1800 星星 react-native-app-intro 專案作者
- 2017 HelloJS 講師 - React Native
- 2016 Trunk Studio - 前端開發 React / Redux 起手式
- 2016 HelloJS 講師 - React Native

簡單介紹一下
React Native 是什麼?
- 2013 年夏天 Facebook 內部駭客松的 Project。
- 2015 年 1 月 React.js Conf 發表, 2015 年 5 月正式發佈,當時只有 iOS 版本,2015 年 9 月 Android 才正式支援。
-
現在已經能開發
- iOS
- Android
- Apple TV
- 用 JavaScript 撰寫真正的原生 App,不是所謂的 Mobile Web App、HTML5 App、 Hybrid App
特色
跨平台
寫一份程式碼
即可達成跨平台 App 開發建置與維護。
- iOS
- Android
- Apple TV
高效能
效能與使用體驗接近原生開發
快速除錯
開發時可以快速的更新 UI
不用重新編譯
熟悉的開發方式
與 Web 前端相同的 REST API 存取後端資料服務。
只要上架一次
CodePush
免送審更新程式之機制
更新週期快速
每個月更新一版
活躍的社群
相較其他跨平台框架
使用人數更多
完整的文件
缺點
開發環境需求高
需要了解 React
其他類似框架
-
Codova , AngularJS, Sass -
骨子裡還是網頁
-
官方 market 有賣 theme、pulgin
-
適合有網頁開發底子,要簡單 MVP 的產品
-
Angular, TypeScript, JavaScript
-
適合熟悉 Angular 的開發者
-
也有官方的 Market
-
可擴展現有 APP
-
Vue 版本 preview 中
-
適合熟悉物件導向的程式語言開發者的垮平台解決方案
-
分為社區版、專業版、企業版
-
最近剛發佈的 Google 跨平台 APP 解決方案
-
使用 Dart 語言開發
-
Beta 中,還在觀望
PhoneGap
-
Html, CSS, JavaScript
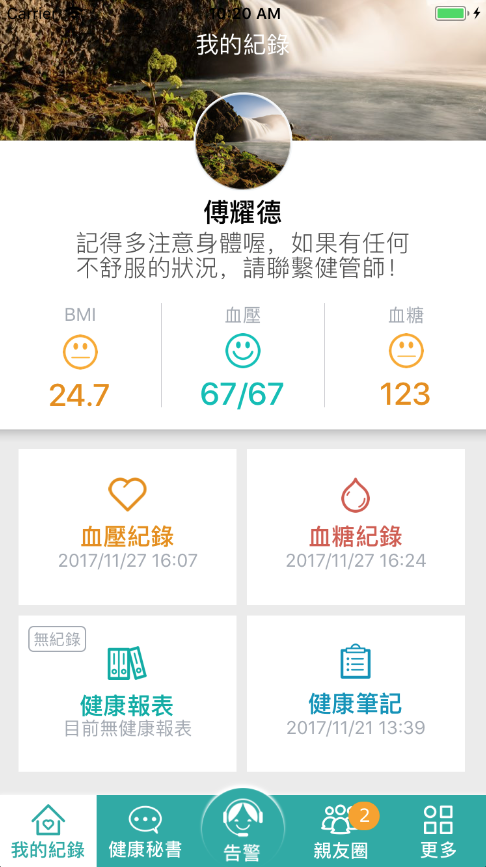
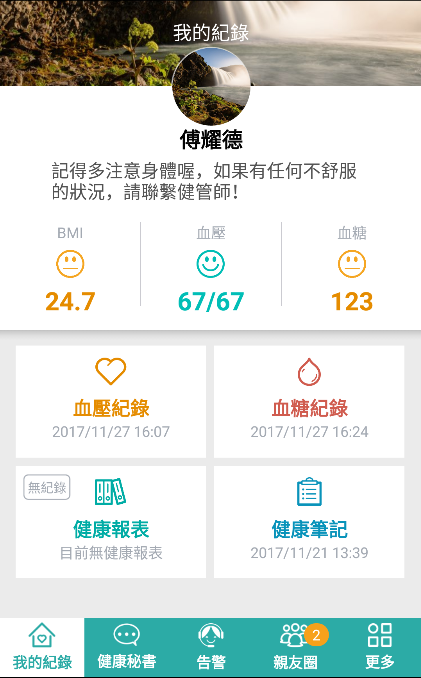
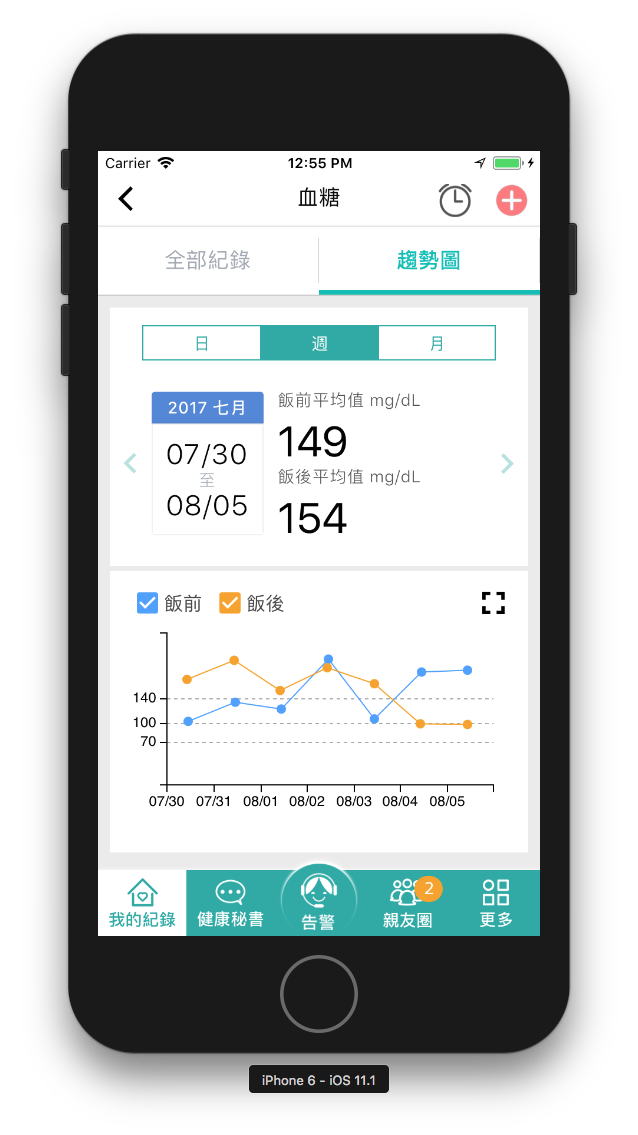
那有誰在用?
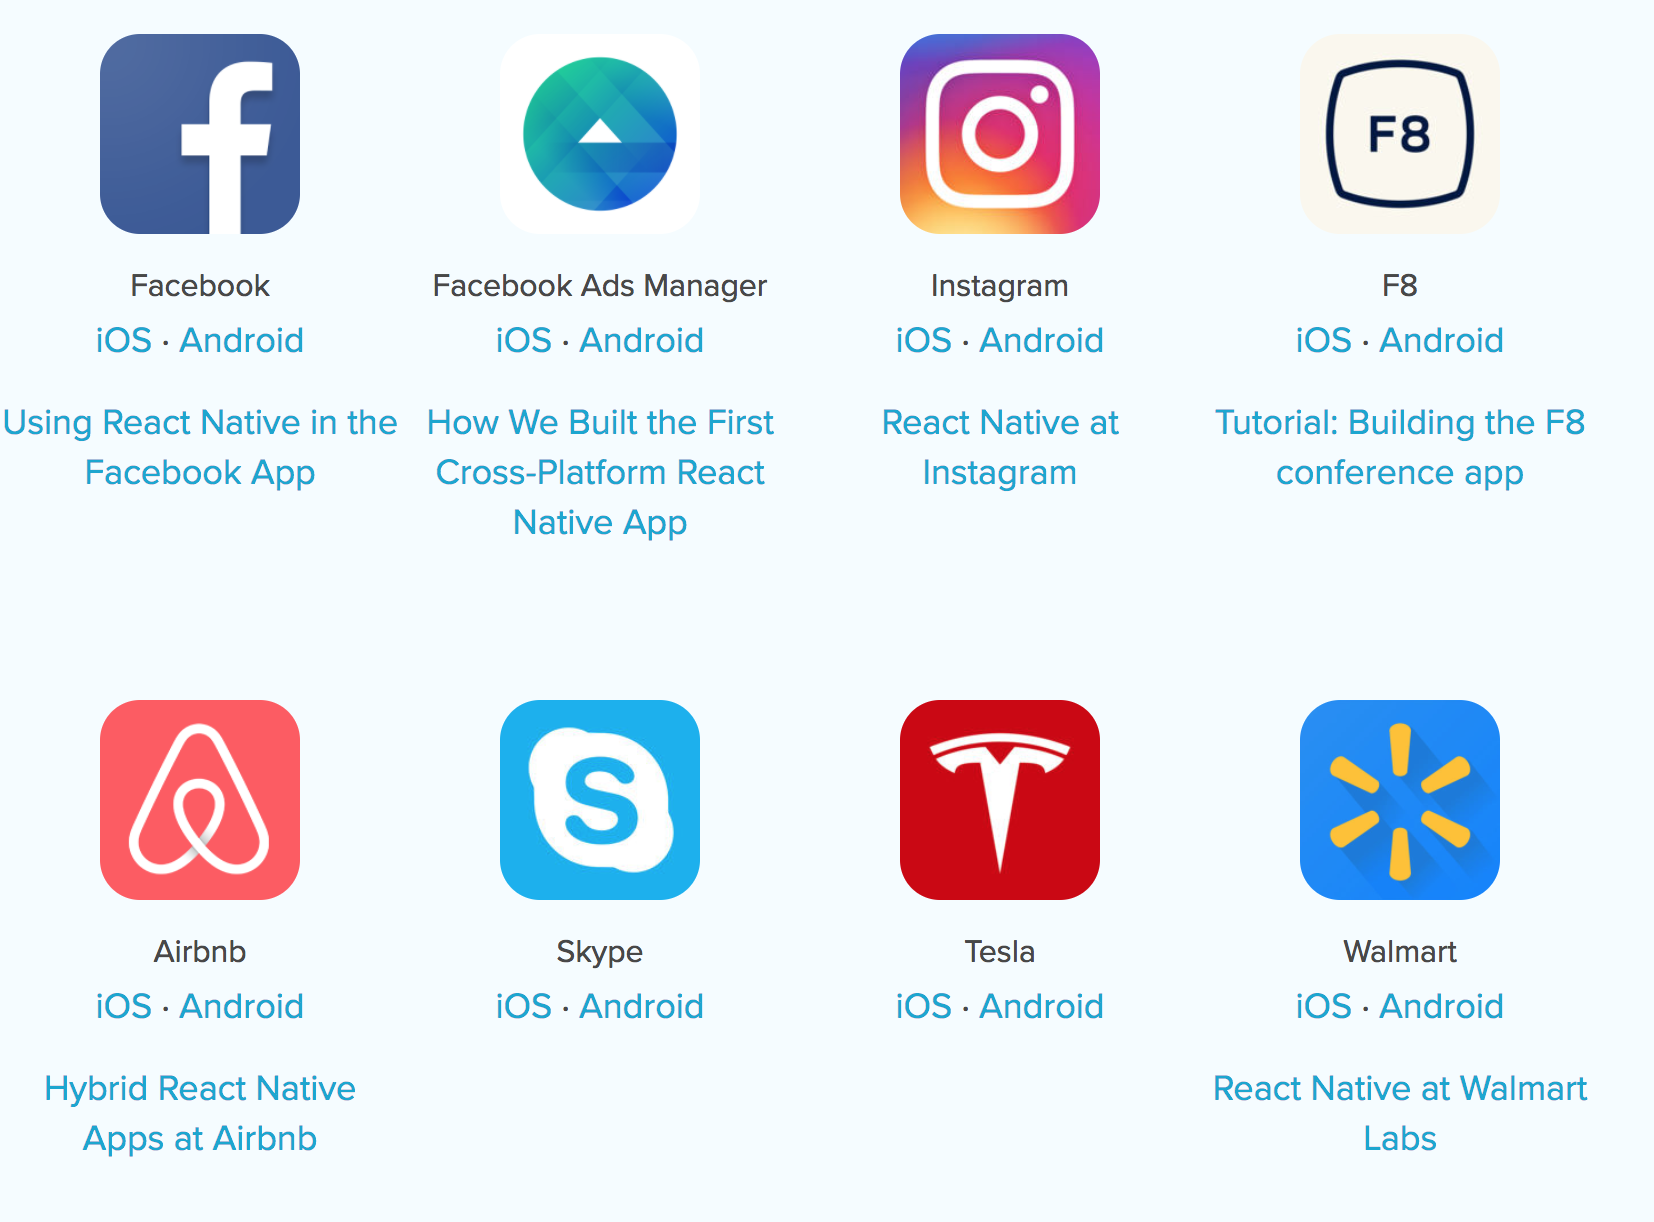


Trunk Studio


環境設定
- Android Studio @ 3.0+
- JDK @ 1.8+
- Node.js @ 8.9.x
- python2
- Xcode (Mac Only)
- Homebrew (Mac Only)
基本系統環境
install NVM
Node
curl -o- https://raw.githubusercontent.com/creationix/nvm/v0.33.6/install.sh | bash設定環境變數 (~/.bash_profile, ~/.zshrc, ~/.profile, or ~/.bashrc)
export NVM_DIR="$HOME/.nvm"
[ -s "$NVM_DIR/nvm.sh" ] && . "$NVM_DIR/nvm.sh" # This loads nvm
source ~/.bashrc
install NodeJs
nvm install 8Android SDK
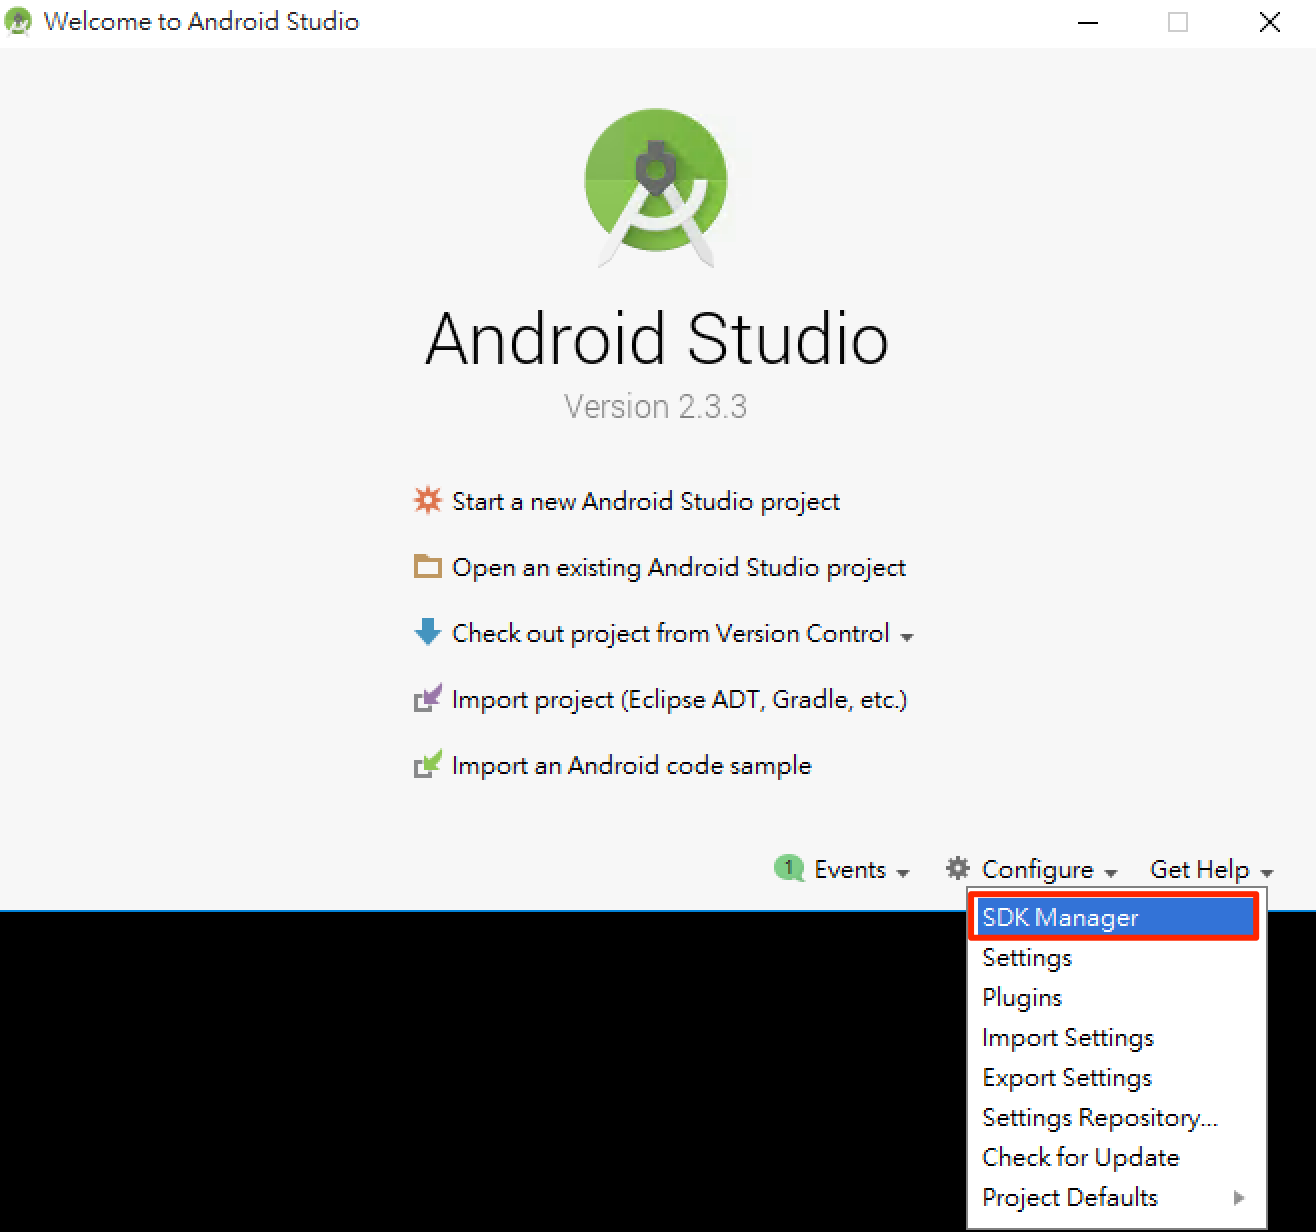
React Native 目前需要 Android Studio2.0 或更高版本。
- 下載 Windows Android Studio
- 安裝 Android Studio - 教學影片
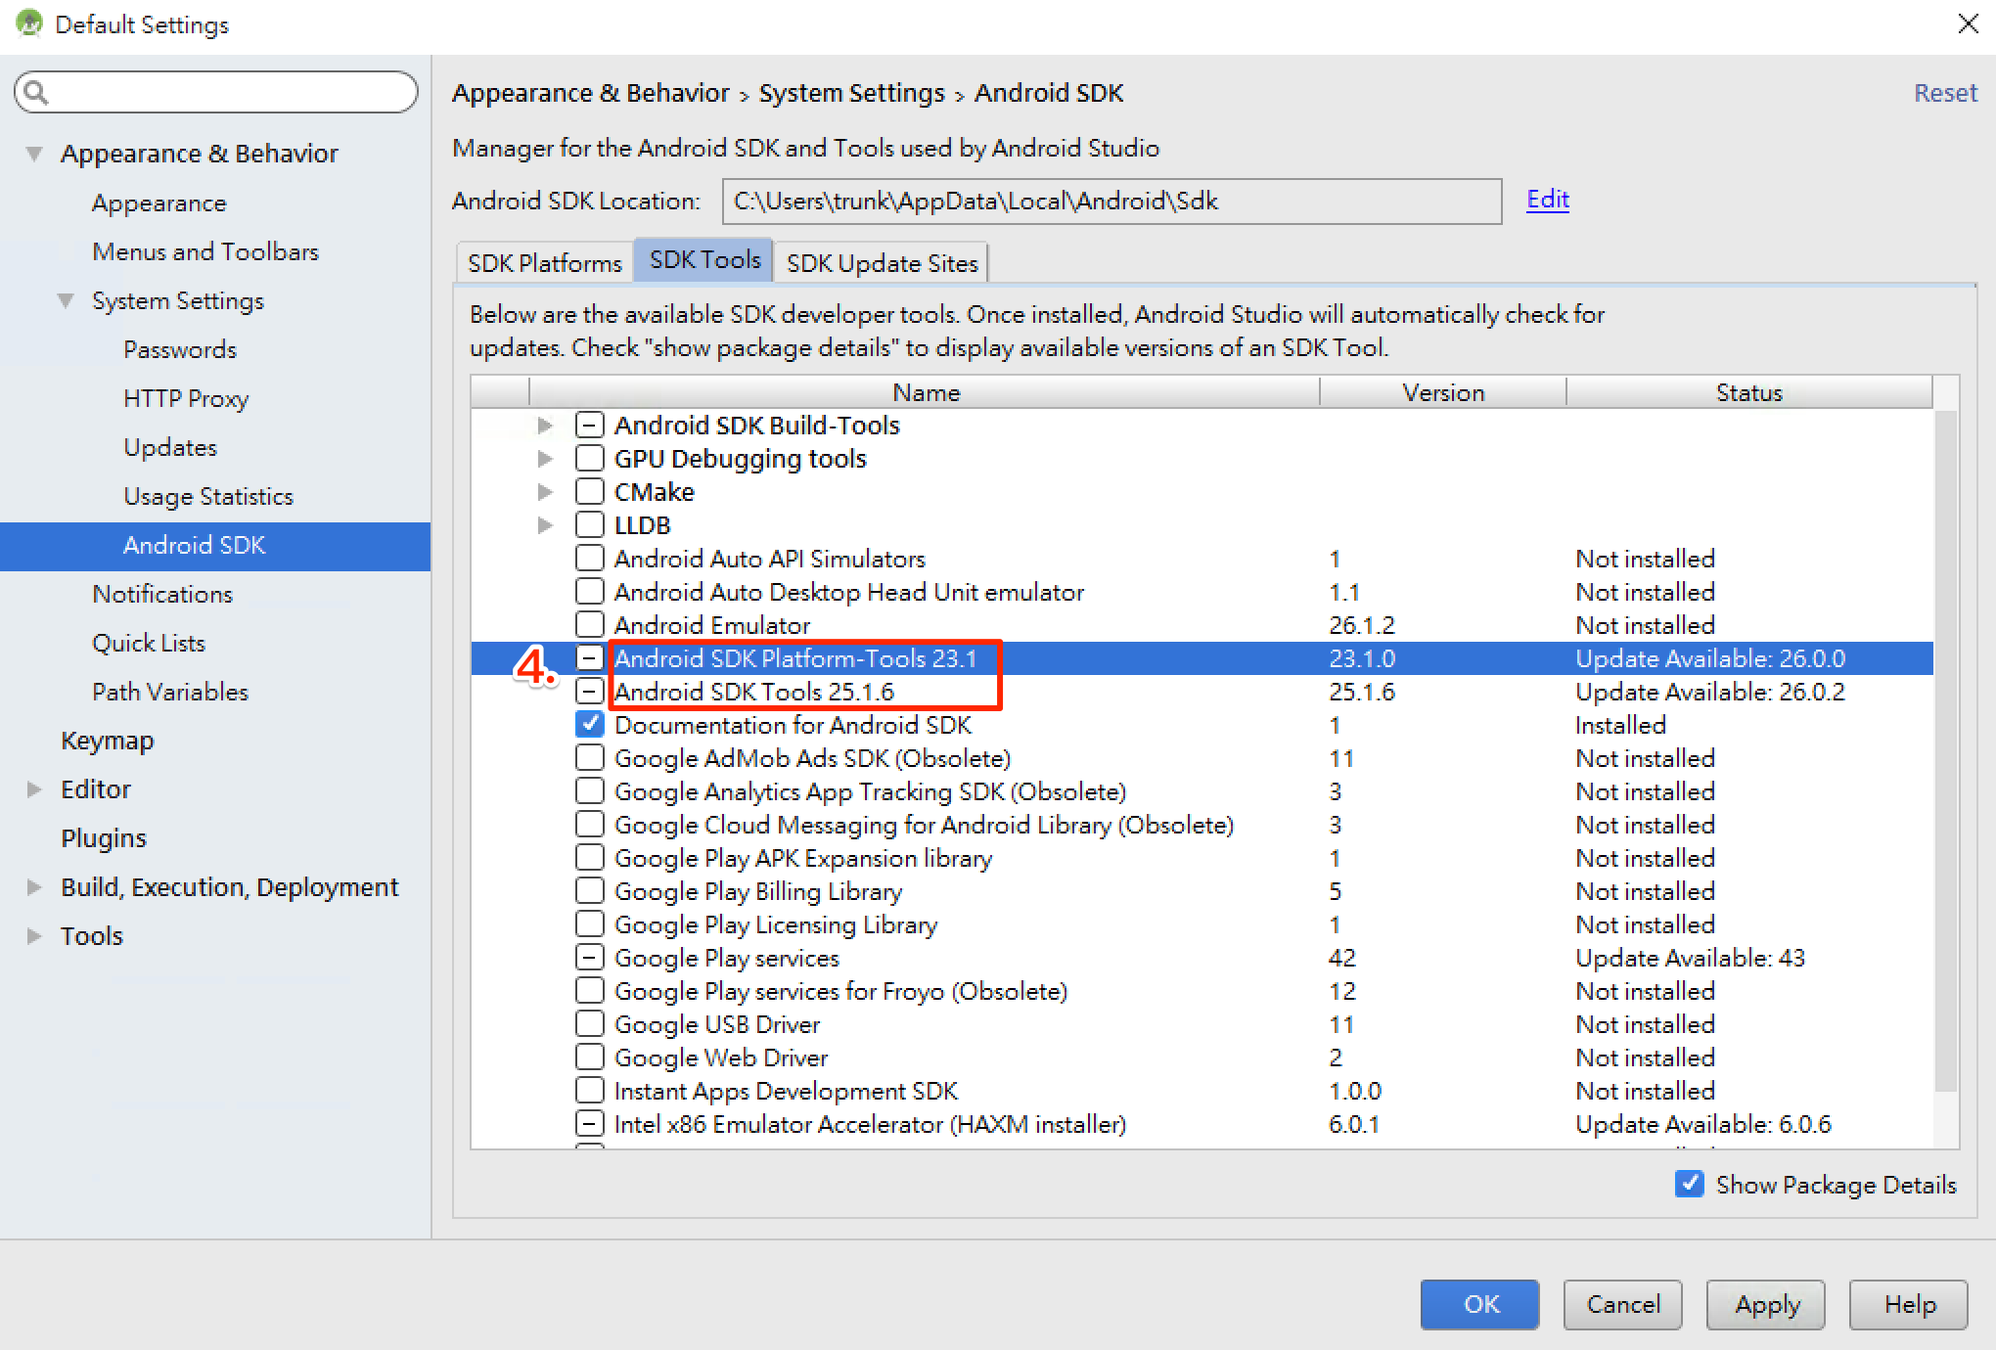
- 安裝 SDK
開發環境
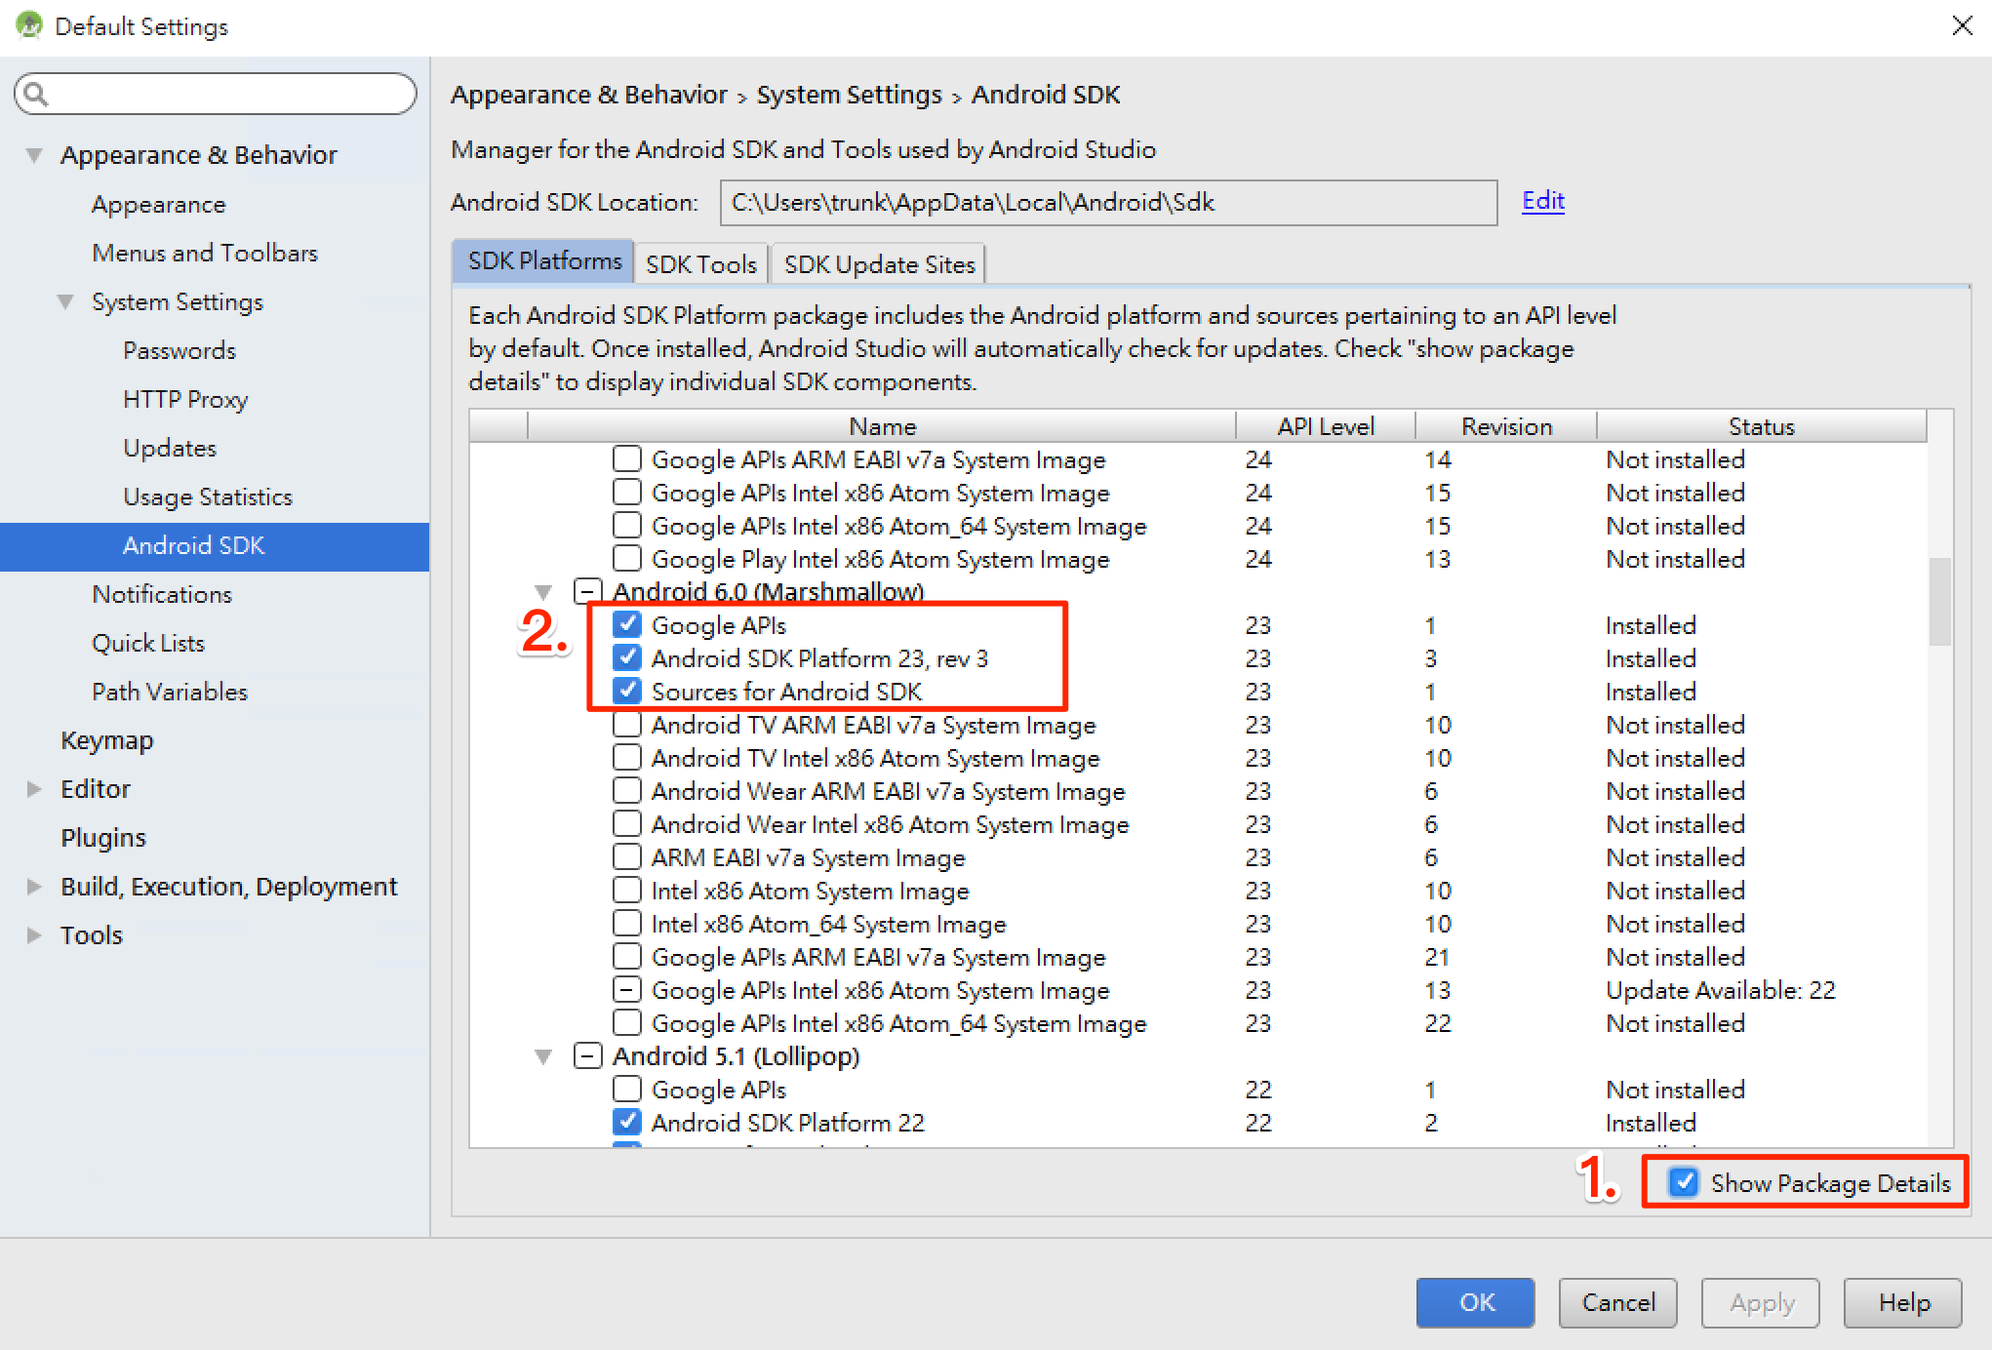
SDK Platforms 選擇 Google APIs 、 Android SDK Platform 23
Android 環境變數
確保 ANDROID_HOME 環境變數跟 SDK 路徑一致。
Windows
控制台 > 系統及安全性 > 進階系統設定 > 進階 > 環境變數 > 新增

控制台 > 系統及安全性 > 進階系統設定 > 進階 > 環境變數 > 選擇 PATH > 編輯 在後方新增
;C:\Users\使用者名稱\AppData\Local\Android\sdk\platform-tools;C:\Users
\使用者名稱\AppData\Local\Android\sdk\tools
Mac 開起 ~/.bashrc 或 ~/.zshrc 或 ~/.profile 在最後加上
export ANDROID_HOME=${HOME}/Library/Android/sdk
export PATH=${PATH}:${ANDROID_HOME}/tools
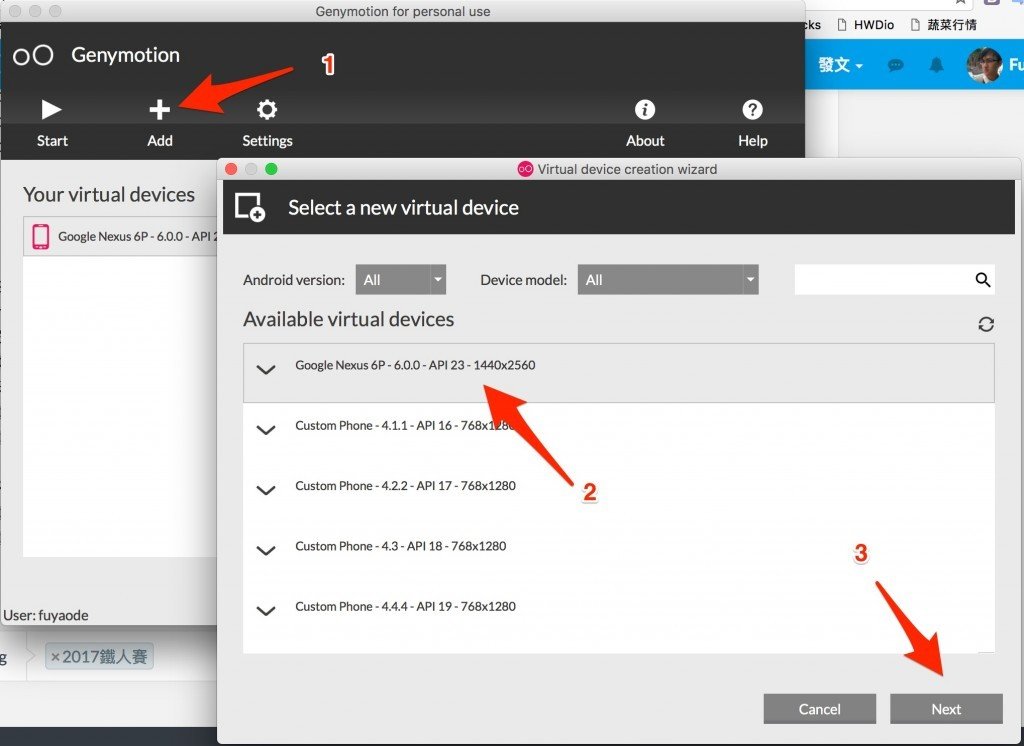
export PATH=${PATH}:${ANDROID_HOME}/platform-toolsAndroid 虛擬機
- 註冊、下載 genymotion
- 新增虛擬機
Xcode
- 從 App Store 安裝 Xcode新增虛擬機
- 安裝 Xcode Command Line Tools, Xcode > ToolBar > Locations > Preferences
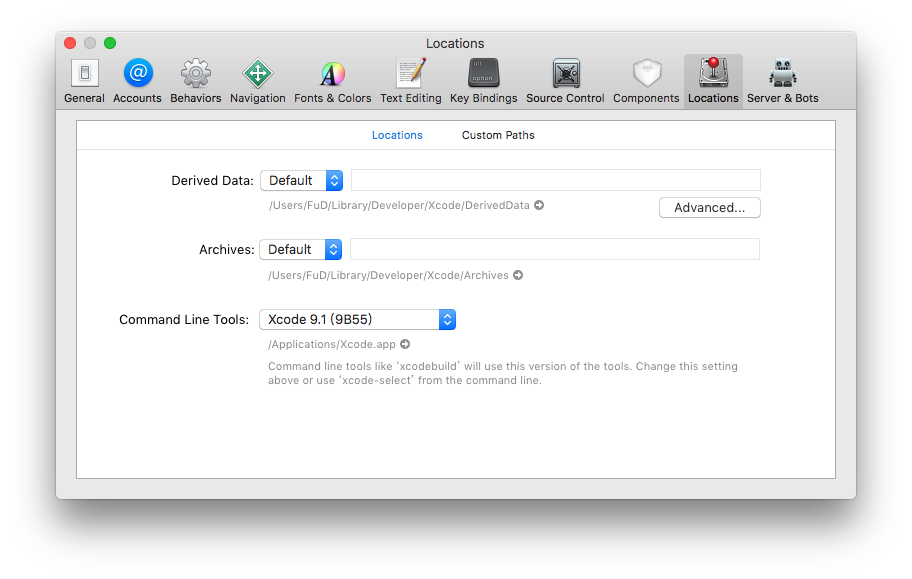
- xcode-select -p,確認是否有安裝完成,安裝完成會回傳 /Applications/Xcode.app/Contents/Developer
- brew install watchman
開發環境
-
VS code
-
React Native Tools
- 自動補齊
- 讓 VS code 變得像是 RN IDE
-
ESLint
- 團隊統一 Code Style
- 靜態分析避免低級錯誤
-
React Native Tools
ESLint
npm install --save-dev babel-eslint eslint-config-airbnb-base
eslint-plugin-react eslint-plugin-react-native
node_modules/.bin/eslint --init選擇 style
? How would you like to configure ESLint? Use a popular style guide
? Which style guide do you want to follow? Airbnb
? Do you use React? Yes
? What format do you want your config file to be in? JavaScript
ESLint
常見 Code Style 提醒
// bad
var count = 1;
if (true) {
  count += 1;
}

// good, use the let.
let count = 1;
if (true) {
  count += 1;
}
// bad
function sayHi(name) {
return 'How are you, ' + name + '?';
}
// good
function sayHi(name) {
return `How are you, ${name}?`;
}// bad
import * as AirbnbStyleGuide from './AirbnbStyleGuide';
// good
import AirbnbStyleGuide from './AirbnbStyleGuide';免環境快速上手
Create React Native App
npm install -g create-react-native-app
create-react-native-app AwesomeProject
cd AwesomeProject
npm start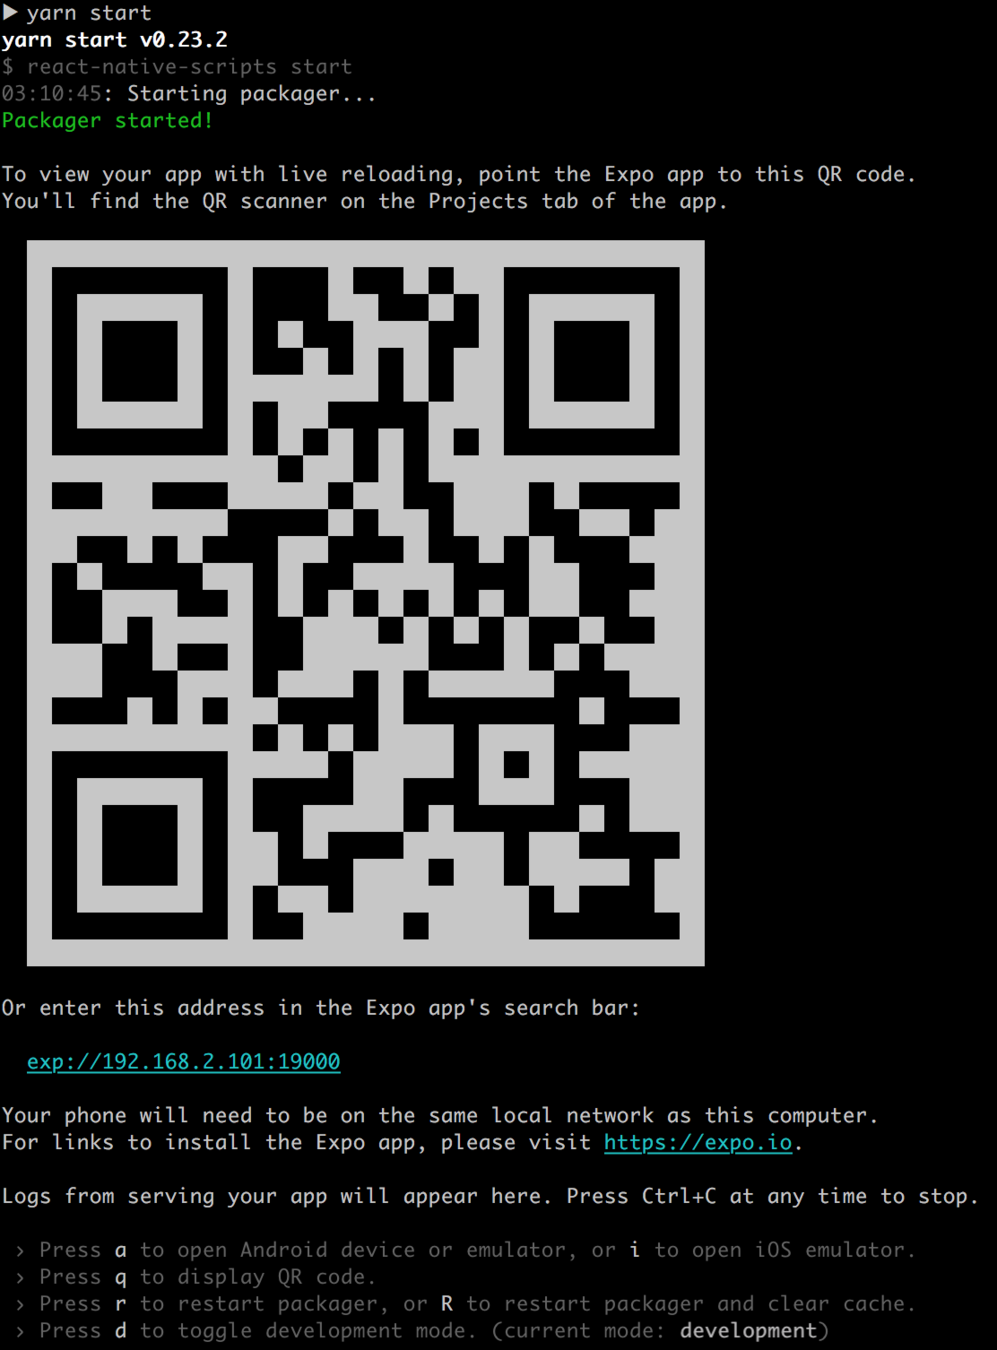
Amazon 版本 CRNA
- AWS Account
- Xcode / Android Studio
-
Node.js with NPM
- npm install -g react-native-cli
- npm install -g create-react-native-app
-
AWS Mobile CLI
- npm install -g awsmobile-cli
- (Optional) Watchman
- On macOS, it is recommended to install it using Homebrew
- brew install watchman
- On macOS, it is recommended to install it using Homebrew
- (Optional) AWS CLI
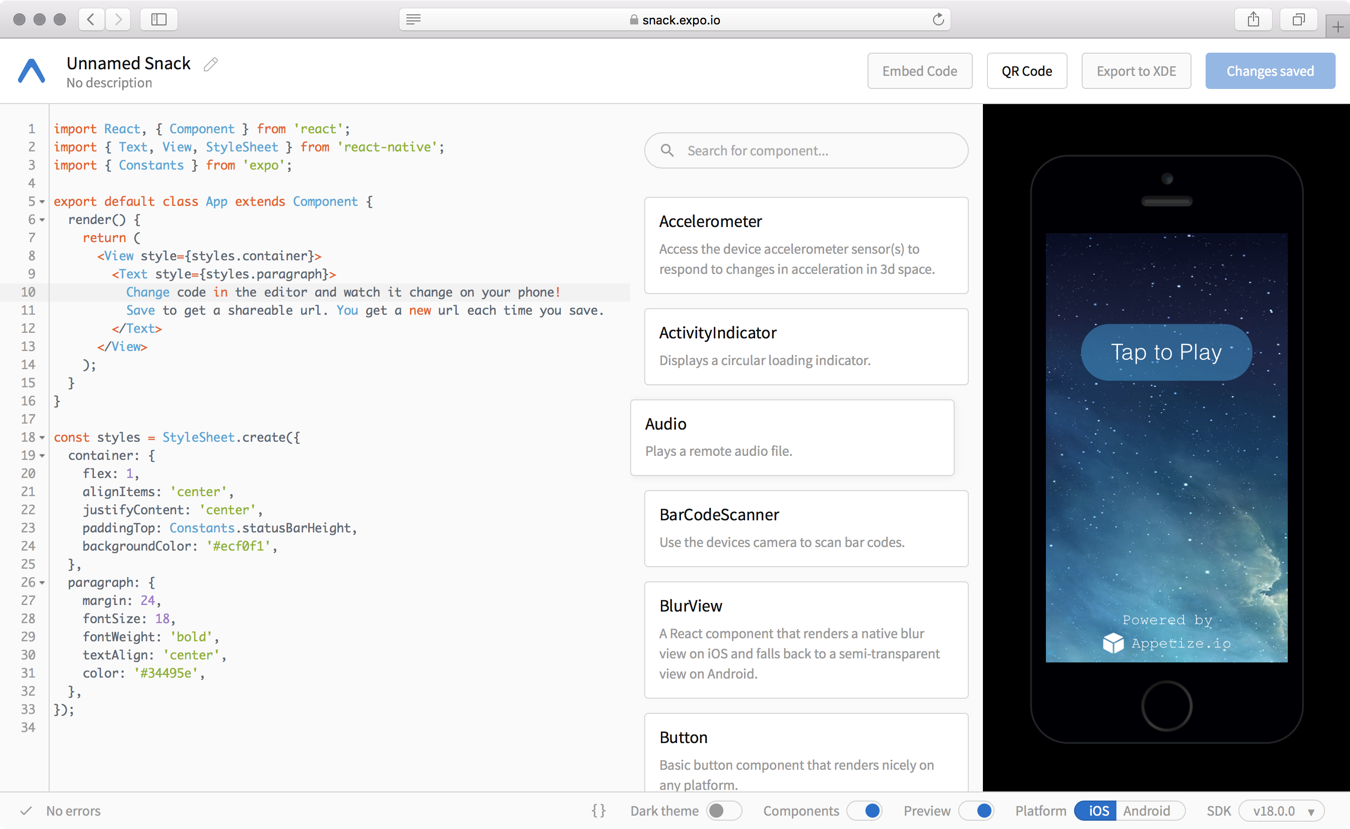
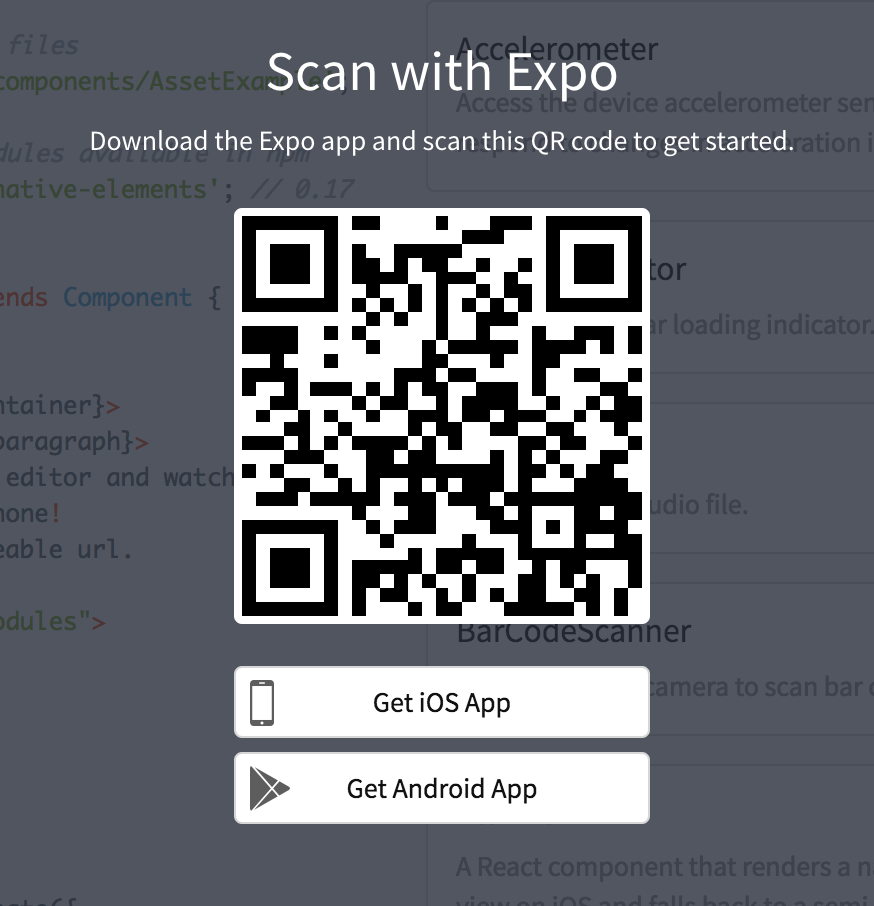
RN Playground
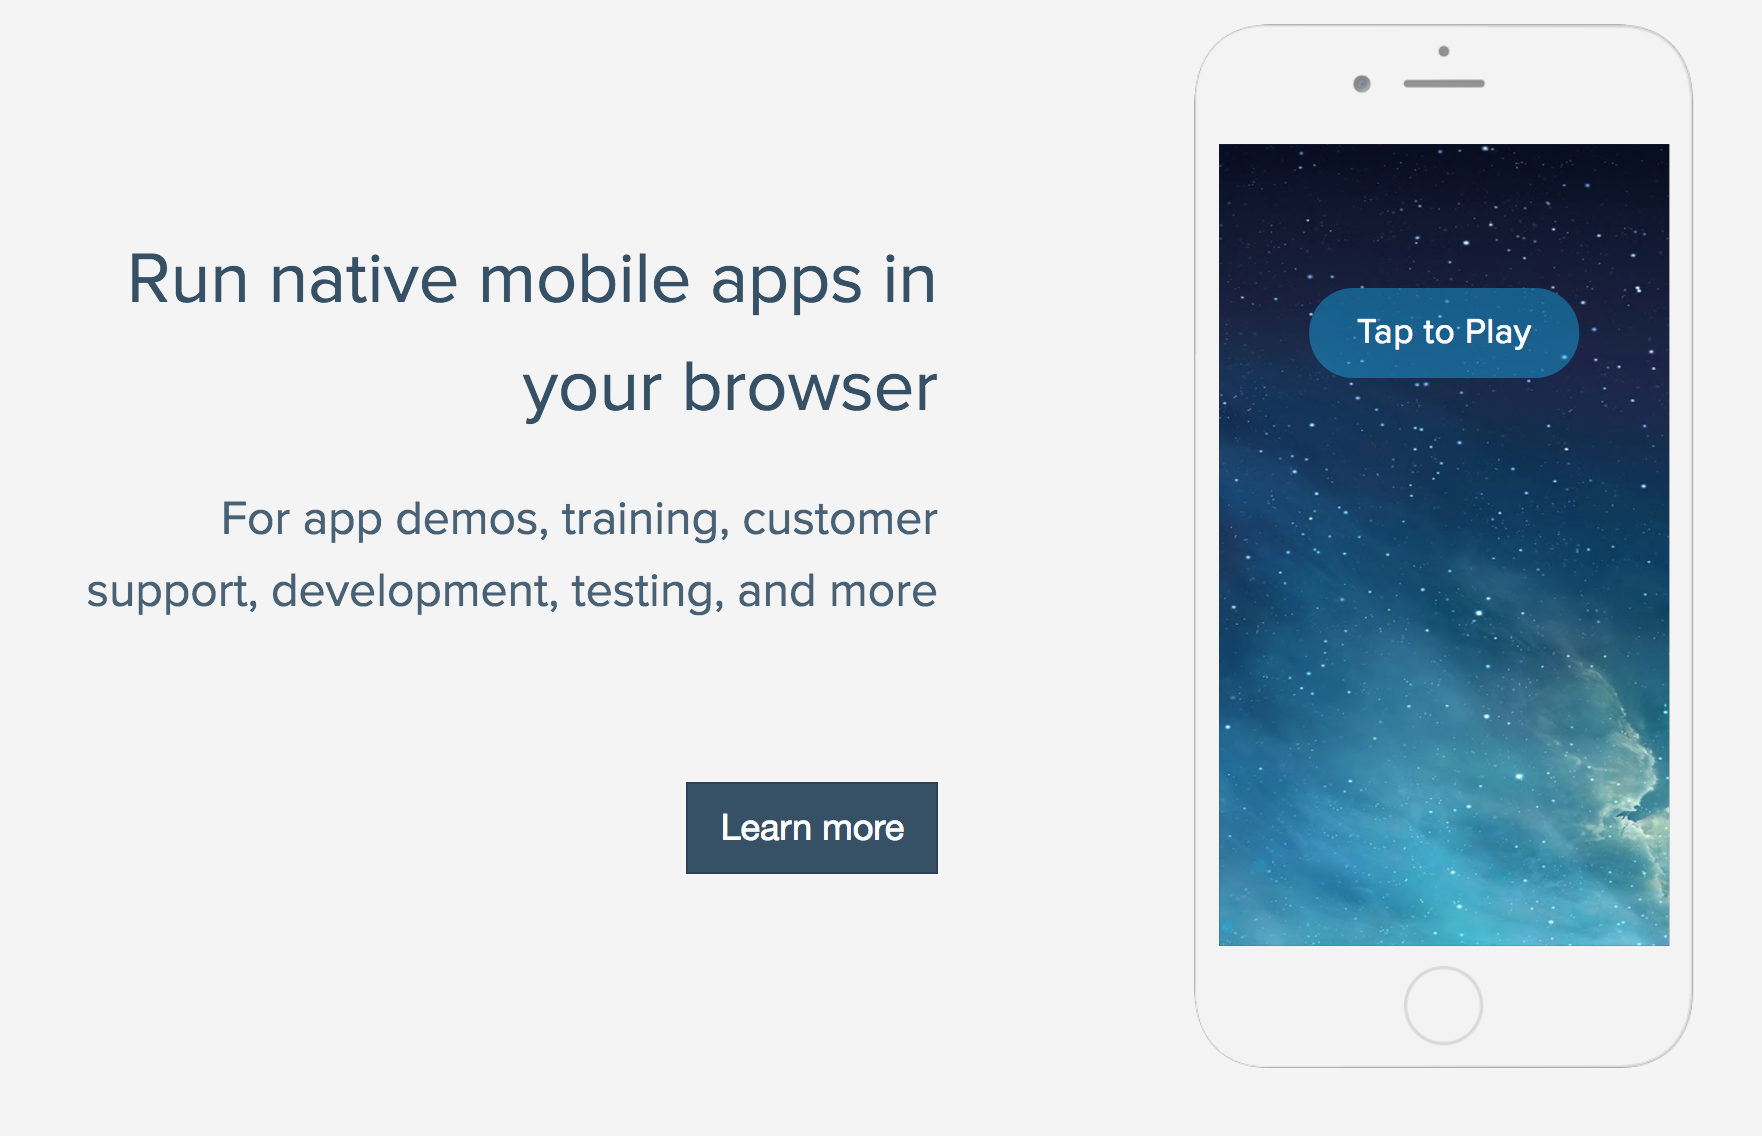
網頁版淺嚐 RN
Expo
上課環境設置
環境使用教學影片 注意有先後順序之分
- 開啟 Genymotion
- 開啟 Genymotion 當中的 Android 虛擬機
- Custom Phone - 7.1.0 - API 25 - 768x1280,等待開機完成
-
在 本機 電腦執行命令提示字元執行指令
- 開啟 VirtualBox 當中的 ReactNative 虛擬機
- ReactNative 虛擬機出現 login 字樣,開啟網頁 http://localhost:9083/ide.html
- 到 ReactNative 虛擬機網頁當中的 terminal 視窗輸入指令
$ adb devices
$ adb tcpip 5556
$ adb connect $ip:5556
/* $ip 請自行替換為 adb devices 回傳的 Android 虛擬機 IP
例如: adb connect 192.168.57.101:5556 */
$ adb devices
/* 測試是否有連上 */
$ adb shell am start -a android.settings.SETTINGSReact Native 專案環境
CLI
$ npm install -g react-native-cli開新專案
$ react-native init demo
$ cd demo
$ npm start
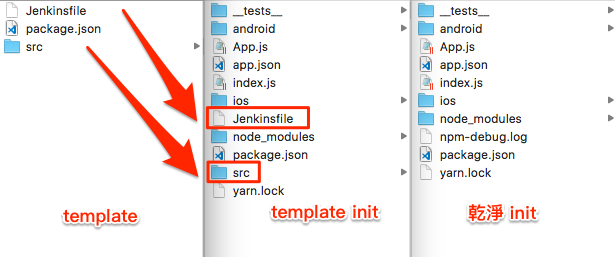
$ react-native run-androidreact-native init
- 新增乾淨的專案
- 使用模板新增專案
專案模板
react-native init ${project name} --template ${template name}

react-native init ${project name} --template file:///path_to/react-native-template-XXXX

react-native init ${project name} --template git://.../react-native-template-XXXX
定義模板
- 放入模板的架構
- 定義 package.json,使用 npm init,能快速產生 package.json
- 模板命名遵守命名規則 react-native-template- 開頭
- 發佈到 npm、git serve
定義模板優點
- 程式碼共享,避免程式私有化
- 減少不必要的重工
- 快速開發 React native module
- 新人能快速上手新專案
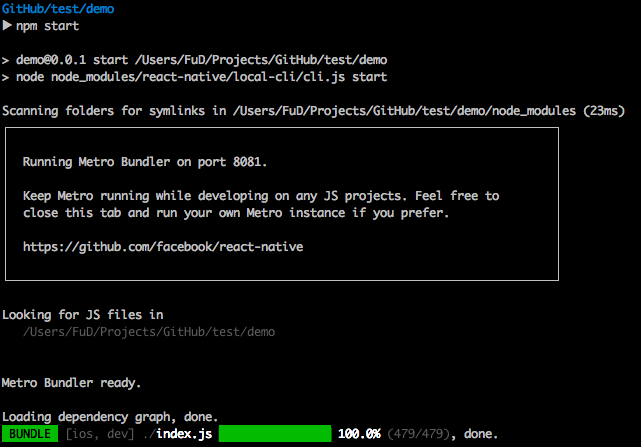
npm start
- 開啟 Bundle server
- Bundle server 負責把 JavaScaript 程式碼轉為 Native Code
- 負責接收、傳送 Debug 訊息
react-native run-android
react-native run-ios
- 負責安裝開發模式的 react native app 至專案
- 出現 BUILD SUCCEEDED 字樣代表完成
- Android 編譯過 dev apk 後可直接使用下列指令安裝 apk 節省時間
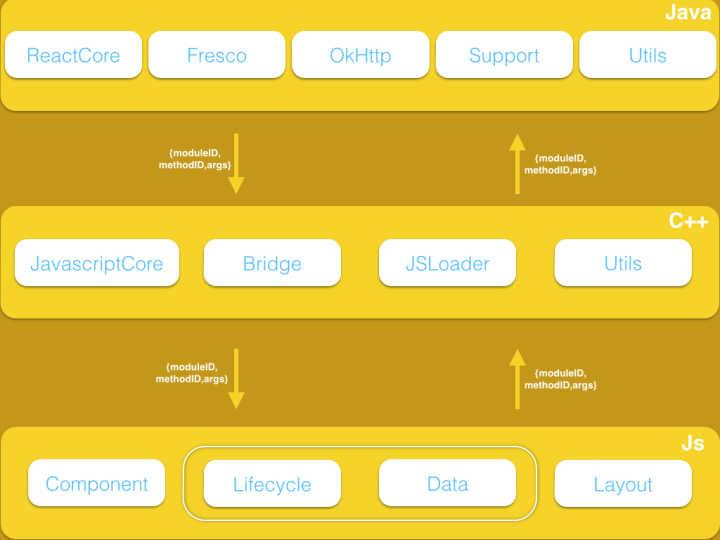
adb install ./android/app/build/outputs/apk/app-debug.apkReact Native 架構
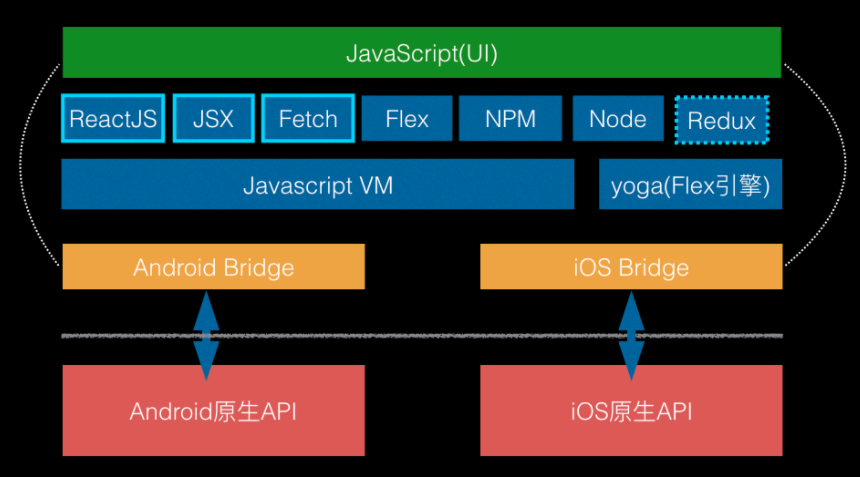
React Native 底層架構
專案結構
.
├── App.js
├── __tests__
├── android
├── app.json
├── index.js
├── ios
├── node_modules
├── package.json
└── yarn.lock
App 名稱位置 :
./android/app/src/main/res/values/strings.xml
./android/app/src/main/res/mipmap-*
App icon:
進入點
- App.js
- 程式碼
除錯
開啟開發人員選單
- iOS simulator: Cmd + D
- iOS device: 搖晃手機
- Android emulator: Cmd + M
- Android Devices: 搖晃手機
除錯選單功能
-
Debug JS Remote
- 顯示除錯訊息
- http://localhost:8081/debugger-ui
- console.log 會直接顯示於 Developer Tools
-
reload
- Hot reload
- Live Reload
與後端交互
Fetch
-
跟 Server 獲取、提交資料的方法
-
提供了和 web 標準一至的 Fetch API
-
安全機制與網頁不同,在 RN 中沒有 CROS 的限制
異步操作,使用 await/async
async function getMoviesFromApi() {
  try {
    let response = await fetch(
      'https://facebook.github.io/react-native/movies.json'
    );
    let responseJson = await response.json();
    return responseJson.movies;
  } catch (error) {
    console.error(error);
  }
}
getMoviesFromApiAsync() {
return fetch('https://facebook.github.io/react-native/movies.json')
.then((response) => response.json())
.then((responseJson) => {
return responseJson.movies;
})
.catch((error) => {
console.error(error);
});
}異步操作,返回 Promise
使用 Fetch 時機
- componentWillMount ?
- componentDidMount ?
iOS 設定例外網域
<key>NSAppTransportSecurity</key>
<dict>
  <key>NSExceptionDomains</key>
  <dict>
    <key>rn.fuyaode.me</key>
    <dict>
      <key>NSExceptionAllowsInsecureHTTPLoads</key>
      <true/>
    </dict>
    <key>localhost</key>
    <dict>
      <key>NSExceptionAllowsInsecureHTTPLoads</key>
      <true/>
    </dict>
  </dict>
</dict>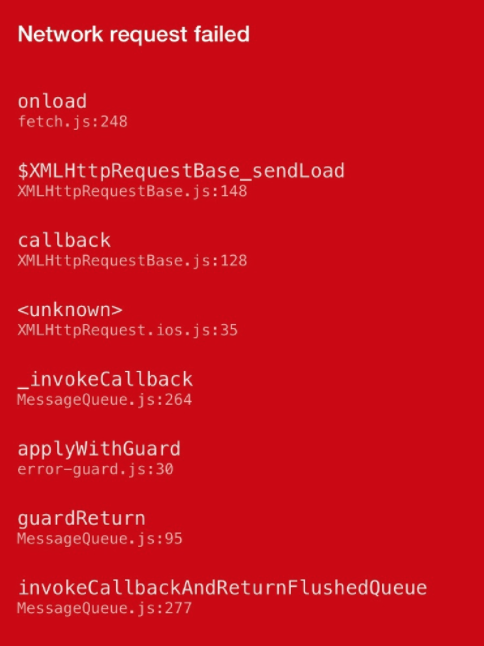
Timeout
NetInfo
handleConnectivityChange = async (isConnected) => {
 ....
}

NetInfo.addEventListener(
  'connectionChange',
  this.handleConnectivityChange
);
Android 記得加上權限
<uses-permission android:name="android.permission.ACCESS_NETWORK_STATE" />Fetch Debug
if (__DEV__) {
  GLOBAL.XMLHttpRequest = GLOBAL.originalXMLHttpRequest || GLOBAL.XMLHttpRequest
}
Fetch 使用方法
getData = async (page) => {
  try {
    let response = await fetch(`http://rn.fuyaode.me/users/1`);
    let responseJson = await response.json();
    console.log(responseJson);
    this.setState({
      name: responseJson.name
    })
    return responseJson;
  } catch (e) {
    console.error(e);
  }
}
Get
fetch('https://mywebsite.com/endpoint/', {
  method: 'POST',
  headers: {
    Accept: 'application/json',
    'Content-Type': 'application/json',
  },
  body: JSON.stringify({
    firstParam: 'yourValue',
    secondParam: 'yourOtherValue',
  }),
});
Post
const formData = new FormData();
form.append('id', 'A123123123');
form.append('password', '0000');
fetch('https://mywebsite.com/endpoint/', {
  method: 'POST',
  headers: {
    Accept: 'application/json',
    'Content-Type': 'multipart/form-data',
  },
  body: formData,
});
Form
const formData = new FormData();
formData.append('file', {
  uri: filepath,
  type: `${fileType}/${ext}`,
  name: fileName,
})
fetch('https://s3.us-east-2.amazonaws.com/test.png', {
  method: 'POST',
  headers: {
    'Content-Type': 'multipart/form-data',
  },
  body: formData,
});
檔案上傳
檔案上傳
選擇圖片、影片
cosnt options = {
  title: '選擇頭貼',
  storageOptions: {
    skipBackup: true,
    path: 'images'
  }
};
ImagePicker.showImagePicker(options, (response) => {
  if (response.didCancel) {
    console.log('User cancelled image picker');
  } else if (response.error) {
    console.log('ImagePicker Error: ', response.error);
  } else {
    let source = { uri: response.uri };
    this.setState({
      avatarSource: source
    });
  }
});
檔案上傳
RNThumbnail.get(filepath).then((result) => {
  console.log(result.path);
})
<Image source={{uri : this.state.videoUri}} />Image 原生元件支援顯示 Video 縮圖
檔案上傳
import {
  AudioPlayer,
  AudioRecorder,
  AudioUtils,
} from 'react-native-audio-player-recorder';

AudioRecorder.prepareRecordingAtPath(
  AudioUtils.DocumentDirectoryPath + '/record.aac', {
    SampleRate: 22050,
    Channels: 1,
    AudioQuality: 'Low',
    AudioEncoding: 'aac',
    AudioEncodingBitRate: 32000
  }
);

AudioRecorder.startRecording();
檔案上傳
檢查檔案大小
import RNFS from 'react-native-fs';

const fileStat = await RNFS.stat(filepath);
if (fileStat.size < 1024 * 1024 * 50) {
   ...
} else {
  // 檔案超過限制大小
}
Websocket
WebSocket 使用方法
var ws = new WebSocket('ws://host.com/path');

ws.onopen = () => {
  // connection opened
  ws.send('something'); // send a message
};

ws.onmessage = (e) => {
  // a message was received
  console.log(e.data);
};

ws.onerror = (e) => {
  // an error occurred
  console.log(e.message);
};

ws.onclose = (e) => {
  // connection closed
  console.log(e.code, e.reason);
};現代 APP 完全開發工作坊
By fuyaode


