


Keylite Web Team
Keylite Roof Windows Web Sqwad
Keylite Accredited Installer Academy
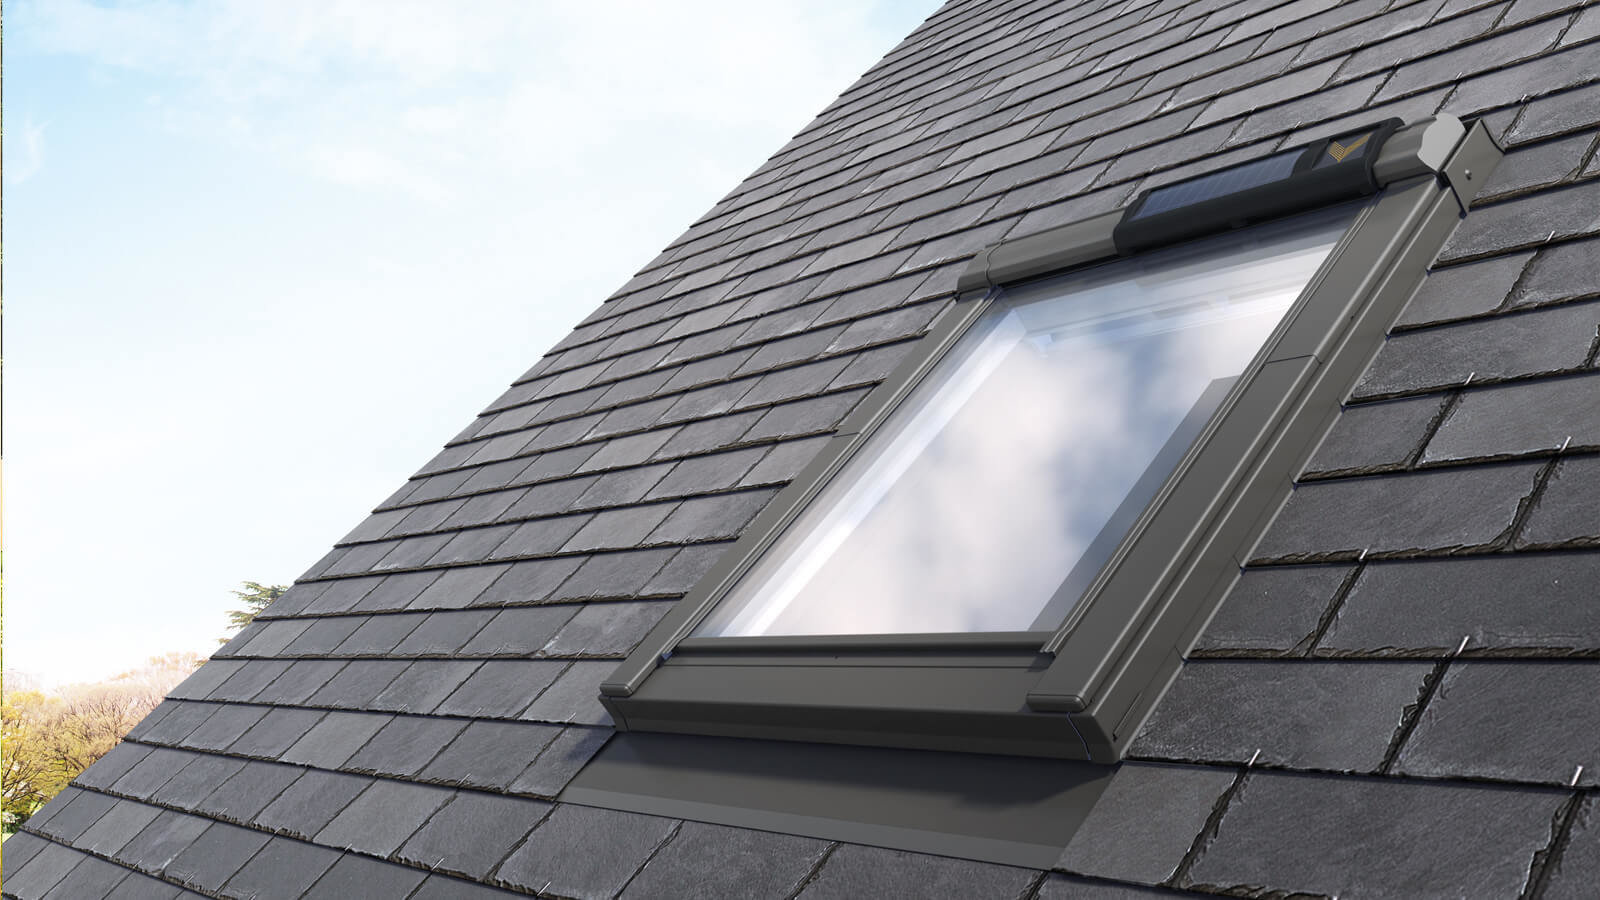
Sun Tunnel Installation
Structural opening sizes.
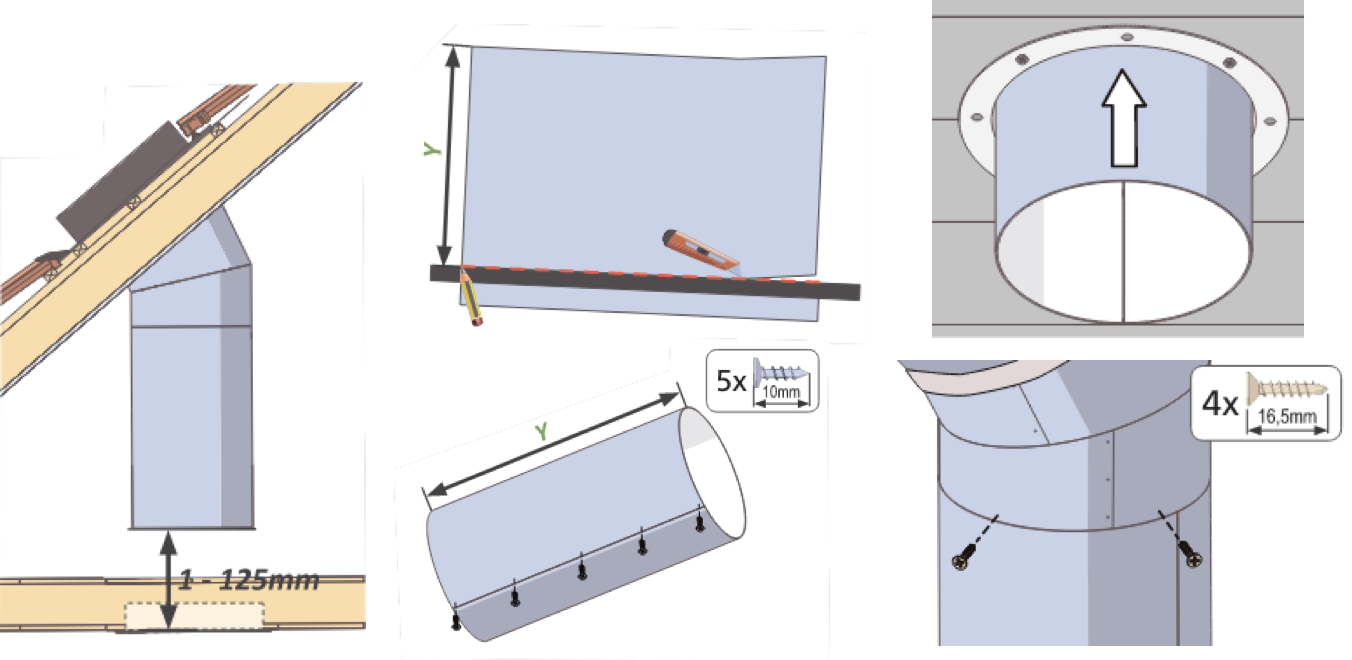
The Z-dimension is the distance the top of the from the lower sun-lite batten to the top of the first tile / slate batten beneath the sun-lite. The dimension ensures that the flashing kit sits flush to the roof resulting in a streamlined finish. Failure to set the z-dimension correctly can lead to water ingress.
Keylite Accredited Installer Academy
Sun Tunnel Installation
Connect the flexi tube to the underside of the flashing kit as per below. Apply sealant around the outer perimeter of the connection. Remove the plastic tape strip to activate the mastic sealant beneath the lead bottom apron.
Keylite Accredited Installer Academy
Sun Tunnel Installation
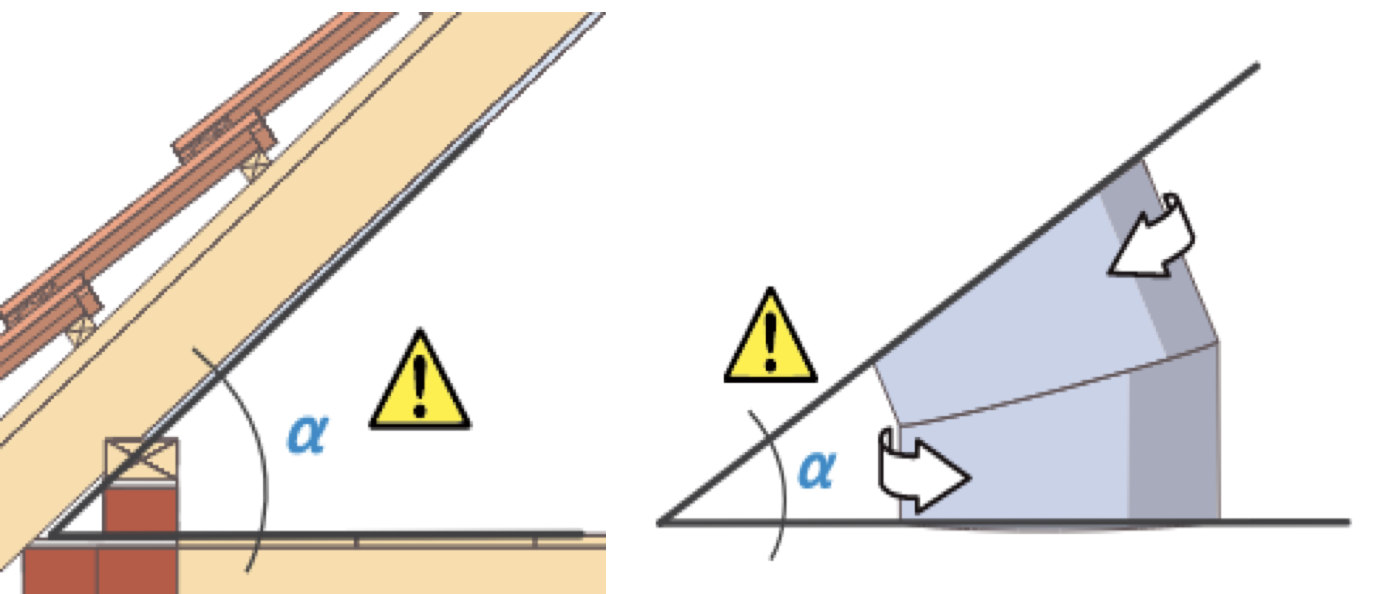
Rotate the angle adaptor to the same angle as the roof.
Keylite Accredited Installer Academy
Sun Tunnel Installation
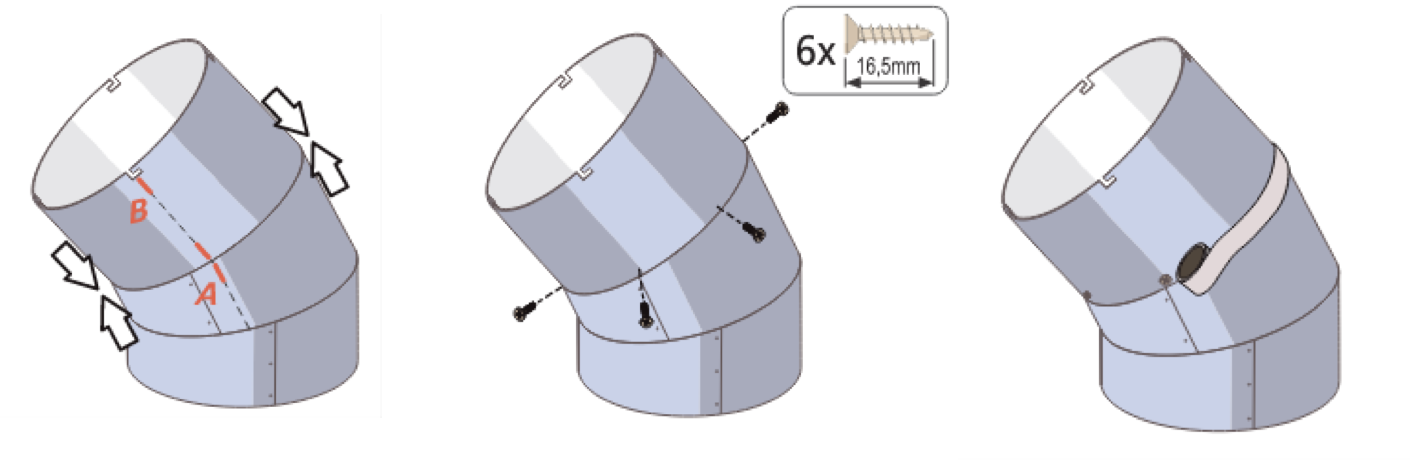
Connect the intermediate tube to the top of the angle adaptor and tape the join using the aluminium tape supplied.
Keylite Accredited Installer Academy
Sun Tunnel Installation
Remove the plastic film from inside the tubes. Connect the combined angle adaptor and intermediate tube to the underside of the flashing unit. Use sealant to seal the connection.
Keylite Accredited Installer Academy
Sun Tunnel Installation
Install the flashing top onto the roof.
Keylite Accredited Installer Academy
Sun Tunnel Installation
Directly below the flashing, position the ceiling diffuser housing to the ceiling, mark the outer perimeter and cut it out.
Keylite Accredited Installer Academy
Sun Tunnel Installation
Install the ceiling diffuser housing as per below. Thread the flexi tube through the ceiling diffuser housing and cut out of the excess. Ensure that the tube is pulled as tight as possible to maximum light performance.
Keylite Accredited Installer Academy
Sun Tunnel Installation
Connect rigid tubing together until it reaches the ceiling diffuser and cut of the excess. Ensure to tape the joints using the tape provided.
Keylite Accredited Installer Academy
Sun Tunnel Installation
Install retaining clip into the ceiling diffuser housing and screw into place.
Keylite Accredited Installer Academy
Sun Tunnel Installation
Push the ceiling diffuser against the diffuser housing. The connection is magnetic. Finally clad the flexi tubing with insulation to prevent condensation build up within the tubing during winter months.
Keylite Accredited Installer Academy
Sun Tunnel Installation
Finally clad the Rigid tubing with insulation to prevent condensation build up within the tubing during winter months. Installation complete.
Keylite Accredited Installer Academy
Sun Tunnel Installation
Please continue to the quiz below
By Keylite Web Team
Aftersales Support


