CMS 1 - W8
Installing D8 on a webhosting
Goals
of the week
- Briefing Project P.E.
- Setup working site (locally or hosted)
- Designing & implementing your content model
based on the briefing
Setting up
To develop your portfolio site in Drupal, you need a working environment; either locally or hosted.
Locally; we're already familiar with Acquia Dev Desktop Mamp of XAMP. Install a new site through those.
In the last week we will see how to transfer your local site to a hosting.
Hosted: Directly create/manage your Drupal site on a webhosting.
Pros/Cons?
Not really applicable
It is ALWAYS recommended to develop a site locally first, and only place it on the hosting when it is ready.
Even now, I would STRONGLY recommend taking this approach.
HOWEVER, because of CoViD-19, it will be much easier to help you all if I can already log on to your site.
If you're not confident in your technical skills: its ok (for once) to start working on our webhost.
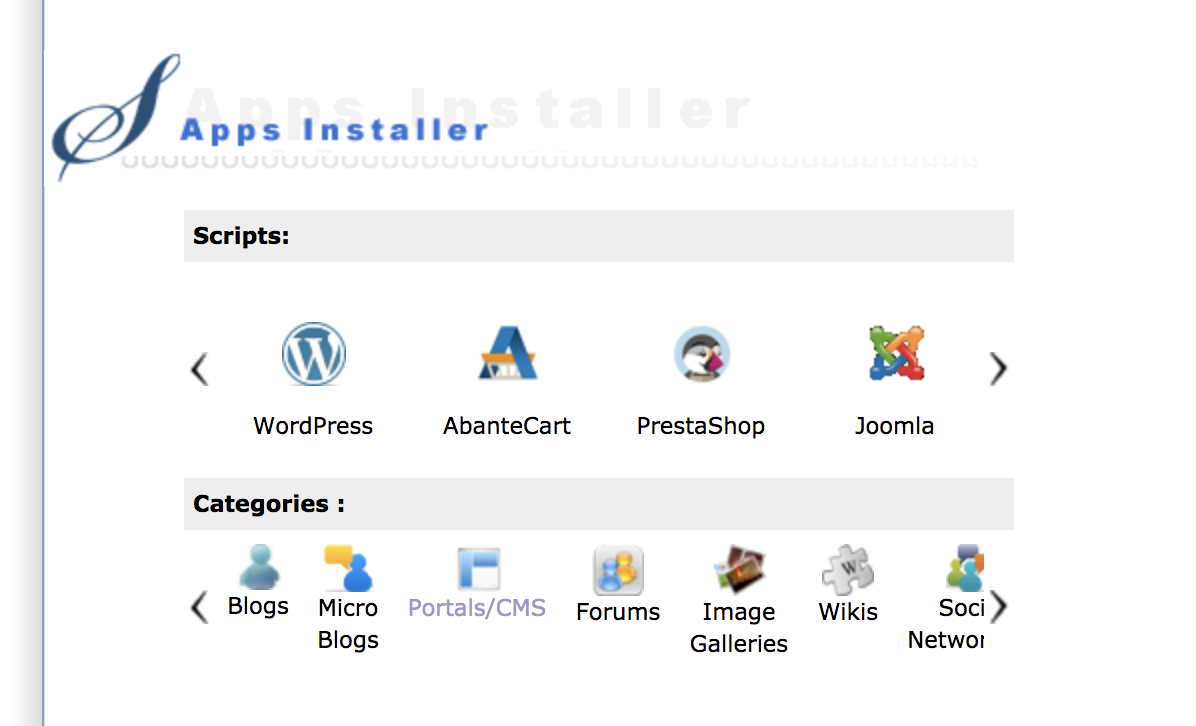
Using an
installer script


Change & Write down the
Admin user & password!

4 steps
- Create a new database
- Upload the code to your webhost
- Create settings.php (*optional)
- Run Drupal install script
1 Create DB
- On CPanel use MySQL Management
- Create a new DB
- Add a user
- save all the information
2. Upload the code
Upload the code to your webhost
- Download the latest code from drupal.org
- Upload through FTP or site filemanager
- Code usually goes in public_html
3. Create settings.php*
* This step is optional. The drupal install script can do this for you.
- Through ftp/filemanager:
- Go to sites/default
- Copy default.settings.php and save it as settings.php
- Add your Database credentials:
Enter your own dbname/dbuser/dbpass! ;-)
$databases['default']['default'] = [
'database' => 'dbname',
'username' => 'dbuser',
'password' => 'dbpass',
'prefix' => '',
'host' => 'mysql',
'port' => '',
'namespace' => 'Drupal\\Core\\Database\\Driver\\mysql',
'driver' => 'mysql',
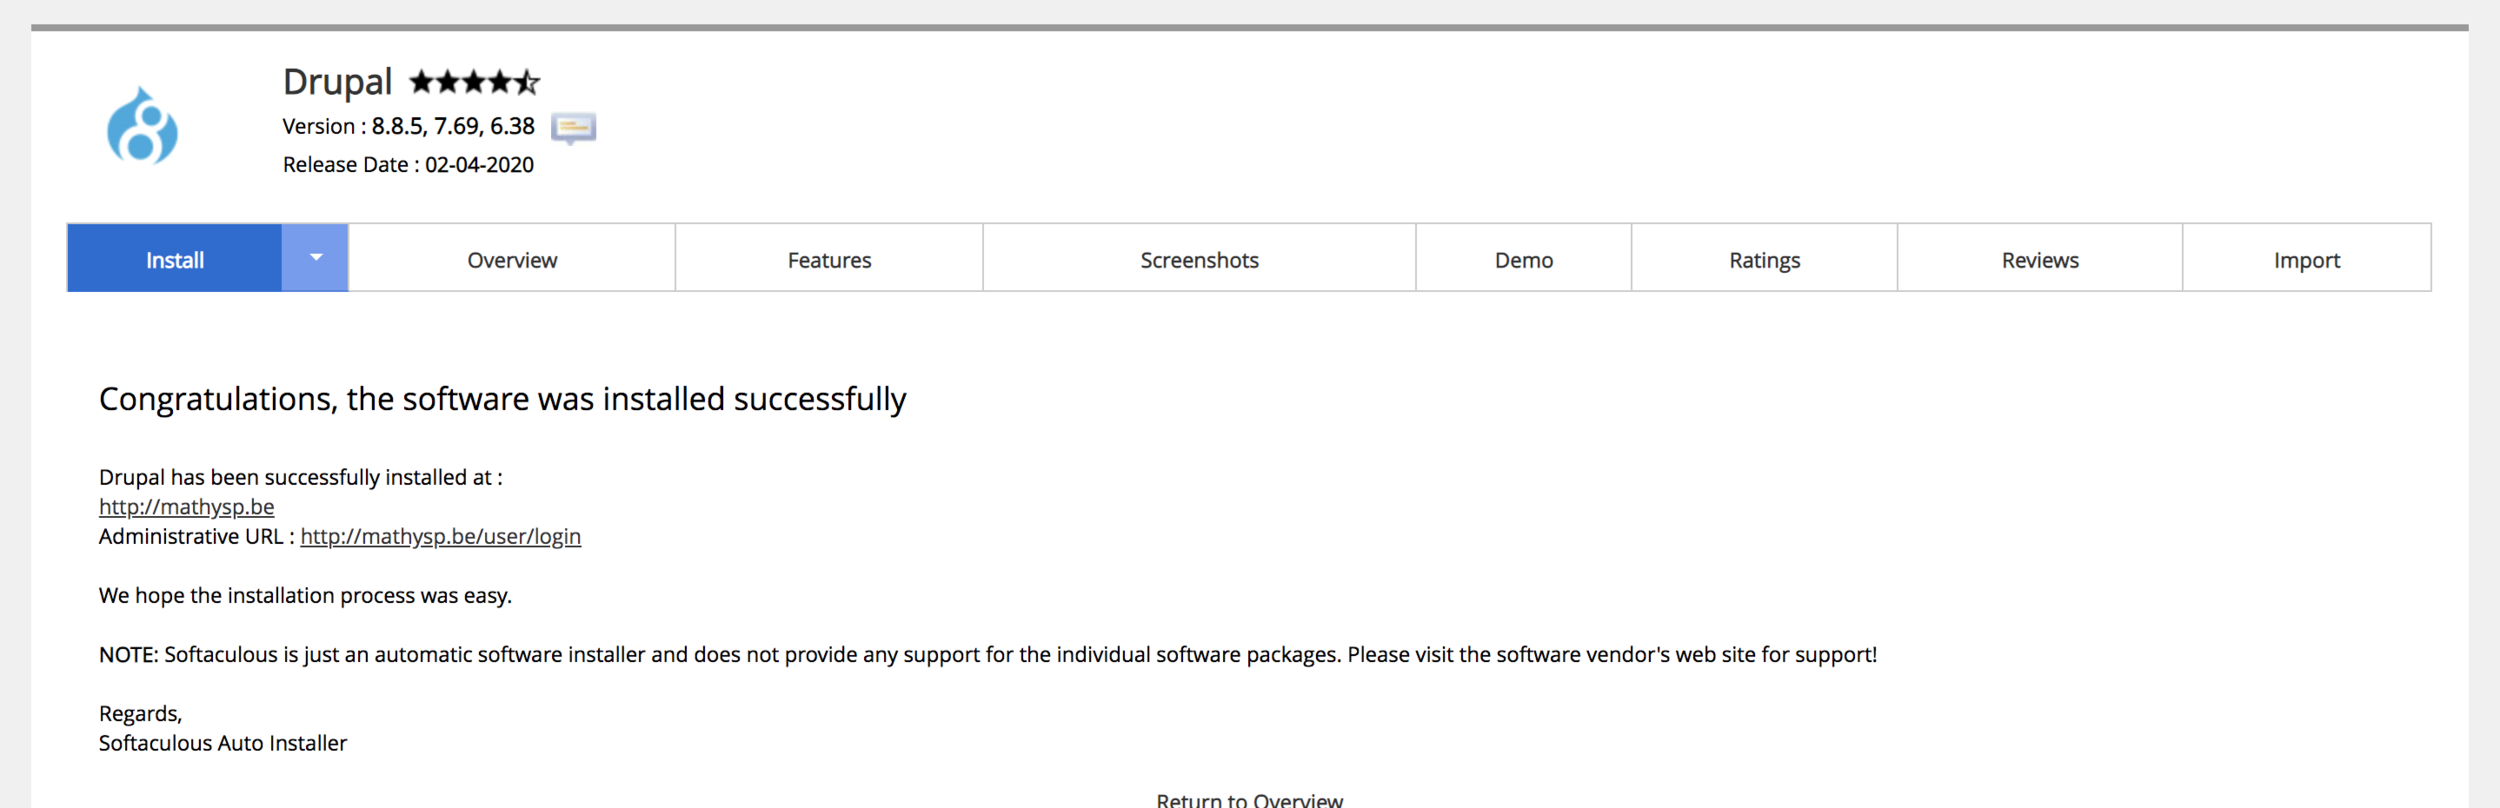
];4. Run Drupal site installer
- Visit your site ip/domain
- If everything went right, the site should load install.php
- If not: panic! (see next slide)
- Follow the wizard
- Don't forget:
- Pick a good admin username & password
- NOT root/root or admin/admin: You will get 'hacked' ;-)
- Save this information! Write it down if need be
- Pick a good admin username & password
- Don't forget:
Something went wrong?
Step 1: Don't panic!
Step 2: Read the error
Try and make sense of what is going wrong
Step 3: Google the error
Look for possible solutions, try out a few
Step 4: Ask your fellow students
Ask questions through slack or the facebook group
That way we can collaborate: find solutions together
Still can't find a good solution?
Step 5: Tag me on Slack / Ask me on messenger ;-)
:-(
Verify for errors
after installation
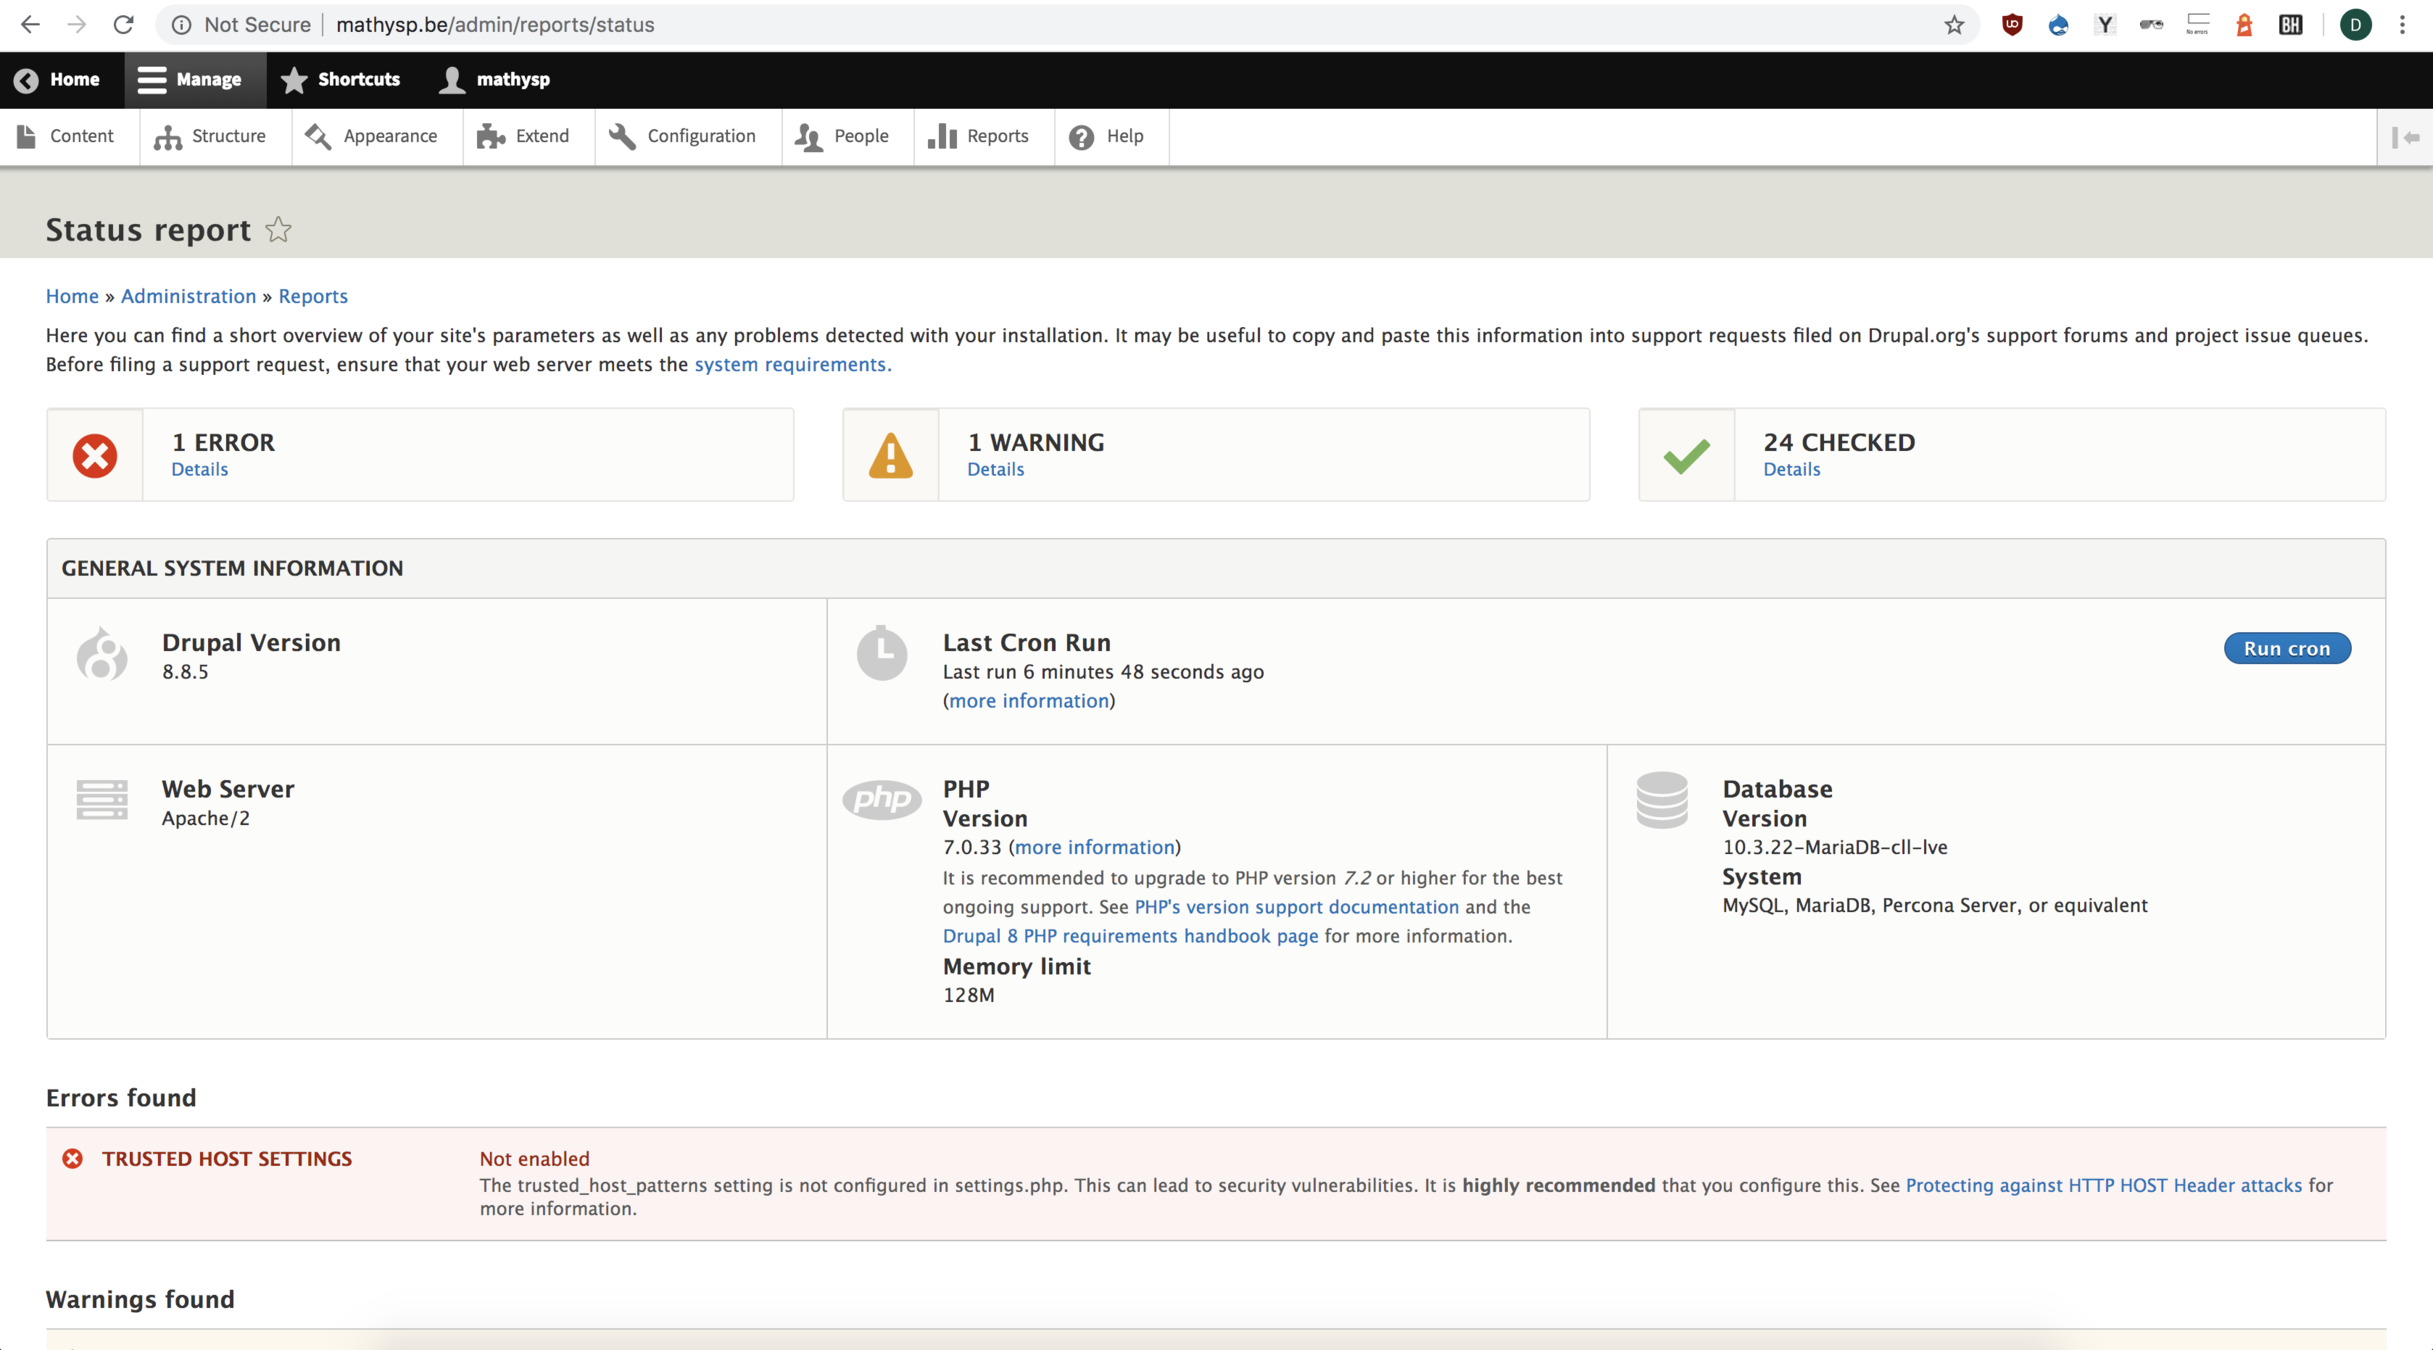
Visit the status report!
Consult the Drupal error log if needed
Start configuring
Content-types, taxonomies, ...
Create the content-model
Go re-read the project briefing,
and start working on a content-model
for your project-site.
Make sure to go over all the requirements and ask yourself how they fit into your site structure.
Start drawing up a scheme like we did before, describing:
content-types,
their fields,
any taxonomies that you will need
Implement your model
Once you are satisfied with your model, you can start implementing it.
Start creating said content-types,
add fields, configure their display, set up the taxonomies,
Then write some content,
and make sure everything works as expected
By next week
Make sure you:
- Have a working project (site)
- Local or hosted
- Have set up your content-model
- Added content-types & some content
- Have a good idea of all the project requirements
- Think about the additions you could make to your site
CMS W8 Praktijk
By Pieter Mathys