AWS for Java Developers Part 4
AWS Lambda
- AWS Lambda is a serverless and event-driven compute service. It allows you to upload a piece of source code to execute against a valid event. The uploaded piece of code is called a Lambda function.
-
AWS Lambda functions includes source code along with all dependencies.
-
Each Lambda function has its own configuration informations, such as runtime, environment variables,
handler, IAM role, tag(s), memory, timeout, VPC, and many other details that are defined at the time of creating.
-
Lambda function can be configured to execute in between 1 to 900 seconds. Lambda function execution time is called timeout. If the Lambda function is running after the defined timeout, it is automatically terminated.
While creating a Lambda function along with memory, here are few more parameters that need to be defined:
-
Maximum execution time (timeout):
The maximum it can be 15 minutes. It helps to prevent the Lambda function from running indefinitely. When timeout has been reached, the Lambda function execution terminates.
-
IAM role (execution role):
Lambda can assume an IAM role at the time of execution. Based on the privileges granted to the IAM role, the Lambda function can inherit the privileges for executing the function.
-
Handler name :
It refers to the method name to be used by AWS Lambda to start the execution. AWS Lambda passes an event information that triggers the invocation as a parameter to the handler method.
Lambda Function Invocation Types
-
AWS Lambda supports two invocation methods: synchronous and asynchronous.
-
The invocation type can be only specified at the time of manually executing a Lambda function.
-
This Lambda function execution is called on-demand invocation.
-
On-demand invocation is done by the invoke operation. It allows you to specify the invocation type, synchronous or asynchronous.
Writing a Lambda Function
- AWS lambda supports Node.js, Java, Python and C#
-
Irrespective of the programming language used to write the AWS Lambda function there is a common pattern to write a code for a Lambda function. It includes the following concept.
-
Handler
-
The Context Object
-
Logging
-
Lambda function Handler
- The general syntax of handler function is as follows :
outputType handler-name(inputType input, Context context) {
...}
- Here is a list of components that are part of the syntax :
- inputType : This can be an event data or custom input that is provided as a string or any custom data object. To successfully invoke this handler, the Lambda function must be invoked with the input data that can be serialized into thedefined data type of the input parameter.
- outputType : When the Lambda function is invoked synchronously using the RequestResponse invocation type, it is possible to return the output of the Lambda function using the valid and supported data type.
inputType and outputType can be one of the following:
-
Predefined AWS event types: They are defined in the aws-lambda-java-events library.
-
Plain Old Java Object (POJO) class: It allows to create own POJO class. Lambda function automatically serializes, deserializes input, and output on the POJO type
or JSON.
-
Primitive Java types: It supports primitive Java types such as String or int.
Simple Lambda
build.gradle
plugins {
    id 'java'
}

group 'com.lambda.demo'
version '1.0-SNAPSHOT'

sourceCompatibility = 1.8

repositories {
    mavenCentral()
}

jar {
    from {
        configurations.compile.collect { it.isDirectory() ? it : zipTree(it) }
    }
}

dependencies {
    compile group: 'com.amazonaws', name: 'aws-lambda-java-core', version: '1.2.0'
    compile 'com.amazonaws:aws-lambda-java-events:2.2.6'
    compile group: 'com.amazonaws', name: 'aws-java-sdk-s3', version: '1.11.659'
    compile group: 'com.amazonaws', name: 'aws-java-sdk-dynamodb', version: '1.11.659'
    compile group: 'com.amazonaws', name: 'aws-java-sdk-lambda', version: '1.11.118'
}
package com.lambda.demo;

import com.amazonaws.services.lambda.runtime.Context;
import com.amazonaws.services.lambda.runtime.RequestHandler;

import java.util.Map;

public class LambdaRequestHandler implements RequestHandler<Map<String,Object>,String> {

    @Override
    public String handleRequest(Map<String, Object> input, Context context) {
        return "Hello" + input.get("name");
    }
}
Java Code
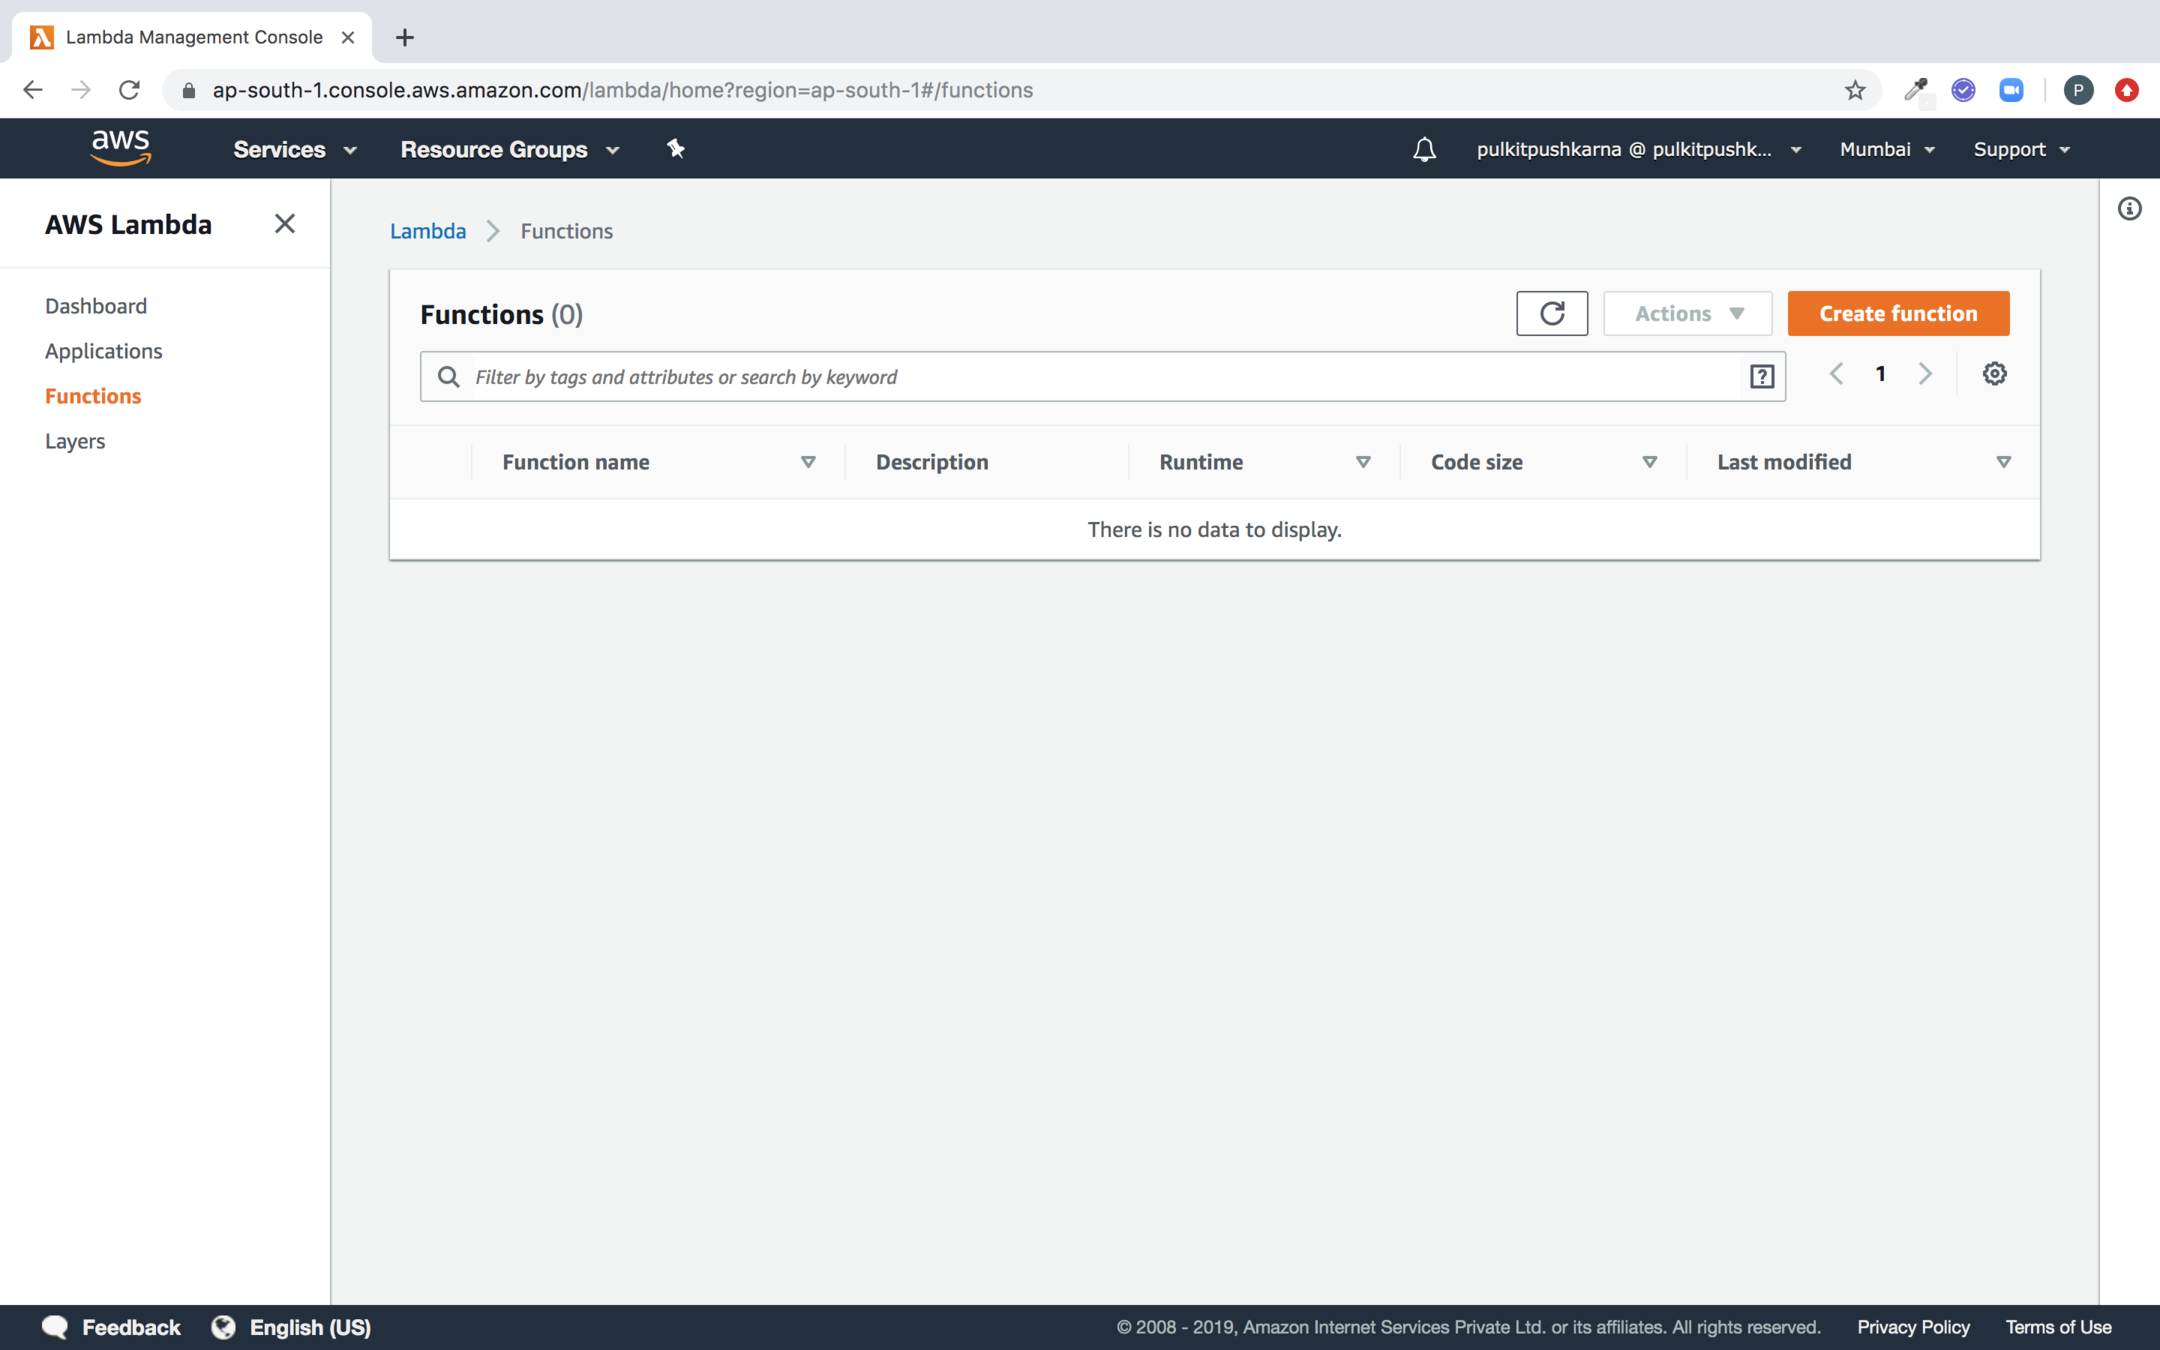
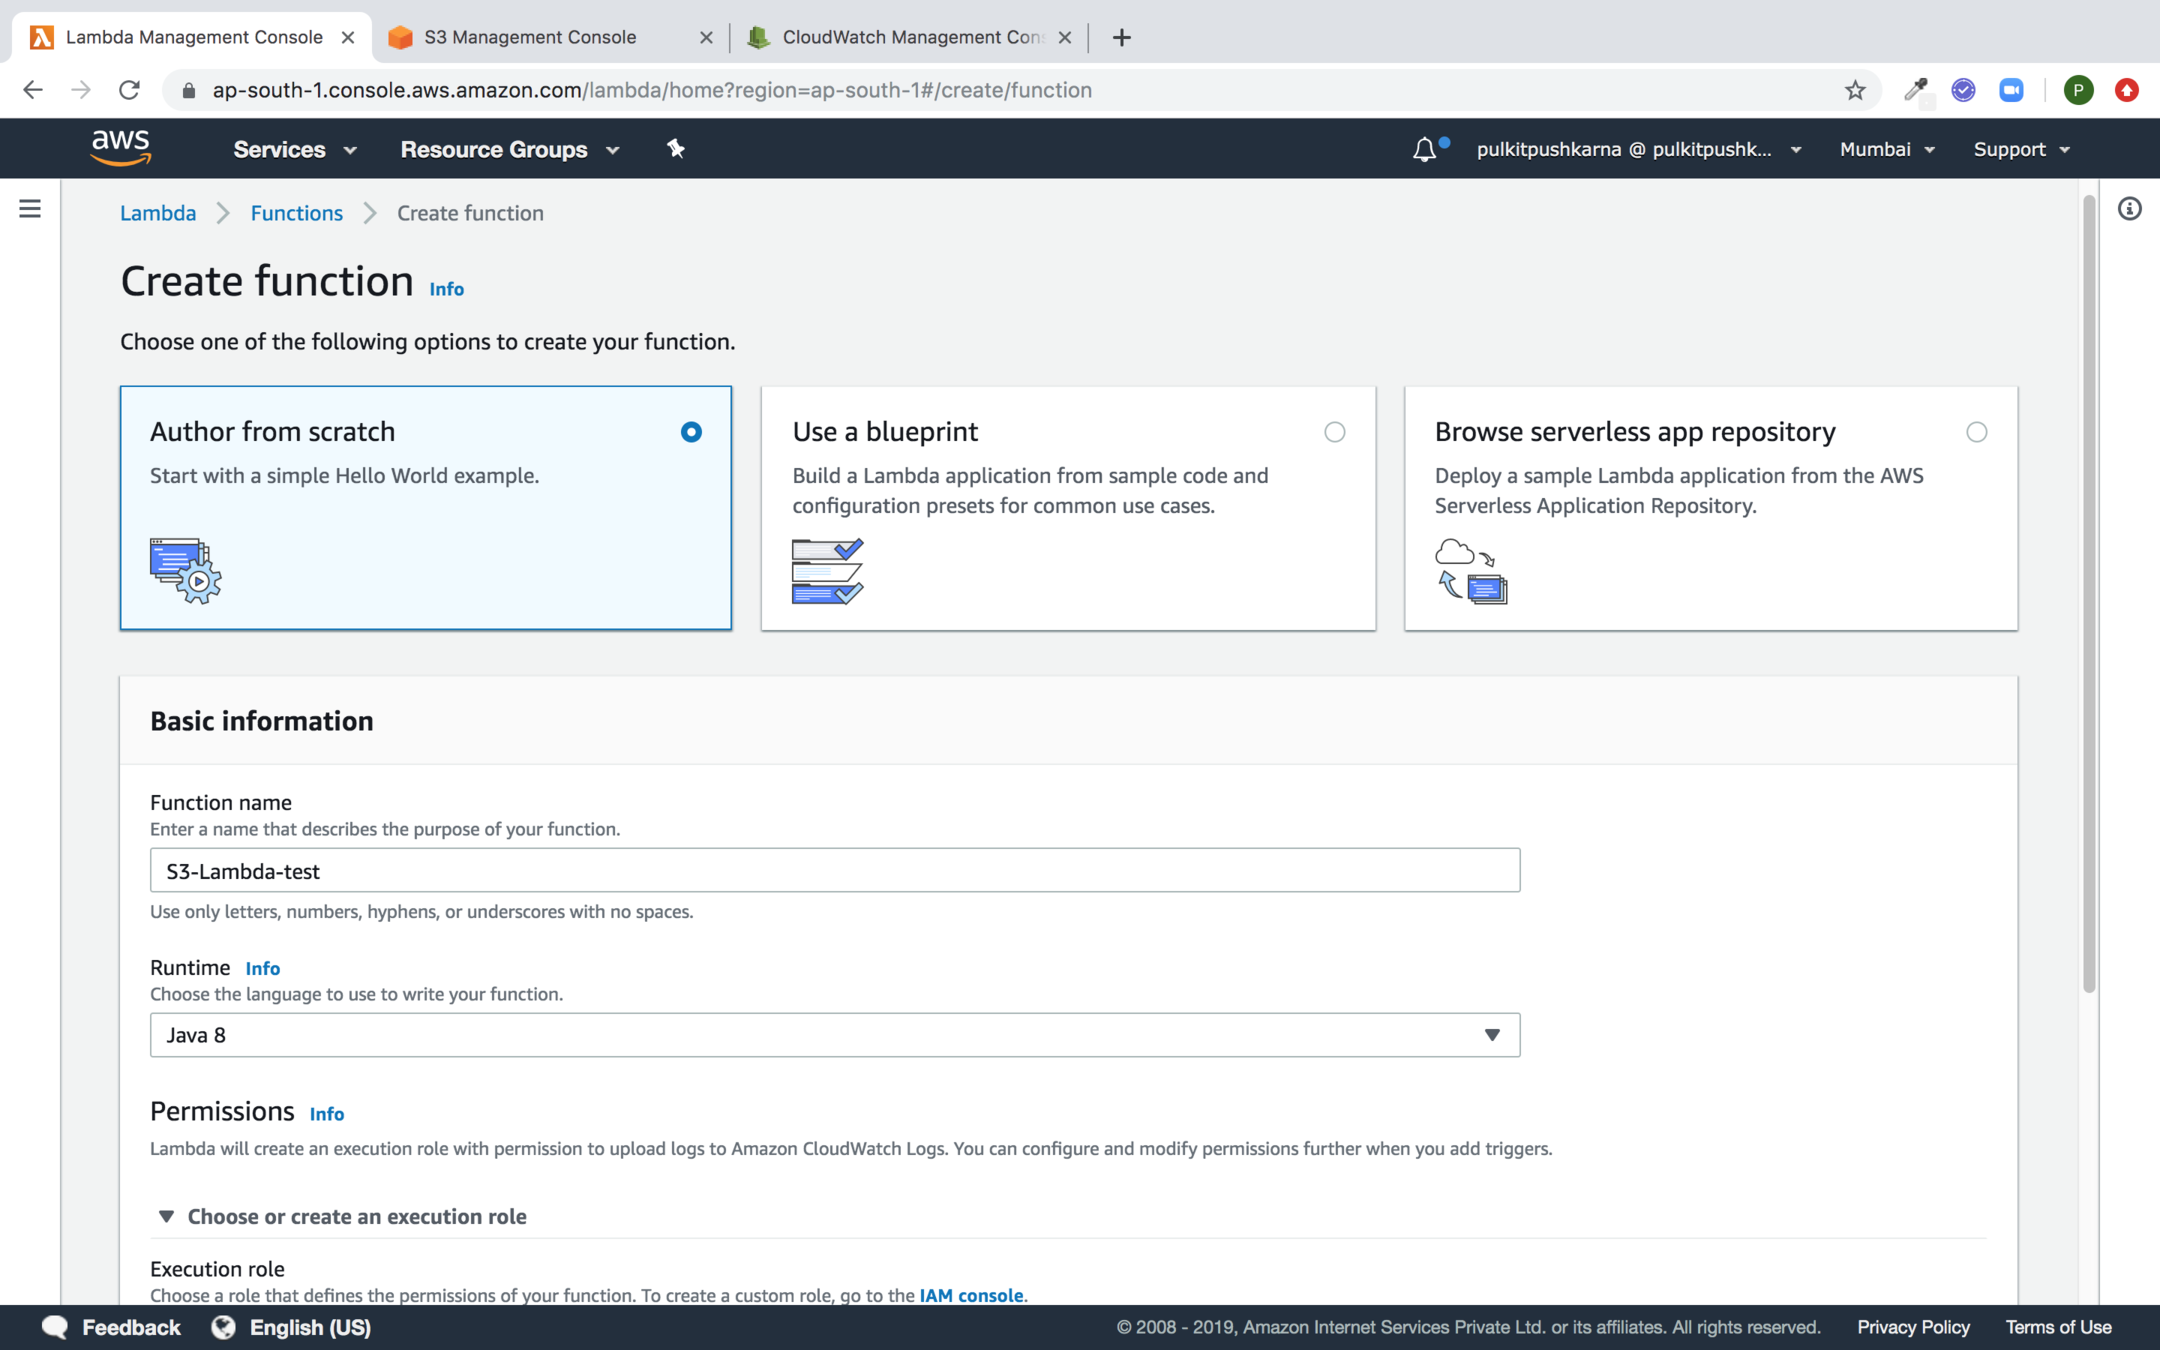
Go to AWS lambda service and click on Create Function
Now Provide lambda configuration
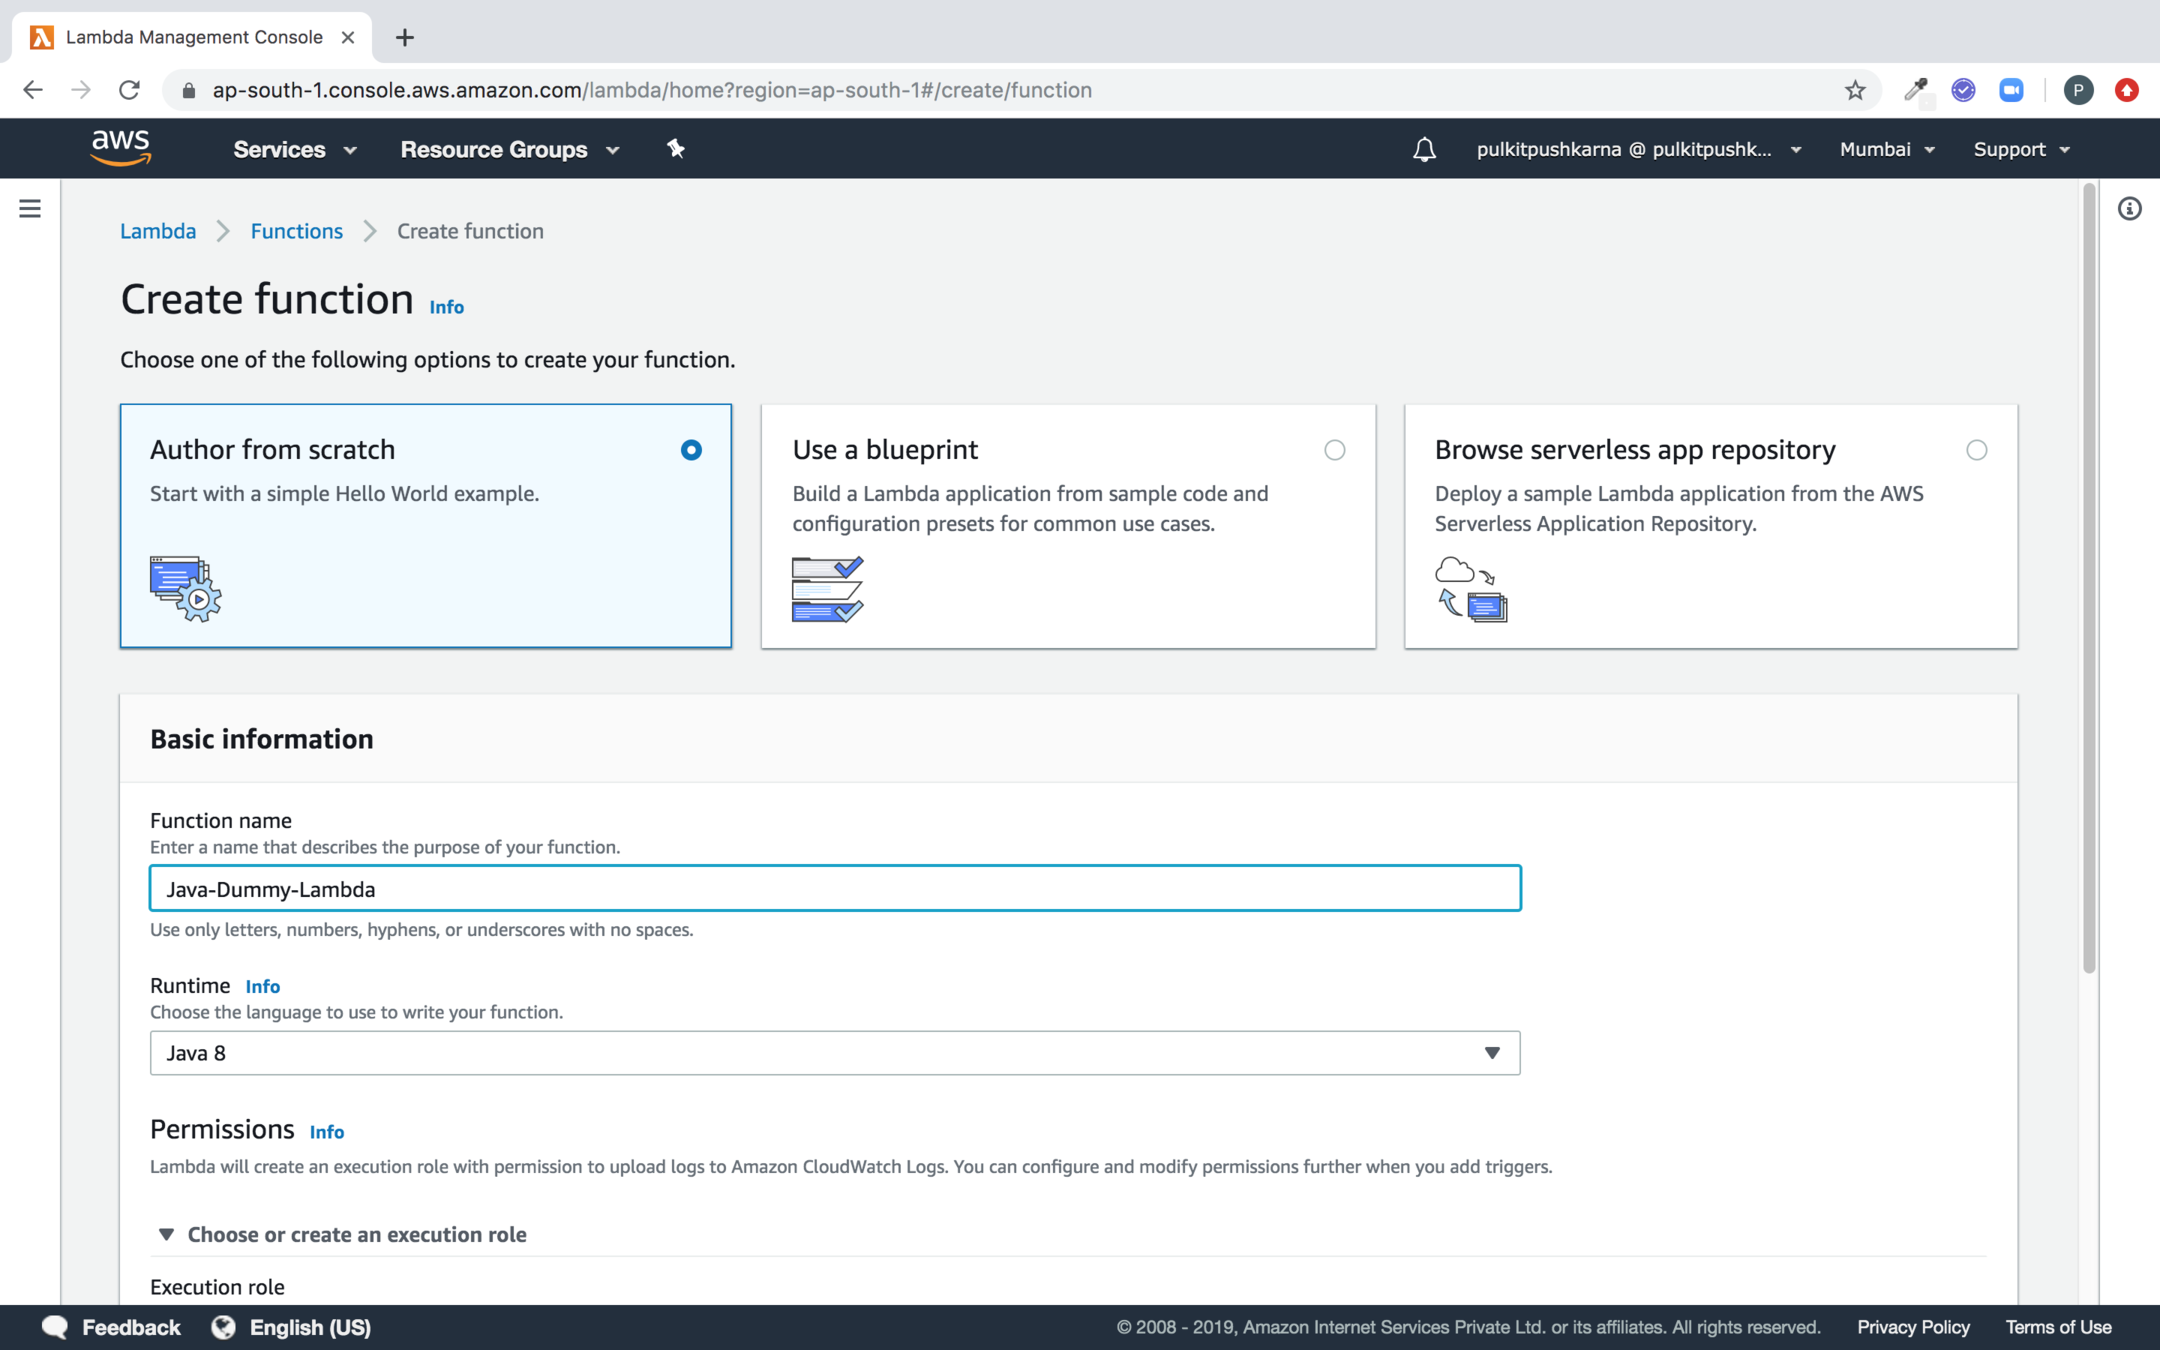
- Select author from scratch option
- Provide the function name
- Provide Java 8 for Runtime

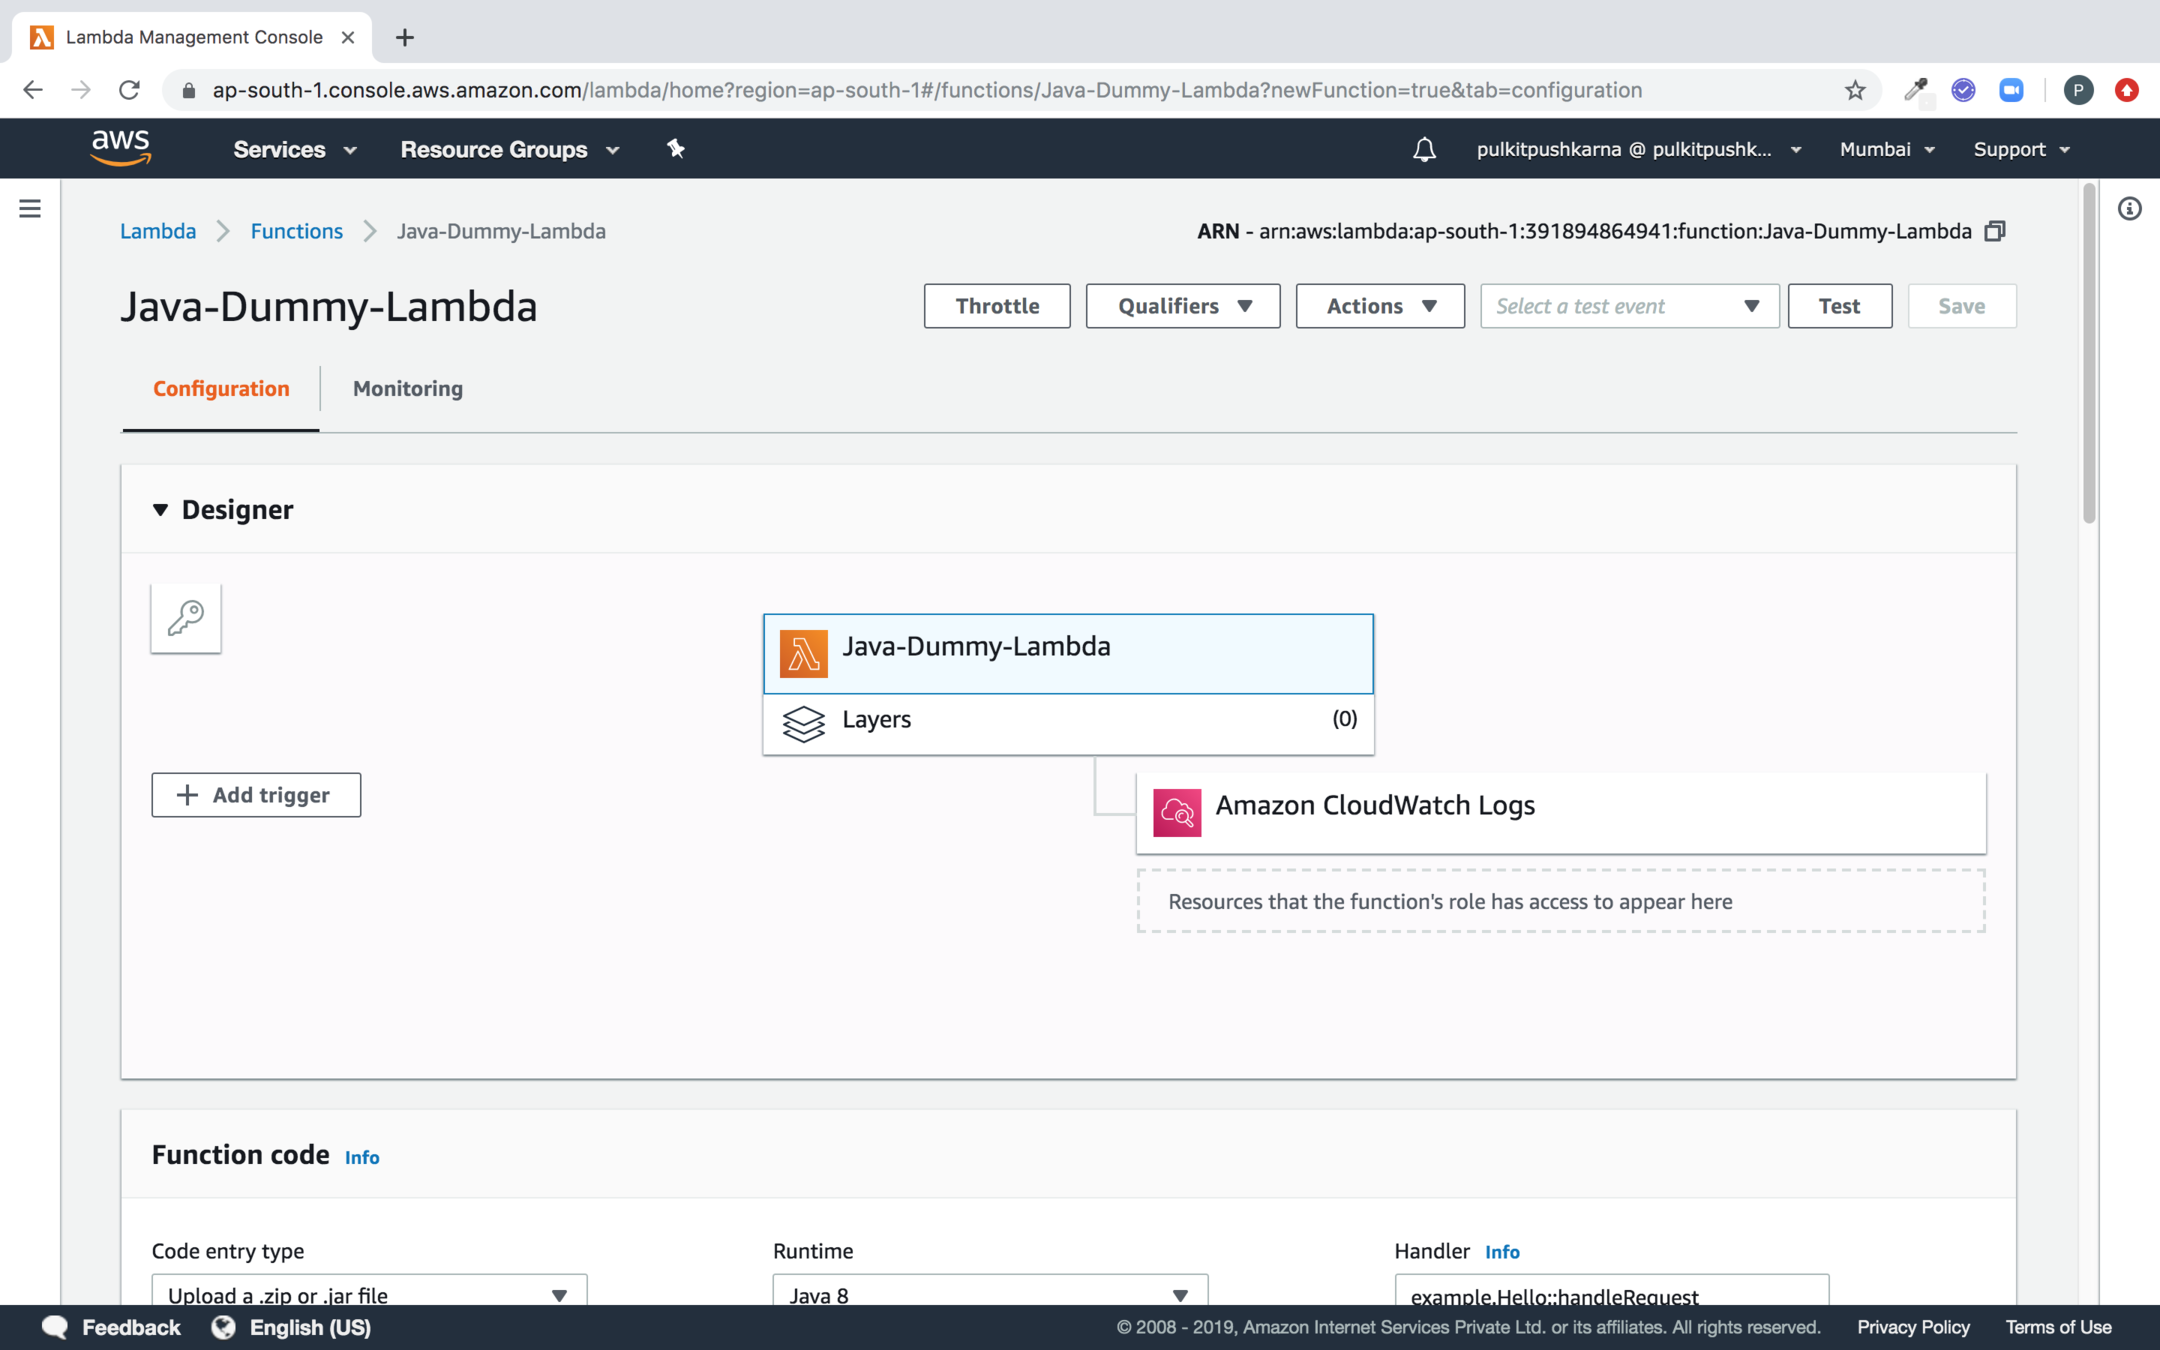
Select Create a new role with basic Lambda Permission in Execution role and Now click on Create Function
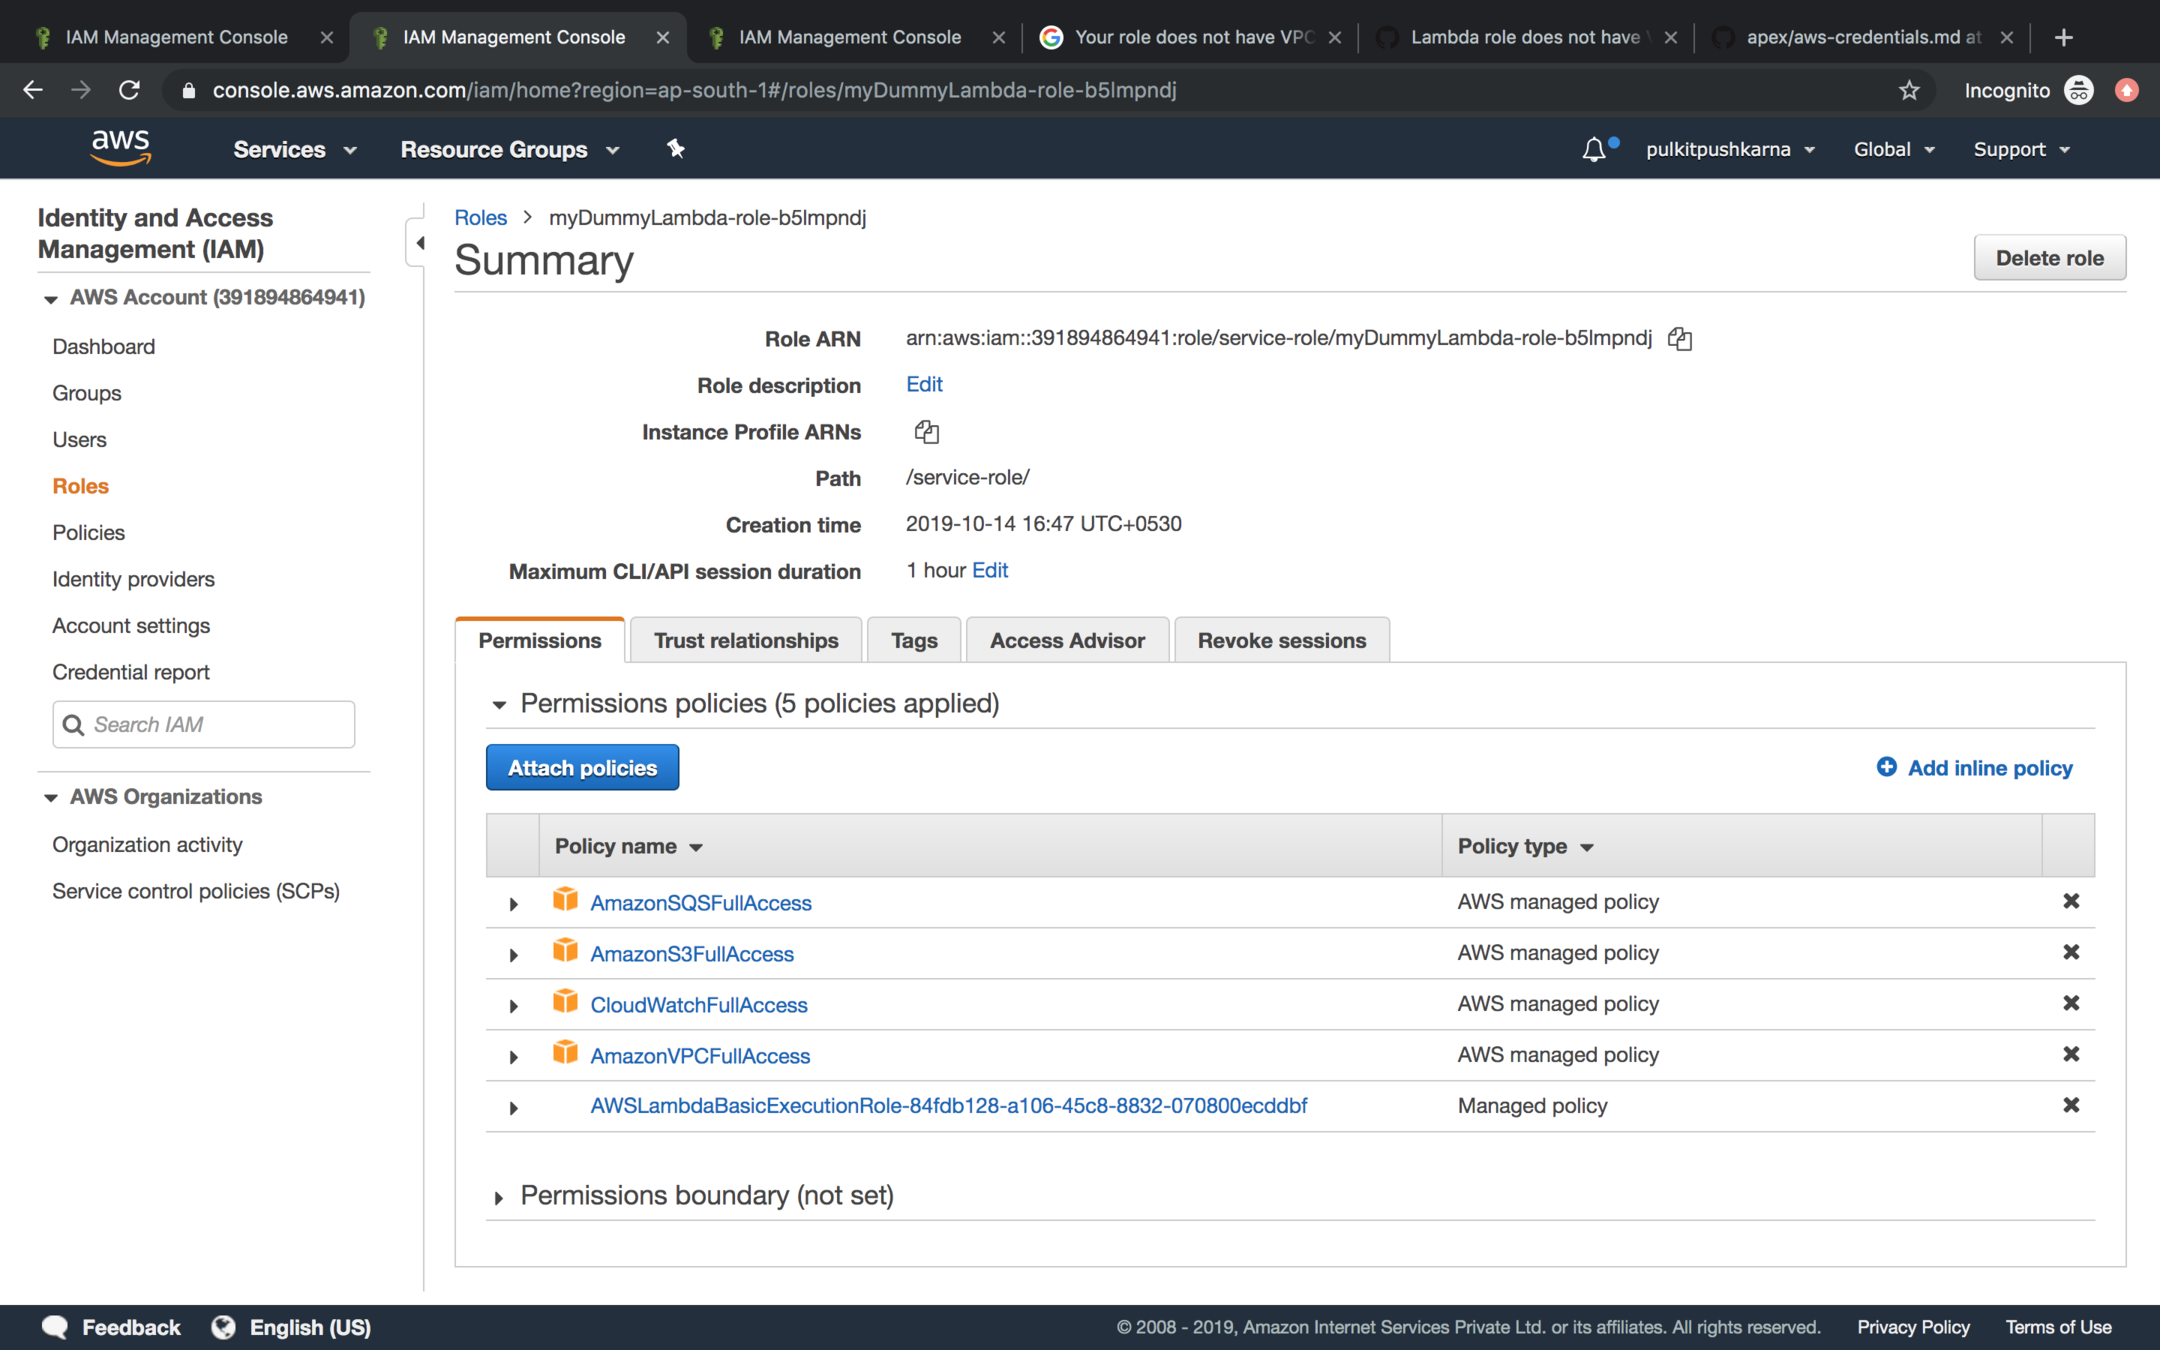
Please make sure that following Policies are attached in your Role assigned to lambda
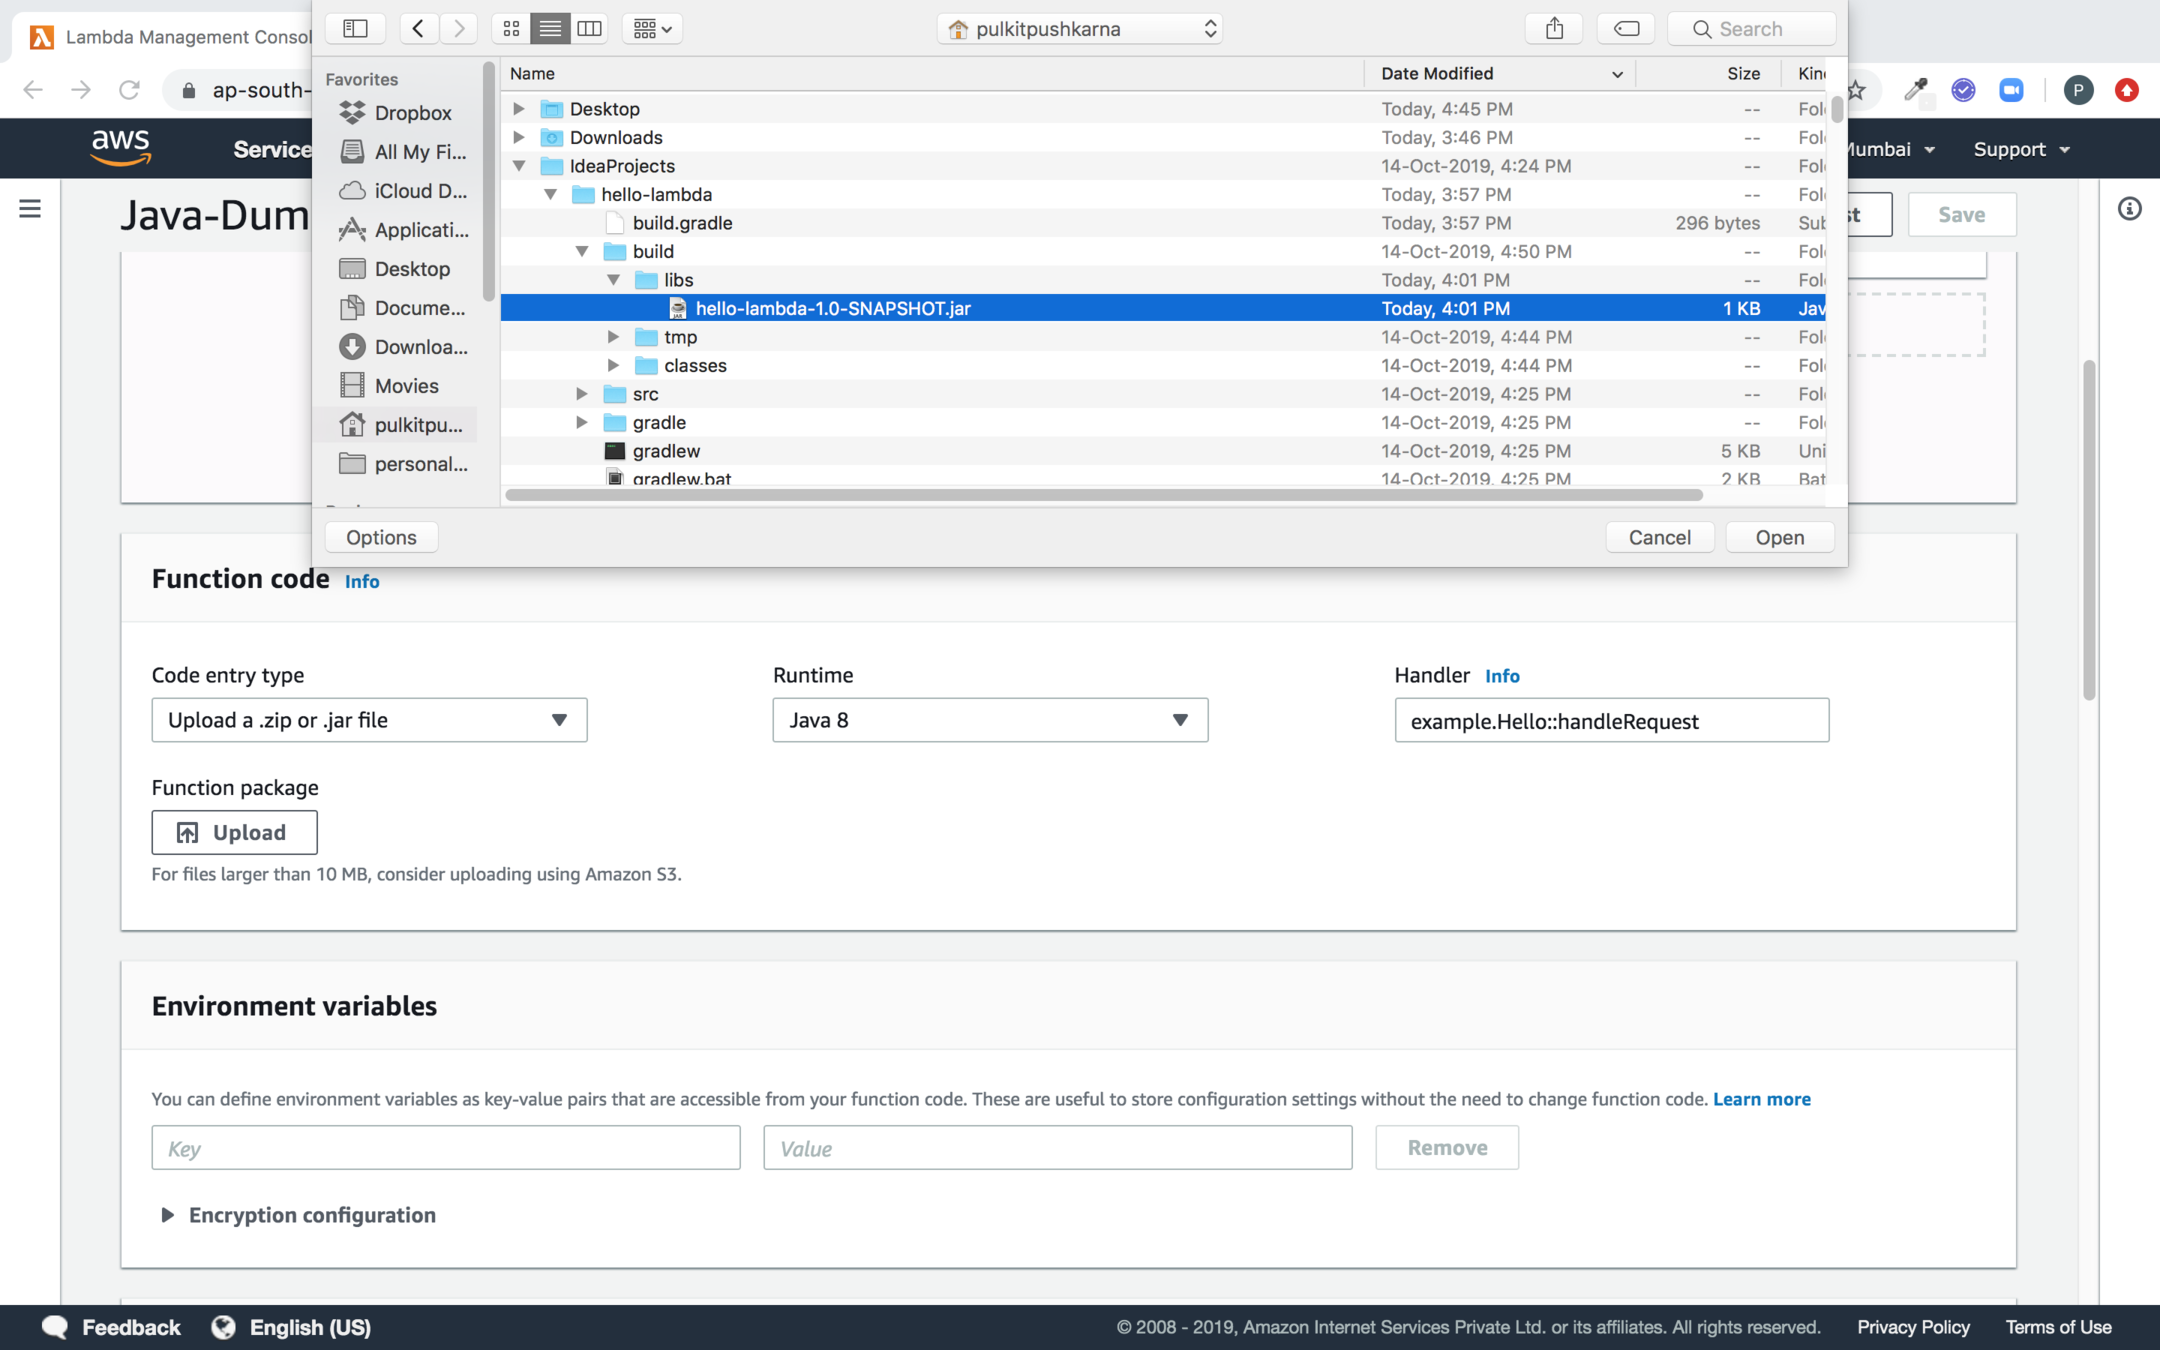
Click on Upload button and Upload the Jar of the Java file which we have created earlier and in the handler specify package with Class and method name in the format specified
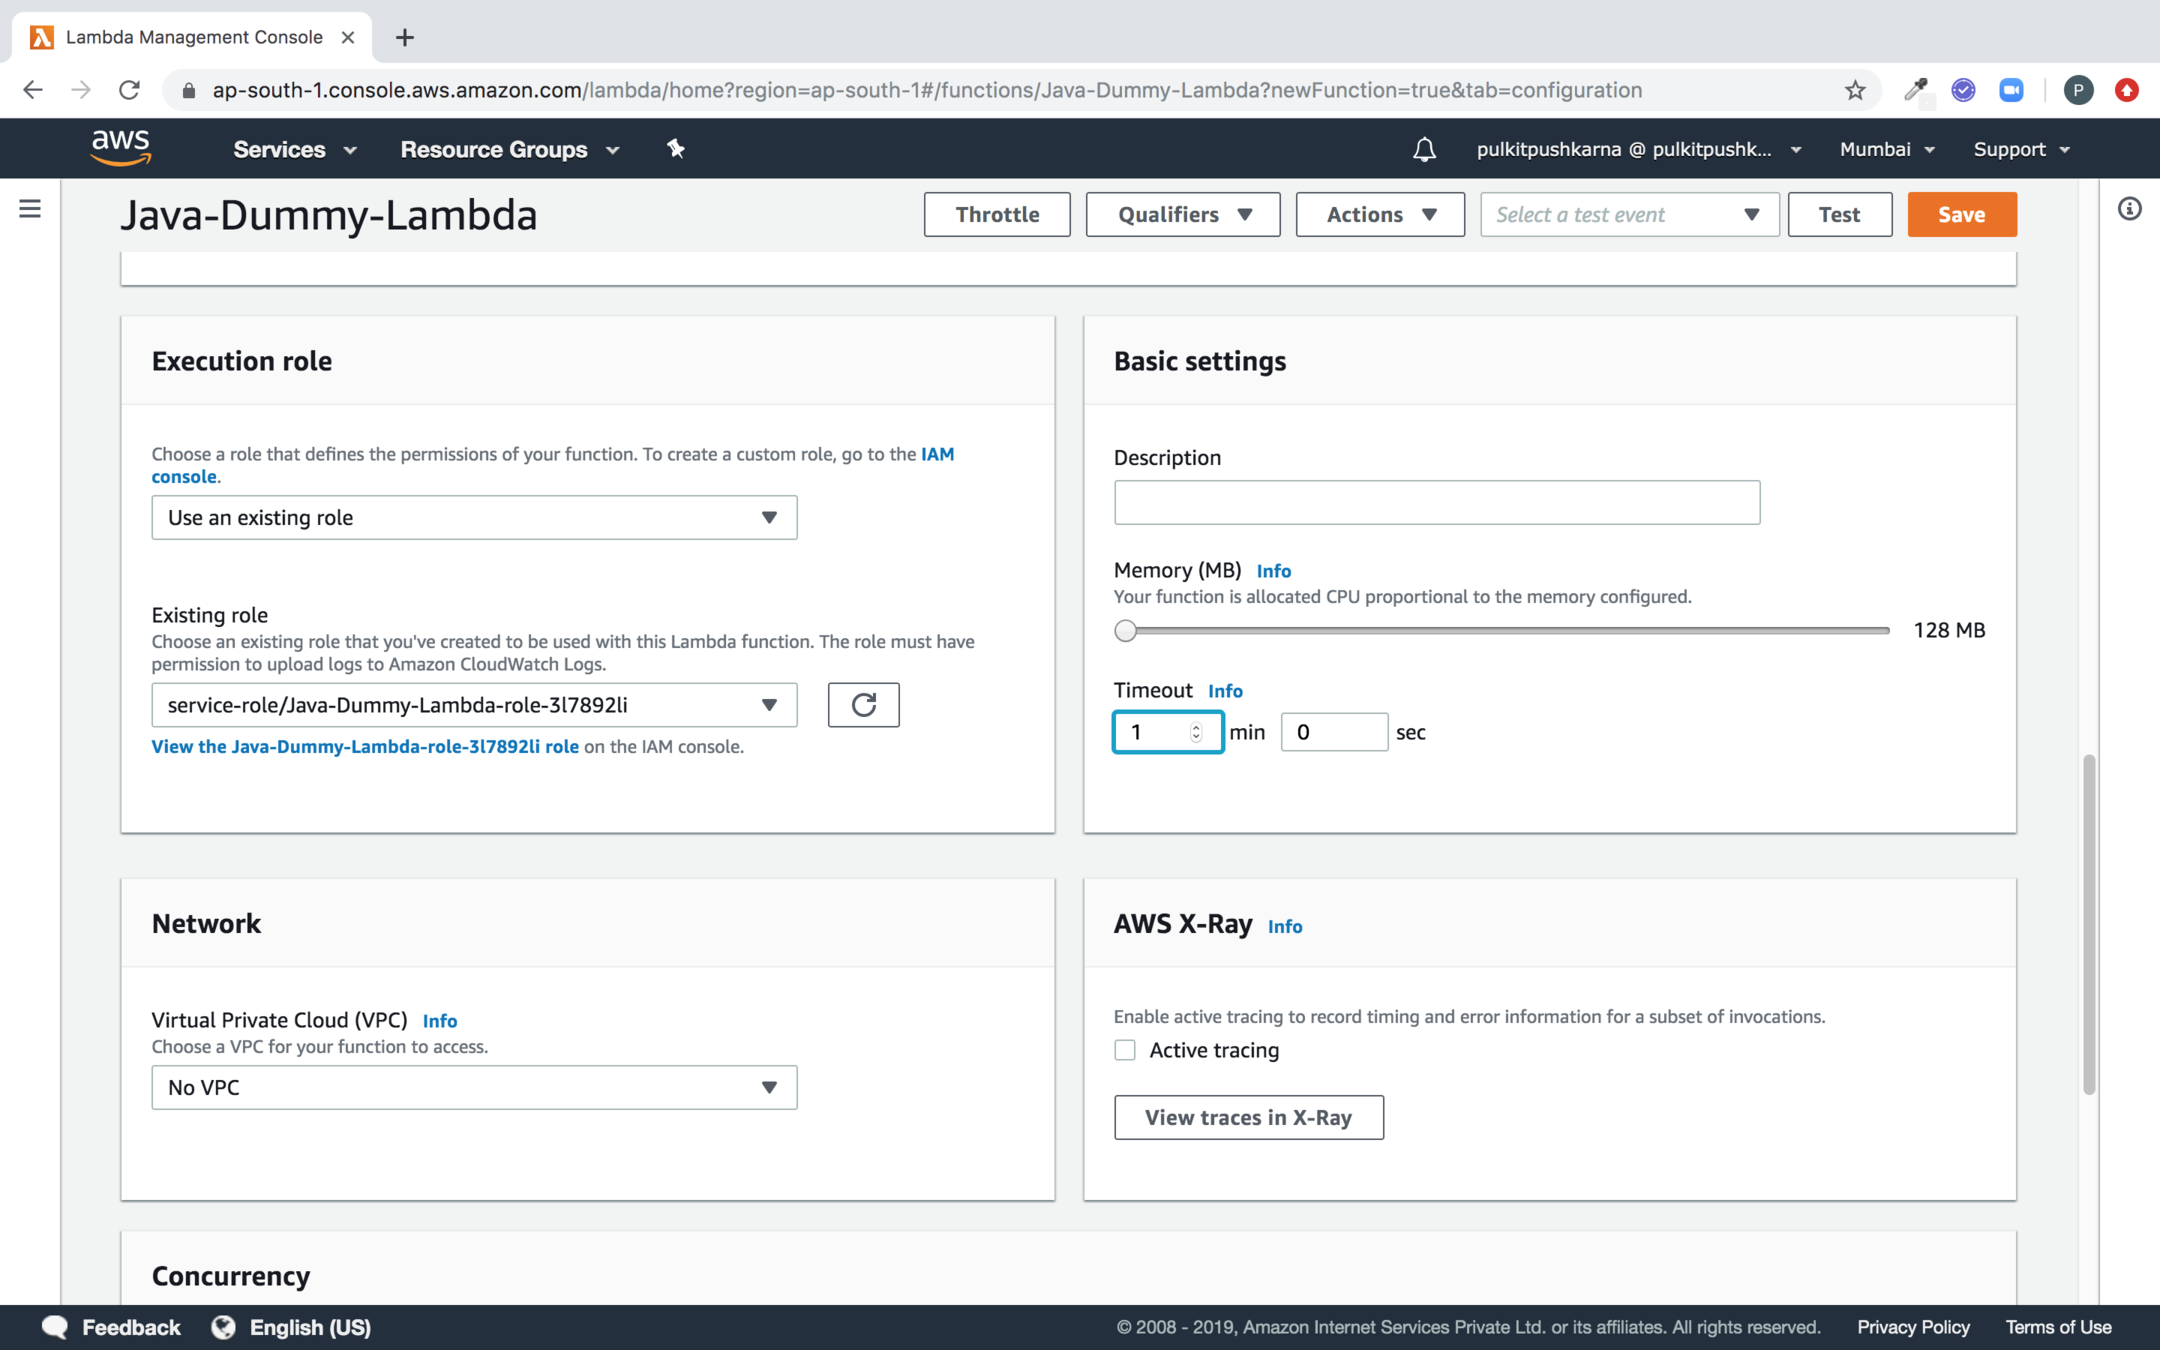
Select the Execution Role and in basic Setting provide CPU proportion and Time out
Select the VPC settings and Click on Test Button to provide the test case

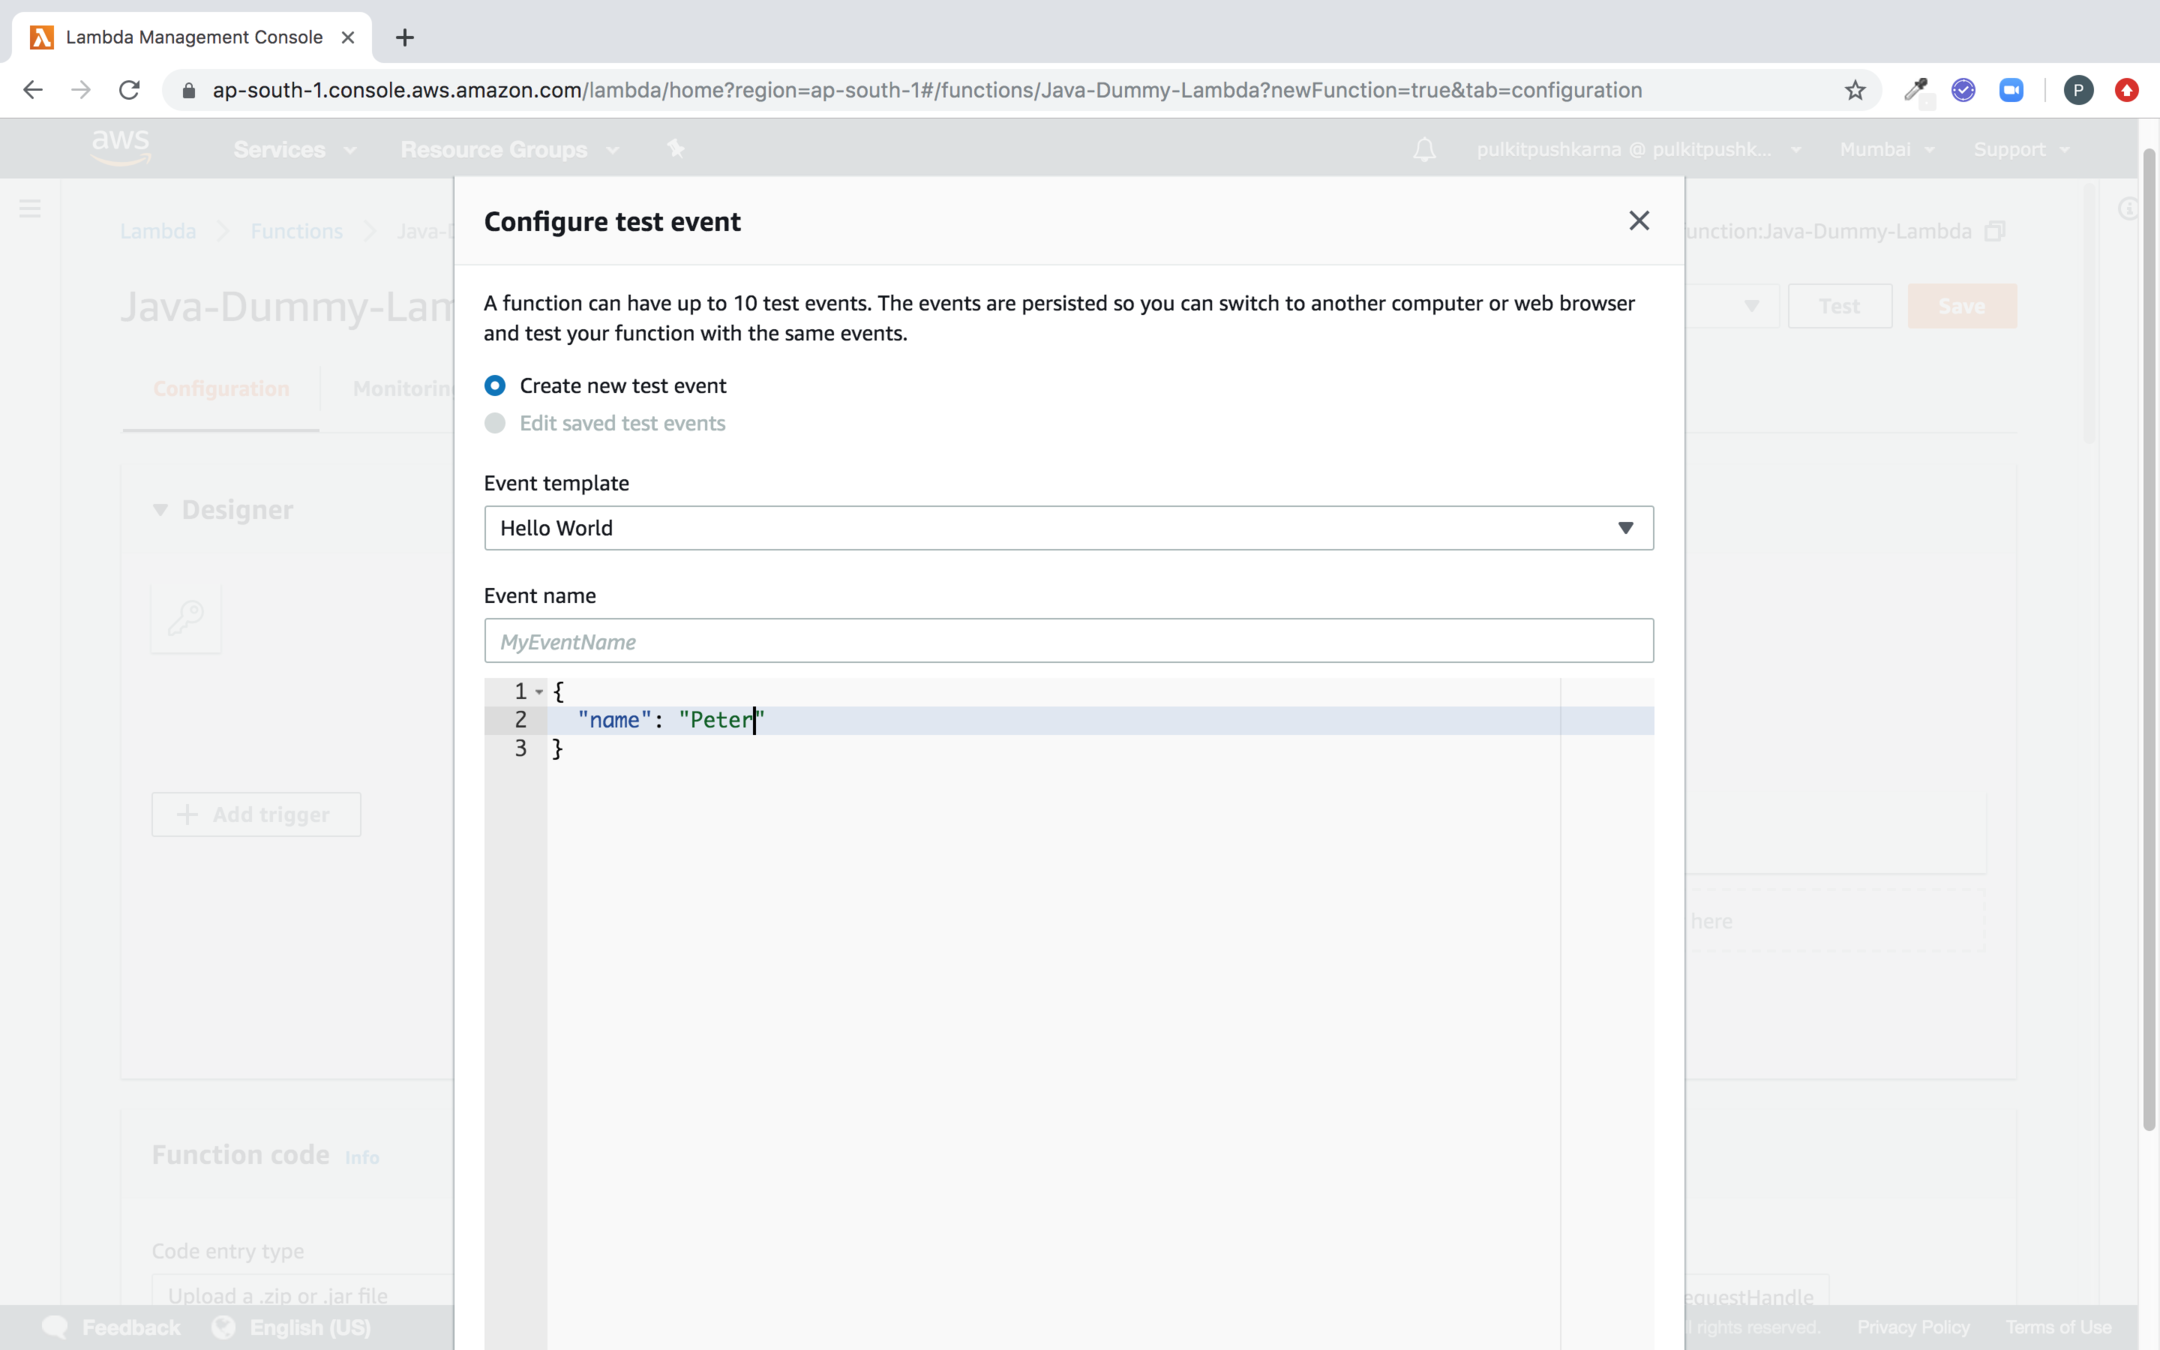
Specify the event name and Parameter for testing and click on Create button
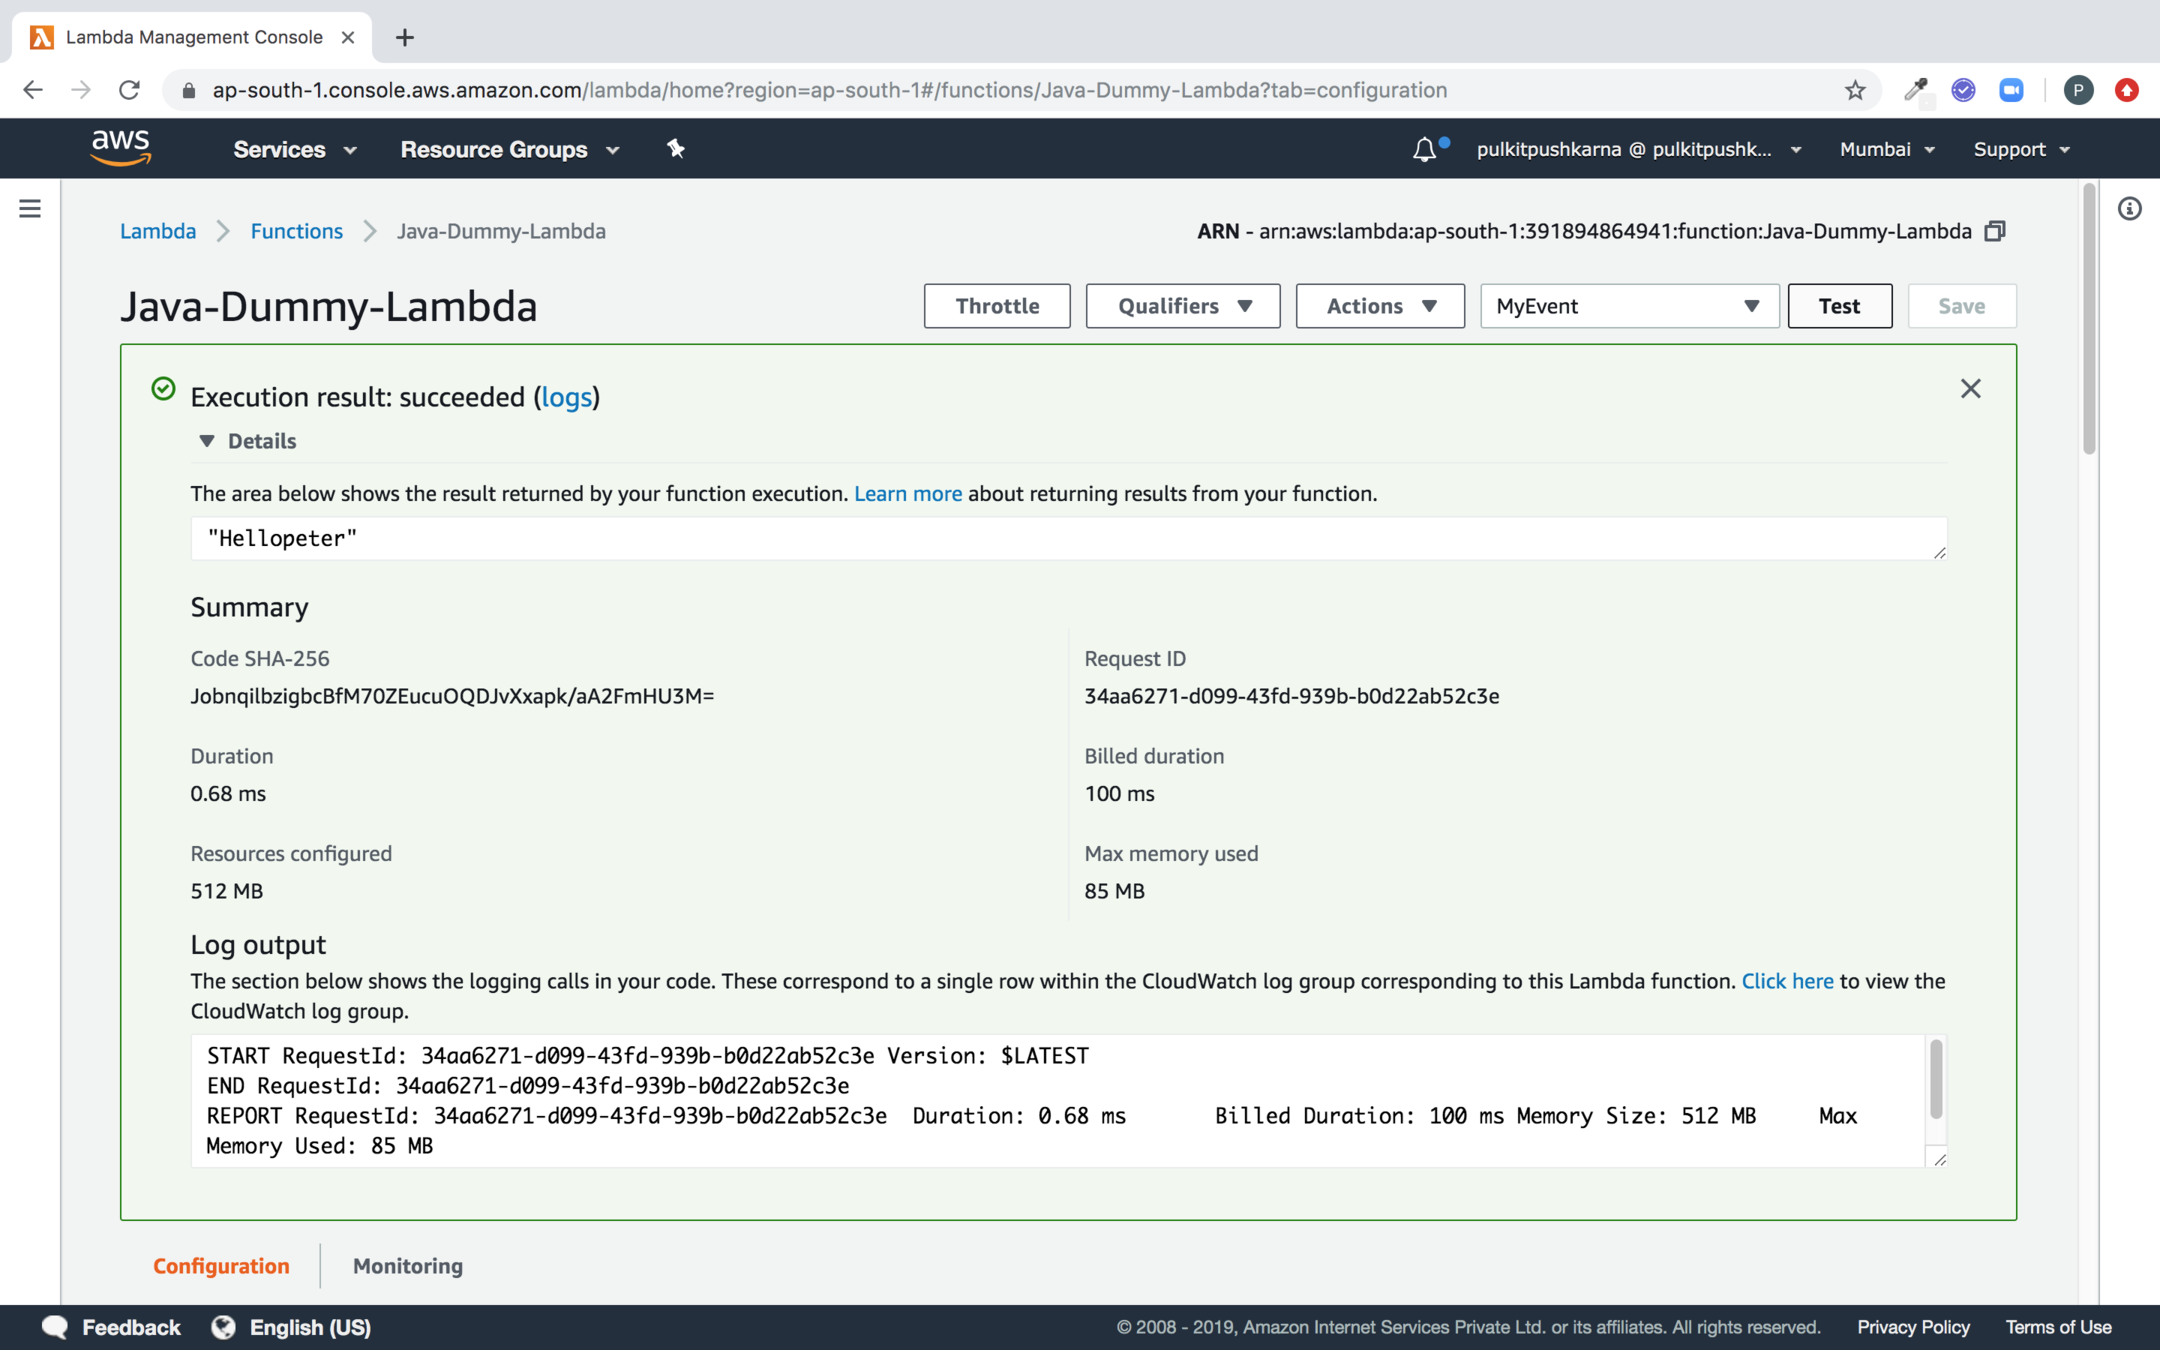
Now hit the Test button and see you lambda executing
Invoking lambda function from Java Code
package com.lambda.demo;

import com.amazonaws.regions.Regions;
import com.amazonaws.services.lambda.AWSLambda;
import com.amazonaws.services.lambda.AWSLambdaClientBuilder;
import com.amazonaws.services.lambda.model.InvokeRequest;
import com.amazonaws.services.lambda.model.InvokeResult;

import java.io.UnsupportedEncodingException;


public class InvokingLambdaFunctions {

    public static void main(String[] args) throws UnsupportedEncodingException {


        AWSLambda client = AWSLambdaClientBuilder
                .standard()
                .withRegion(Regions.AP_SOUTH_1)
                .build();

        InvokeRequest req = new InvokeRequest()
                .withFunctionName("BasicLambda")
                .withPayload("{ \"name\":\"peter\" }"); // optional

       InvokeResult invokeResult = client.invoke(req);
        System.out.println(invokeResult);
        System.out.println(invokeResult.getPayload());

        String converted = new String(invokeResult.getPayload().array(), "UTF-8");
        System.out.println(converted);

    }
}
Exercise 1
- Create a Aws Lambda and upload it to Amazon AWS lambda Service
- Create a Test for the uploaded lambda
- Run the test and see the logs in cloudwatch
- Invoke the lambda function from Java code.
Create a S3 bucket for lambda invocation

package com.lambda.demo;

import com.amazonaws.services.lambda.runtime.Context;
import com.amazonaws.services.lambda.runtime.LambdaLogger;
import com.amazonaws.services.lambda.runtime.RequestHandler;
import com.amazonaws.services.lambda.runtime.events.S3Event;

public class LambdaS3RequestHandle implements RequestHandler<S3Event, String> {

    @Override
    public String handleRequest(S3Event event, Context context) {
        LambdaLogger lambdaLogger = context.getLogger();
        lambdaLogger.log("Received event" + event);
        // Get the object from the event and show its content type
        String bucket = event.getRecords().get(0).getS3().getBucket().getName();
        String key = event.getRecords().get(0).getS3().getObject().getKey();
        lambdaLogger.log("bucket >>>>" + bucket);
        lambdaLogger.log("key >>>>" + key);

        return "S3 Uploaded...";
    }
}
Create a lambda jar with following class
Create a new function
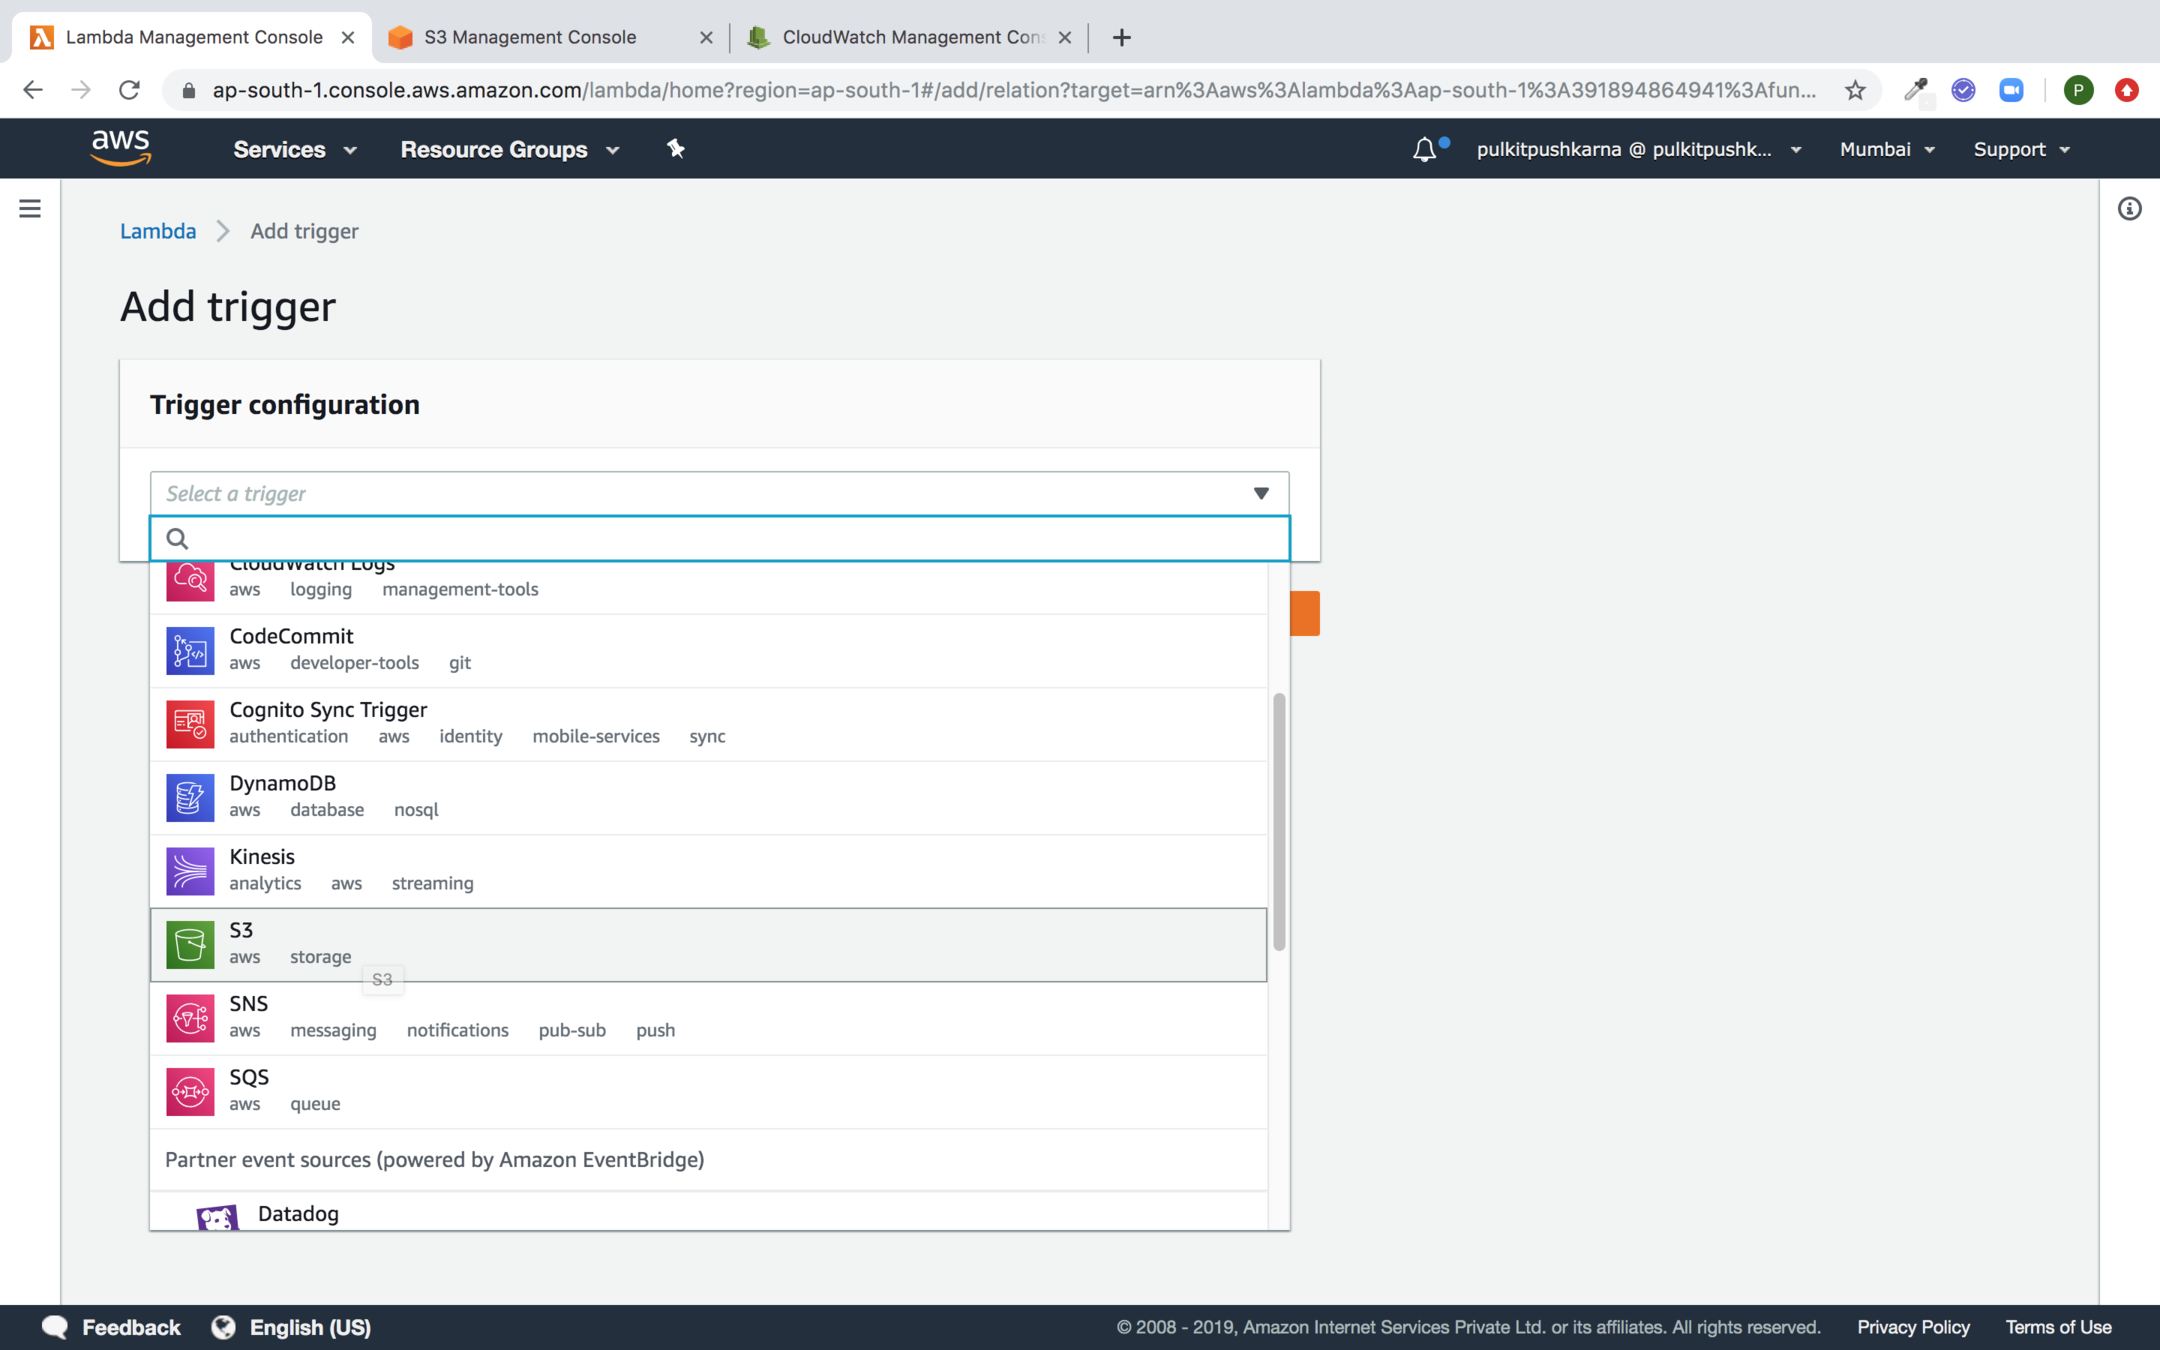
Add Trigger
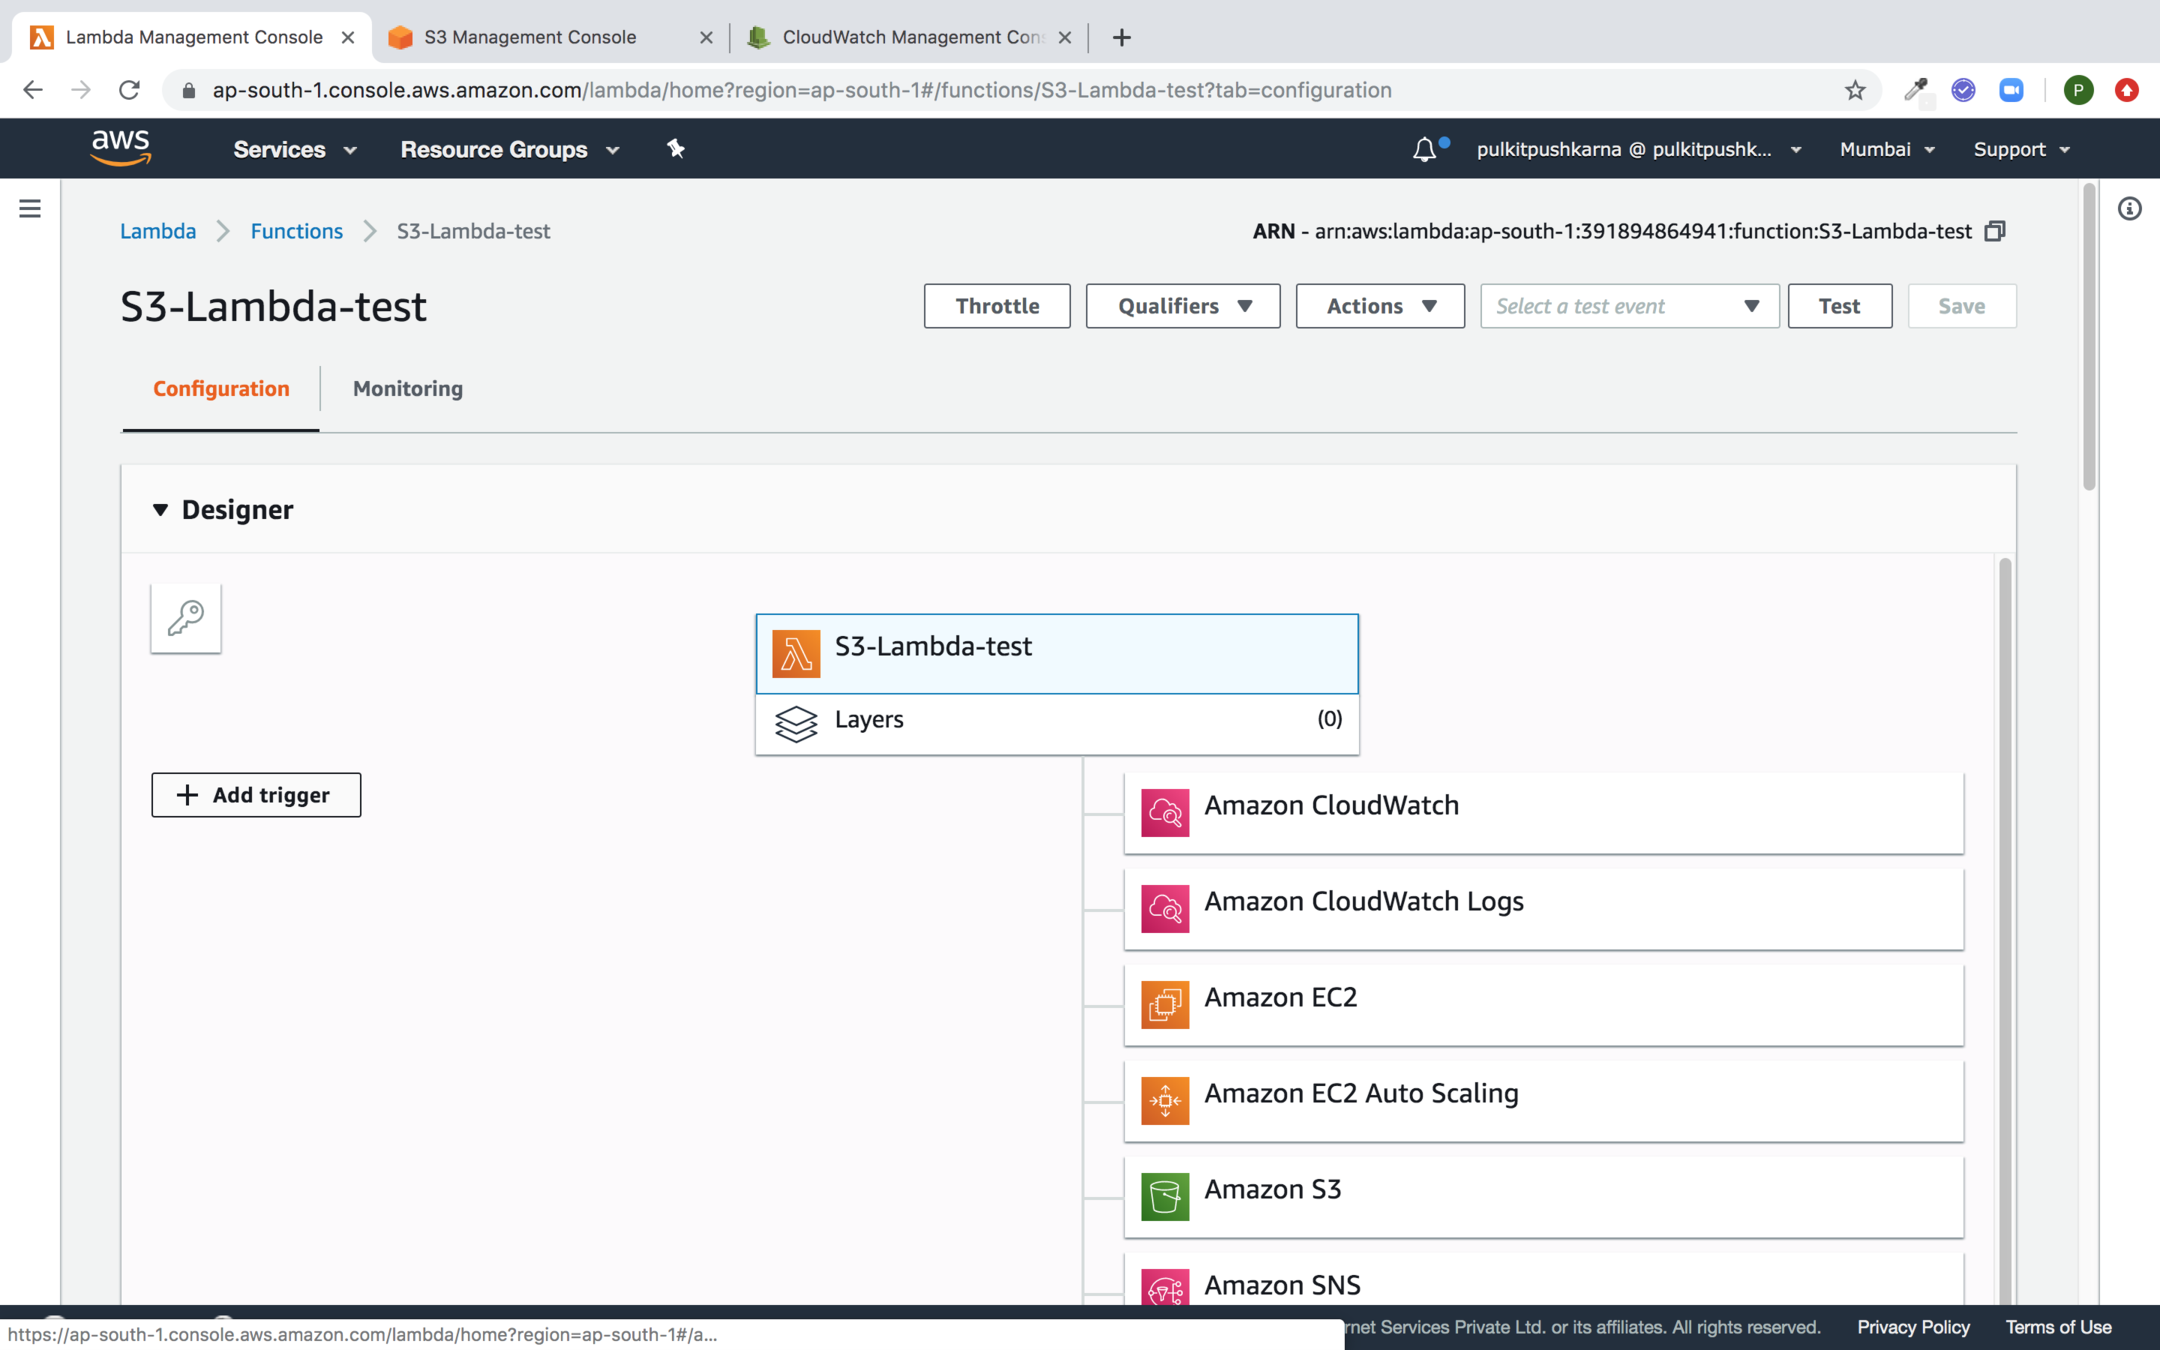
Select S3 trigger
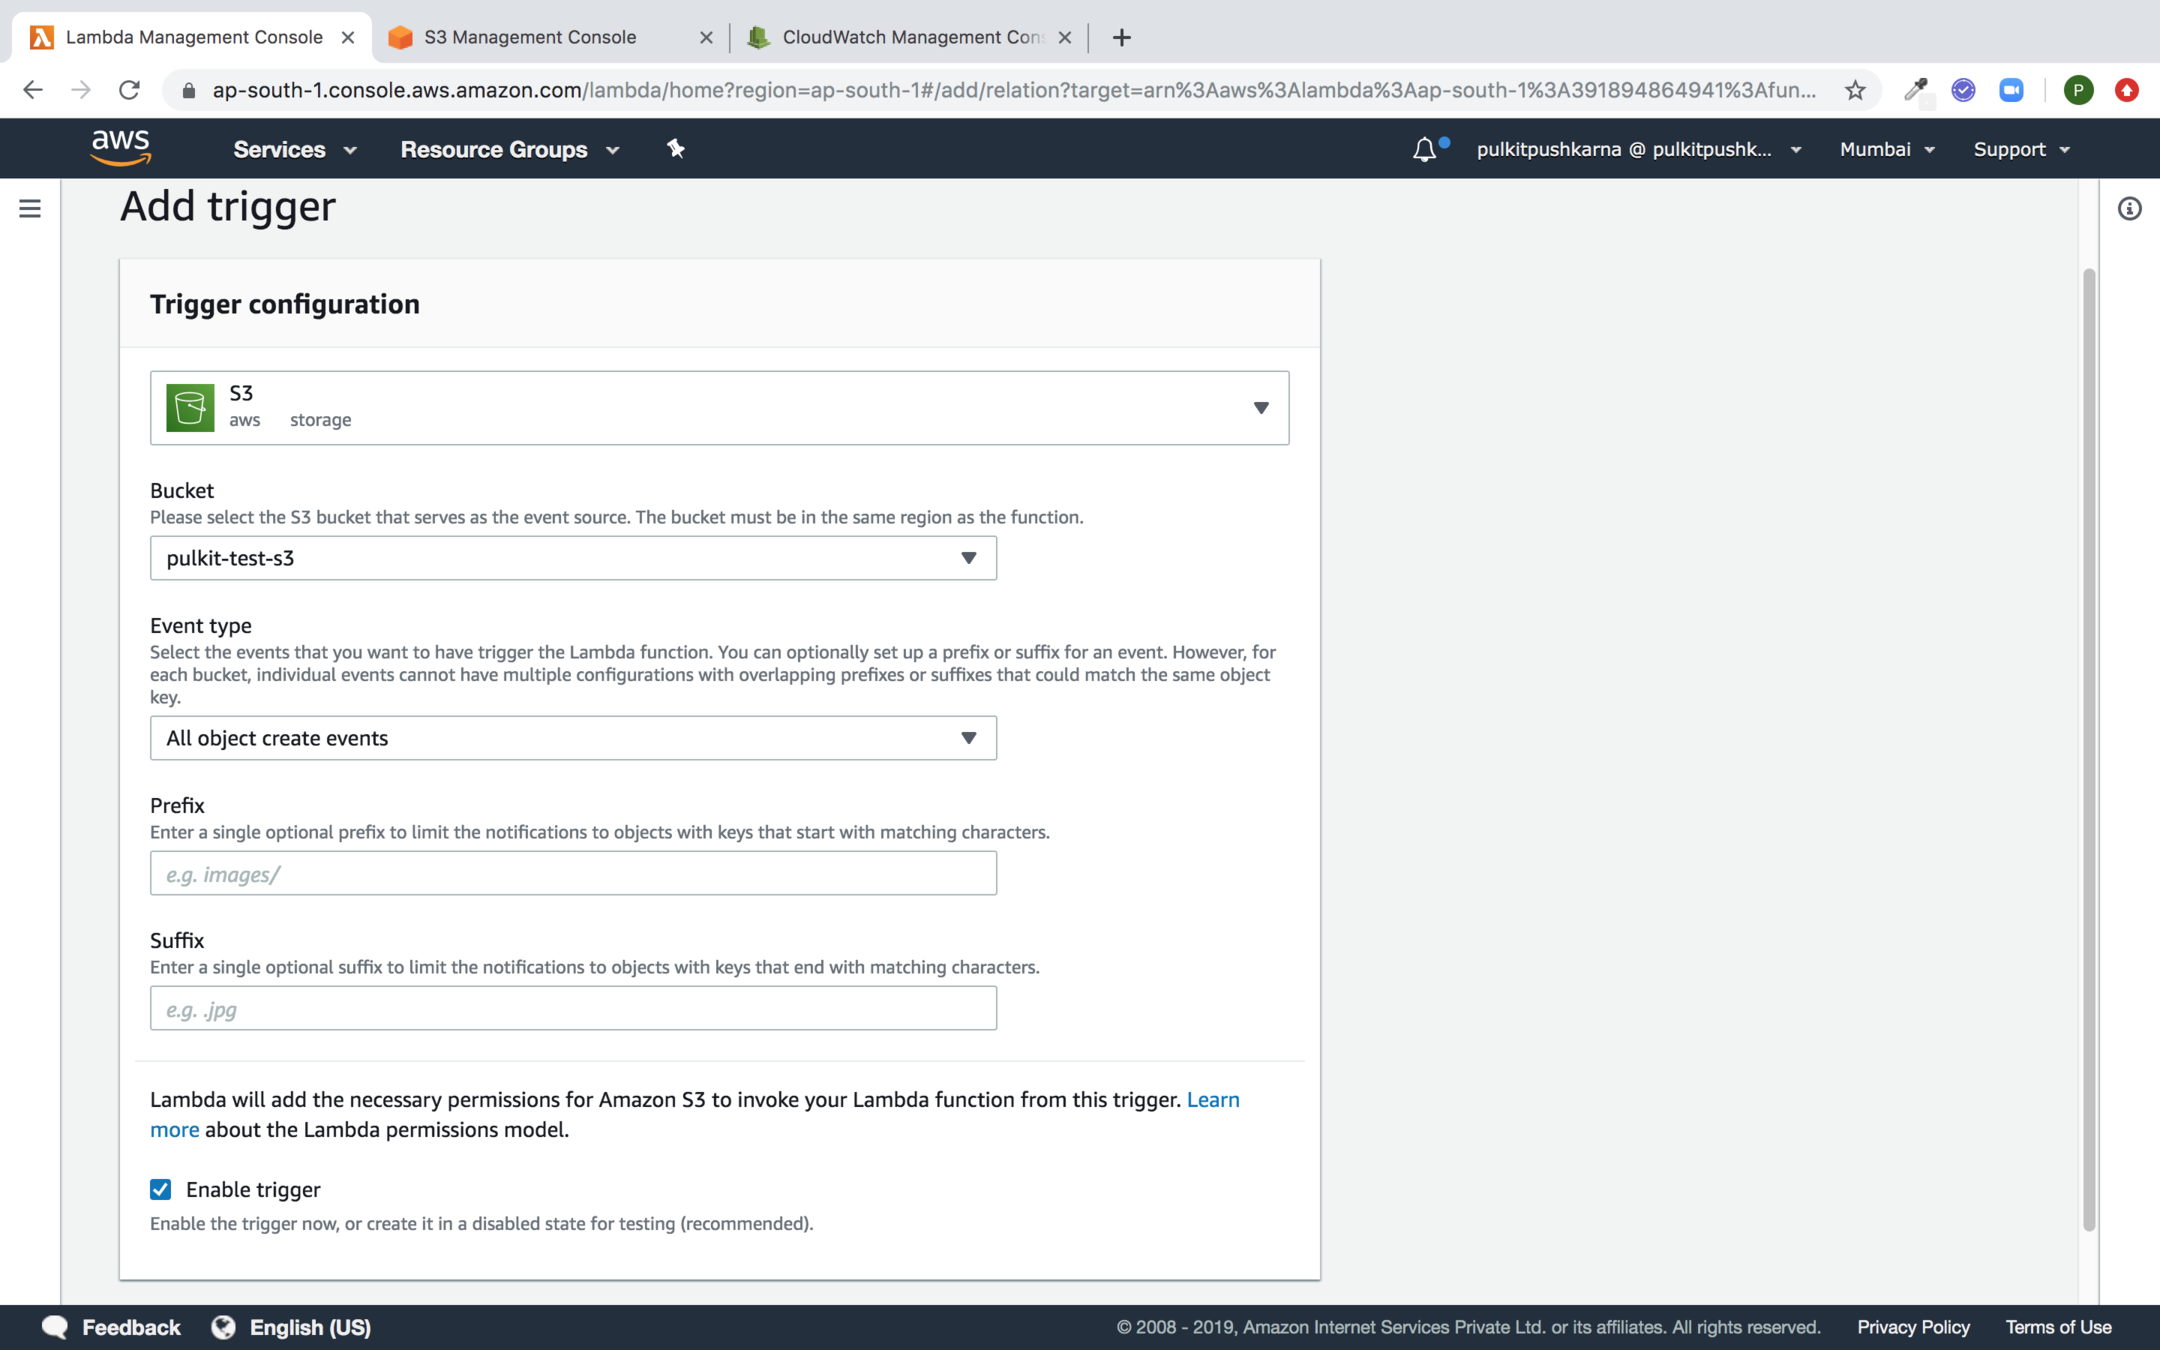
Fill the details and click on add
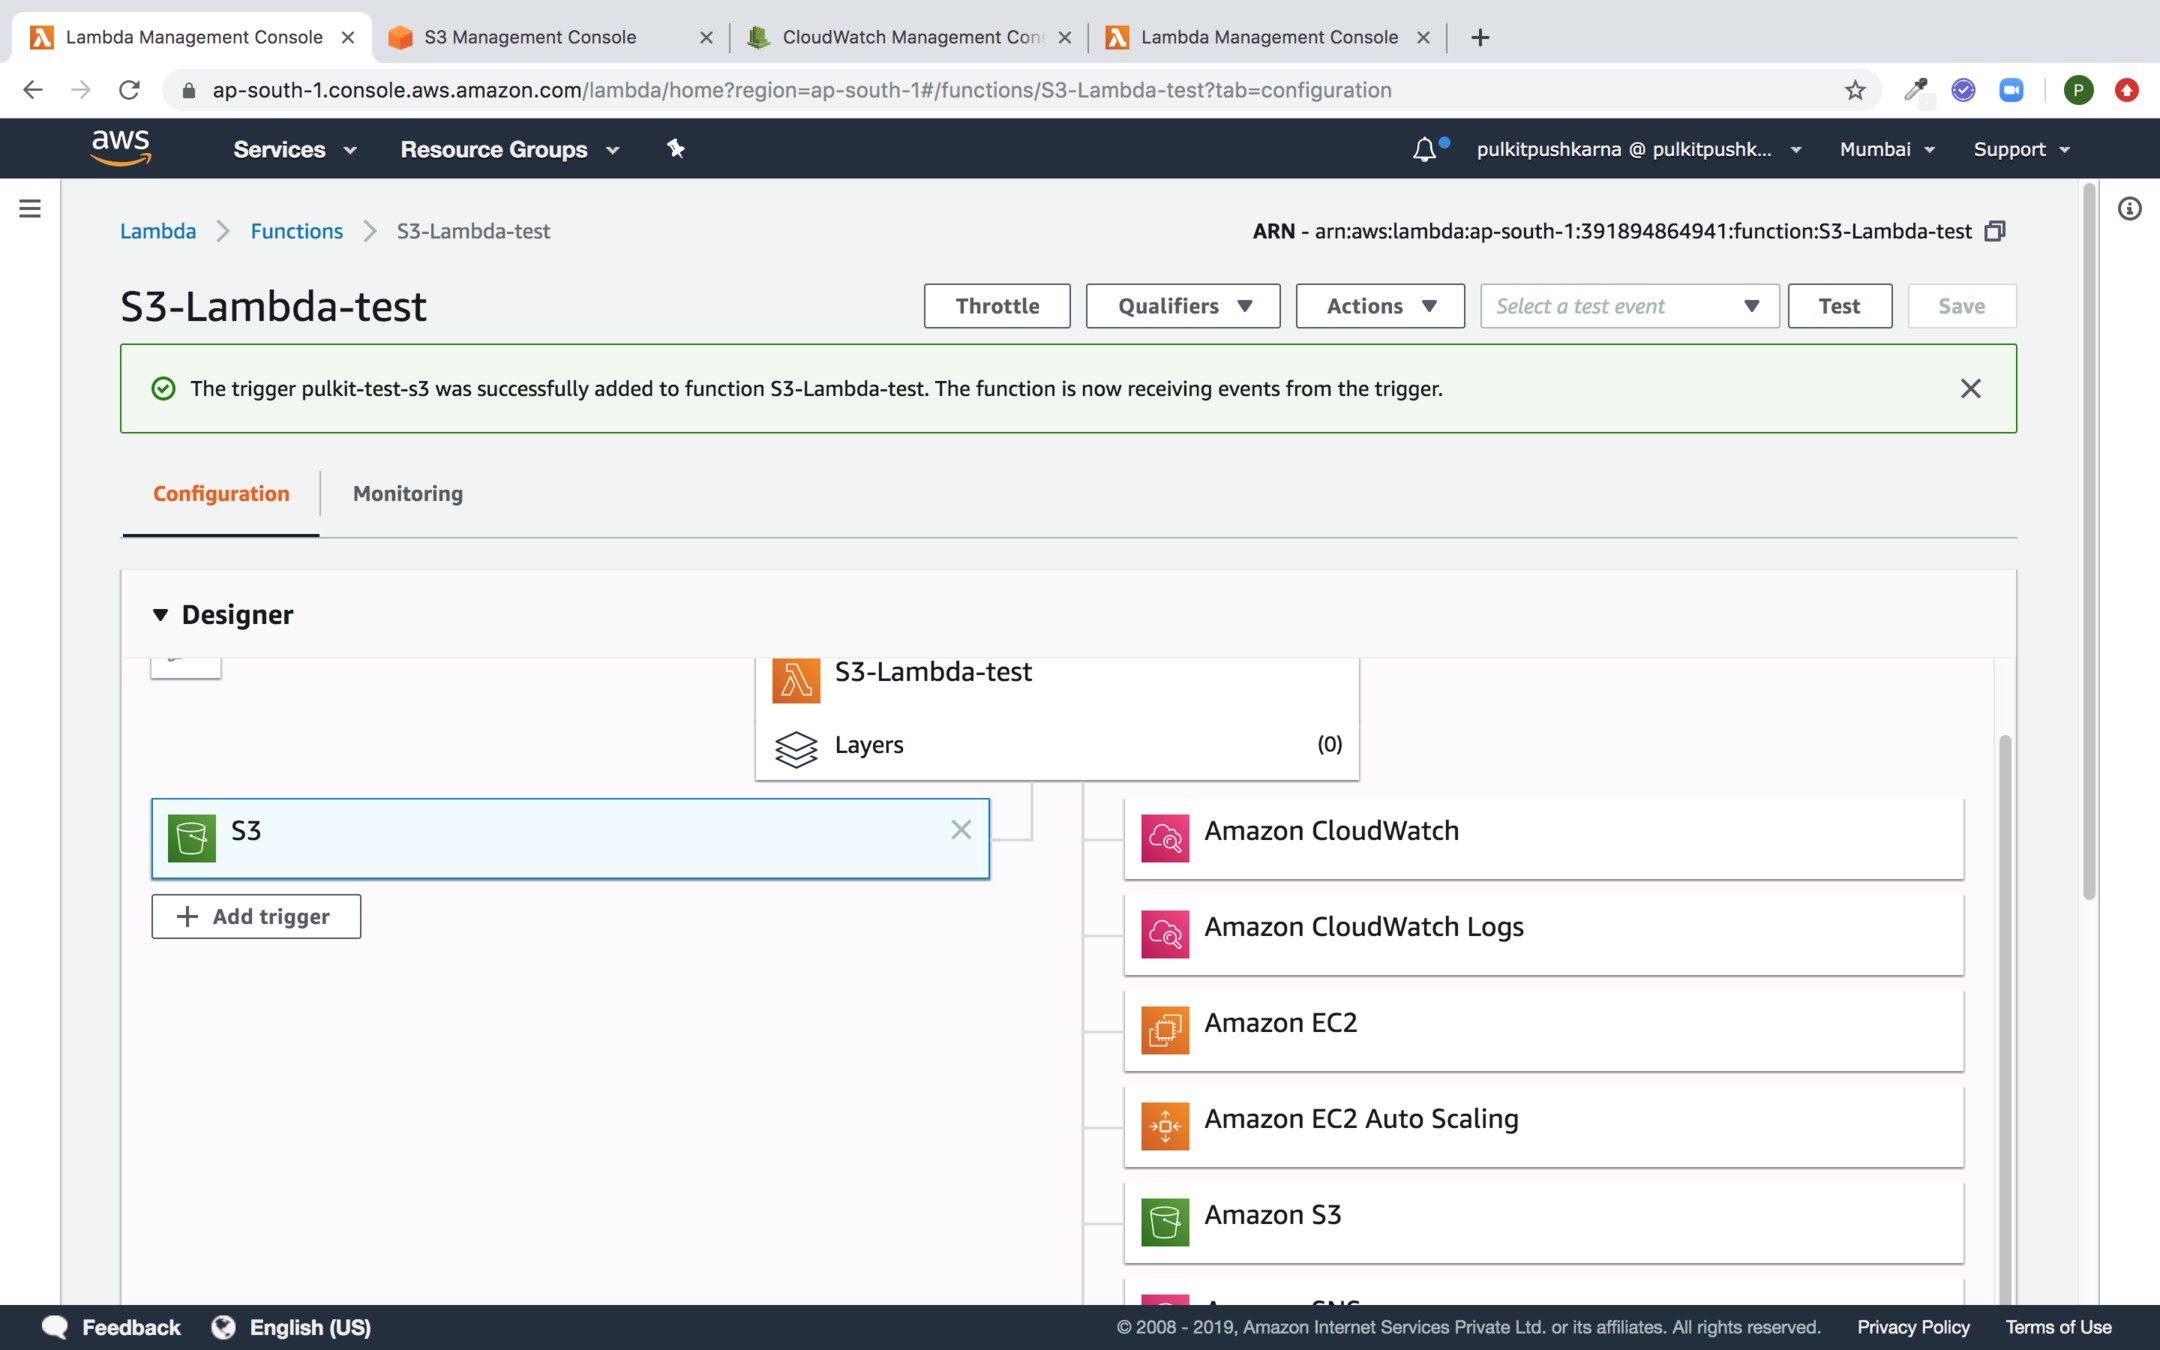
You will see that S3 trigger added
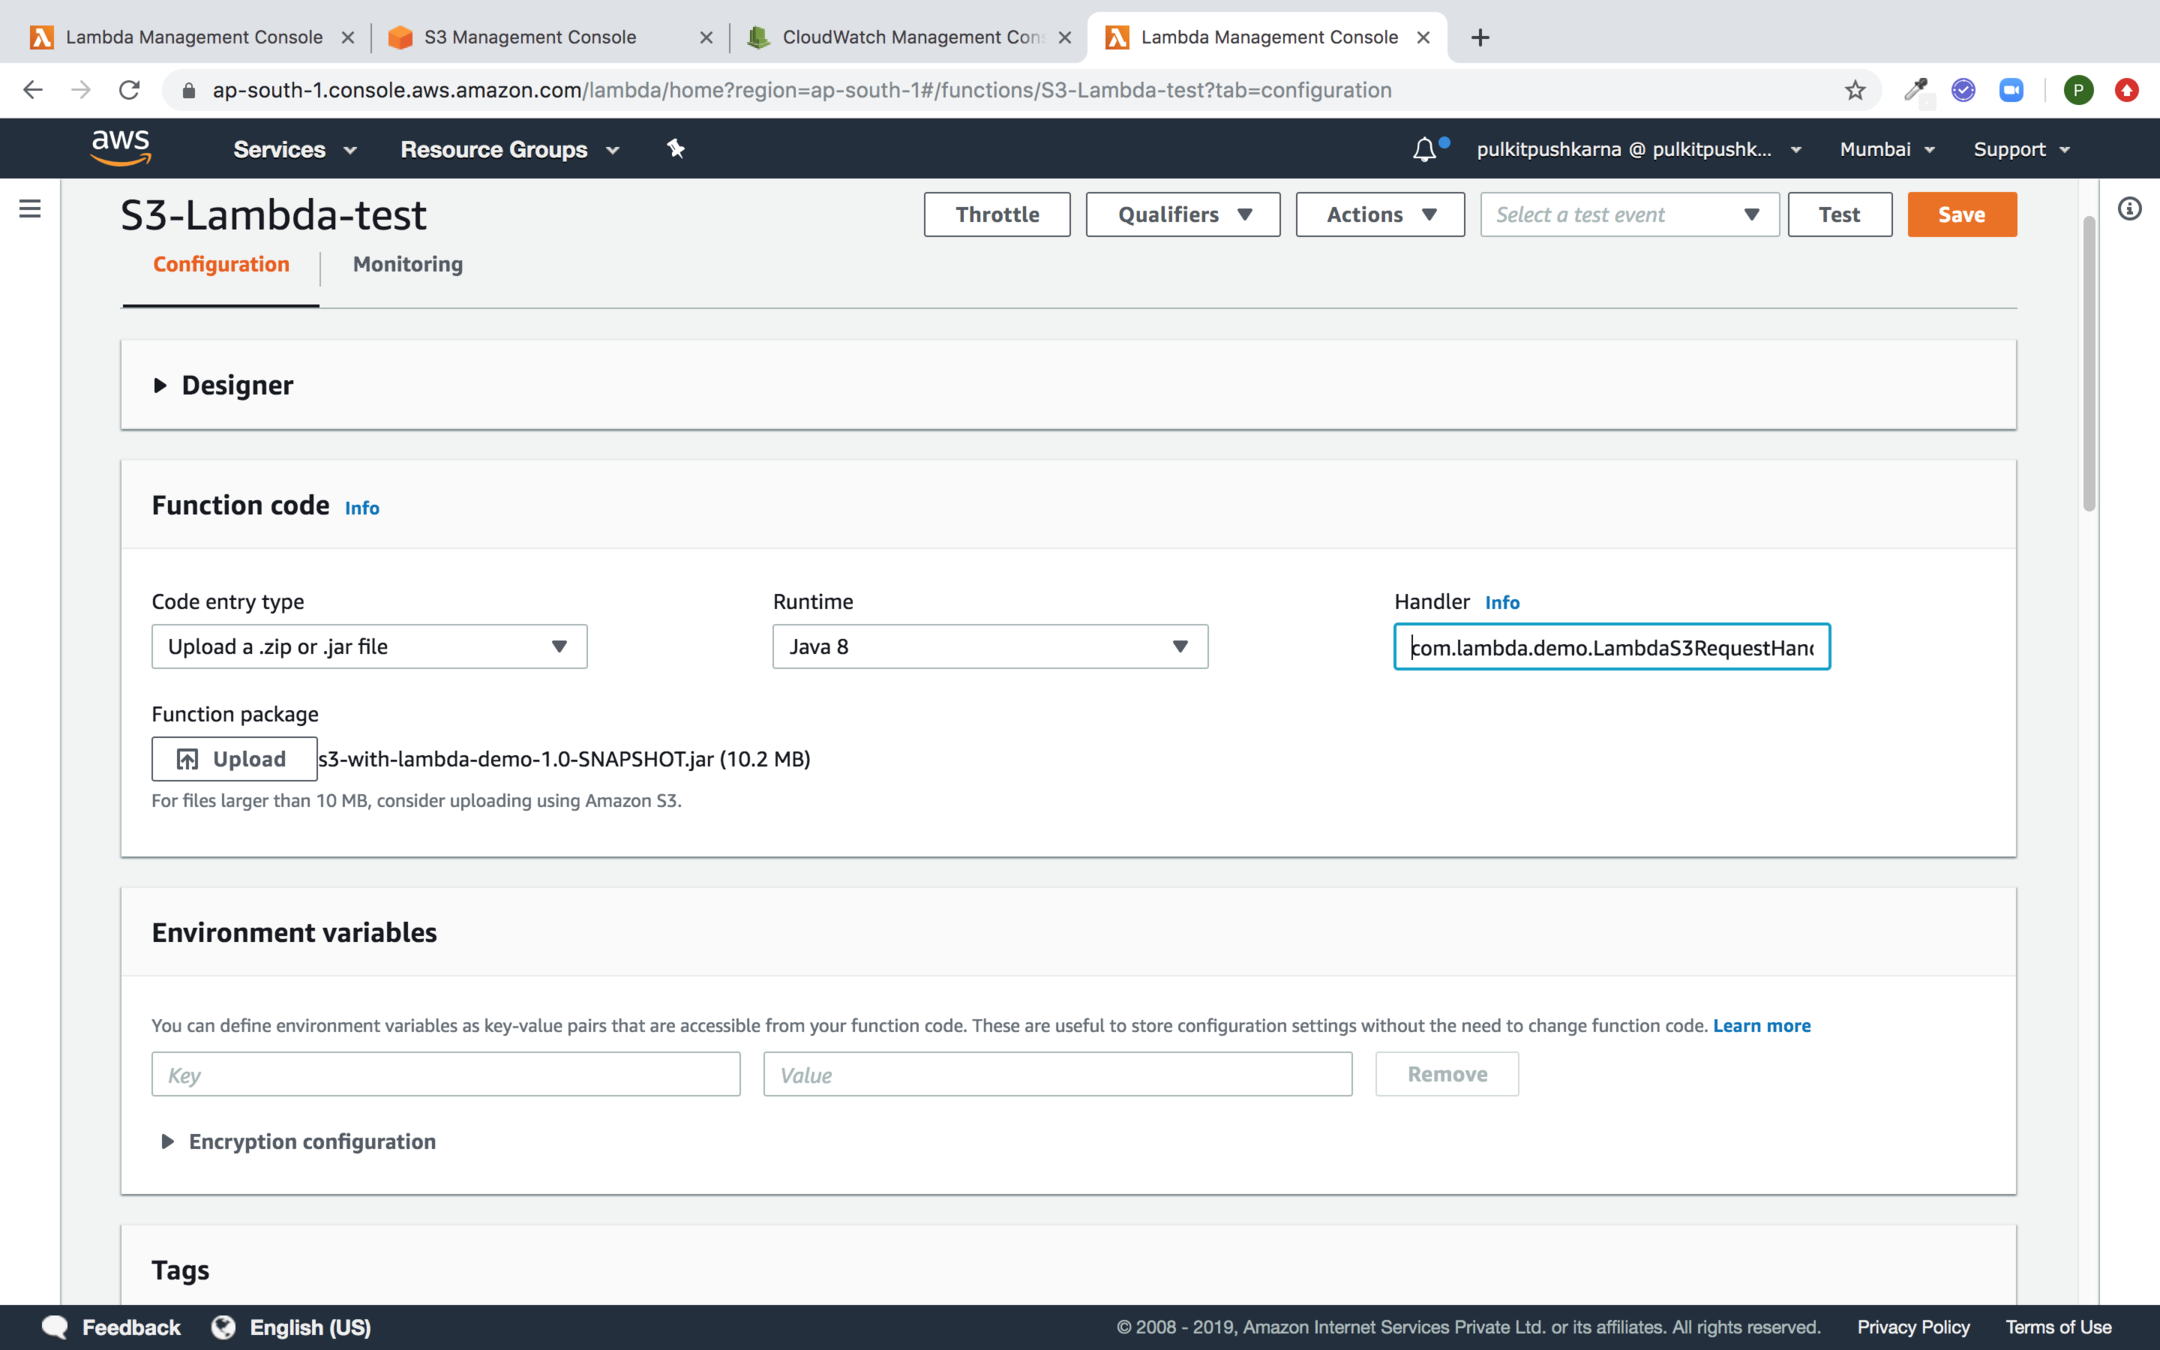
Upload the lambda to catch S3 Object create event
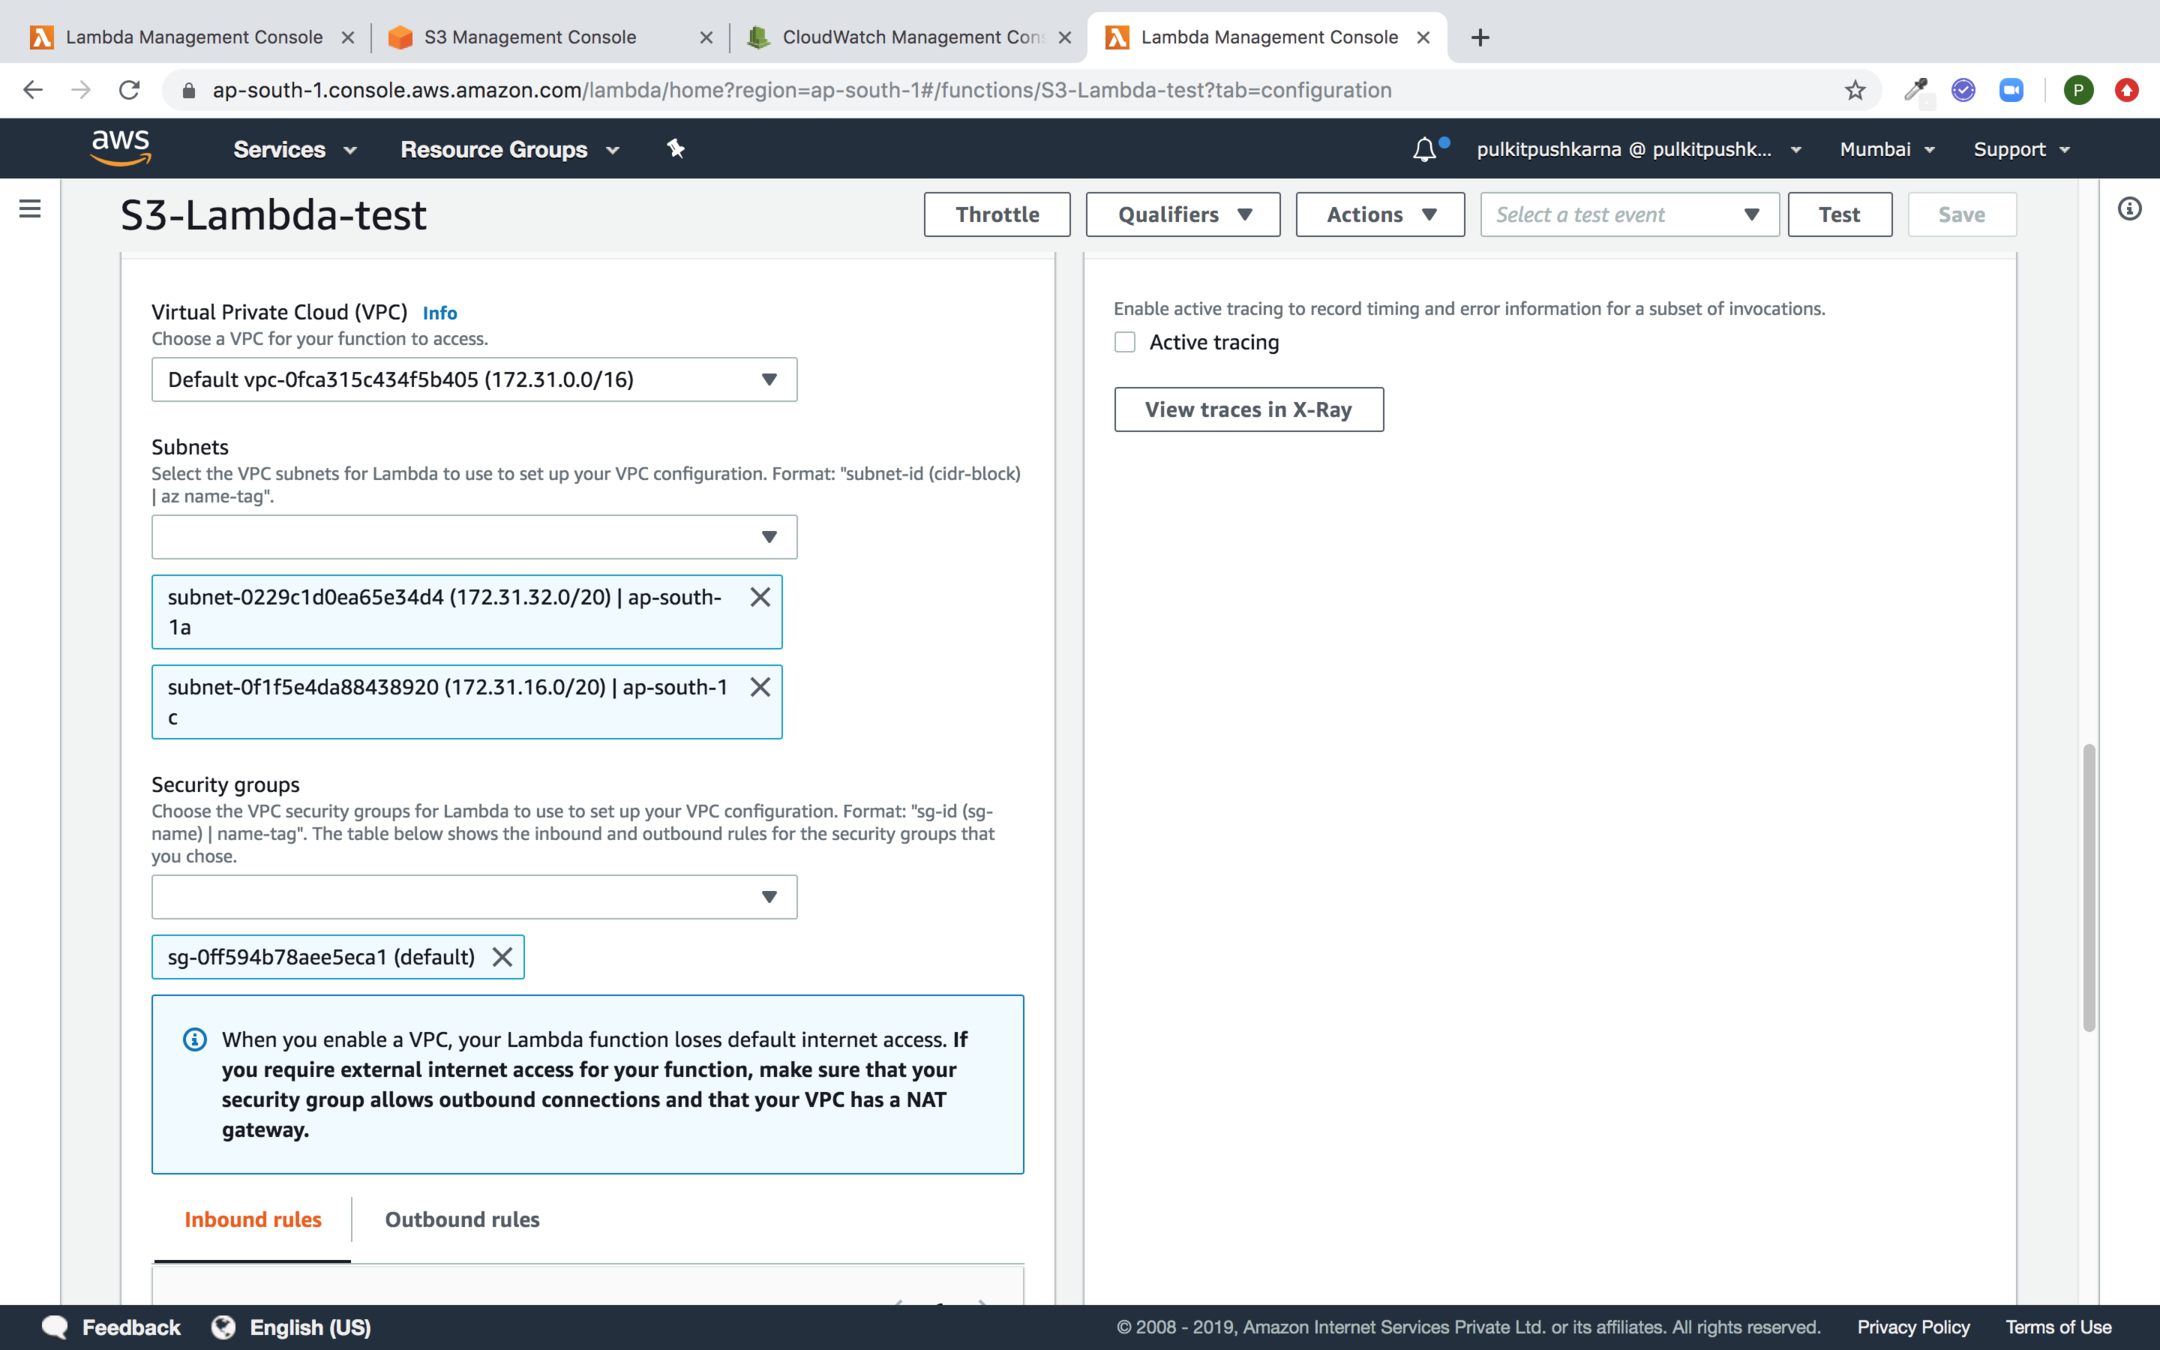
Configure VPC for the lambda
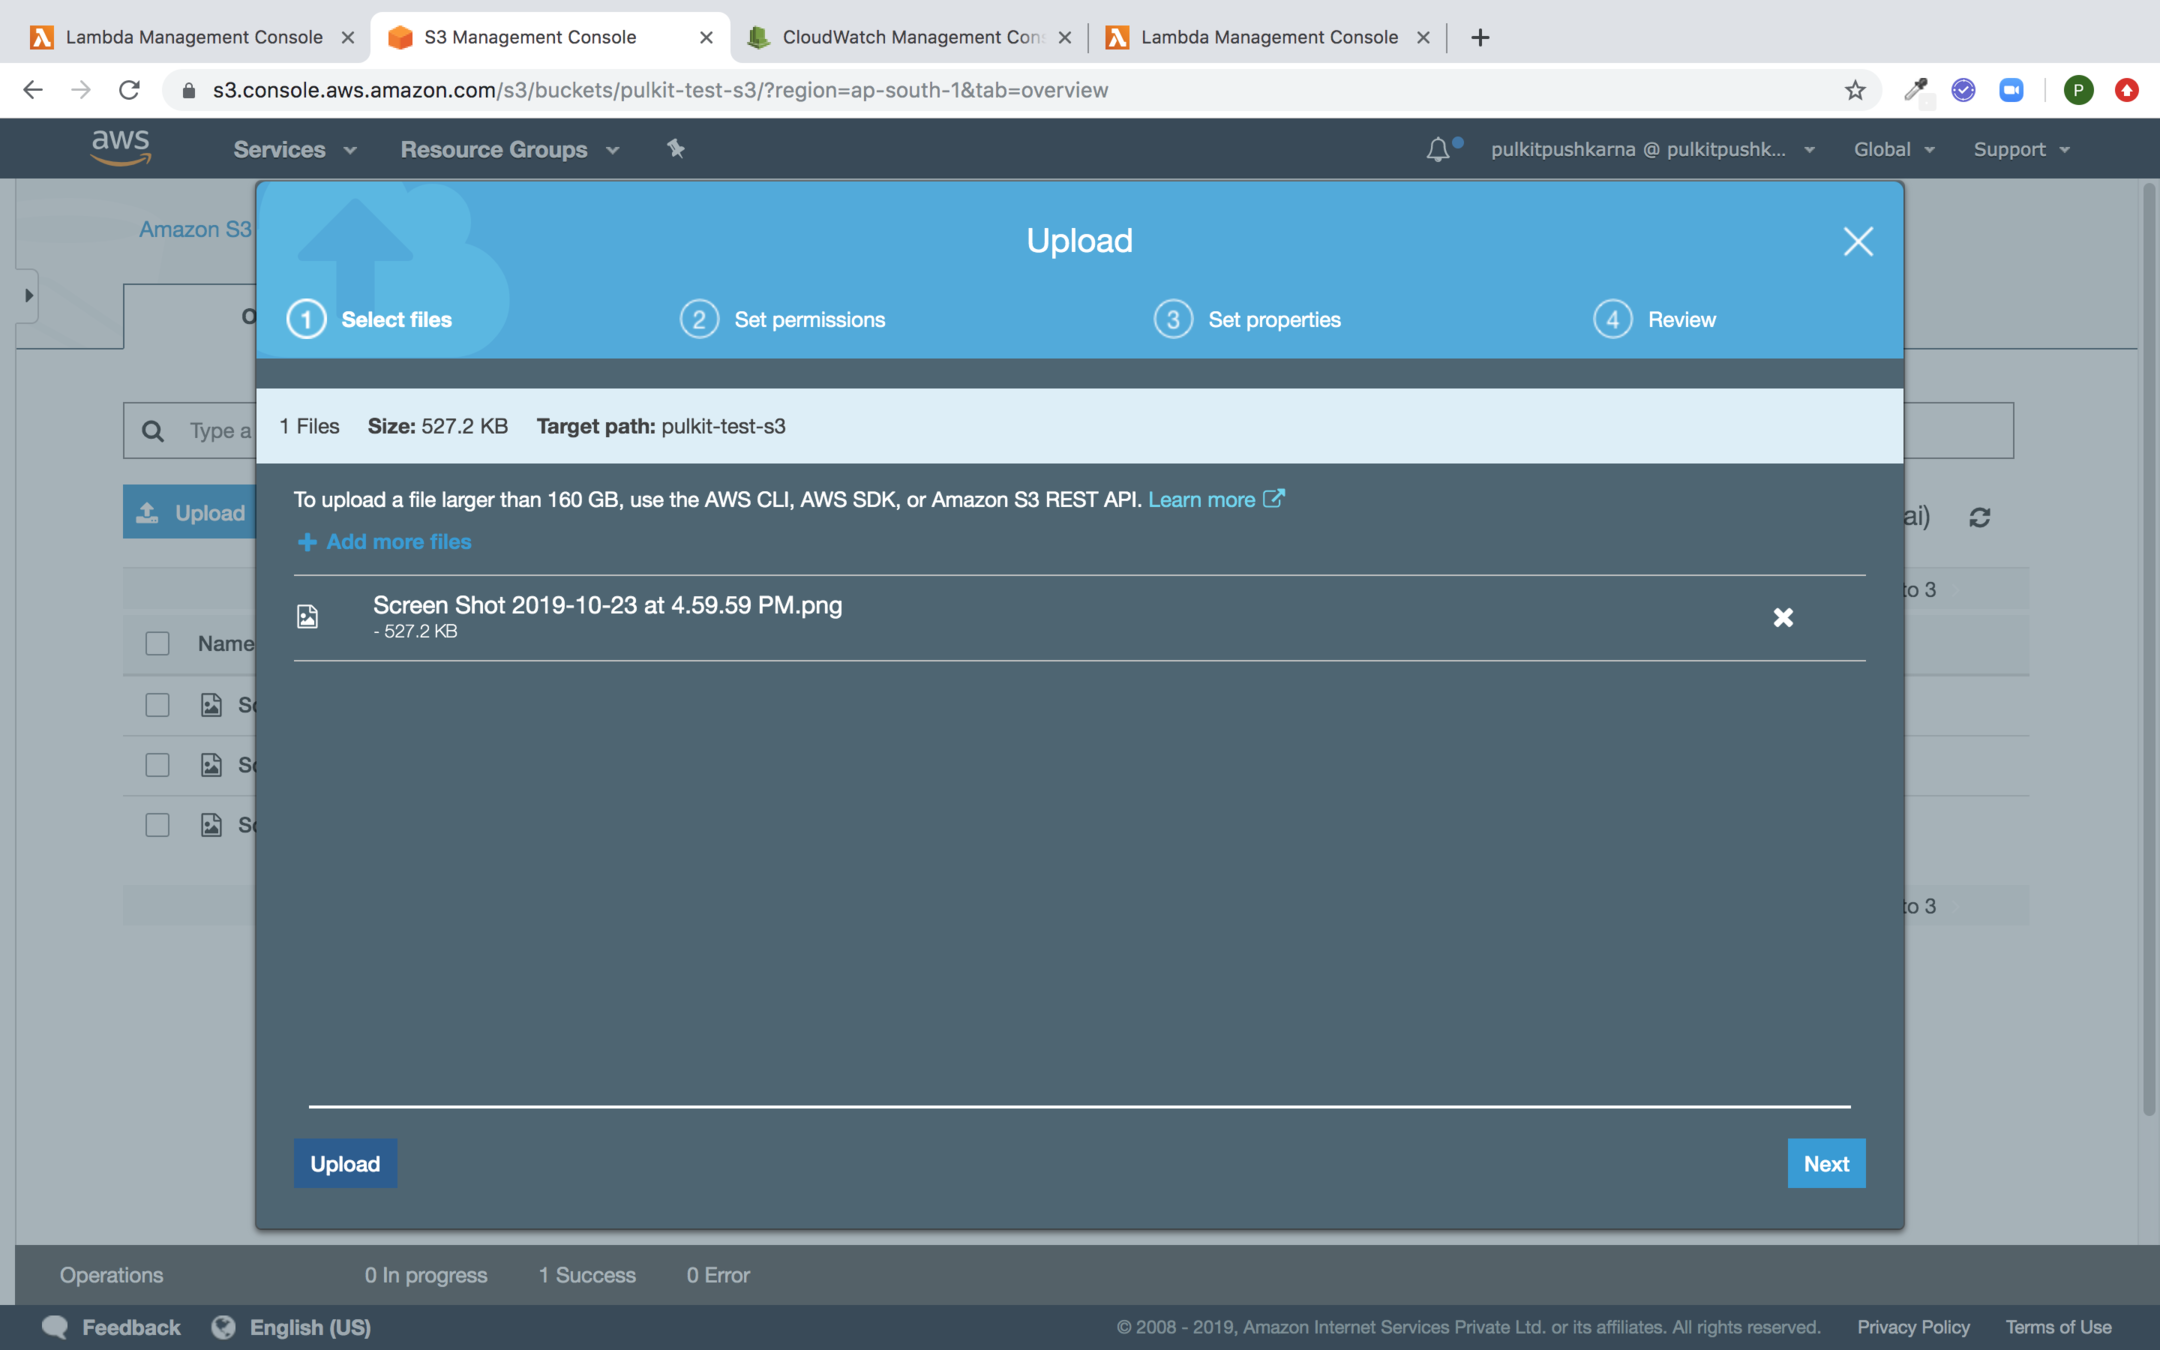
Upload file to S3 bucket
In the cloudwatch you can check the logs for the lambda function
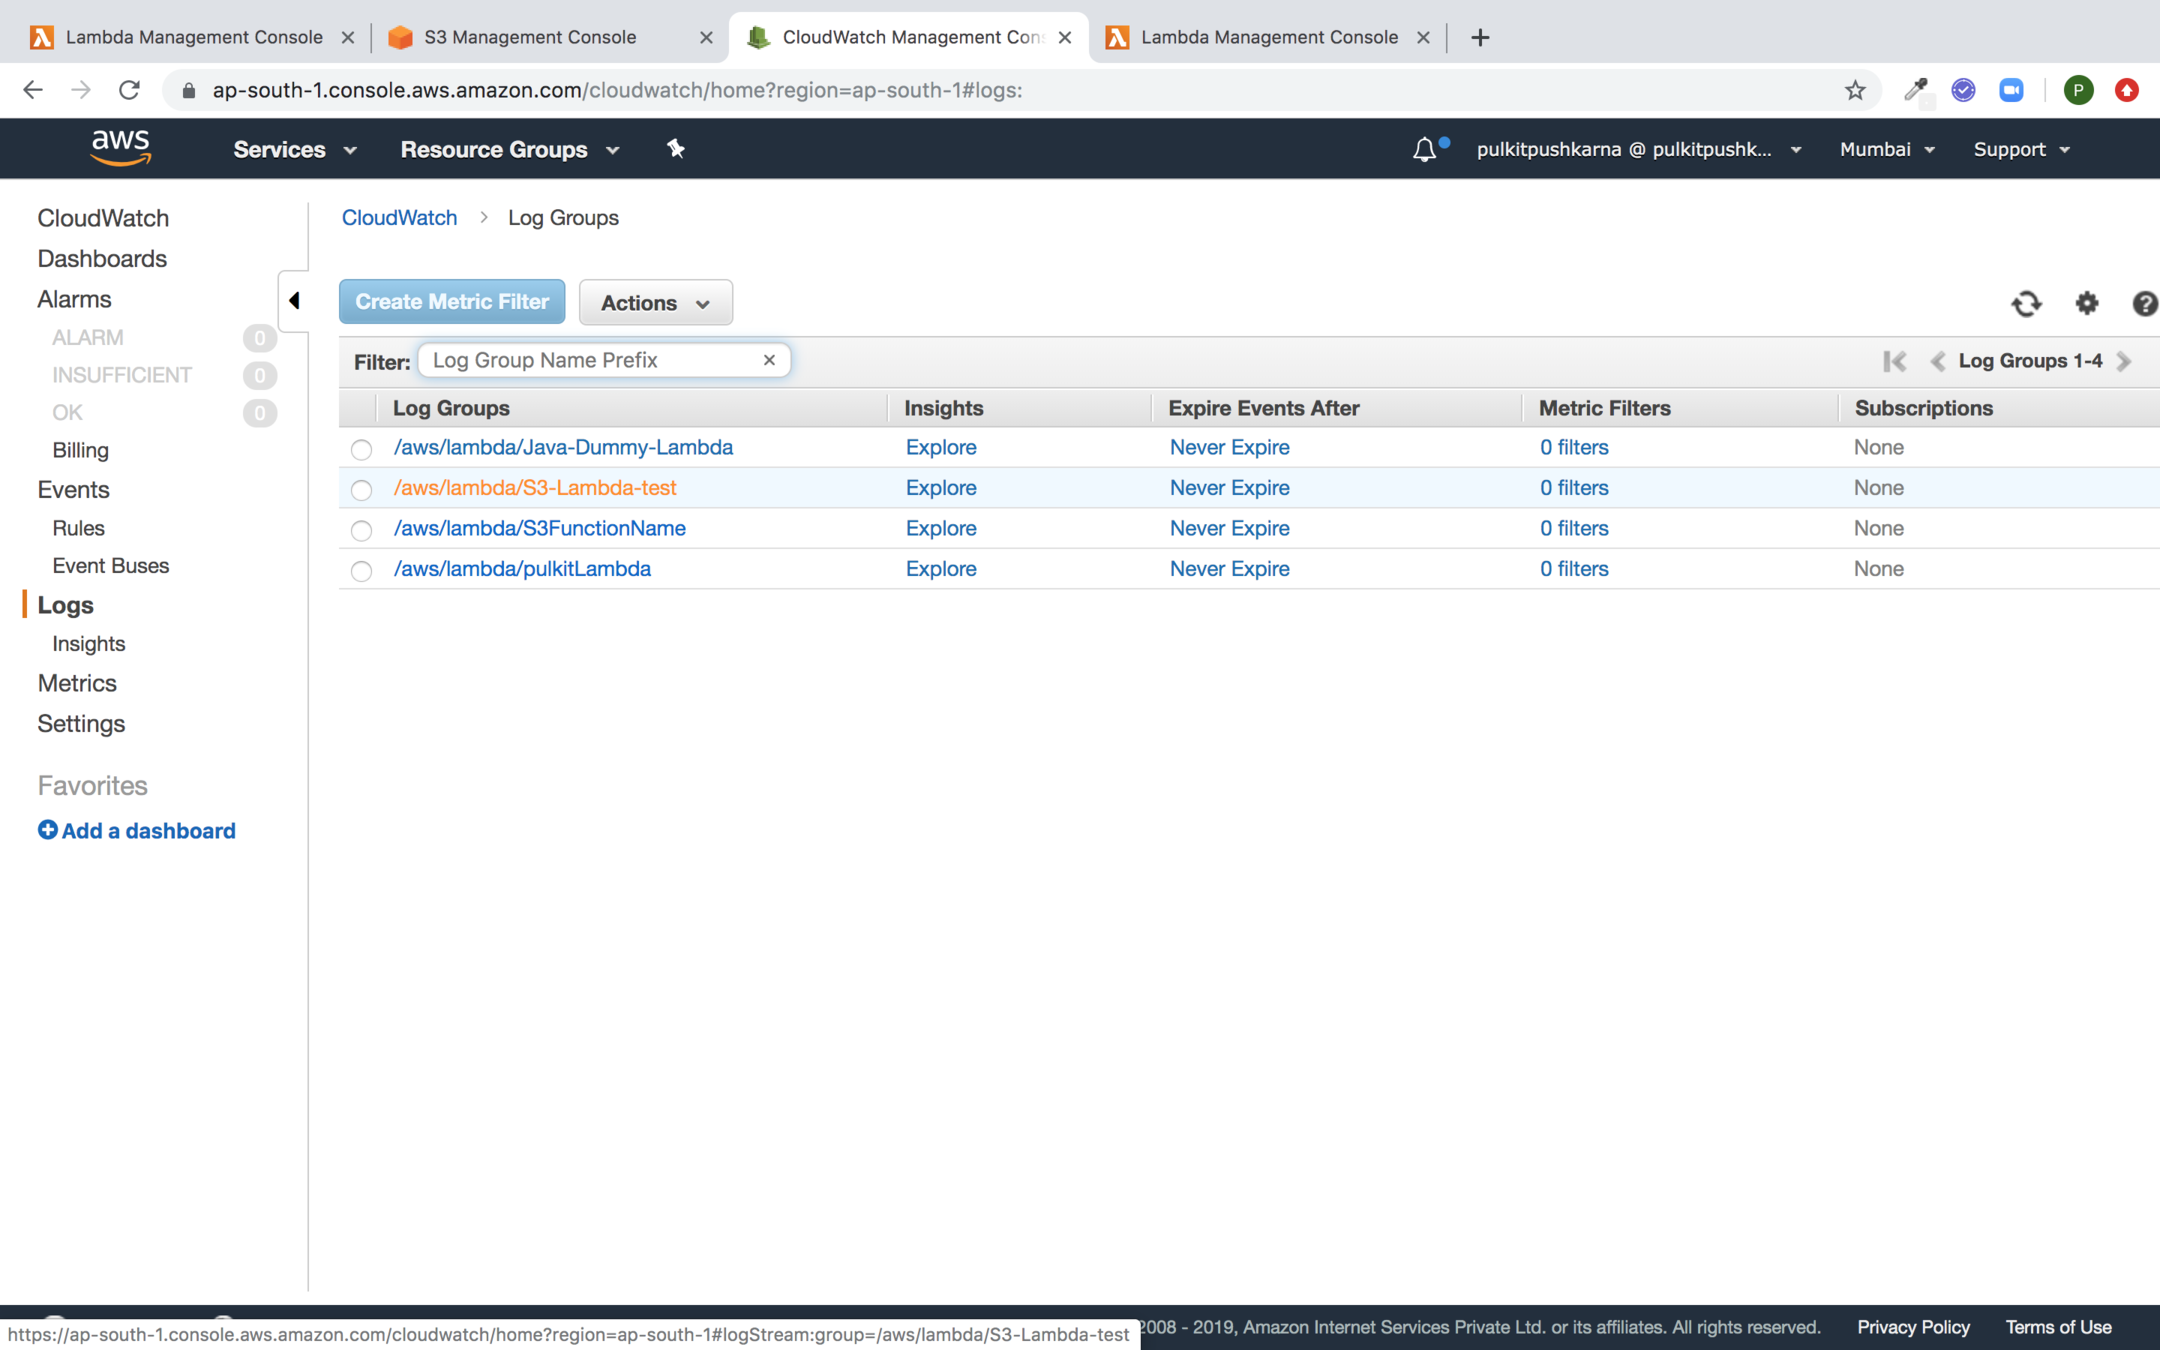
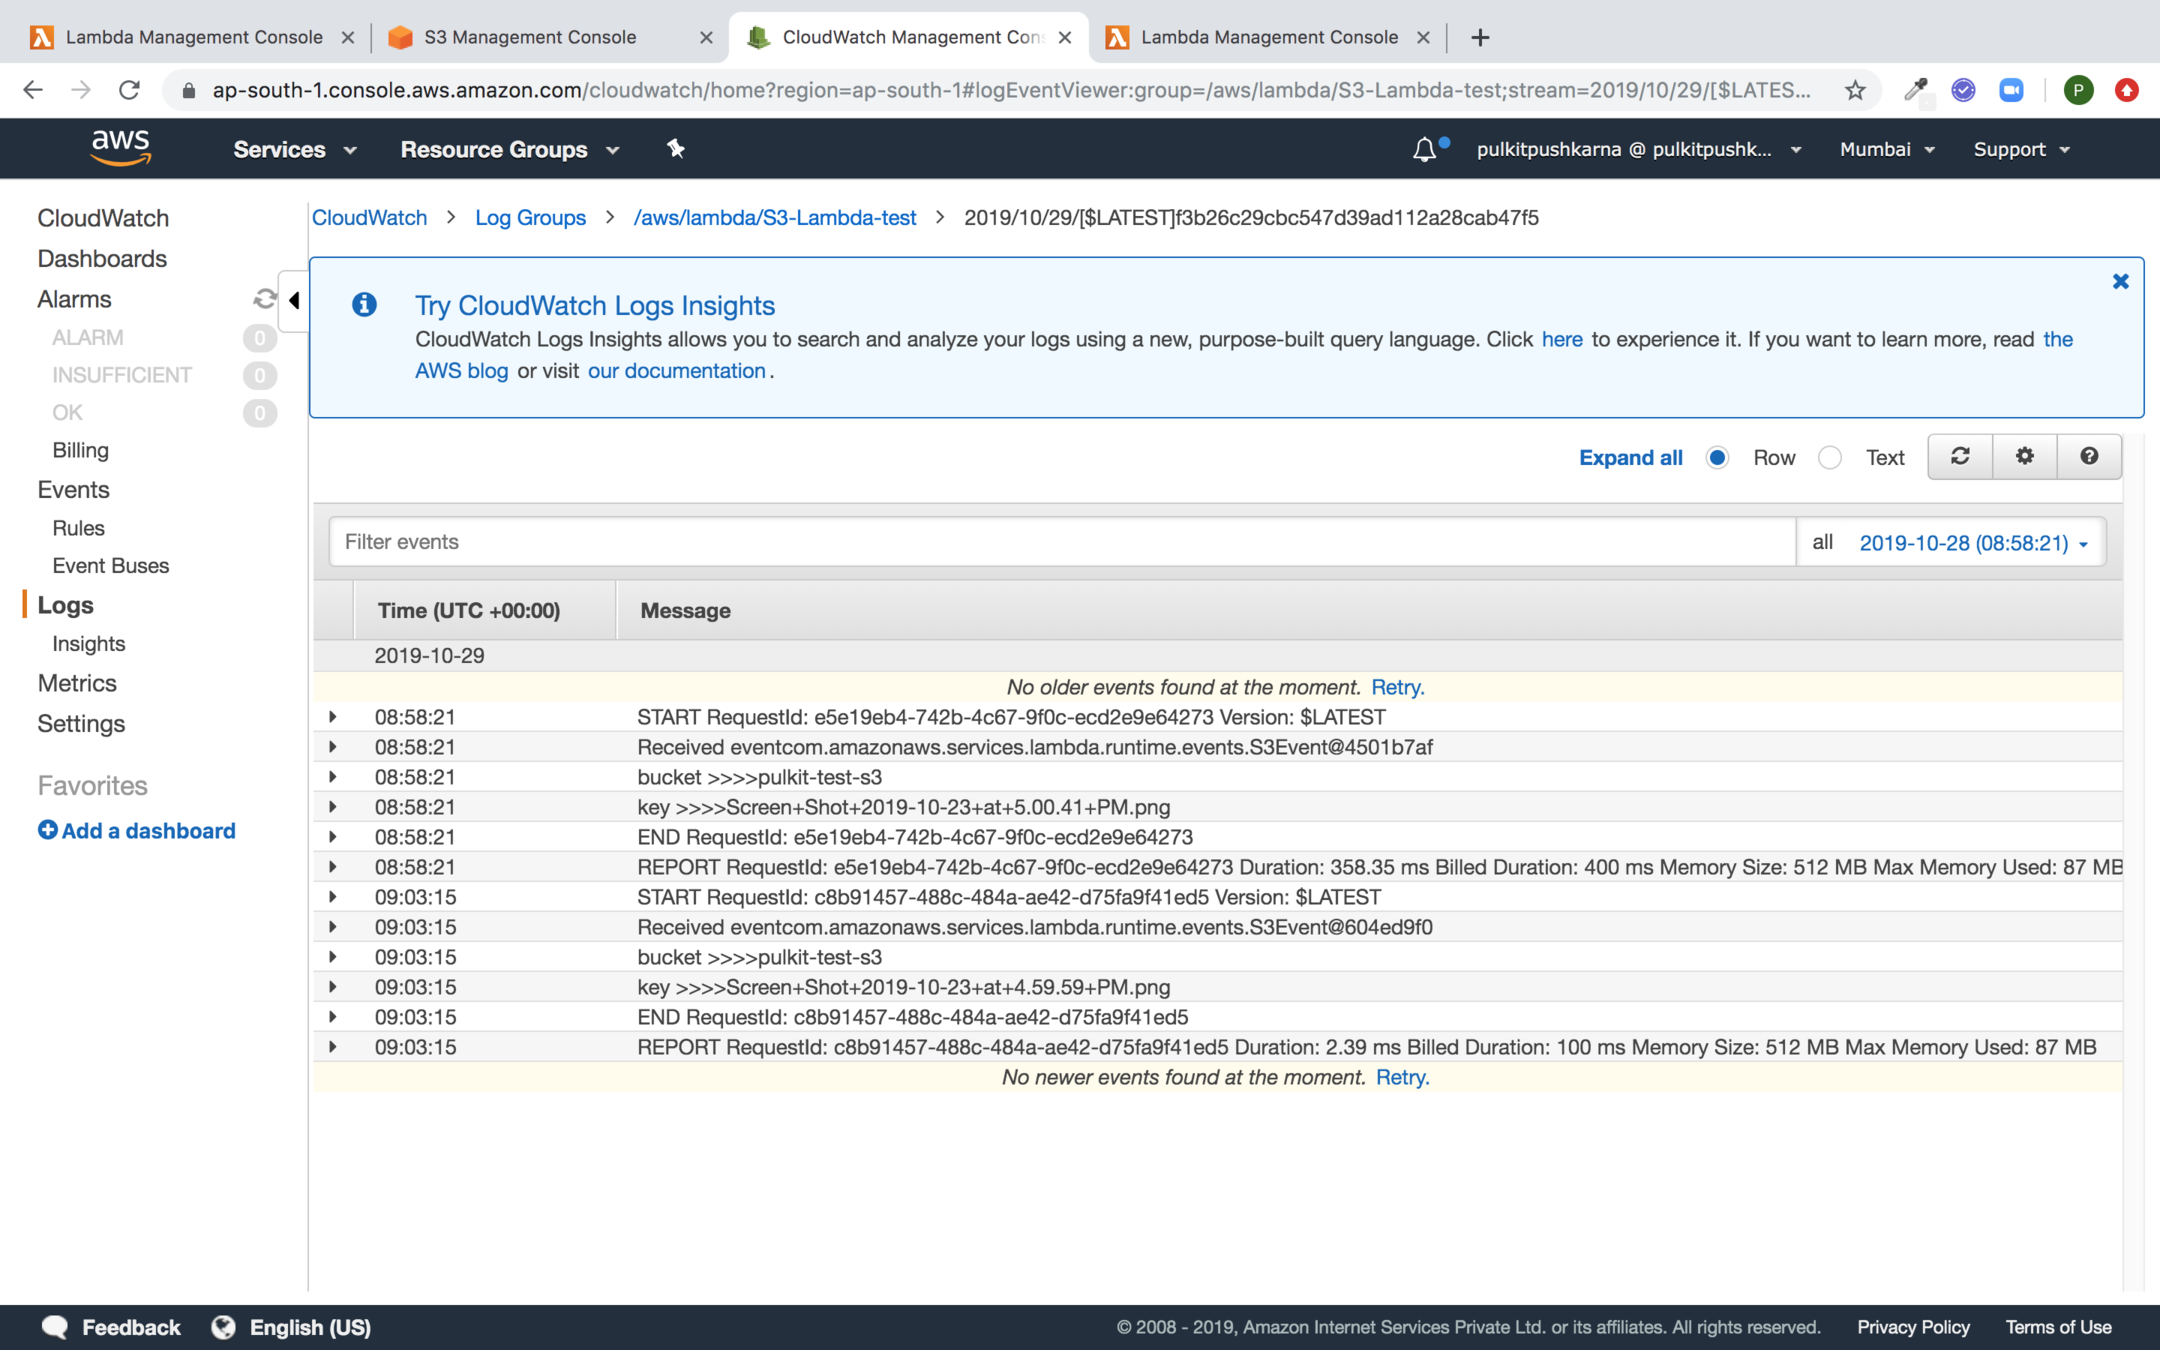
You can see the logs for the S3 bucket upload from the lambda
Java Code to Capture SQS Event using lambda
package com.lambda.demo;

import com.amazonaws.services.lambda.runtime.Context;
import com.amazonaws.services.lambda.runtime.LambdaLogger;
import com.amazonaws.services.lambda.runtime.RequestHandler;
import com.amazonaws.services.lambda.runtime.events.SQSEvent;

public class LambdaSQSRequestHandler implements RequestHandler<SQSEvent,String> {

    @Override
    public String handleRequest(SQSEvent event, Context context) {
        LambdaLogger lambdaLogger = context.getLogger();
        for(SQSEvent.SQSMessage msg : event.getRecords()){
            lambdaLogger.log(new String(msg.getBody()));
        }
        return event.toString();

    }
}
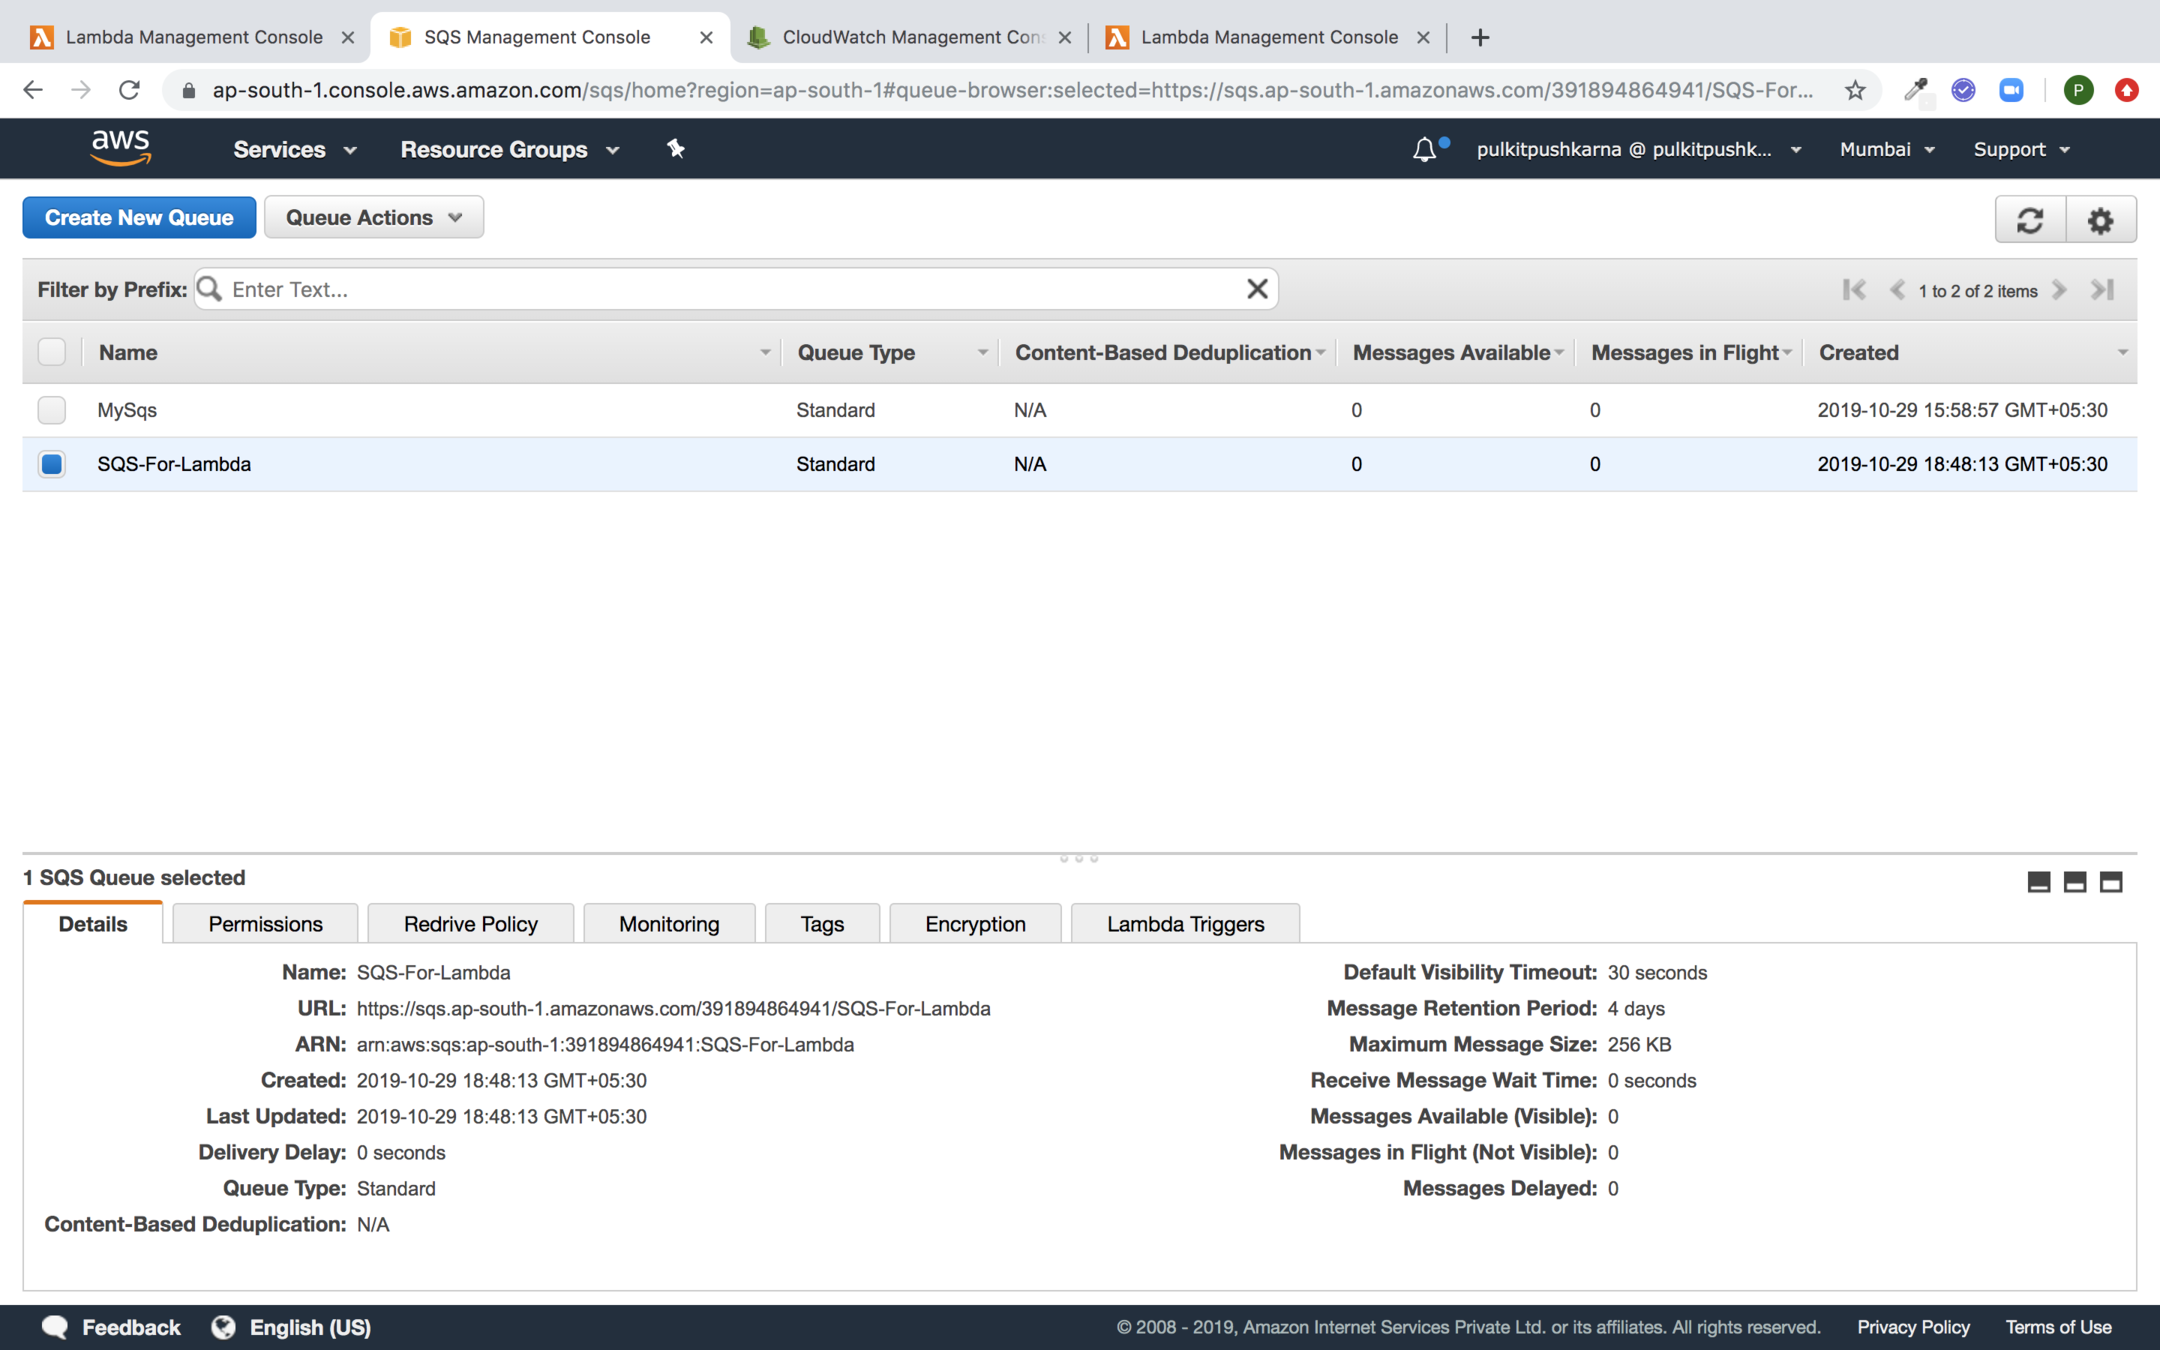
Create an SQS to Test with Lambda
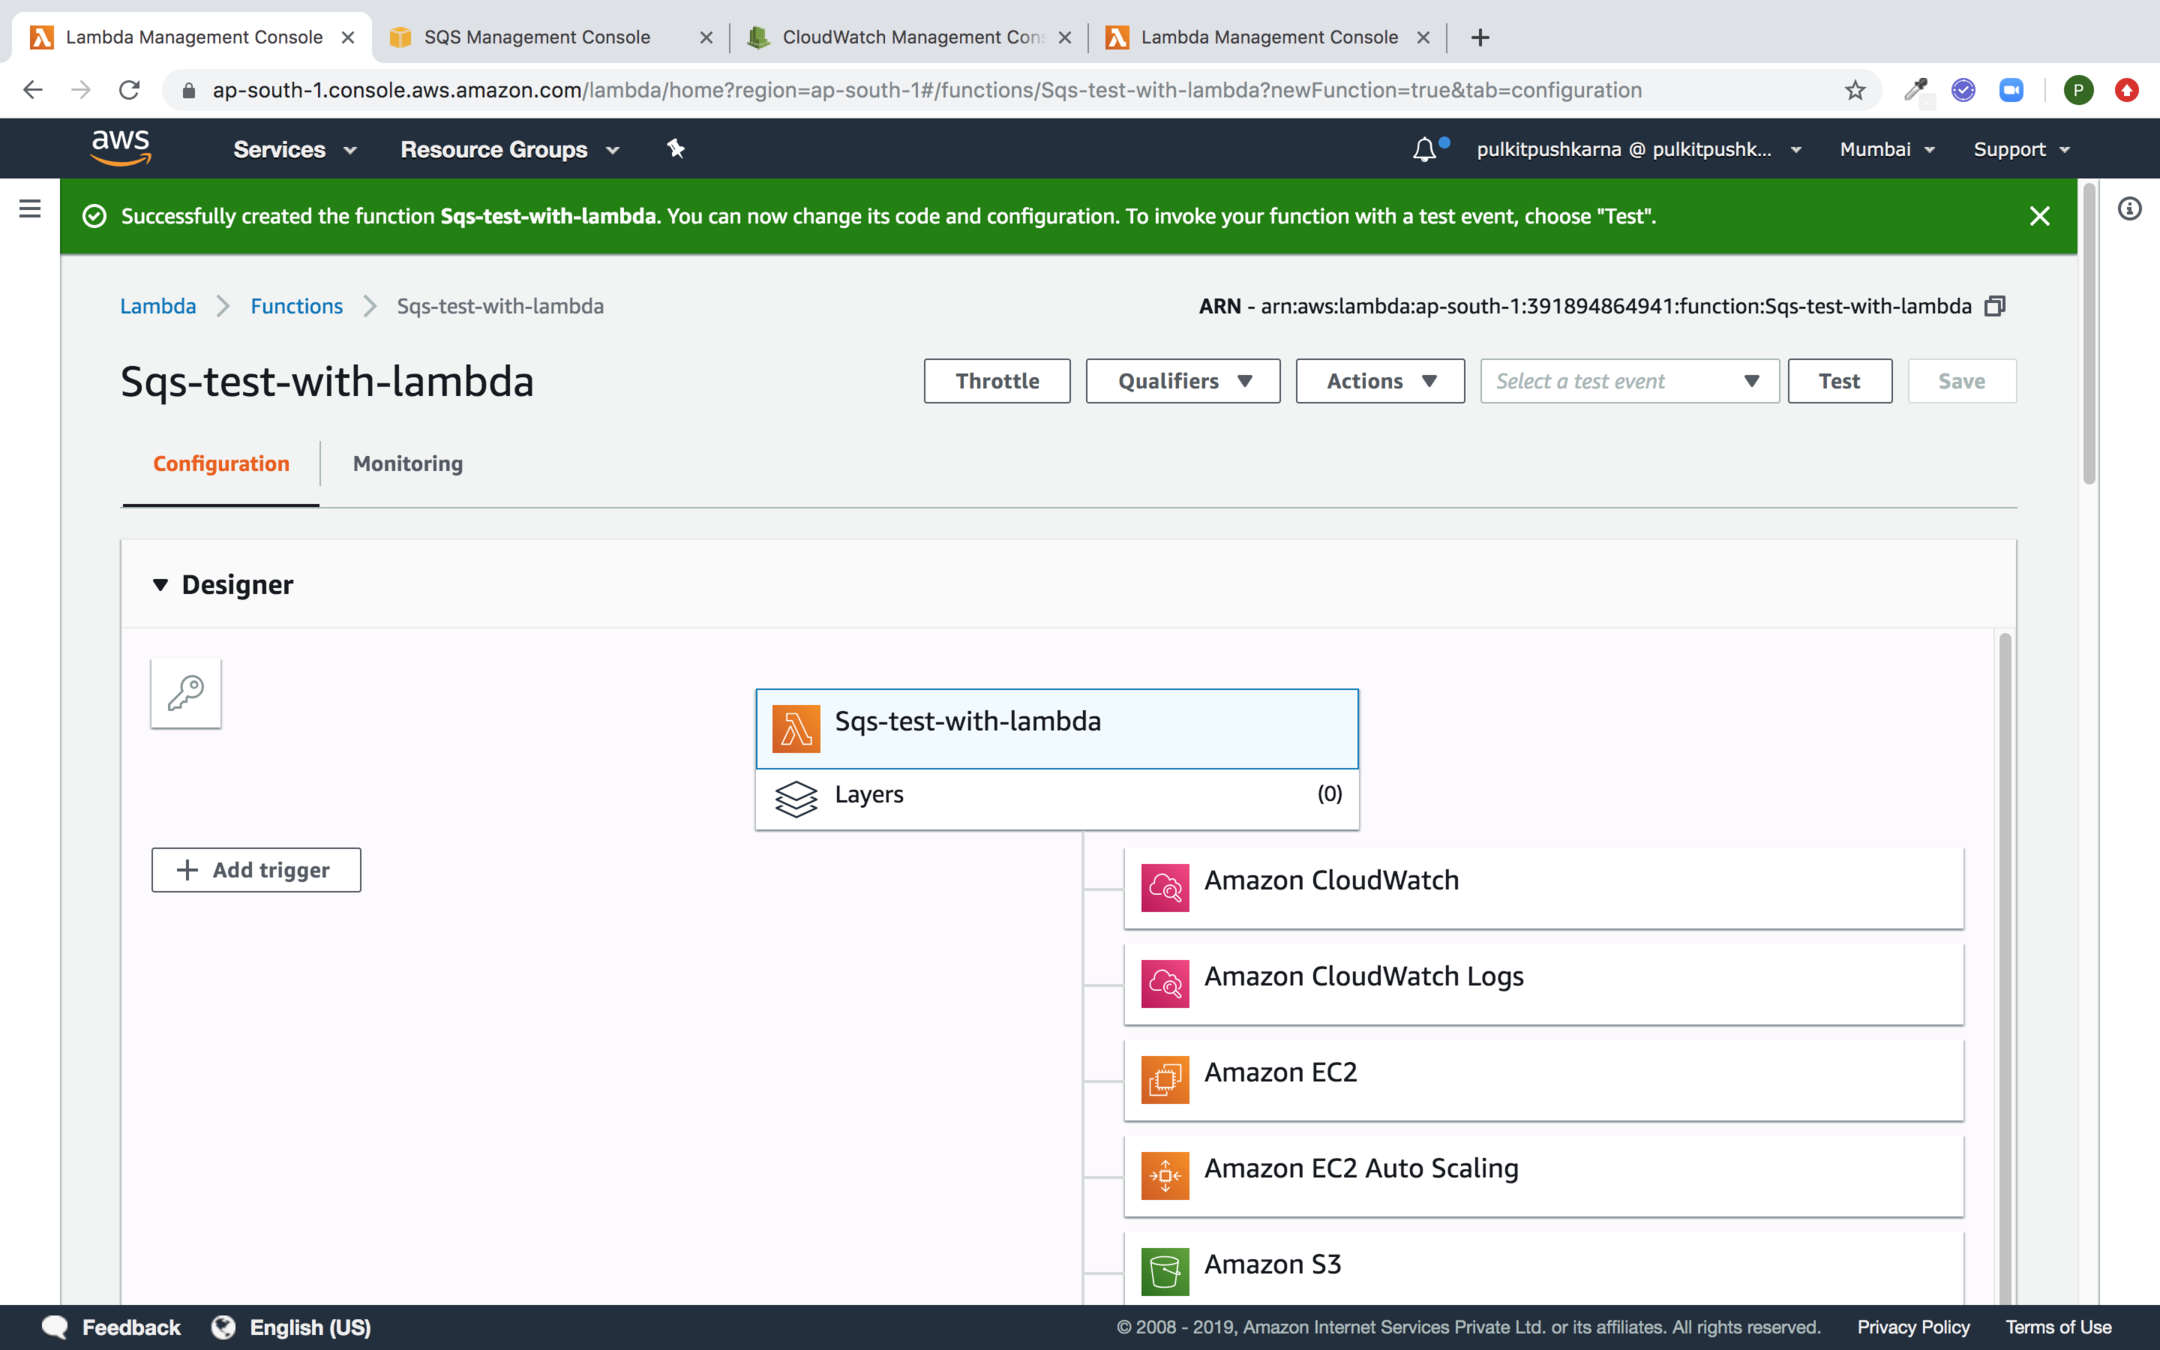
Create a Lambda Function and configure VPC and assign a role to it
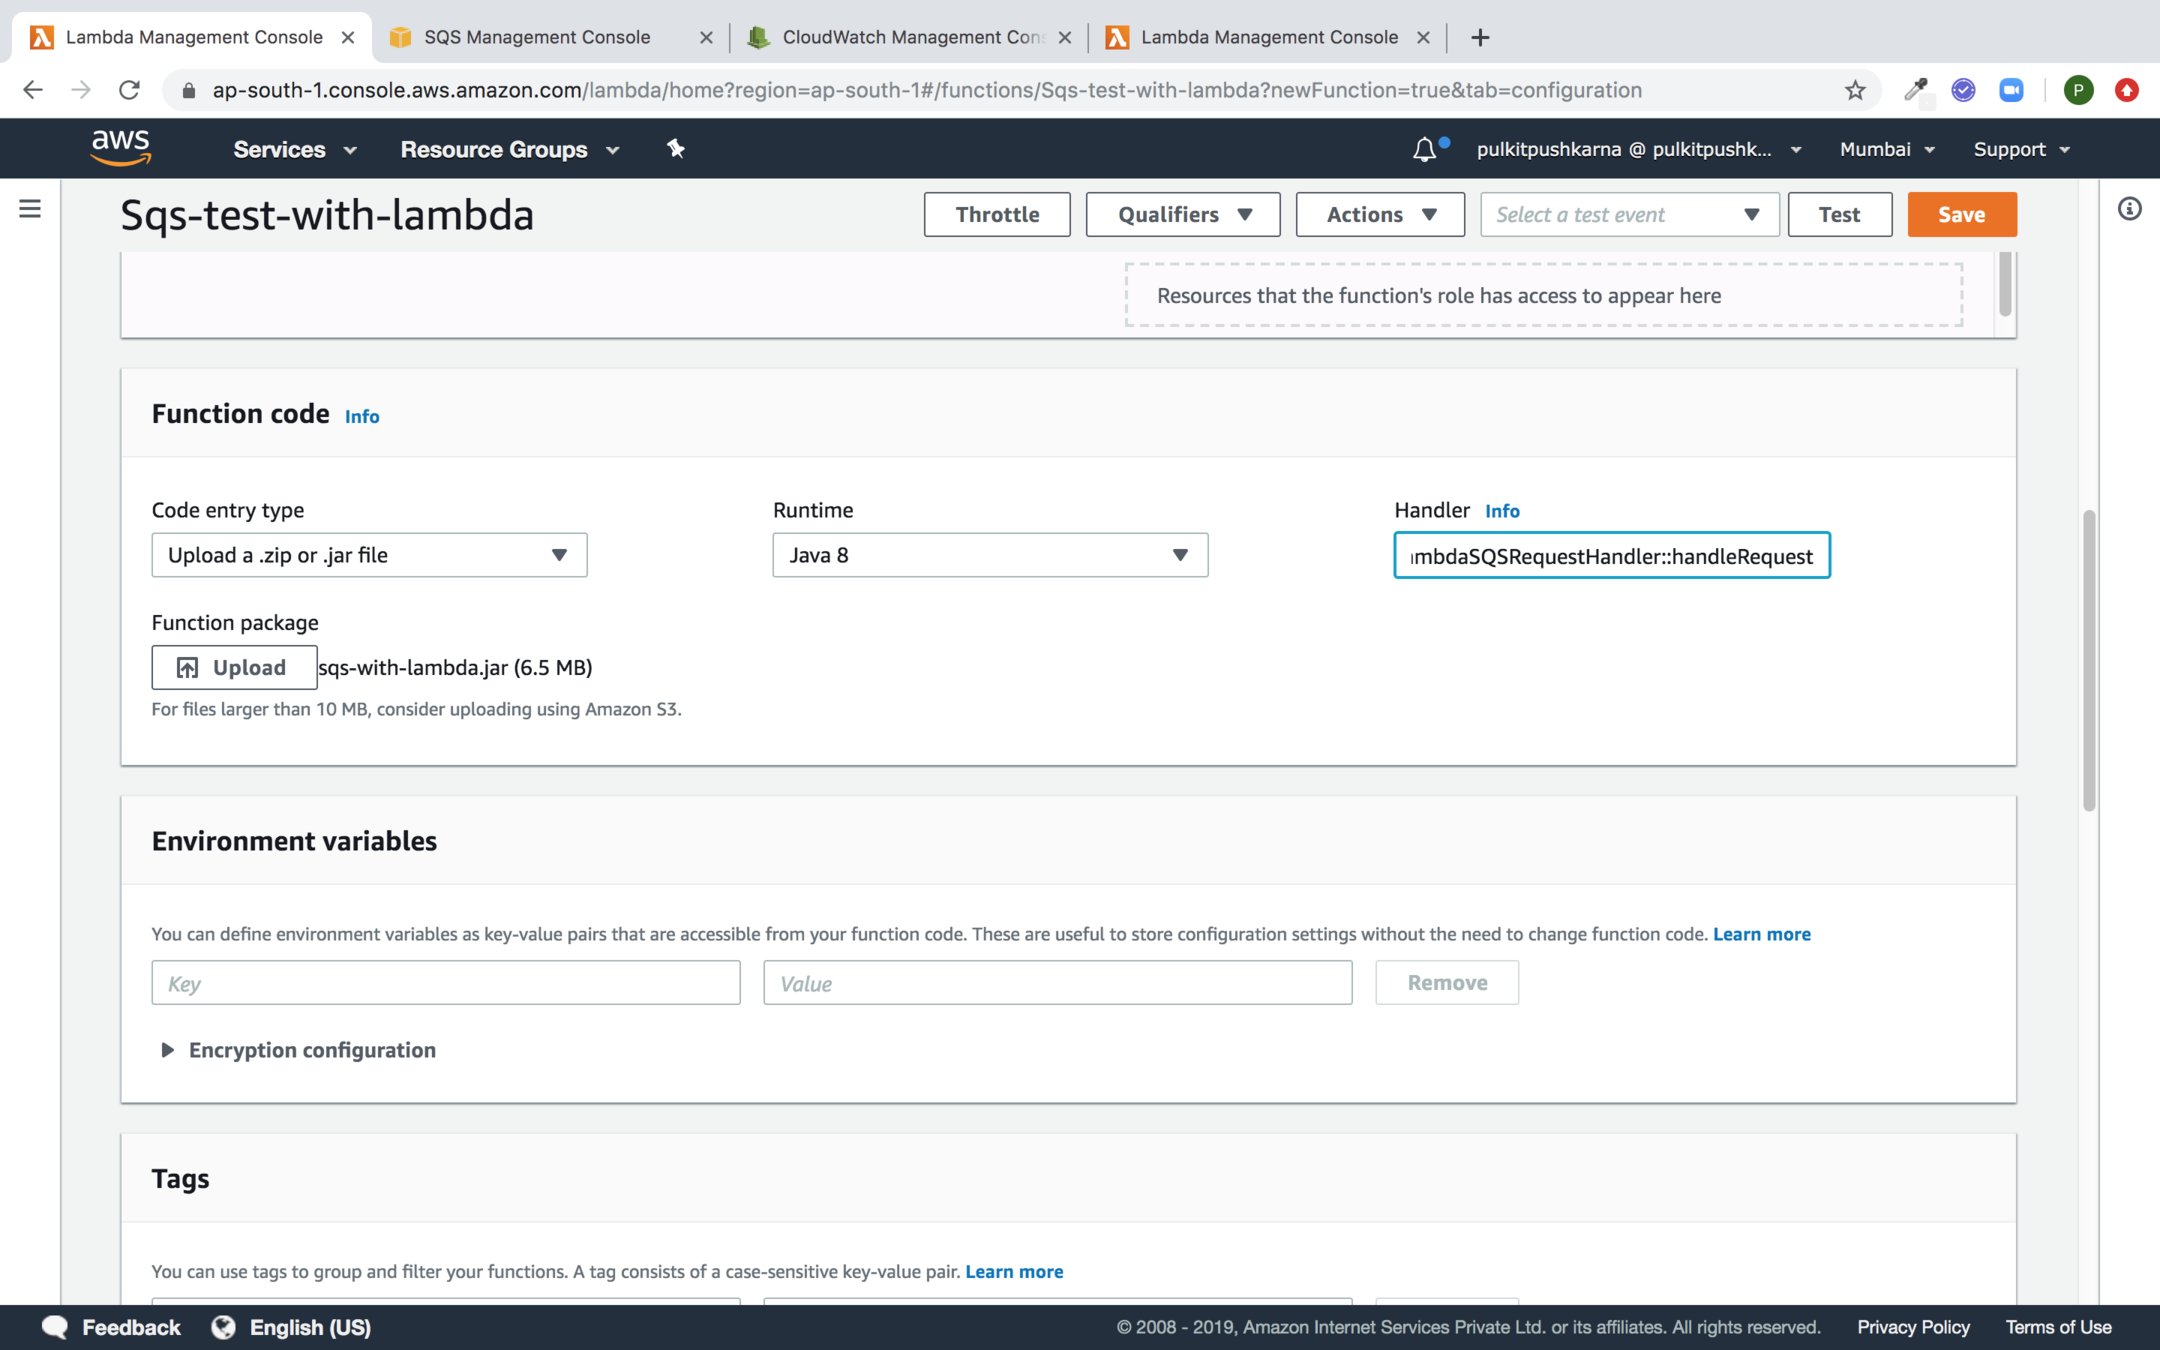
Upload the Lambda which contains SQS event handling
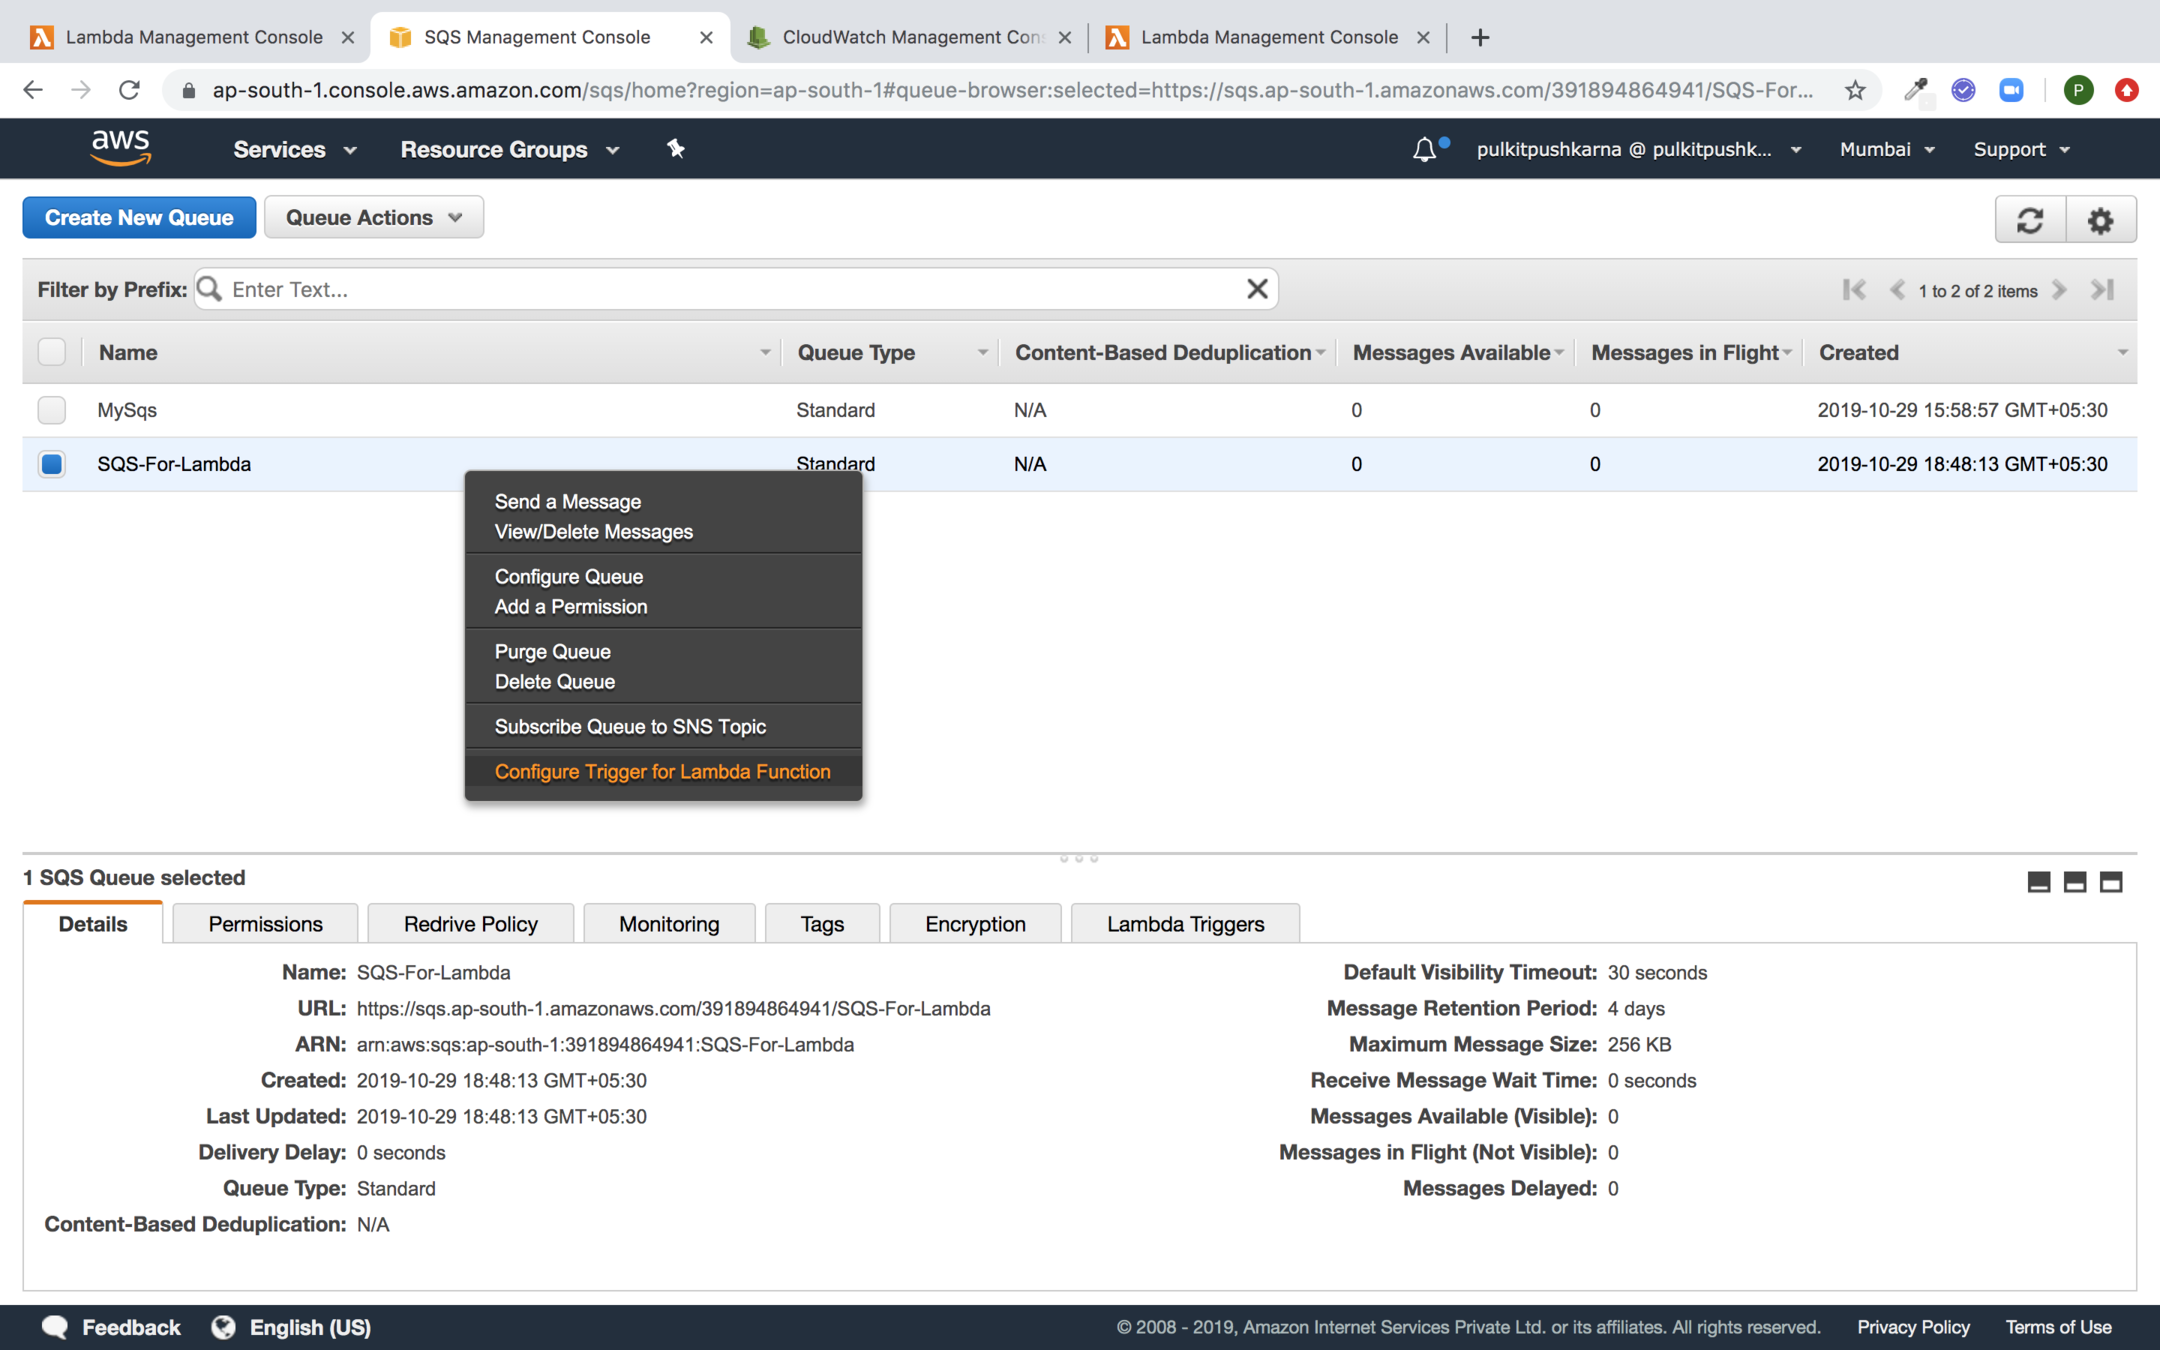
Go to the SQS right click and choose Configure Trigger for Lambda Function
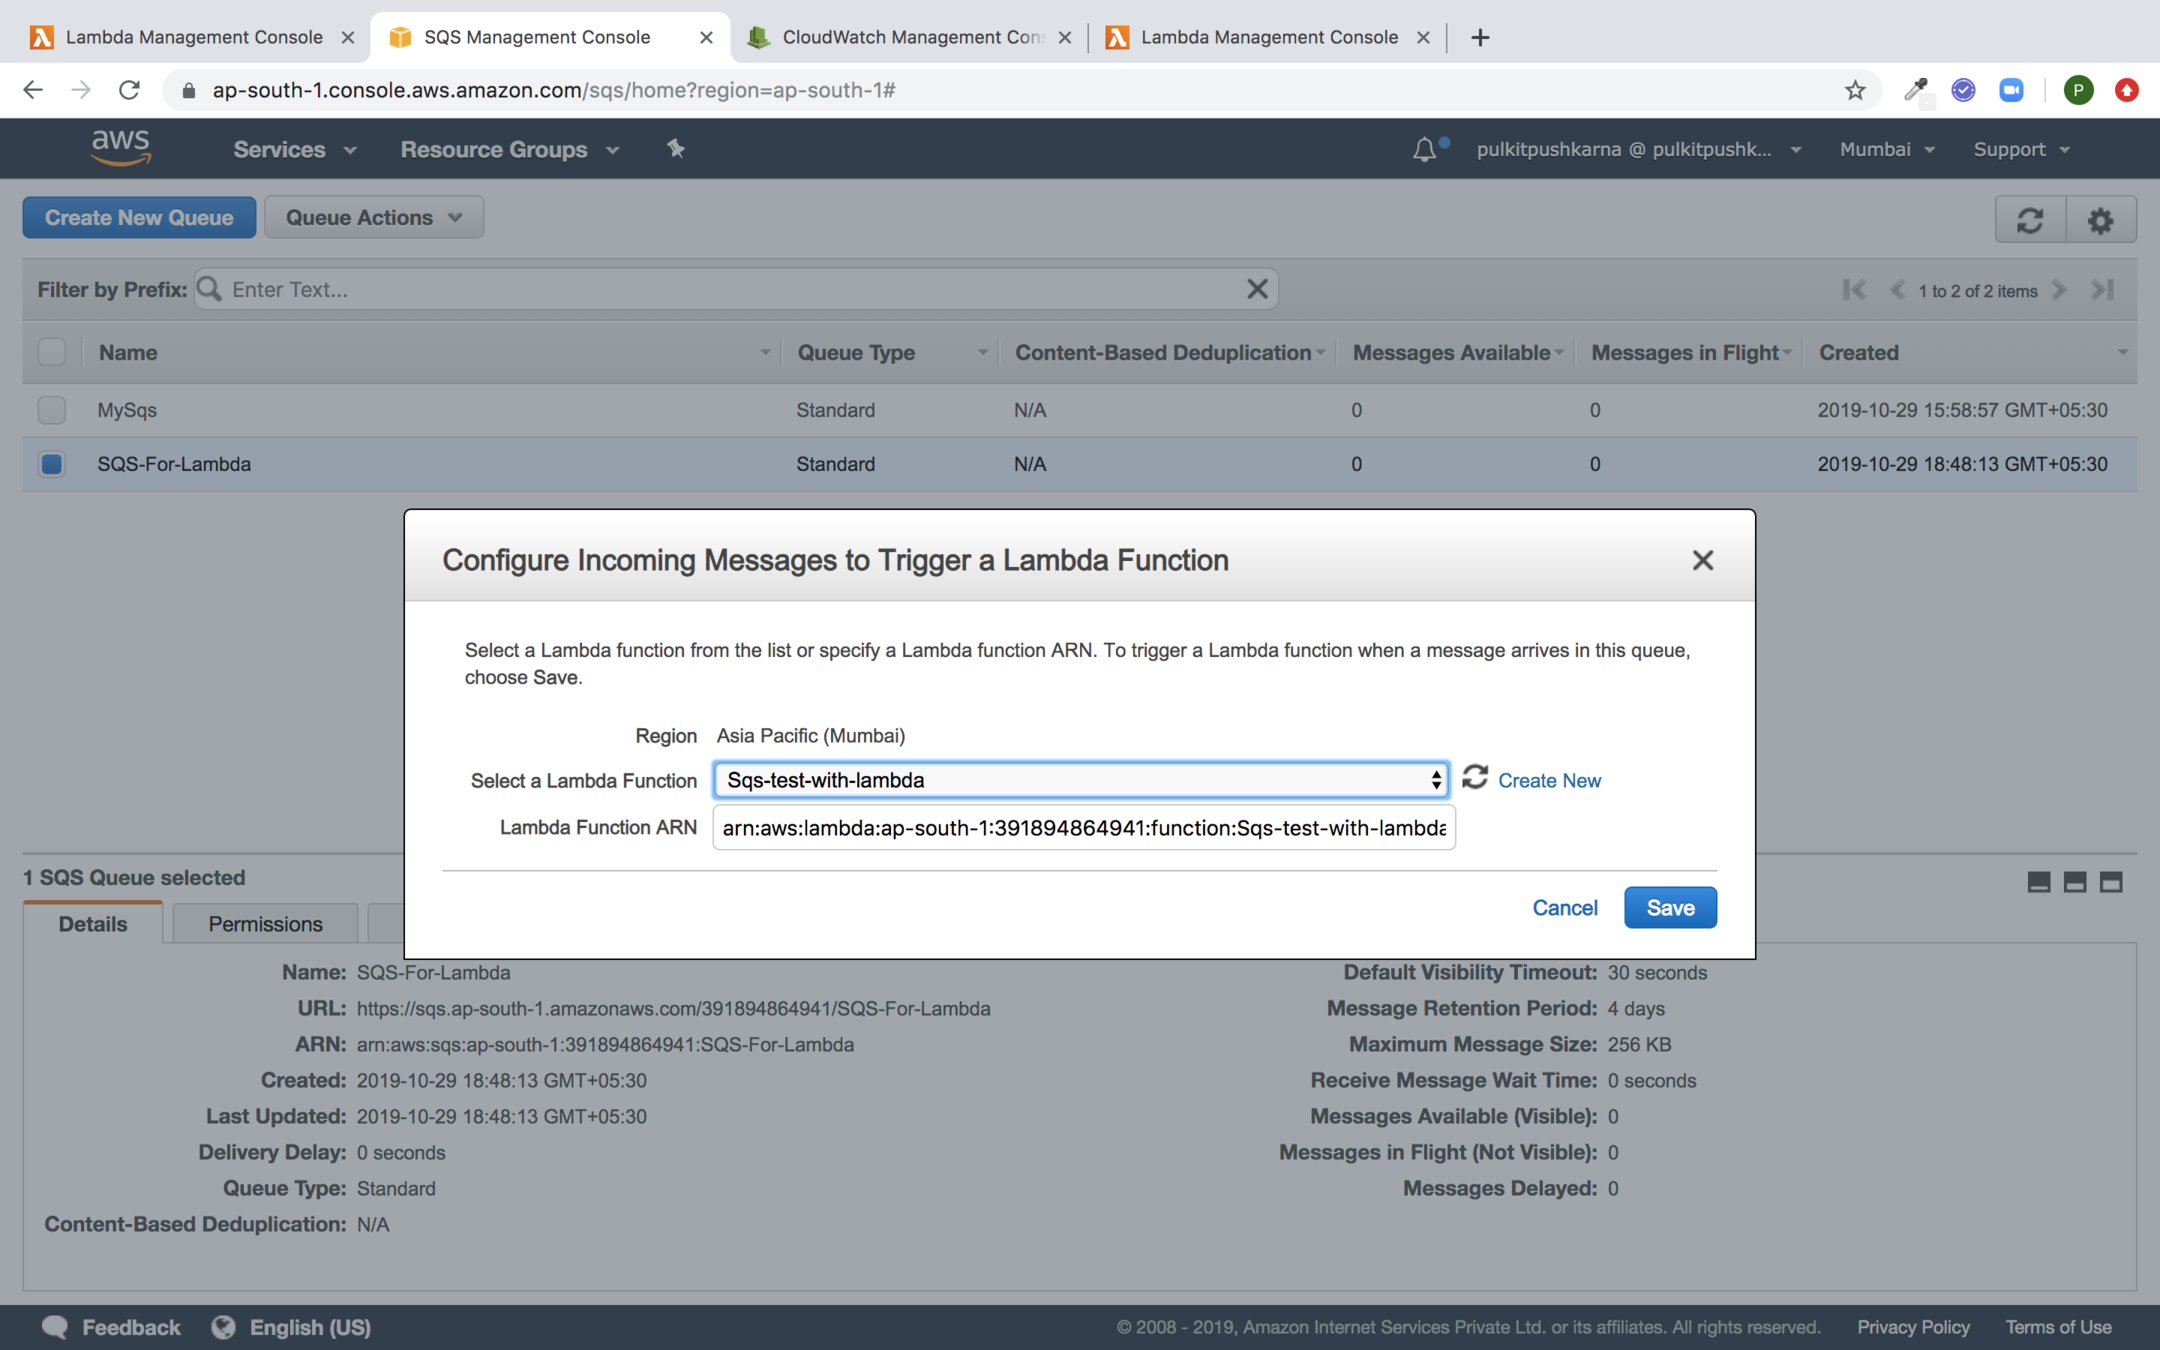
Select the Lambda which needs to be triggered from SQS
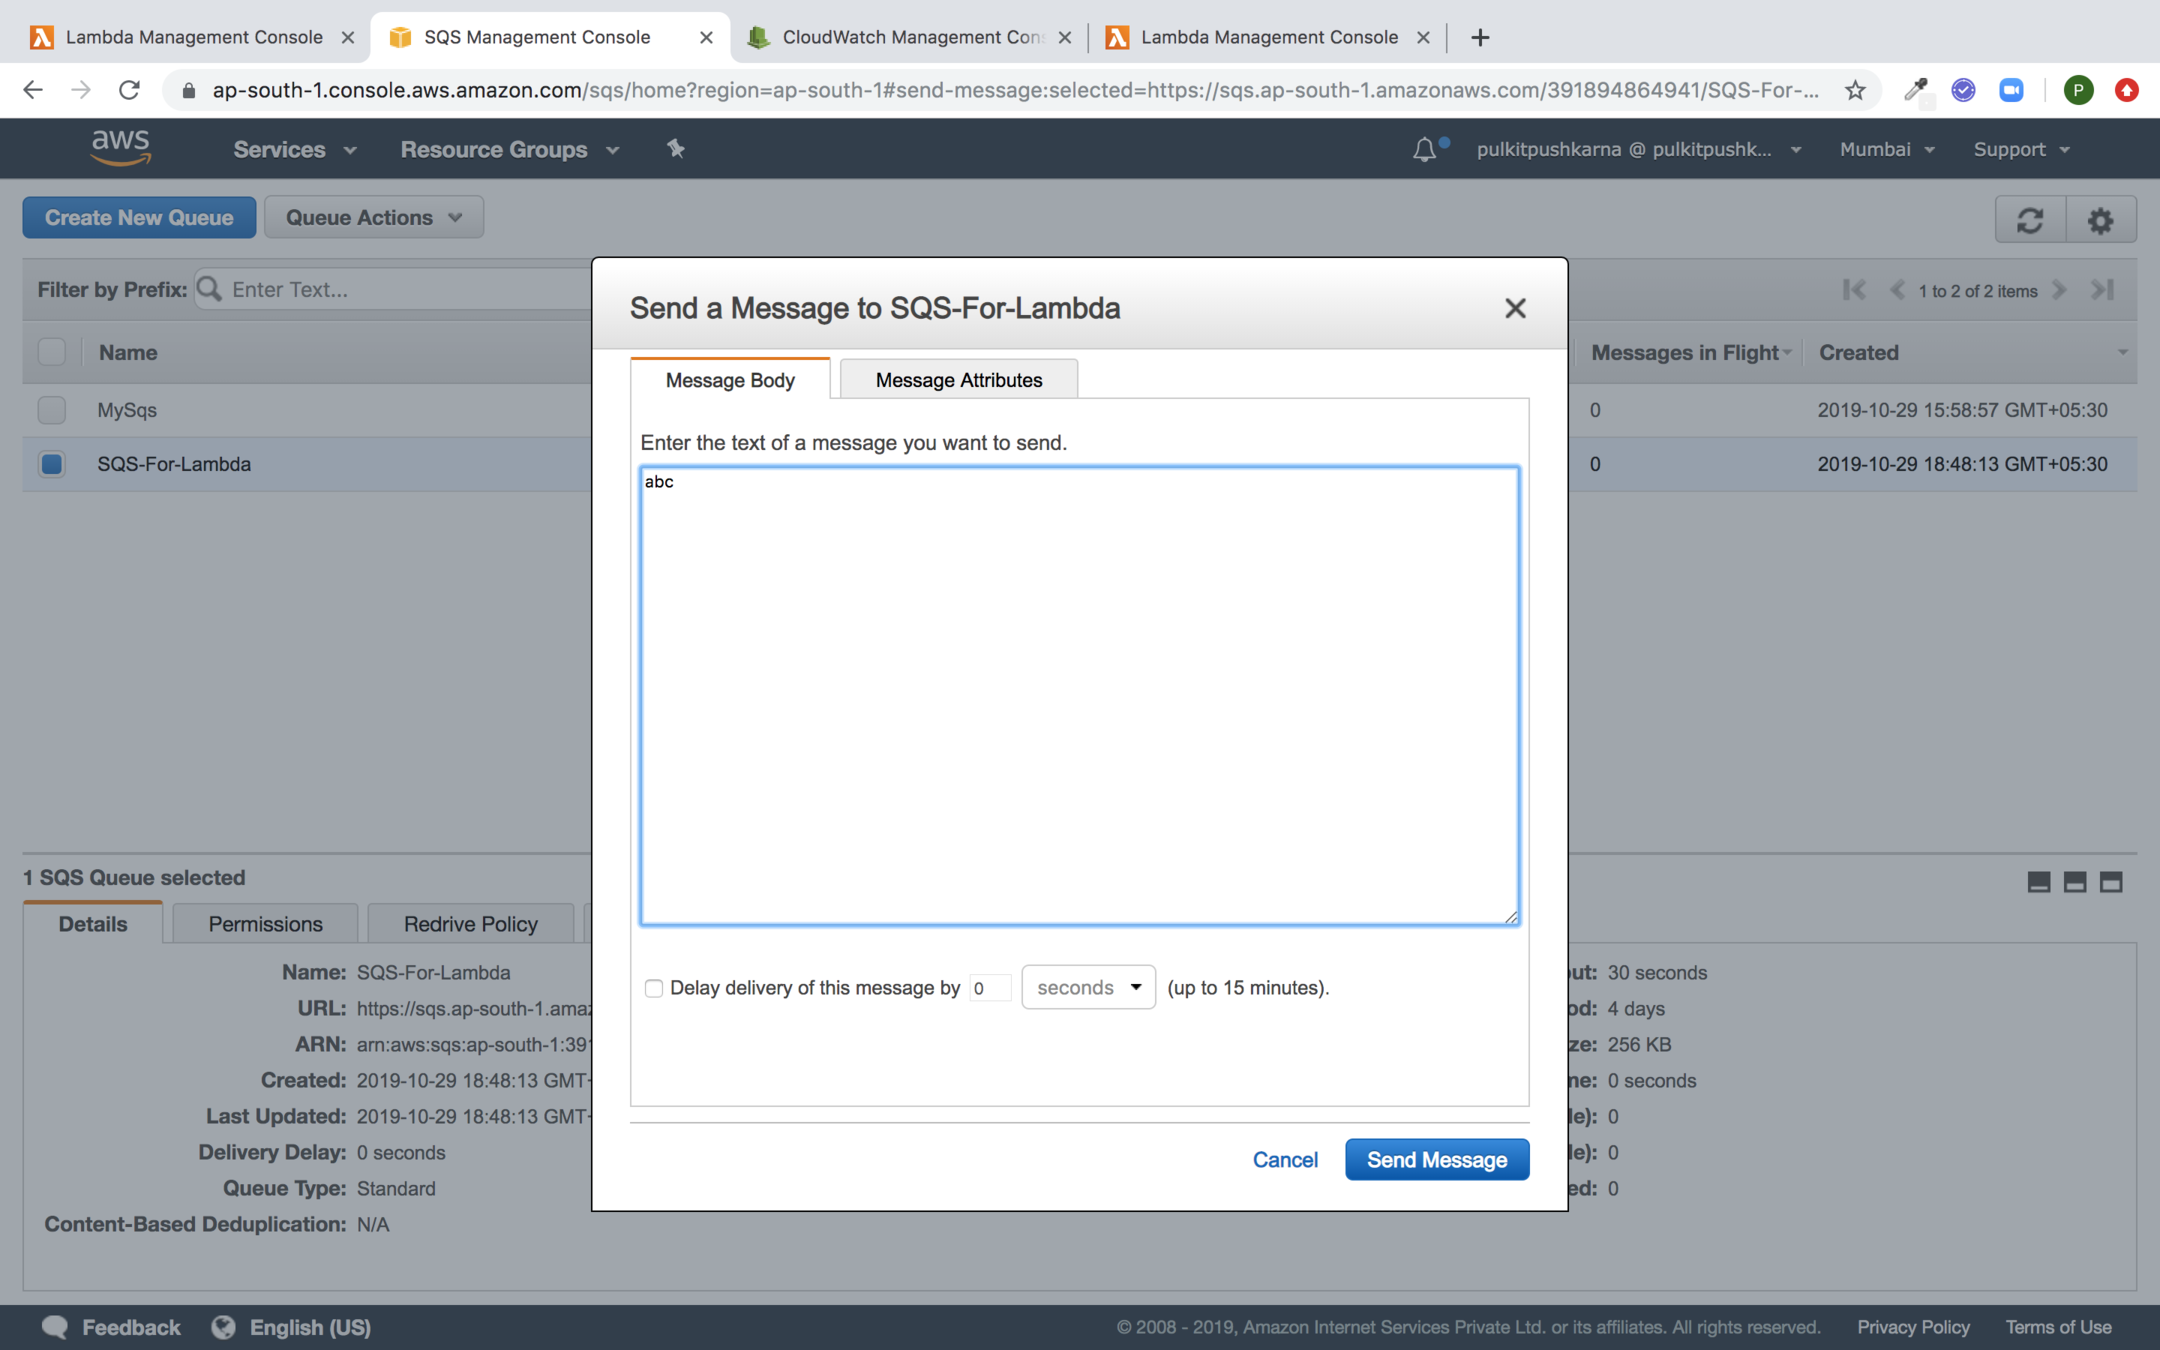
Send a message to SQS
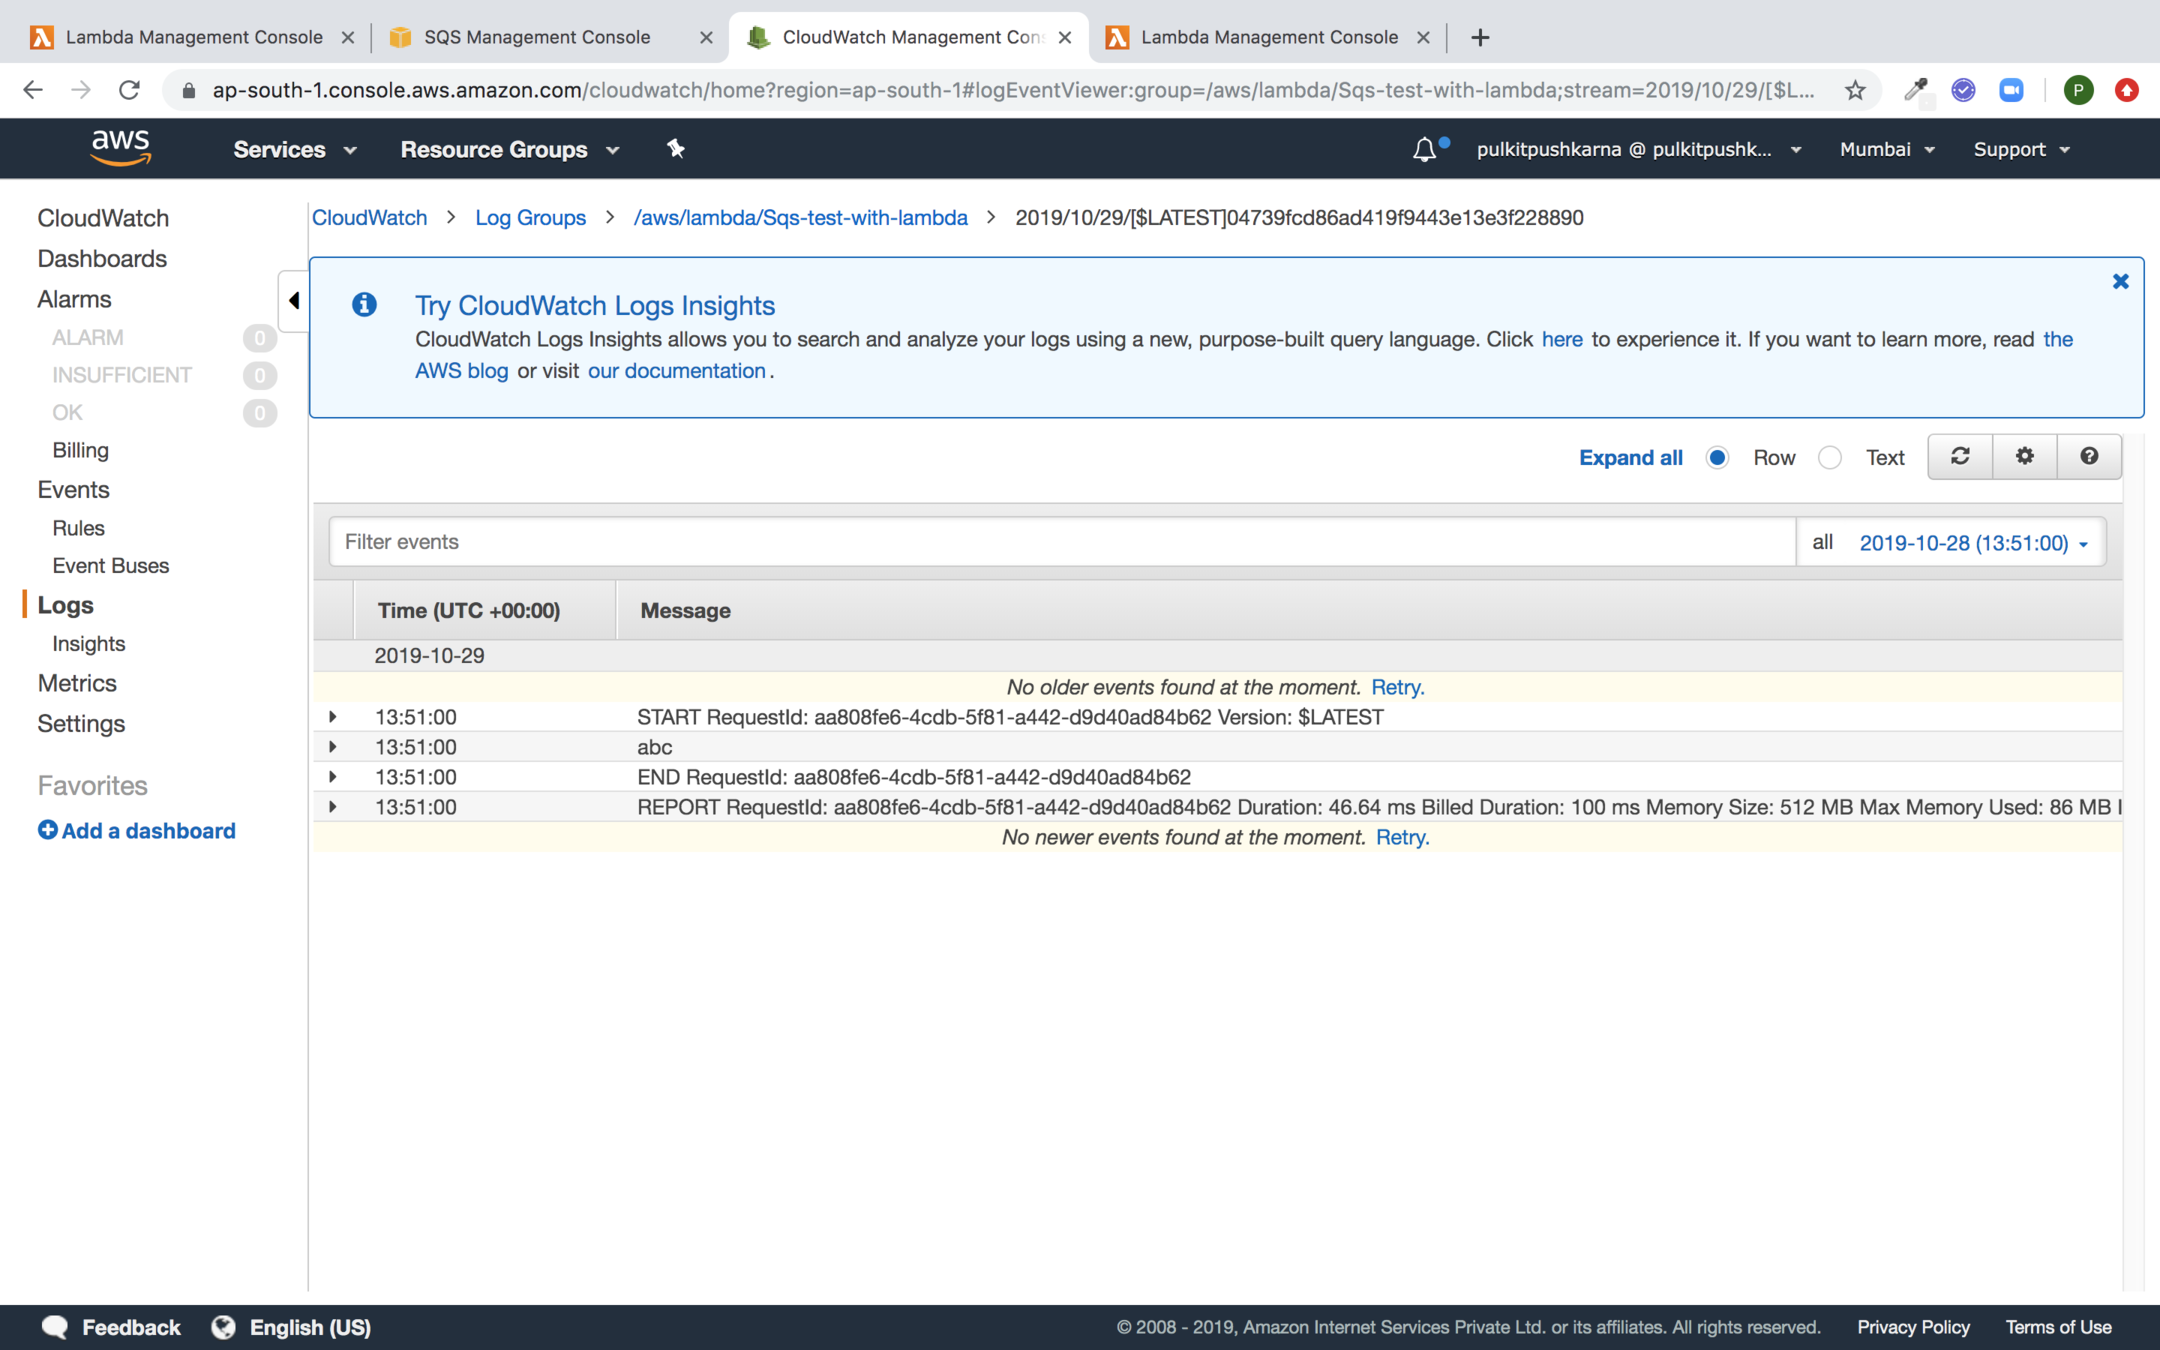
You can check the logs of lambda triggered from cloudwatch
package com.lambda.demo;

import com.amazonaws.services.lambda.runtime.Context;
import com.amazonaws.services.lambda.runtime.LambdaLogger;
import com.amazonaws.services.lambda.runtime.RequestHandler;
import com.amazonaws.services.lambda.runtime.events.SNSEvent;


public class LambdaSNSRequestHandler implements RequestHandler<SNSEvent, String> {

    @Override
    public String handleRequest(SNSEvent input, Context context) {
        LambdaLogger lambdaLogger = context.getLogger();
        lambdaLogger.log(input.getRecords().get(0).getSNS().getMessage());
        return input.toString();
    }
}
Java Code for SNS Event
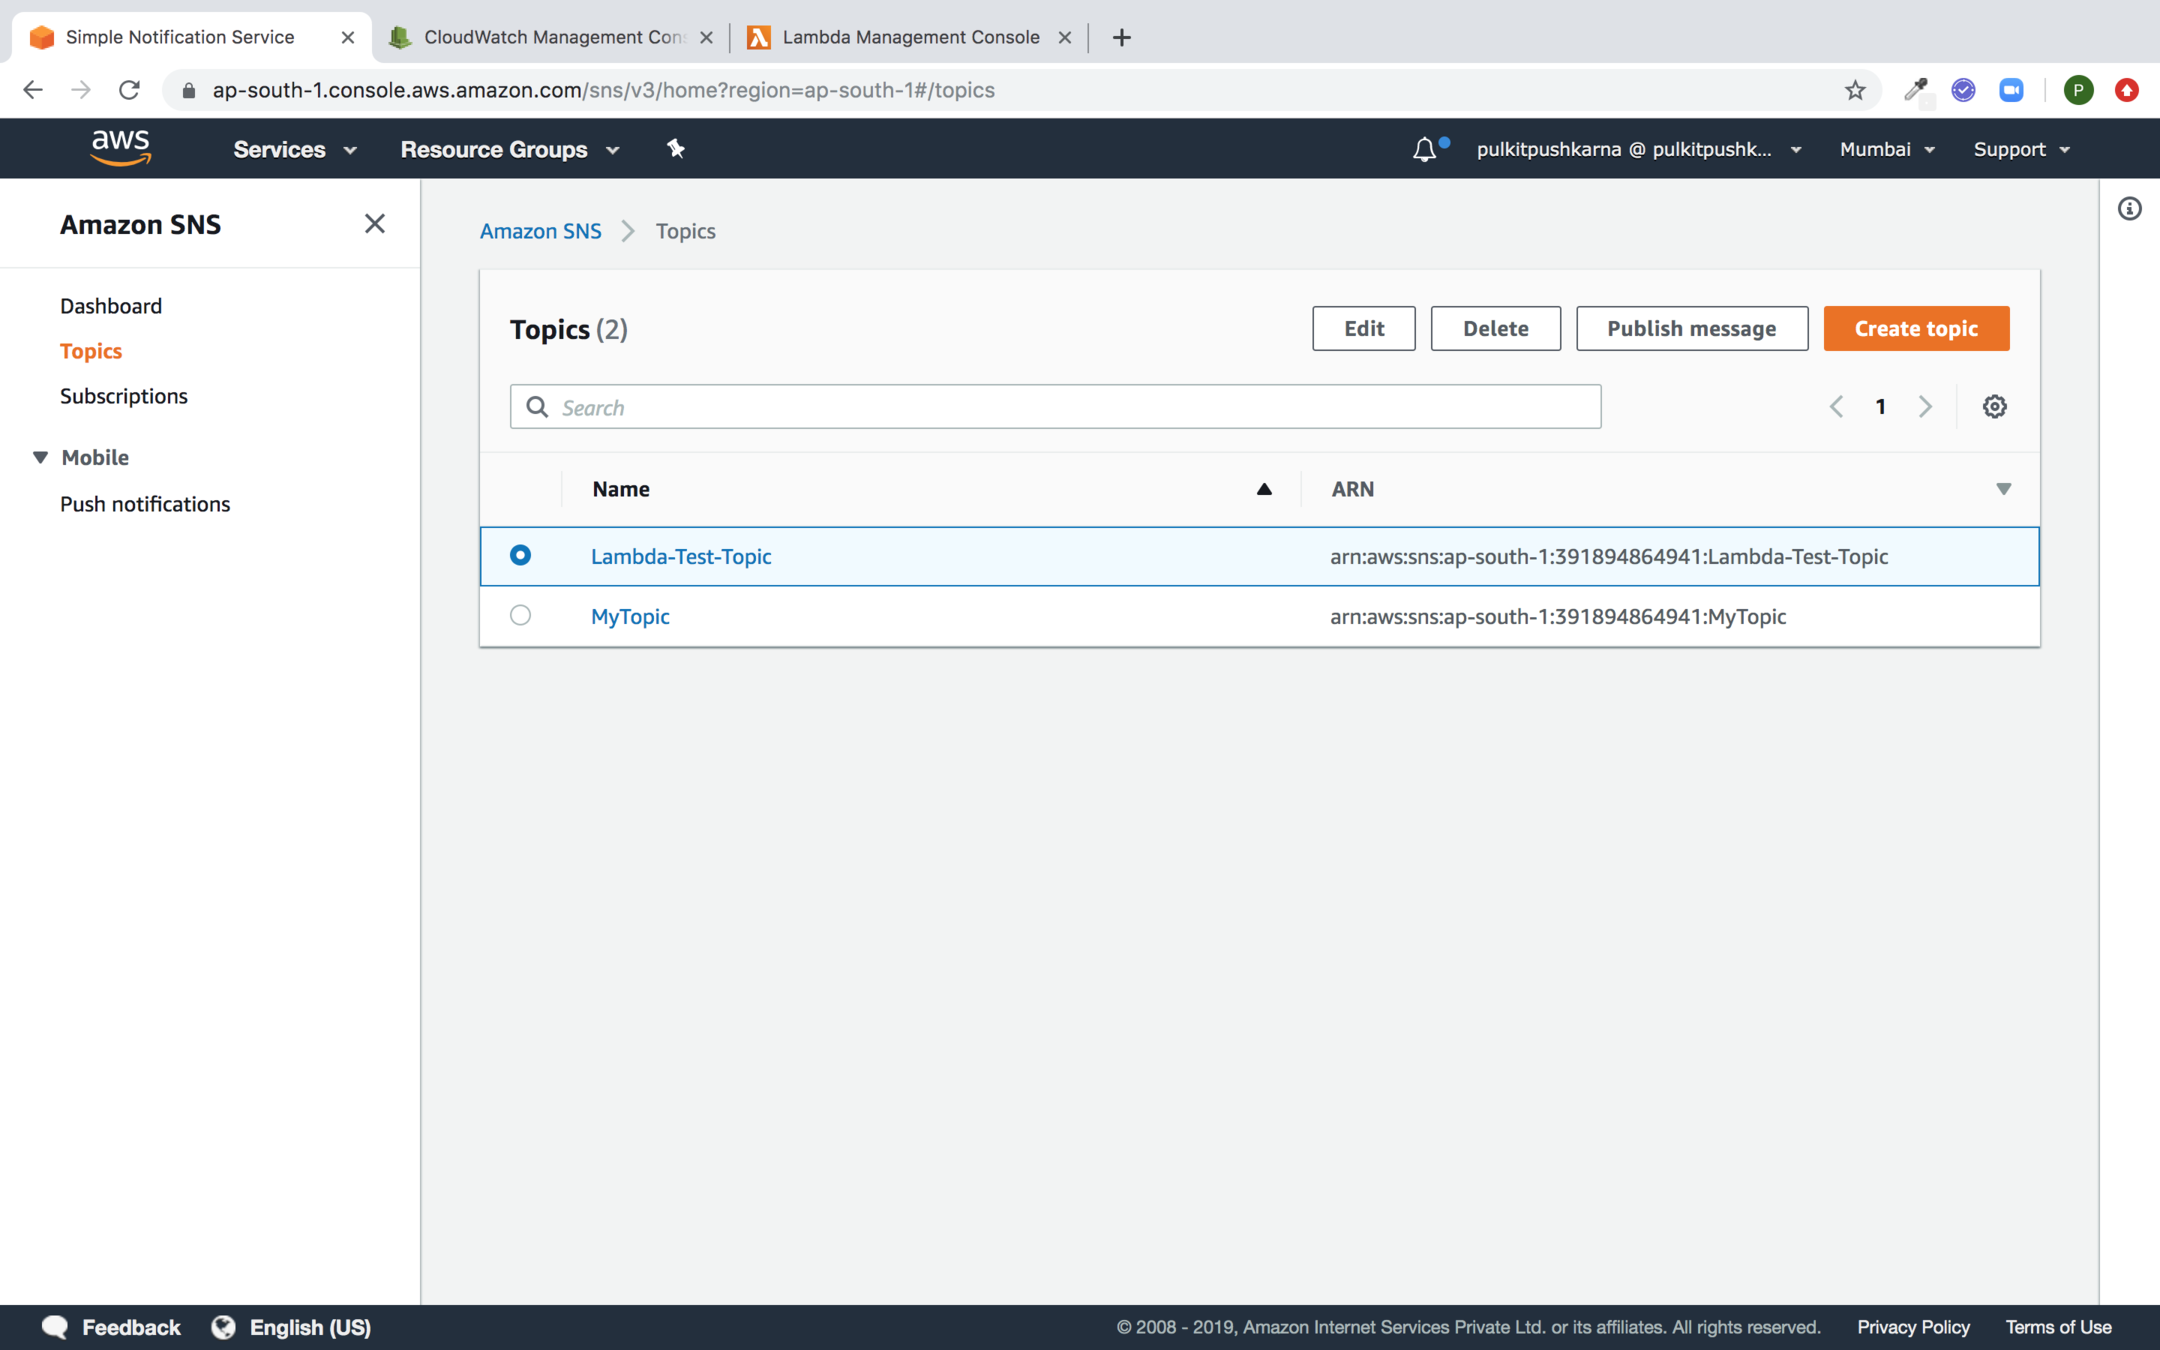
Create SNS topic to Trigger Lambda
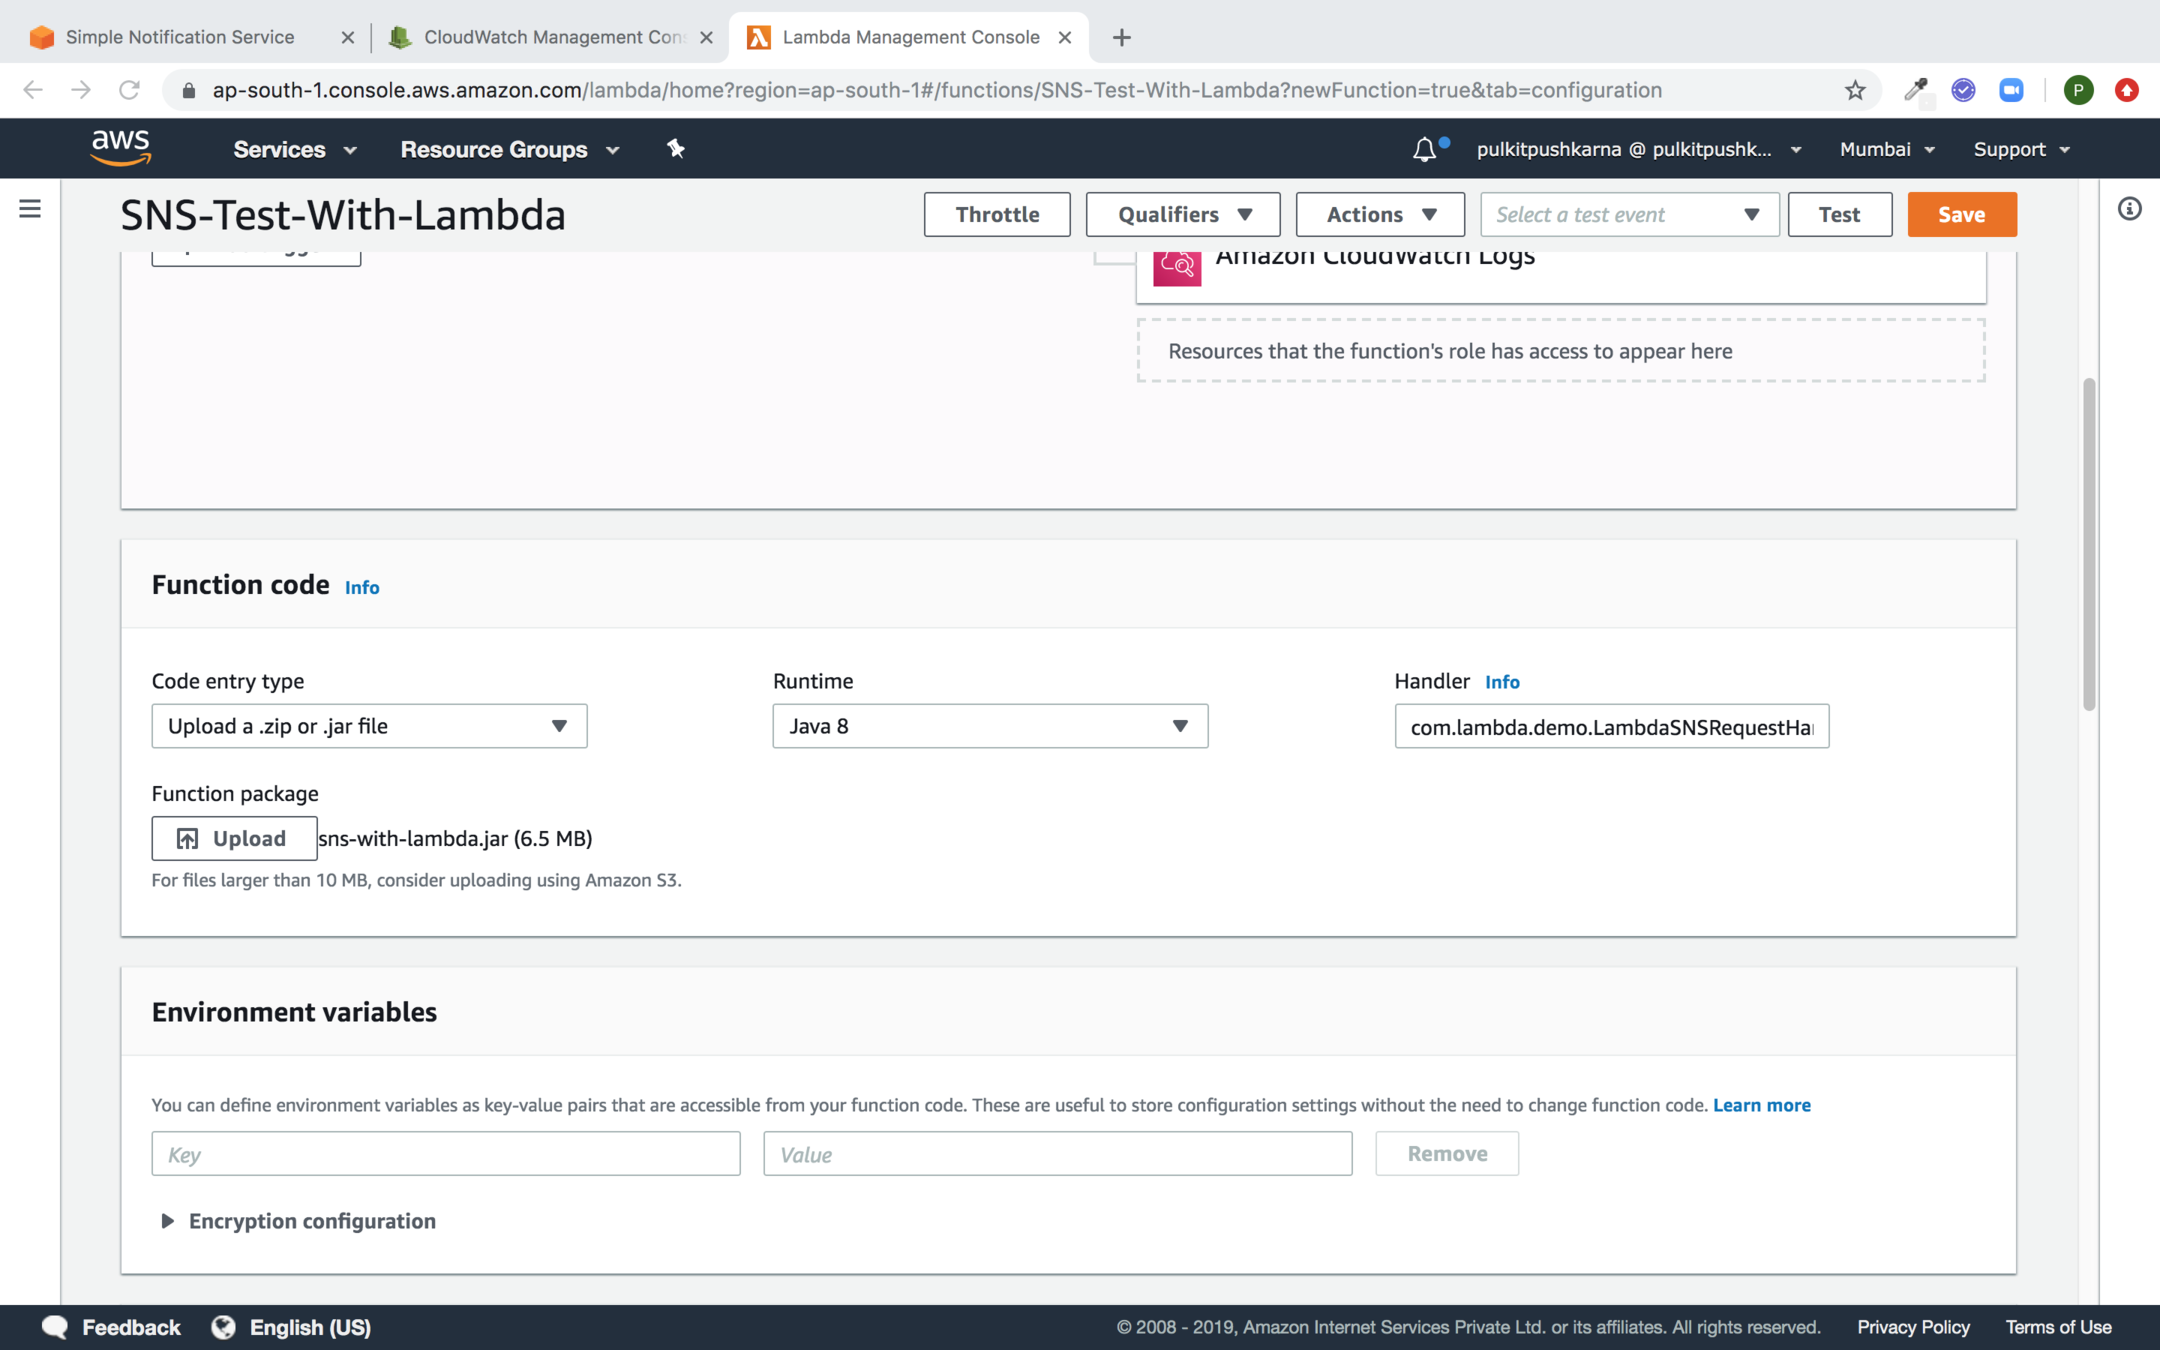
Create a lambda Function which need to be triggered by SNS, Specify VPC, upload the jar and enter the Handler
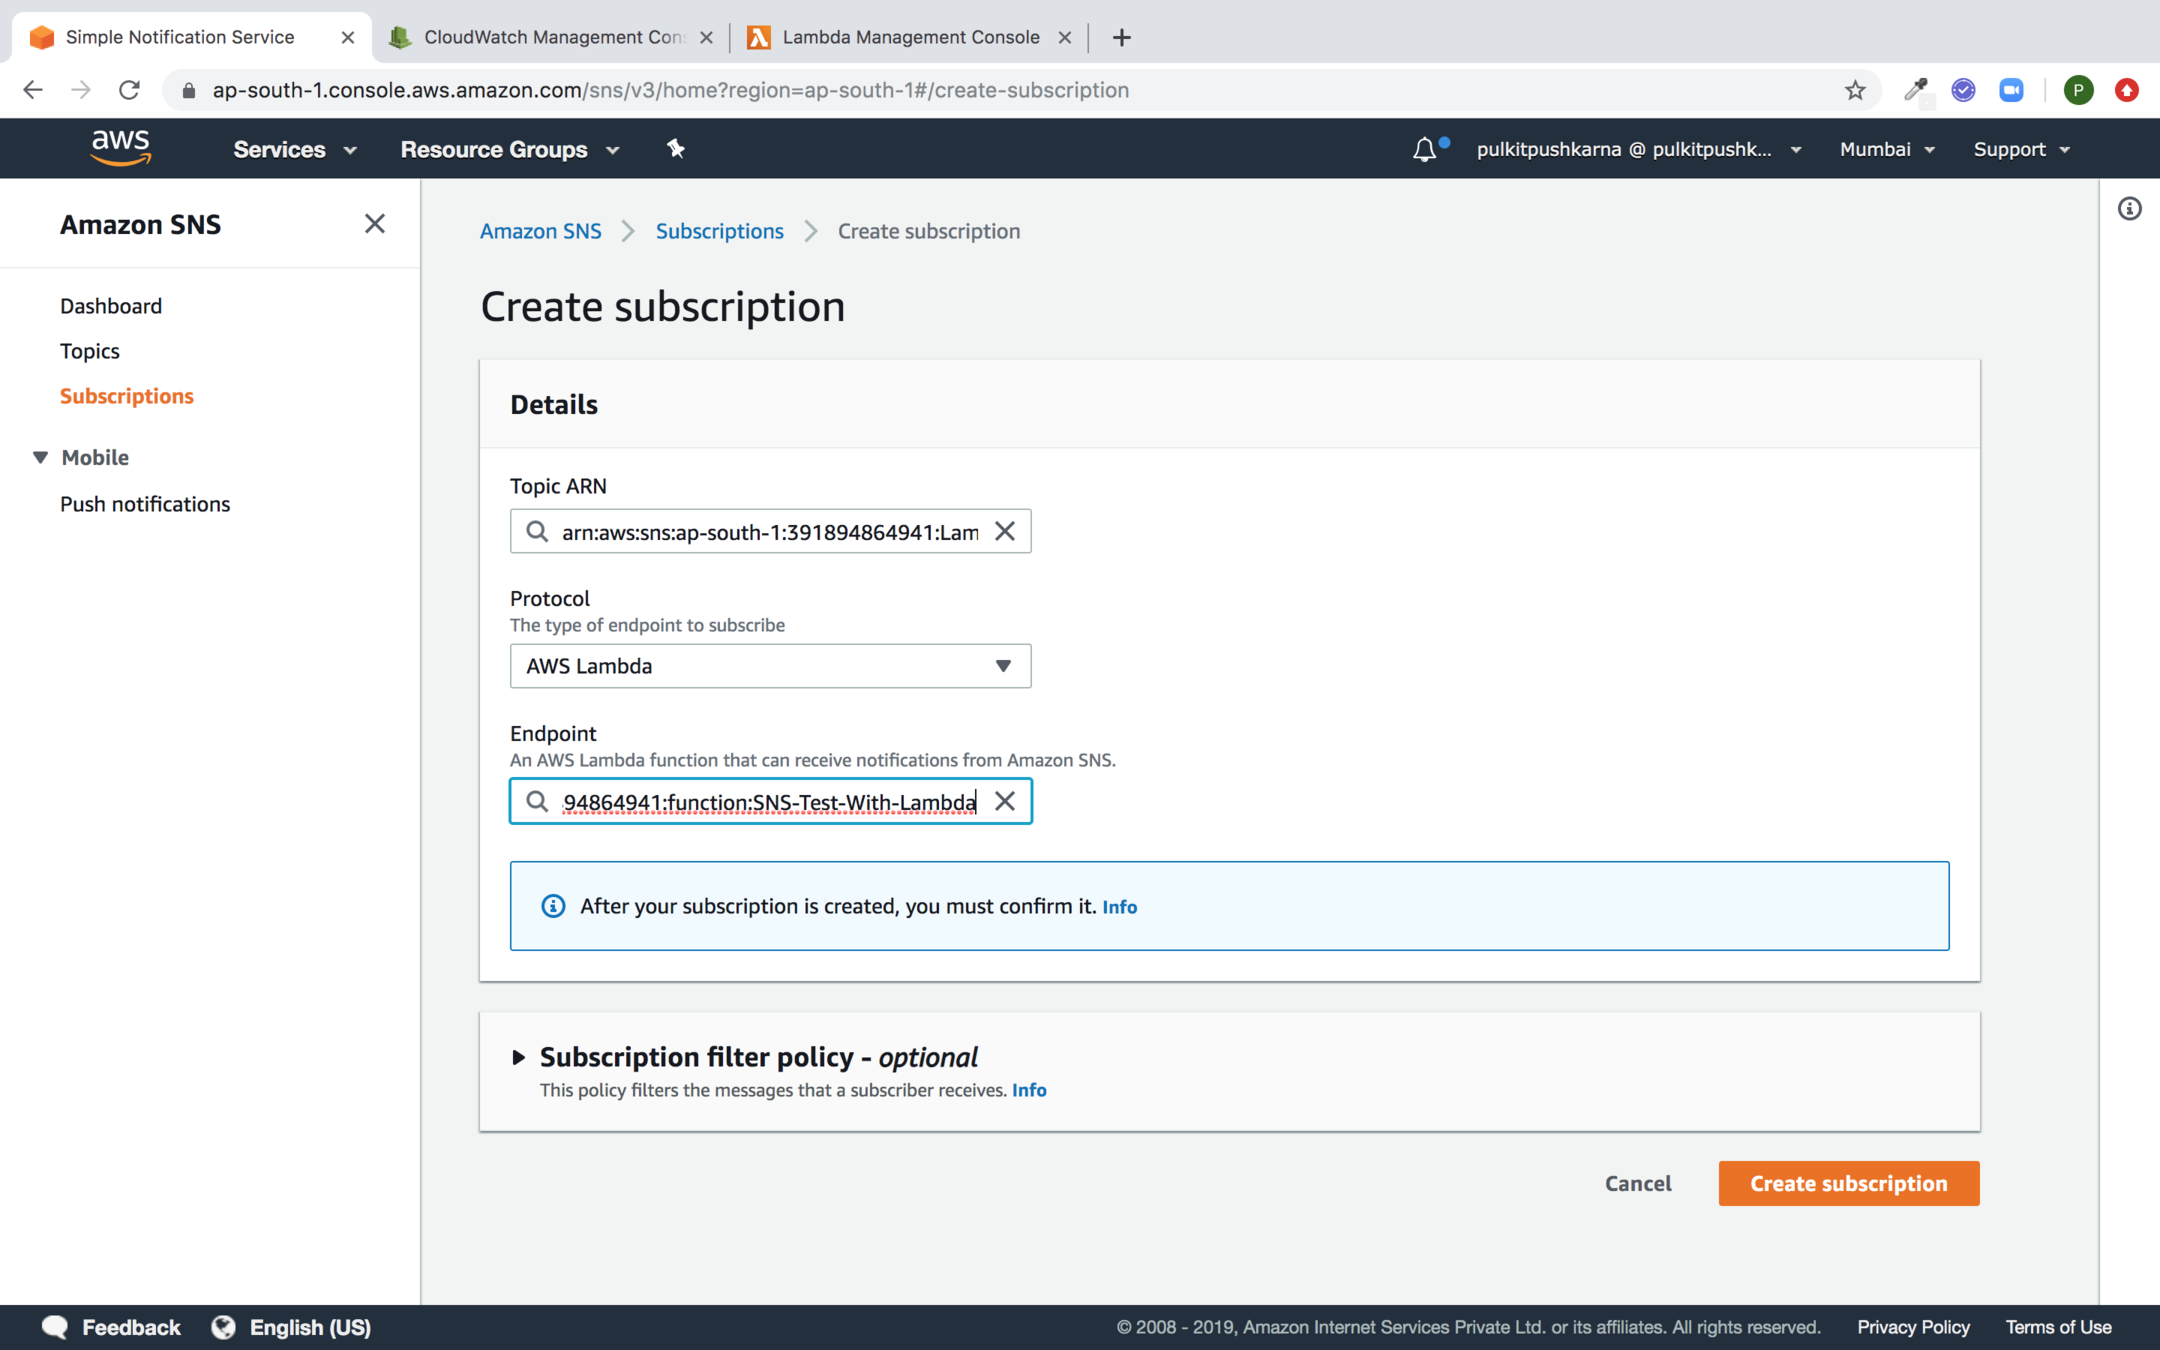
Create SNS Subscription for Lambda
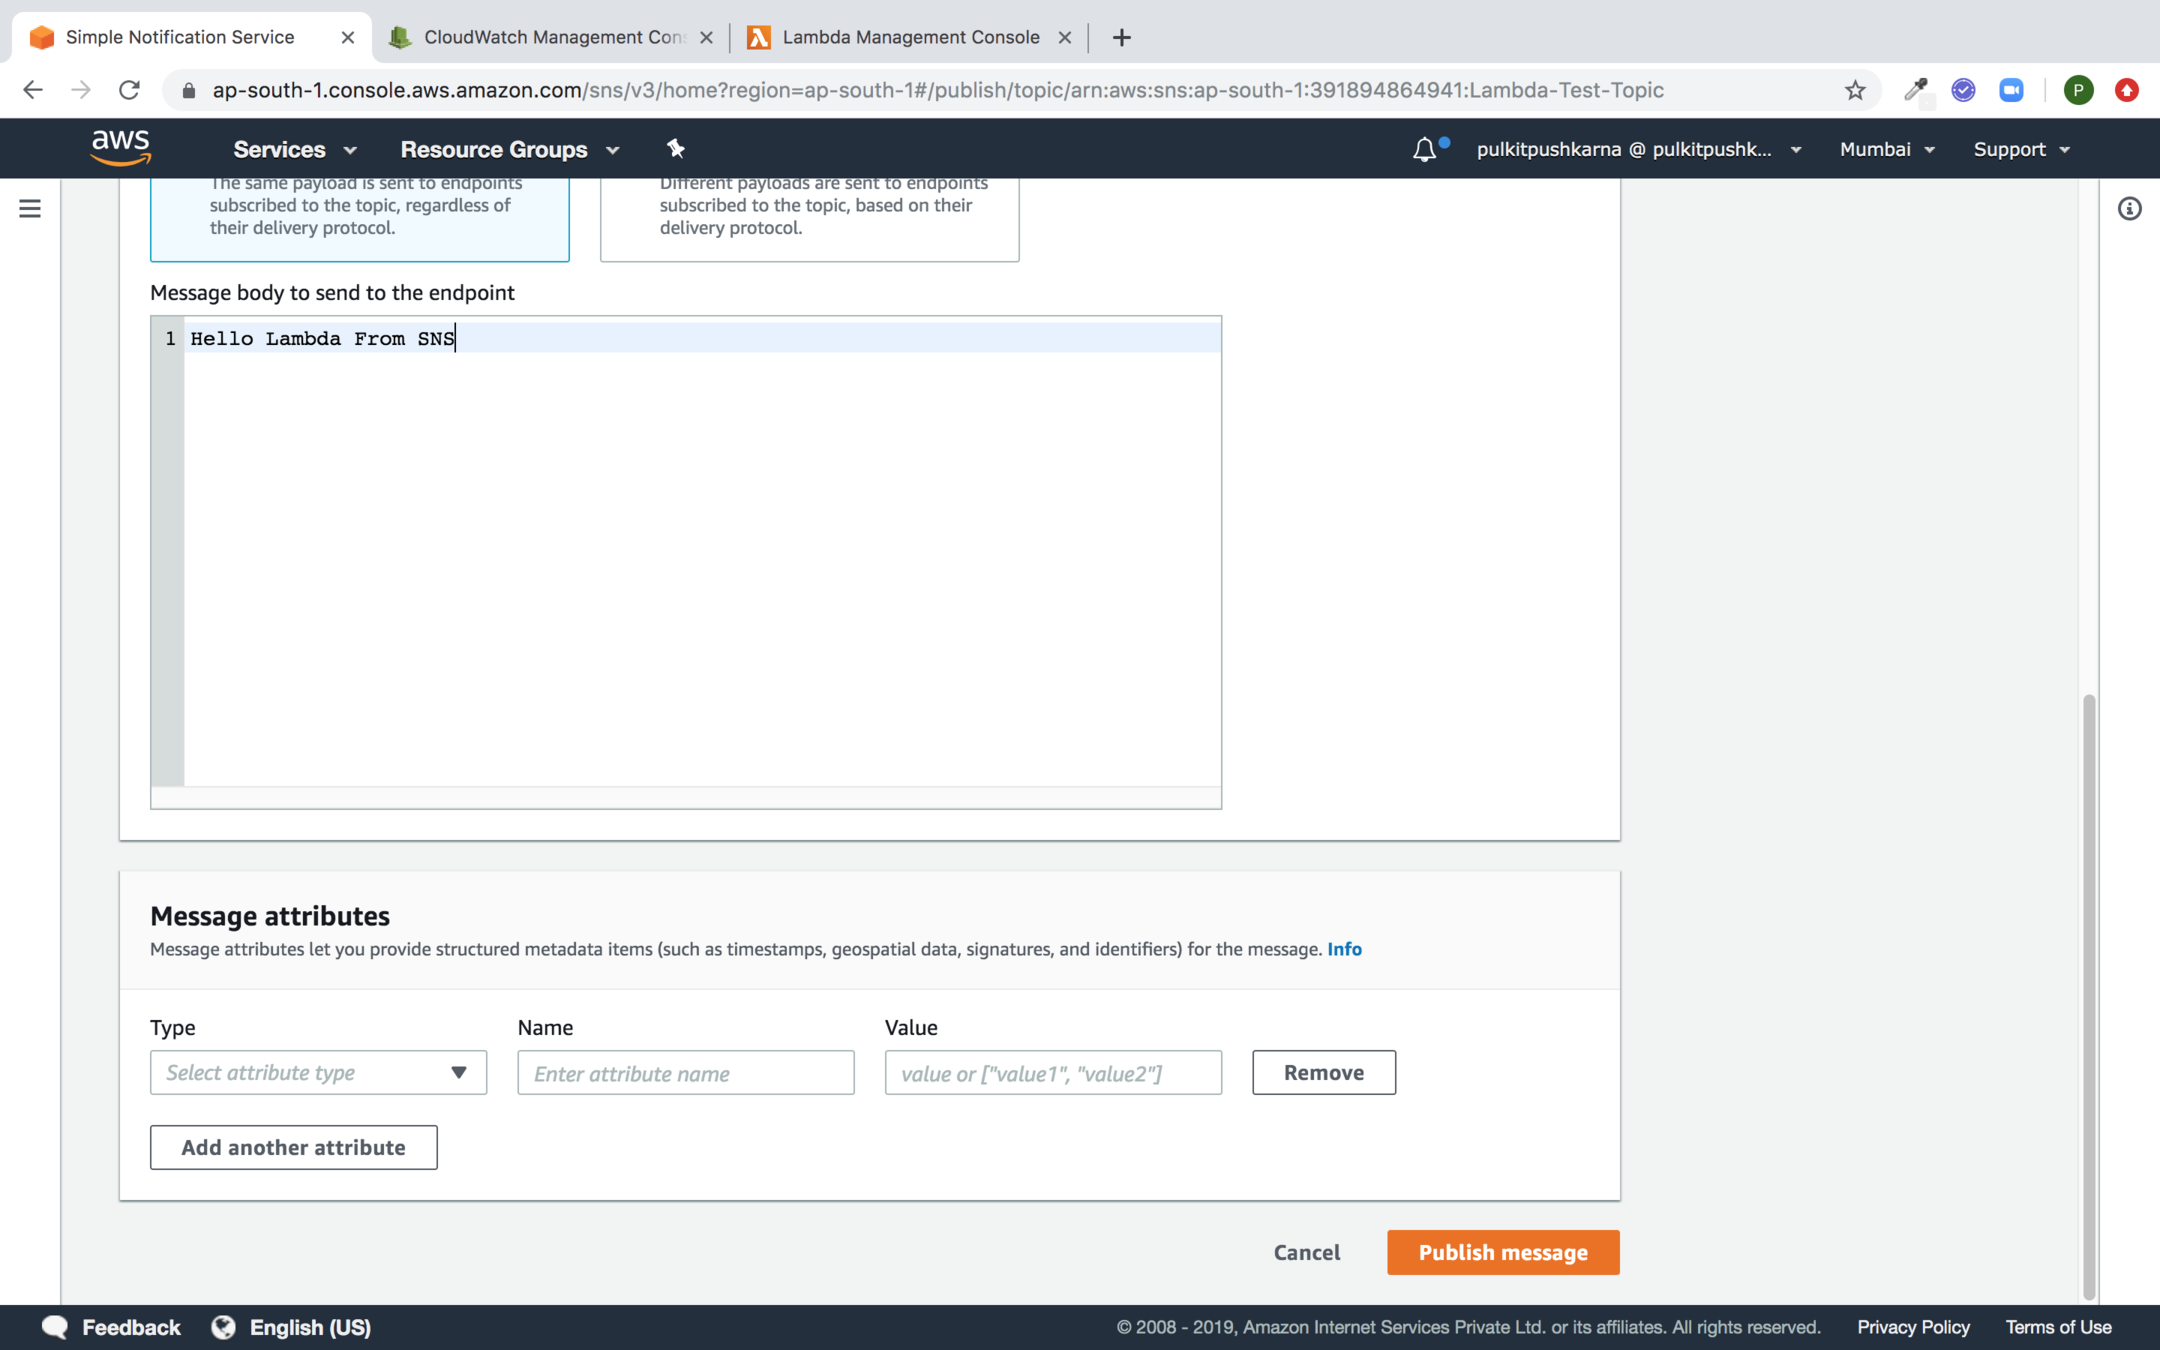
Publish the Message from SNS

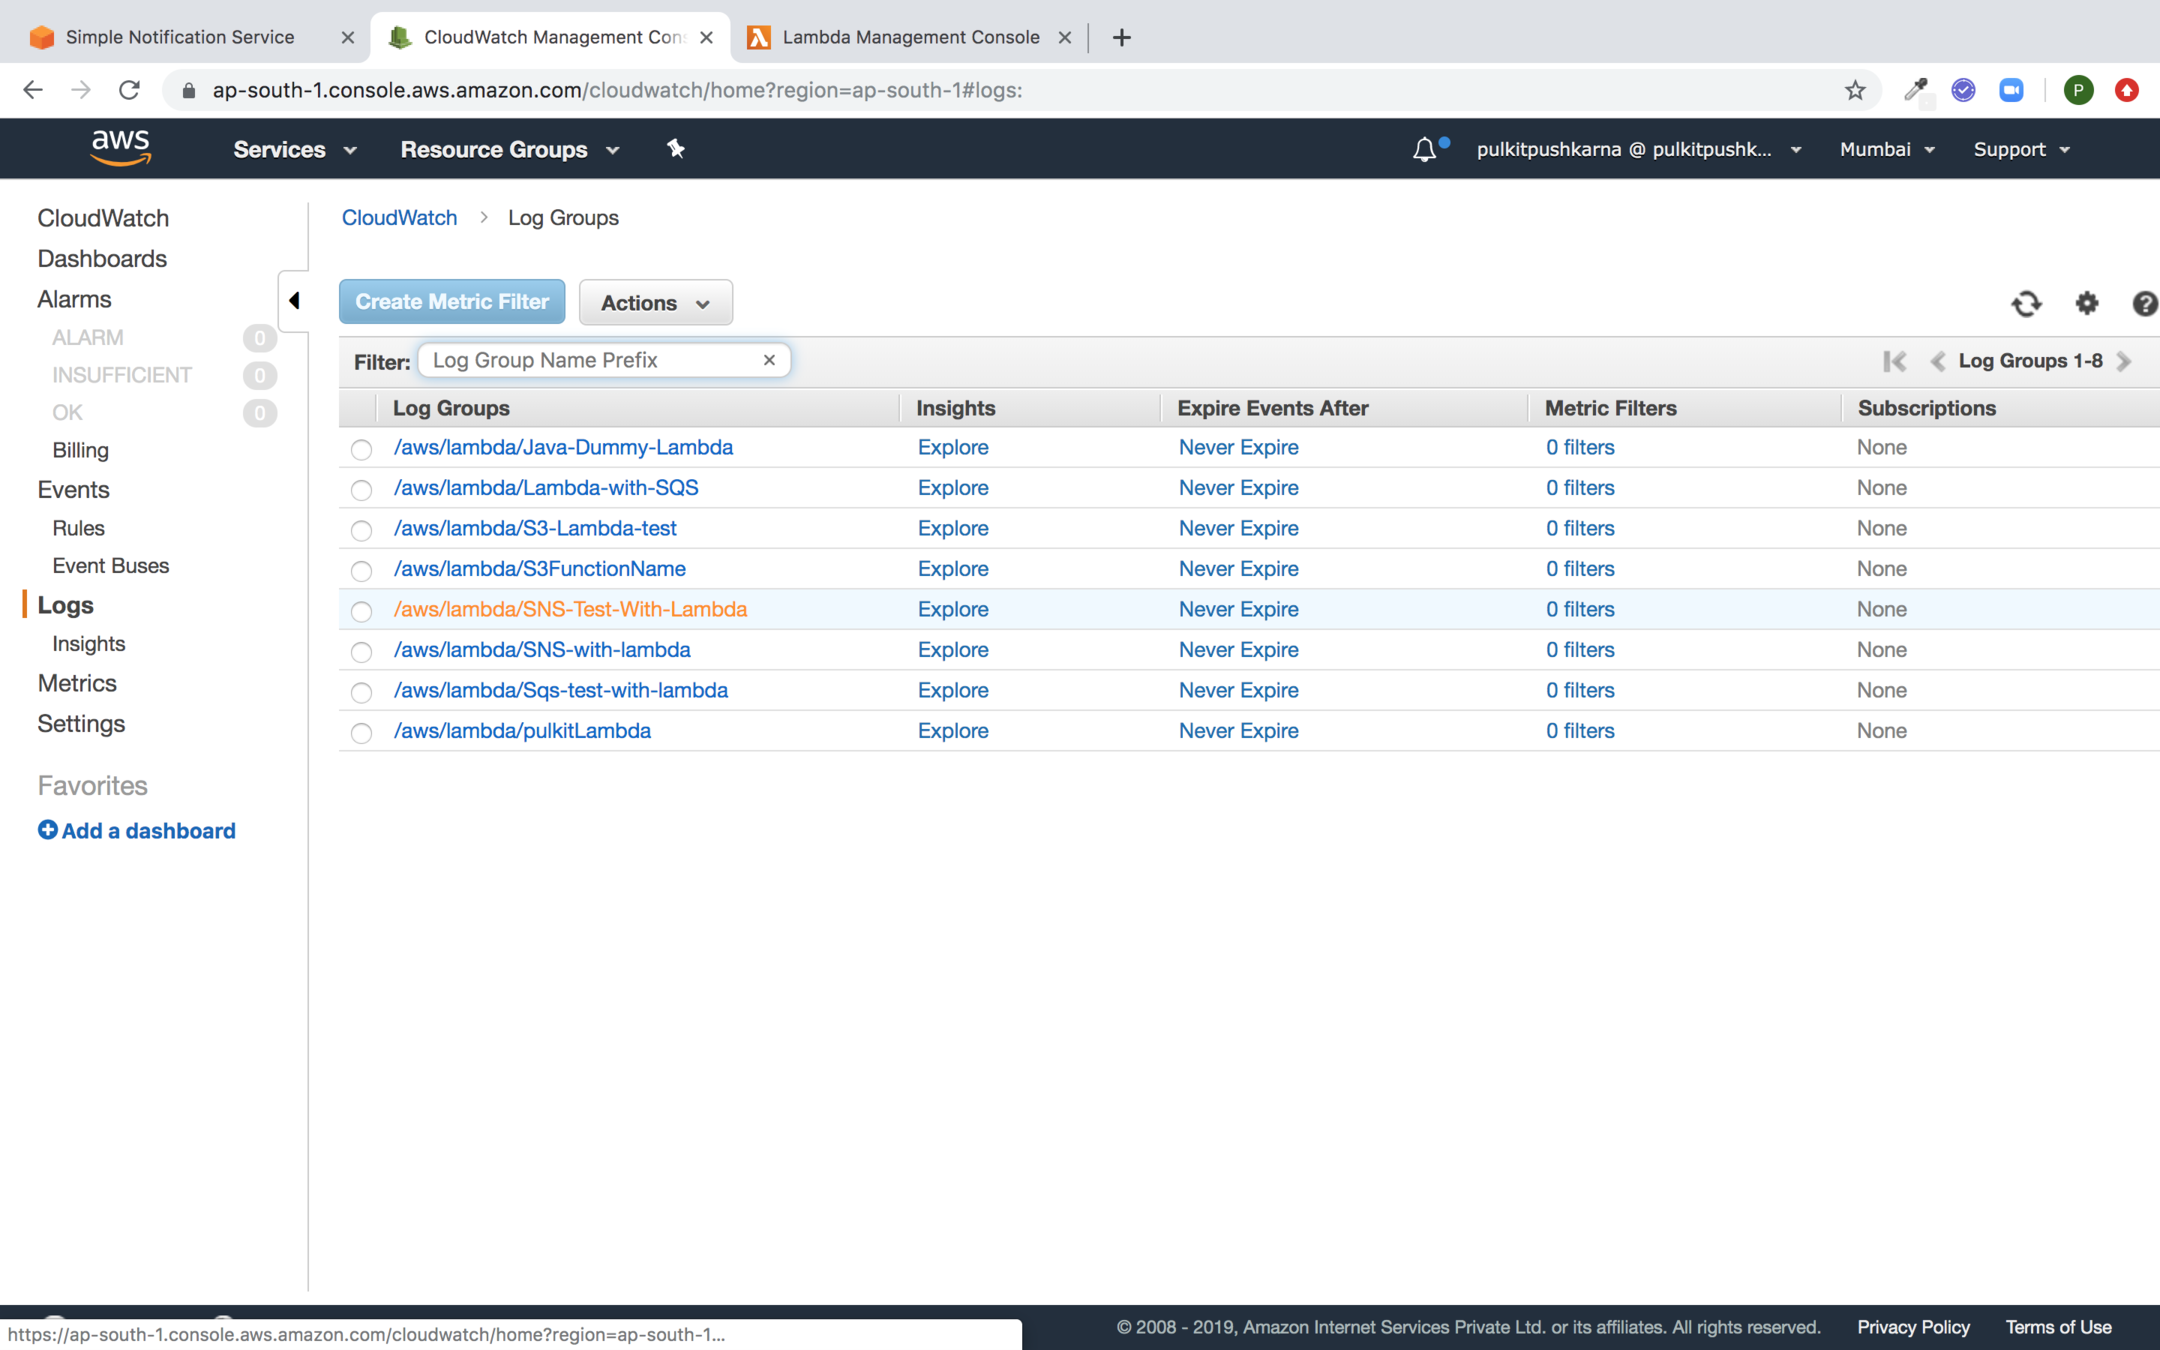
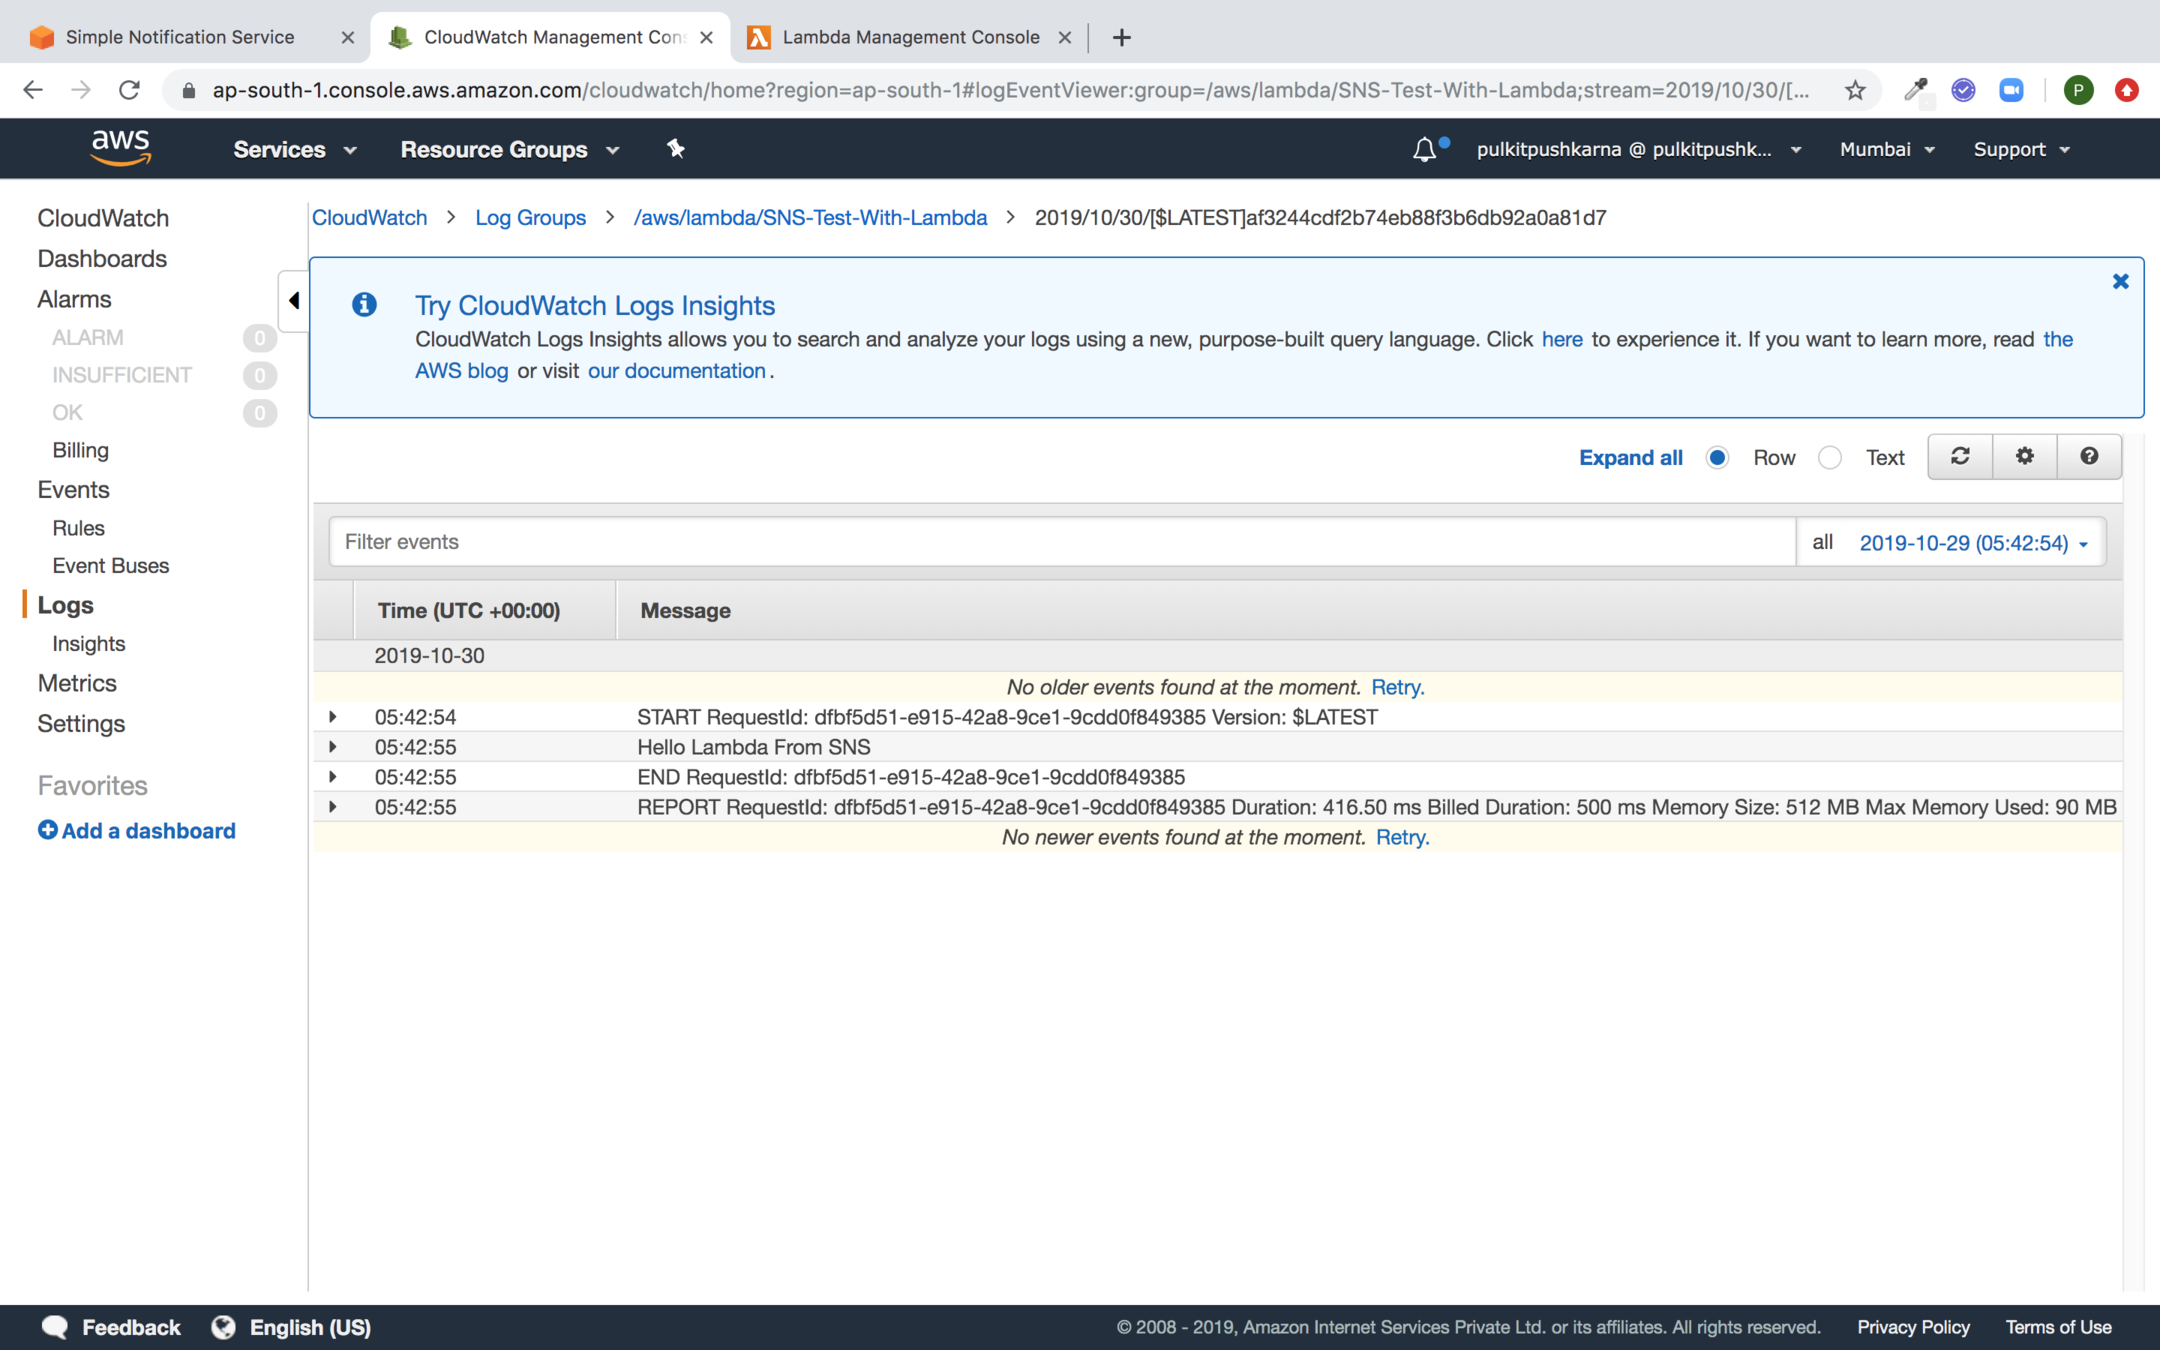
Now check the logs in Cloudwatch
Exercise 2
- Create a lambda which triggers when some object is uploaded on the S3.
- Create a lambda which consumes the items from SQS
- Create a lambda which is triggered when data is pushed in SNS
API Gateway
- Amazon API Gateway is a fully managed service that makes it easy for developers to create, maintain and publish APIs.
- API Gateway has no minimum fees or startup costs. You pay only for the API calls you receive and the amount of data transferred out.
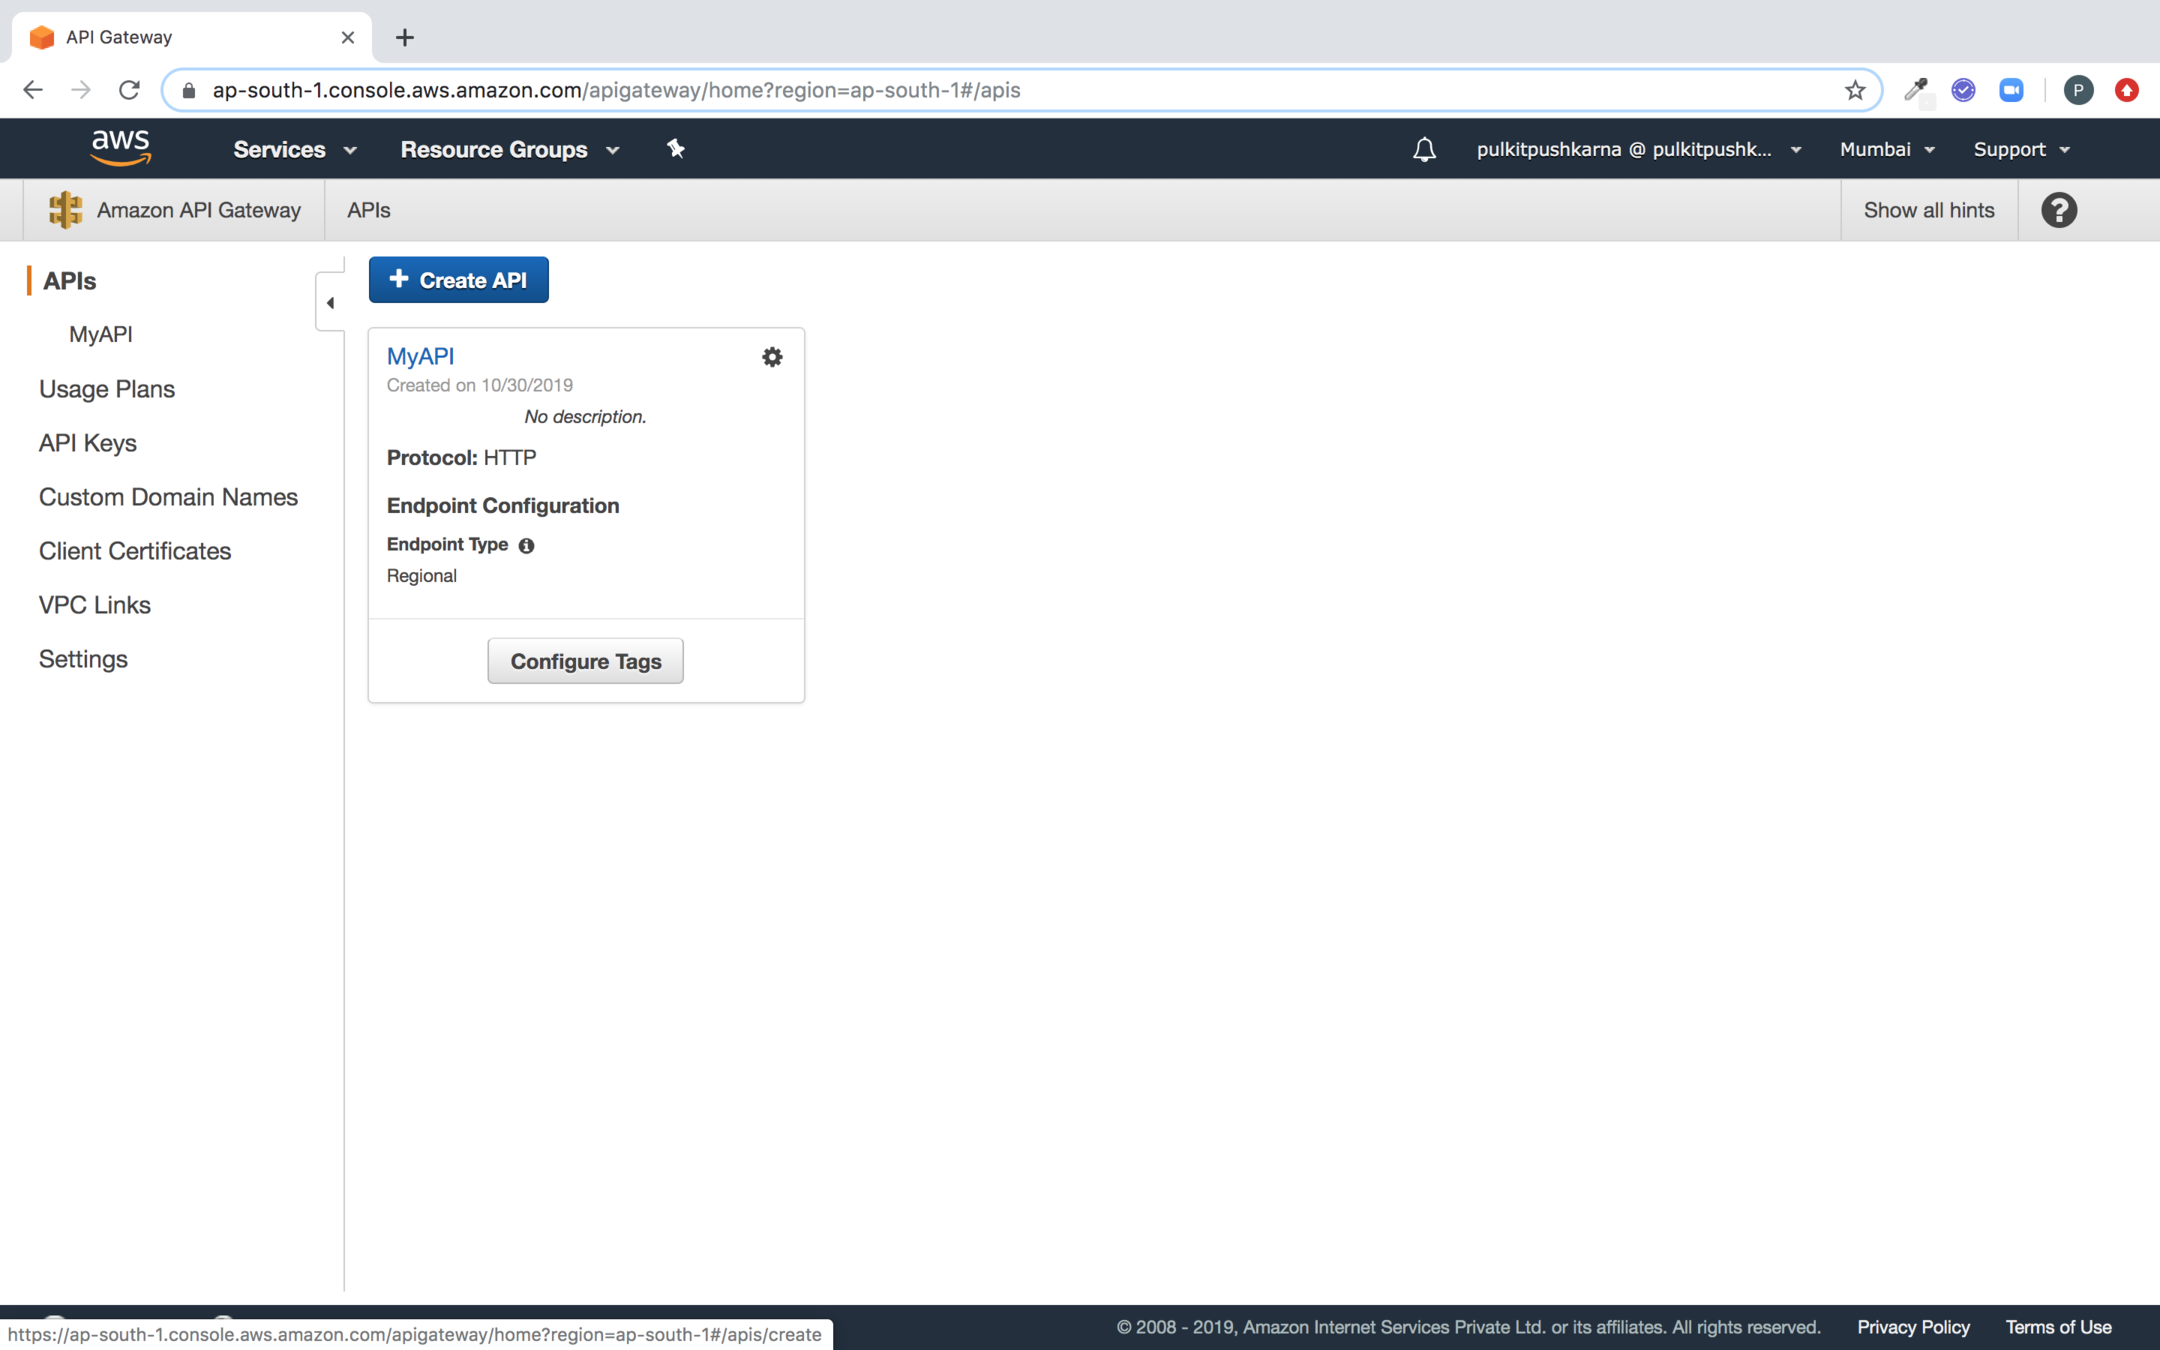
Creating API using API Gateway
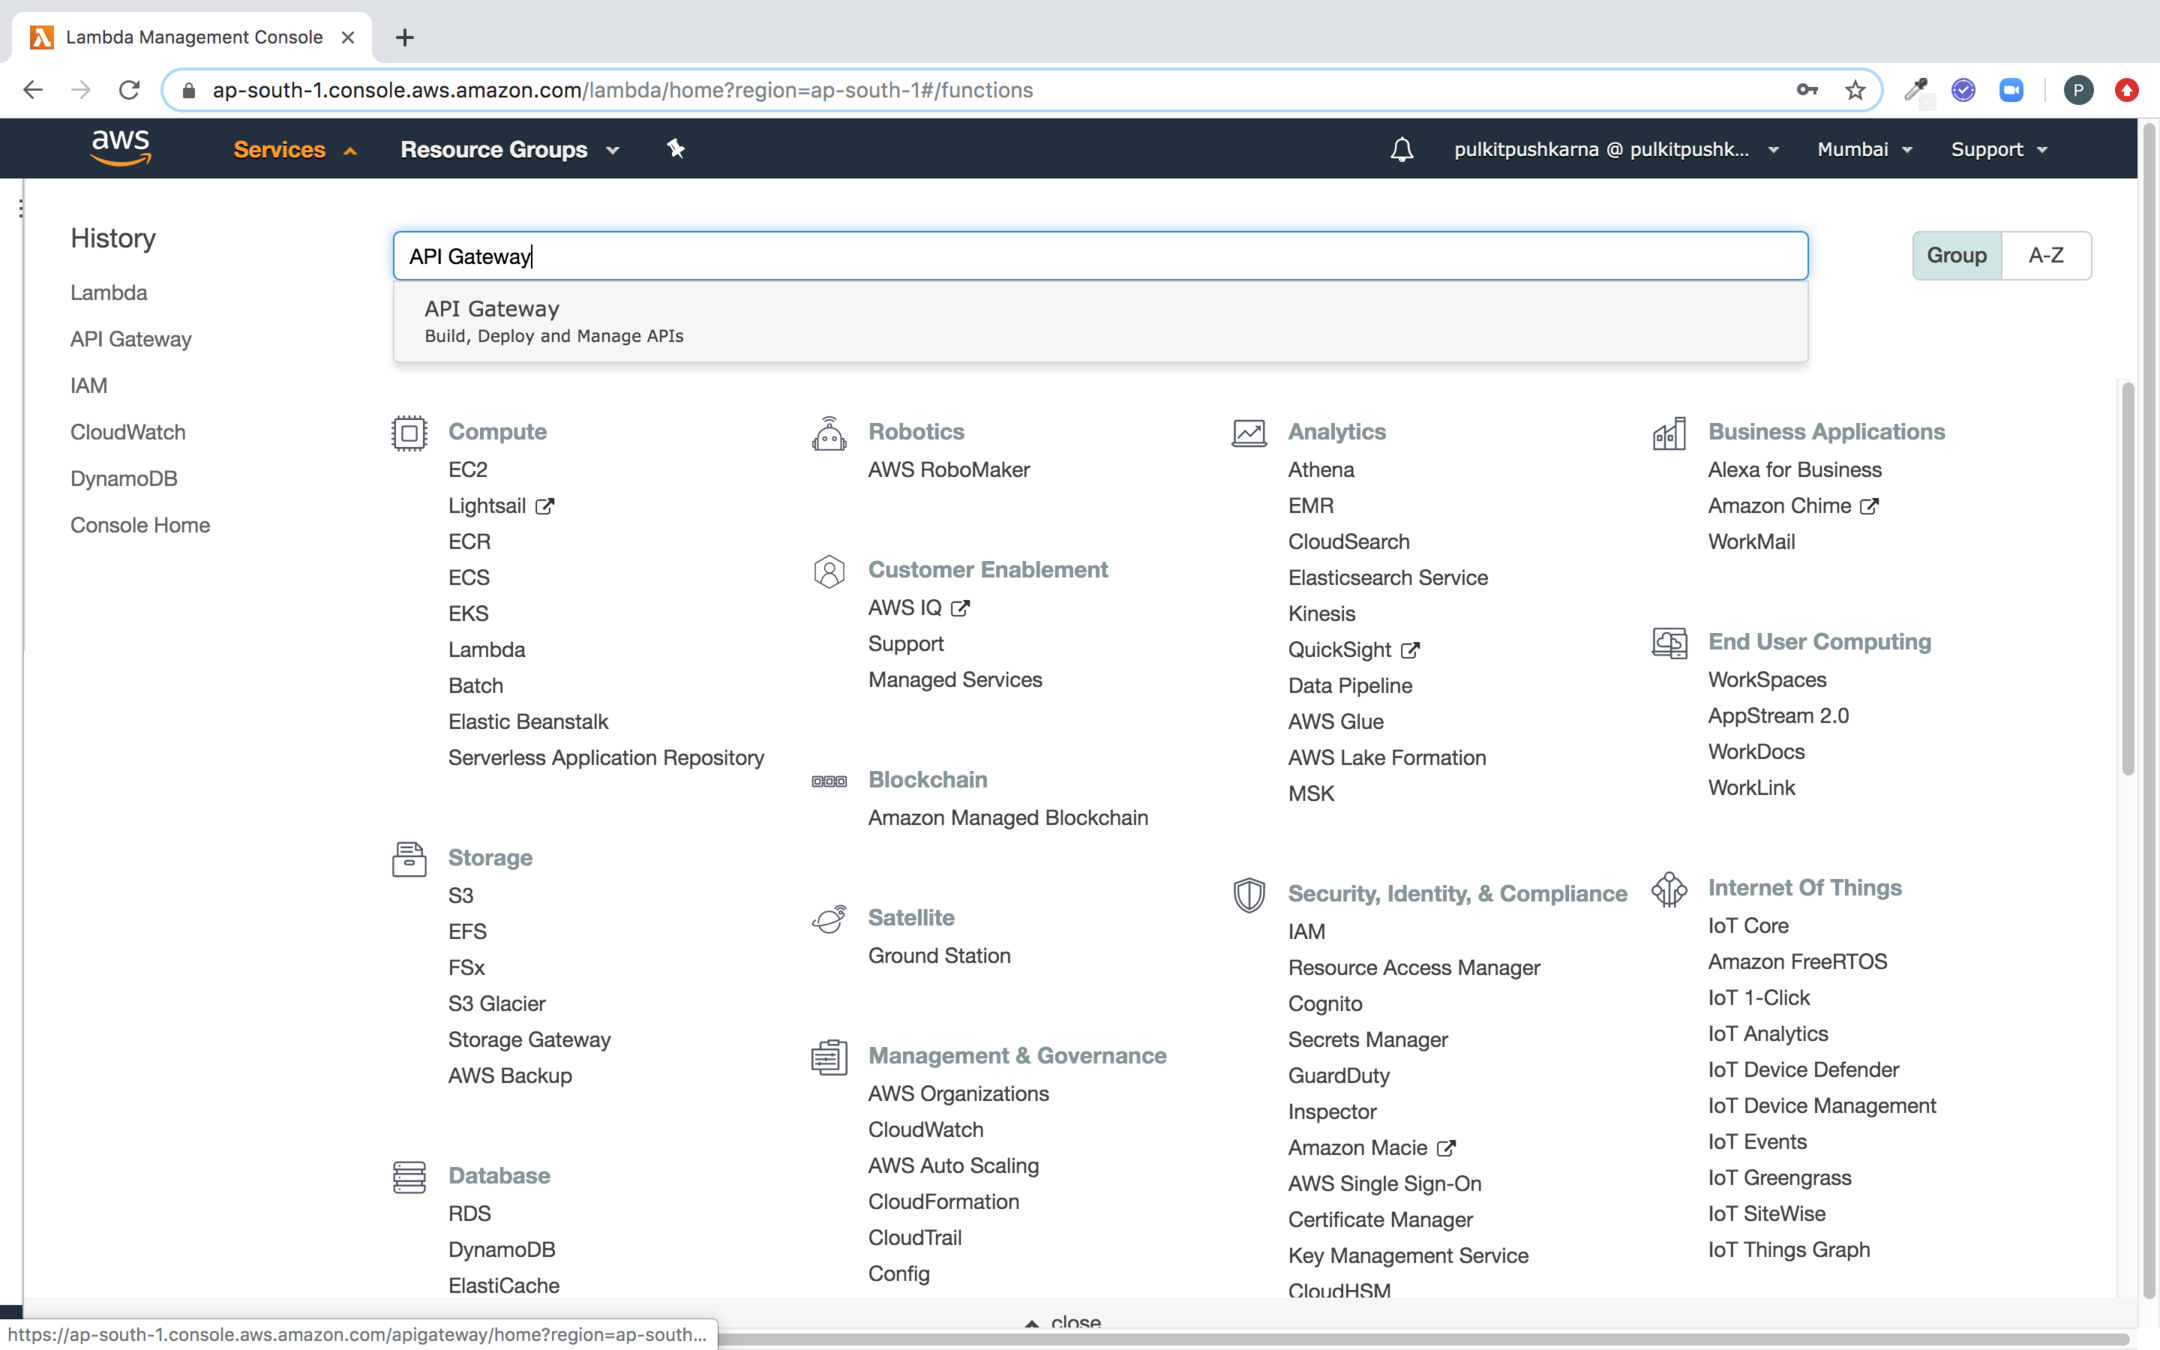
- Go to the API Gateway Service
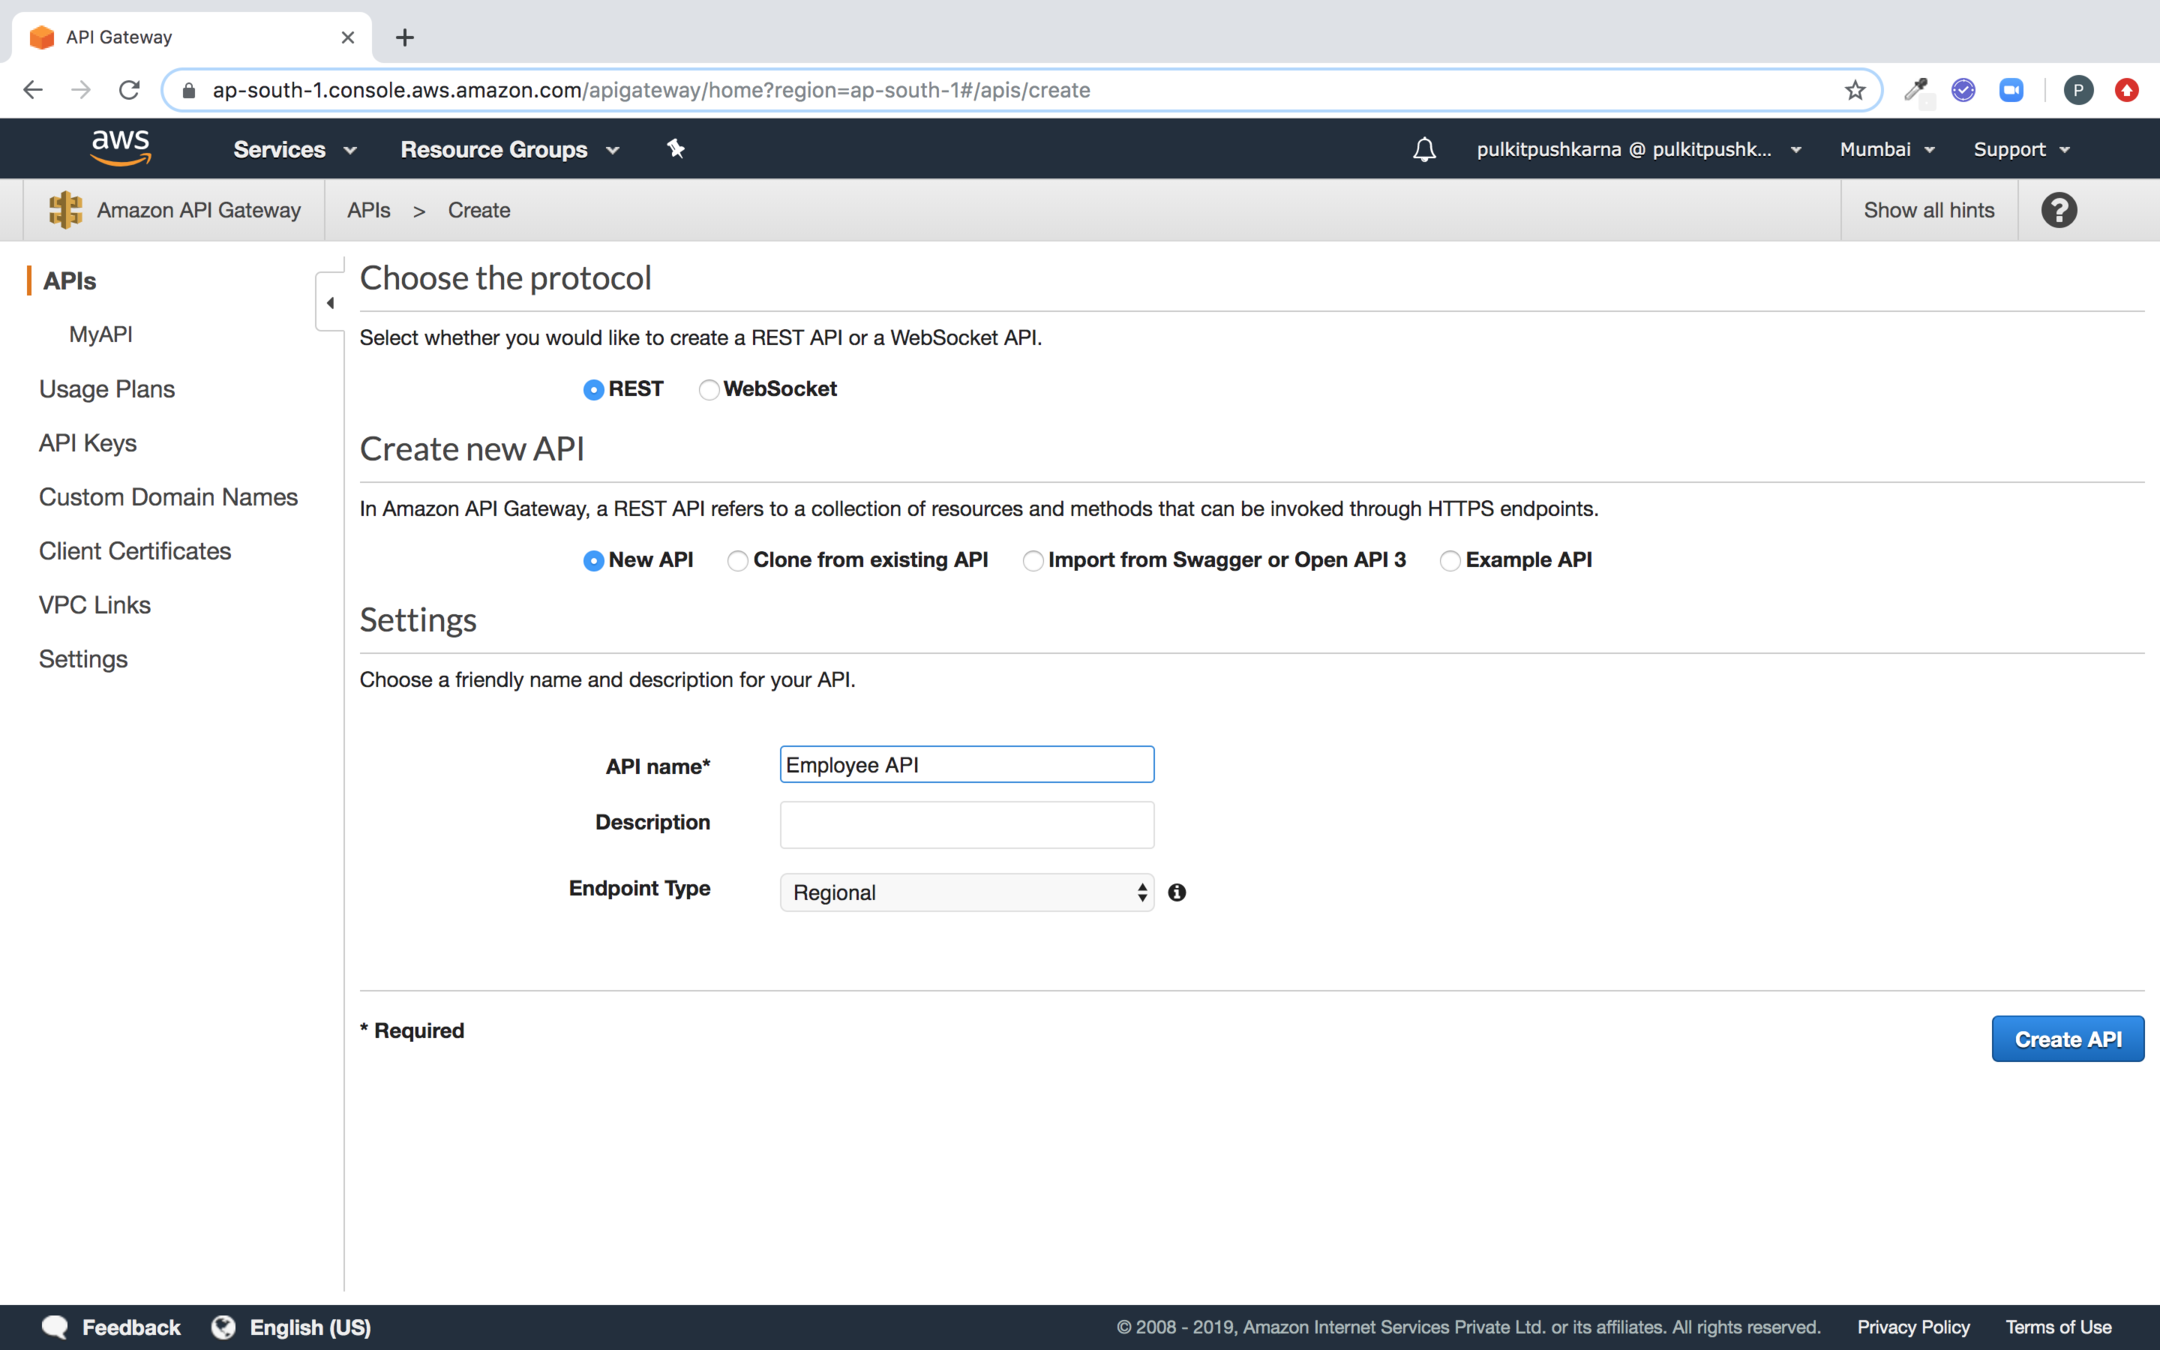
Click on create API button
Fill the details for your API and Hit Create API
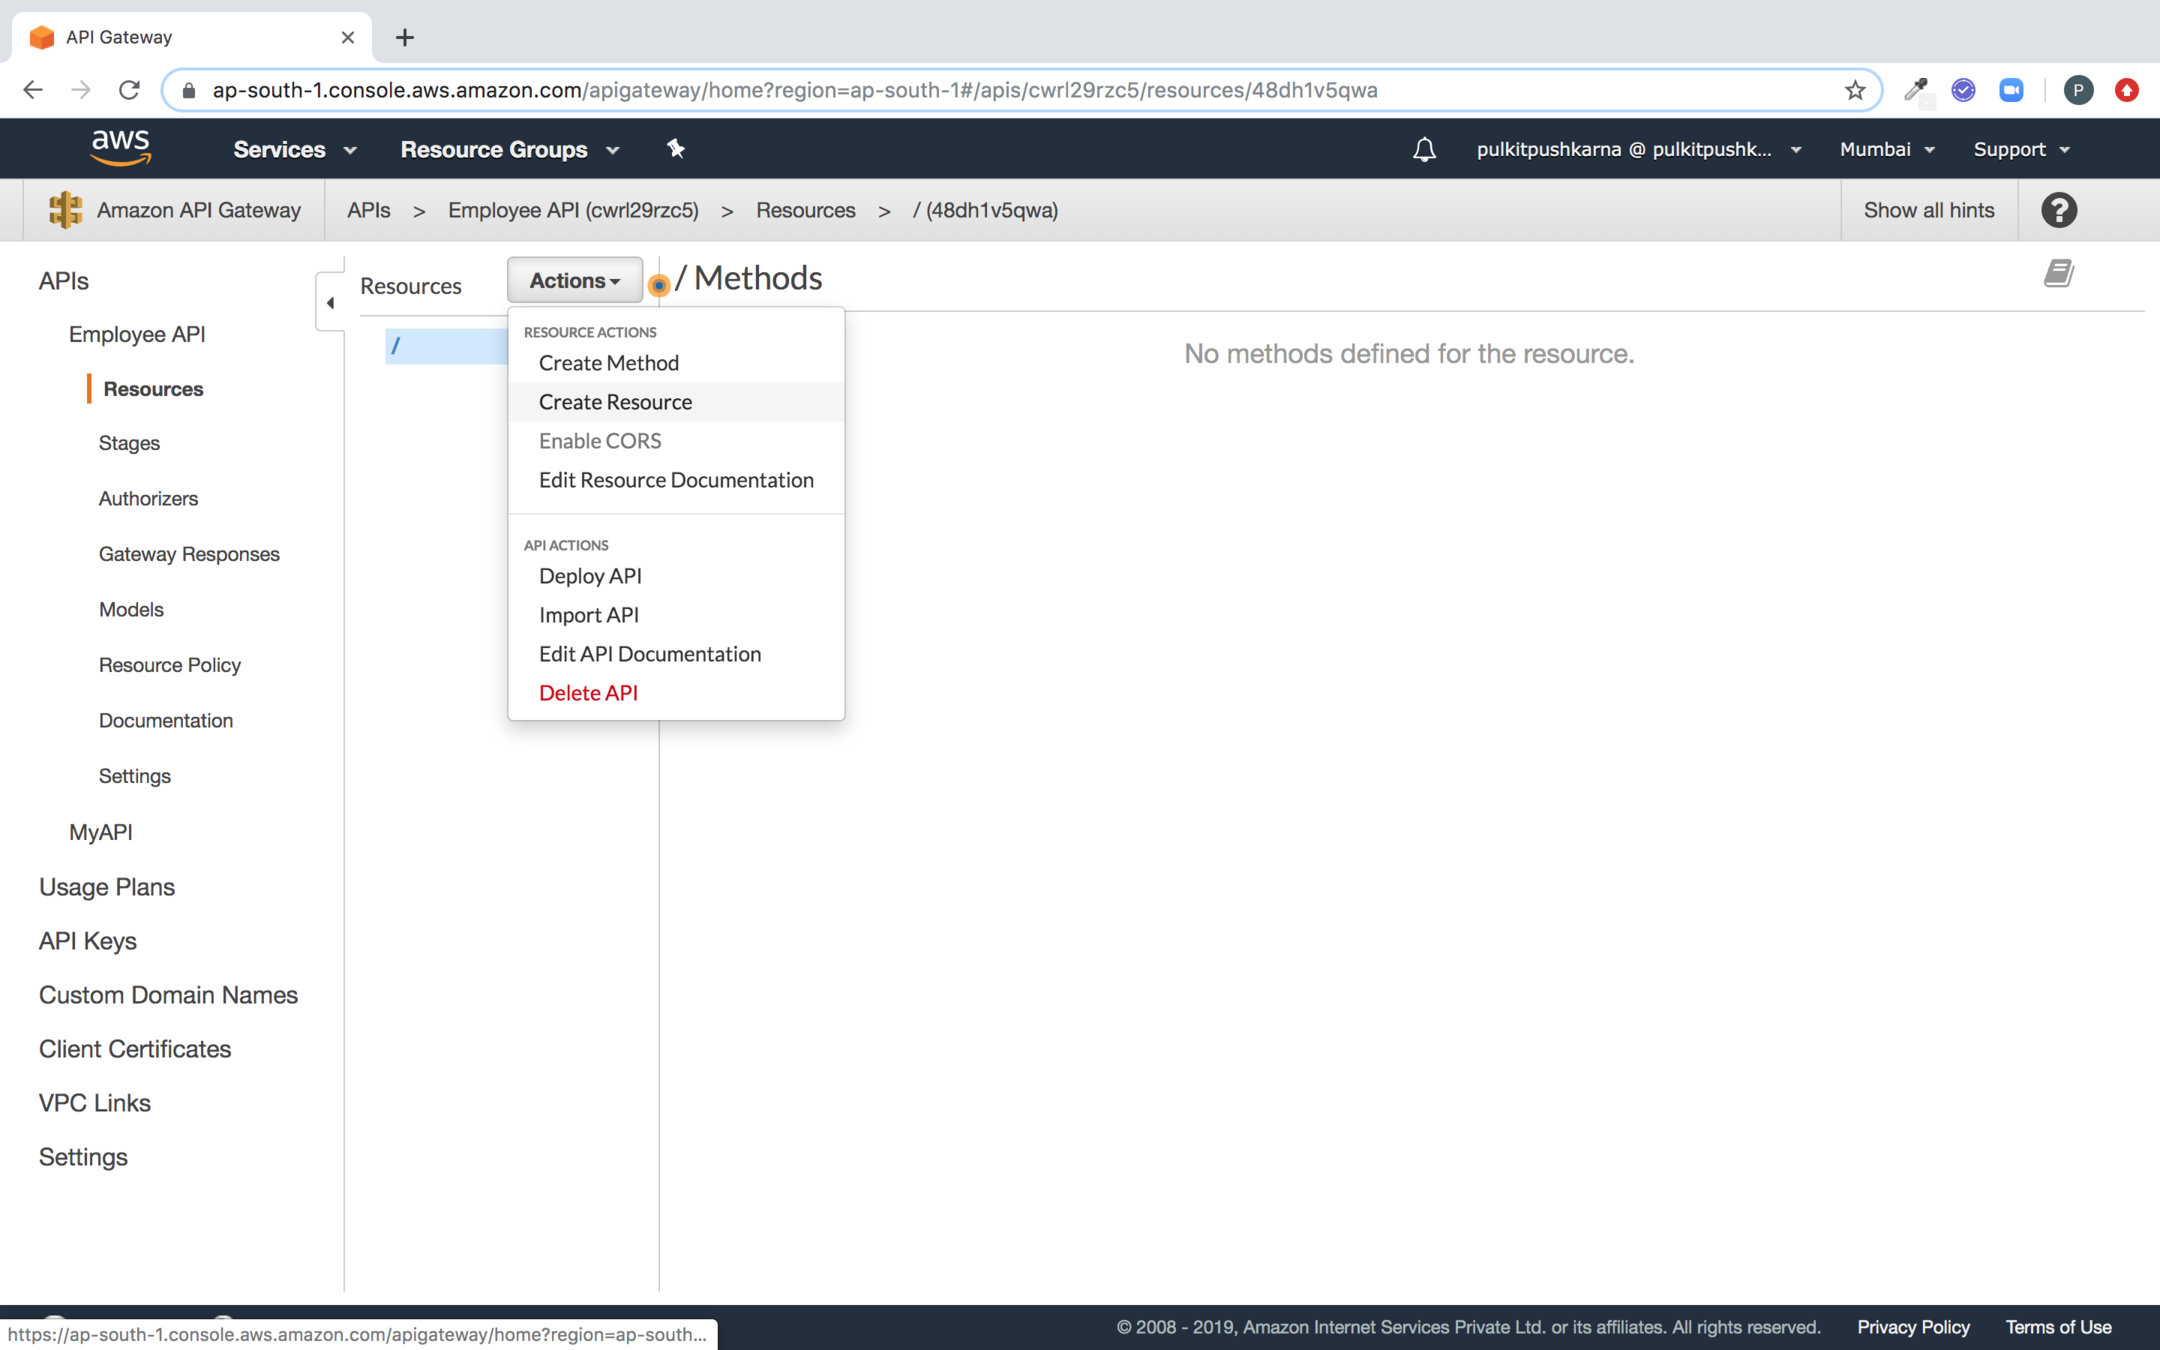
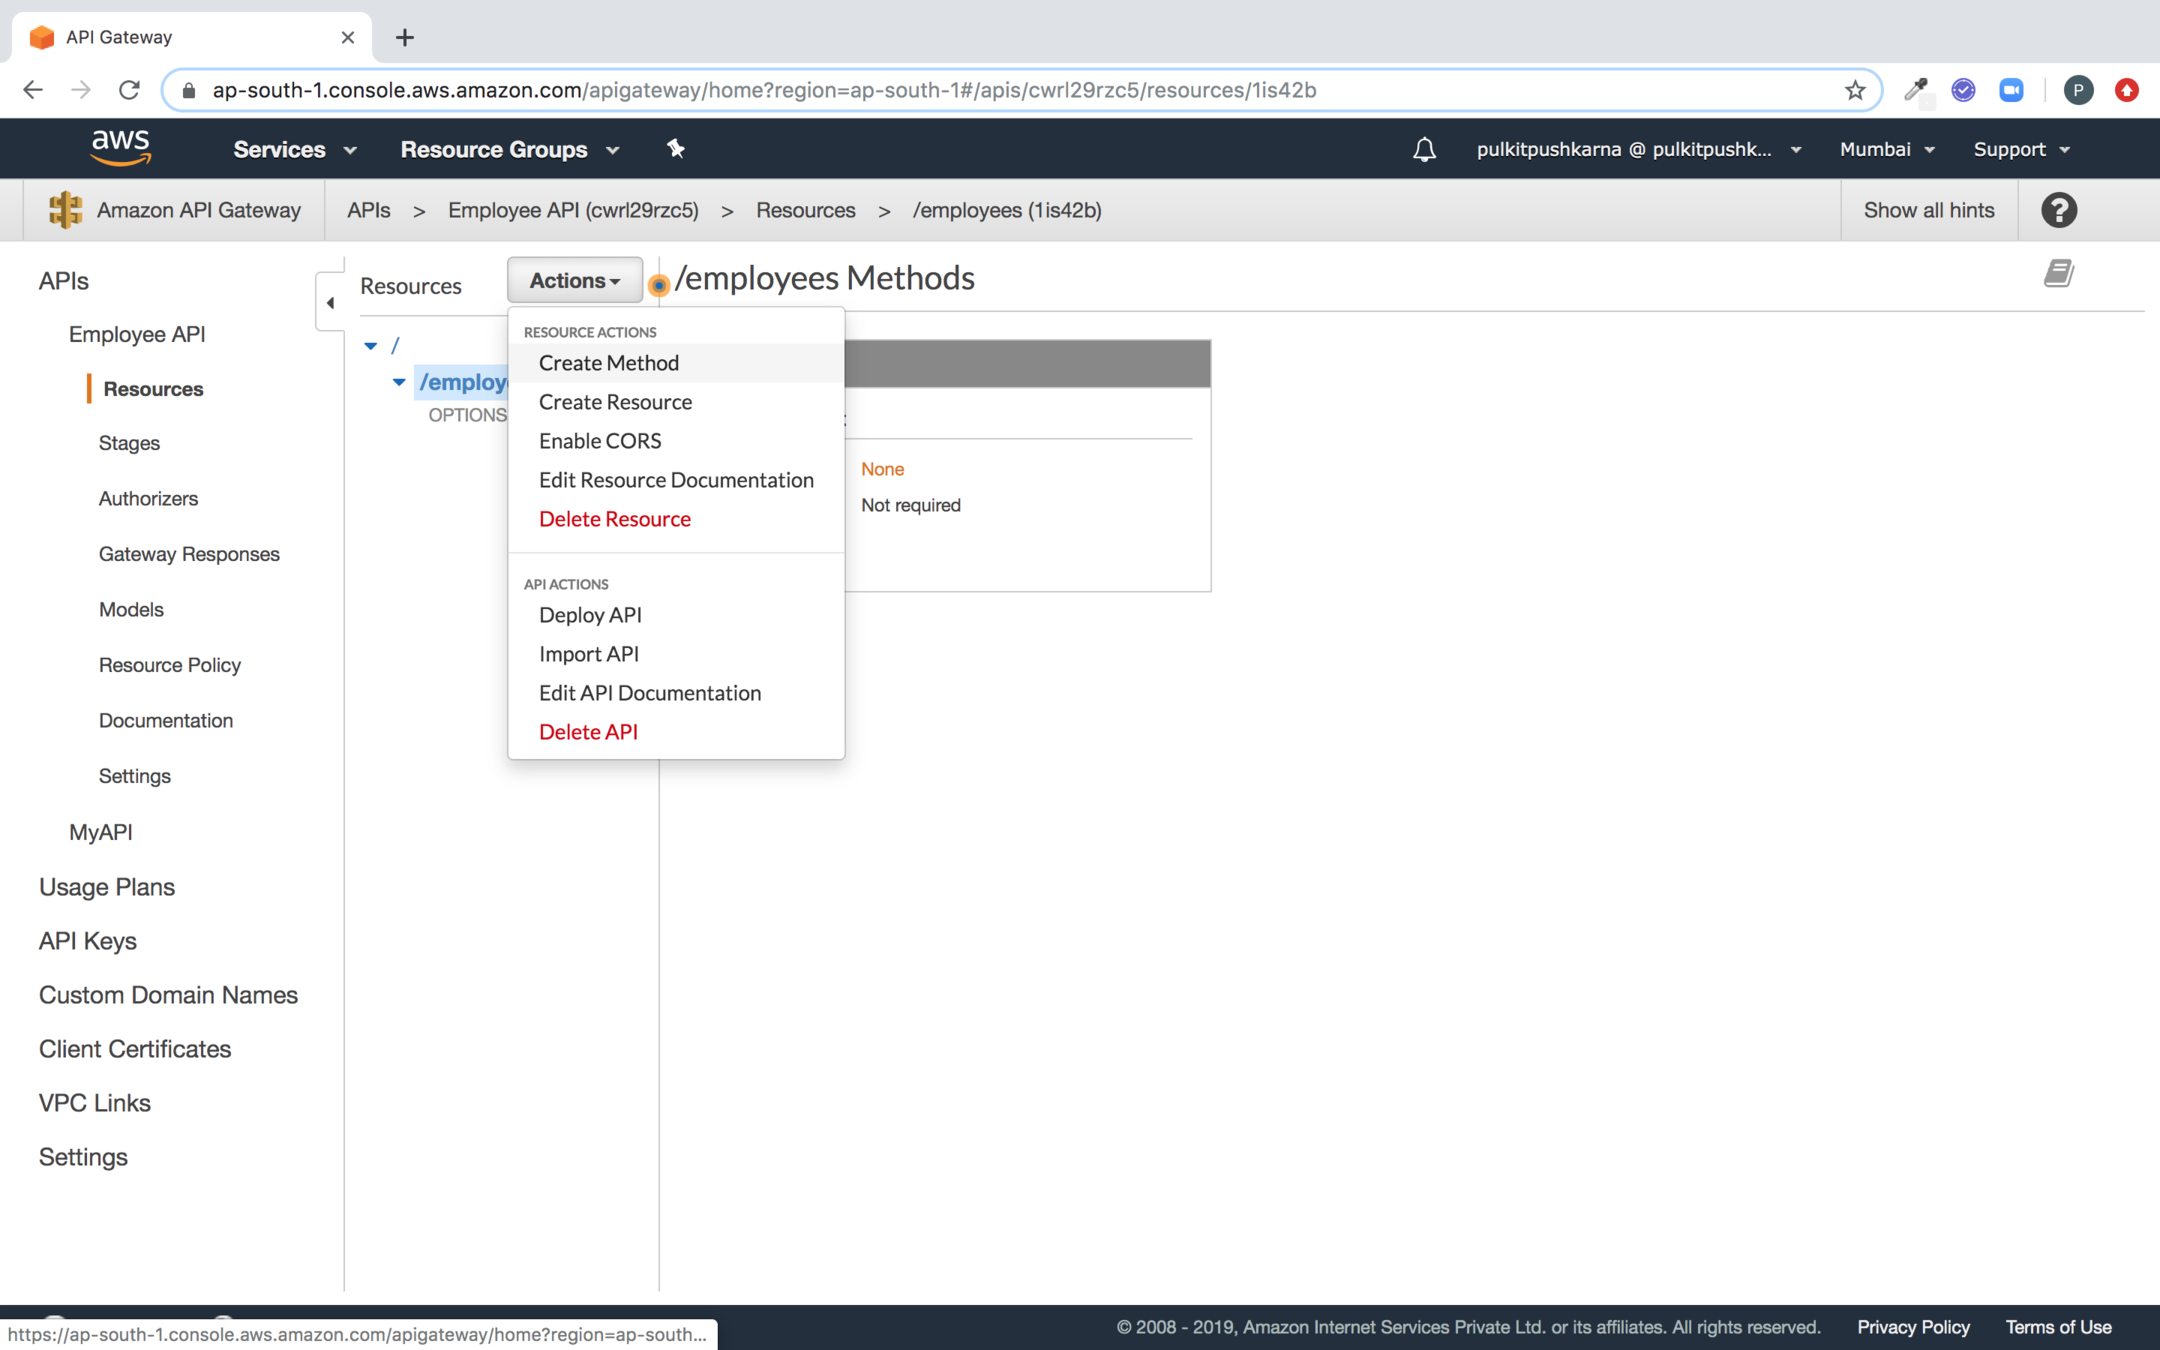
Go to the Action button and click on create resource
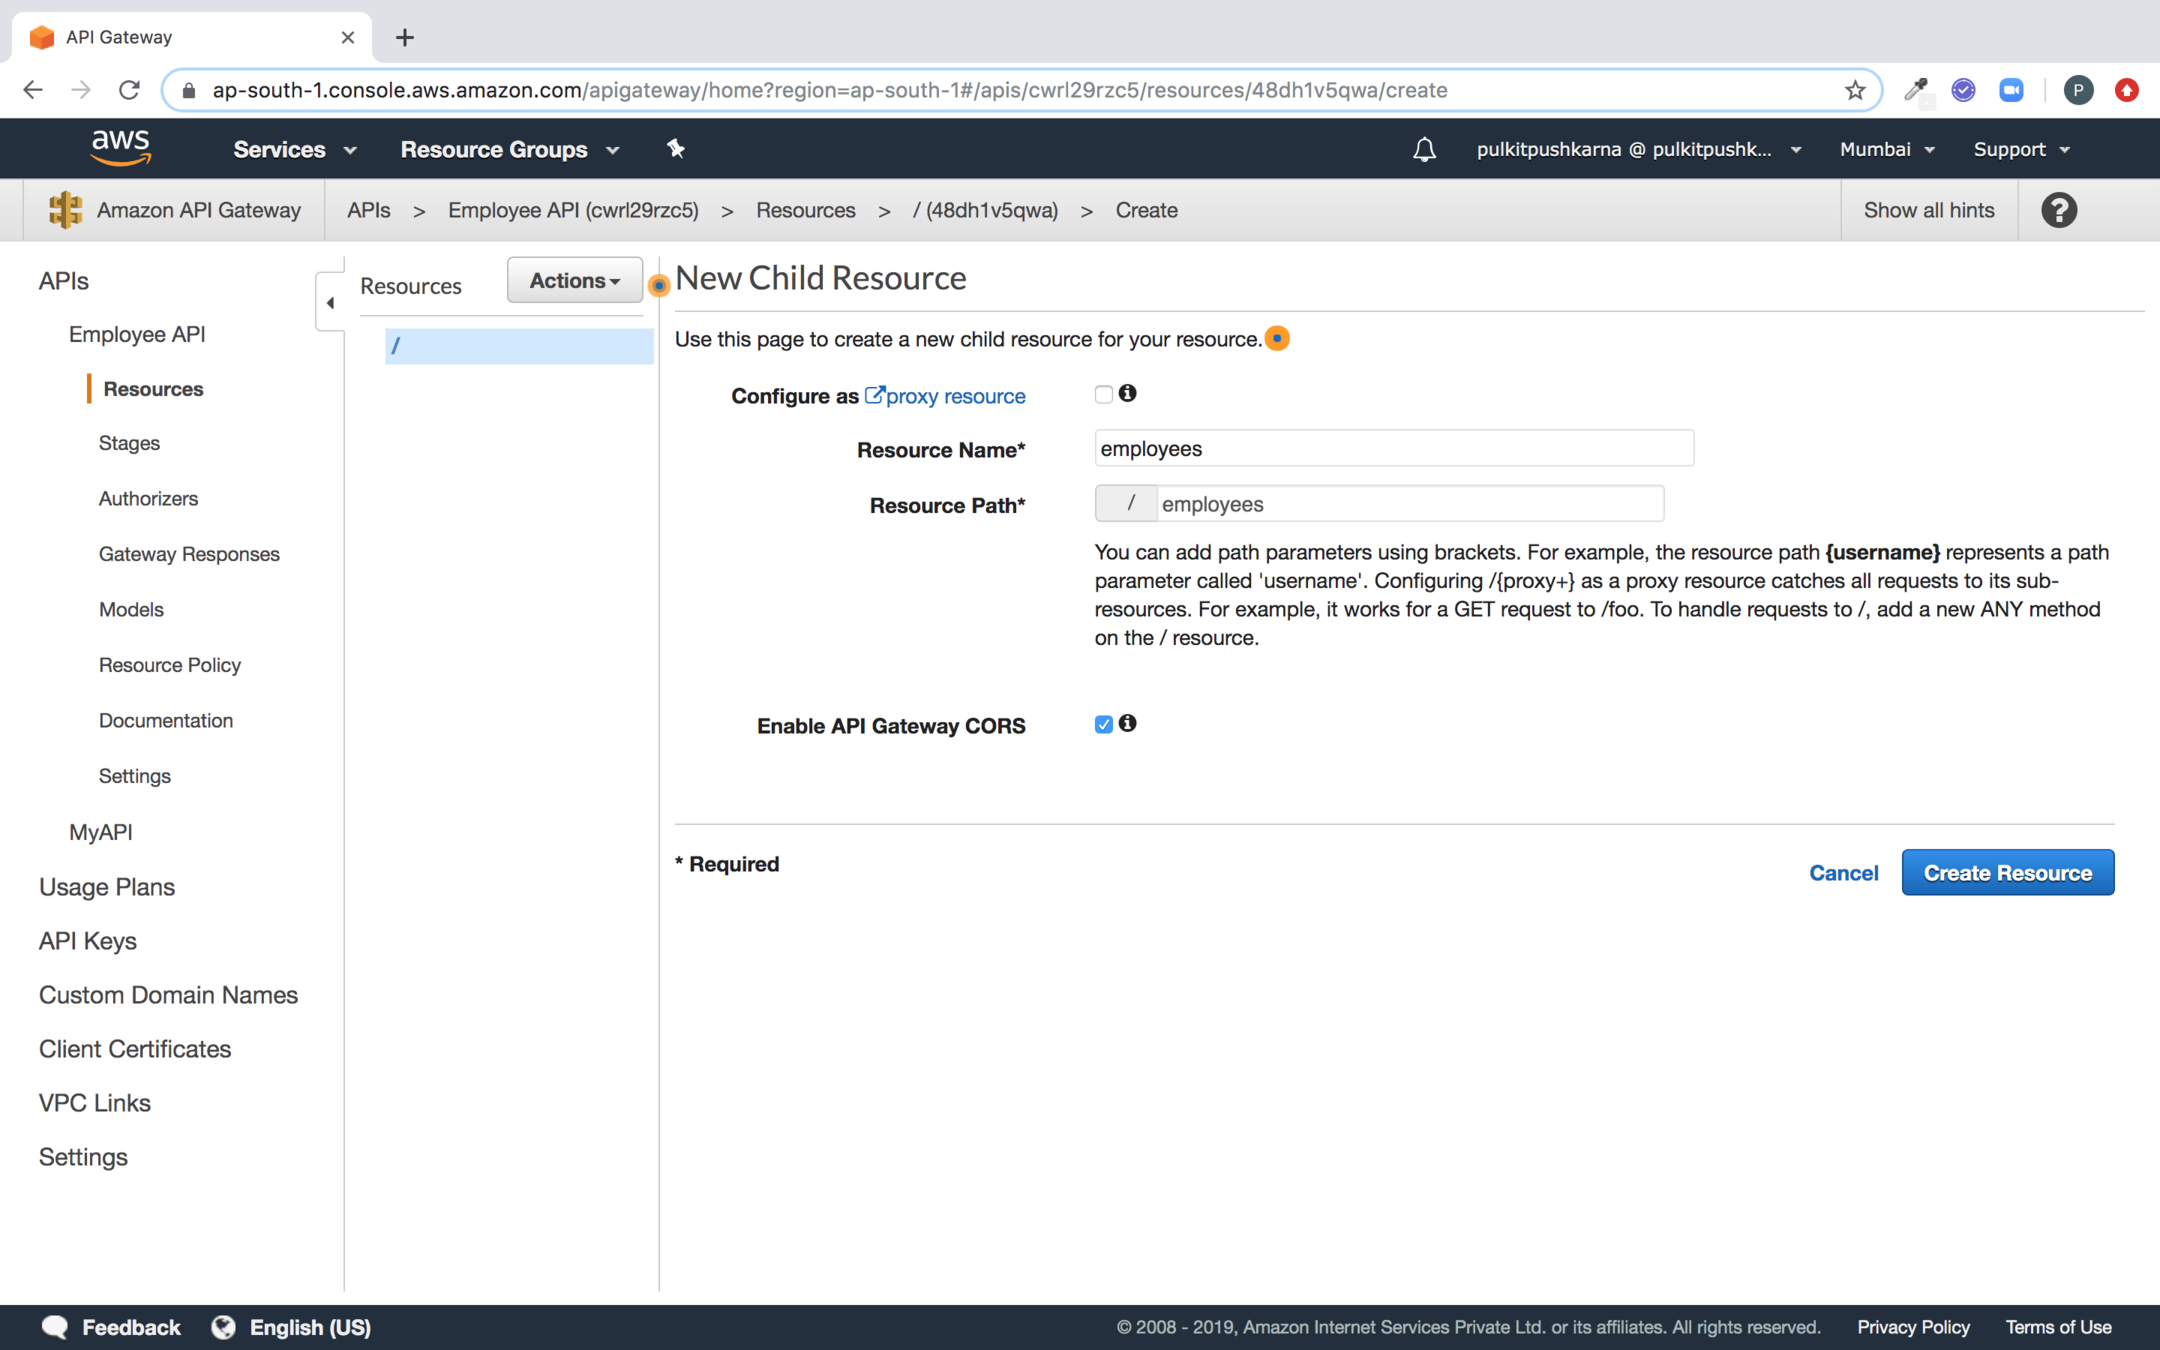
Fill the name of the resource, enable API Gateway for cors and Create Resource
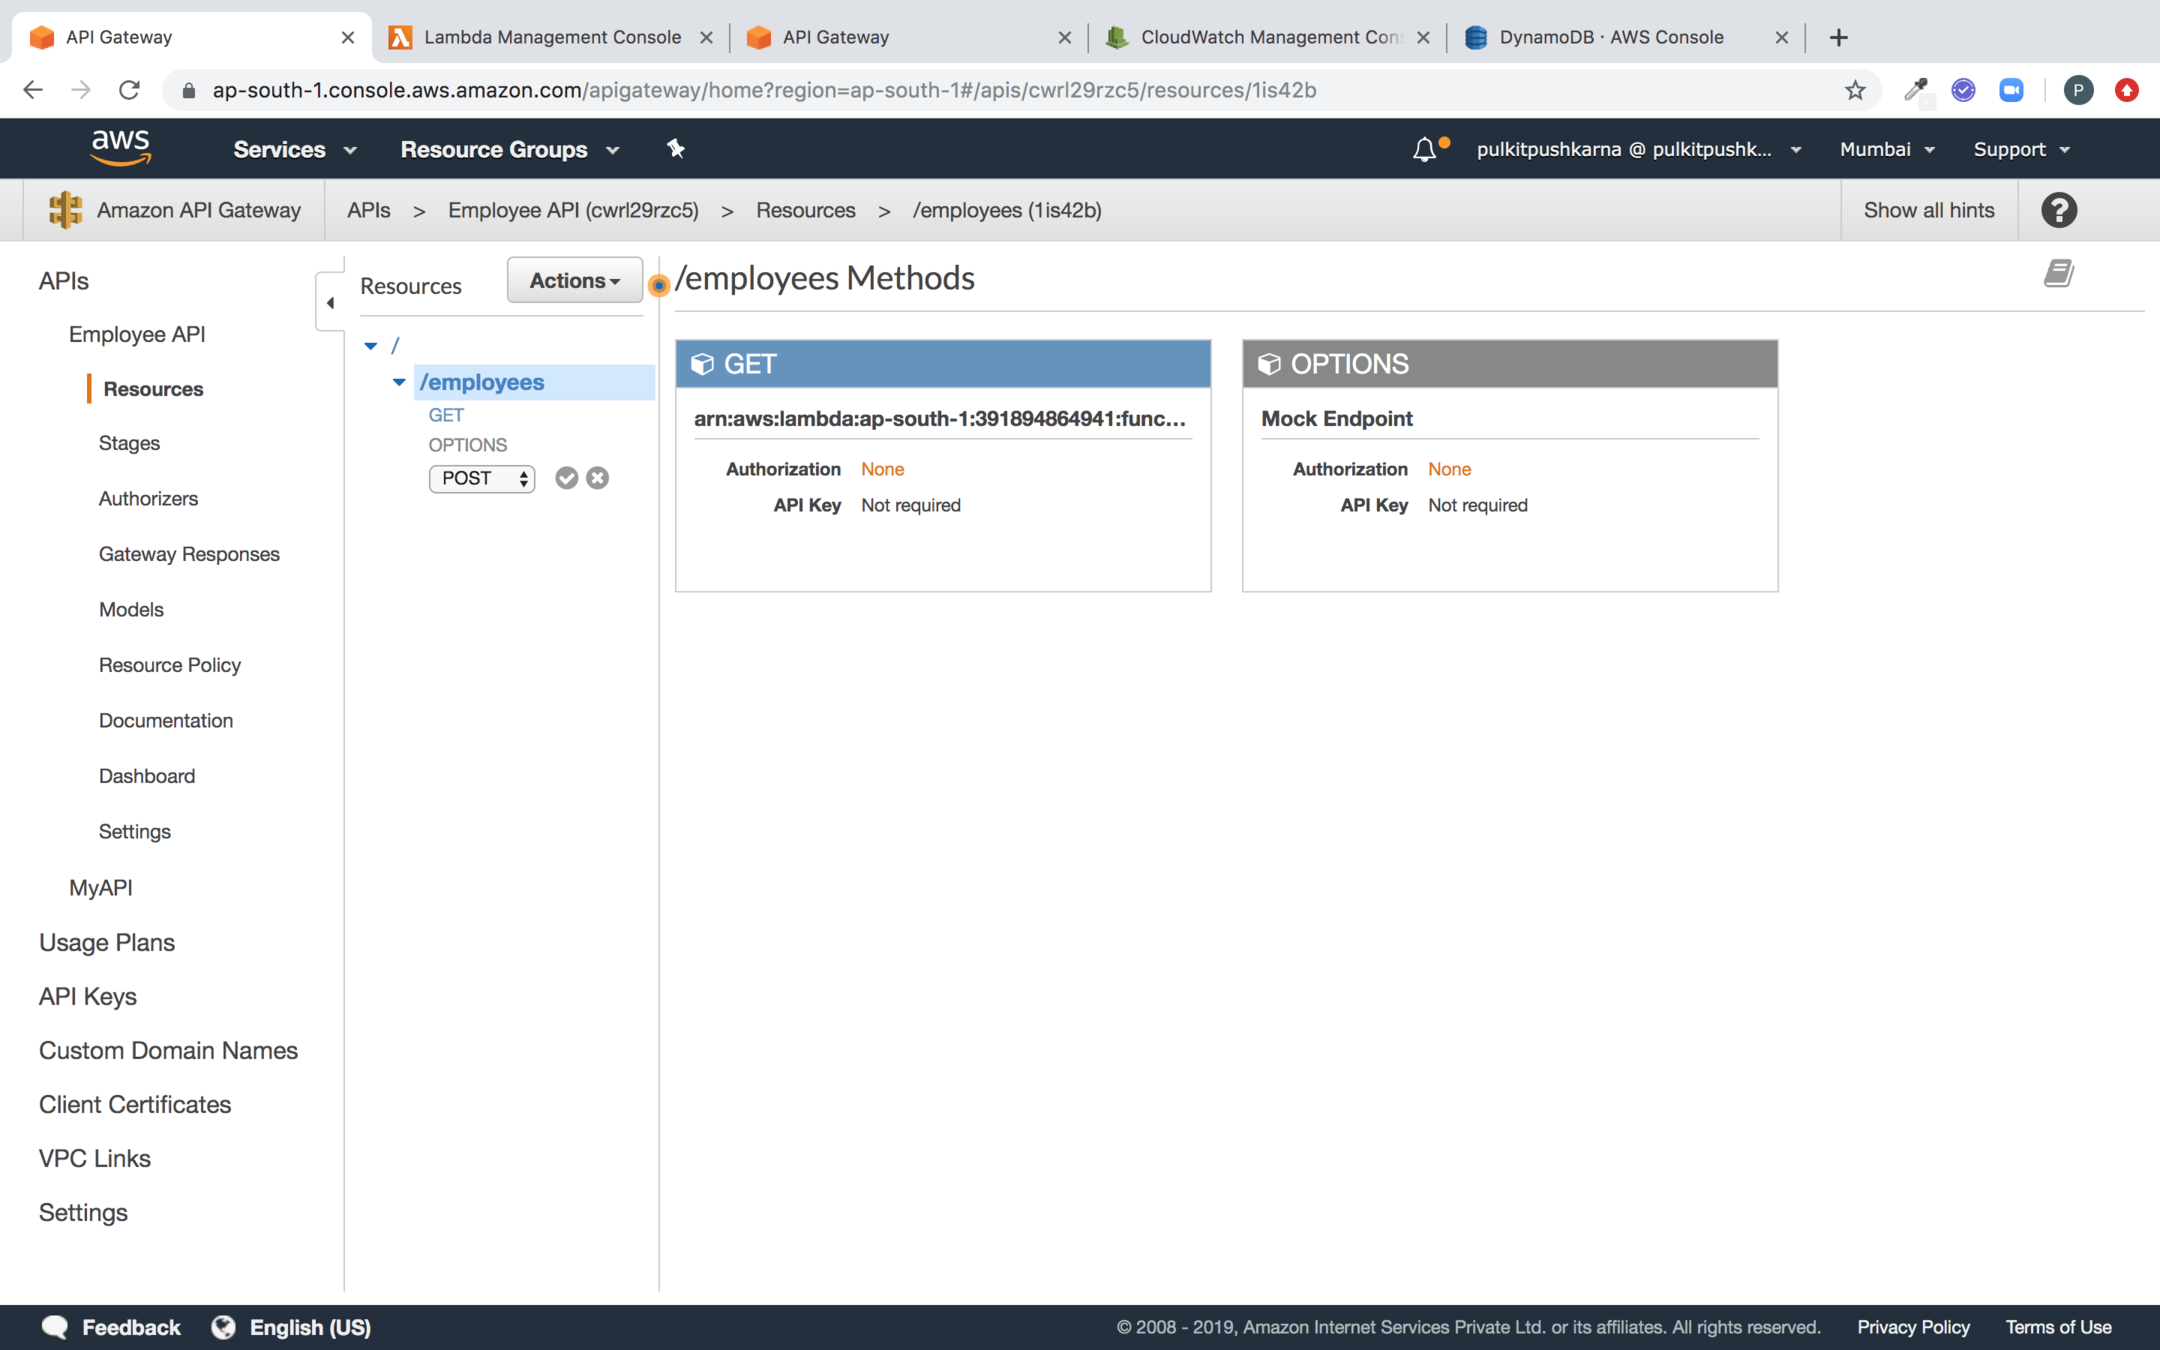
Select the resource, Go to the Actions and Create Method
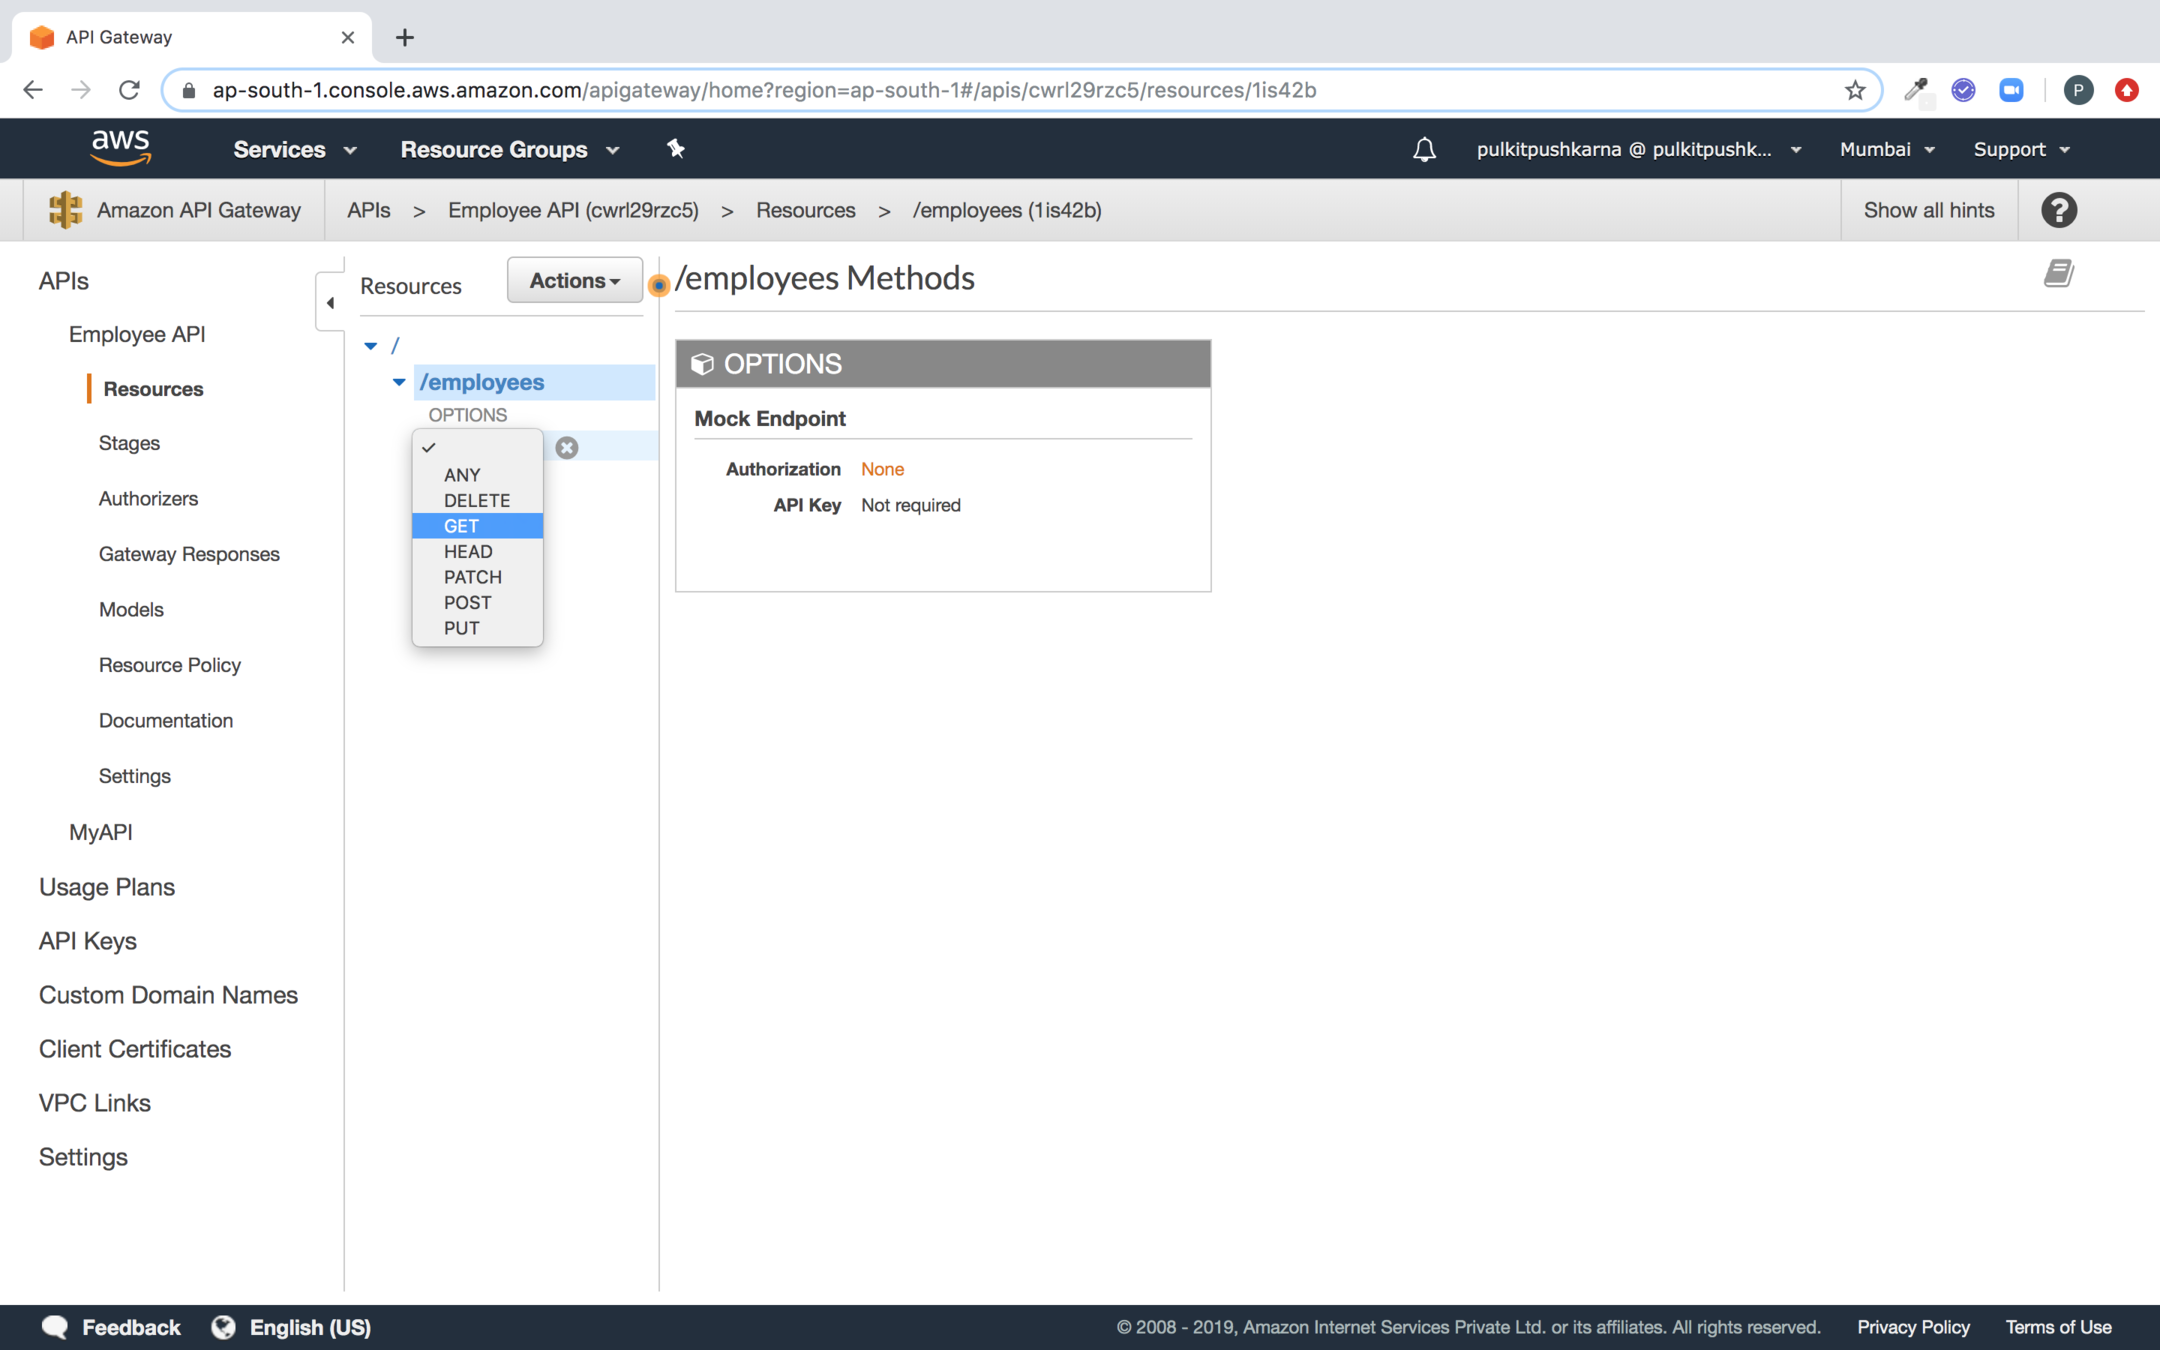
Select the method type for the resource
Now create a lambda with the code below
package com.lambda.demo;
import com.amazonaws.services.lambda.runtime.Context;
import com.amazonaws.services.lambda.runtime.LambdaLogger;
import com.amazonaws.services.lambda.runtime.RequestHandler;
public class LambdaAPIEmployeeGetHandler implements RequestHandler<EmployeeRequest, String> {
@Override
public String handleRequest(EmployeeRequest input, Context context) {
LambdaLogger lambdaLogger = context.getLogger();
lambdaLogger.log(">>>>>>>>>>>>>>>>>>>>>>>"+input.toString());
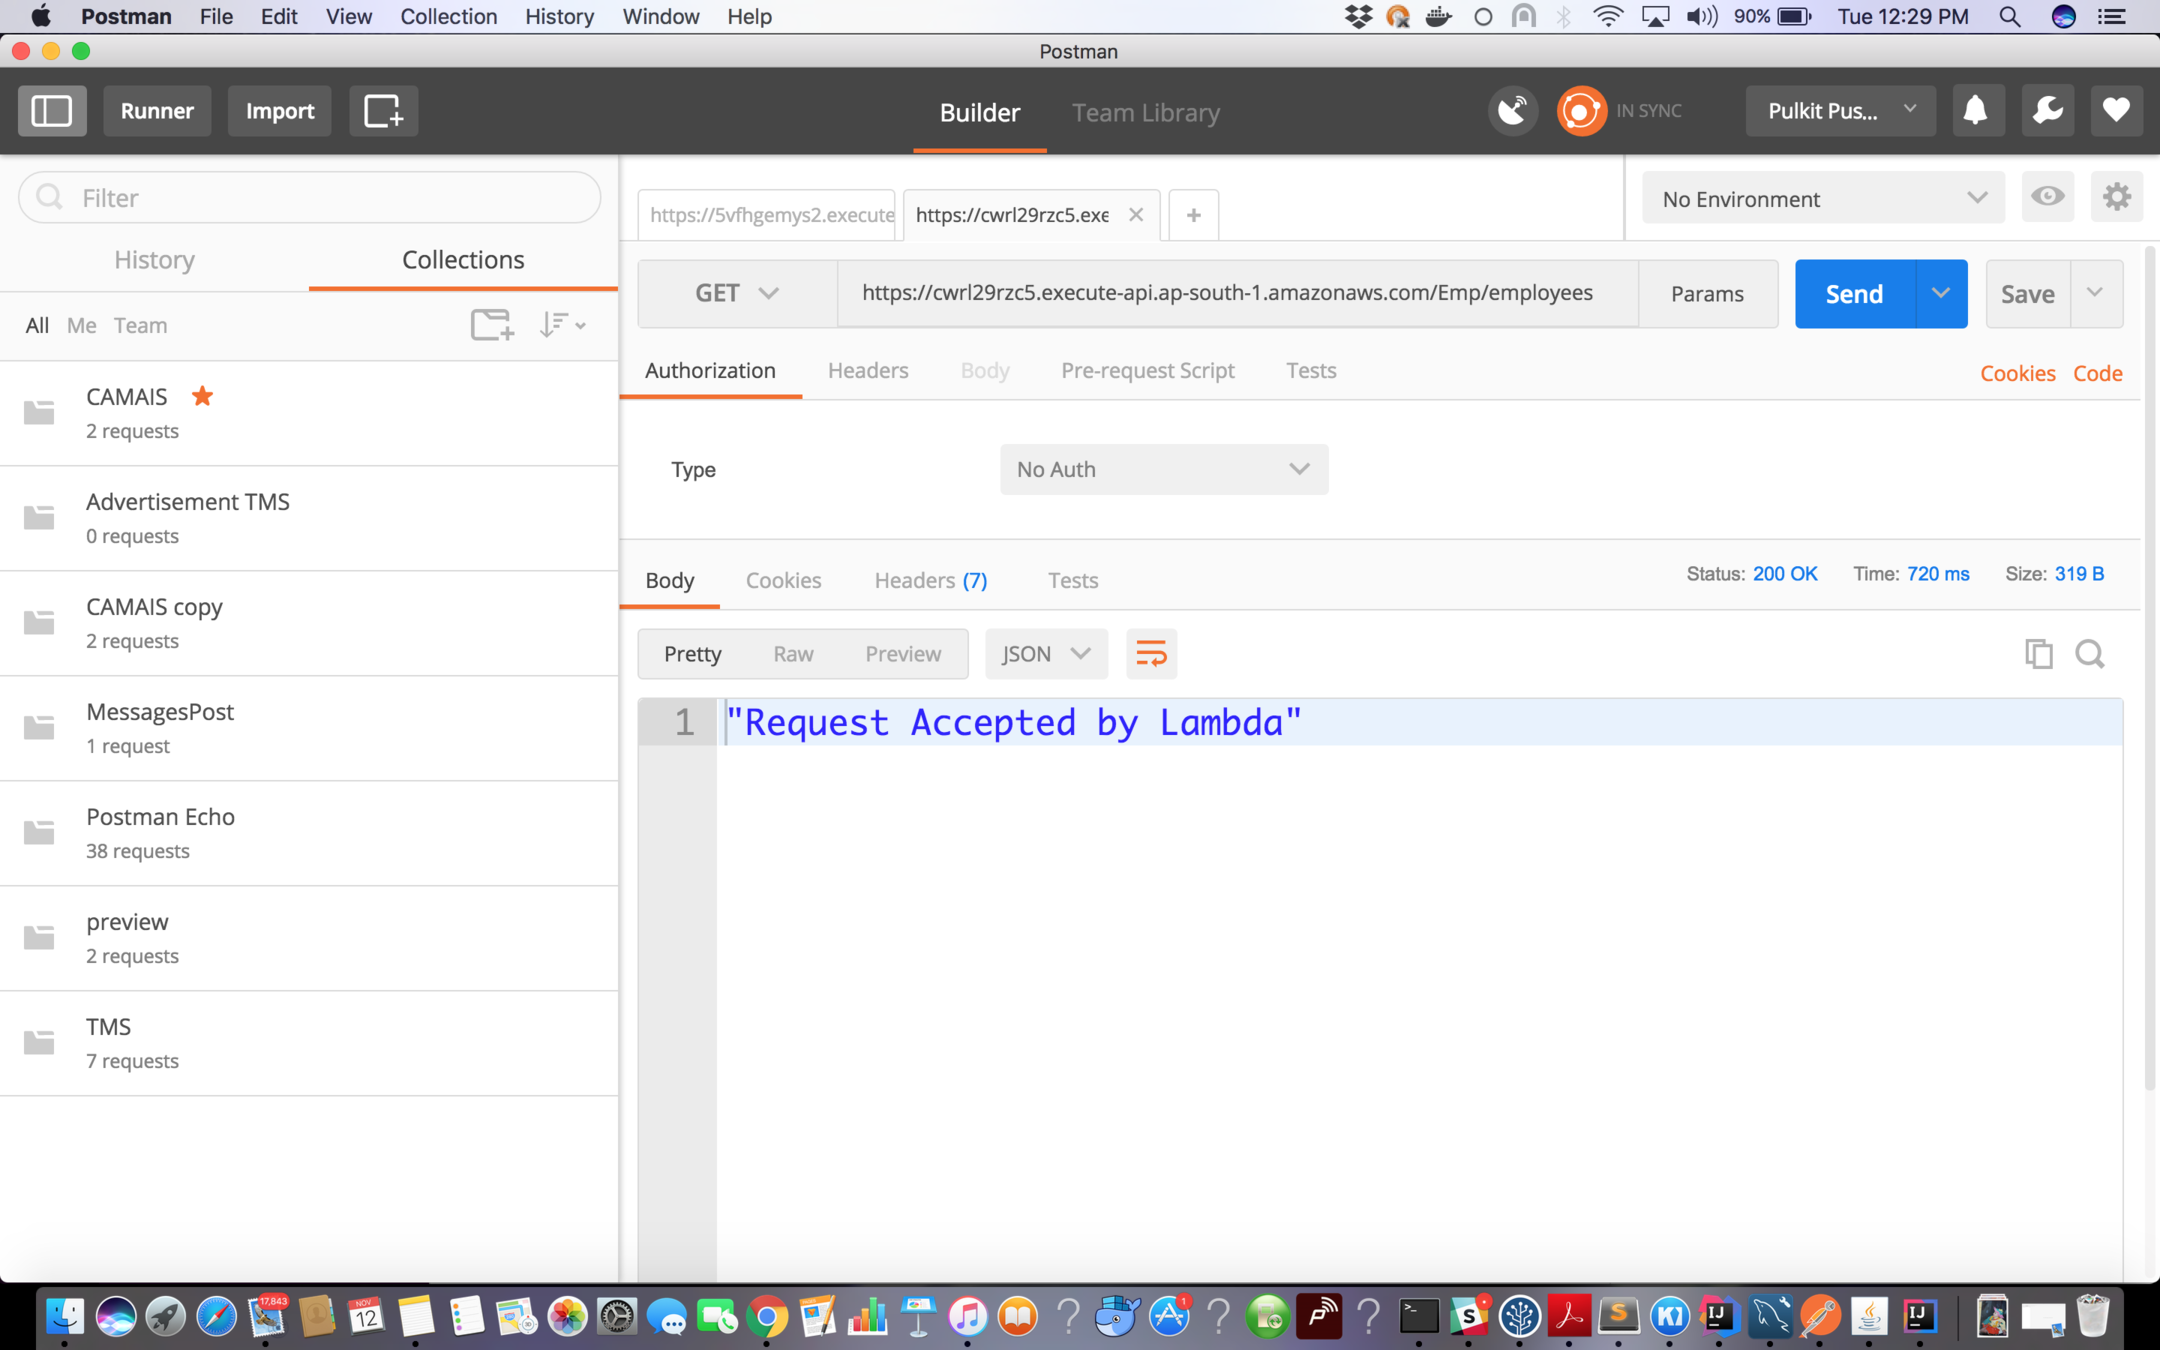
return "Request Accepted by Lambda";
}
}
package com.lambda.demo;

public class EmployeeRequest {

    private String httpMethod;

    // Getter, Setter and toString

}
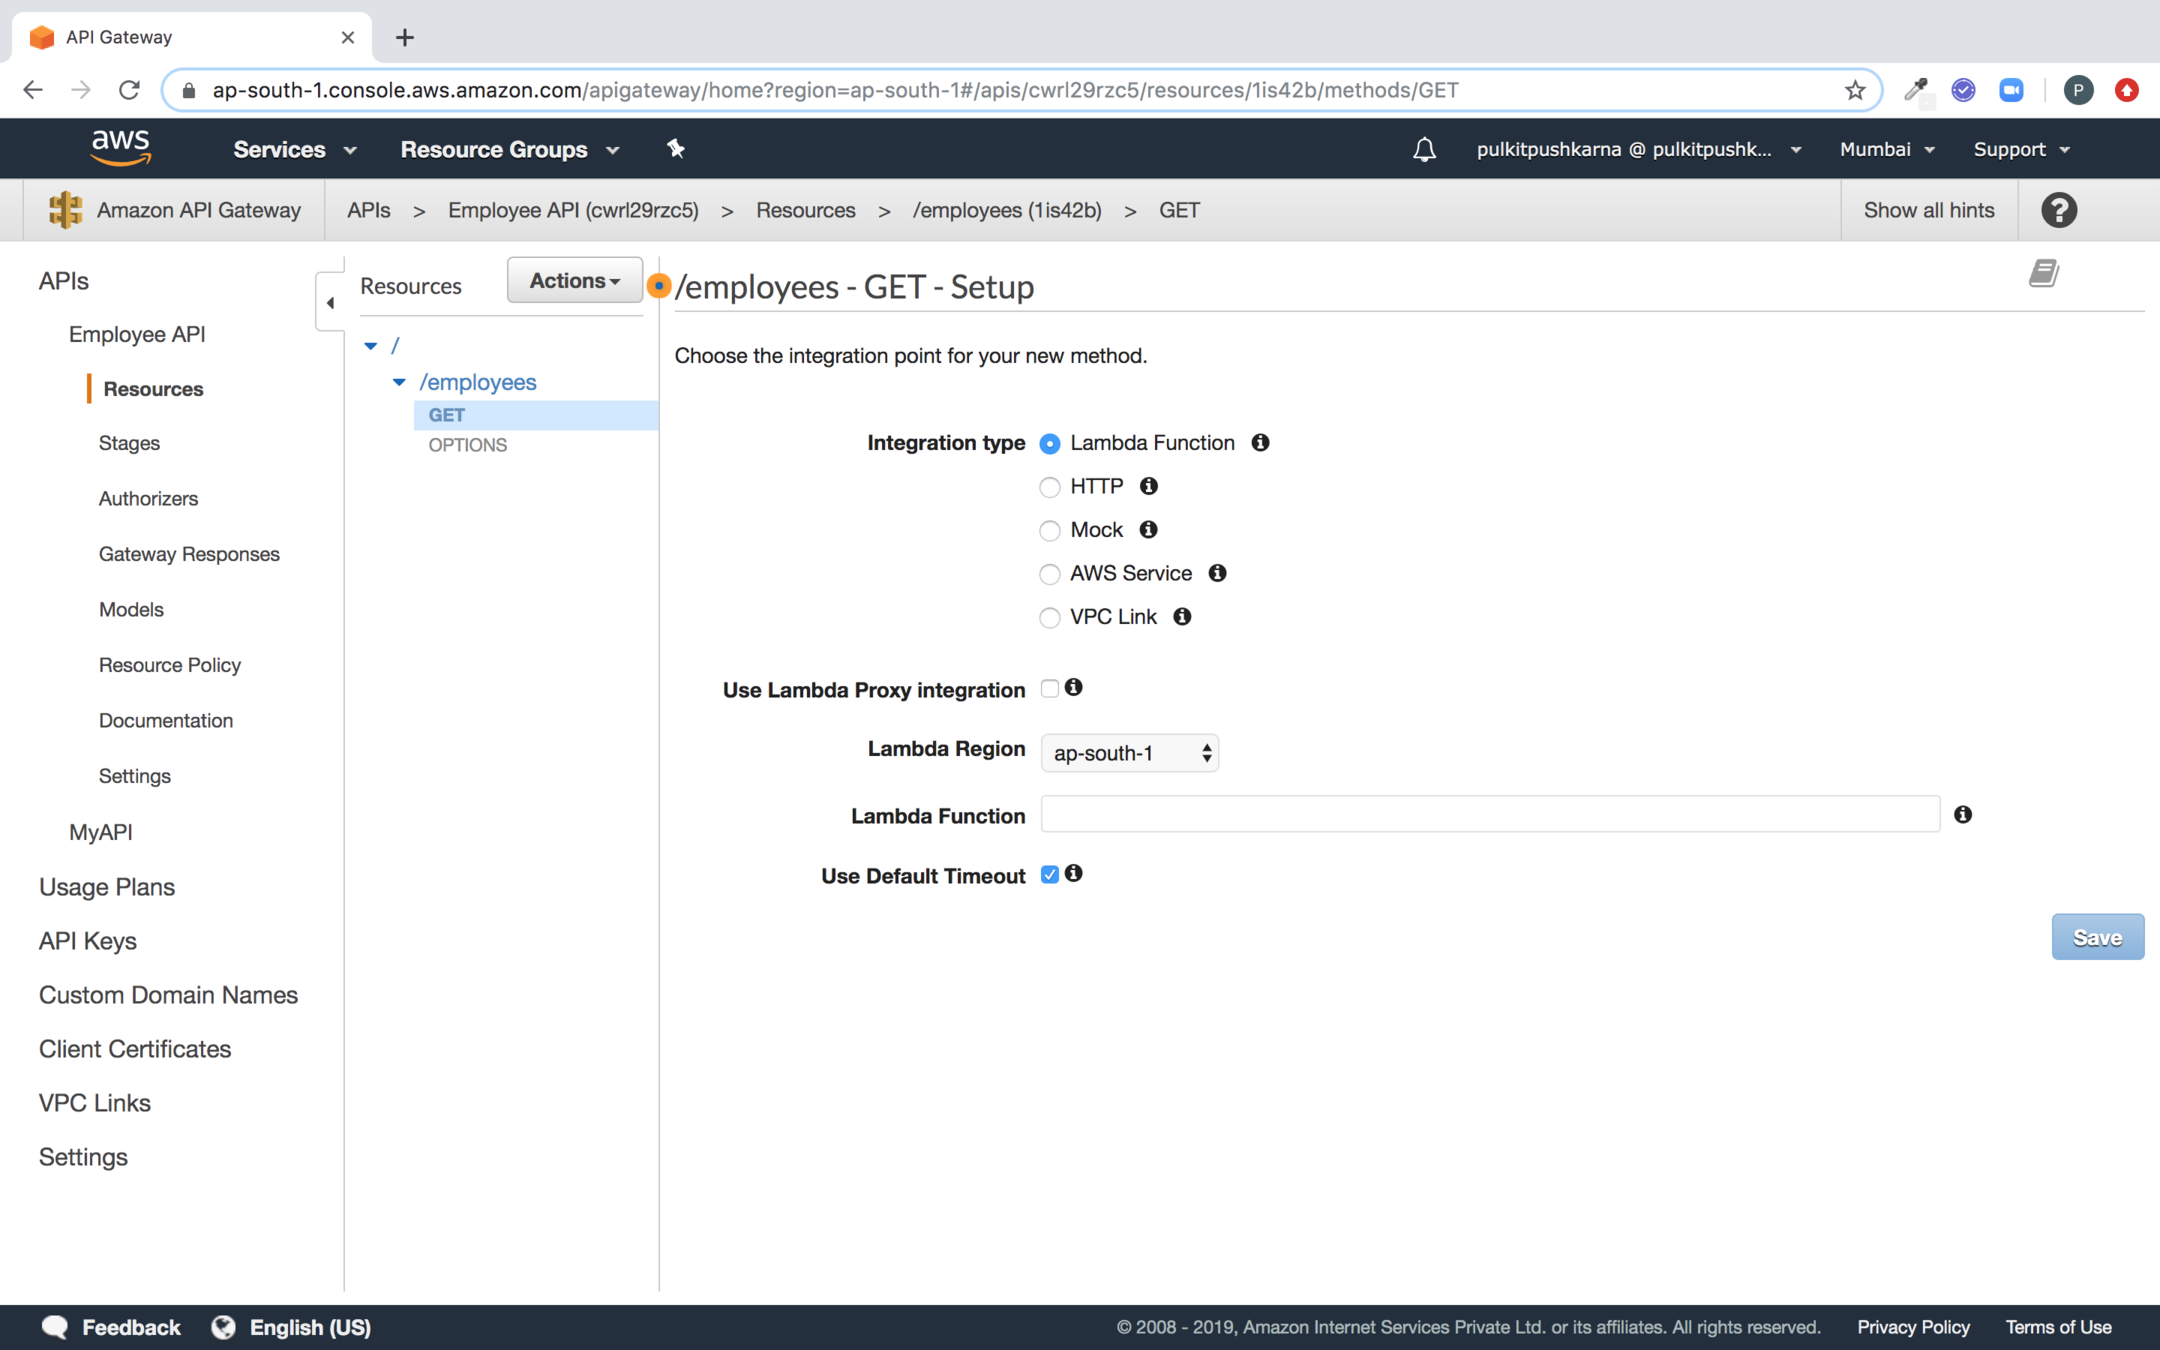
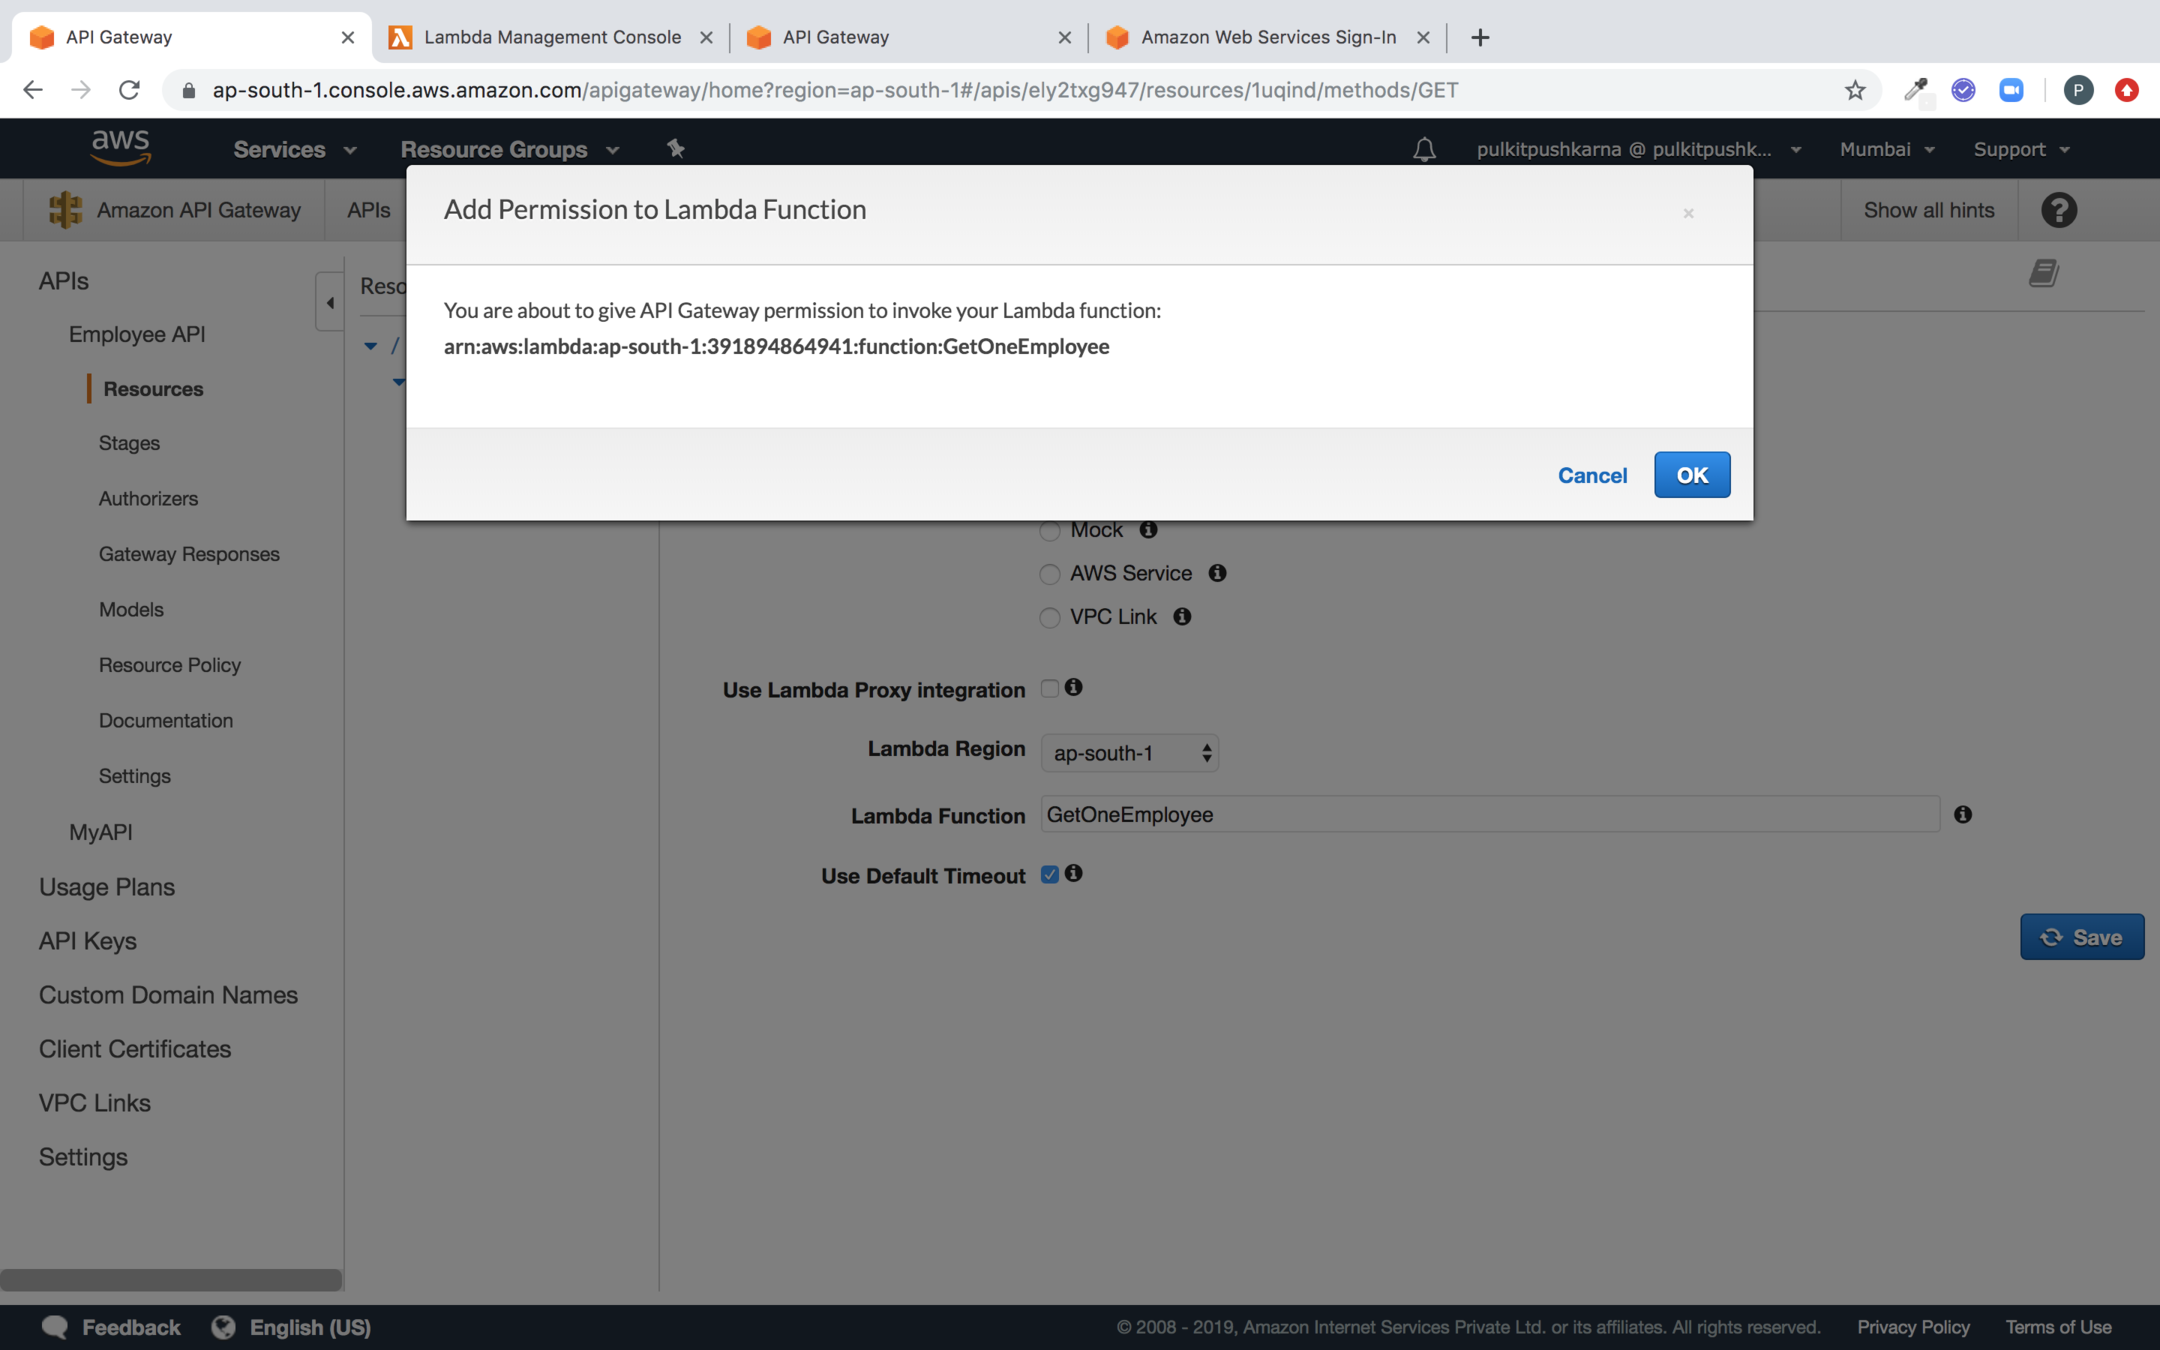
Select the lambda you need to trigger for Get call and Click on Save

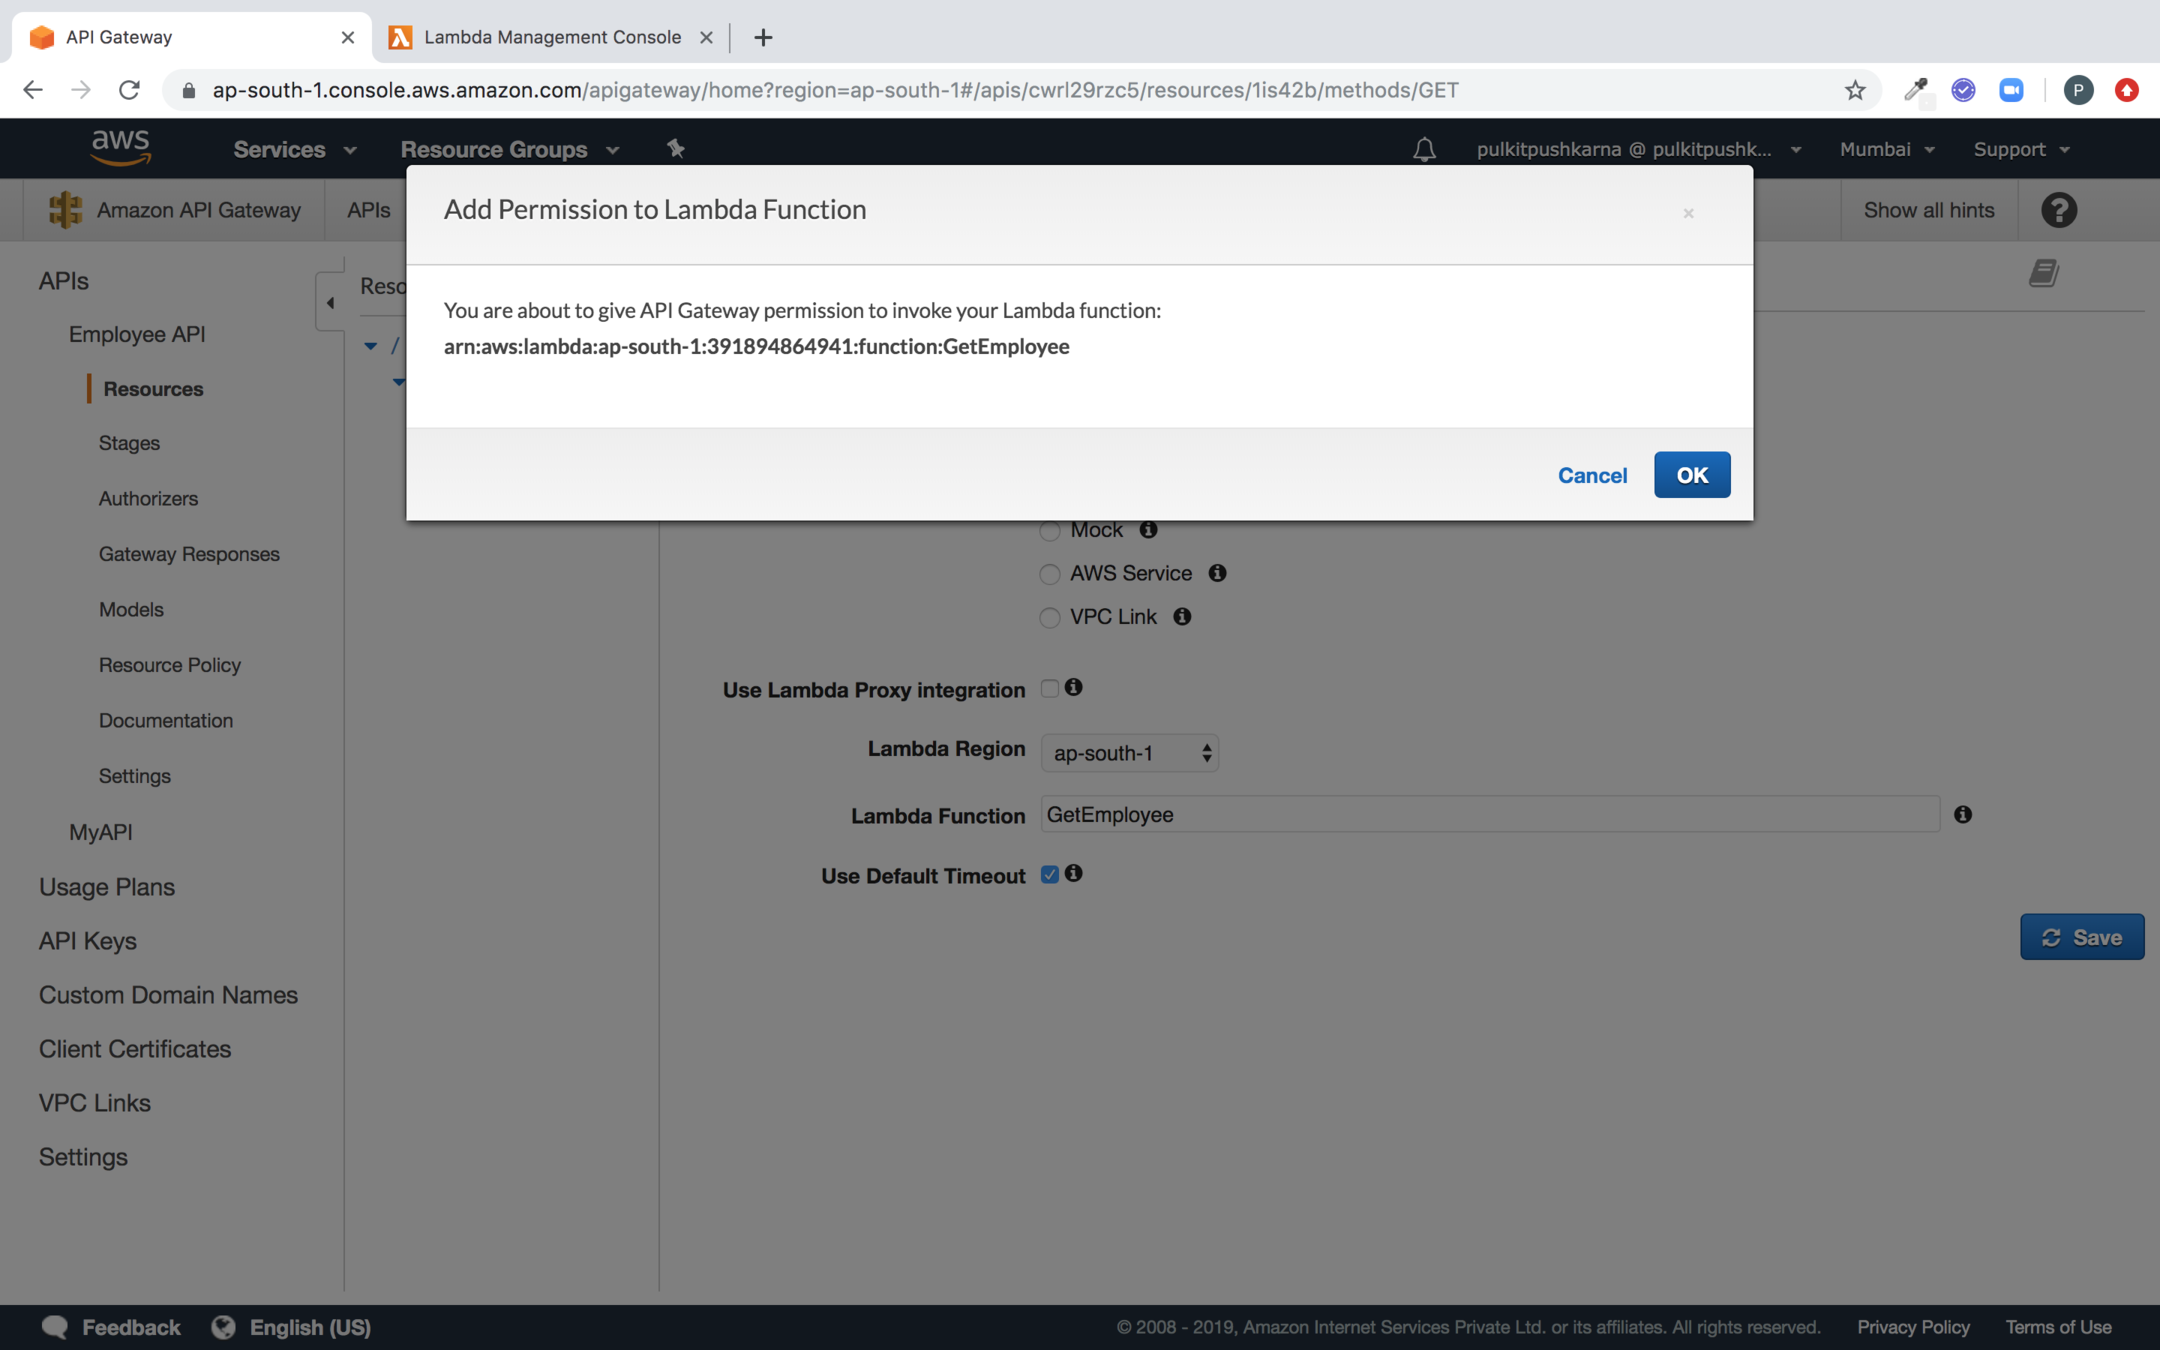
Click on ok to add API Gateway Permission to lambda
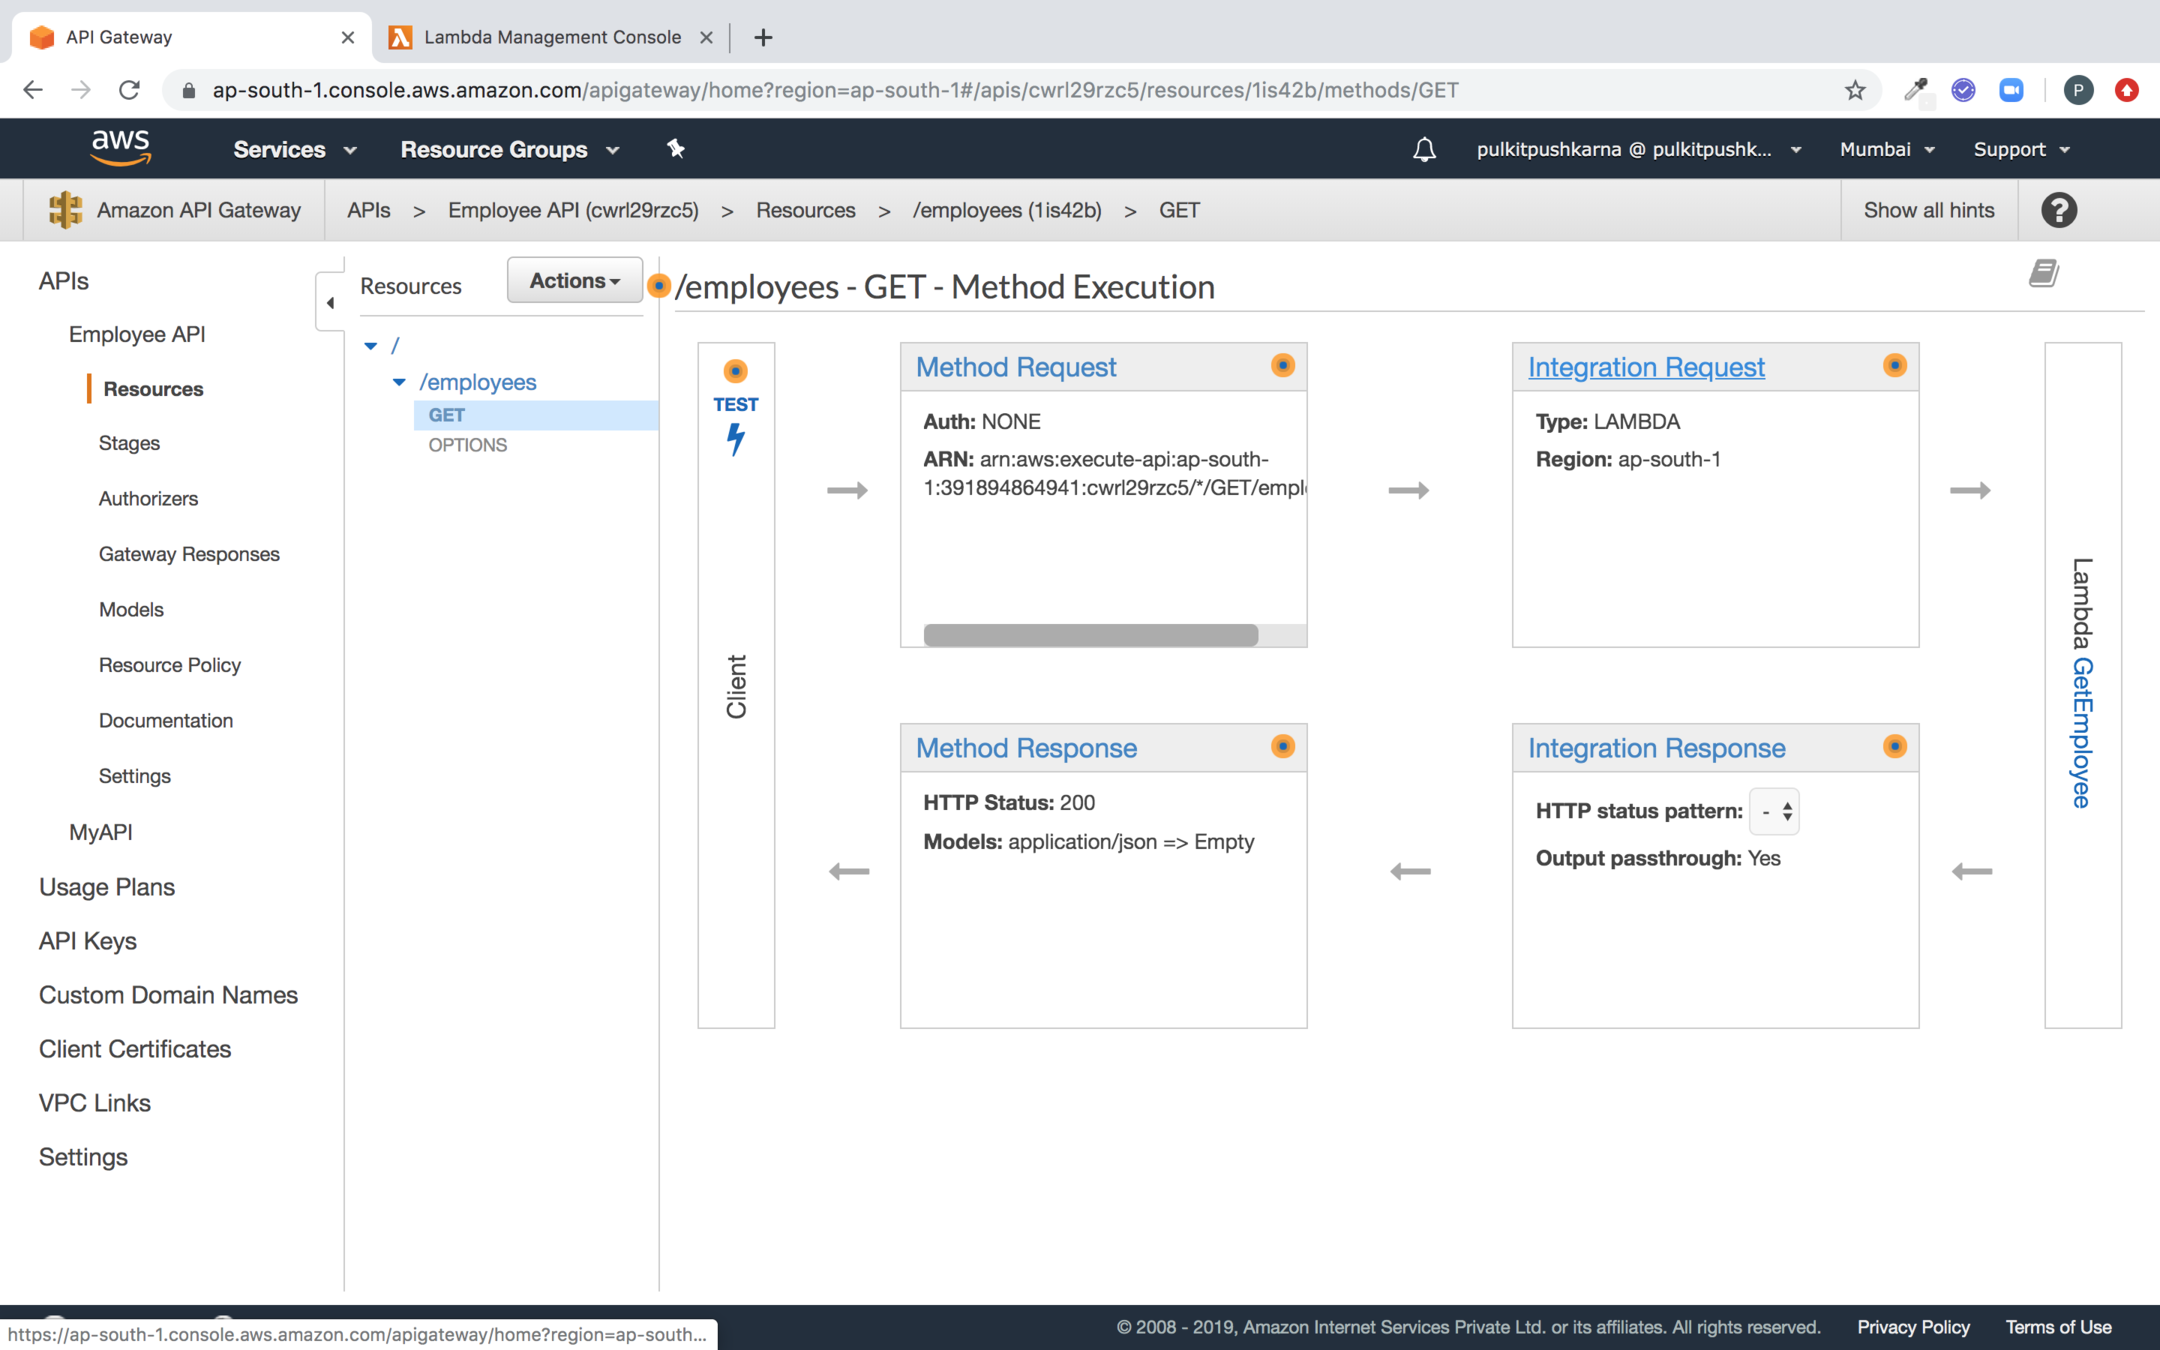
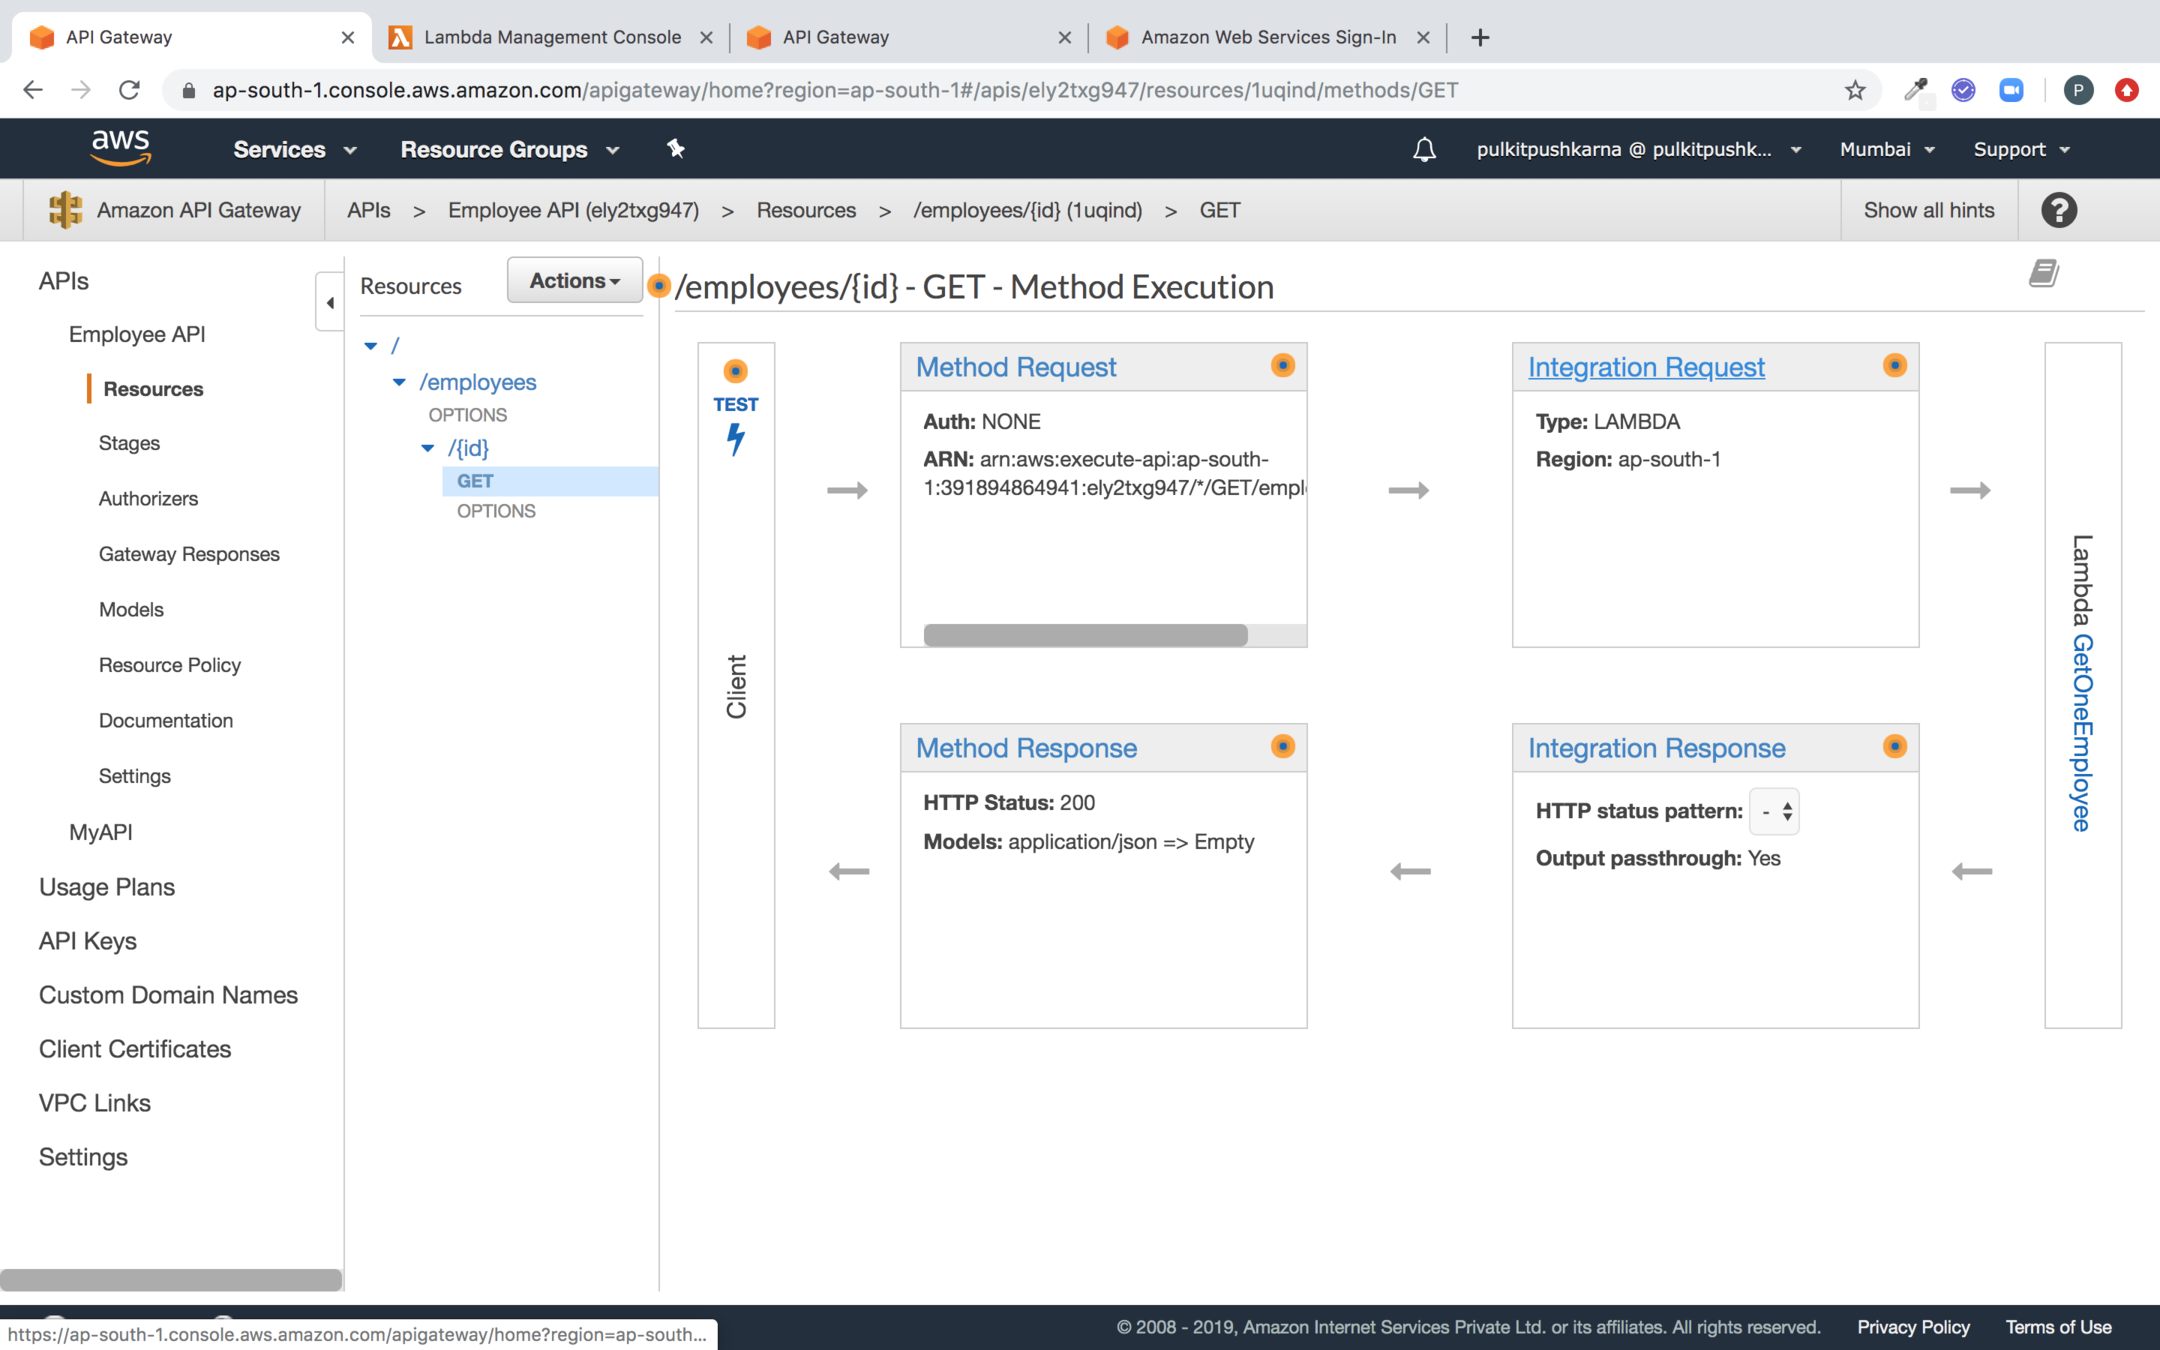
Click on the Integration Request
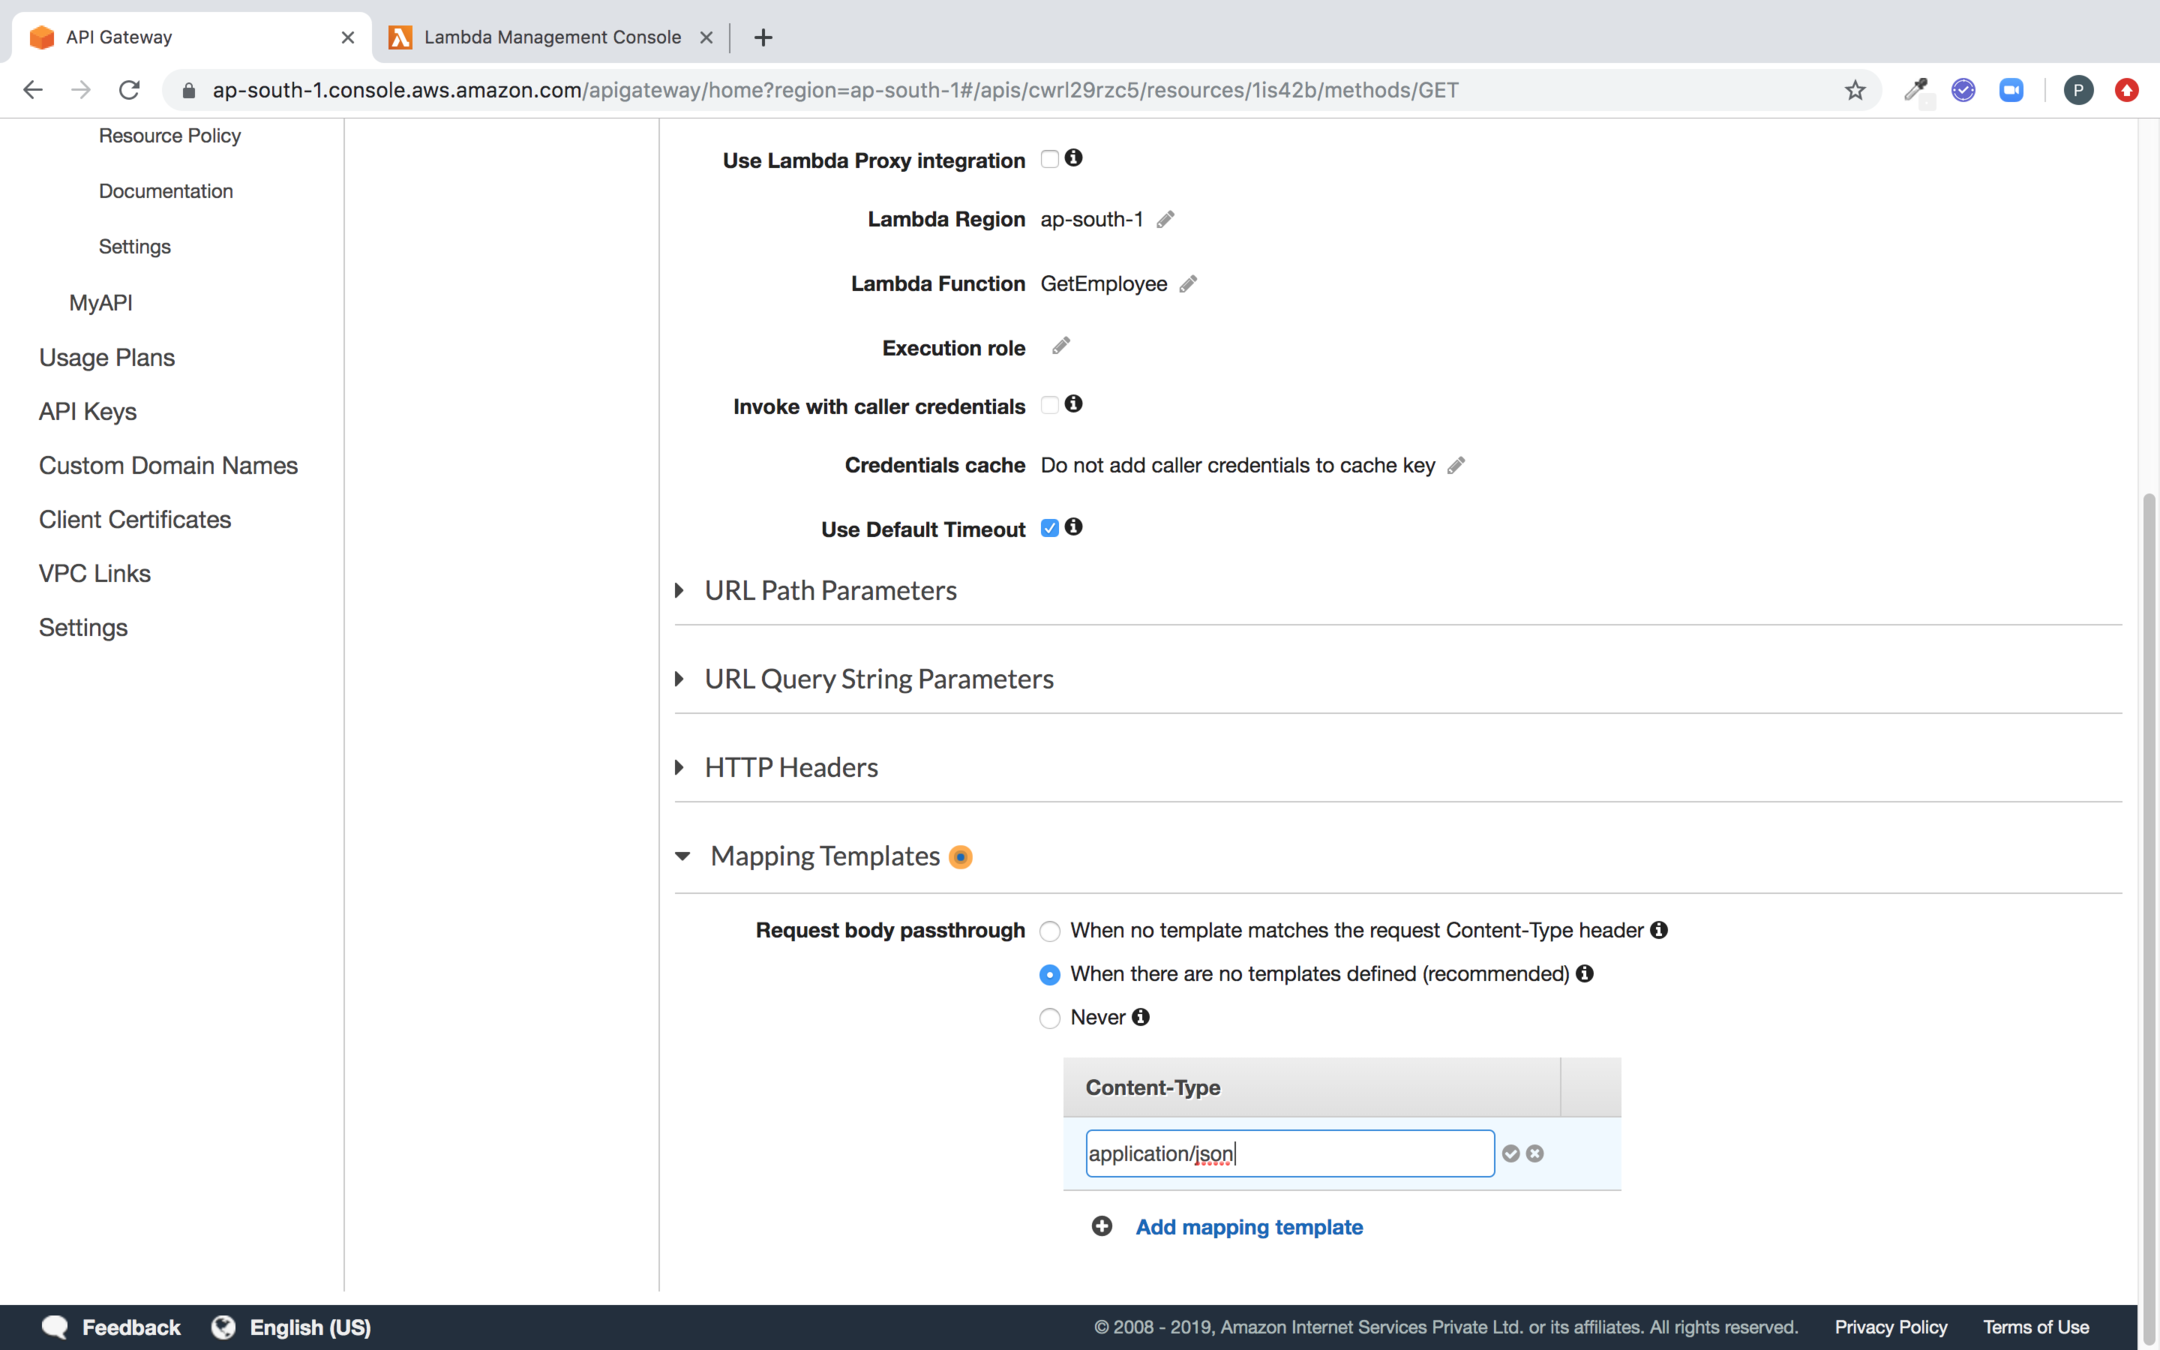
Go to the Mapping Templates, click on Add mapping template and enter application/json in text box
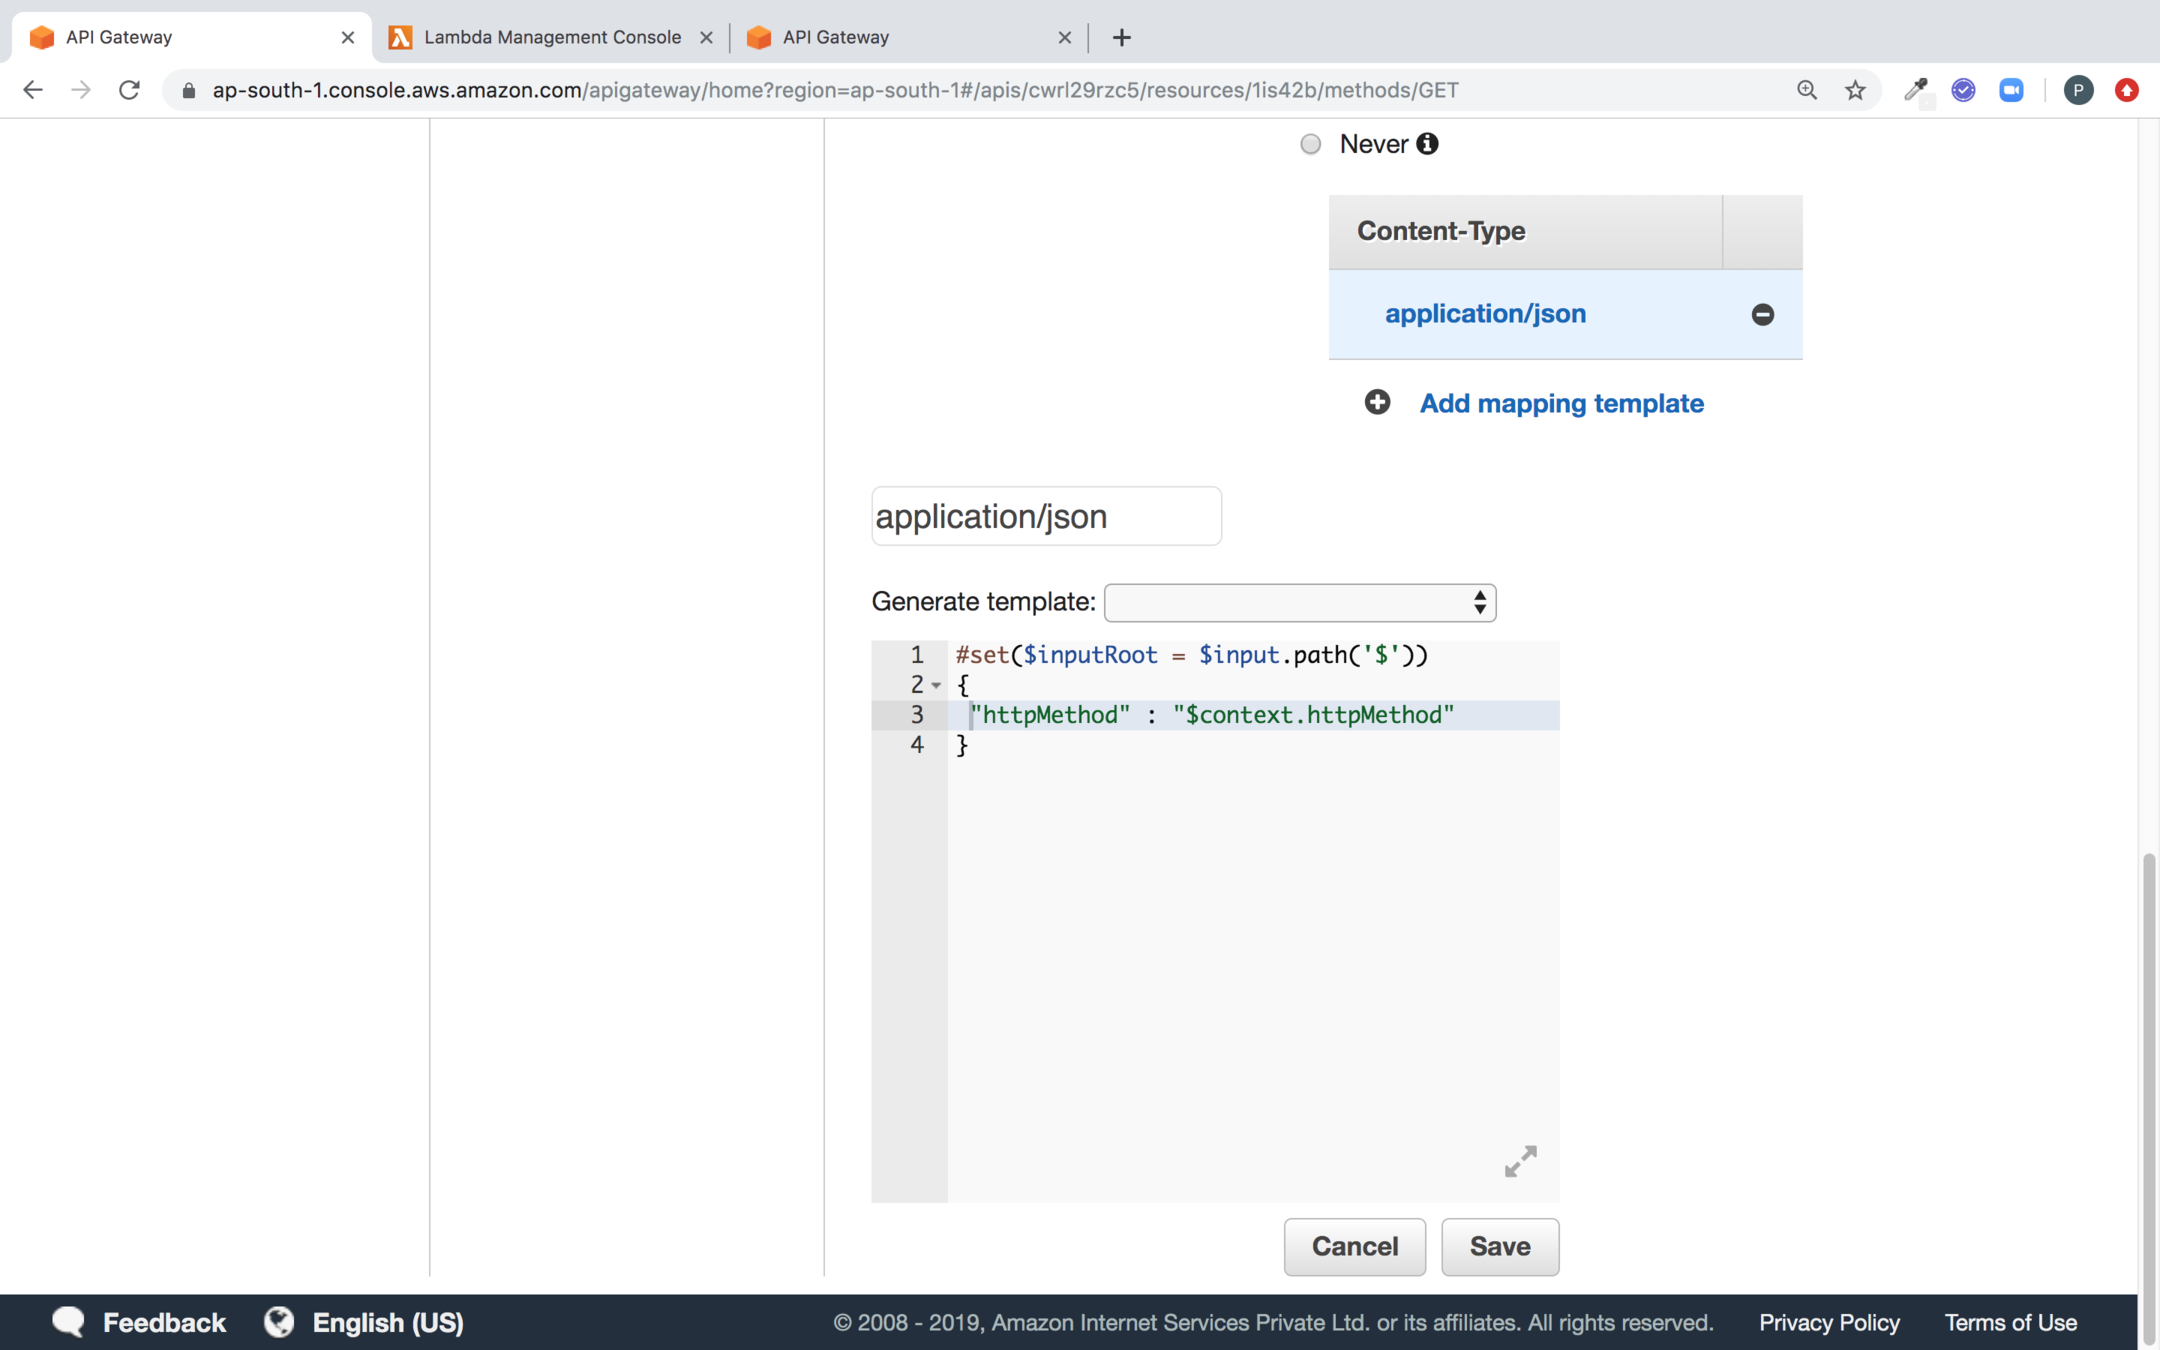
Use the velocity script for template mapping to capture request variables and click on save
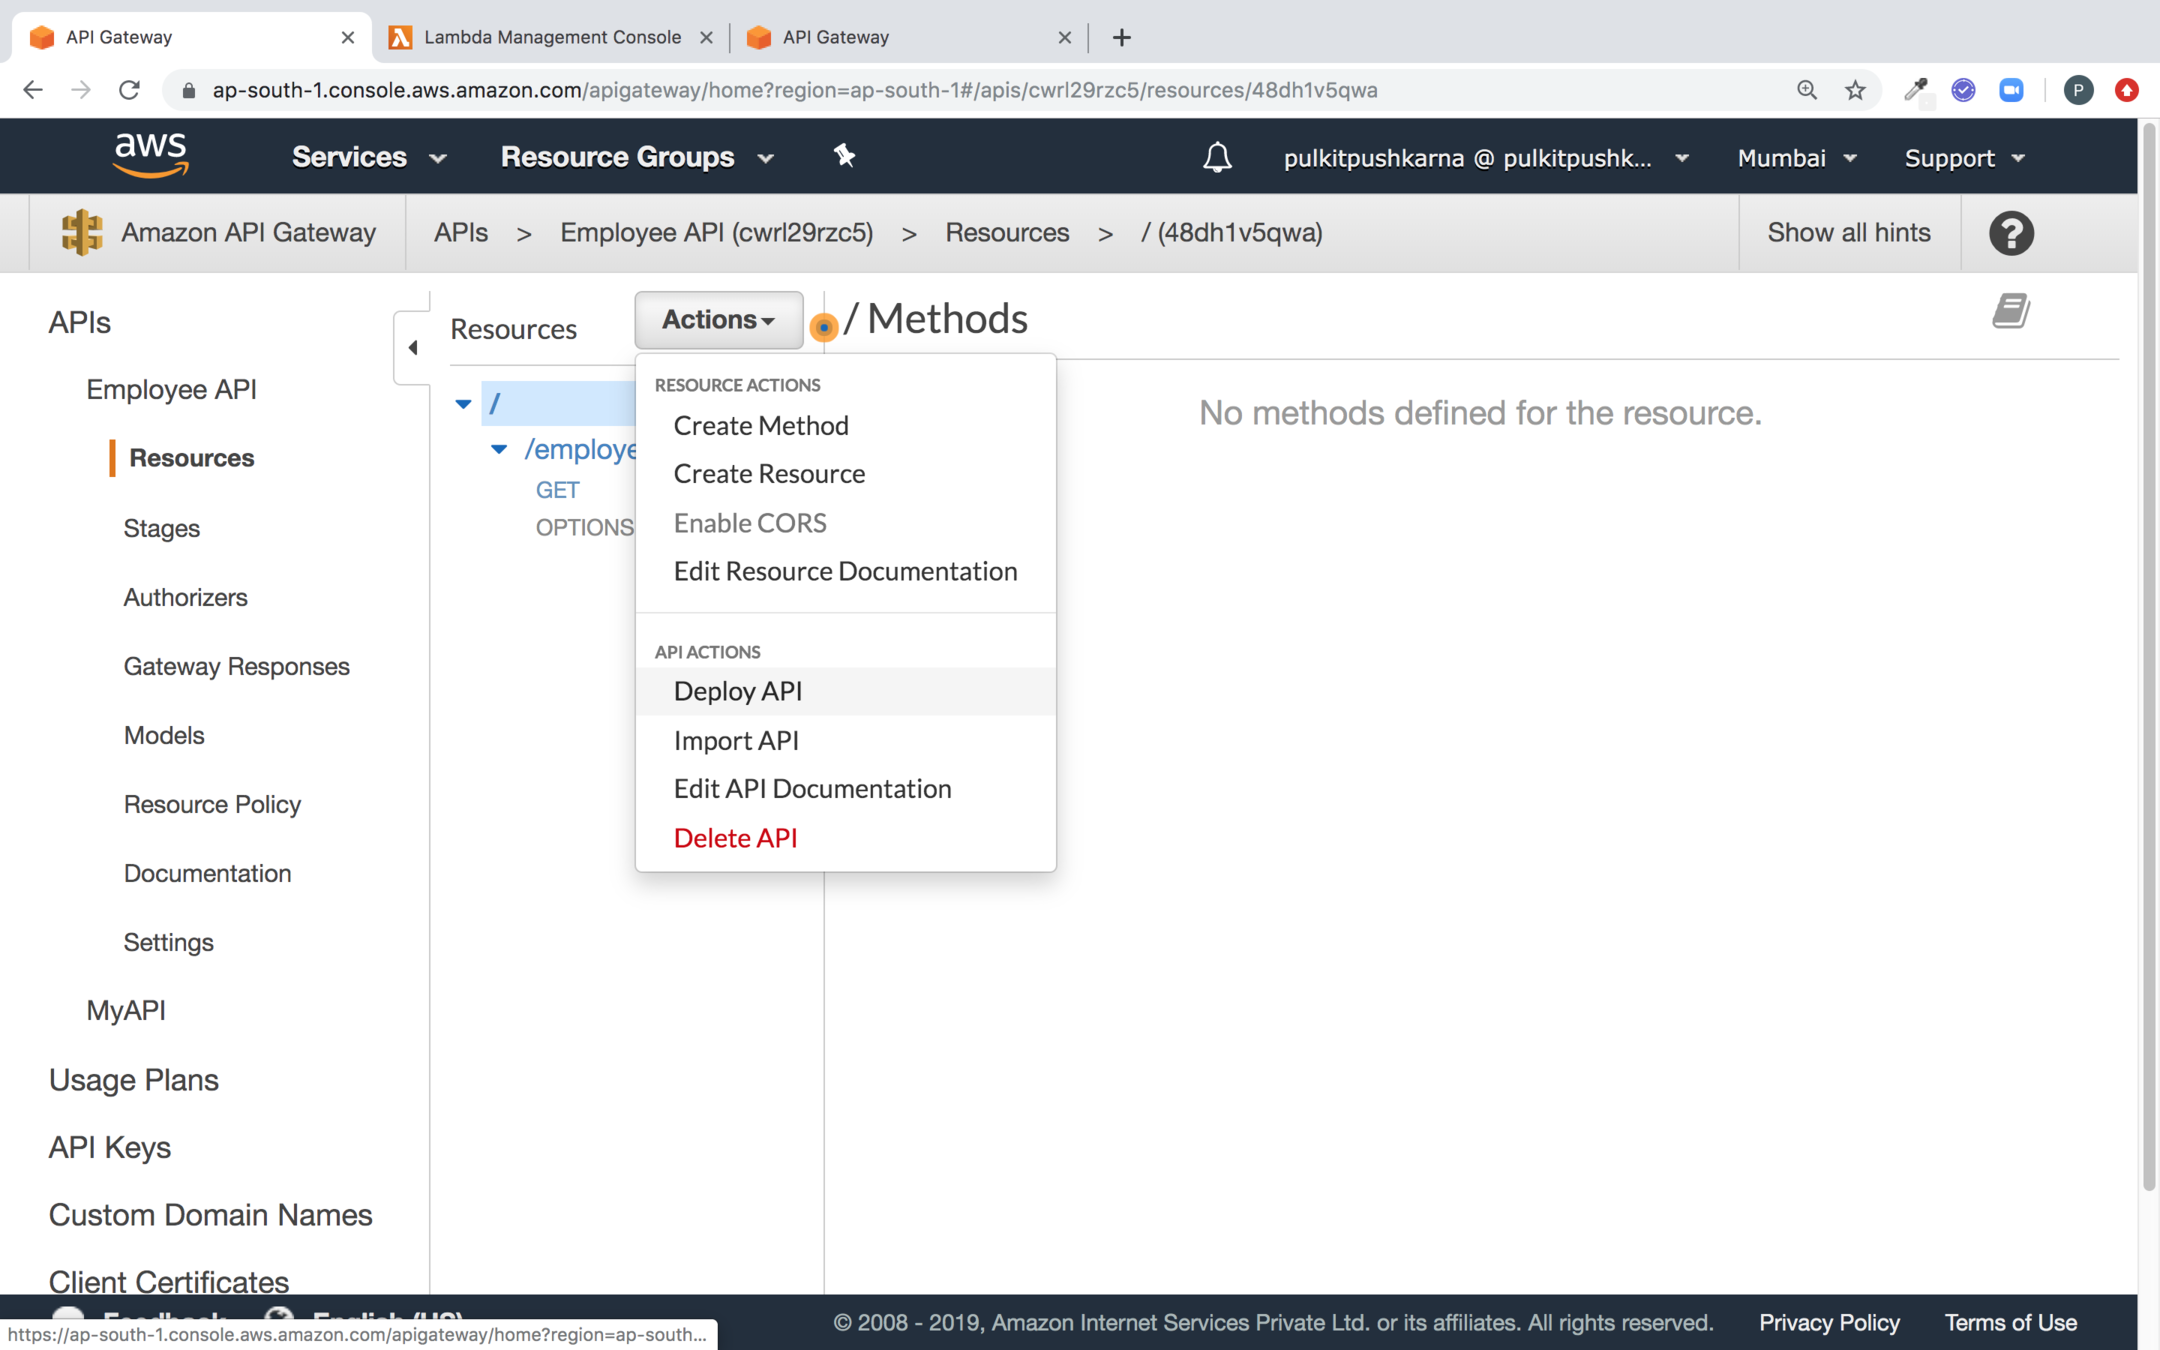
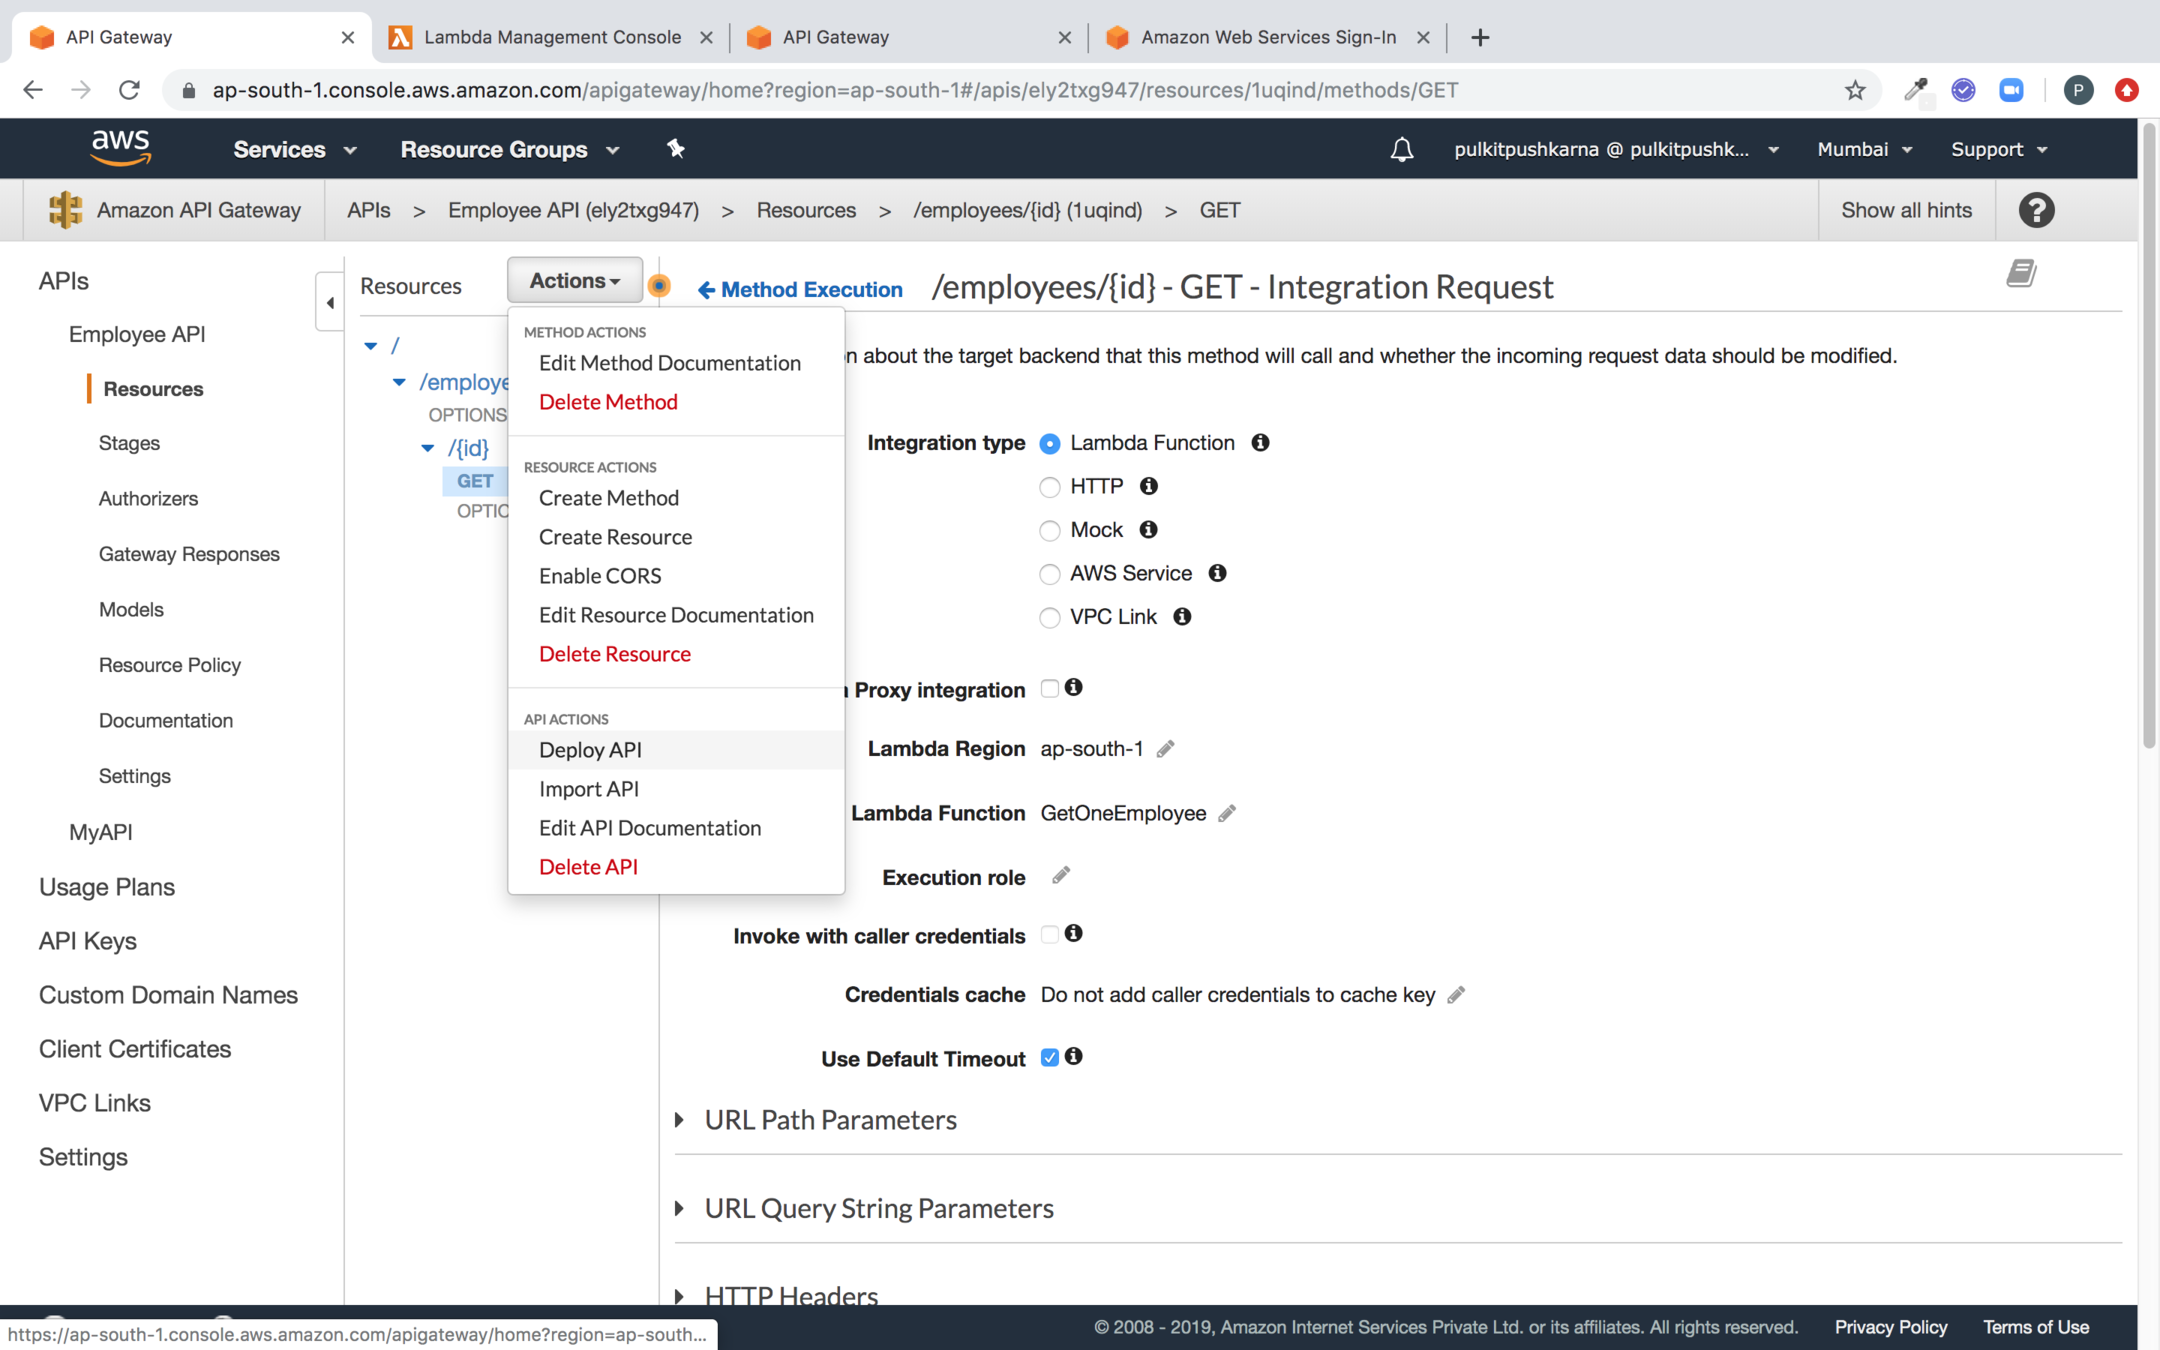
Now go to the Action and Deploy the API
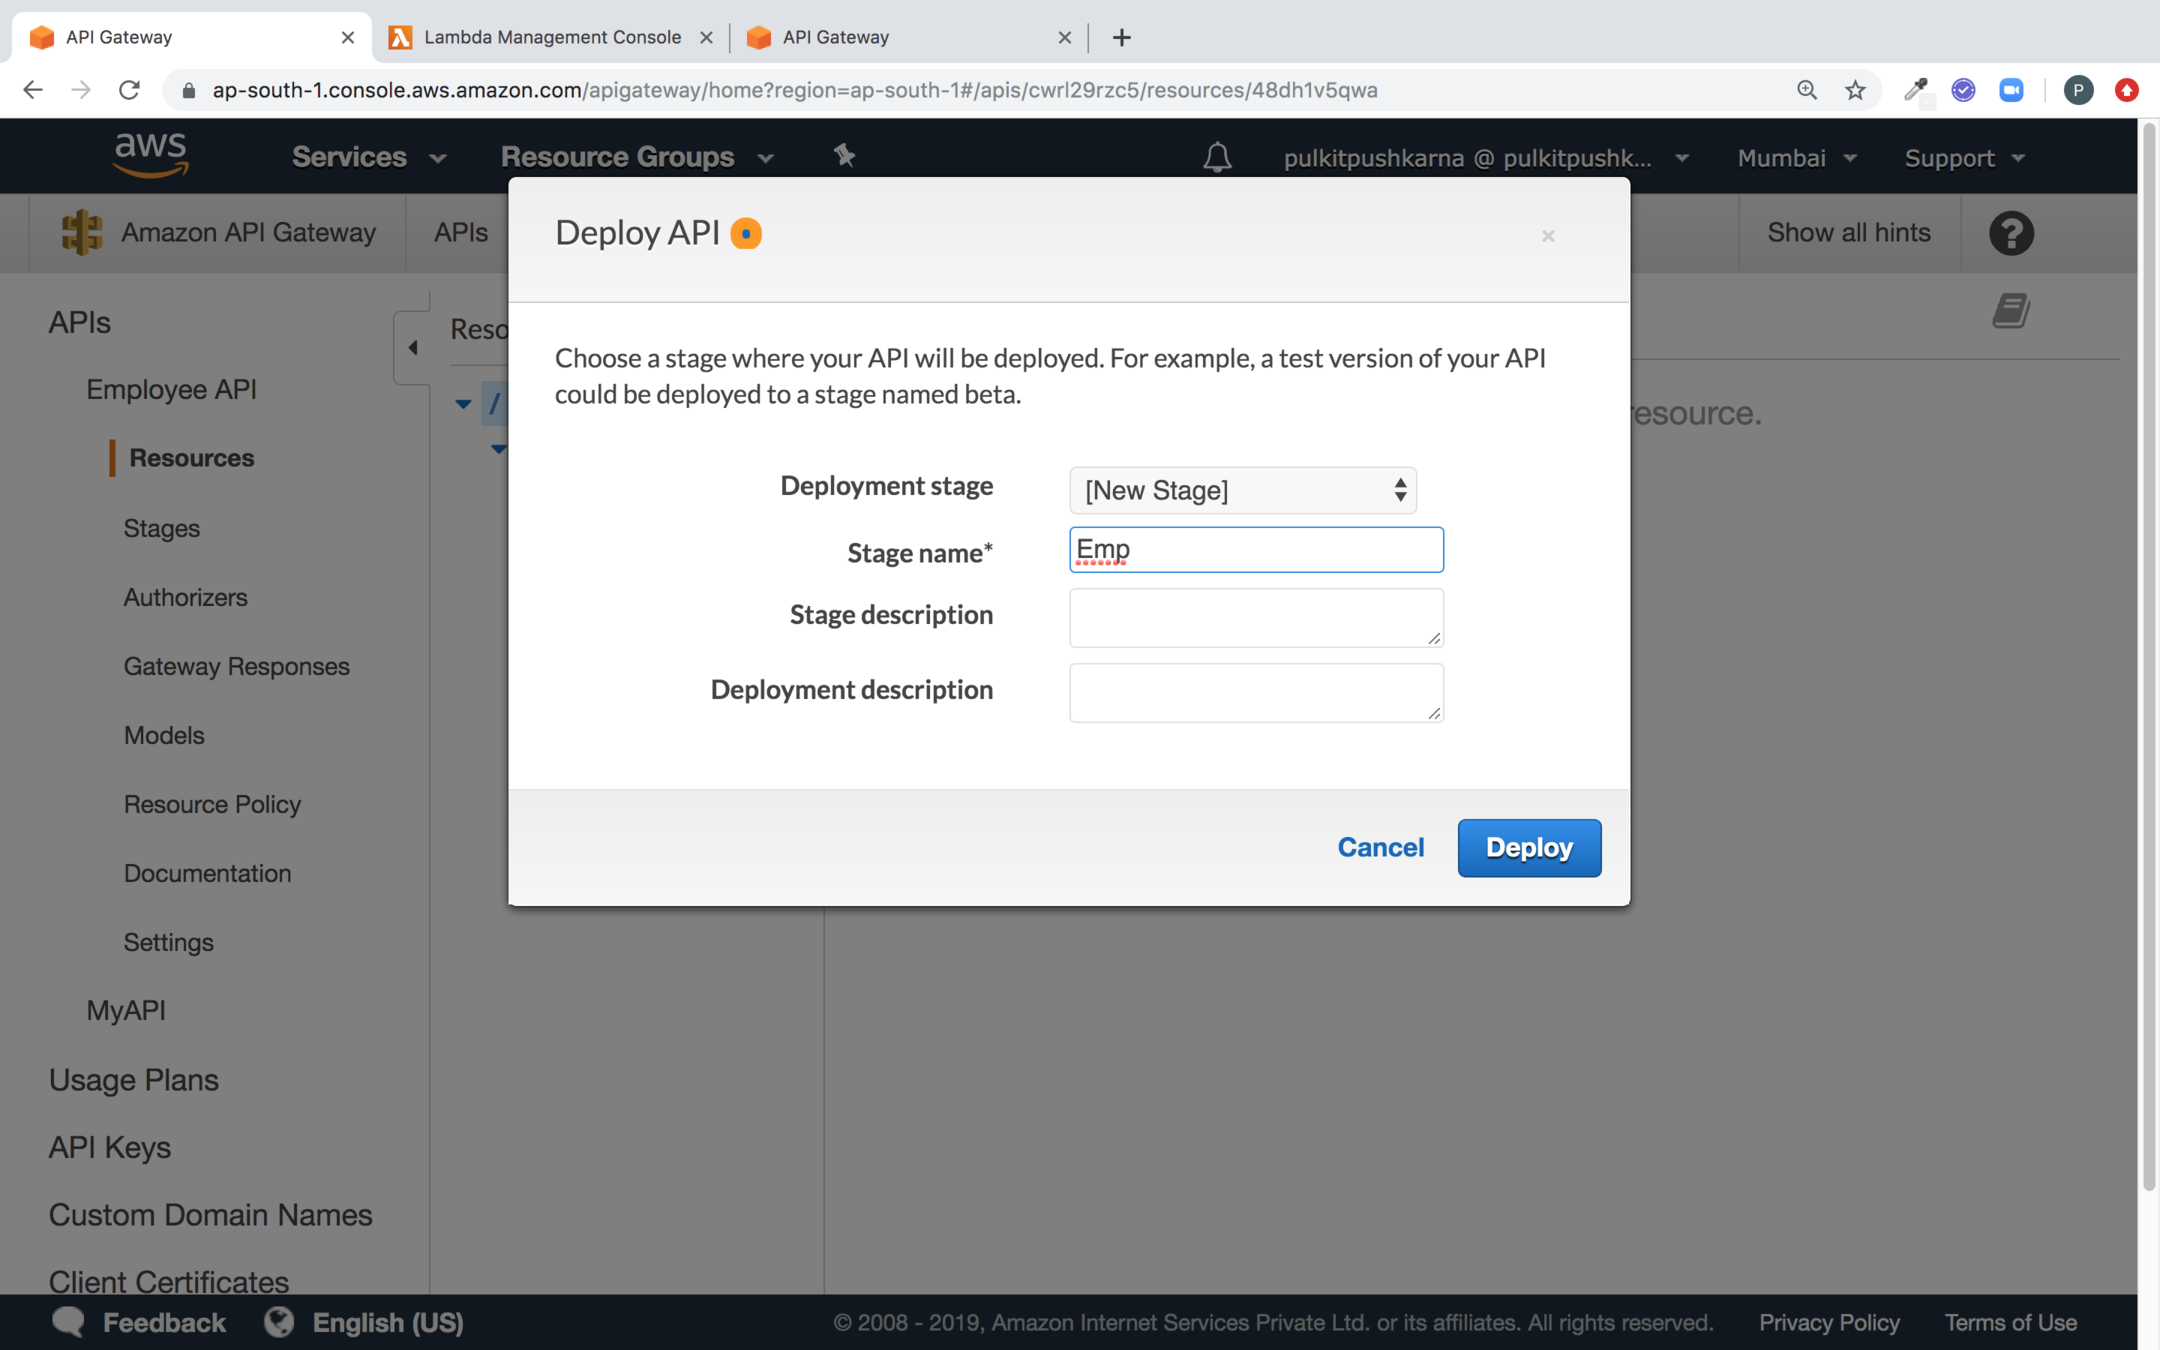
Create a new Deployment Stage and Click on Deploy
Now copy the Invoke URL
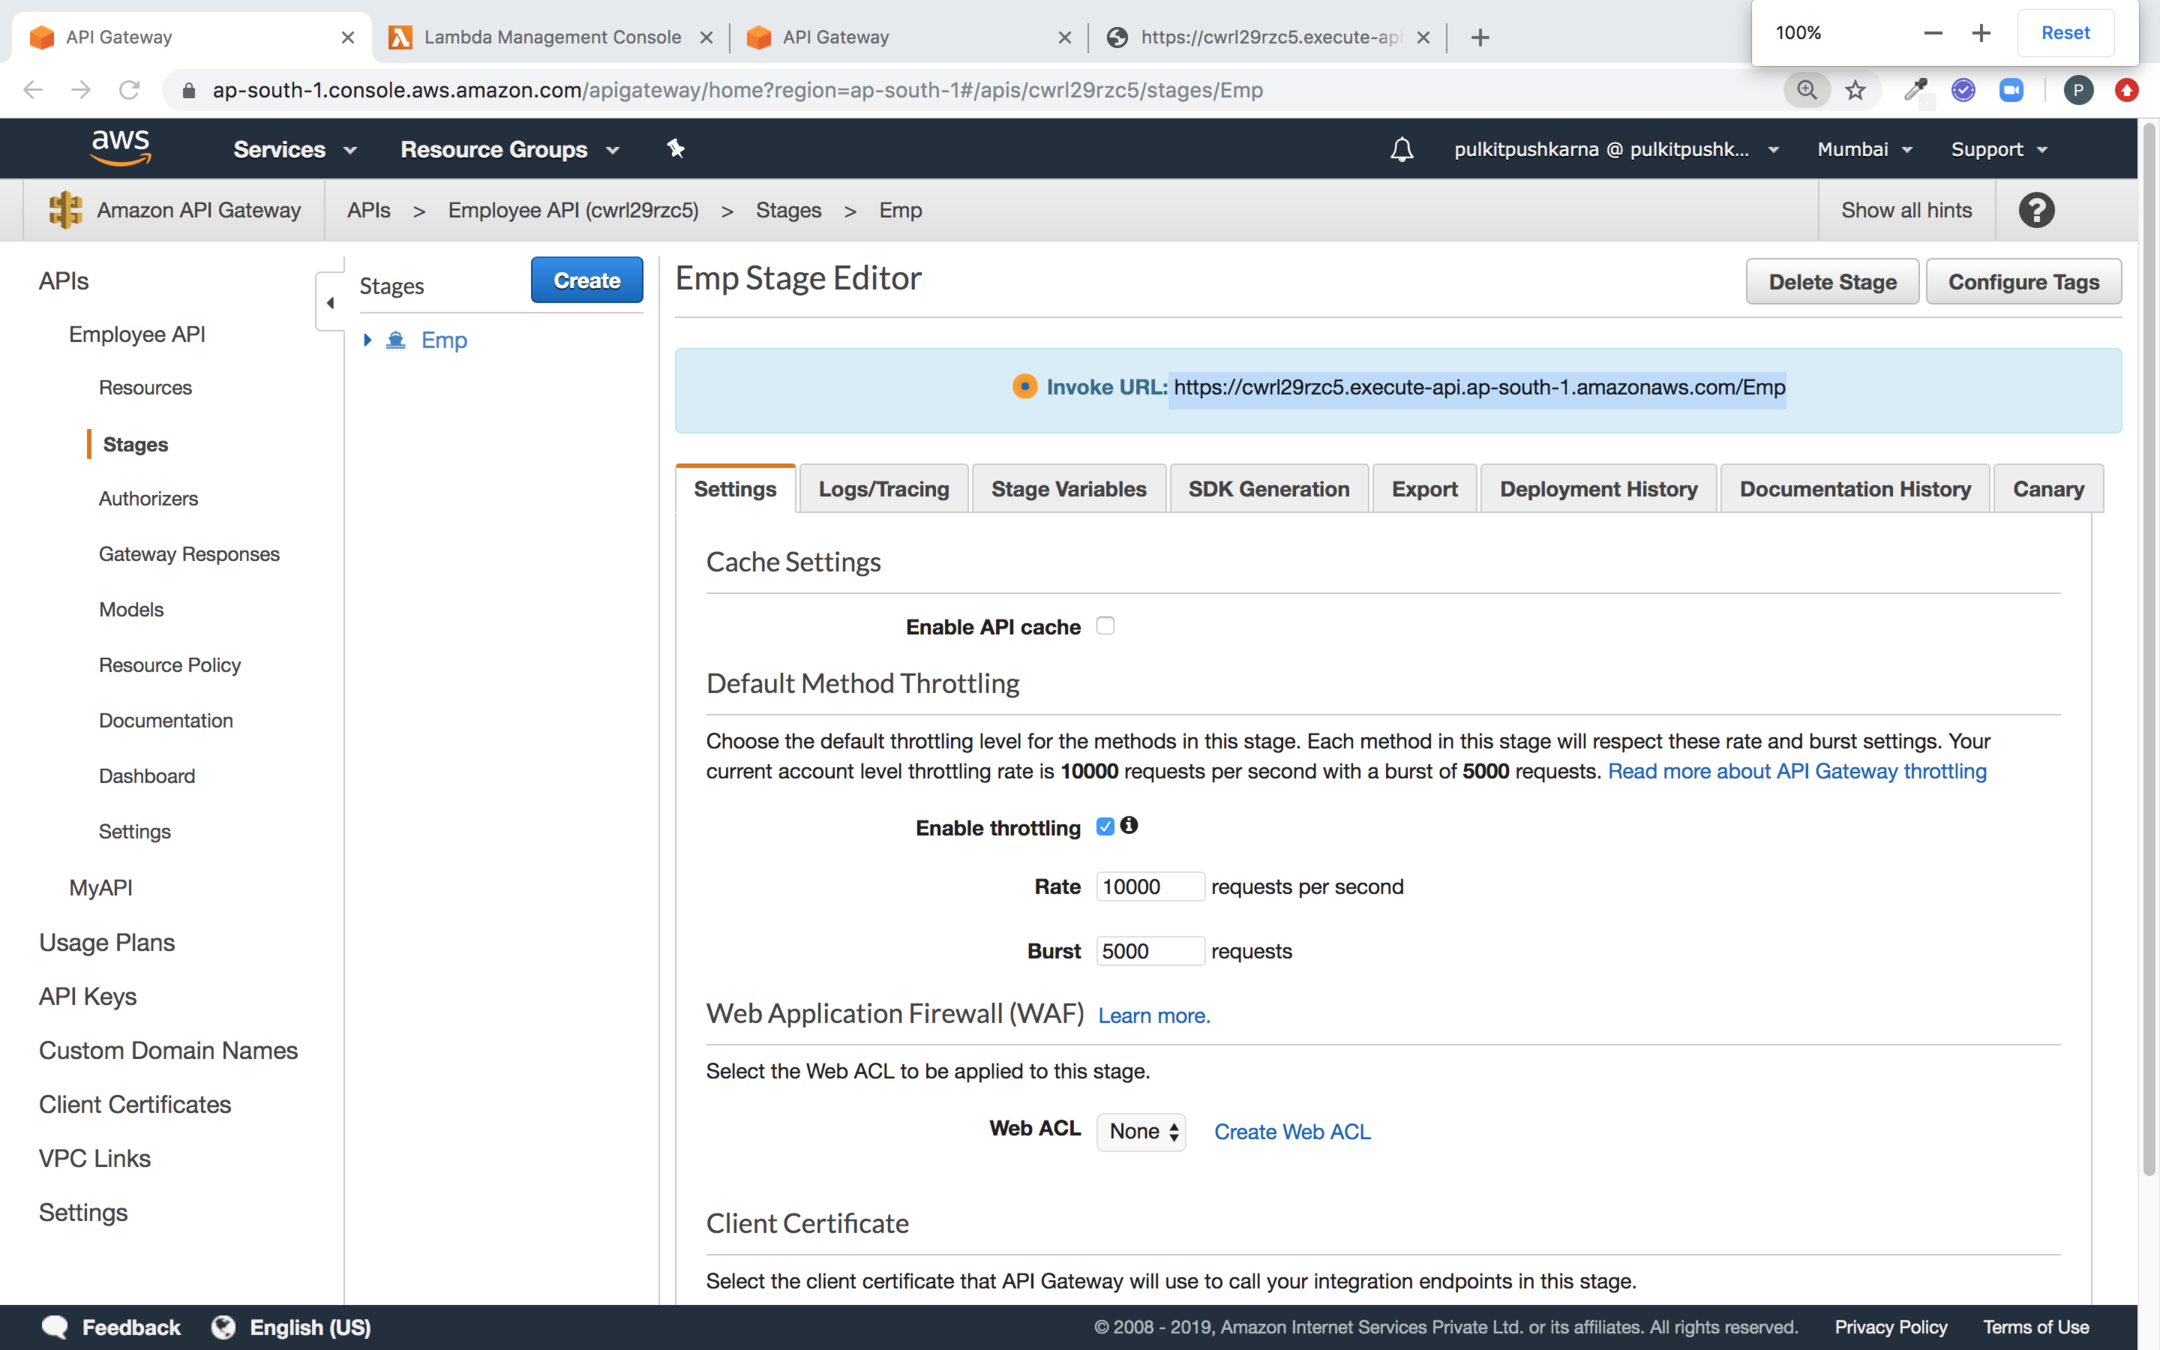
Hit the invoke url after suffix resource name
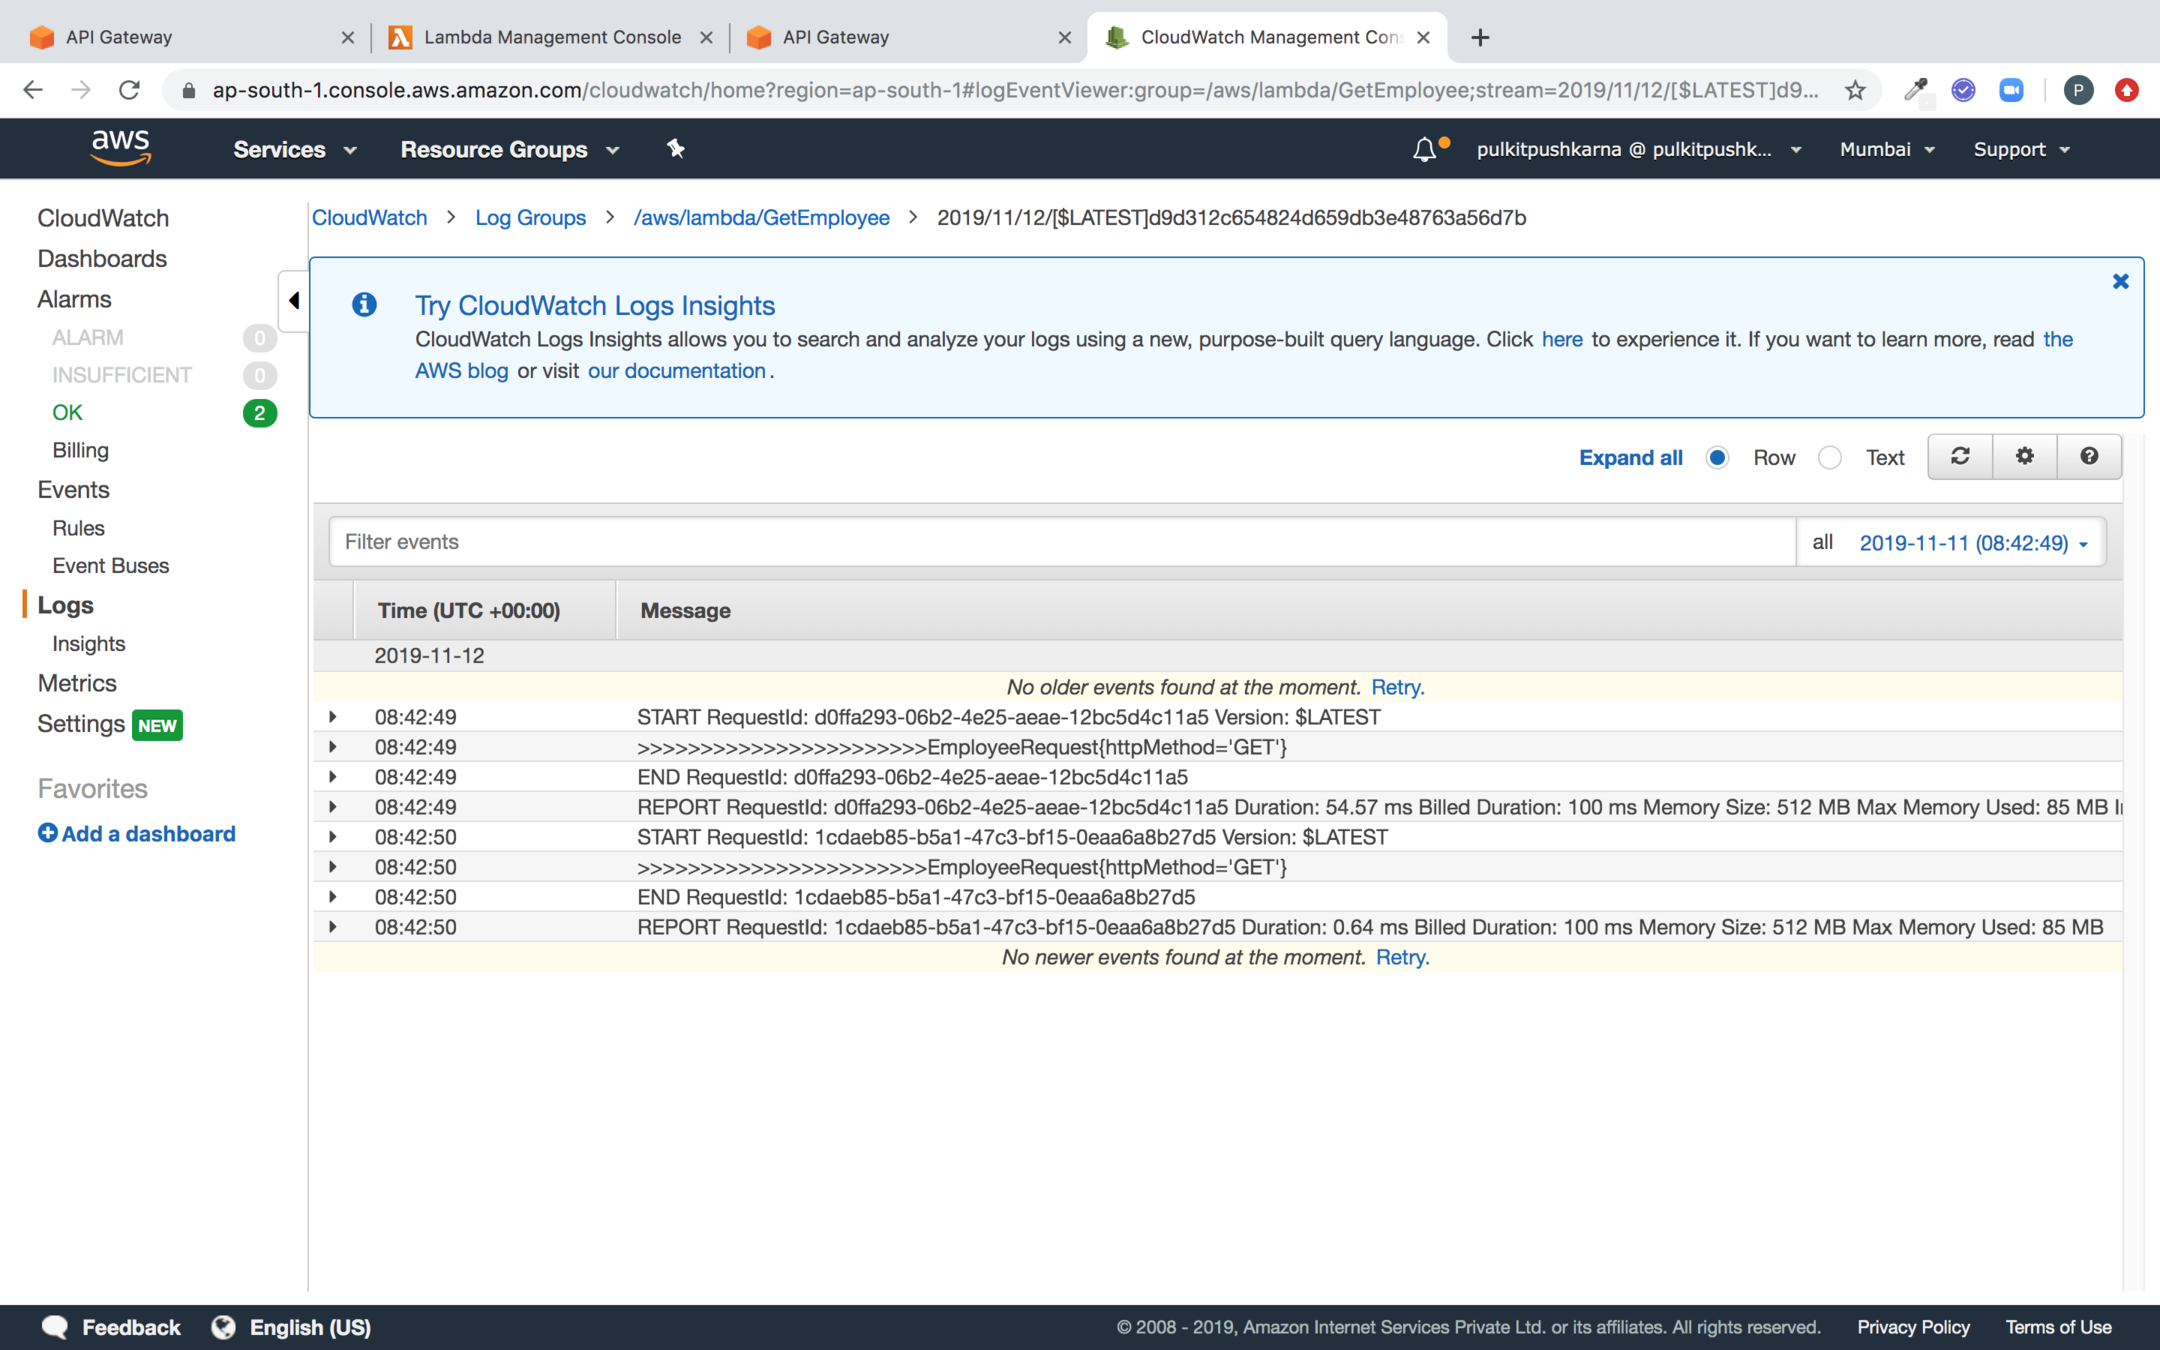
You can check the logs in Cloudwatch
Creating a POST request with DynamoDB
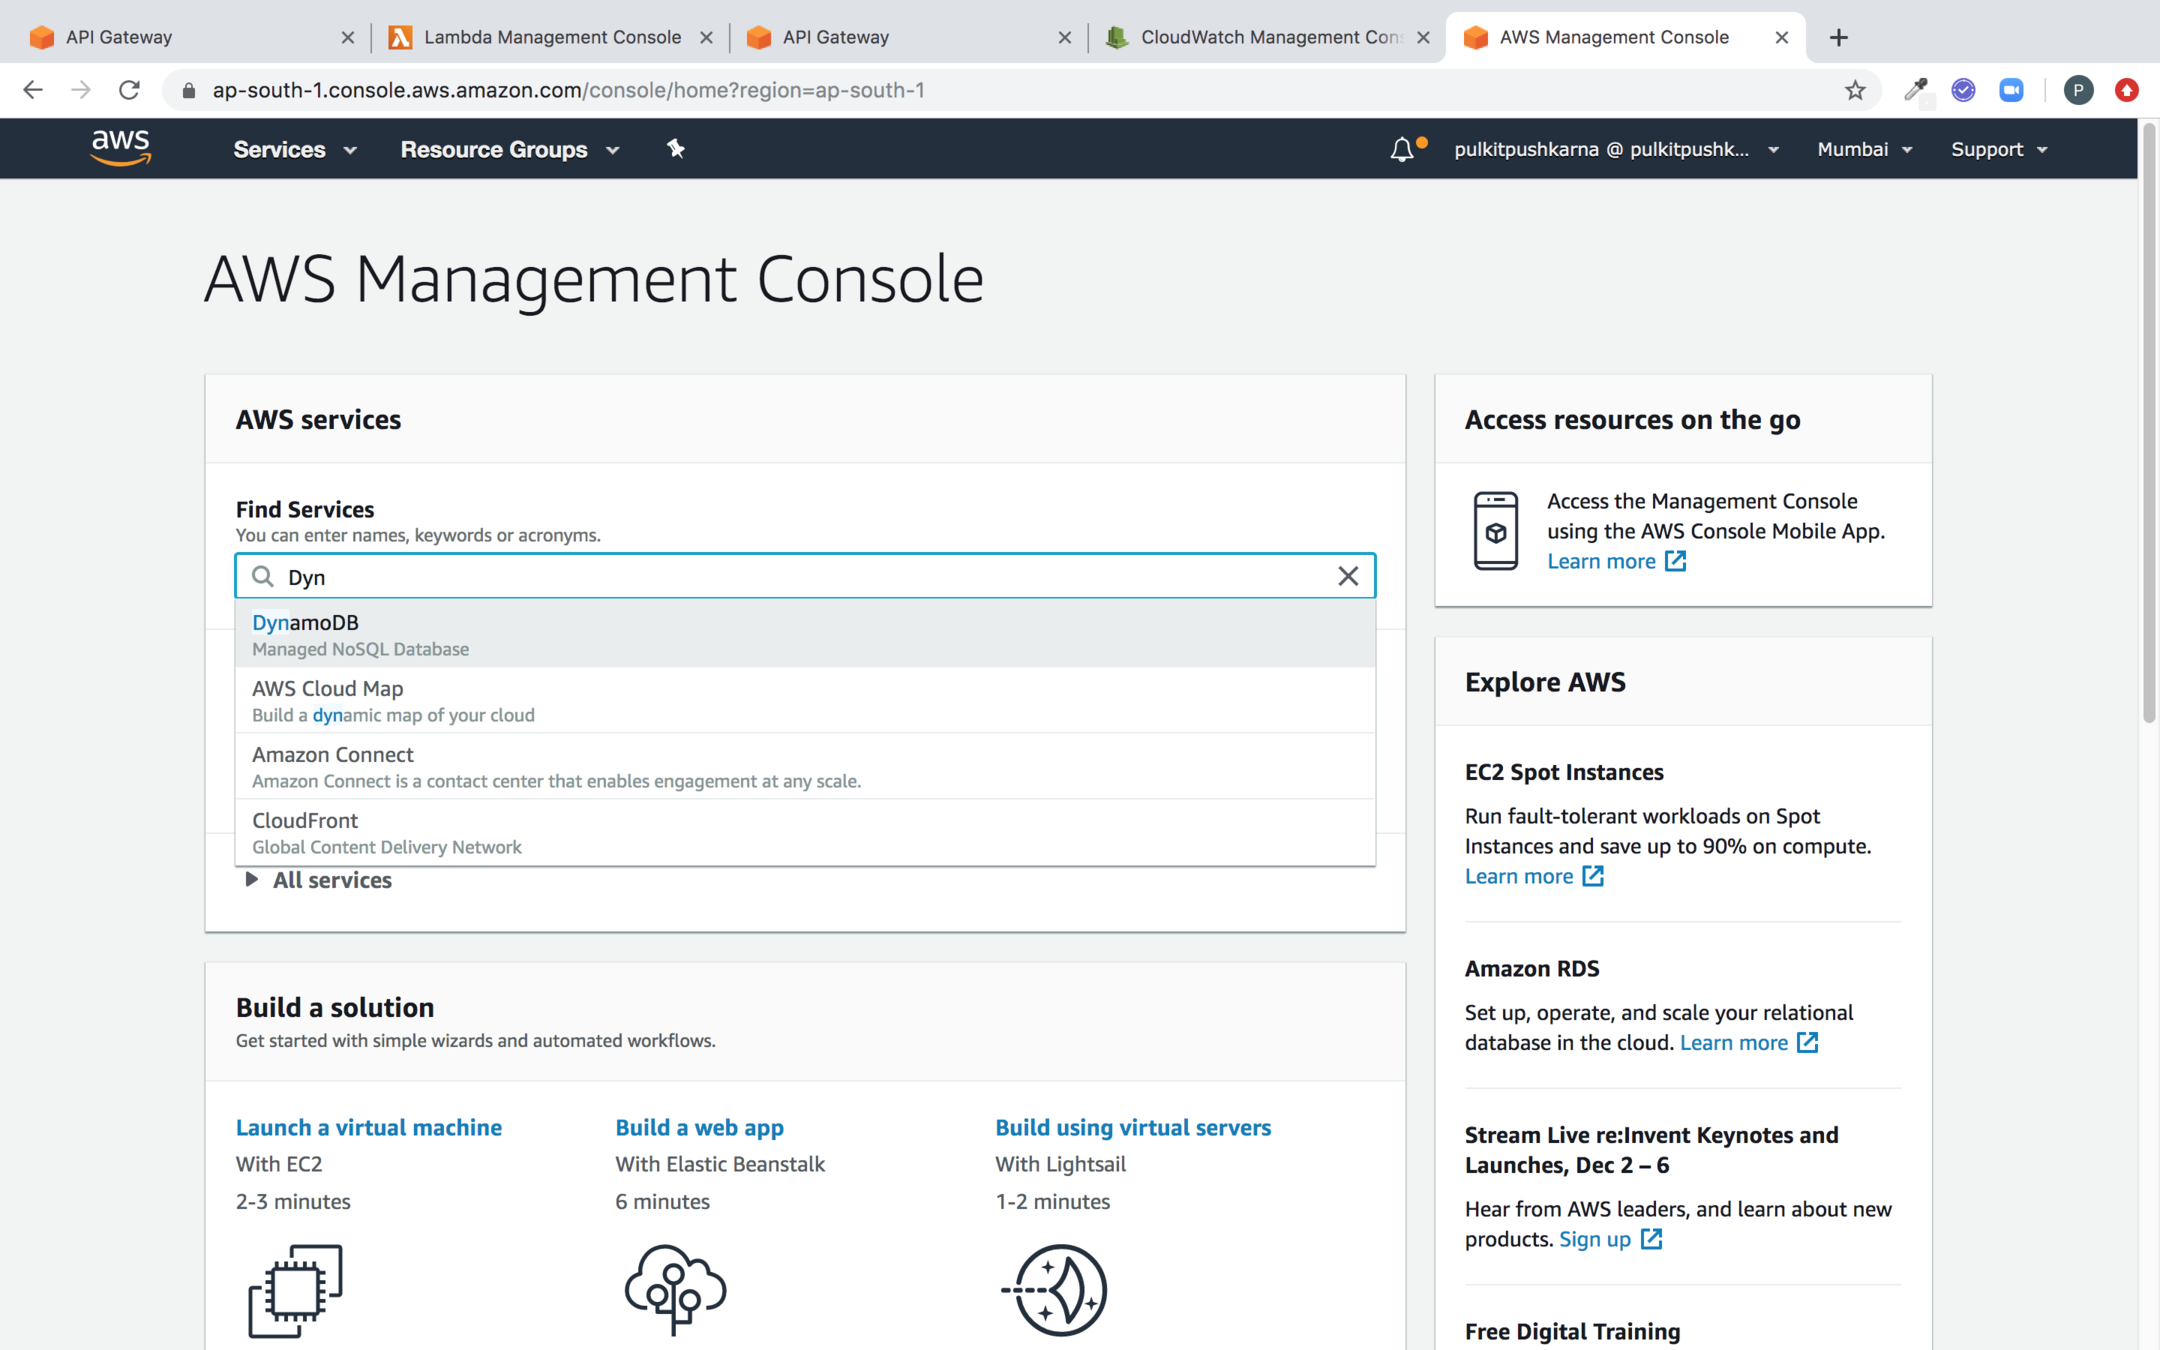
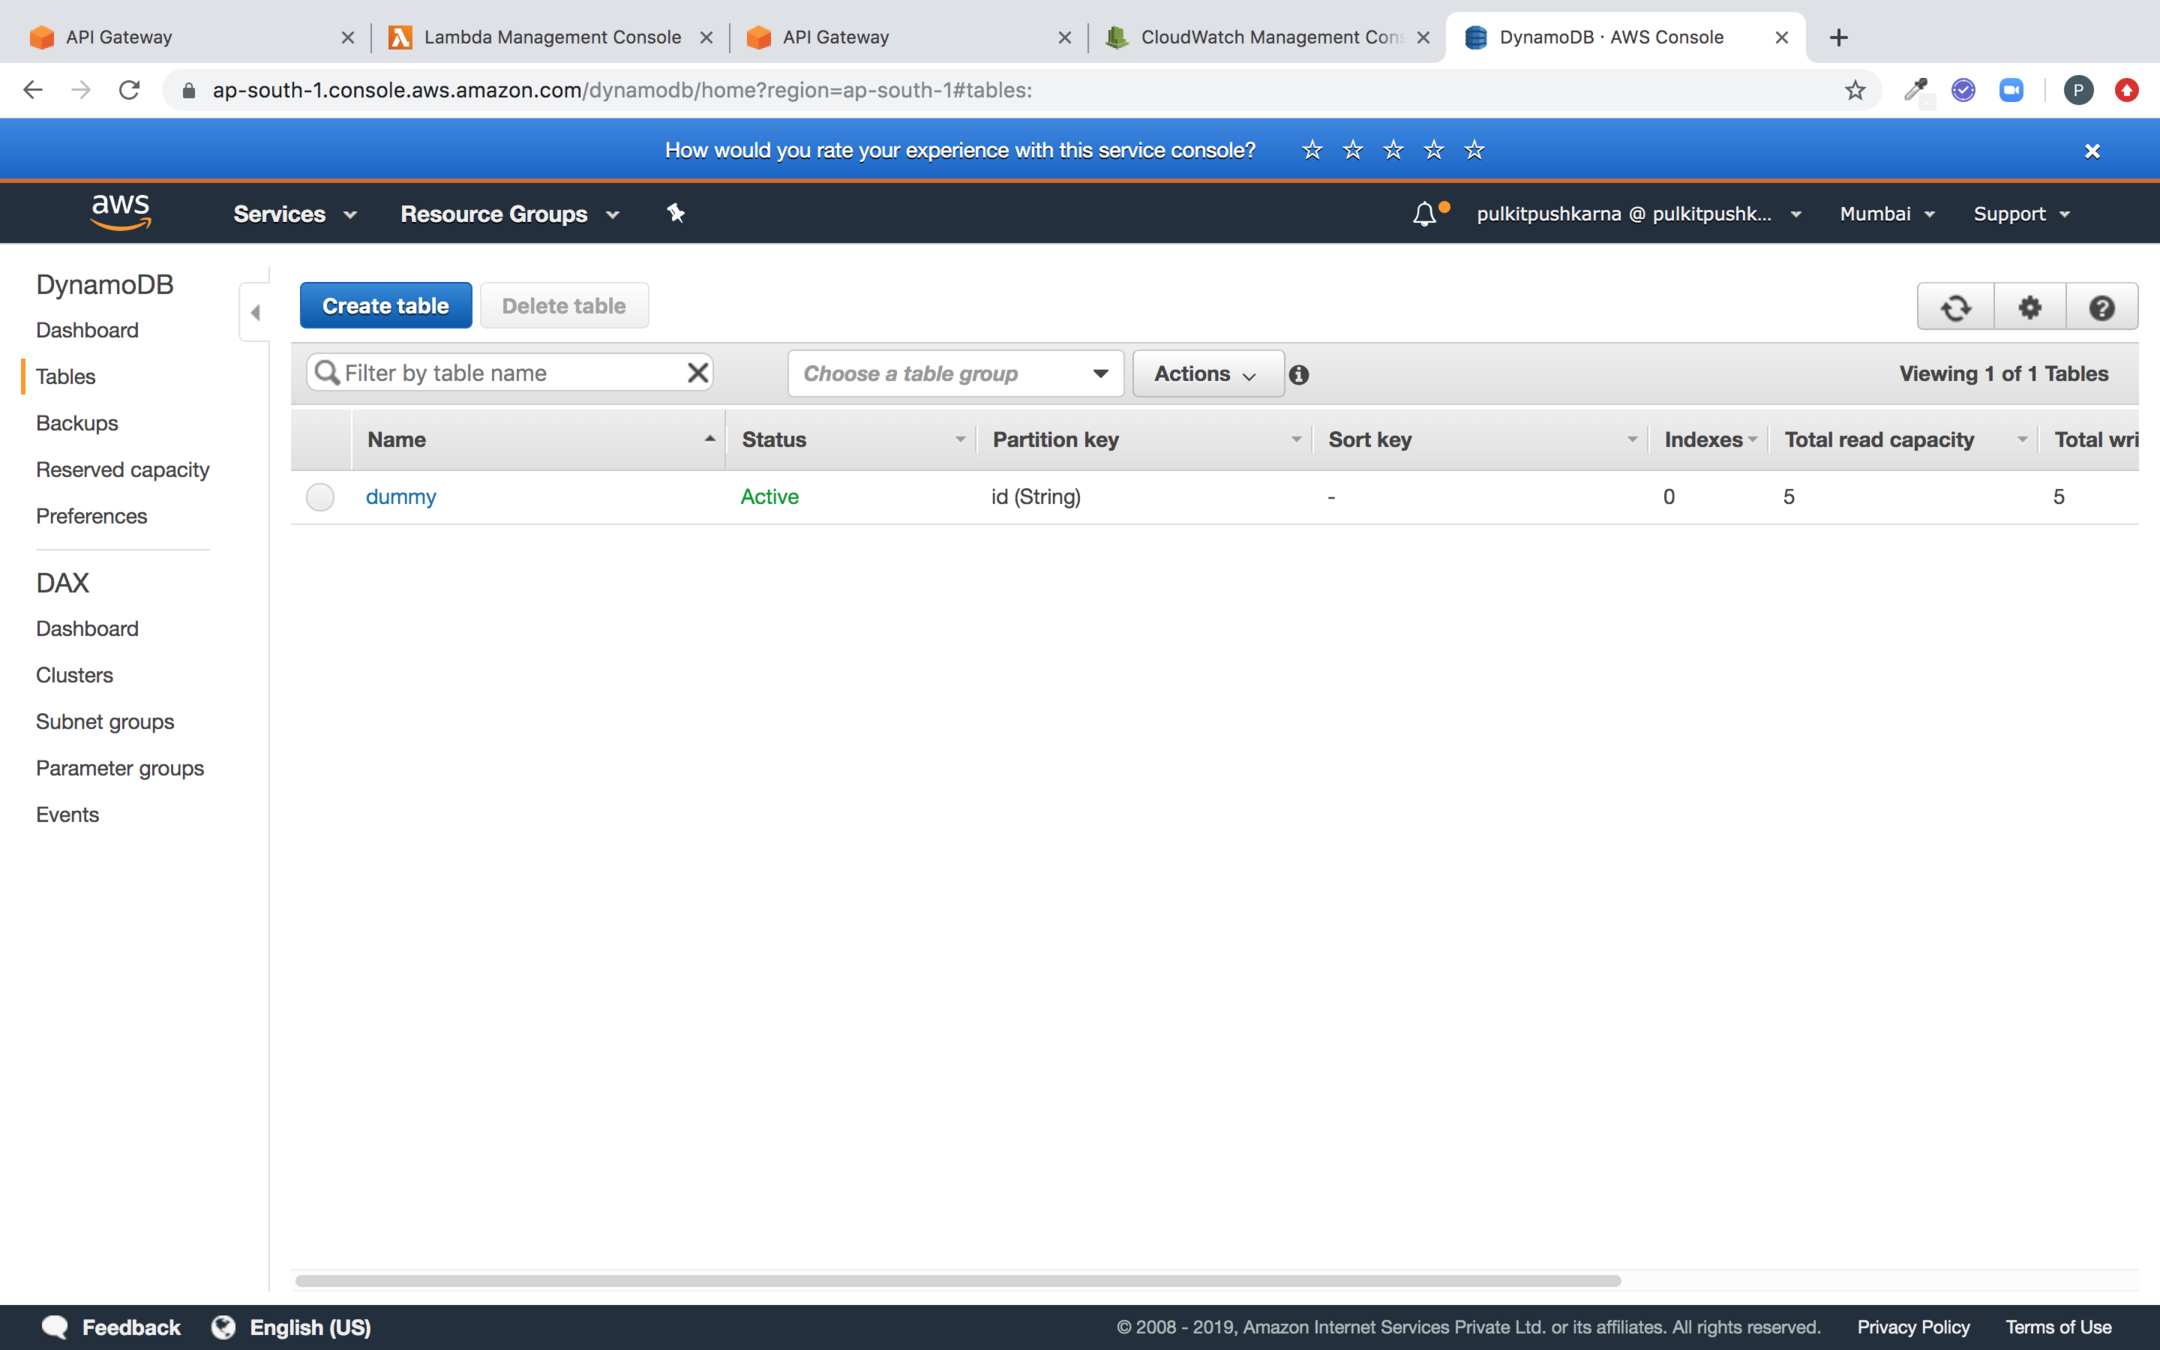
Click on Create table
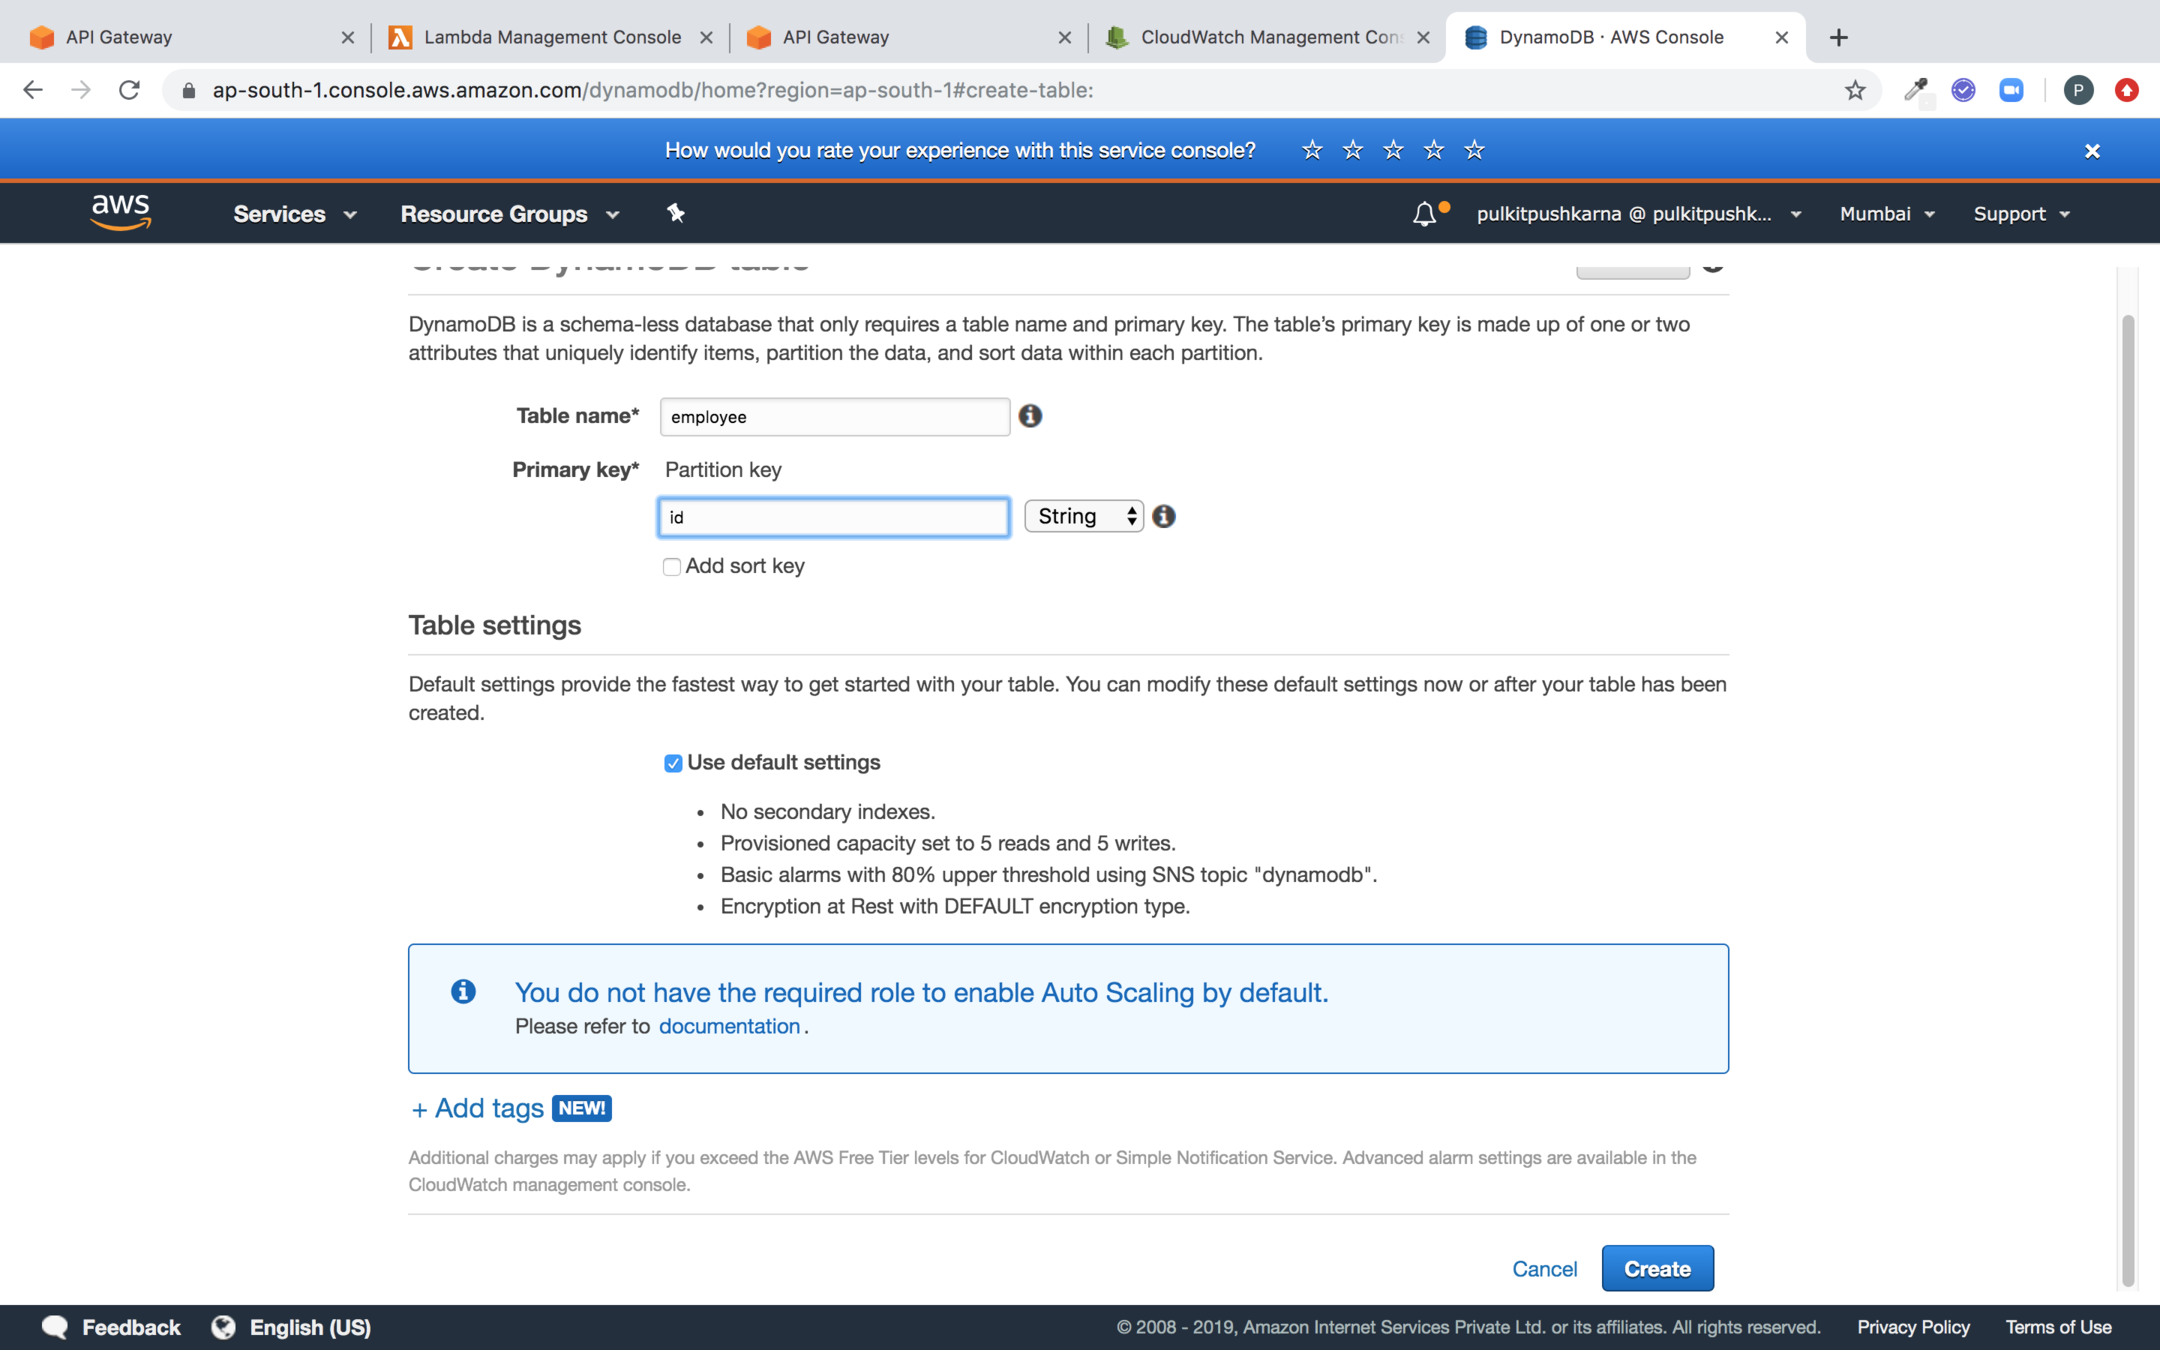
Enter the name of the table and primary key and click on Create button
Create a Lambda for Creating Employee
package com.lambda.demo;

import com.amazonaws.regions.Regions;
import com.amazonaws.services.dynamodbv2.AmazonDynamoDB;
import com.amazonaws.services.dynamodbv2.AmazonDynamoDBClientBuilder;
import com.amazonaws.services.dynamodbv2.document.DynamoDB;
import com.amazonaws.services.dynamodbv2.document.Item;
import com.amazonaws.services.dynamodbv2.document.PrimaryKey;
import com.amazonaws.services.dynamodbv2.document.Table;
import com.amazonaws.services.lambda.runtime.Context;
import com.amazonaws.services.lambda.runtime.LambdaLogger;
import com.amazonaws.services.lambda.runtime.RequestHandler;

public class CreateEmployee implements RequestHandler<EmployeeRequest, Item> {

    @Override
    public Item handleRequest(EmployeeRequest input, Context context) {

        AmazonDynamoDB client = AmazonDynamoDBClientBuilder
                .standard()
                .withRegion(Regions.AP_SOUTH_1)
                .build();

        LambdaLogger lambdaLogger = context.getLogger();
        DynamoDB dynamoDB = new DynamoDB(client);
        Table table = dynamoDB.getTable("employee");
        Employee paramEmployee = input.getEmployee();
        try{
            lambdaLogger.log("paramEmployee>>"+paramEmployee);
            Item item = new Item()
                    .withPrimaryKey("id", paramEmployee.getId())
                    .withString("name", paramEmployee.getName())
                    .withString("age", paramEmployee.getAge());
            lambdaLogger.log("Trying to save the Item");
            table.putItem(item);
            lambdaLogger.log("Saved Item");
        }catch (Exception ex){
            lambdaLogger.log("Exception :: "+ex.getMessage());
        }

        return table.getItem(new PrimaryKey("id",paramEmployee.getId()));
    }
}
Employee POJO
package com.lambda.demo;

public class Employee {

    private String id;

    private String name;

    private String age;

    public String getId() {
        return id;
    }

    public void setId(String id) {
        this.id = id;
    }

    public String getName() {
        return name;
    }

    public void setName(String name) {
        this.name = name;
    }

    public String getAge() {
        return age;
    }

    public void setAge(String age) {
        this.age = age;
    }

    @Override
    public String toString() {
        return "Employee{" +
                "id='" + id + '\'' +
                ", name='" + name + '\'' +
                ", age='" + age + '\'' +
                '}';
    }
}
Employee Request
package com.lambda.demo;

public class EmployeeRequest {

    private String httpMethod;

    private Employee employee;

    public Employee getEmployee() {
        return employee;
    }

    public void setEmployee(Employee employee) {
        this.employee = employee;
    }

    public String getHttpMethod() {
        return httpMethod;
    }

    public void setHttpMethod(String httpMethod) {
        this.httpMethod = httpMethod;
    }

    @Override
    public String toString() {
        return "EmployeeRequest{" +
                "httpMethod='" + httpMethod + '\'' +
                ", employee=" + employee +
                '}';
    }
}
Upload the Lambda for creating Employee
Create POST method employee
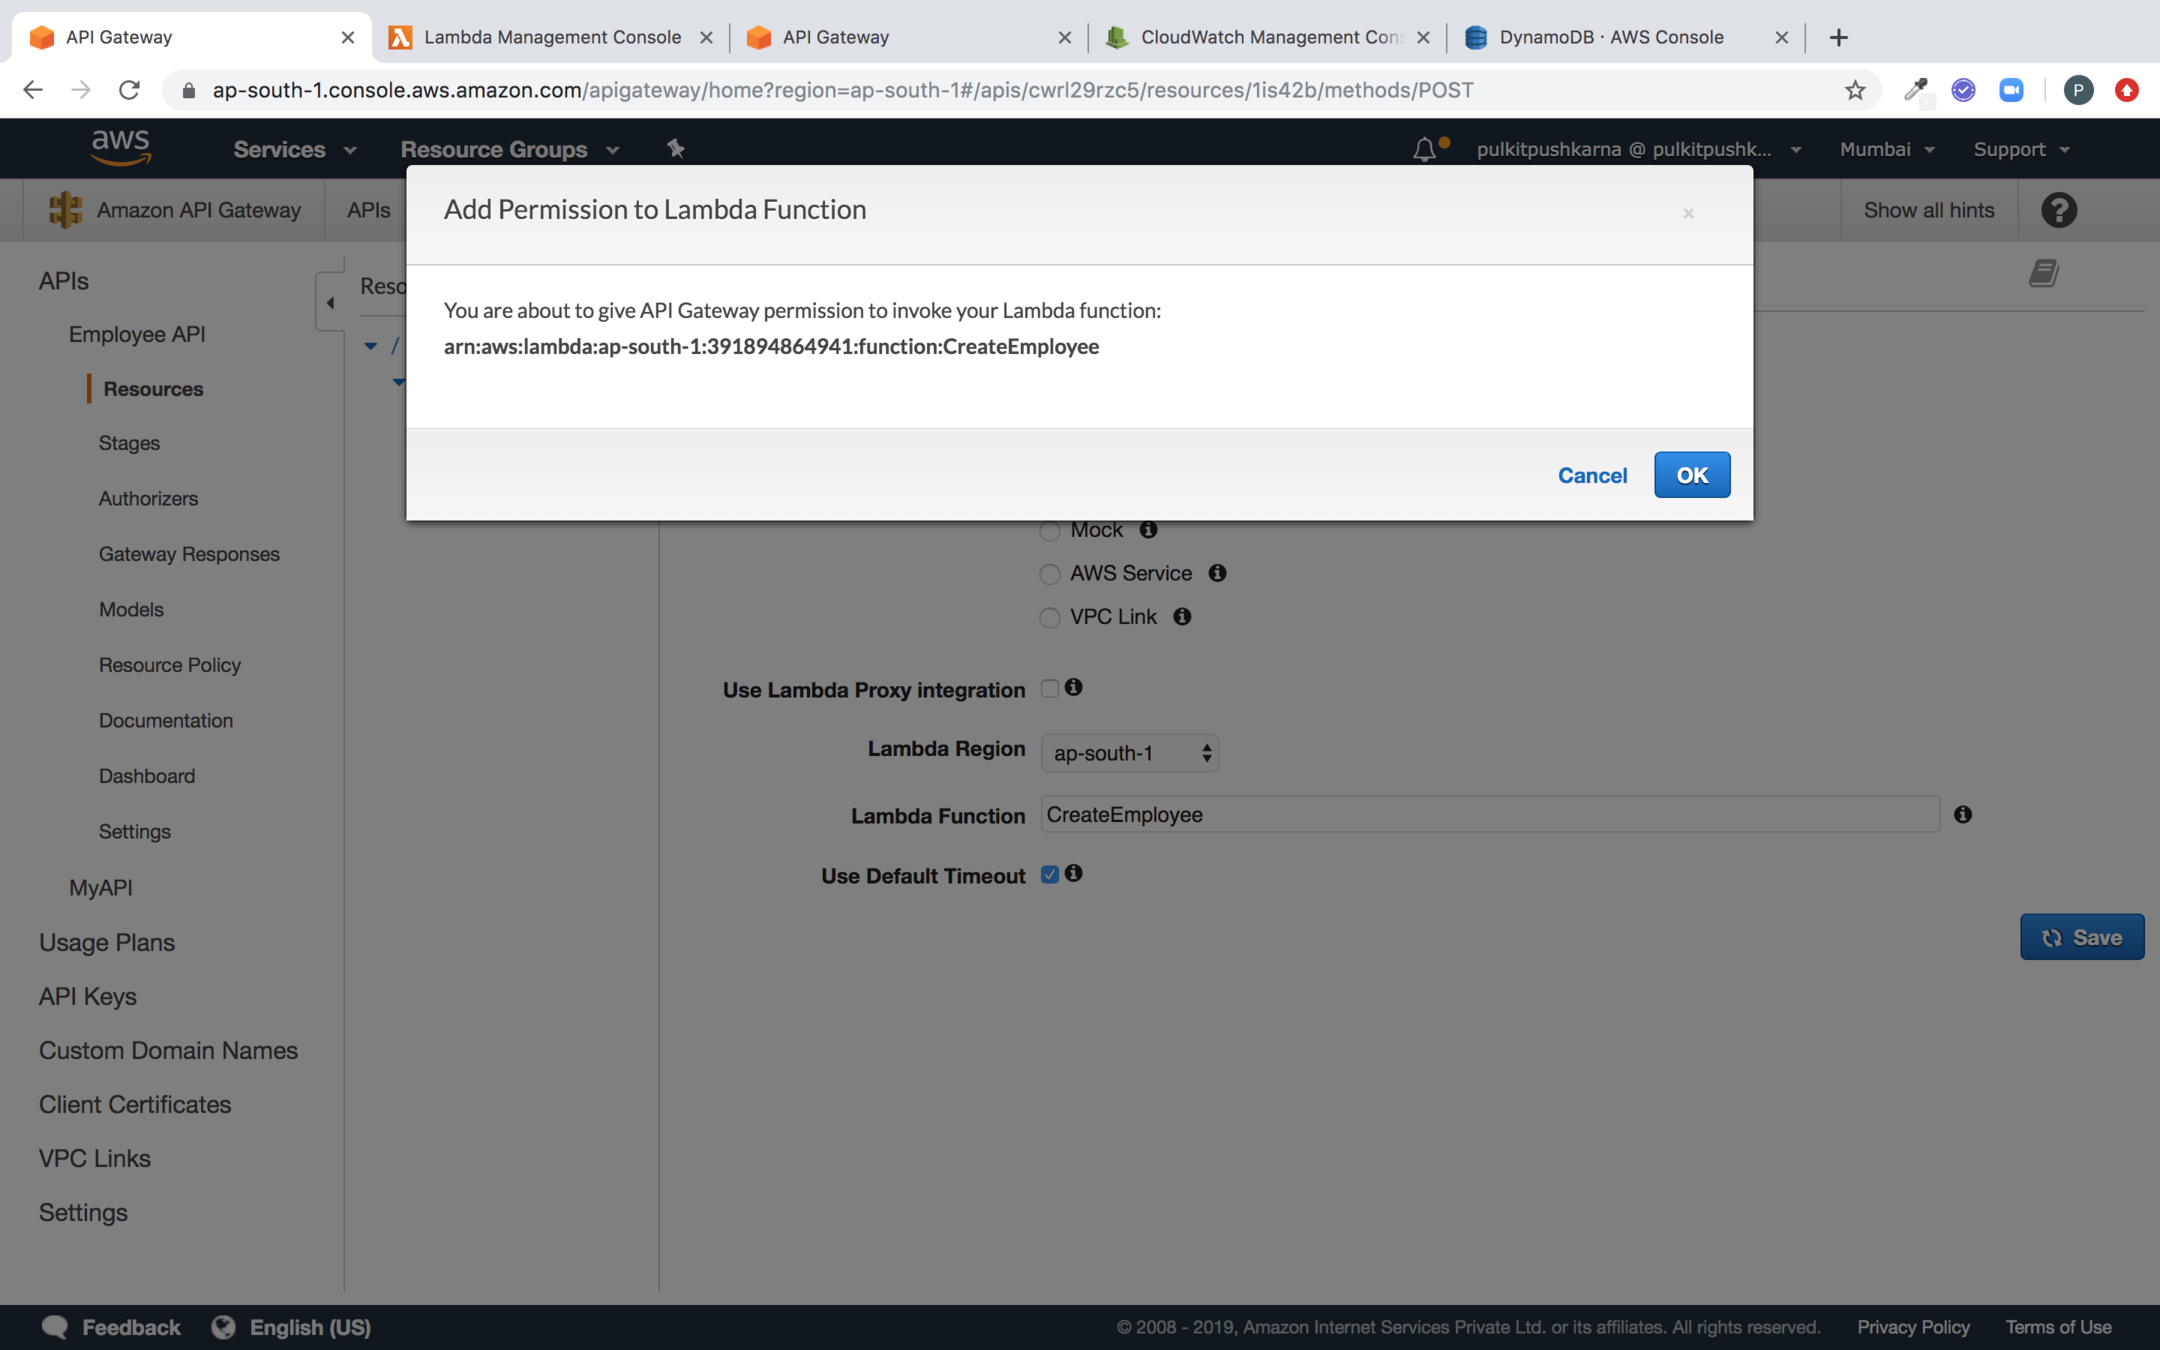
Click ok to give API Gateway permission to invoke Lambda
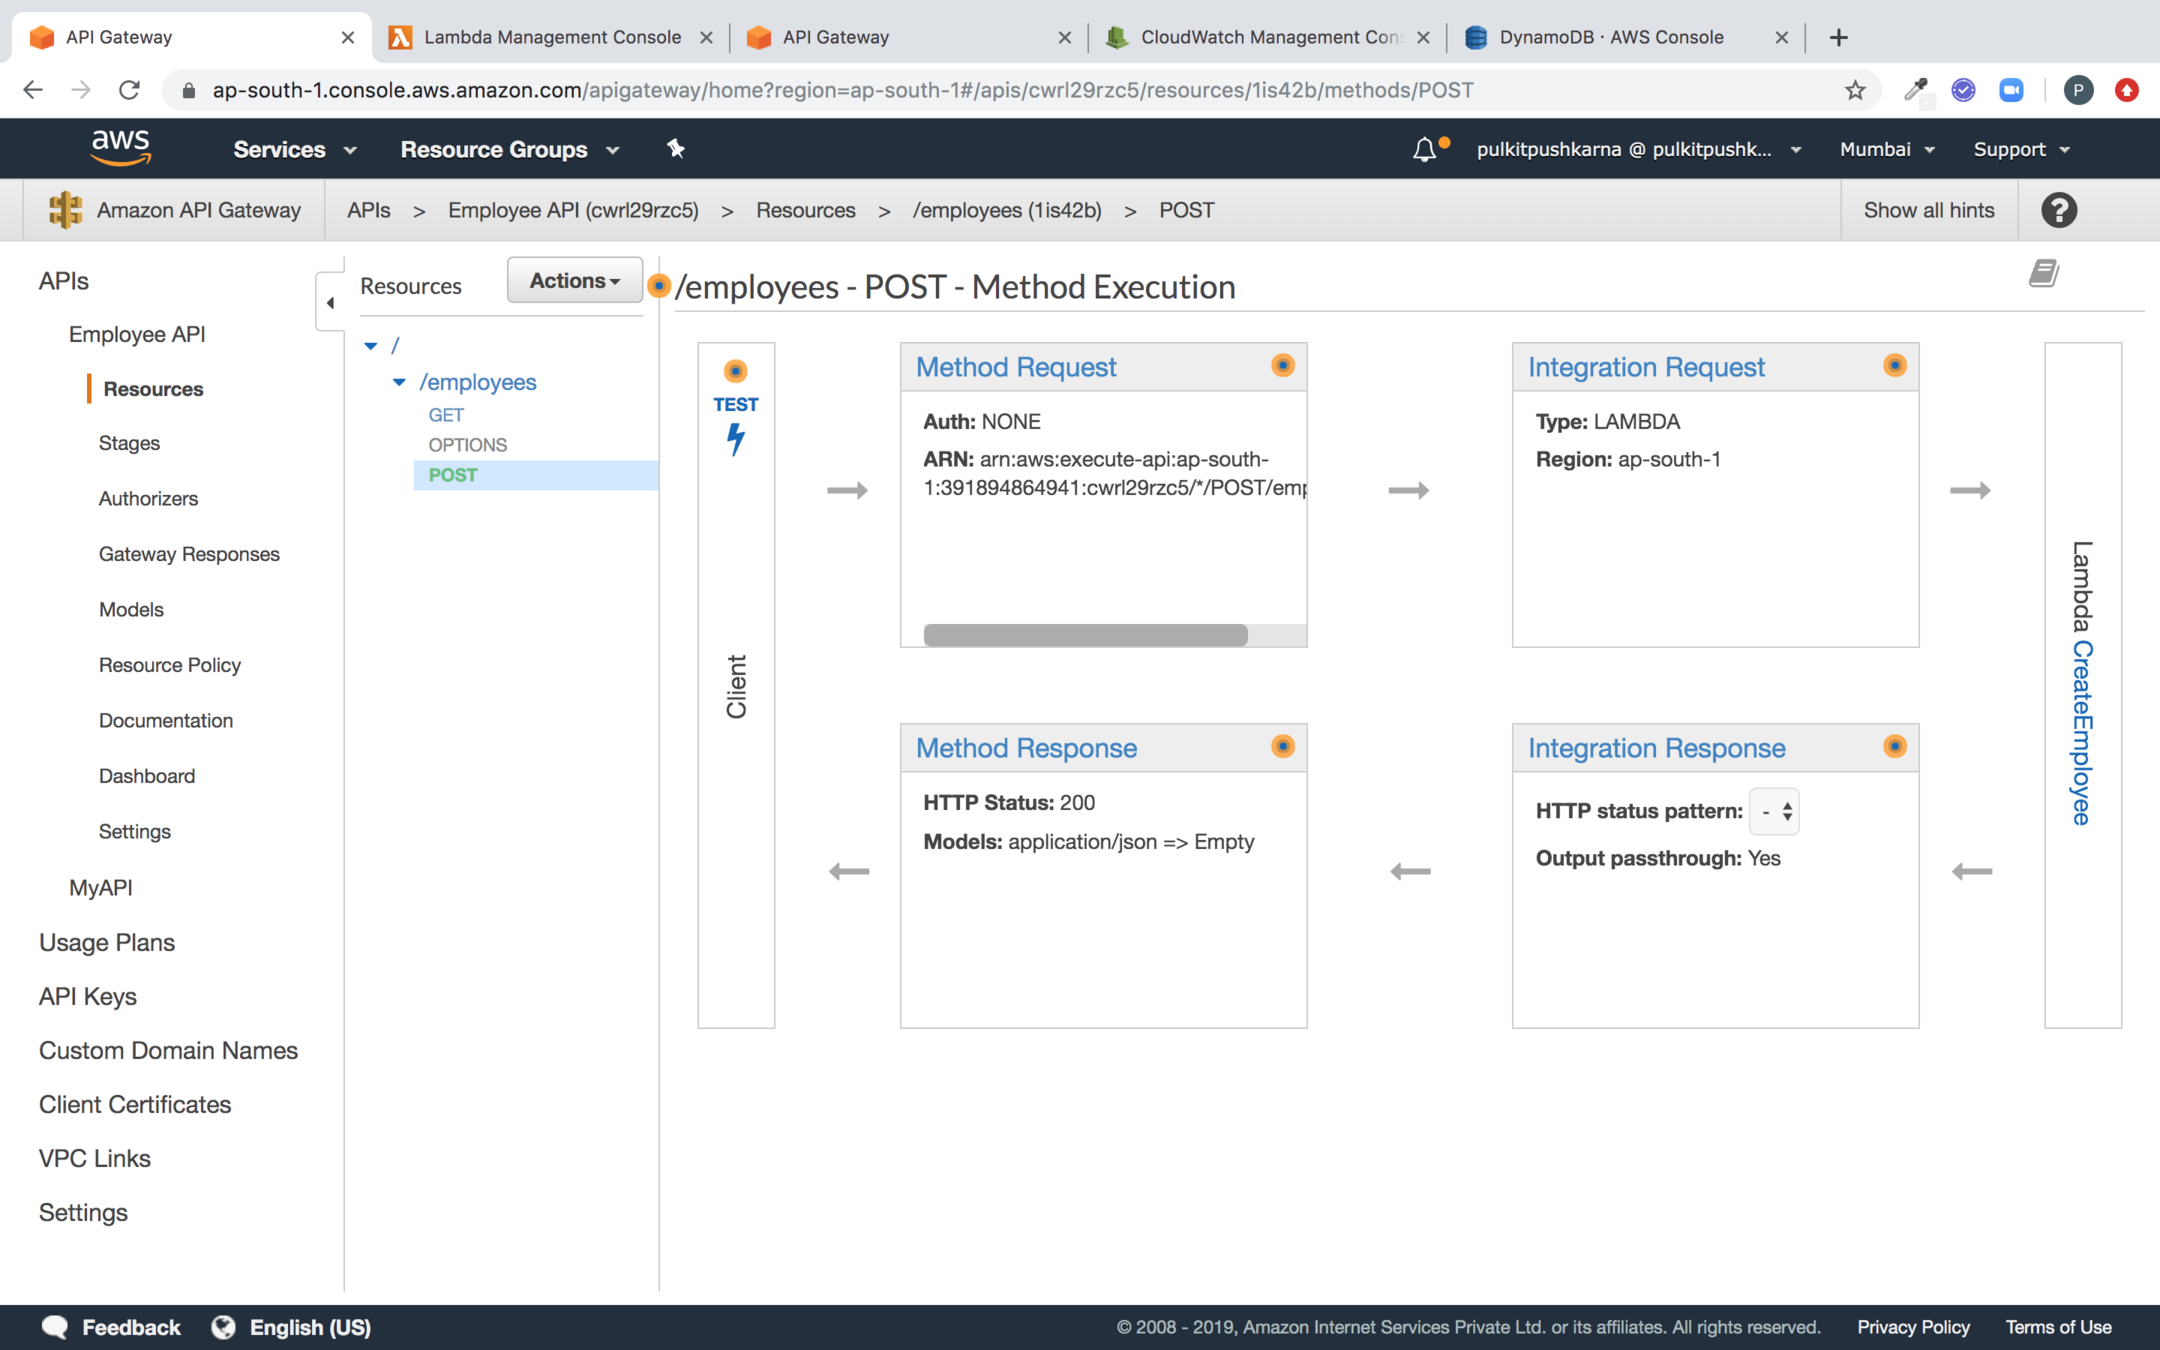
Go to the Integration Request
In the mapping template add application/json and the velocity script
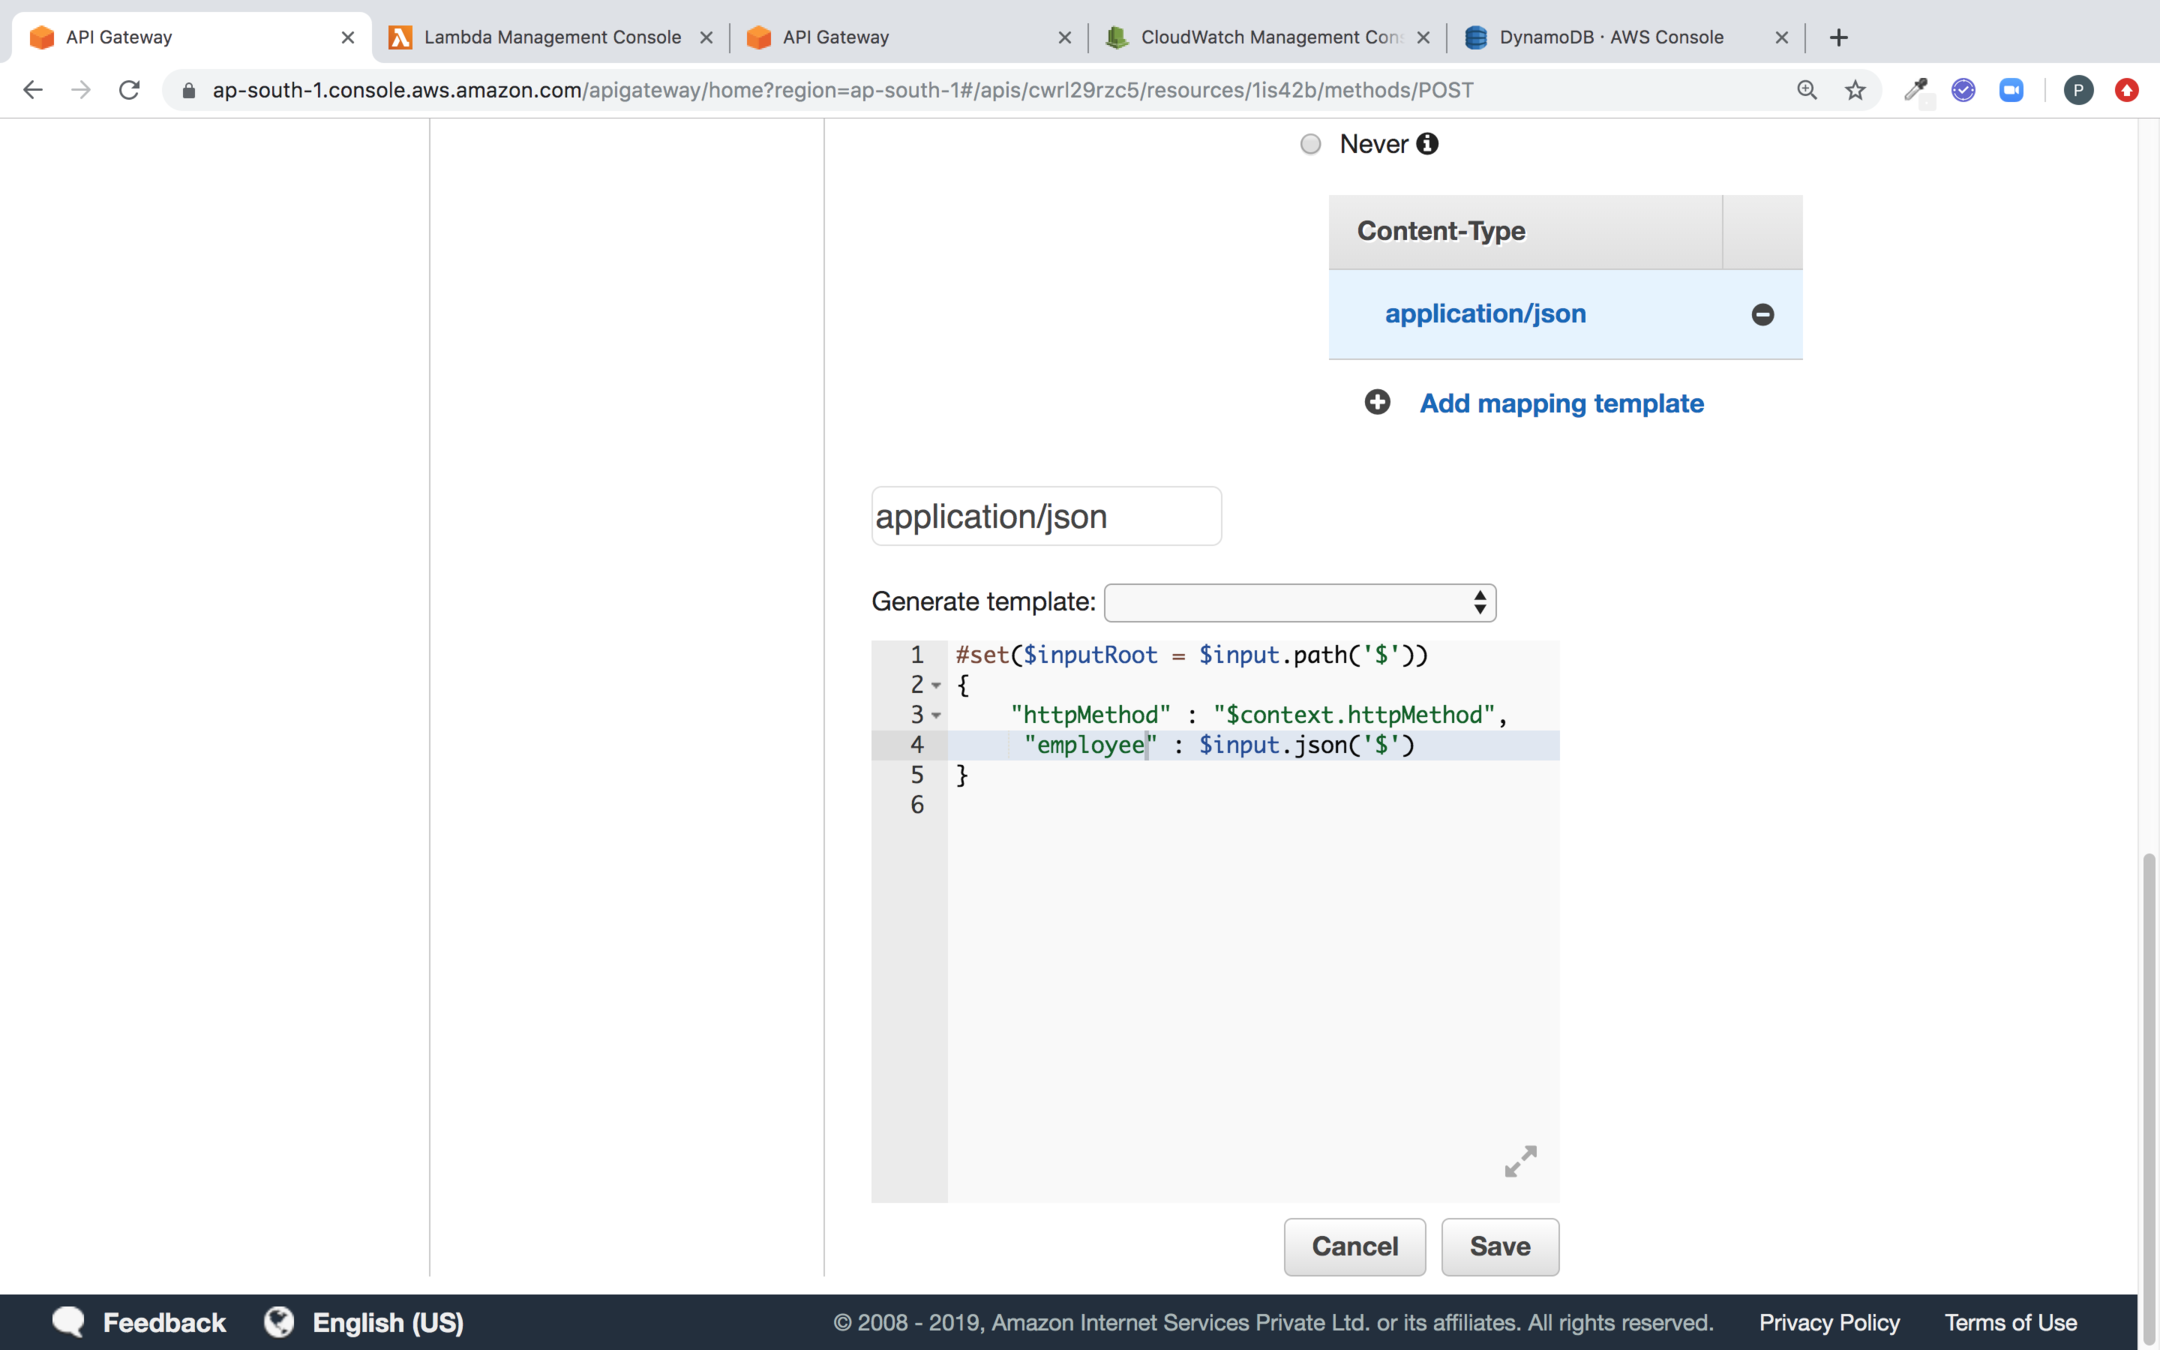
#set($inputRoot = $input.path('$'))
{
    "httpMethod" : "$context.httpMethod",
     "employee" : $input.json('$')
}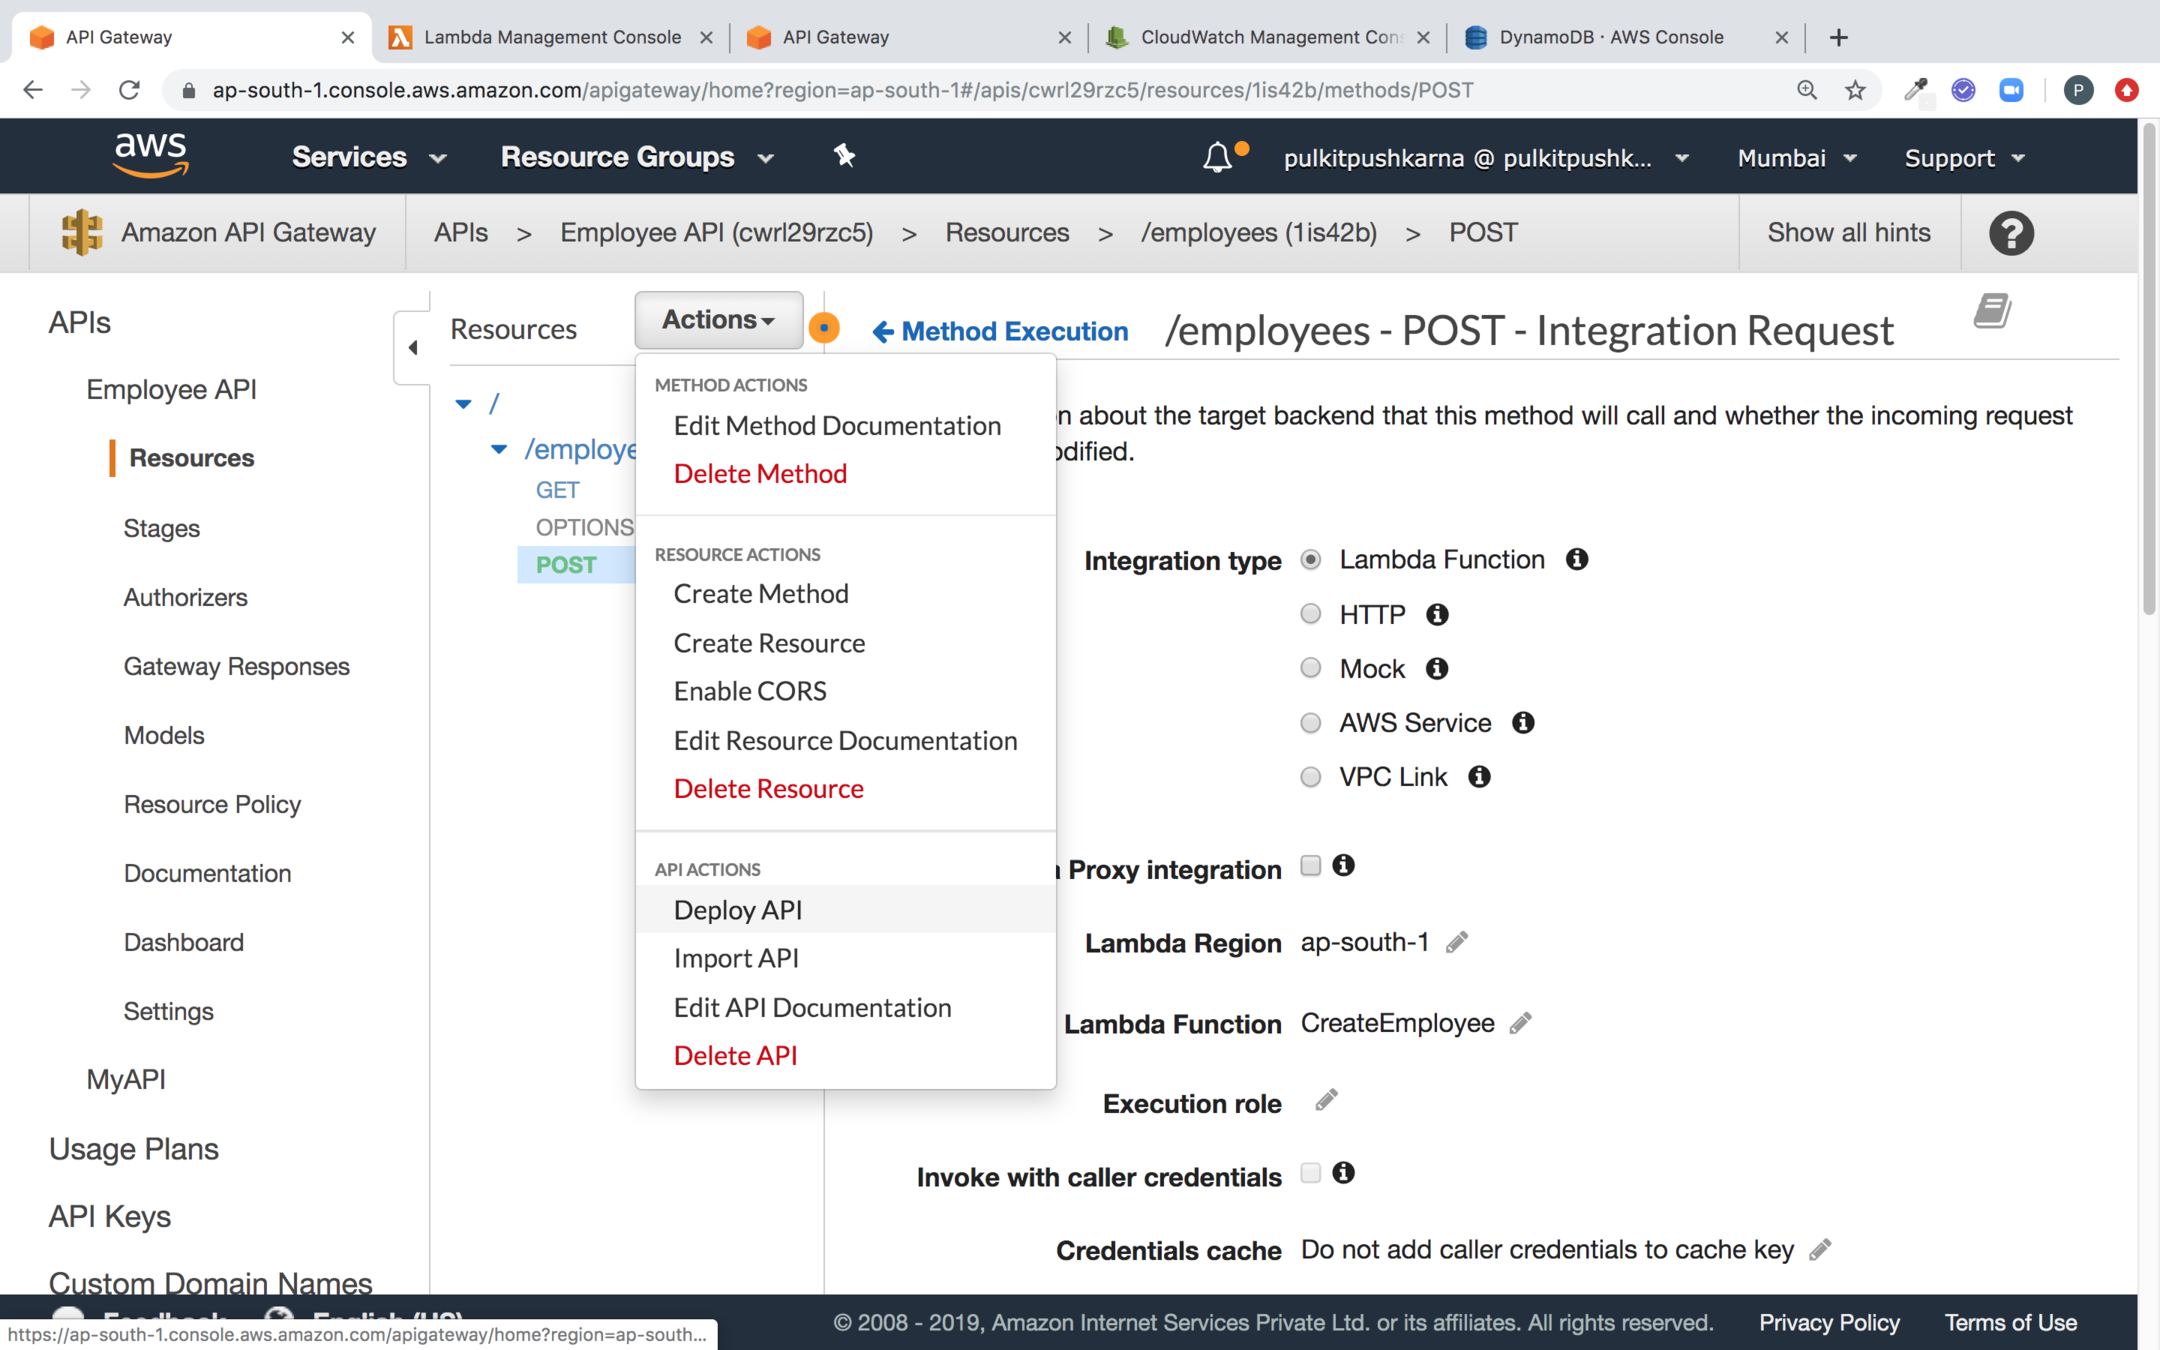
Deploy the API
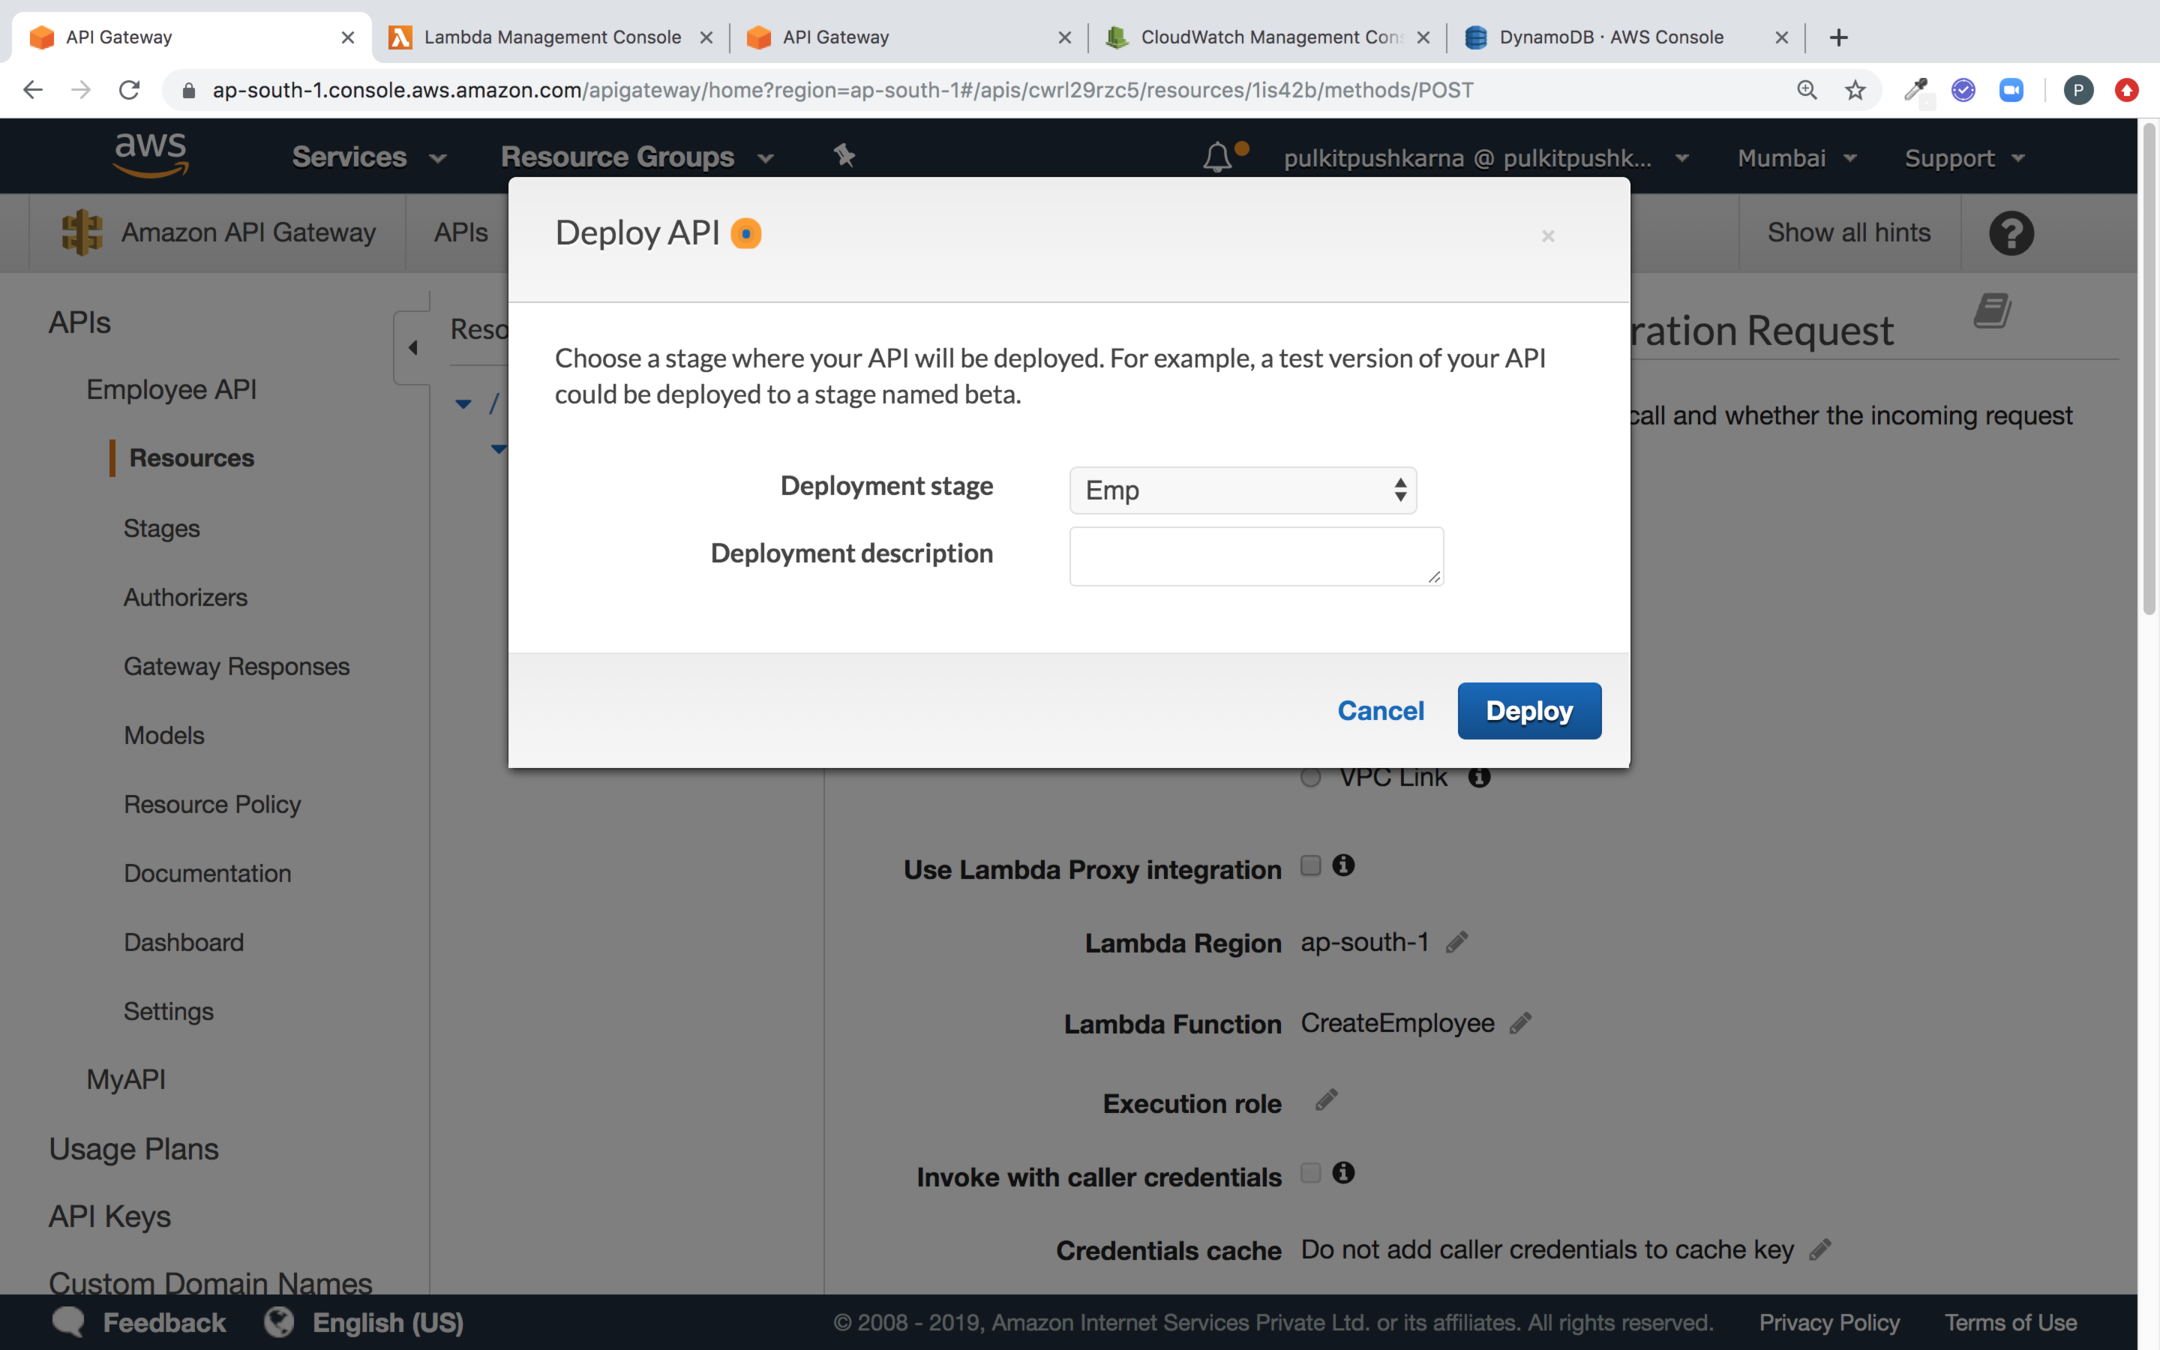
Deploy Emp
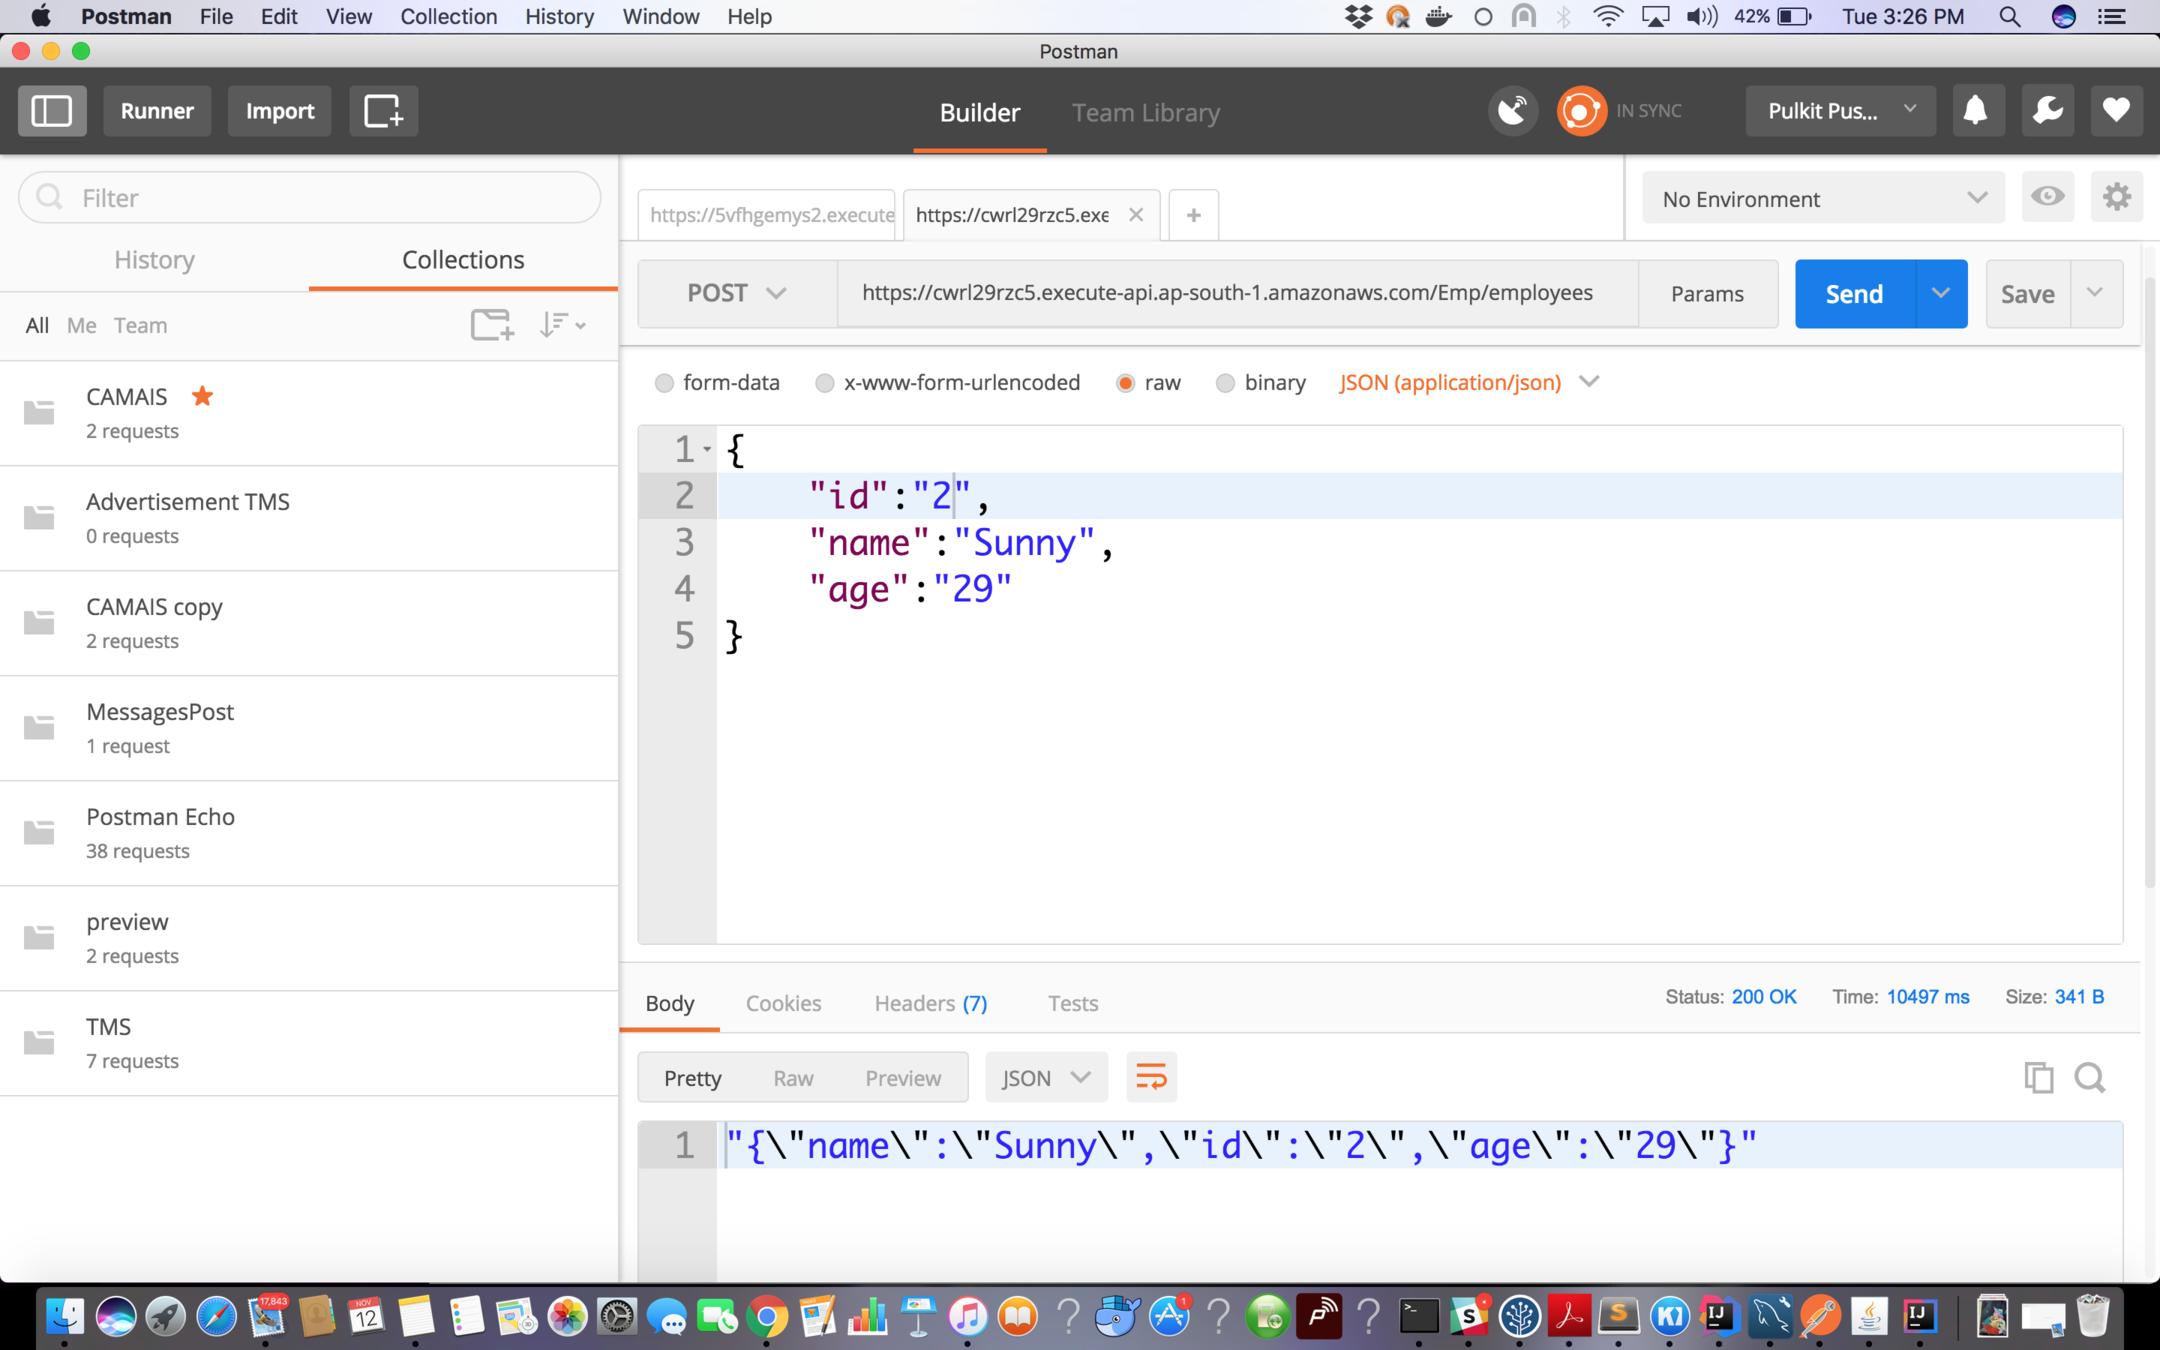
Now hit the Post request for Employee
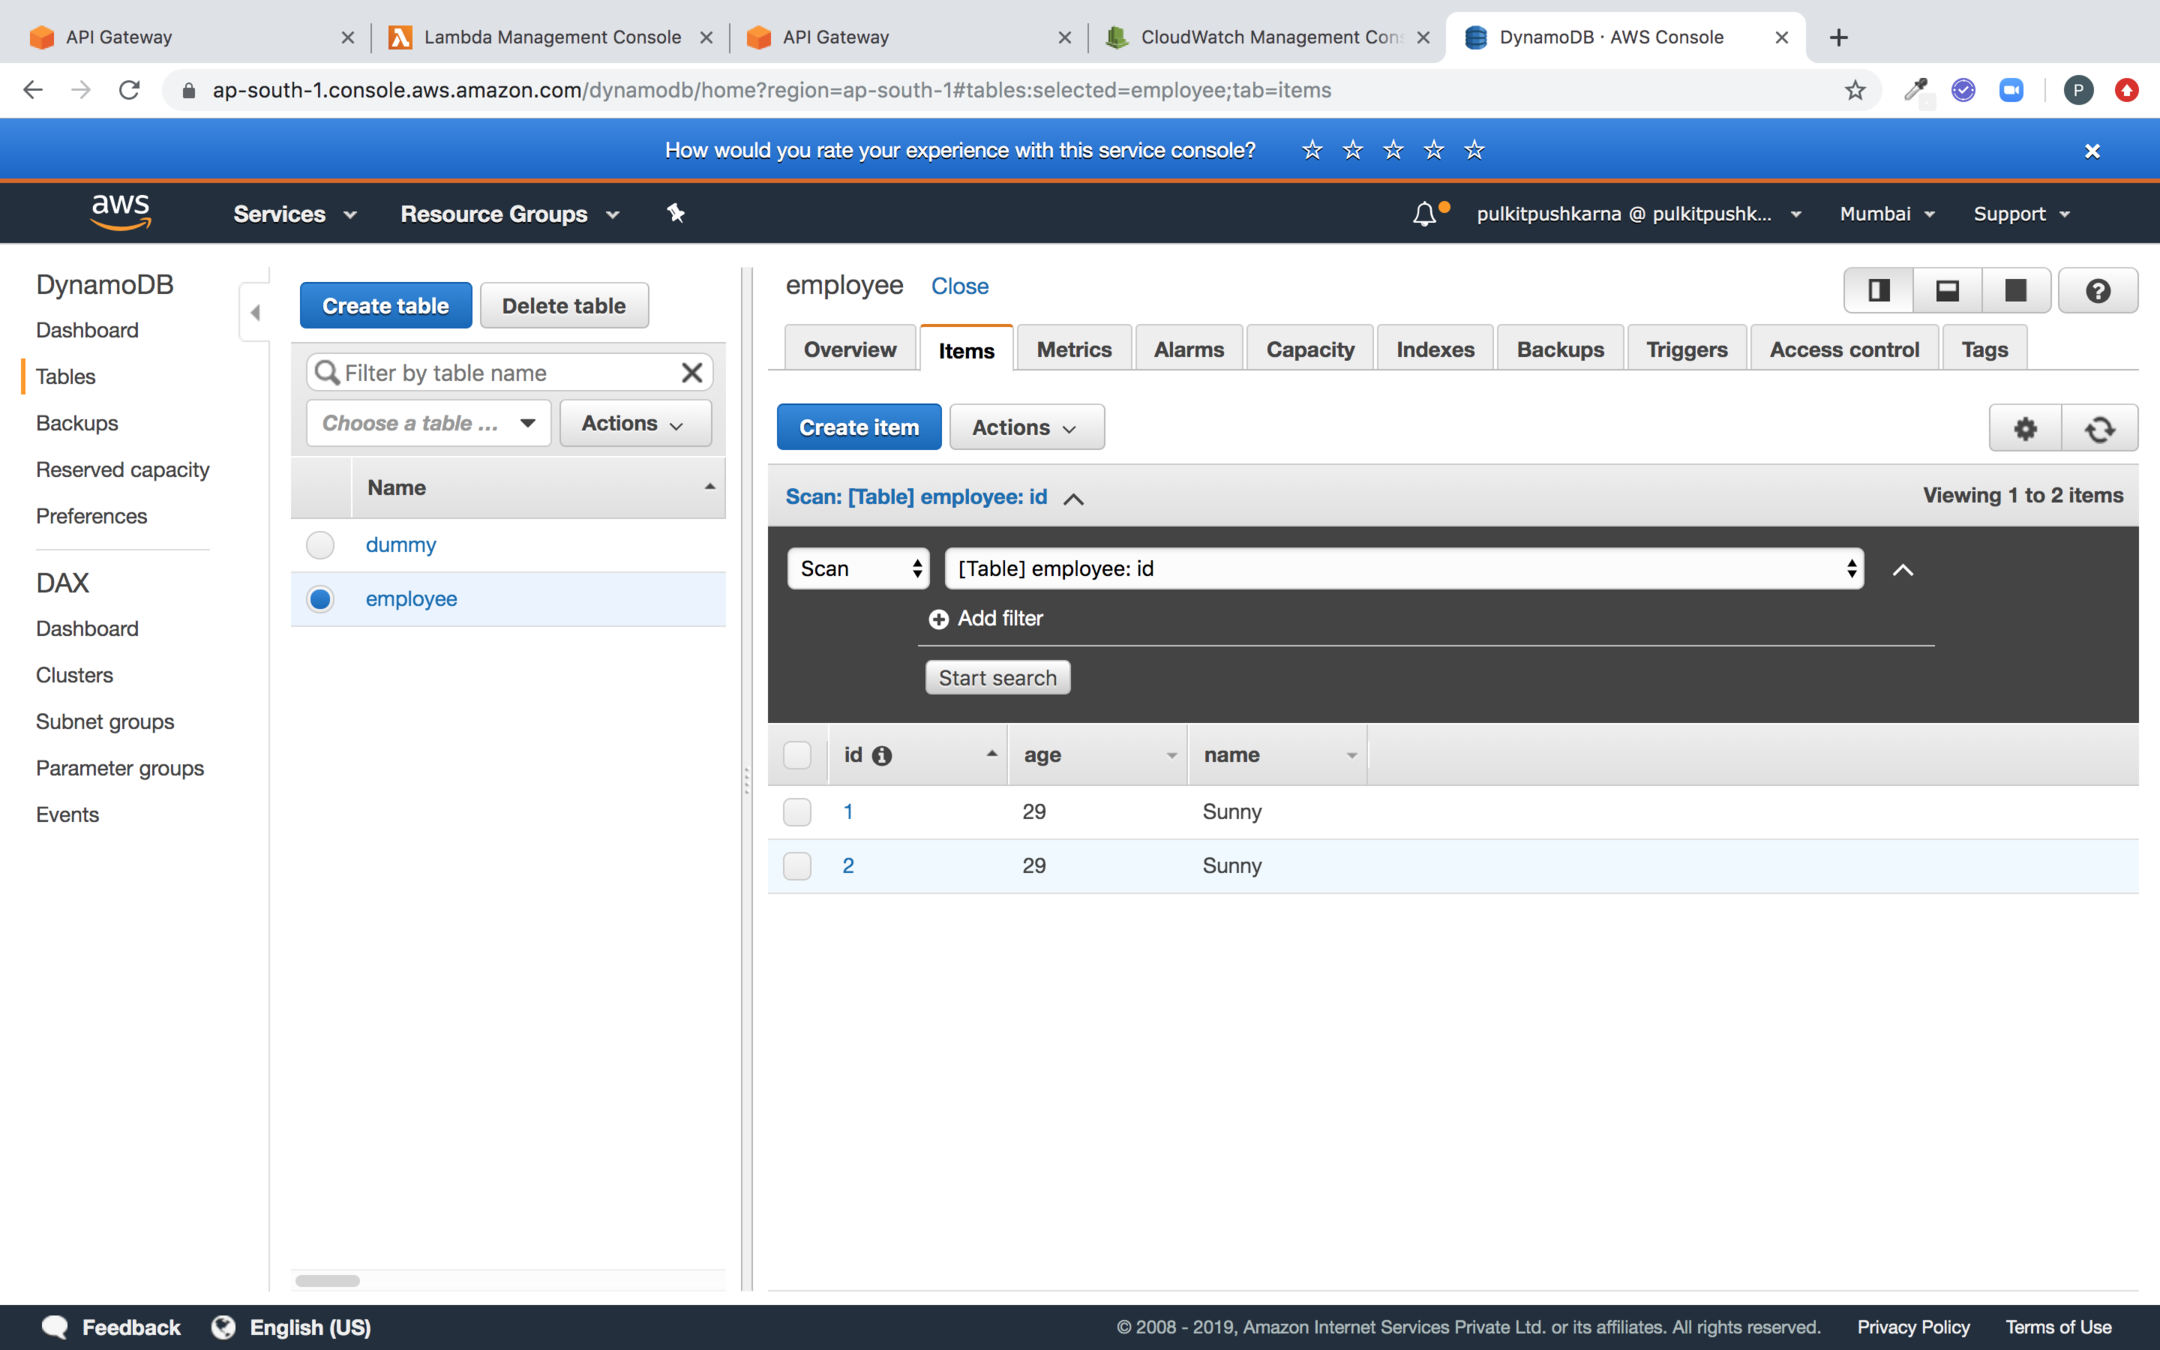
You can check the entry in Dynamo DB for Employee Created
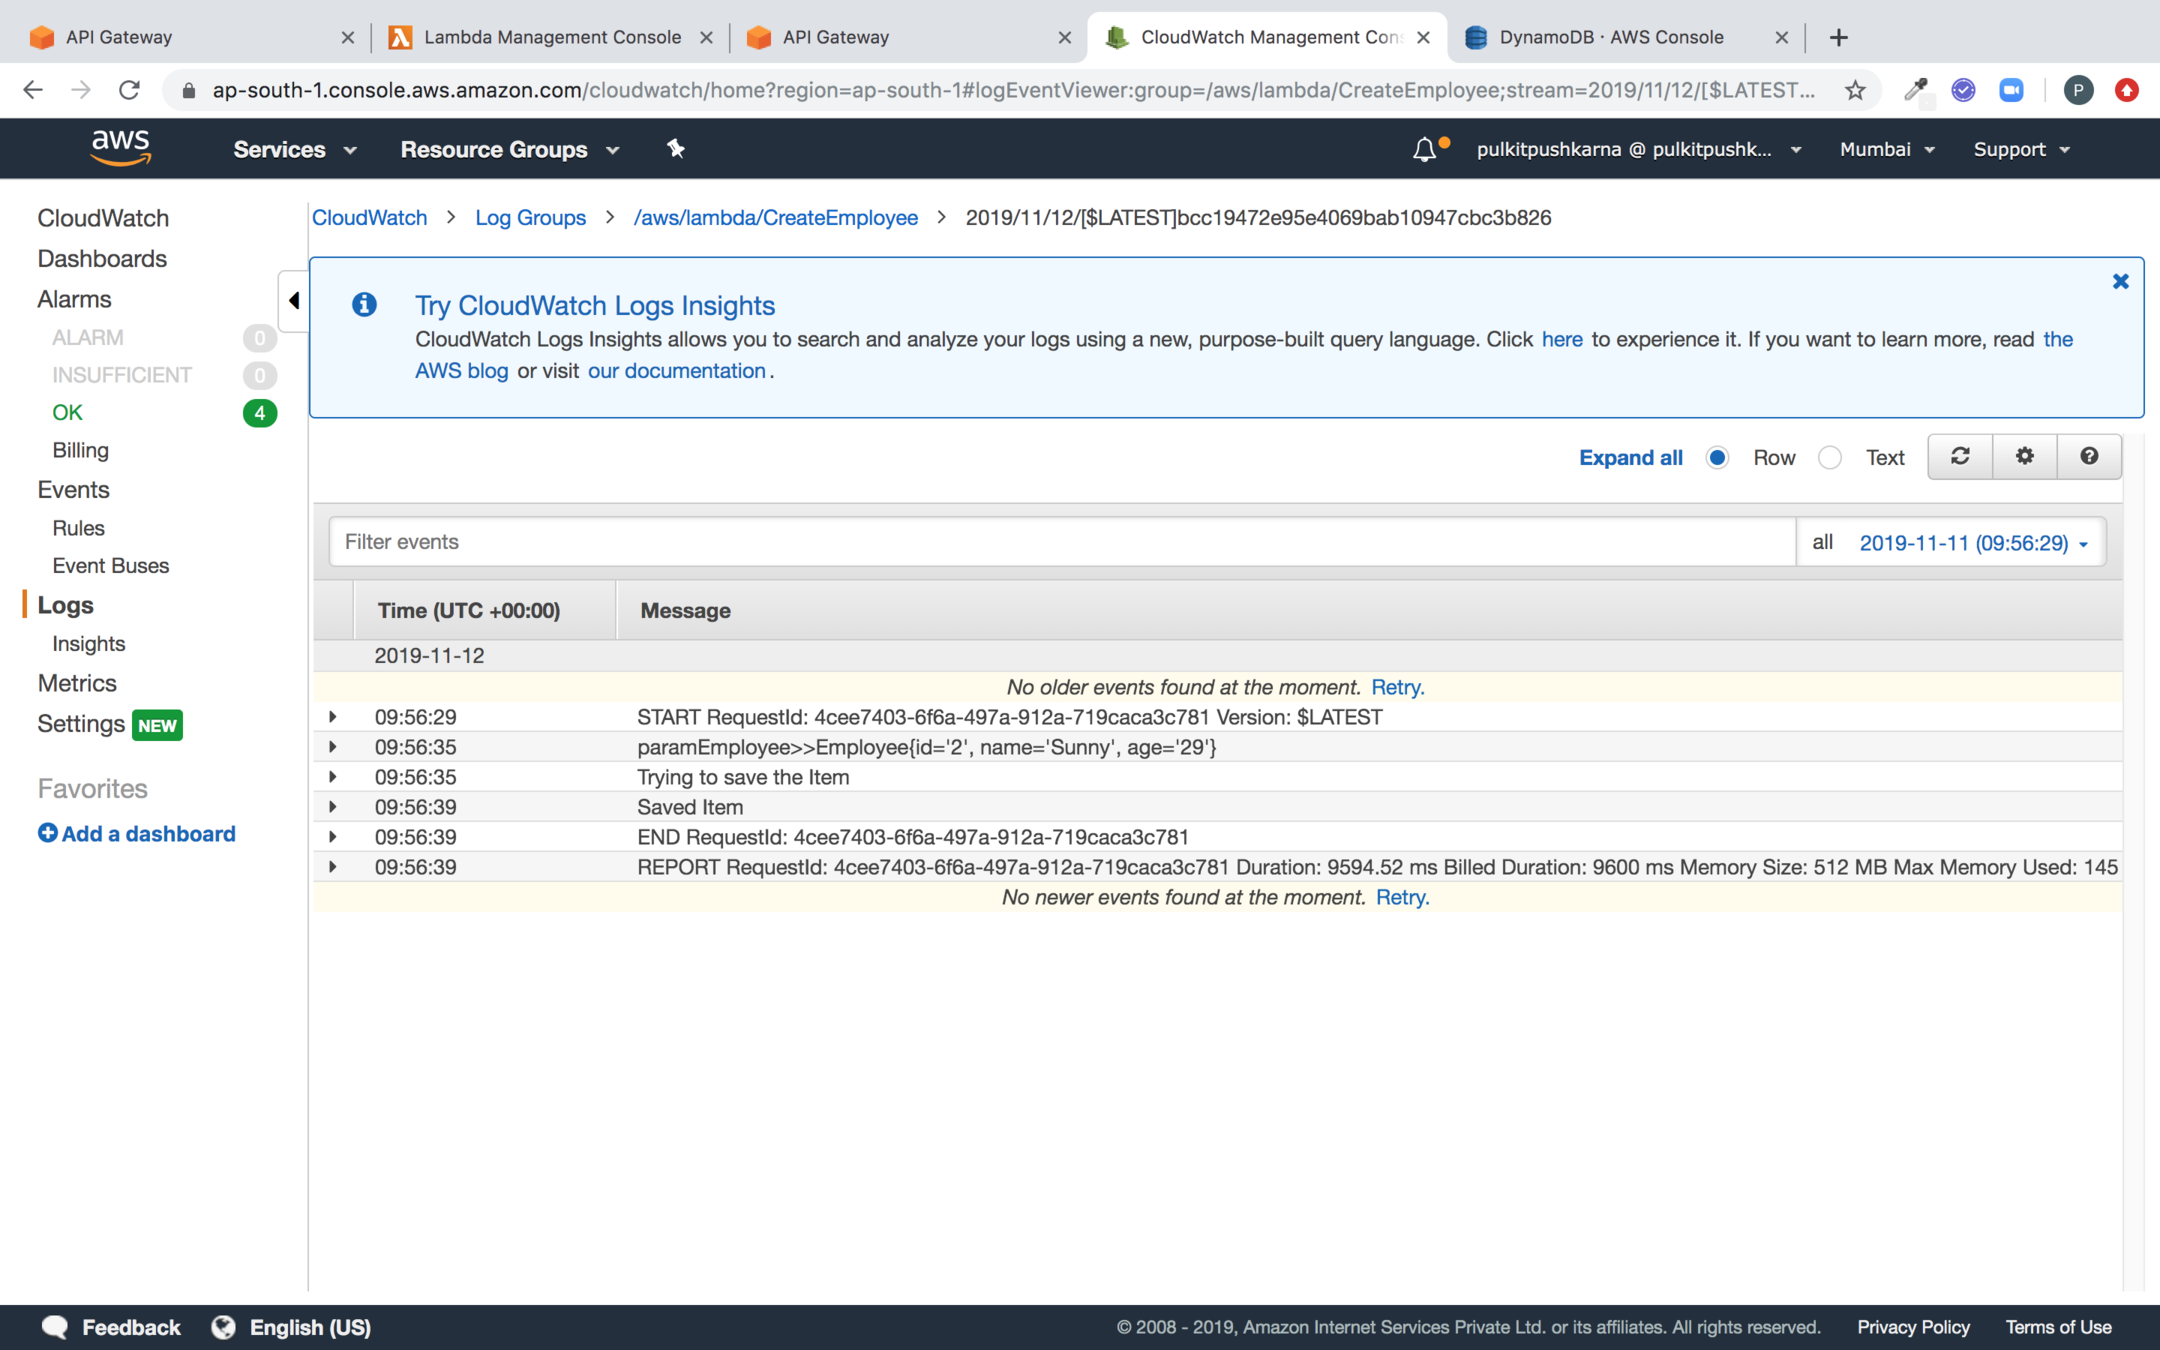
Cloudwatch logs for Object created
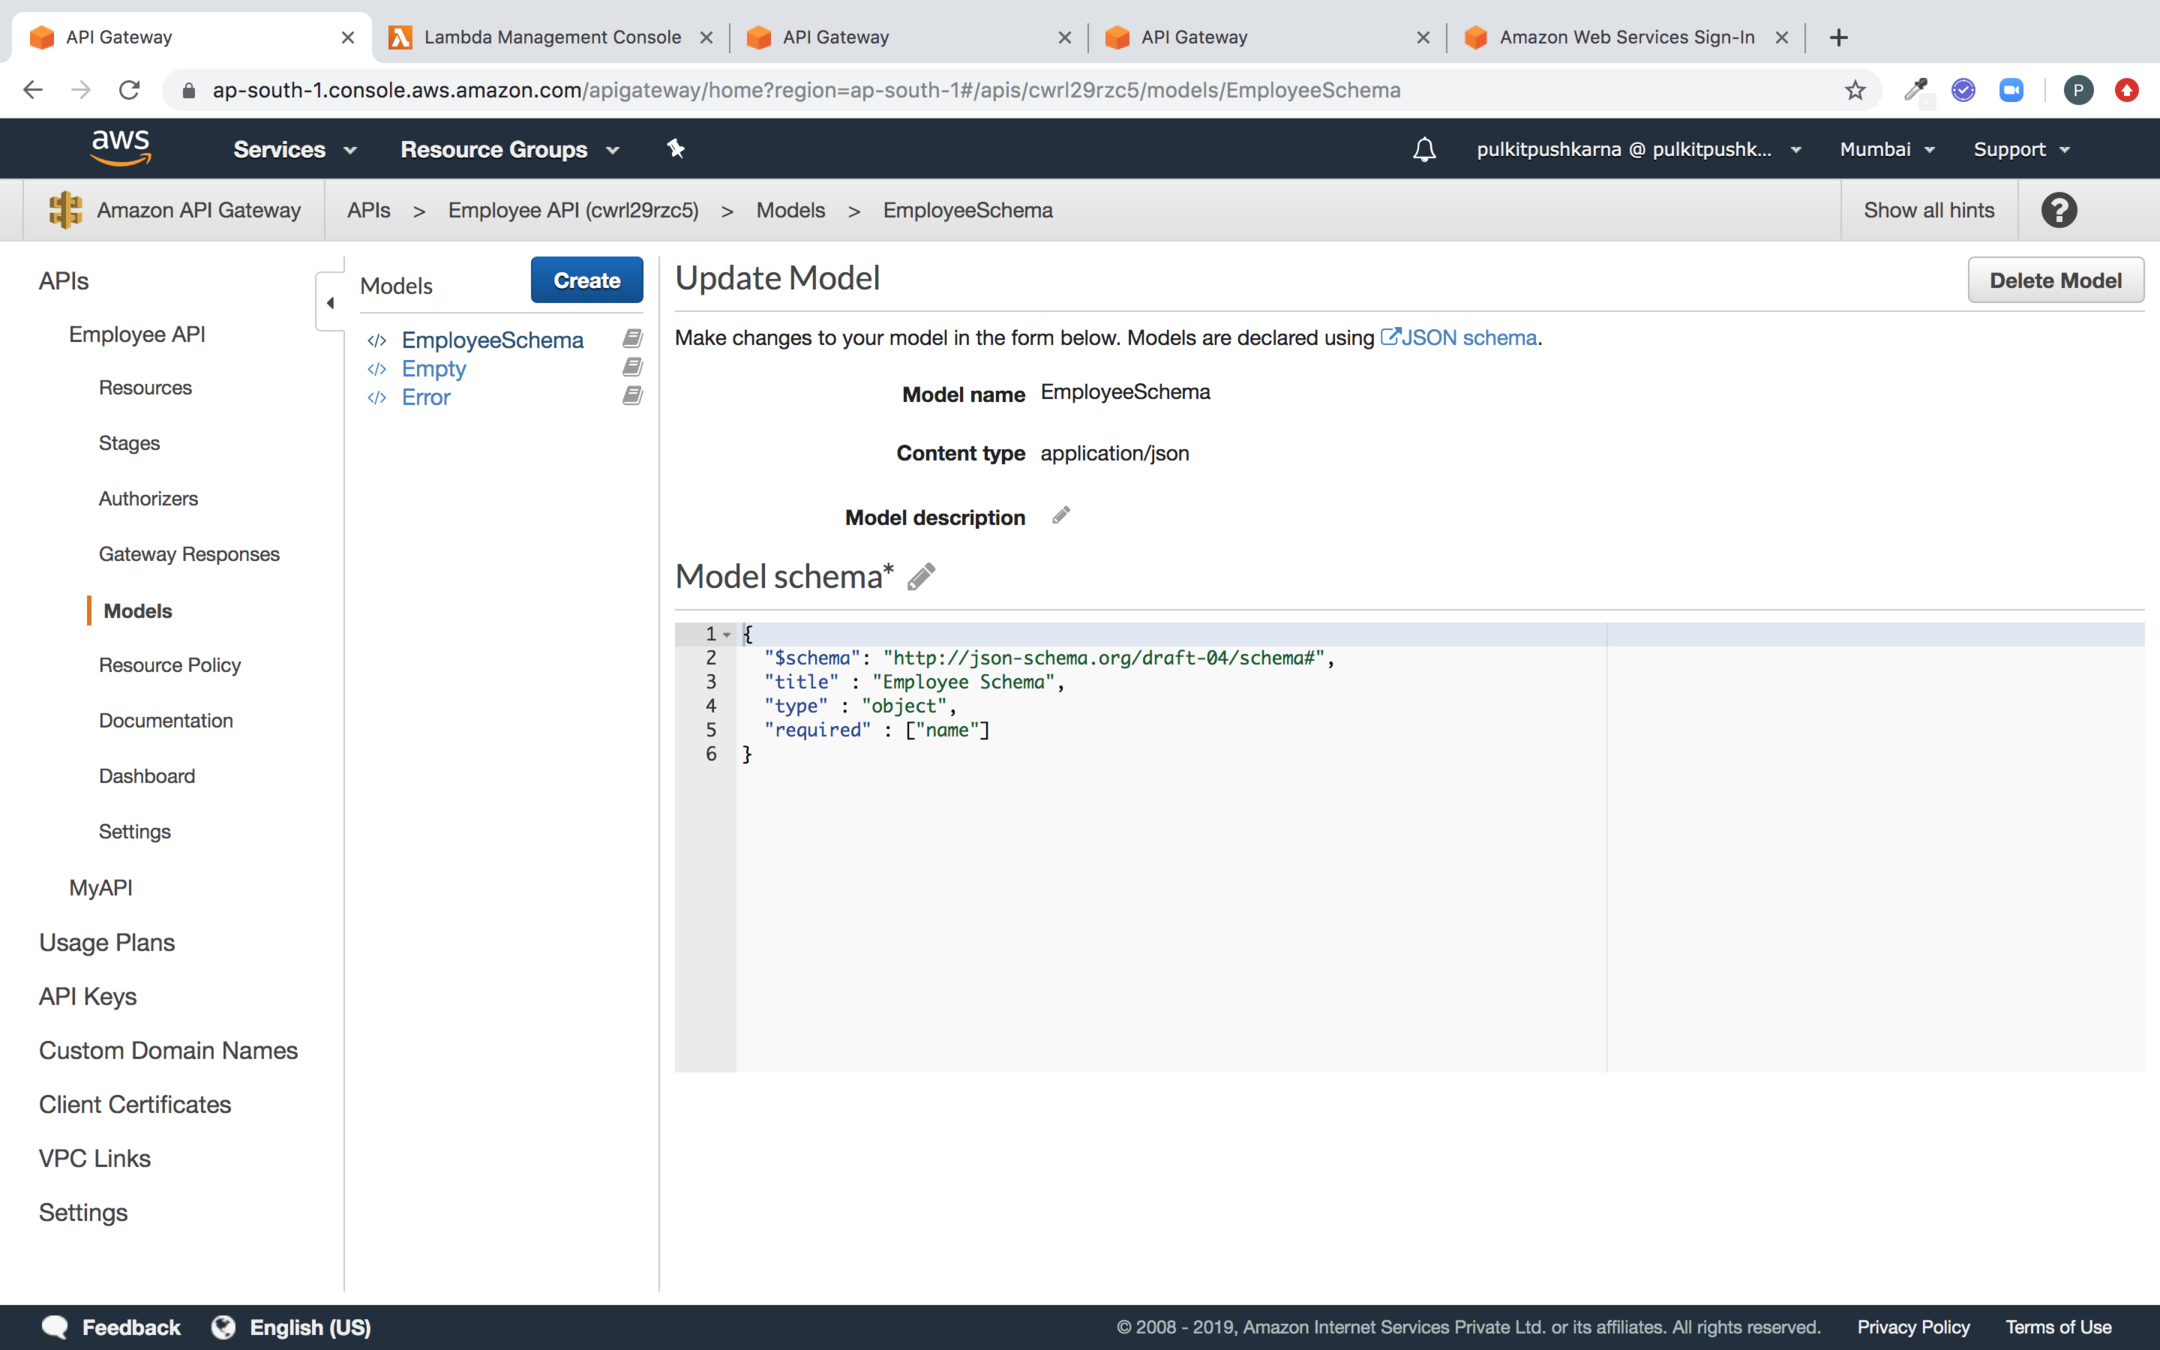
Error Handling For POST request
Go to the Models and Create a new Model as shown below
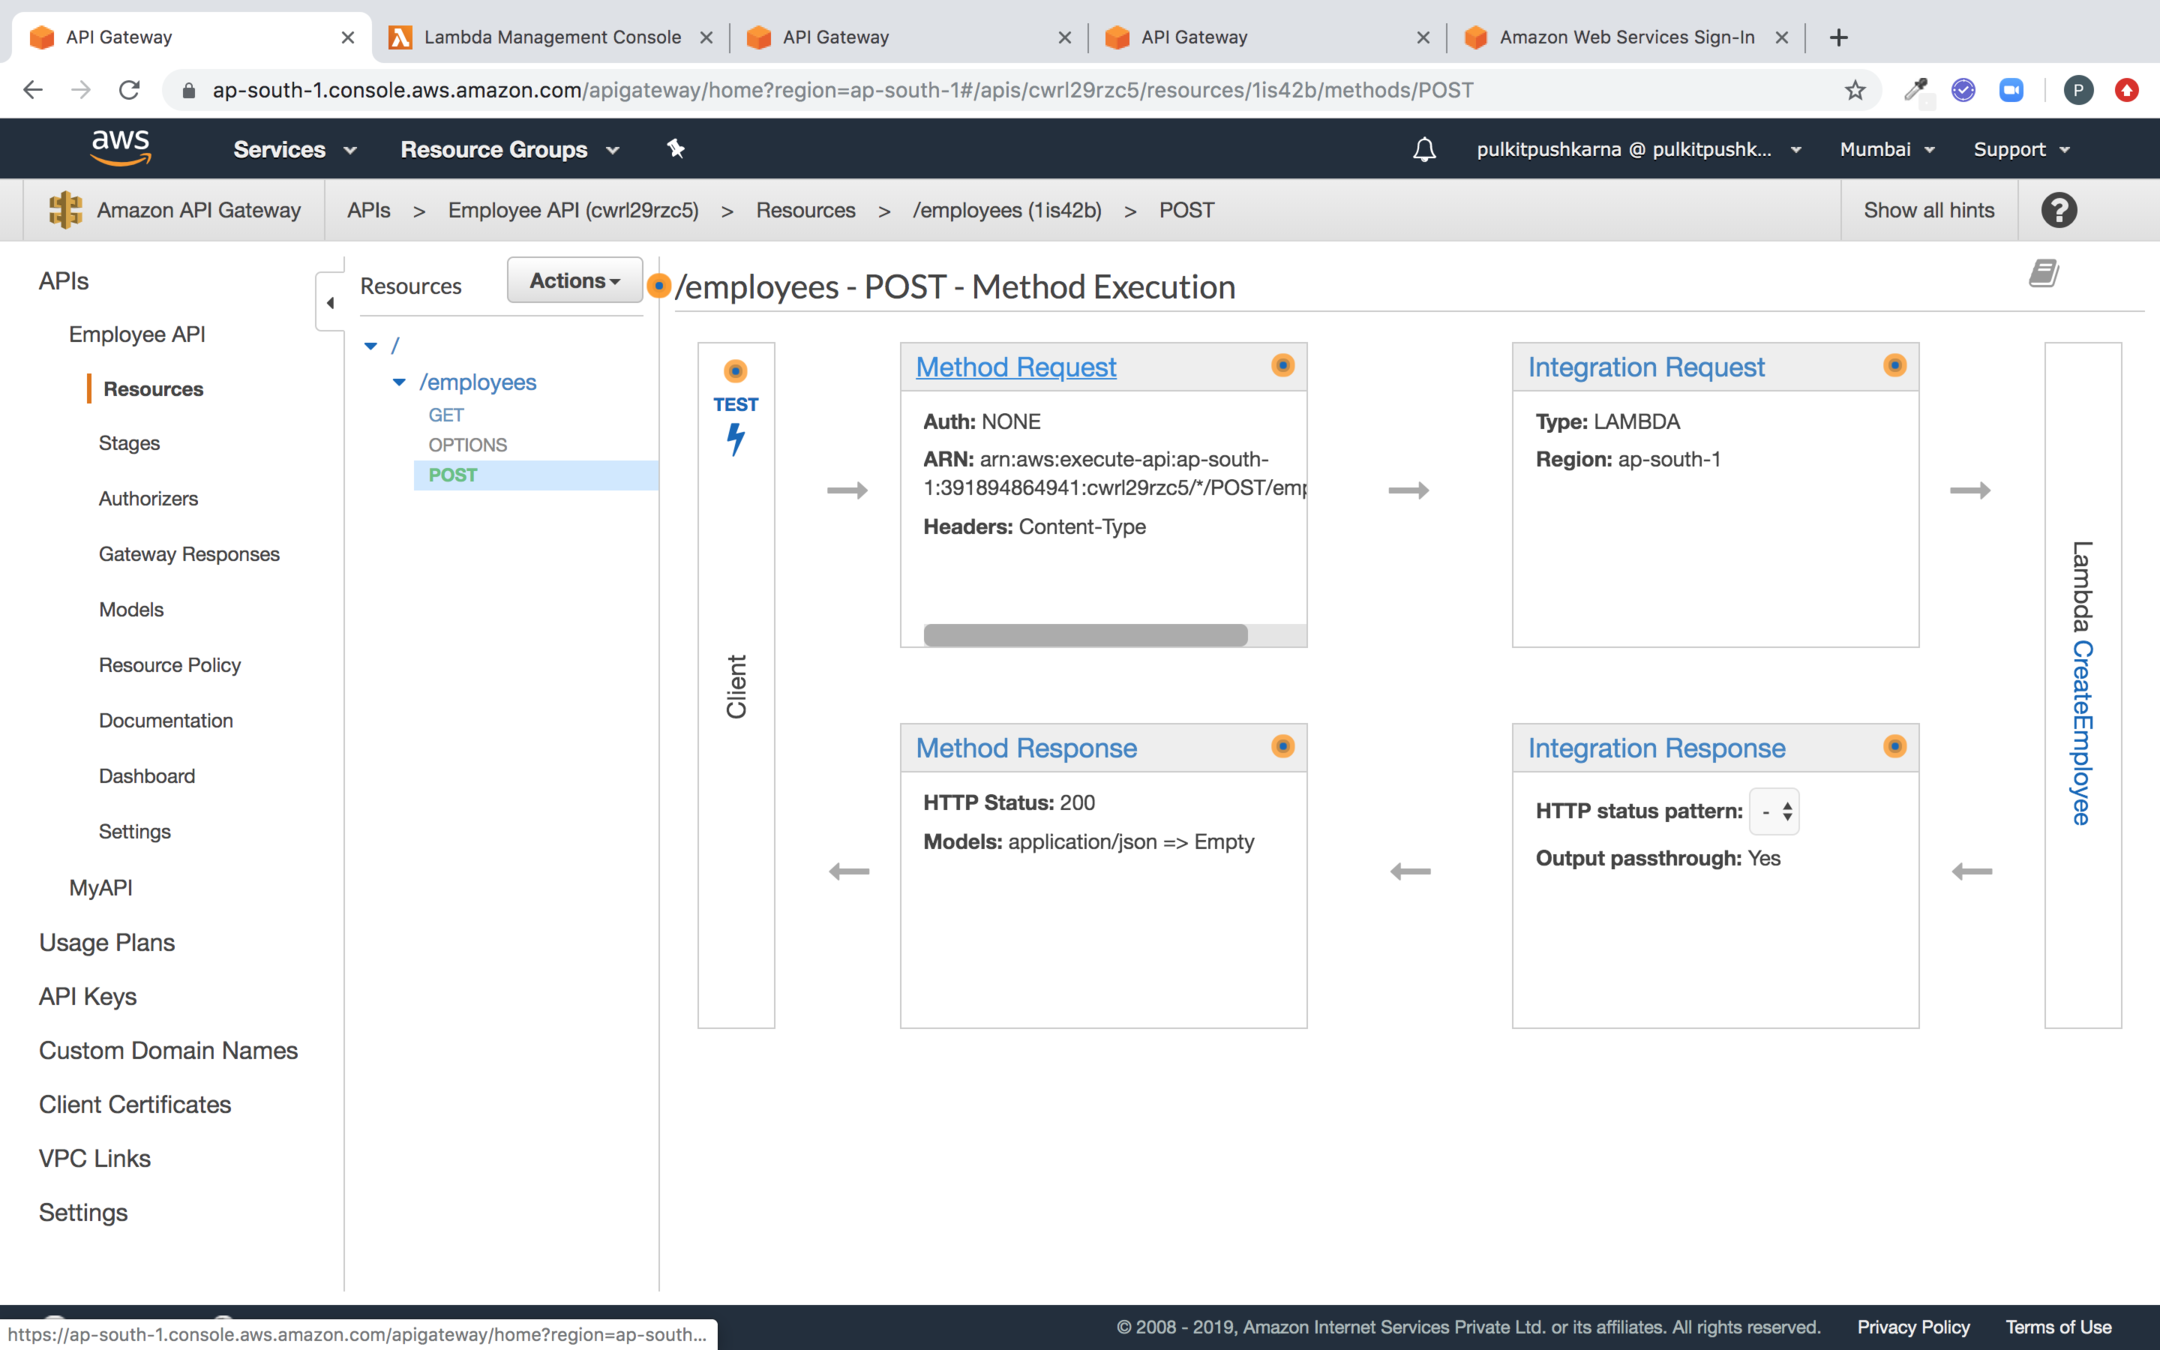
Go to the Method Request Section of POST Method
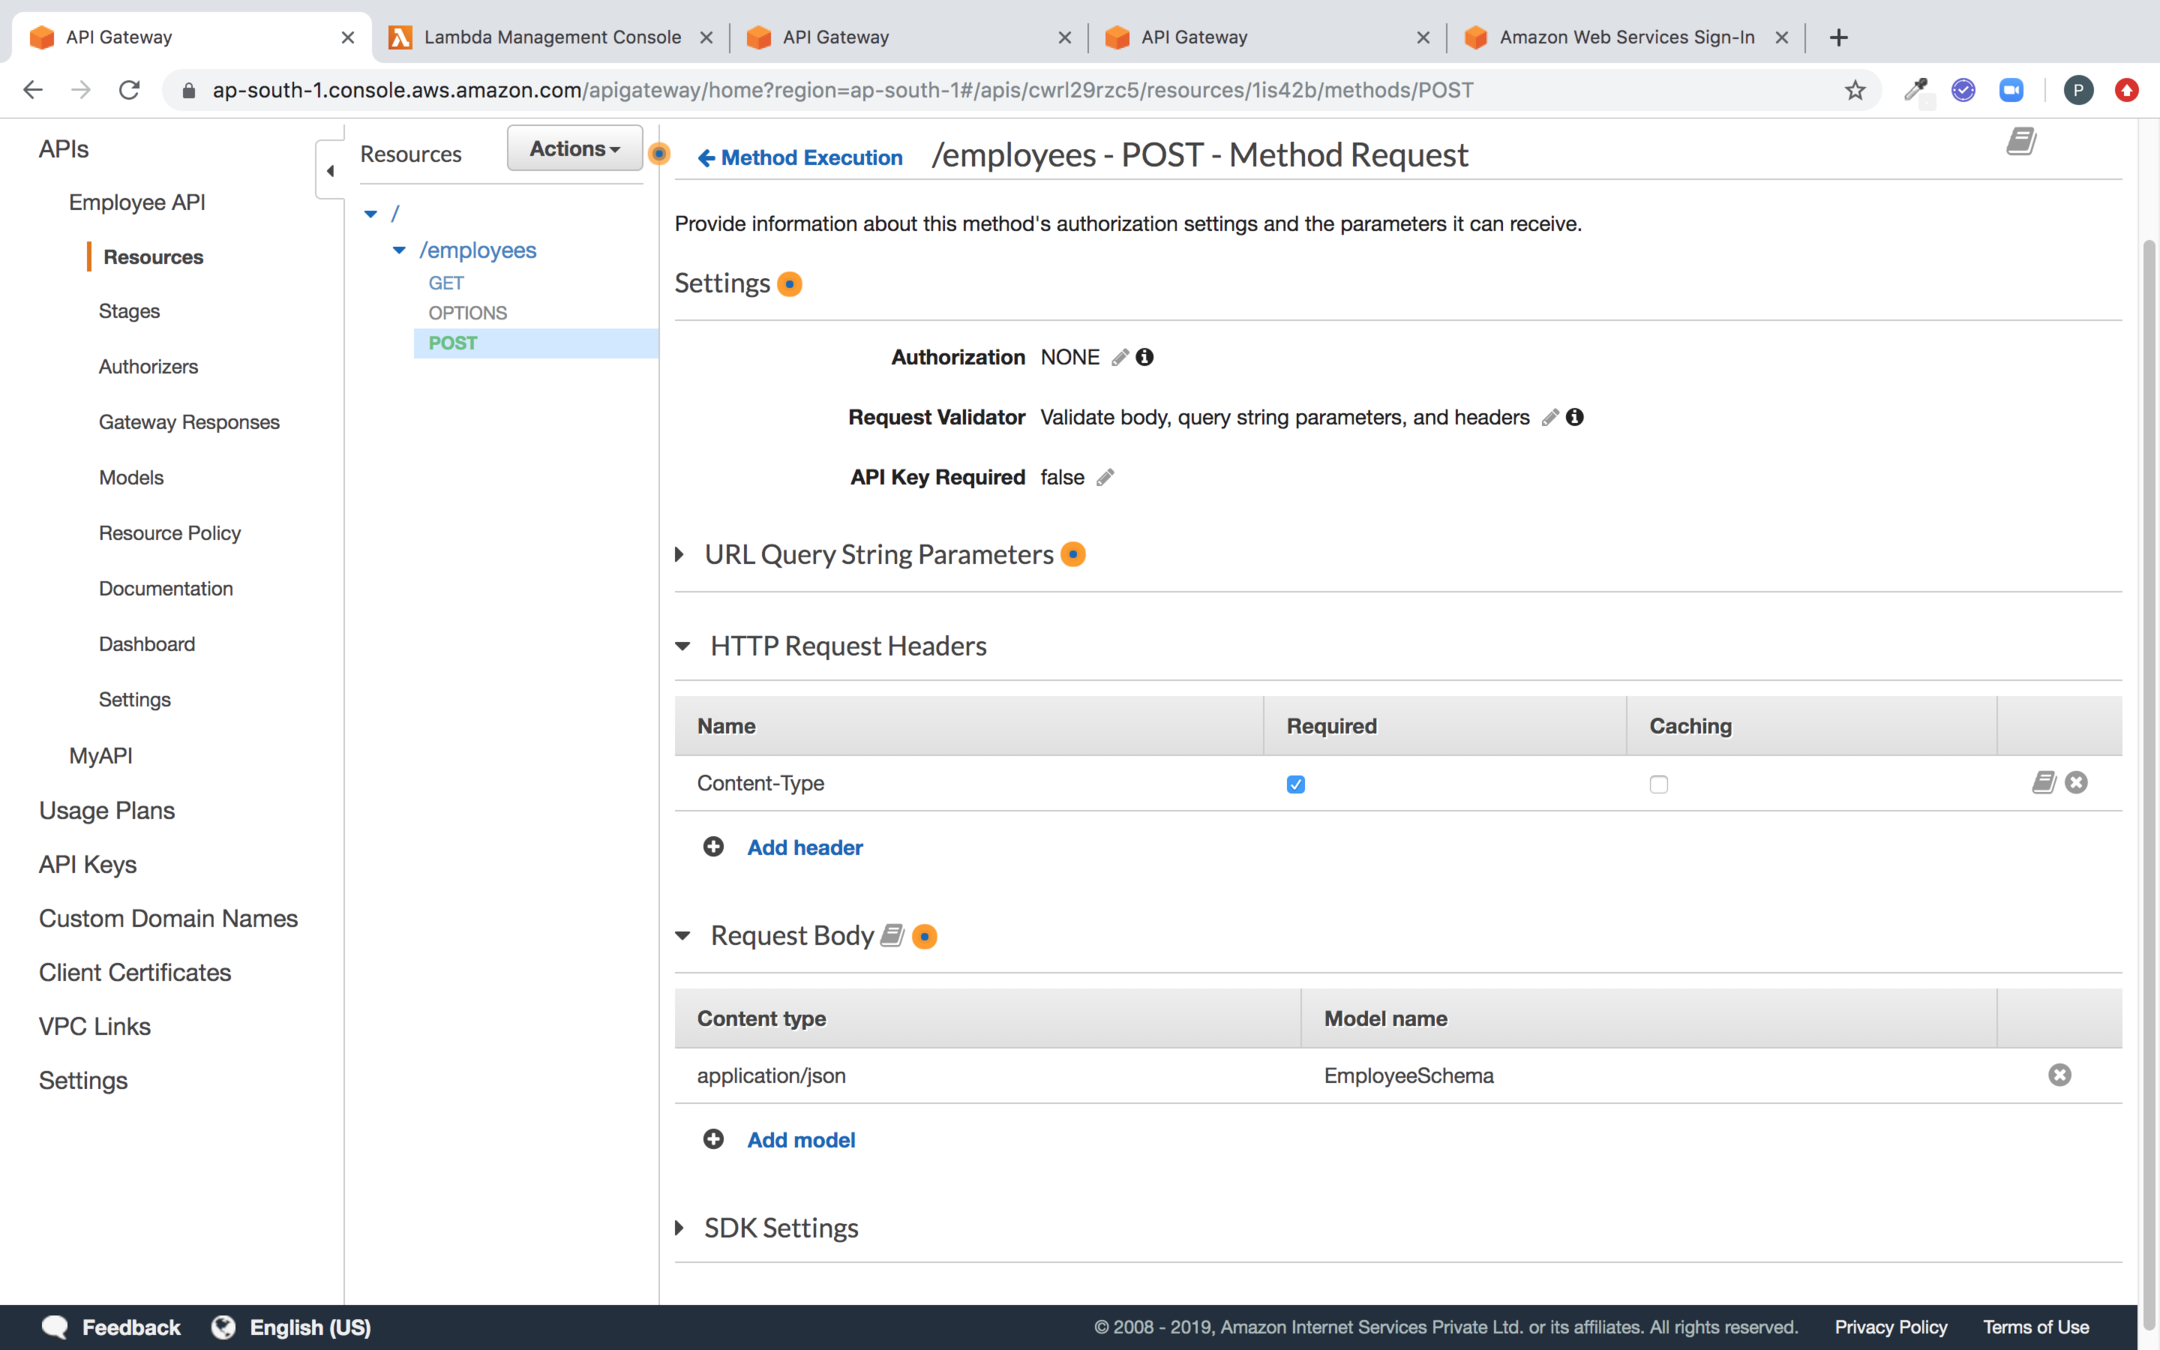
Select the Values of Request Validator, HTTP Request Harders and Request Body as shown below
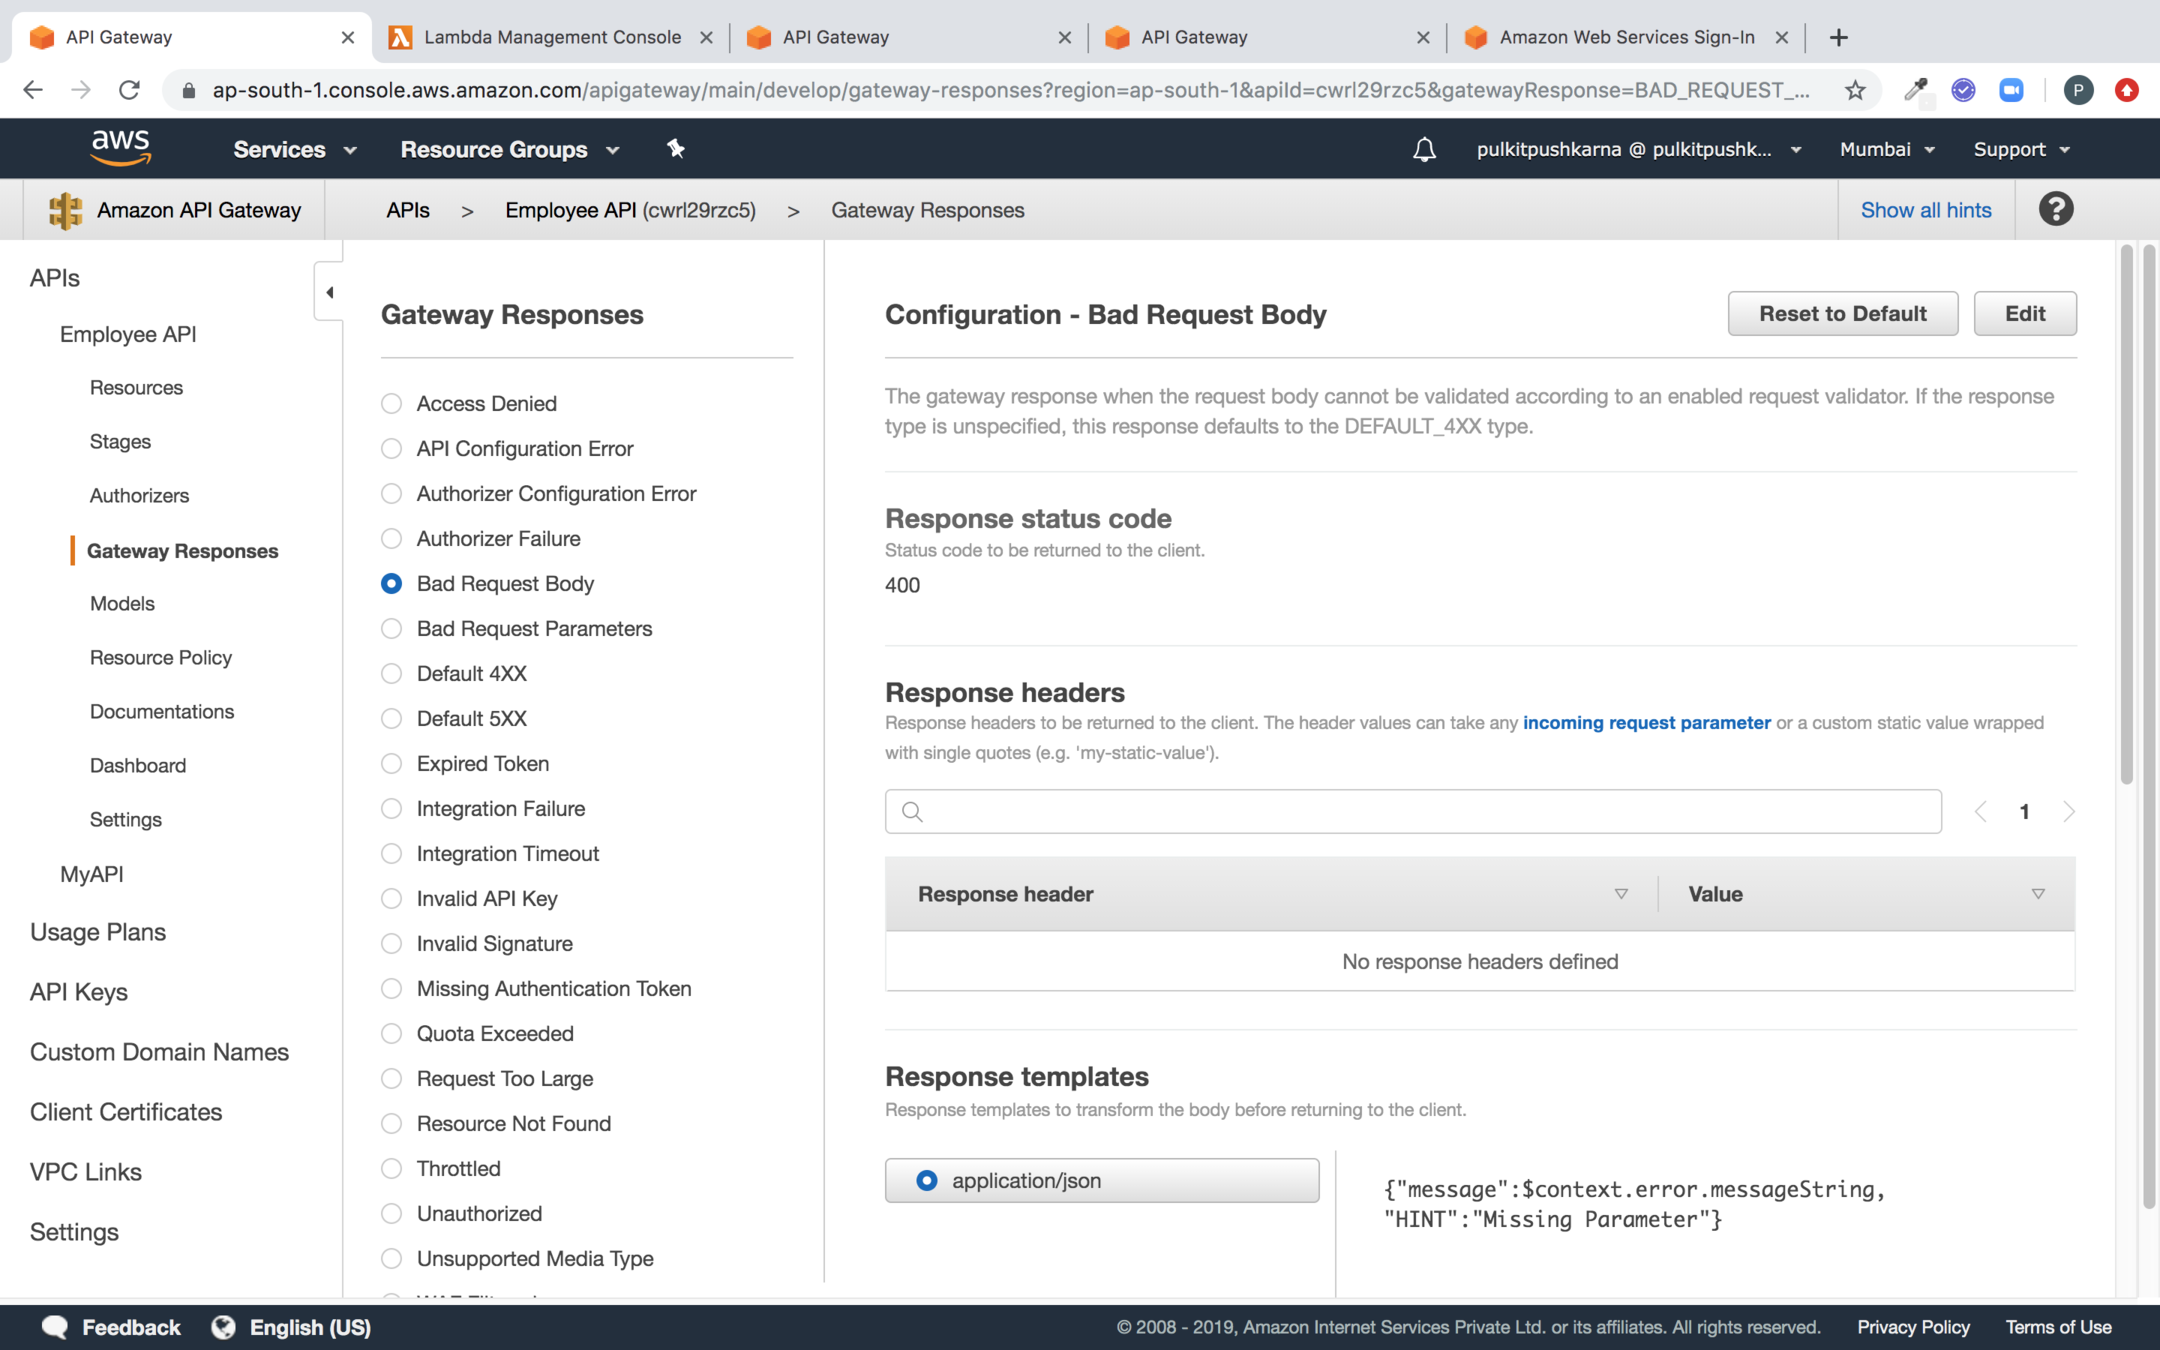
In the Gateway Response Section Change the Velocity Script for Response Template as shown below for Bad Request Body
Fetch the Data from Dynamo DB
package com.lambda.demo;

import com.amazonaws.regions.Regions;
import com.amazonaws.services.dynamodbv2.AmazonDynamoDB;
import com.amazonaws.services.dynamodbv2.AmazonDynamoDBClientBuilder;
import com.amazonaws.services.dynamodbv2.datamodeling.DynamoDBMapper;
import com.amazonaws.services.dynamodbv2.datamodeling.DynamoDBScanExpression;
import com.amazonaws.services.dynamodbv2.document.DynamoDB;
import com.amazonaws.services.dynamodbv2.document.Table;
import com.amazonaws.services.lambda.runtime.Context;
import com.amazonaws.services.lambda.runtime.LambdaLogger;
import com.amazonaws.services.lambda.runtime.RequestHandler;

import java.util.List;

public class LambdaAPIEmployeeGetHandler implements RequestHandler<EmployeeRequest, List<Employee>> {

    @Override
    public List<Employee> handleRequest(EmployeeRequest input, Context context) {

        AmazonDynamoDB client = AmazonDynamoDBClientBuilder
                .standard()
                .withRegion(Regions.AP_SOUTH_1)
                .build();

        LambdaLogger lambdaLogger = context.getLogger();
        DynamoDB dynamoDB = new DynamoDB(client);
        Table table = dynamoDB.getTable("employee");
        DynamoDBMapper mapper = new DynamoDBMapper(client);
        DynamoDBScanExpression scanExpression = new DynamoDBScanExpression();
        List<Employee> scanResult = mapper.scan(Employee.class, scanExpression);
        lambdaLogger.log(scanResult.toString());
        return scanResult;
    }
}
package com.lambda.demo;

import com.amazonaws.services.dynamodbv2.datamodeling.DynamoDBHashKey;
import com.amazonaws.services.dynamodbv2.datamodeling.DynamoDBTable;

@DynamoDBTable(tableName="employee")
public class Employee {

    private String id;

    private String name;

    private String age;

    @DynamoDBHashKey(attributeName="id")
    public String getId() {
        return id;
    }

    public void setId(String id) {
        this.id = id;
    }

    public String getName() {
        return name;
    }

    public void setName(String name) {
        this.name = name;
    }

    public String getAge() {
        return age;
    }

    public void setAge(String age) {
        this.age = age;
    }

    @Override
    public String toString() {
        return "Employee{" +
                "id='" + id + '\'' +
                ", name='" + name + '\'' +
                ", age='" + age + '\'' +
                '}';
    }
}
Introduce @DynamoDBTable and
Deploy the Latest Jar for GetEmployee

Create a new resource for Path variable employee id
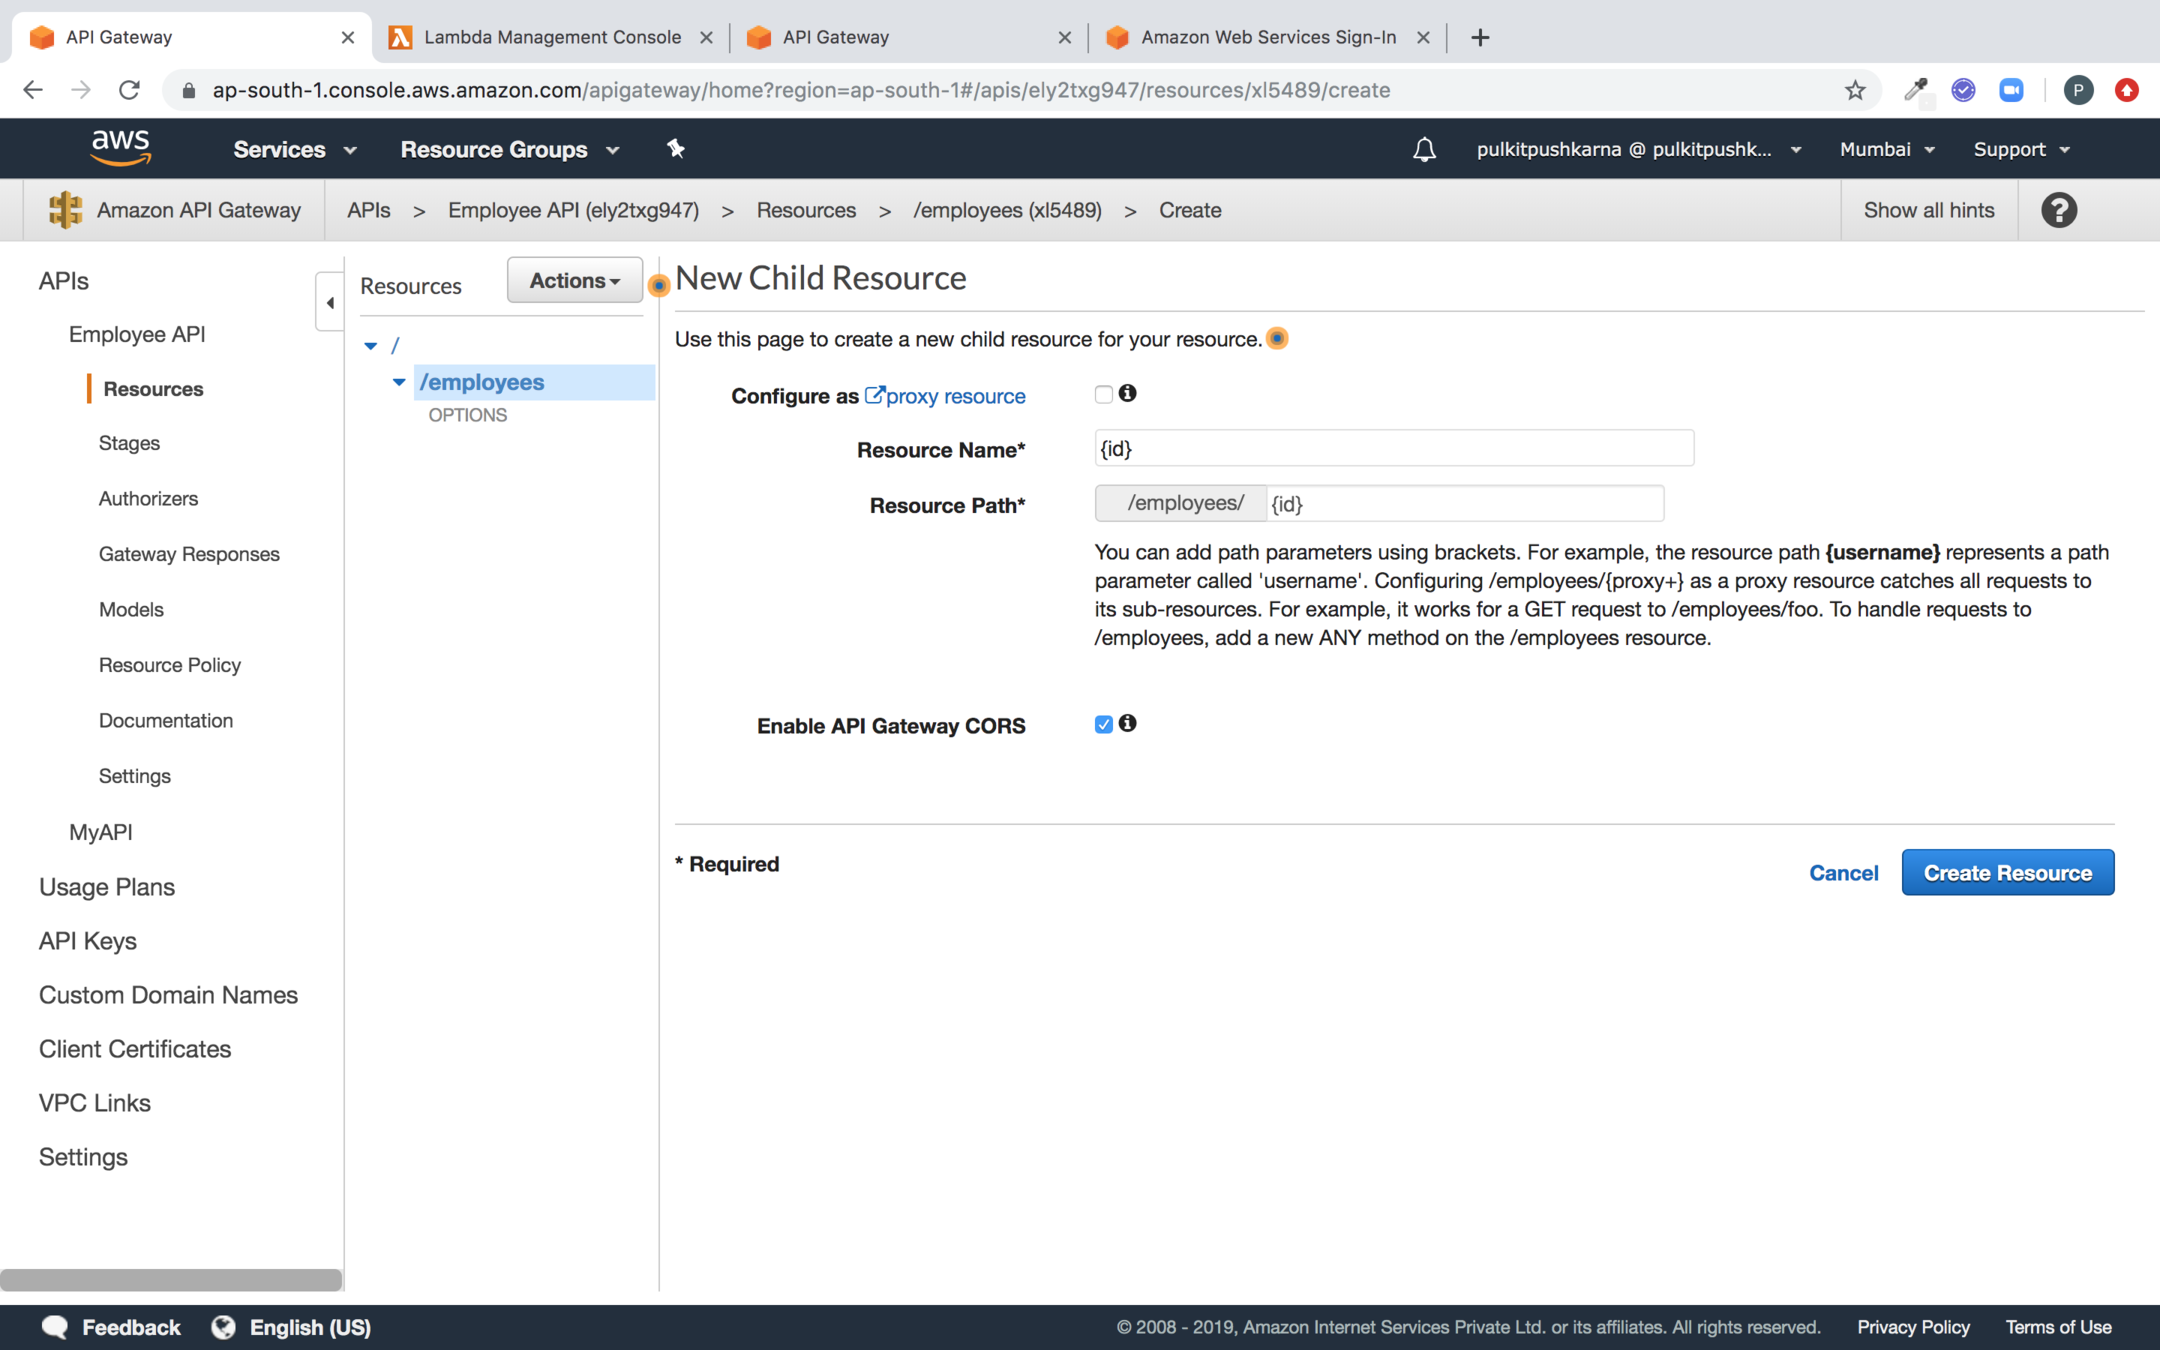
Specify the Path Variable id in Resource name and click on Create Resource
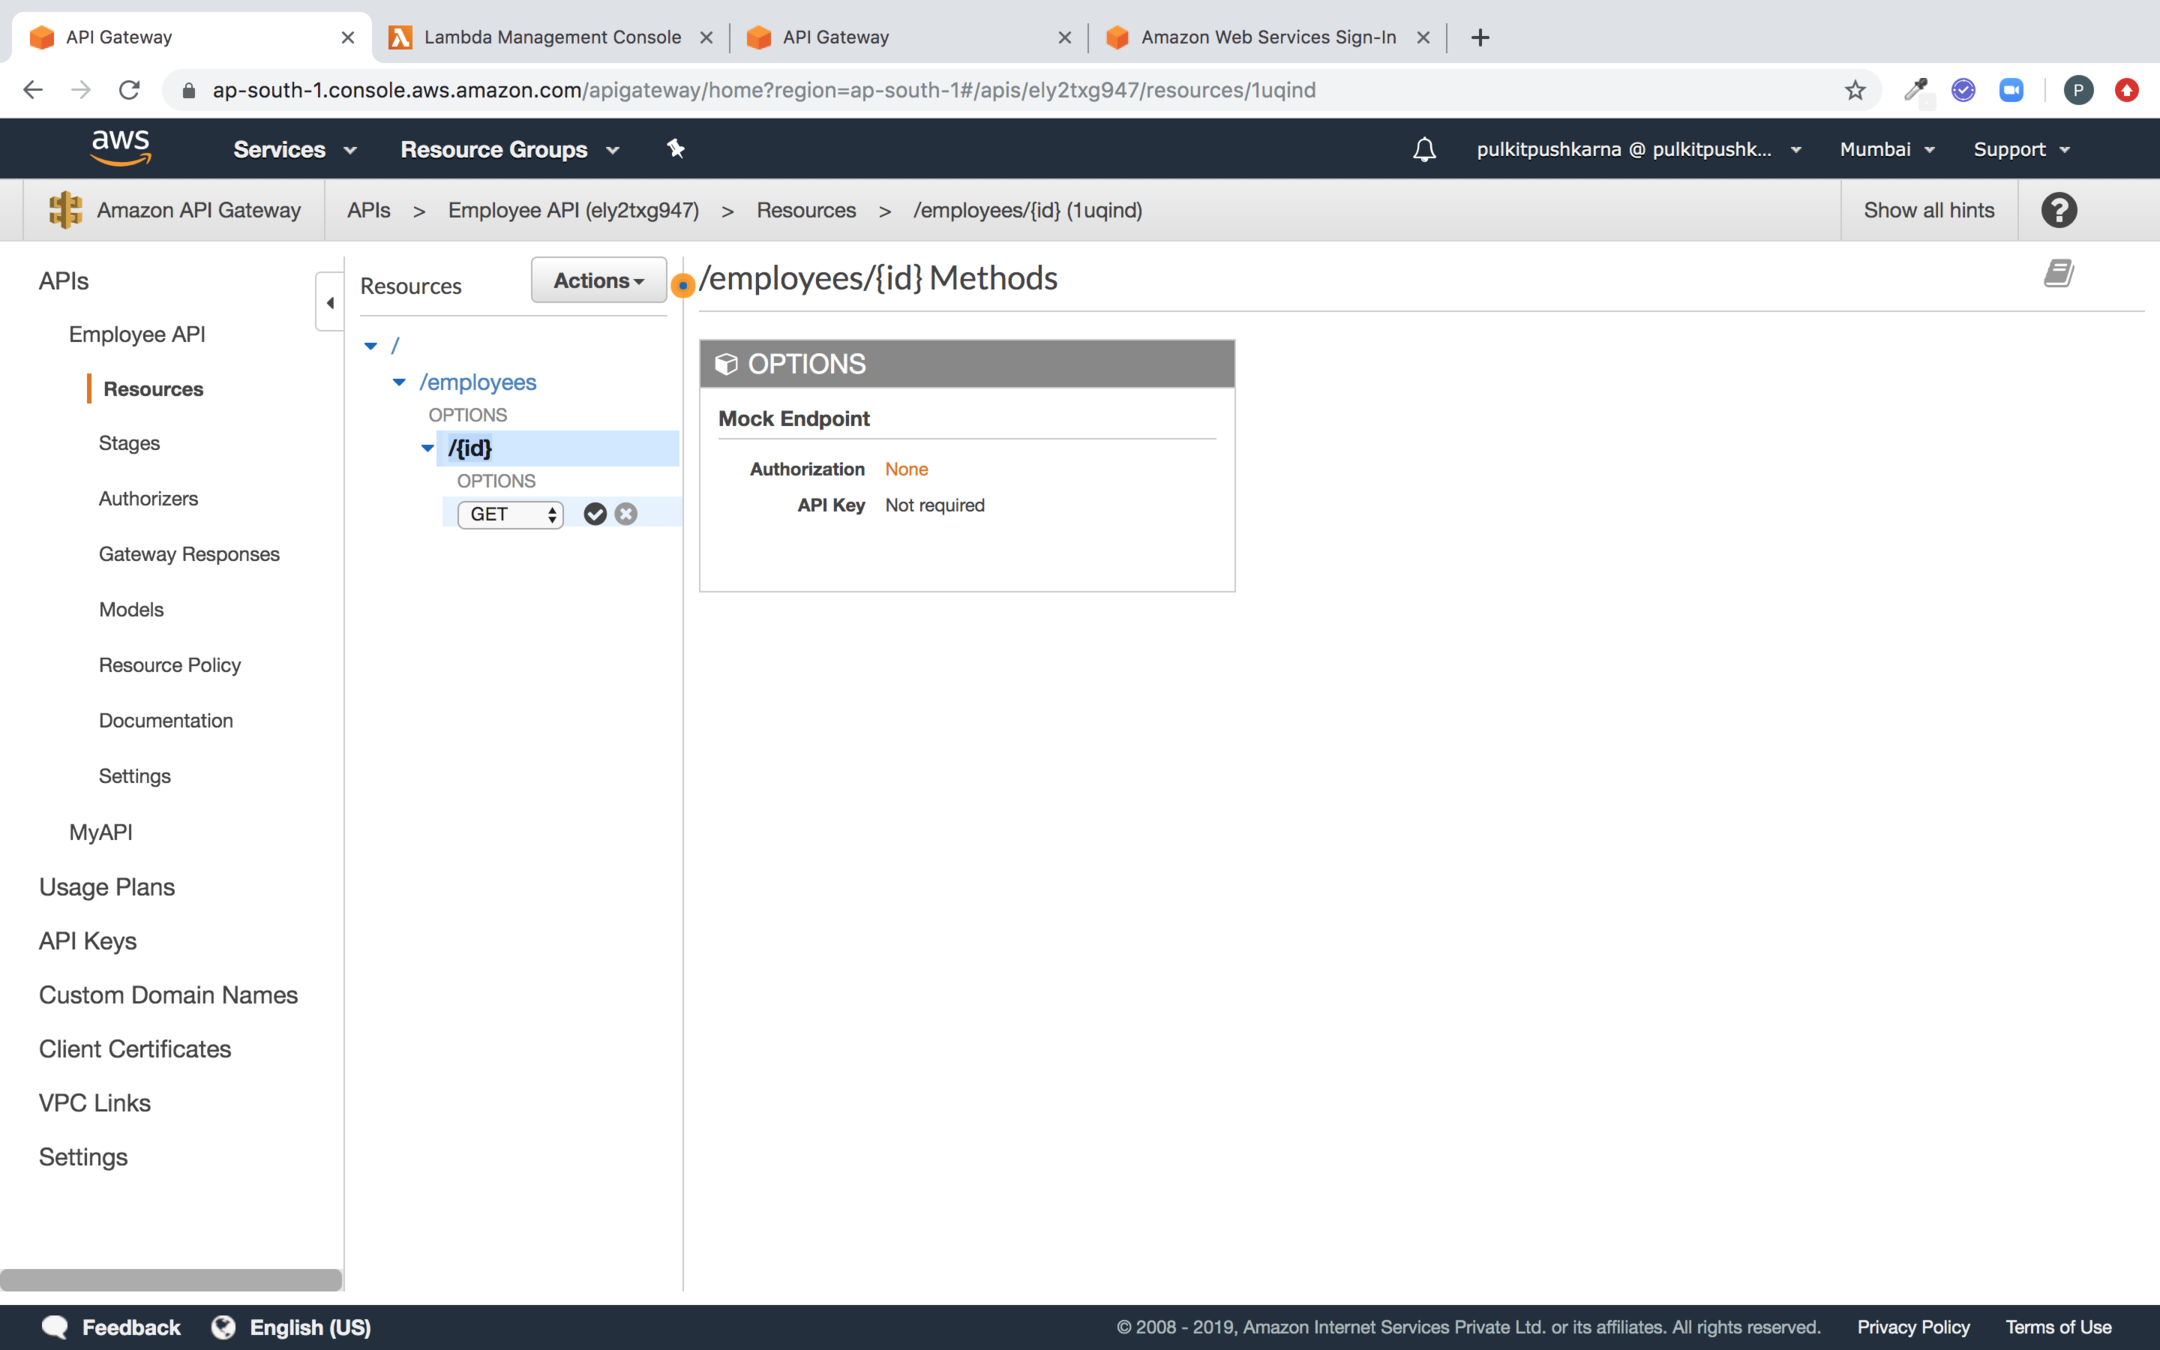
Introduce a Get method for employee/{id}
package com.lambda.demo;

import com.amazonaws.regions.Regions;
import com.amazonaws.services.dynamodbv2.AmazonDynamoDB;
import com.amazonaws.services.dynamodbv2.AmazonDynamoDBClientBuilder;
import com.amazonaws.services.dynamodbv2.datamodeling.DynamoDBMapper;
import com.amazonaws.services.dynamodbv2.datamodeling.DynamoDBMapperConfig;
import com.amazonaws.services.dynamodbv2.document.DynamoDB;
import com.amazonaws.services.dynamodbv2.document.Table;
import com.amazonaws.services.lambda.runtime.Context;
import com.amazonaws.services.lambda.runtime.LambdaLogger;
import com.amazonaws.services.lambda.runtime.RequestHandler;

public class GetEmployee implements RequestHandler<EmployeeRequest, Employee> {

    @Override
    public Employee handleRequest(EmployeeRequest input, Context context) {
        LambdaLogger lambdaLogger = context.getLogger();

        AmazonDynamoDB client = AmazonDynamoDBClientBuilder
                .standard()
                .withRegion(Regions.AP_SOUTH_1)
                .build();

        DynamoDB dynamoDB = new DynamoDB(client);
        Table table = dynamoDB.getTable("employee");
        DynamoDBMapper mapper = new DynamoDBMapper(client);
        Employee employee = mapper.load(Employee.class, input.getEmpId(),
                new DynamoDBMapperConfig(DynamoDBMapperConfig.ConsistentReads.CONSISTENT));

        lambdaLogger.log(employee.toString());

        return employee;
    }
}
Create and upload the lambda to Get One Employee
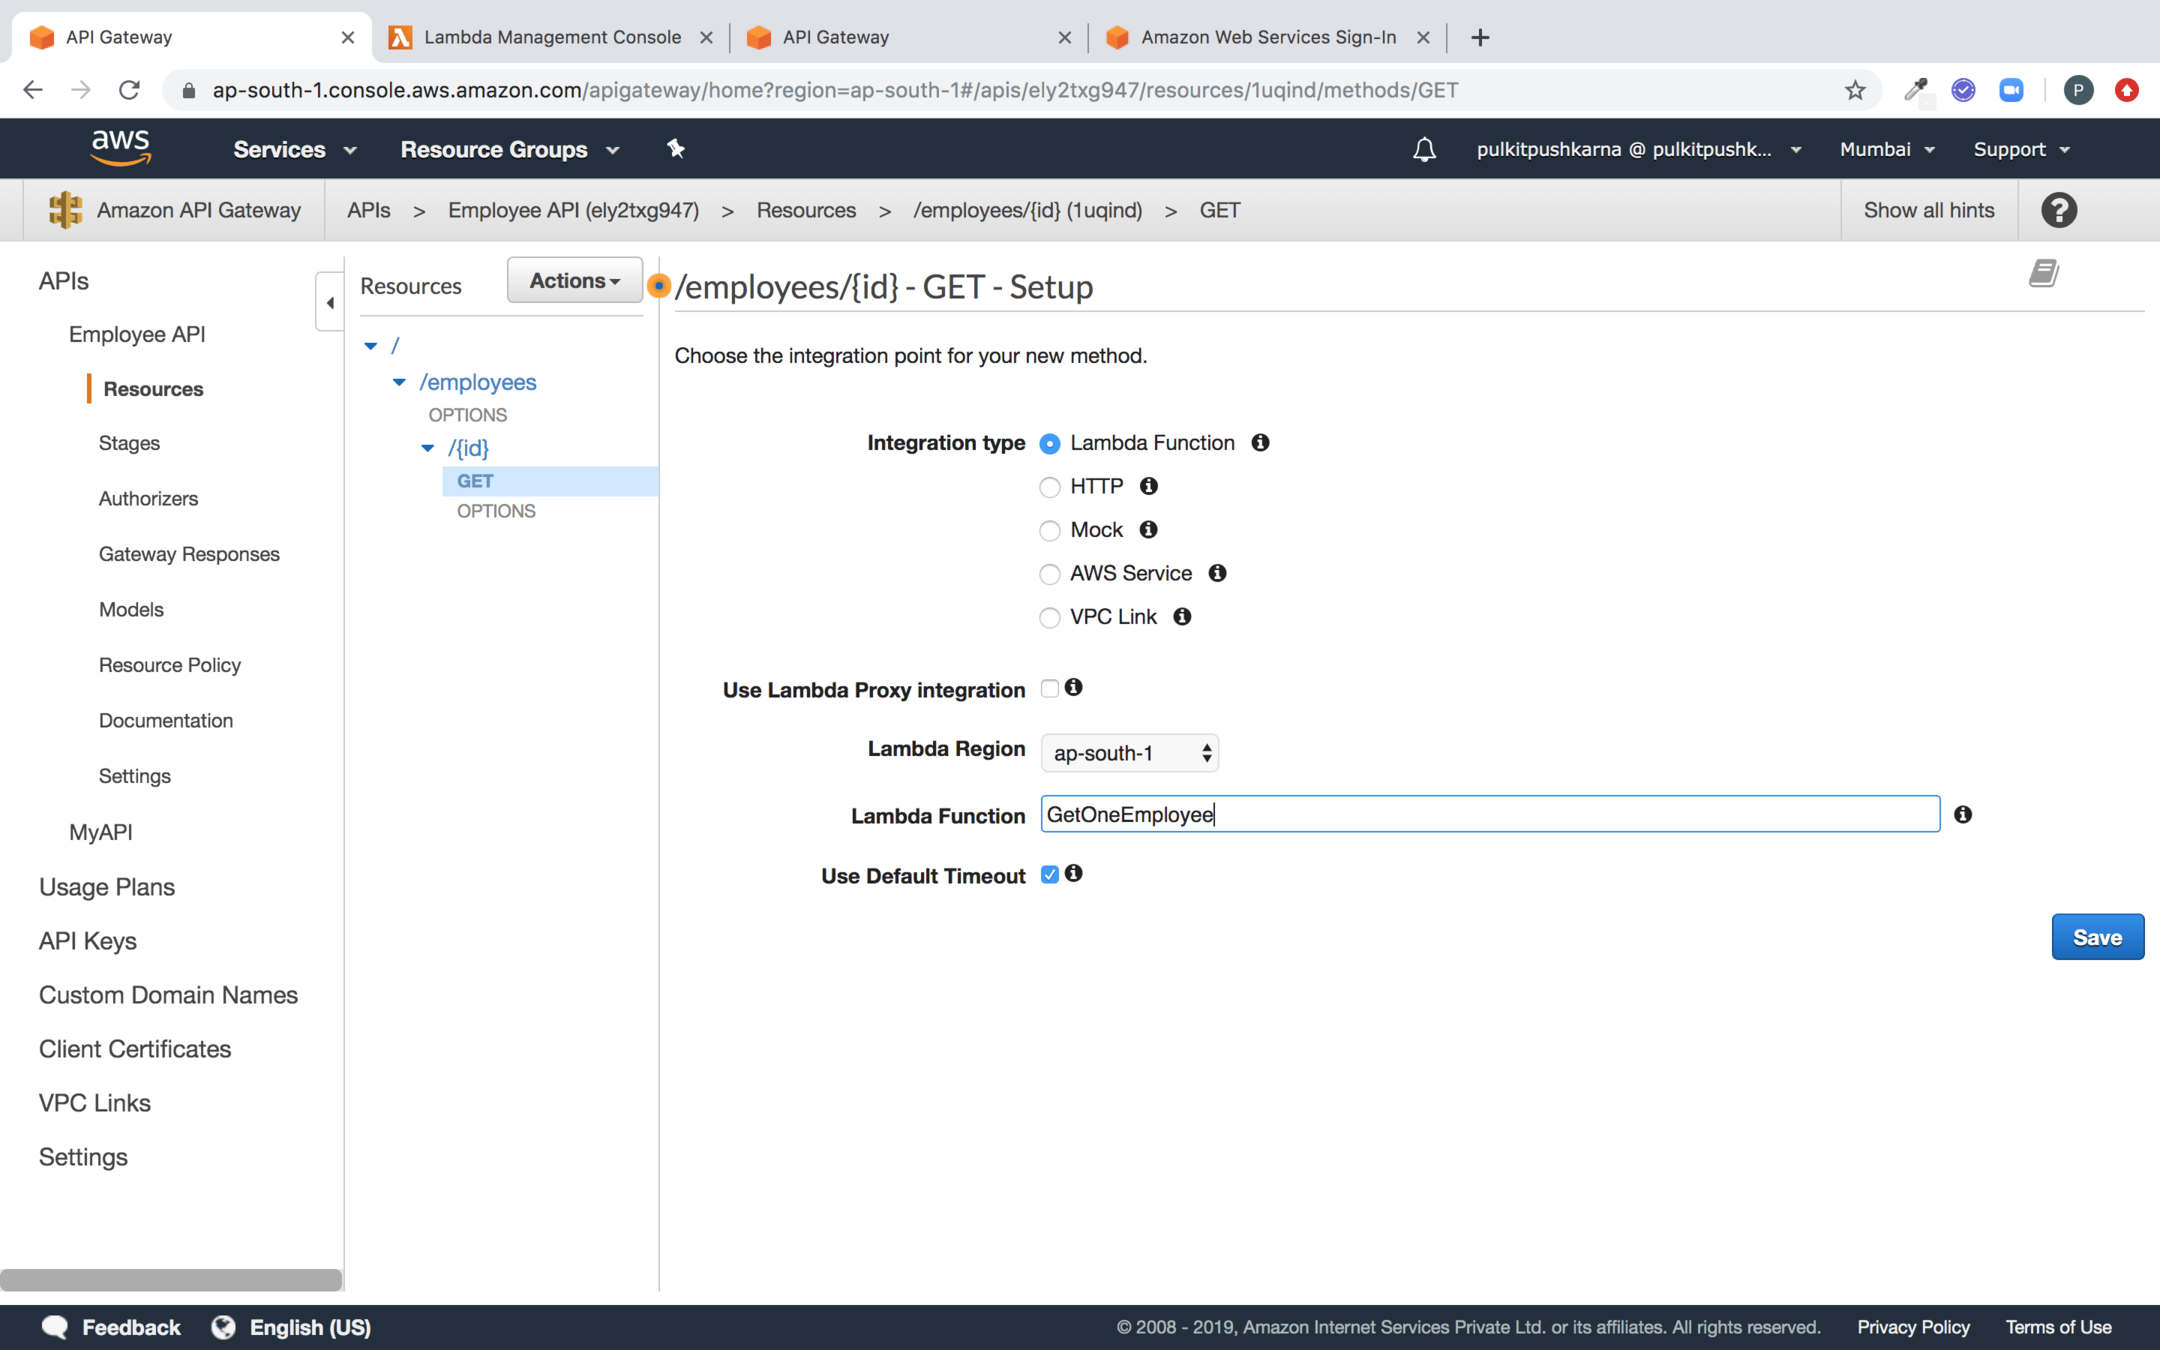
Specify the Lambda function to be triggered
Add Permission to the lambda Function
Go to the integration request
Under the integration Request select the Mapping Template
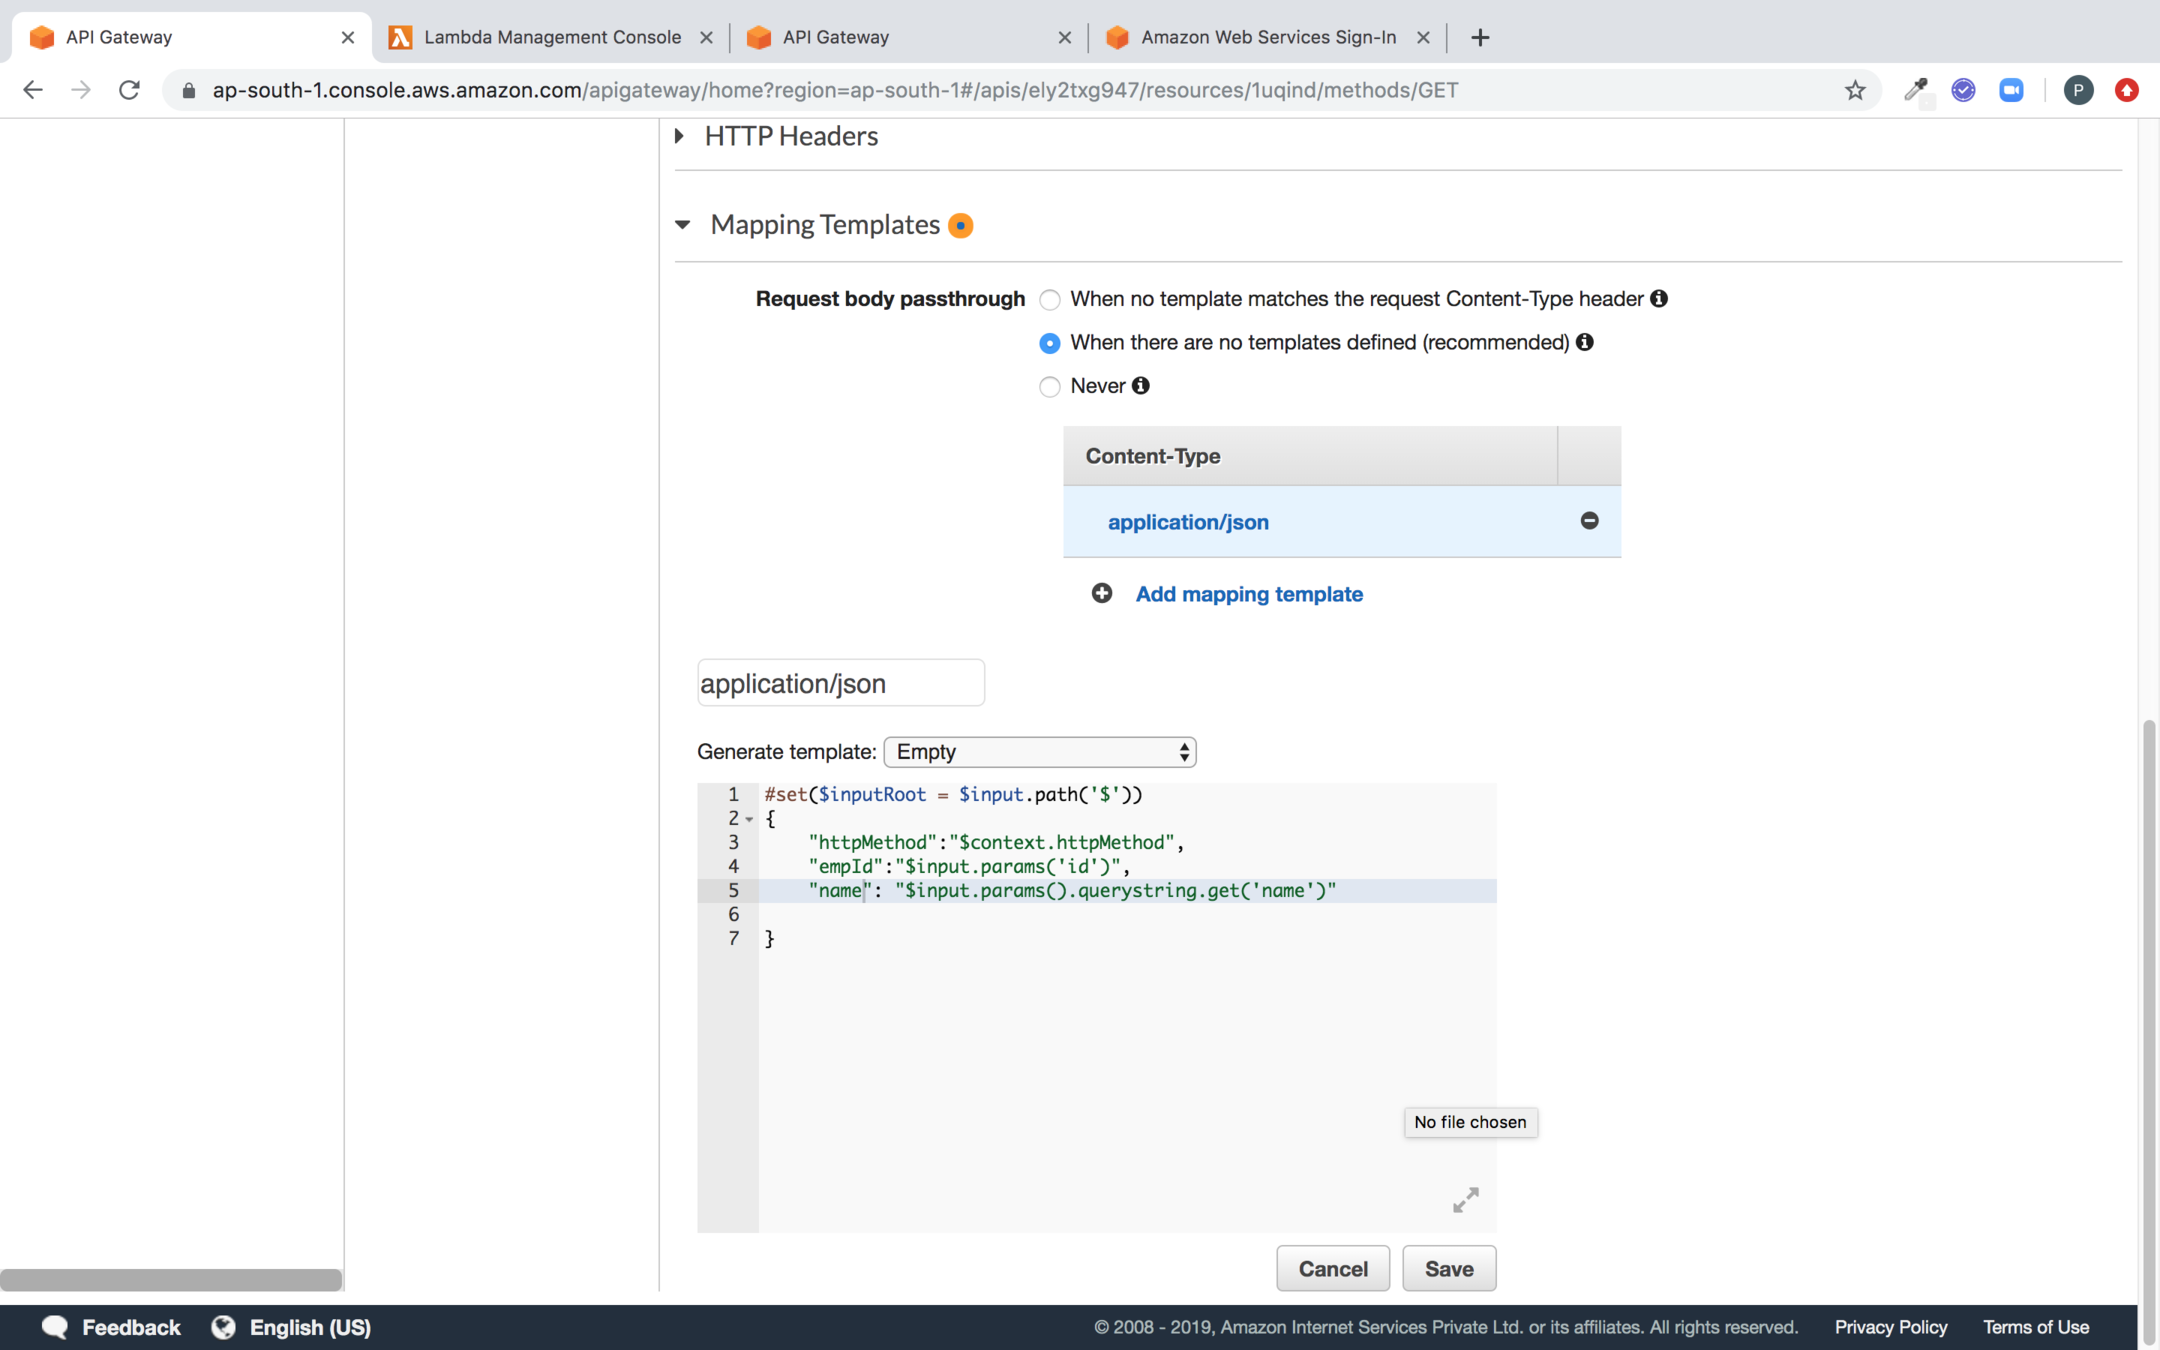
#set($inputRoot = $input.path('$'))
{
    "httpMethod":"$context.httpMethod",
    "empId":"$input.params('id')",
    "name": "$input.params().querystring.get('name')"

}
Script to generate Template
Deploying the API
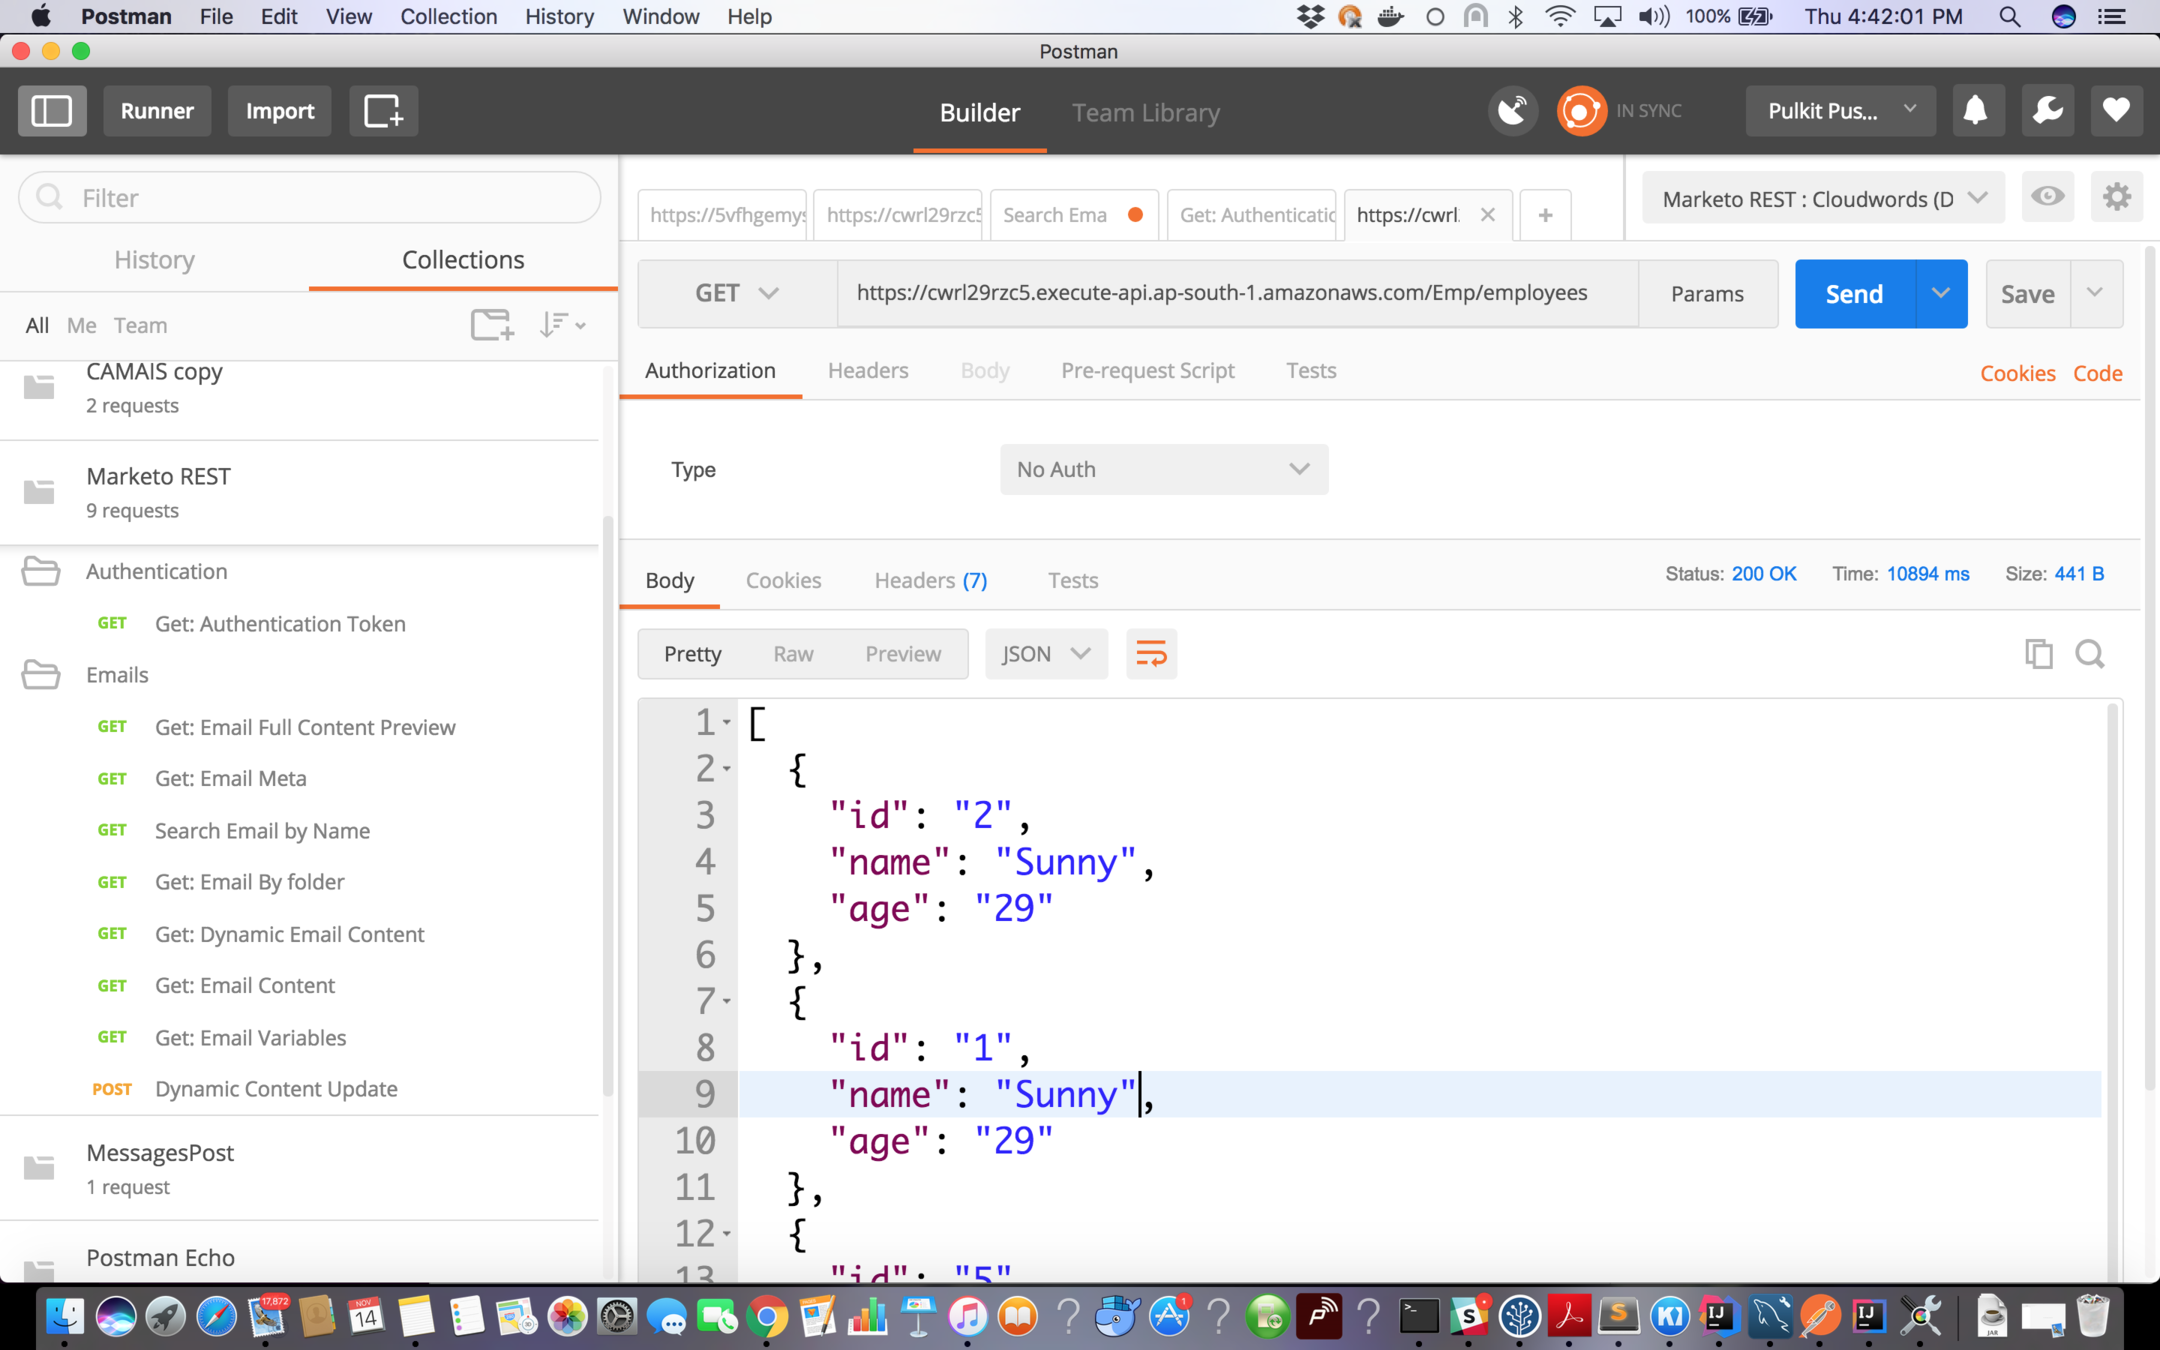
Now hit the employee API to get one employee
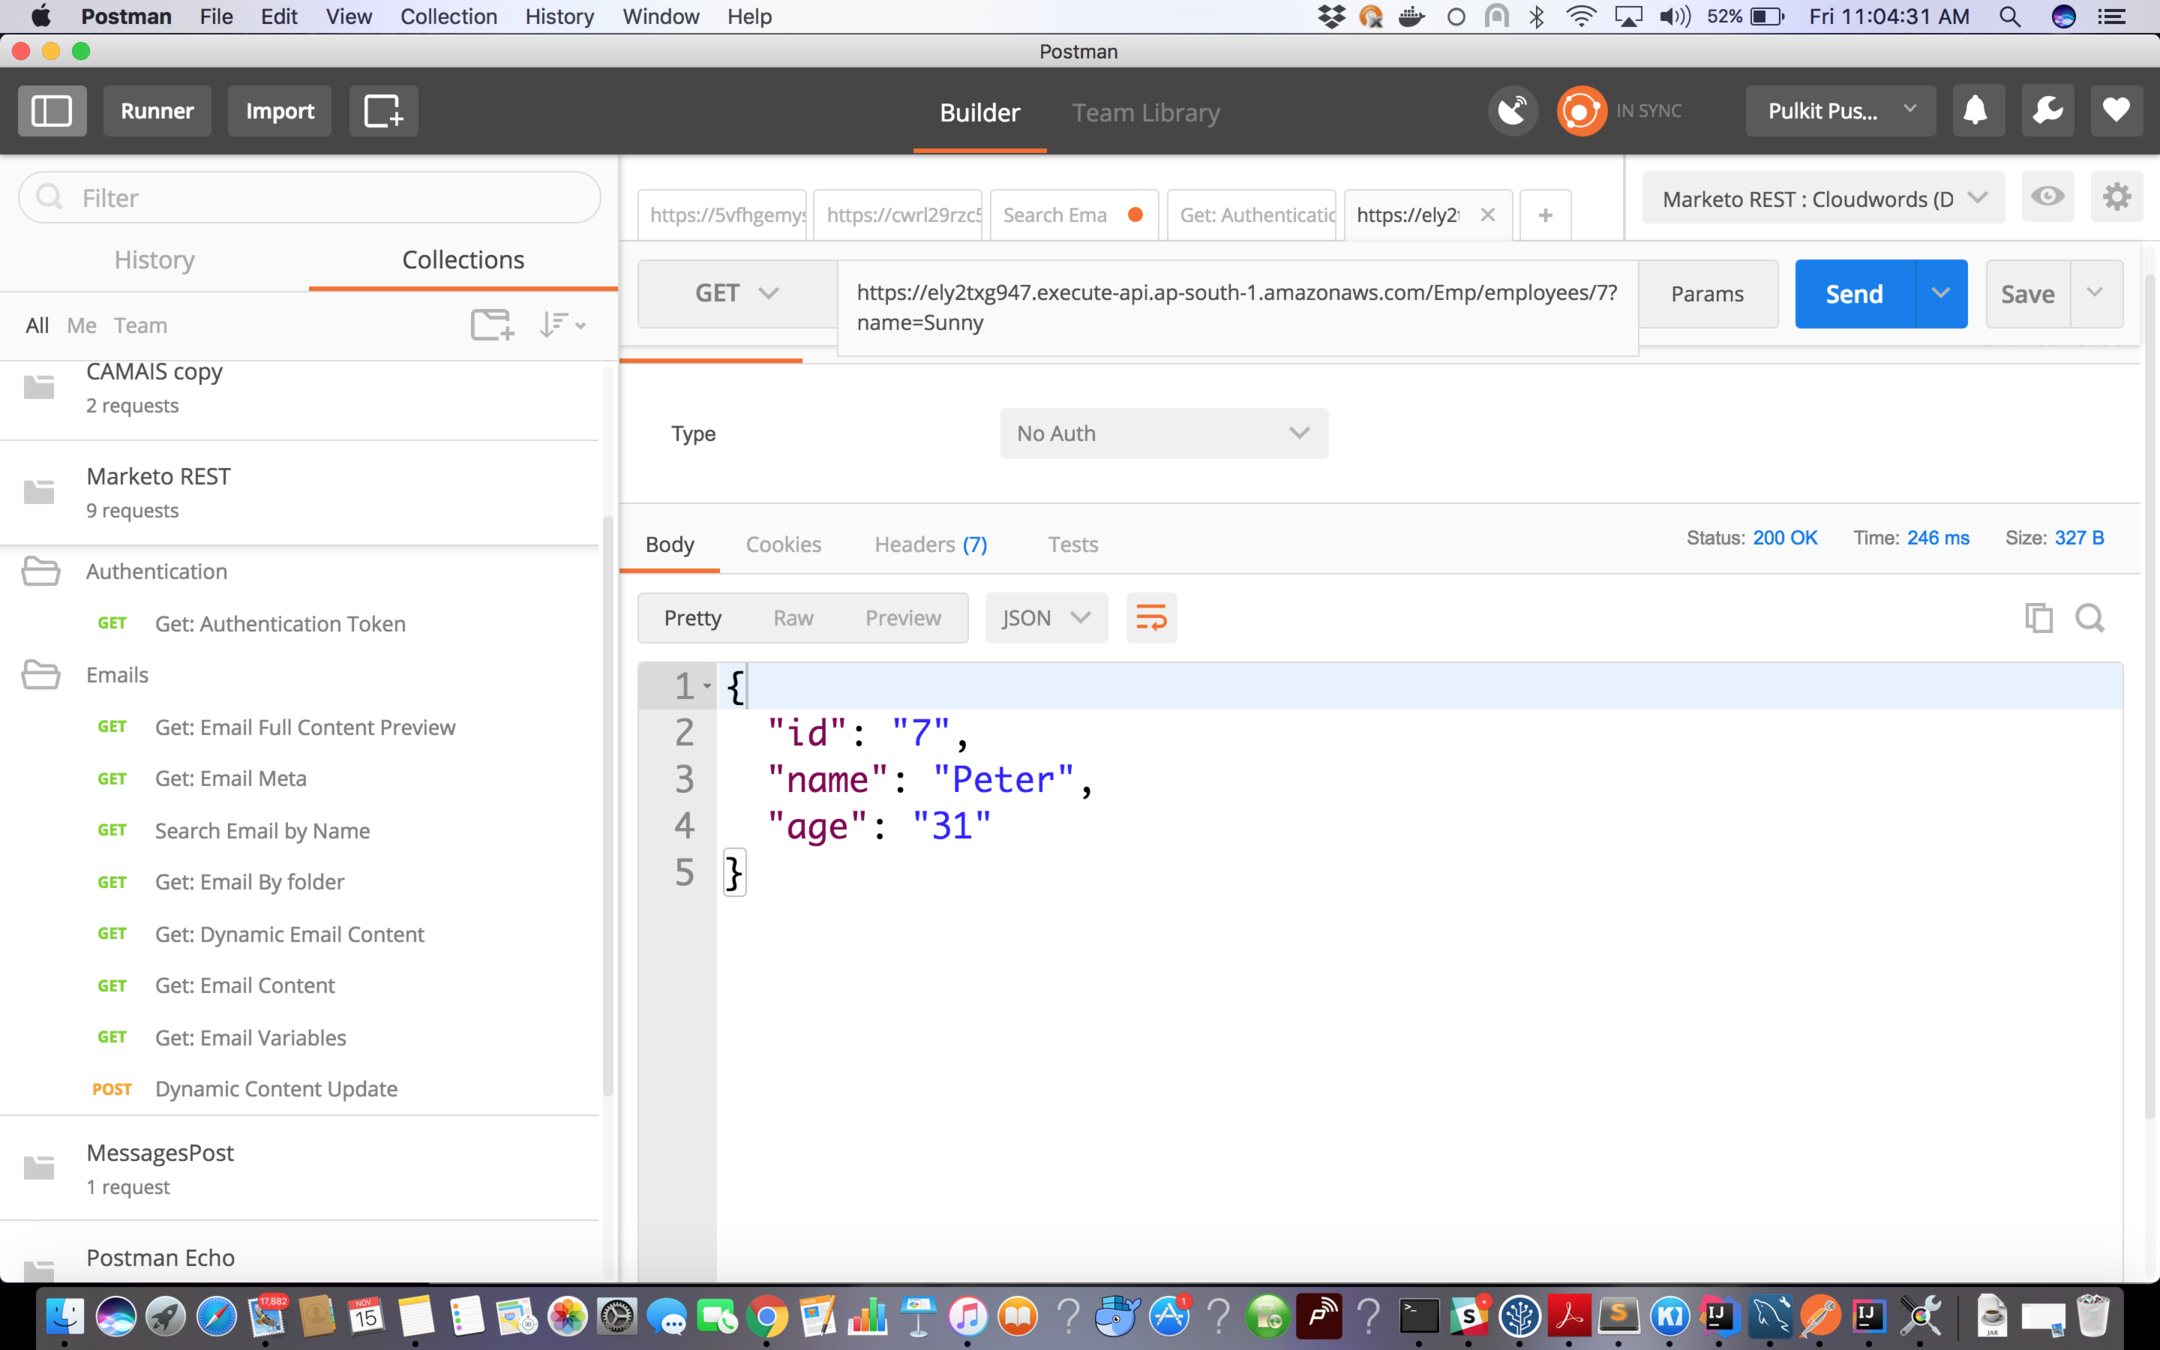
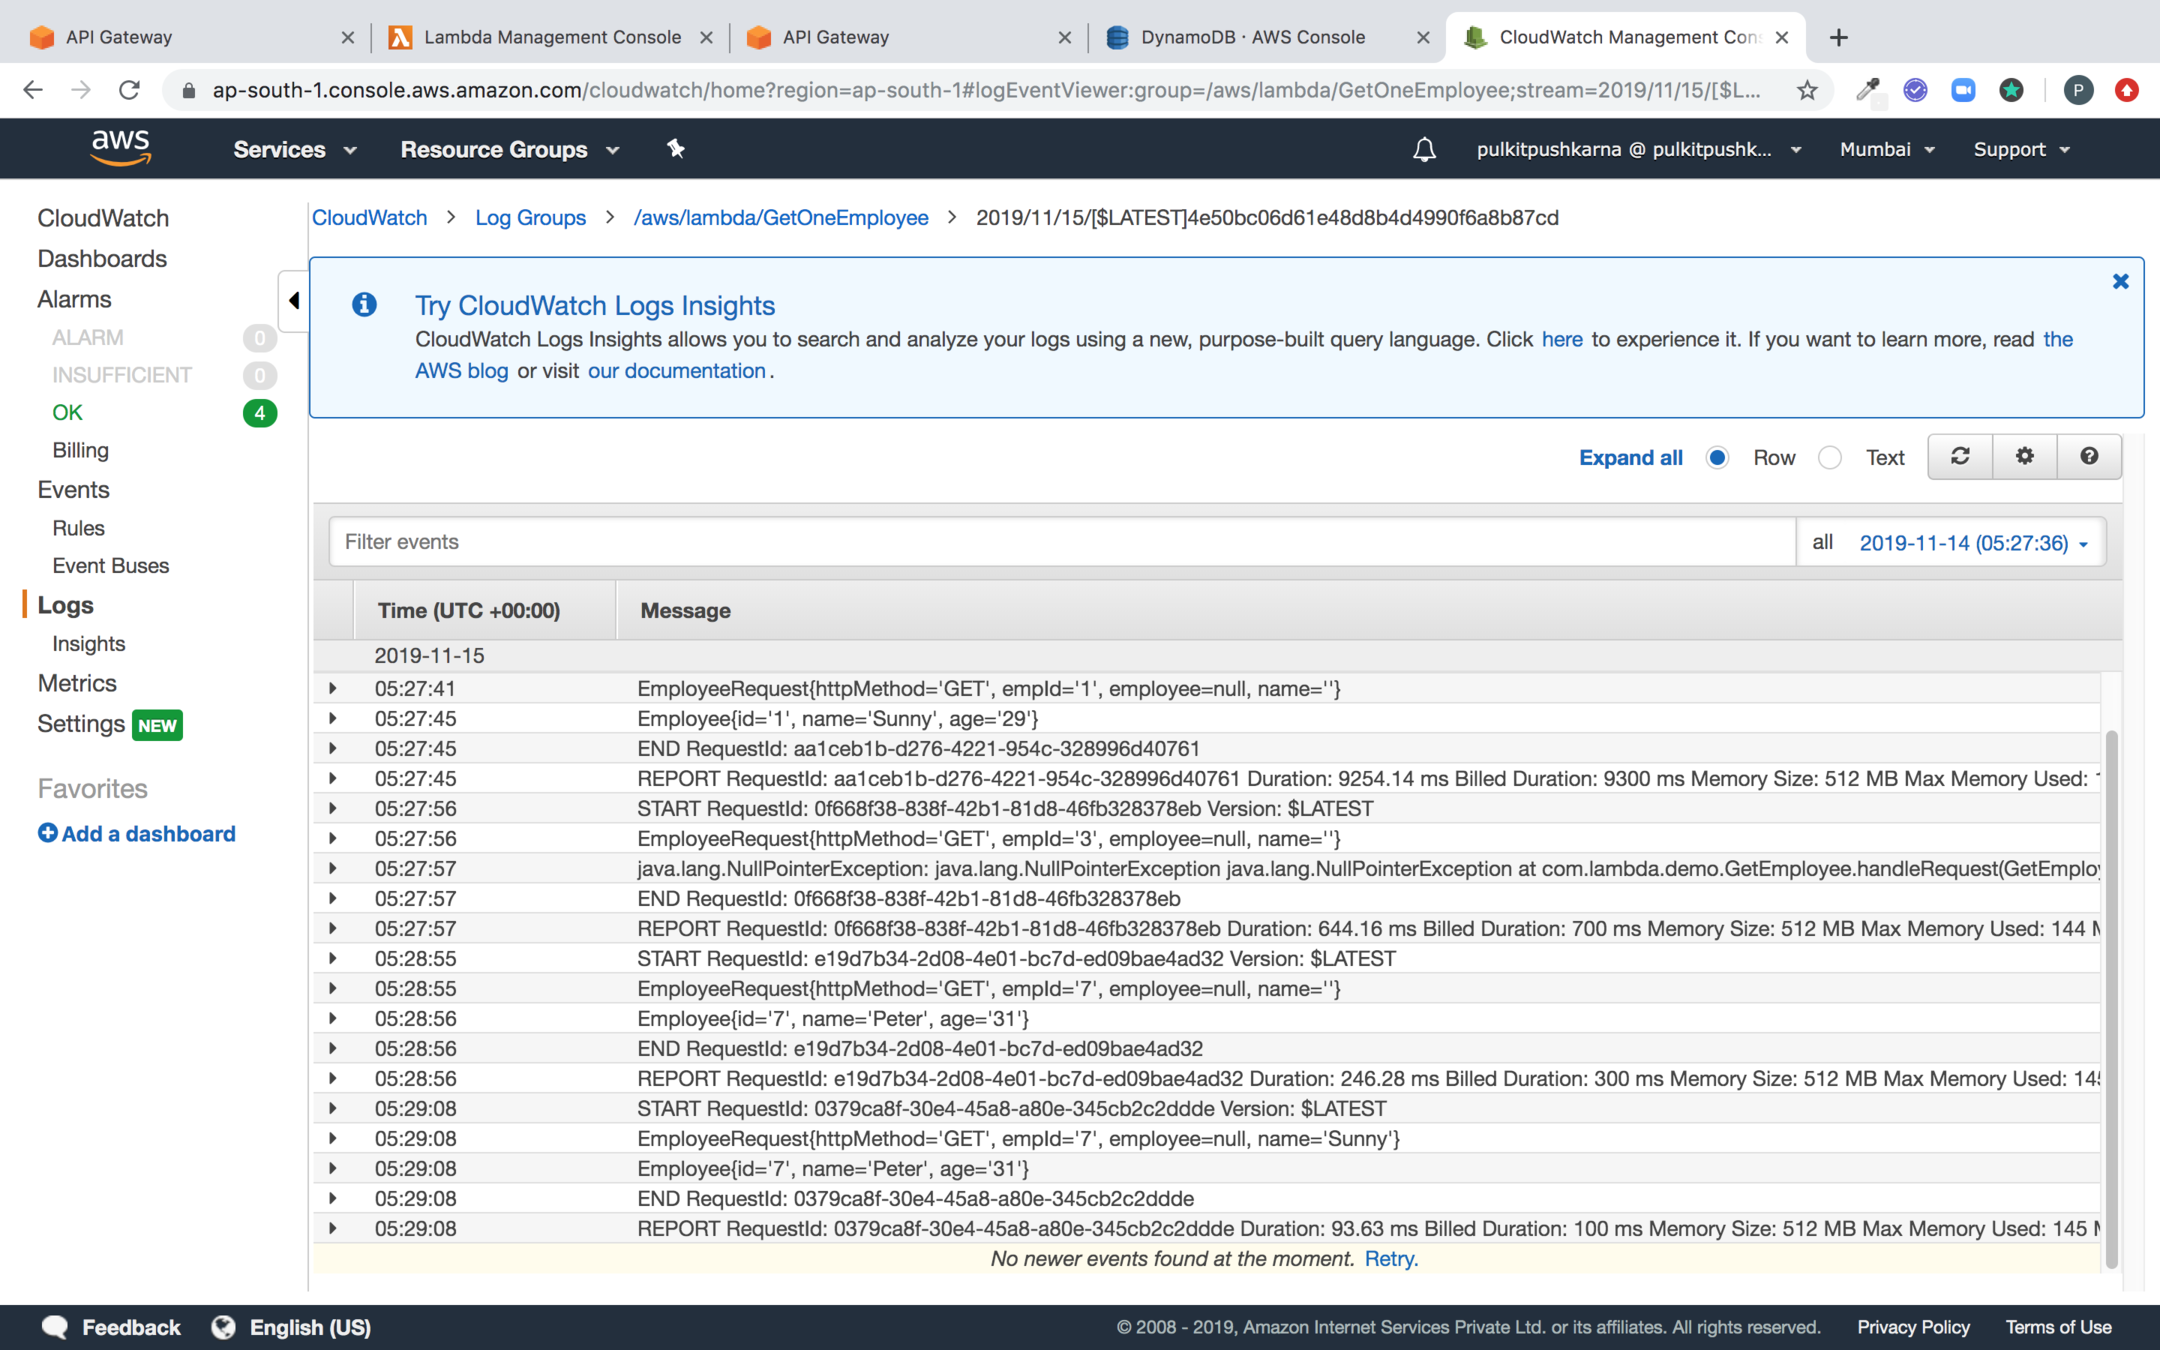
Logs from Cloudwatch
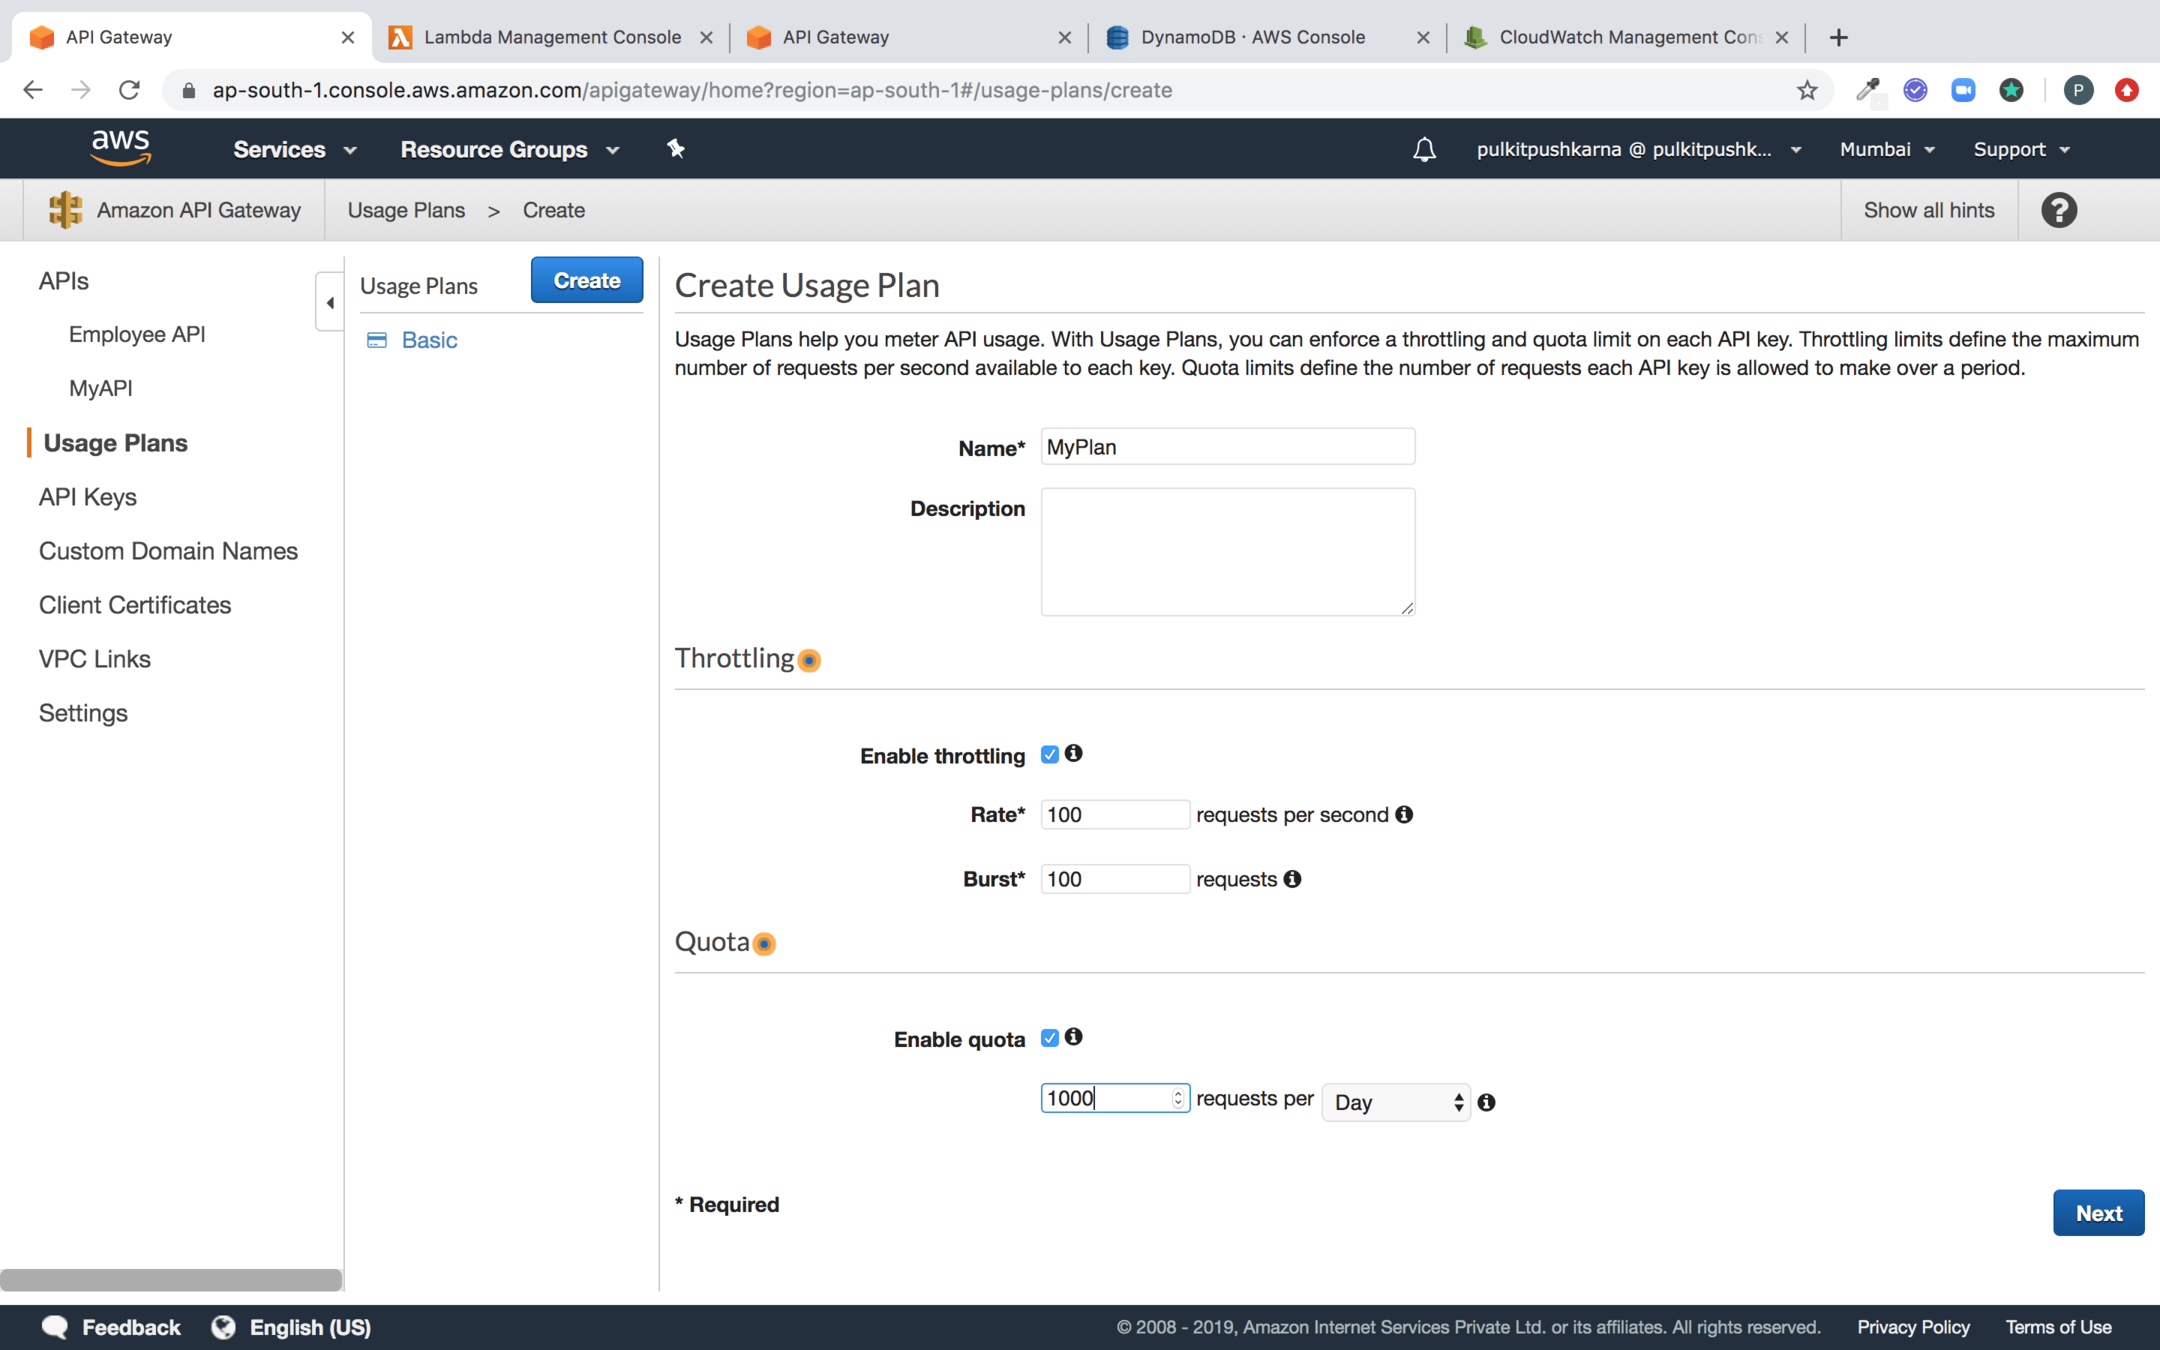
Create a Plan and Click on Next
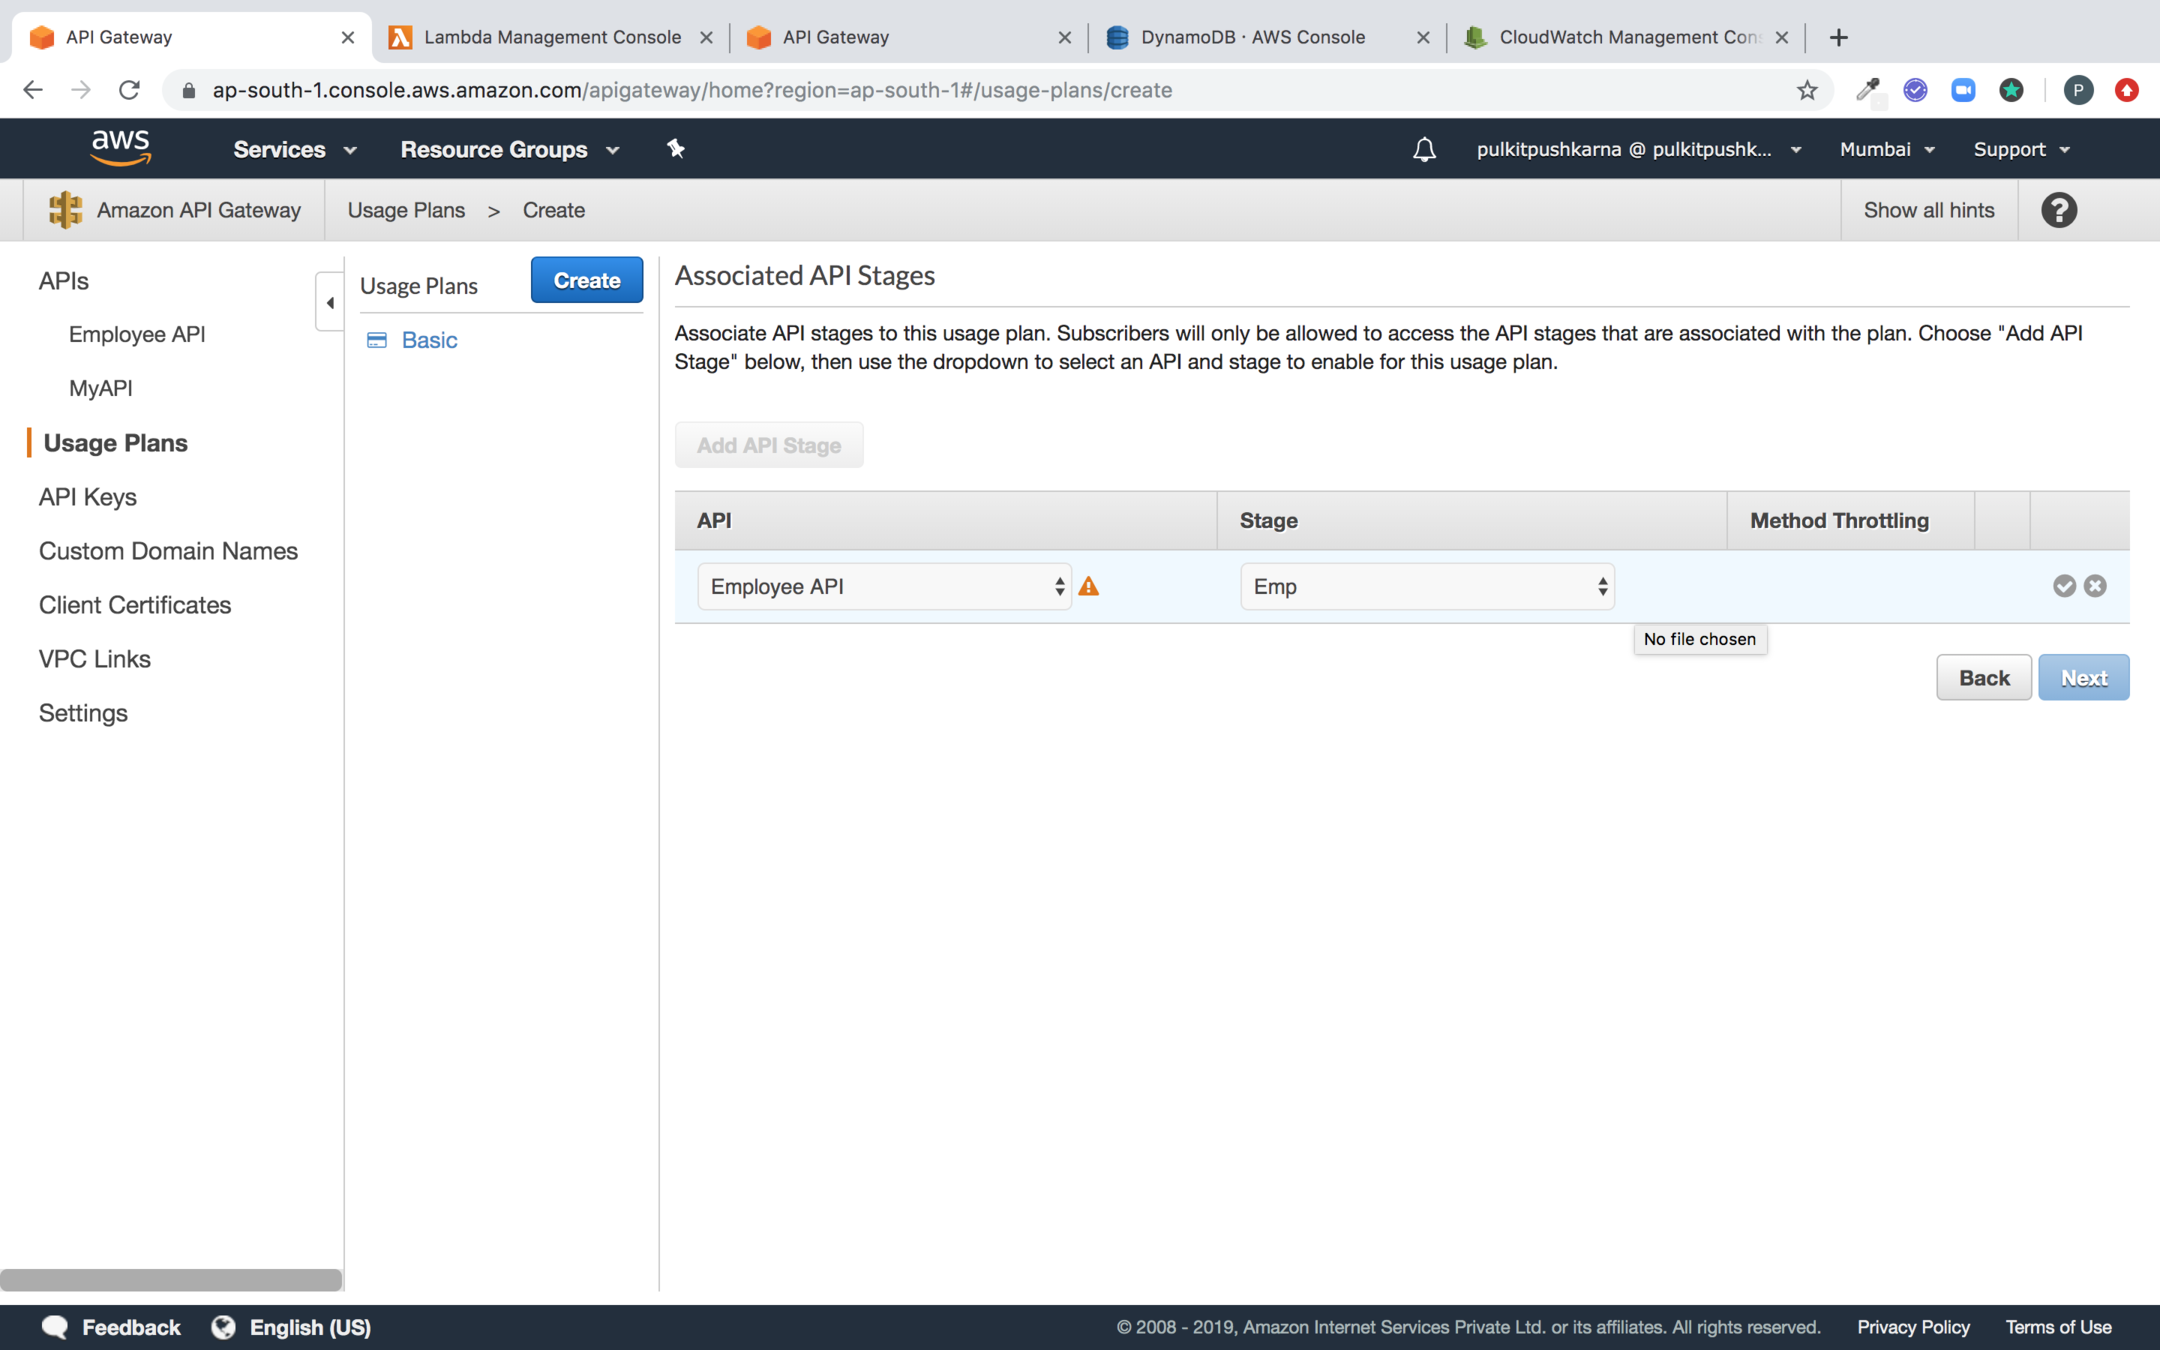
Select the API and Stage

Hit Next
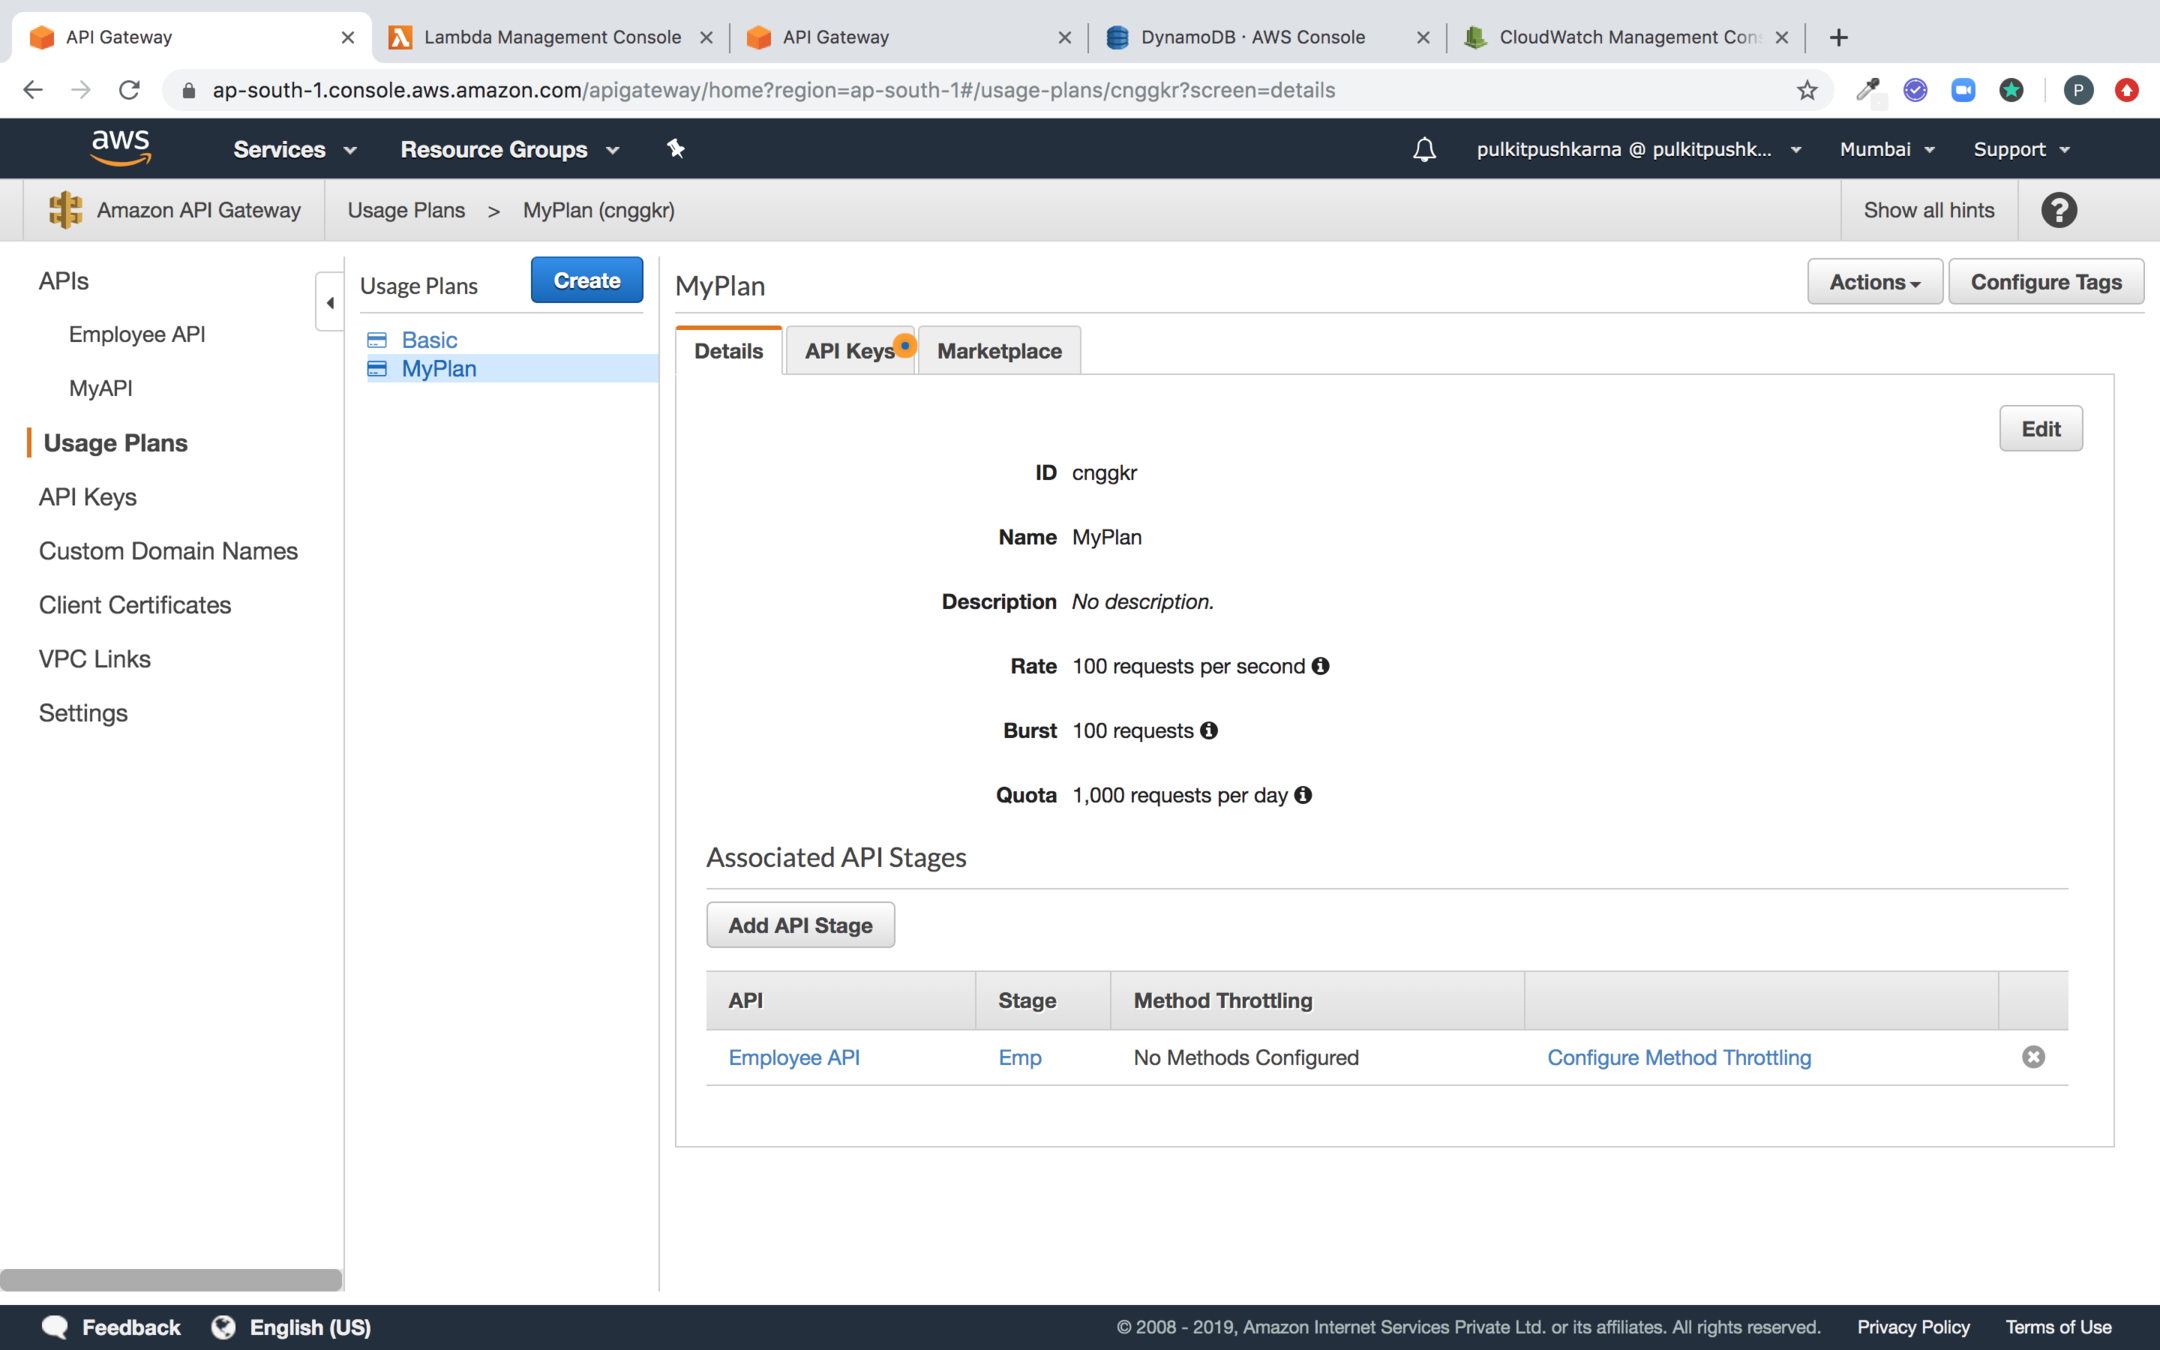
Add the Employee API in the plan
Securing the API
Go to API Key and Select Create API Key
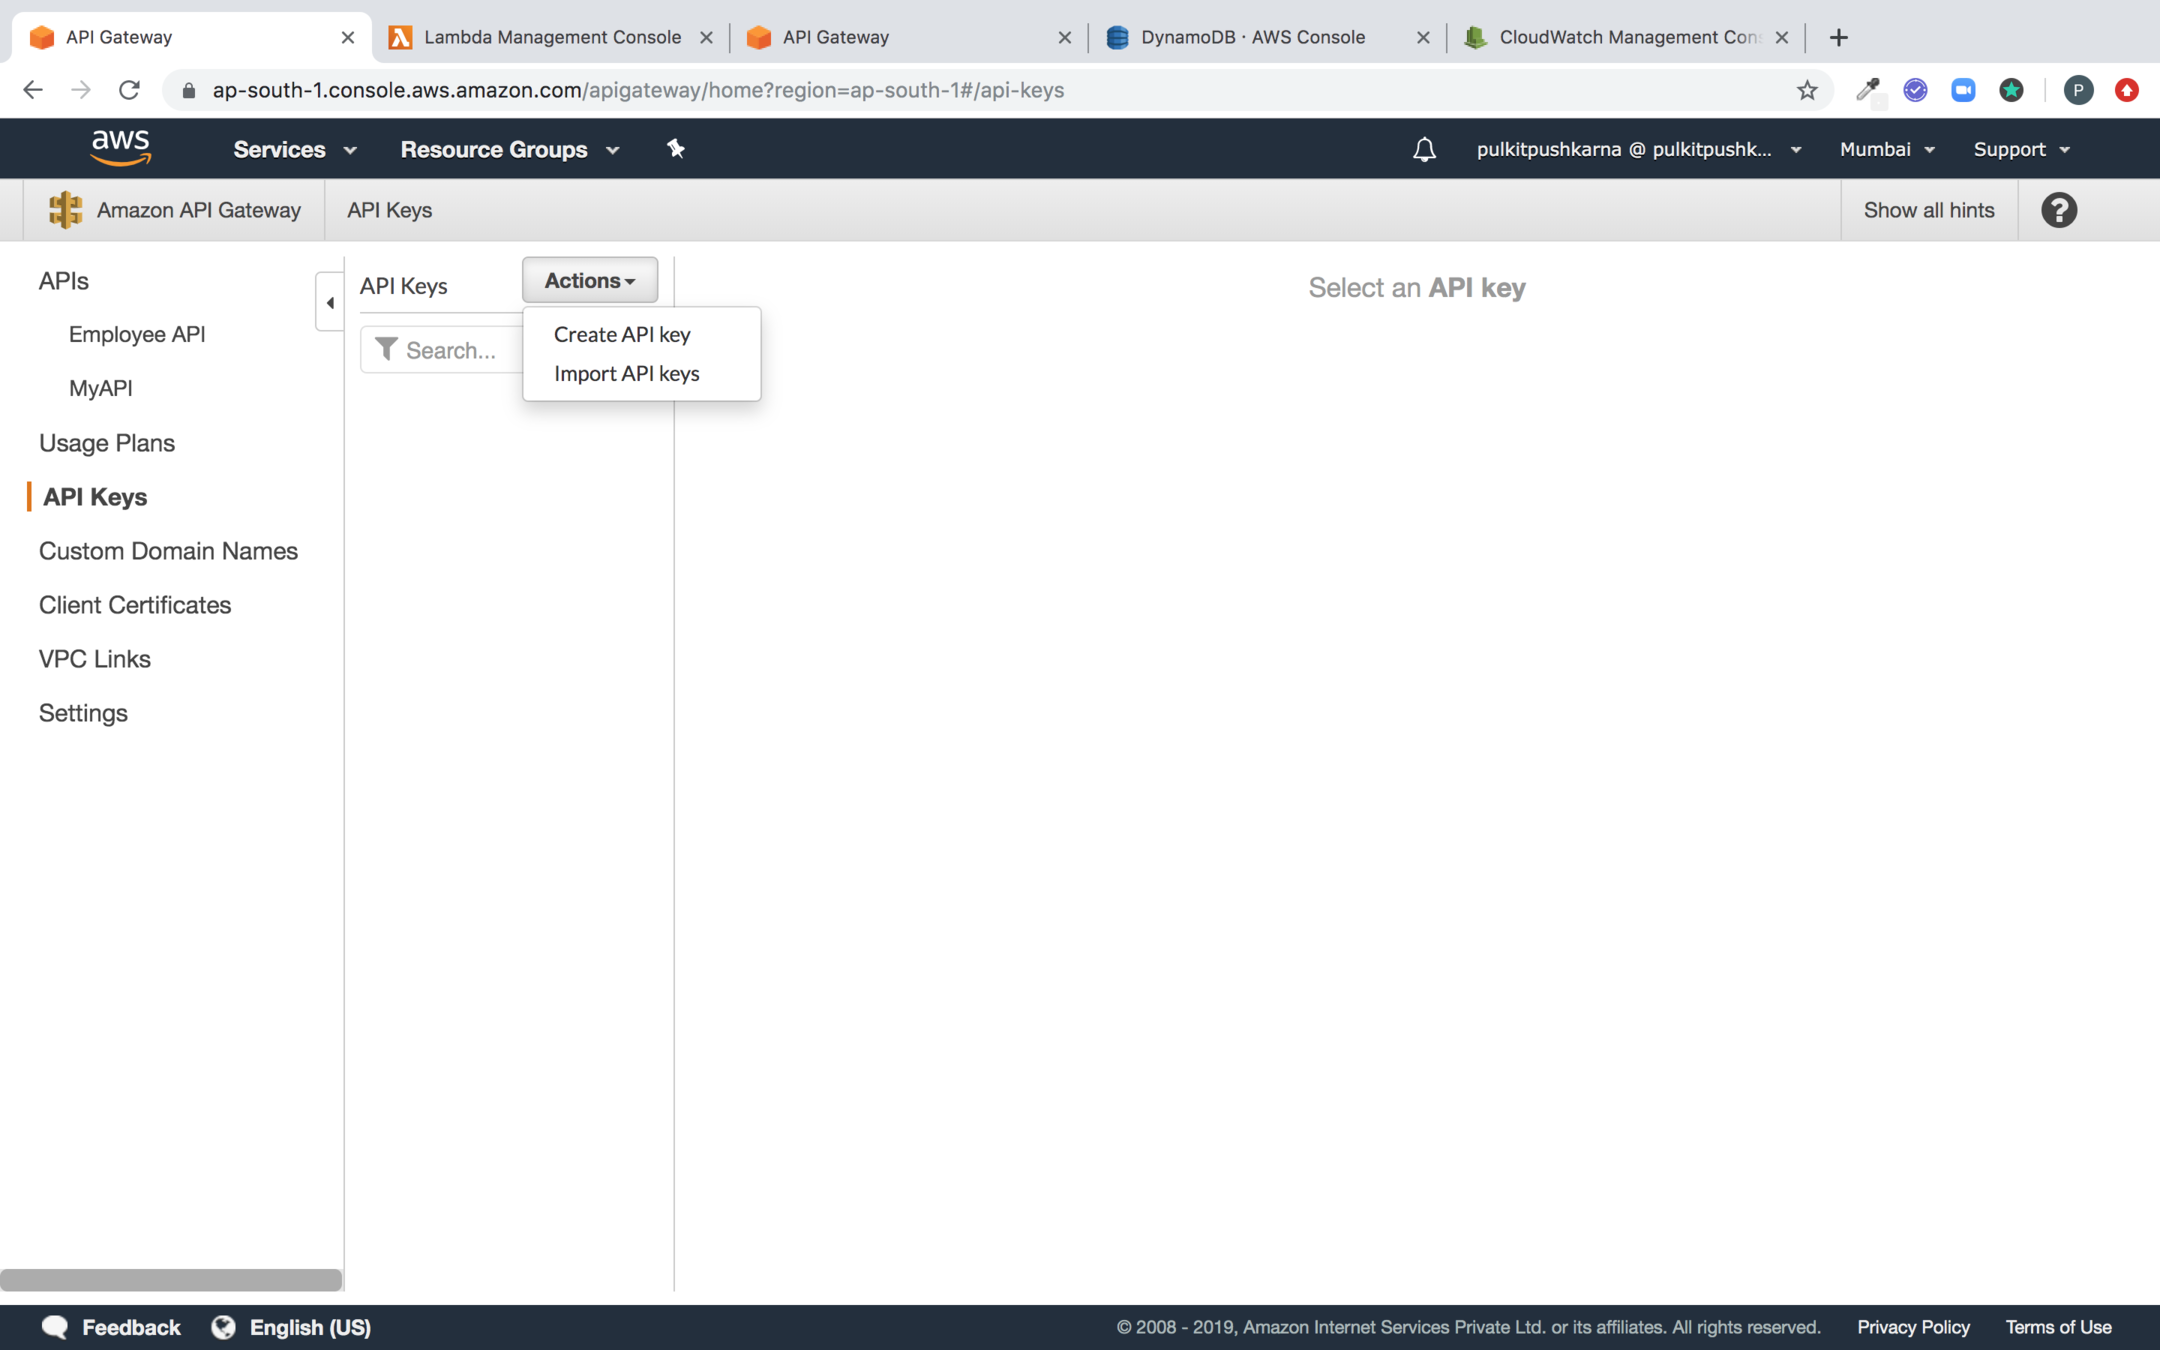
Enter the name of the key and Click on save


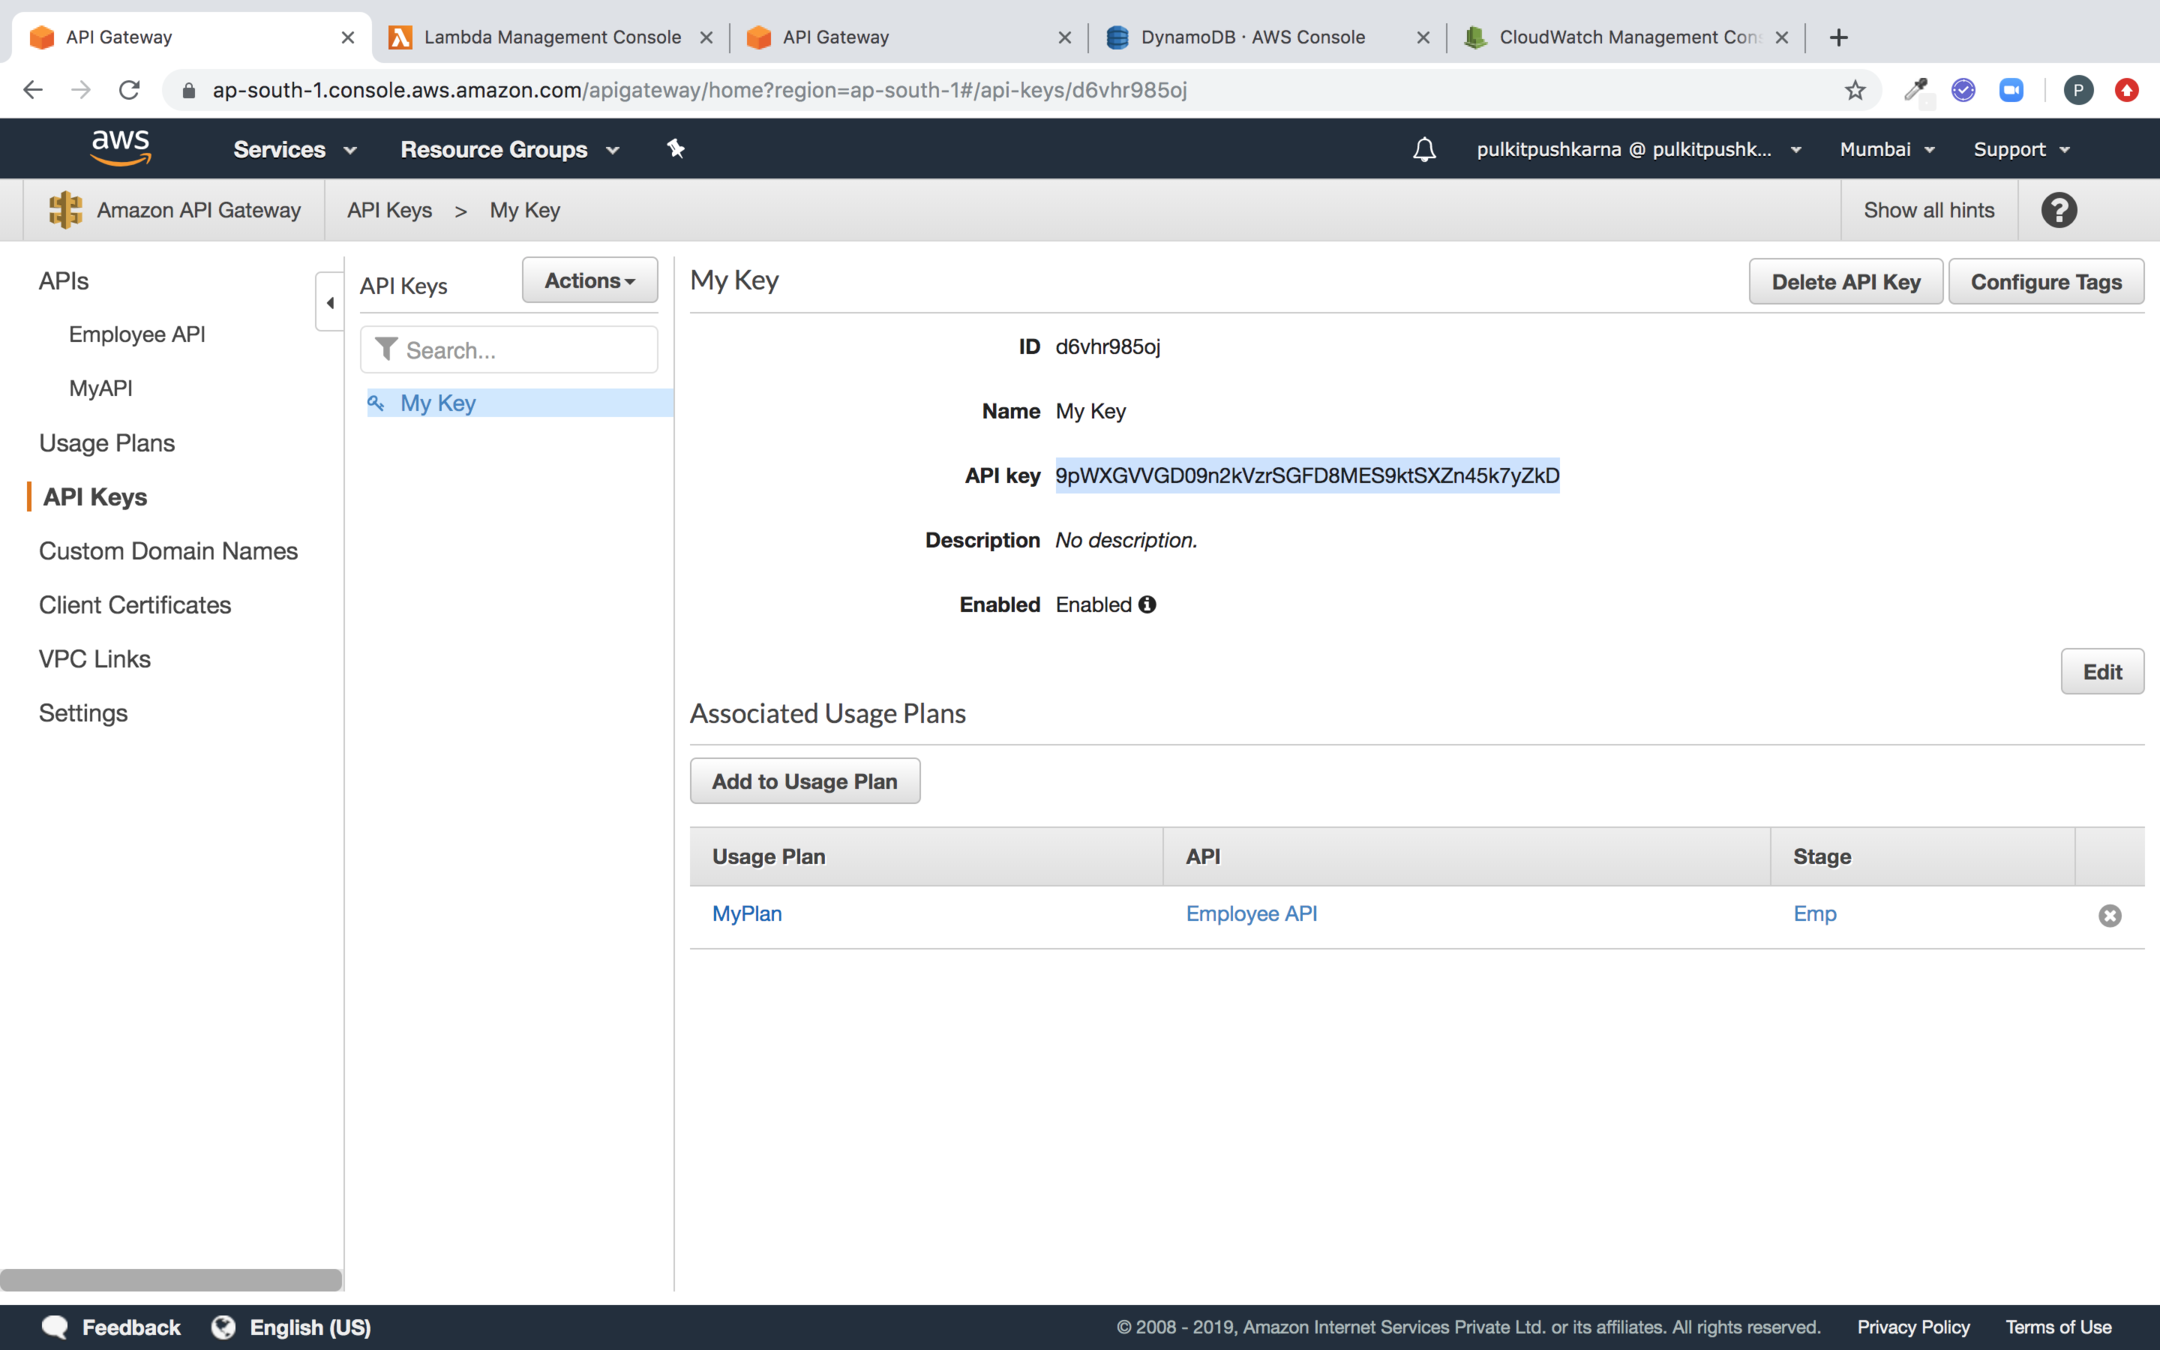
Enter the name of the plan for the Key
Click on Show to get the Key
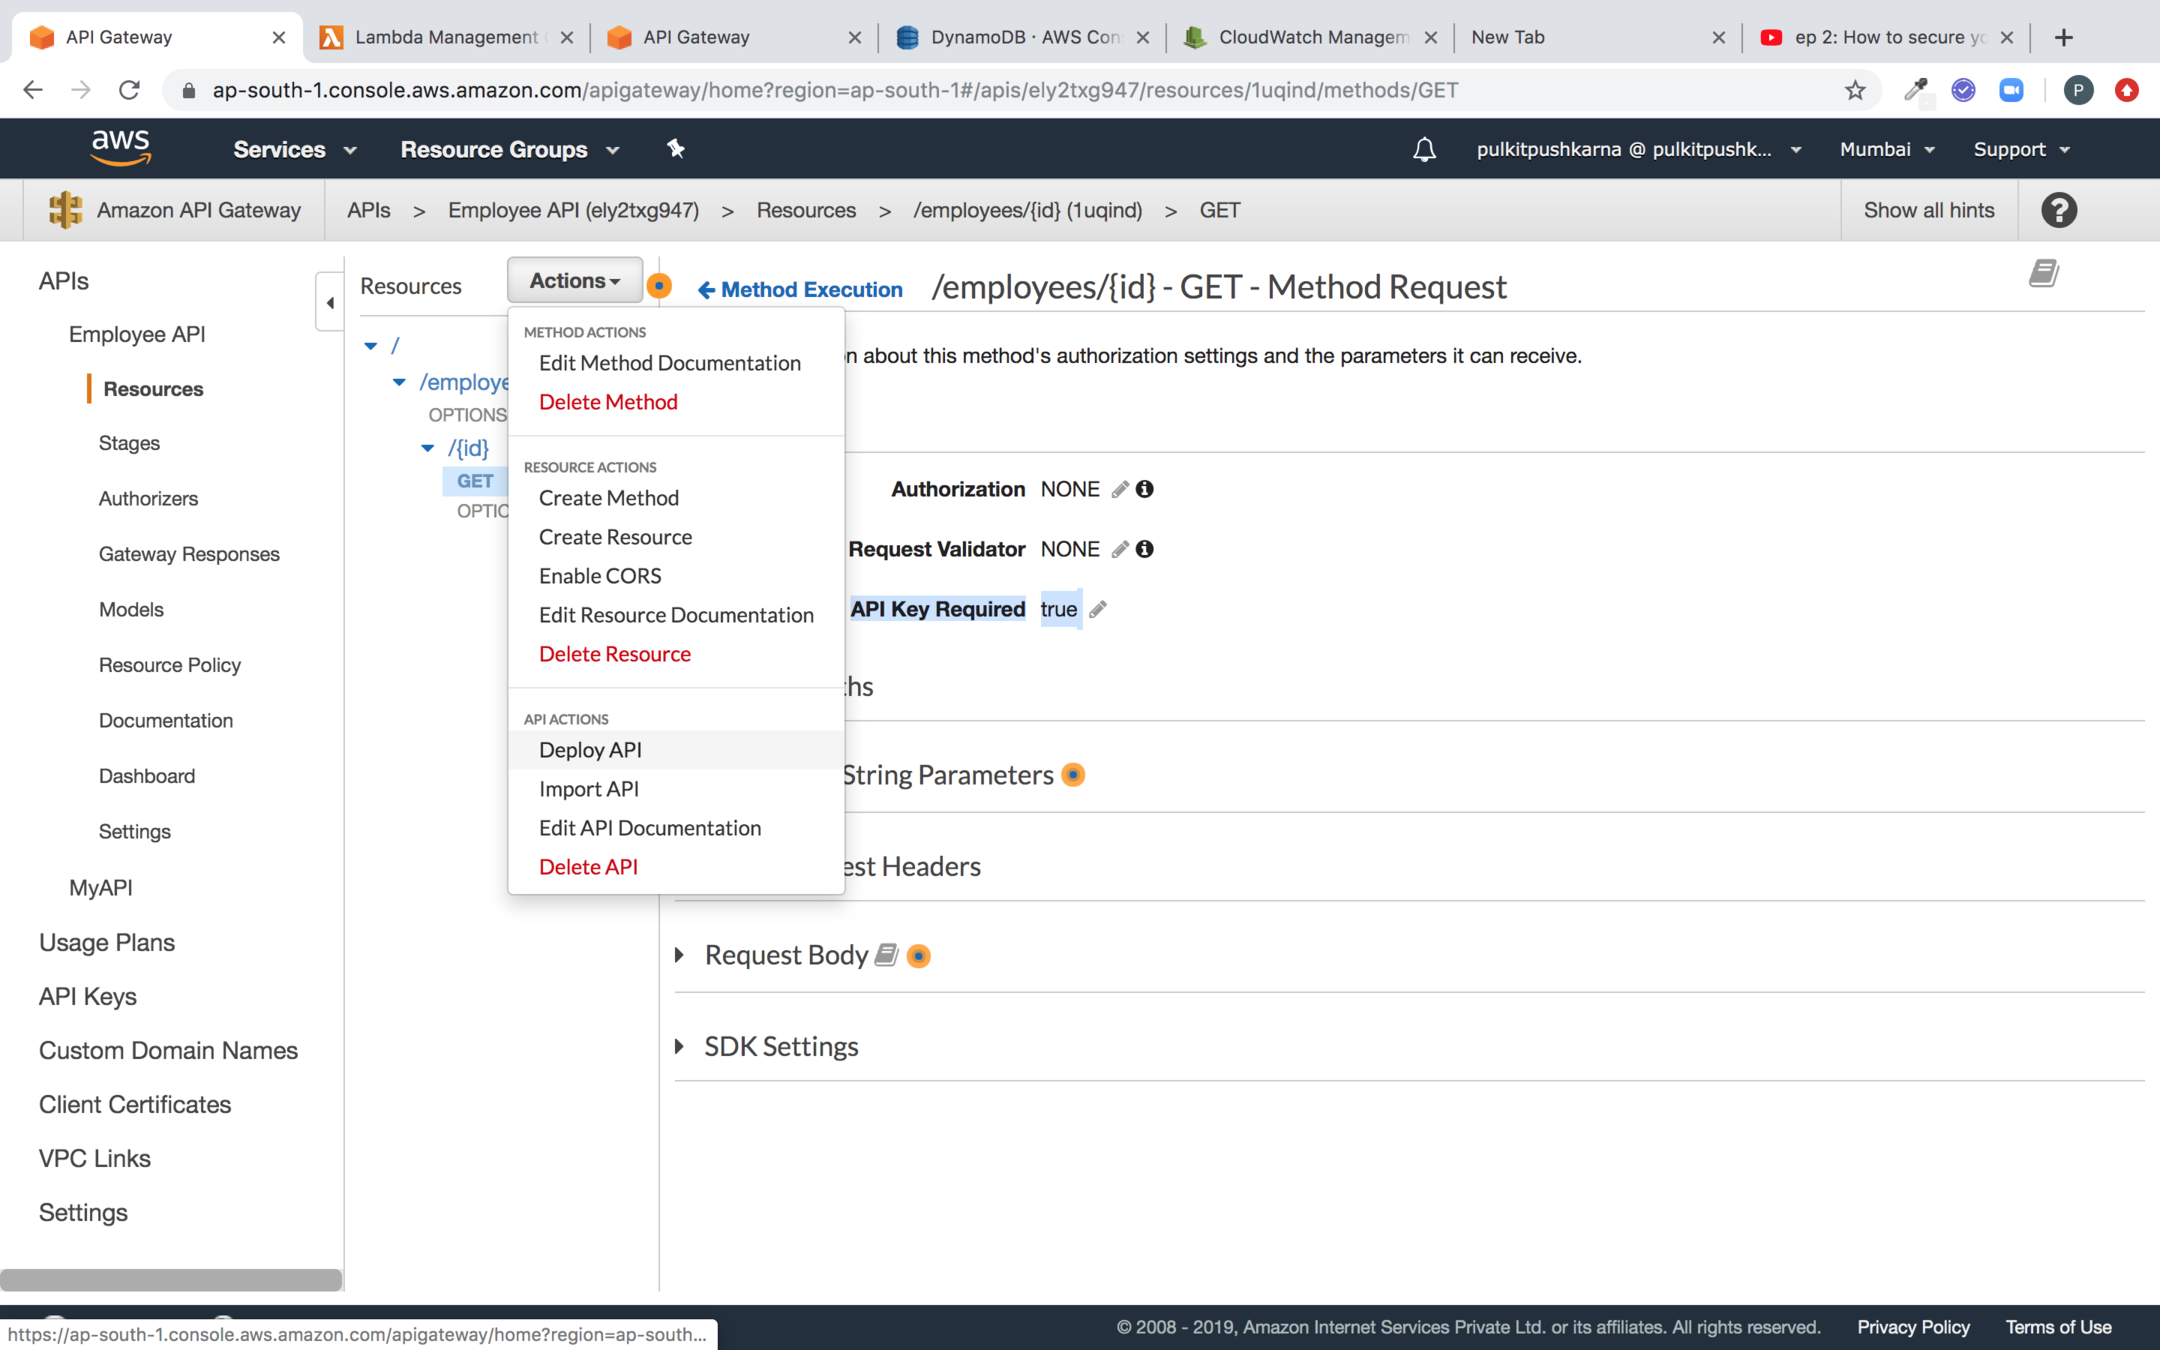
Go to the method request and set API Key Required to true
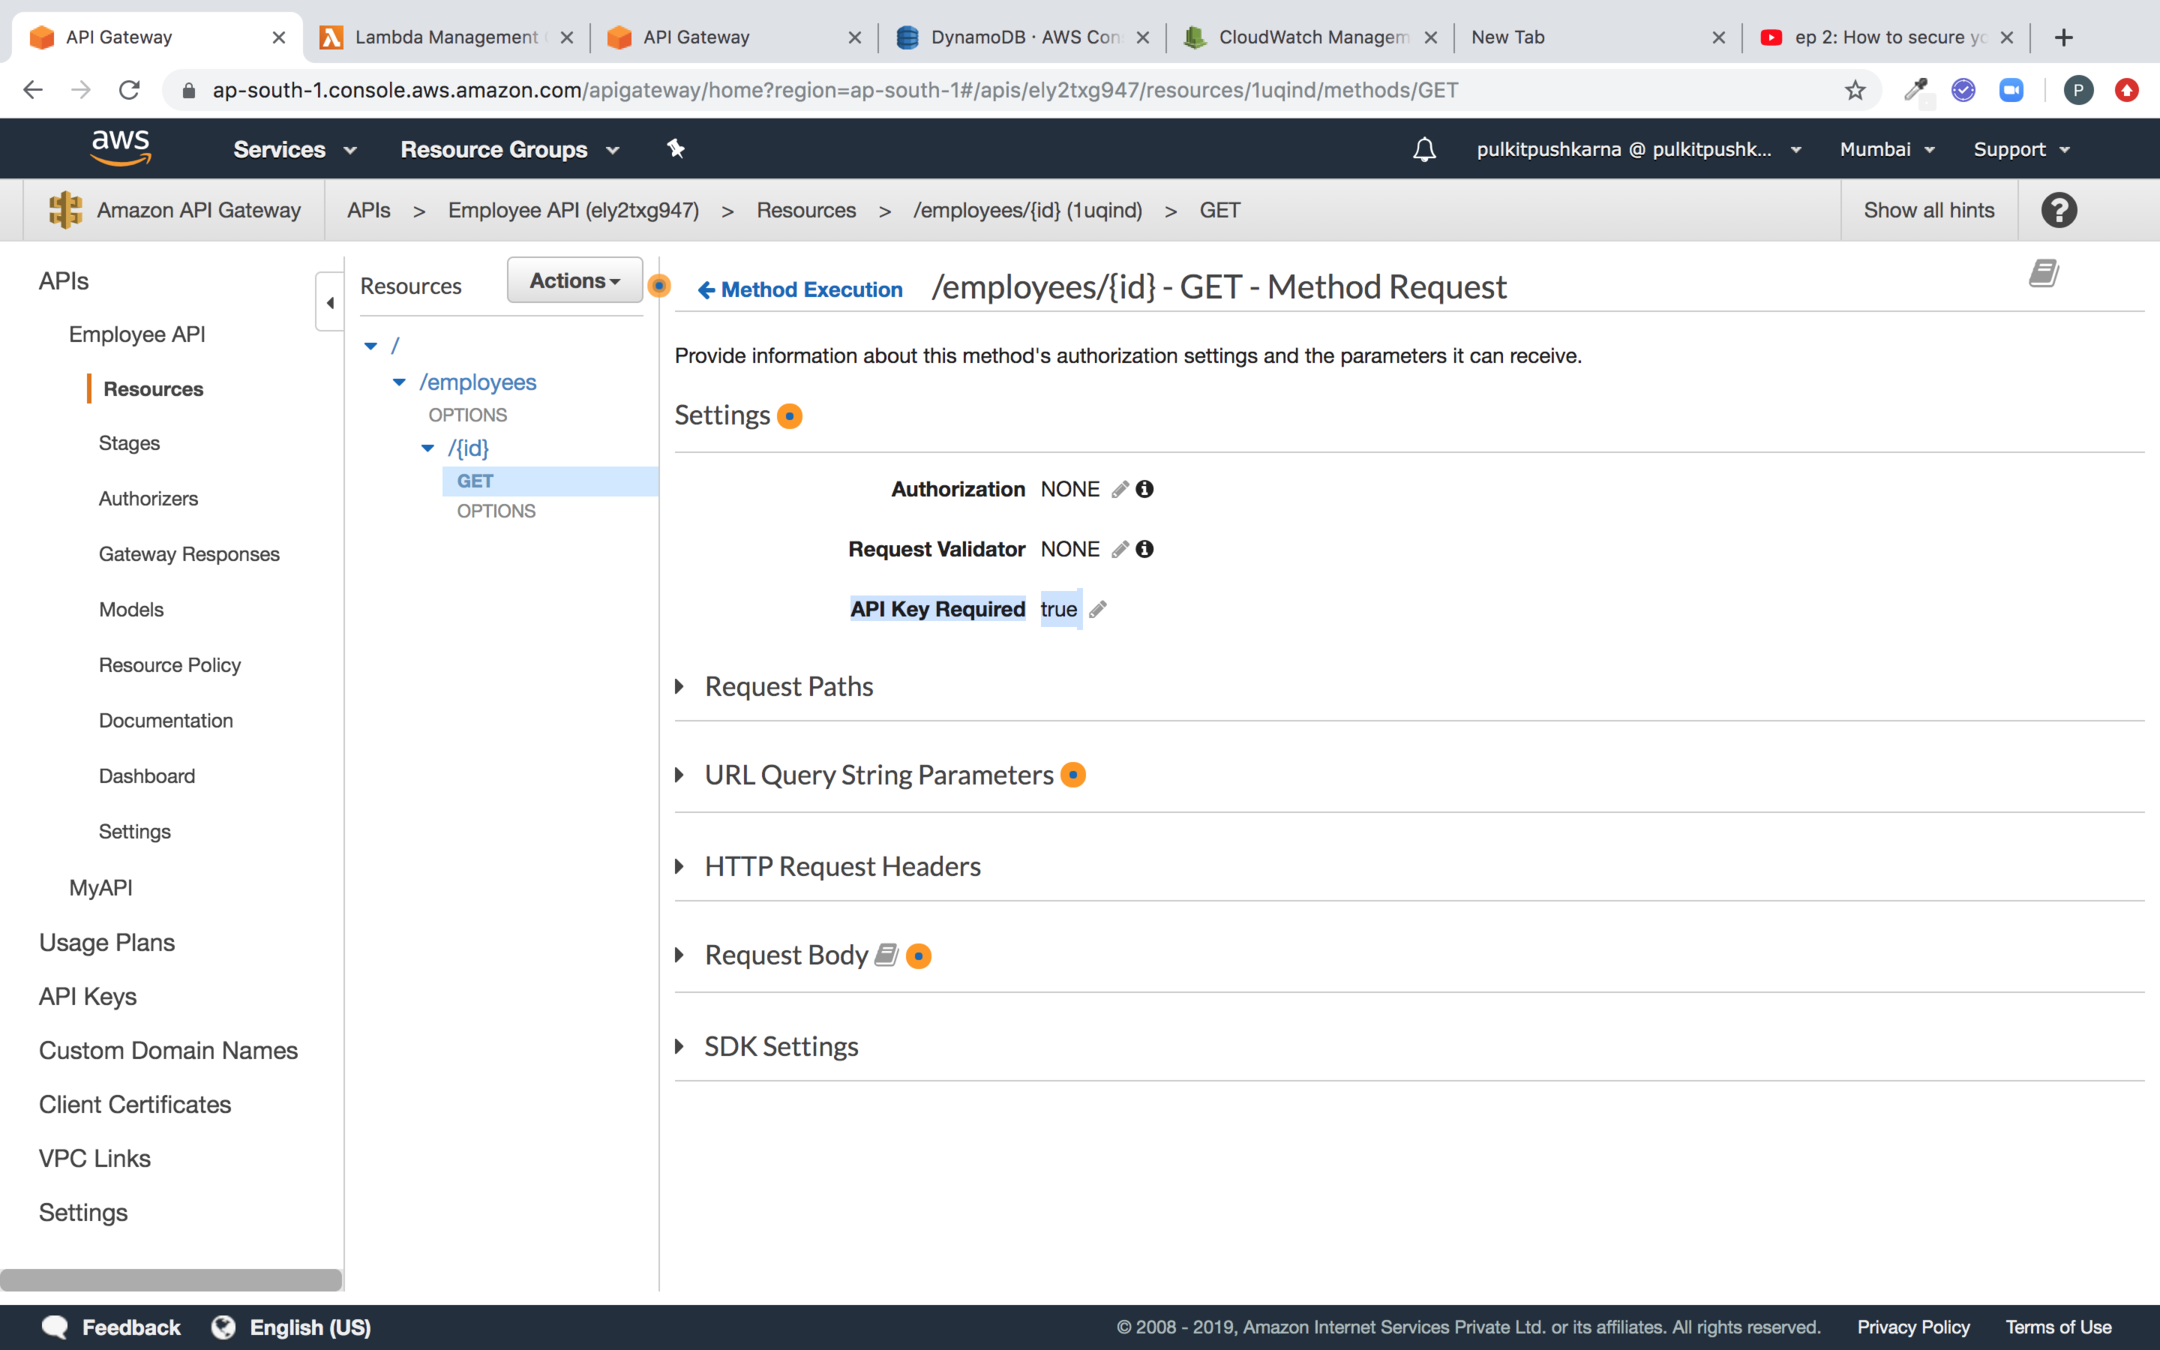
Deploy the API
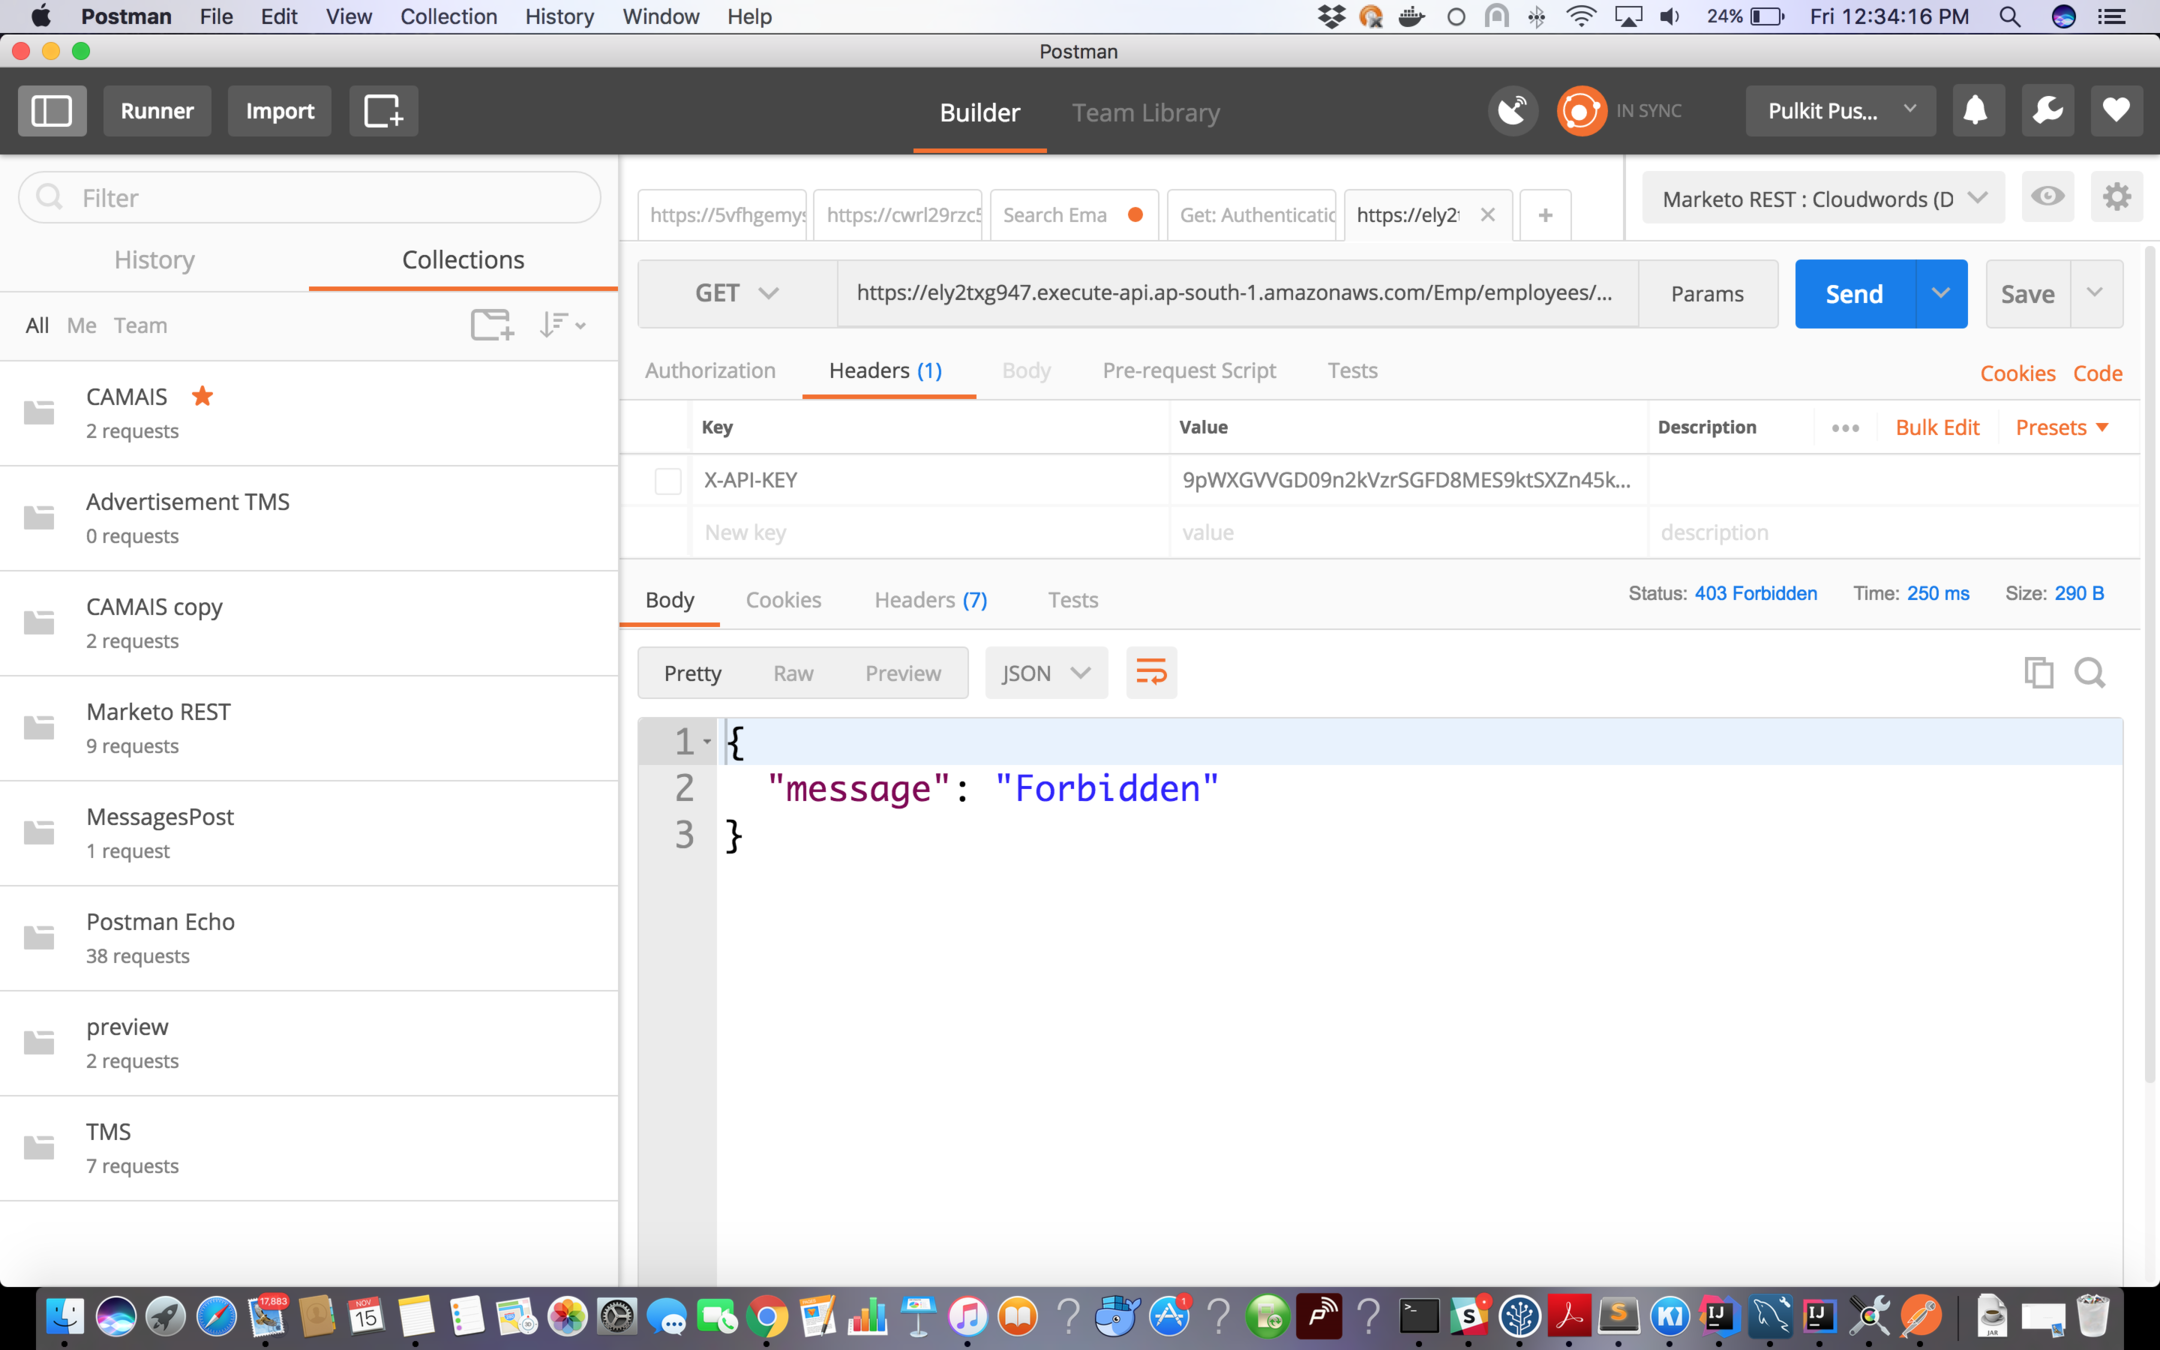
Hit the API without Token
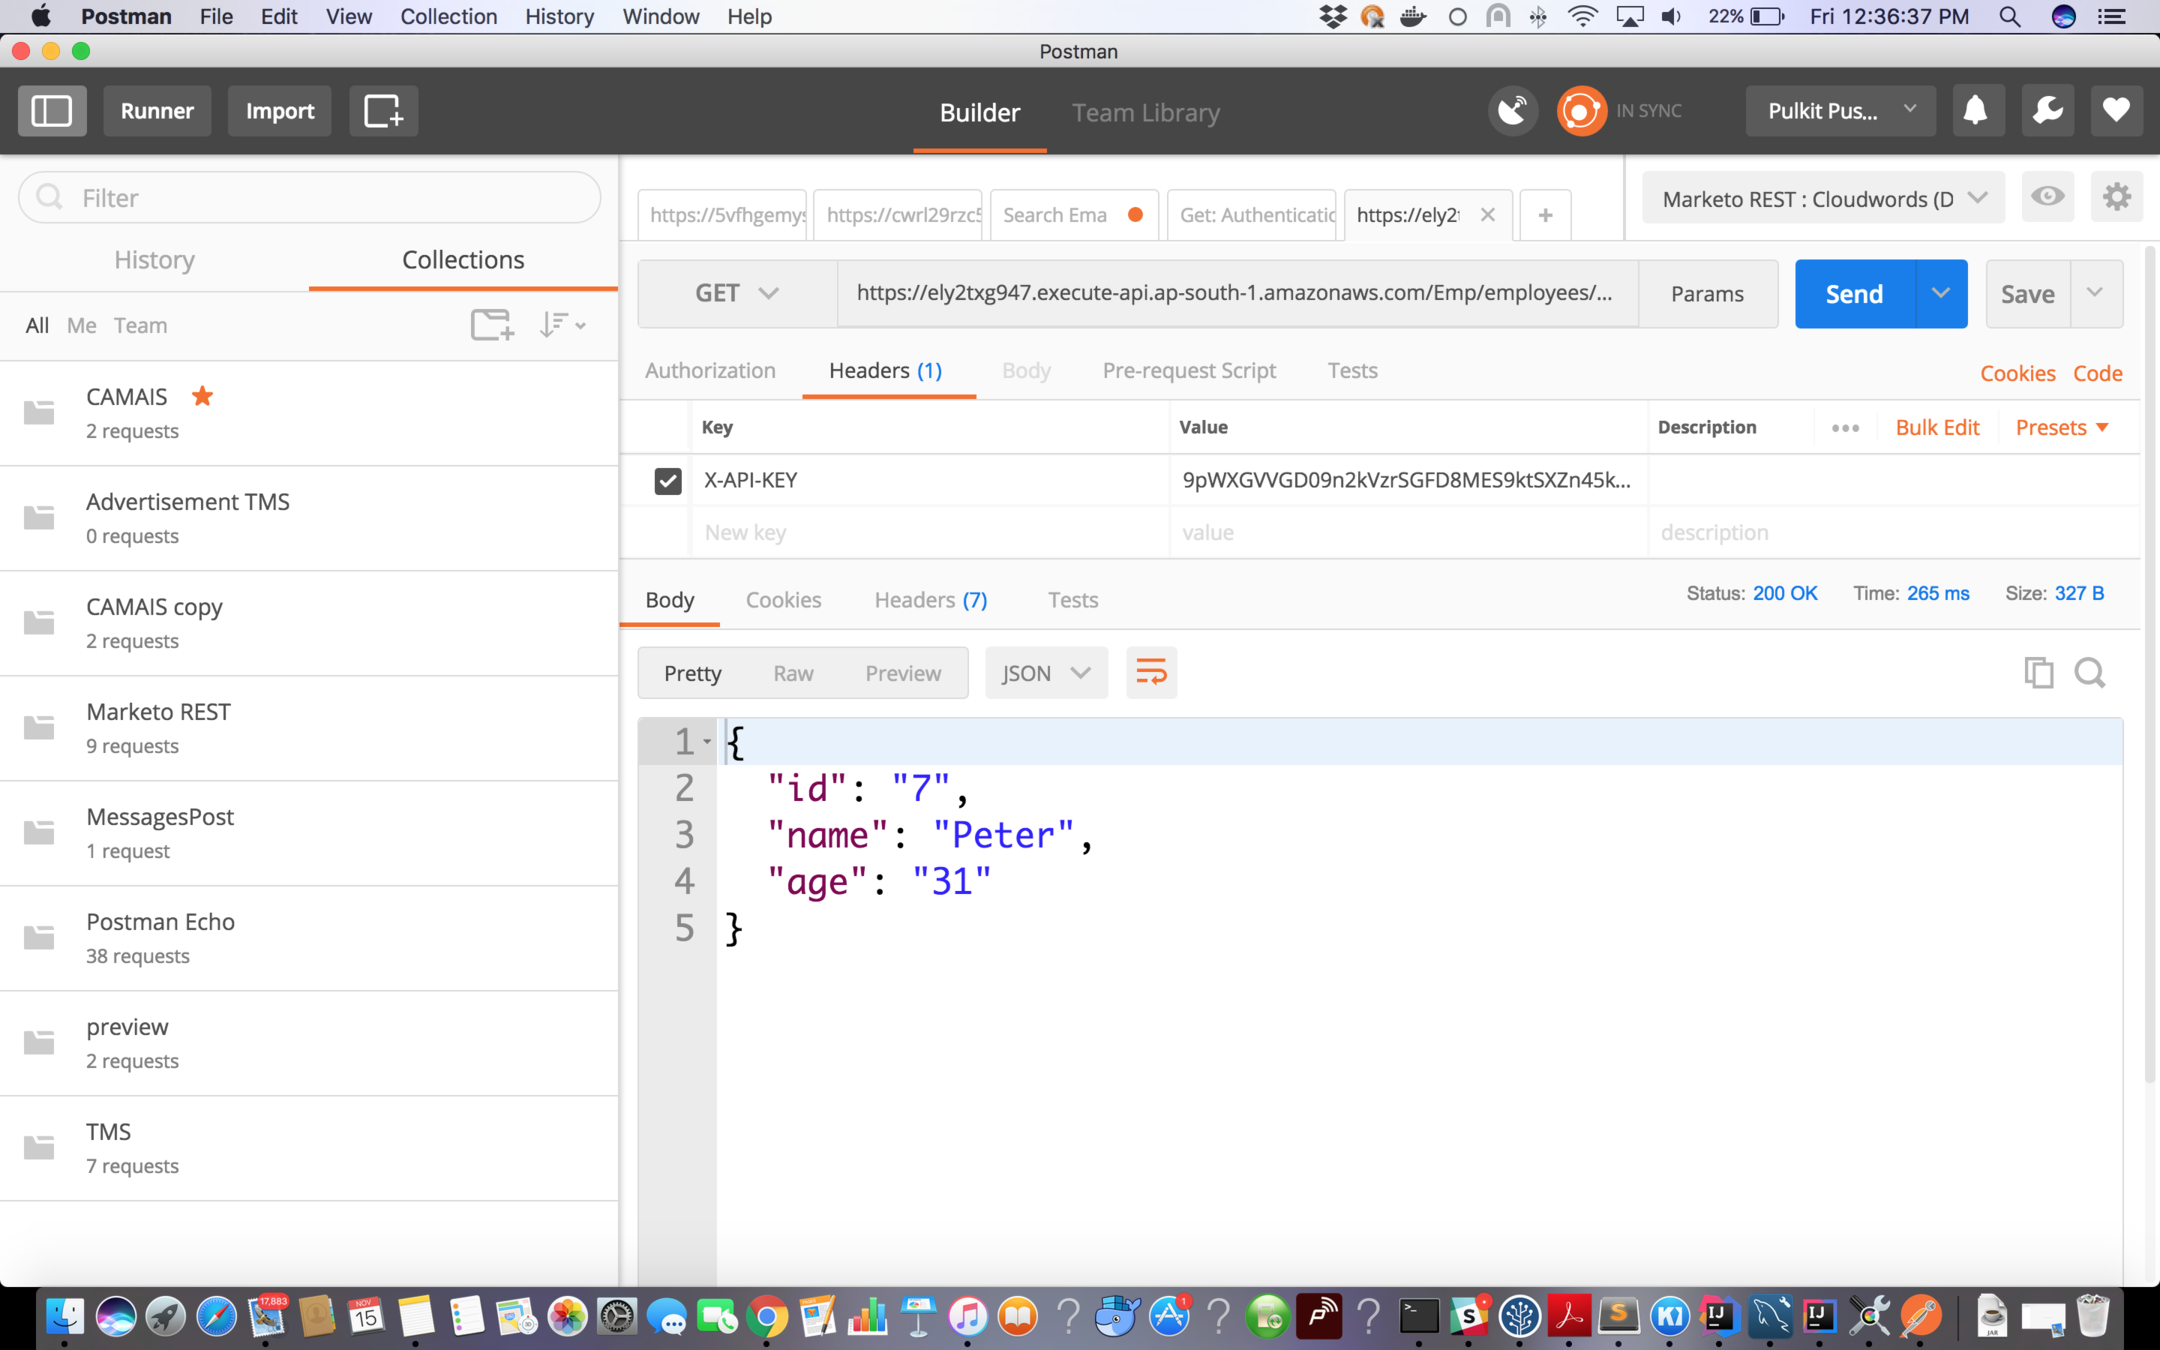
Hitting the API with response
Exercise 3
- Create a Restful API for Student (id, name, age) to create the employee
- Create a Restful API to read all the records
- Create a Restful API to read the record on the basis on id.
- Secure the API with API TOKEN
Elastic Beanstalk
-
Traditionally, deploying a web application on AWS may have required spending time
-
selecting appropriate AWS services such as EC2, ELB, Auto Scaling, and so on, and creating and configuring an AWS resource from scratch to host a web application can be quite a pain.
-
It could be difficult for developers to build the infrastructure, configure the OS, install the required dependencies, and deploy the web services.
-
AWS Elastic Beanstalk removes the need to
manually build an infrastructure for the developer and makes it possible for them to quickly deploy and manage a web application on AWS of any scale.
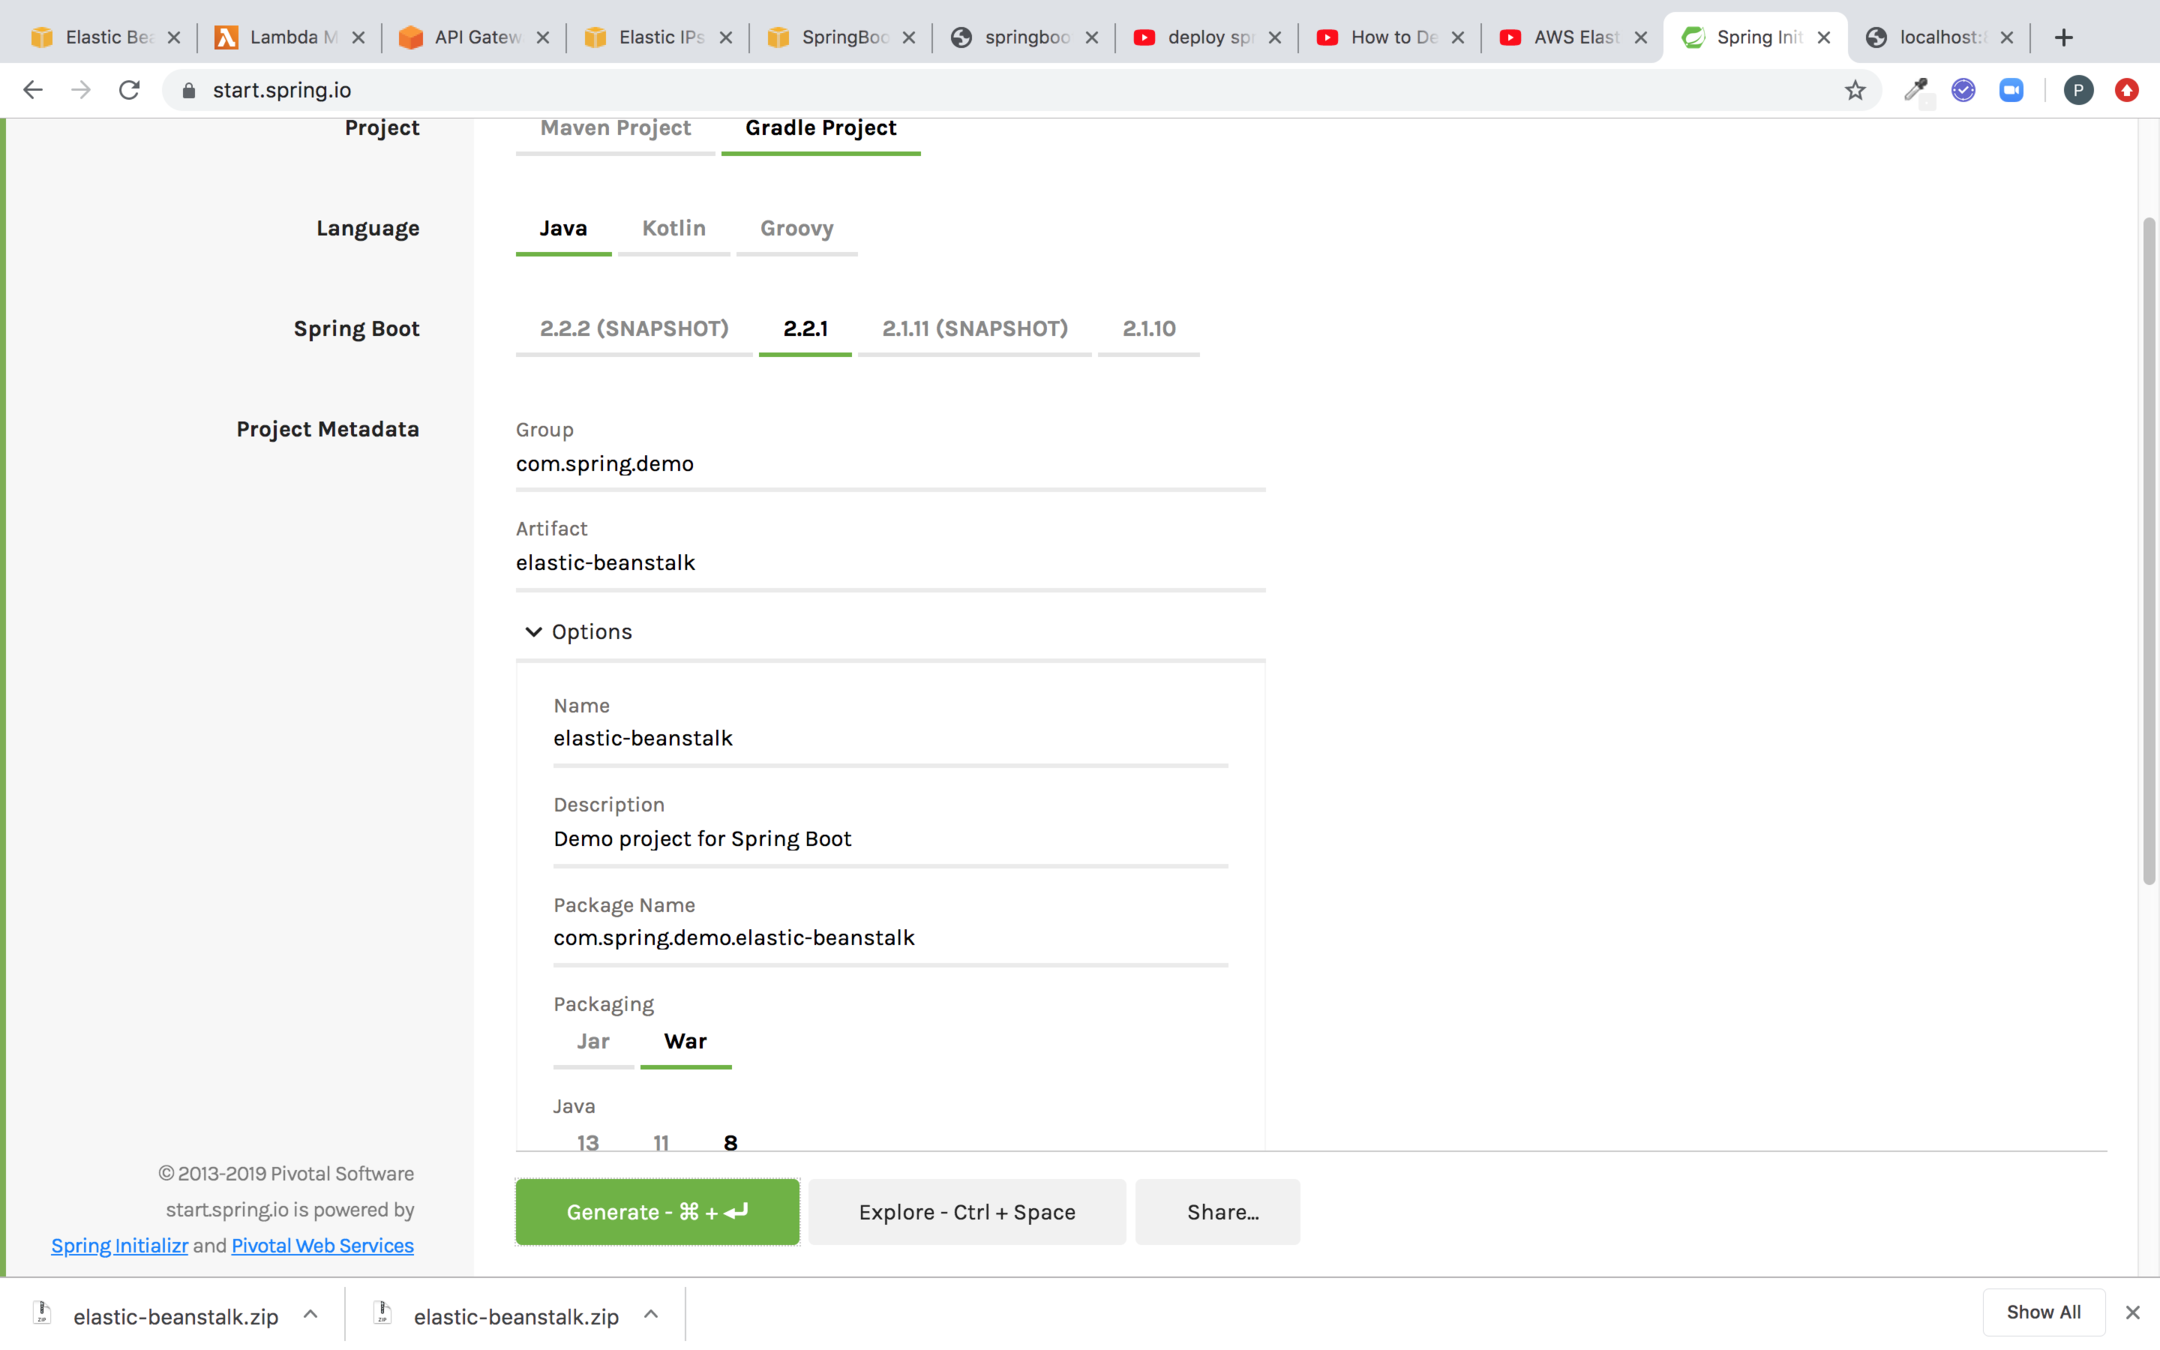
Create a Spring Boot Project
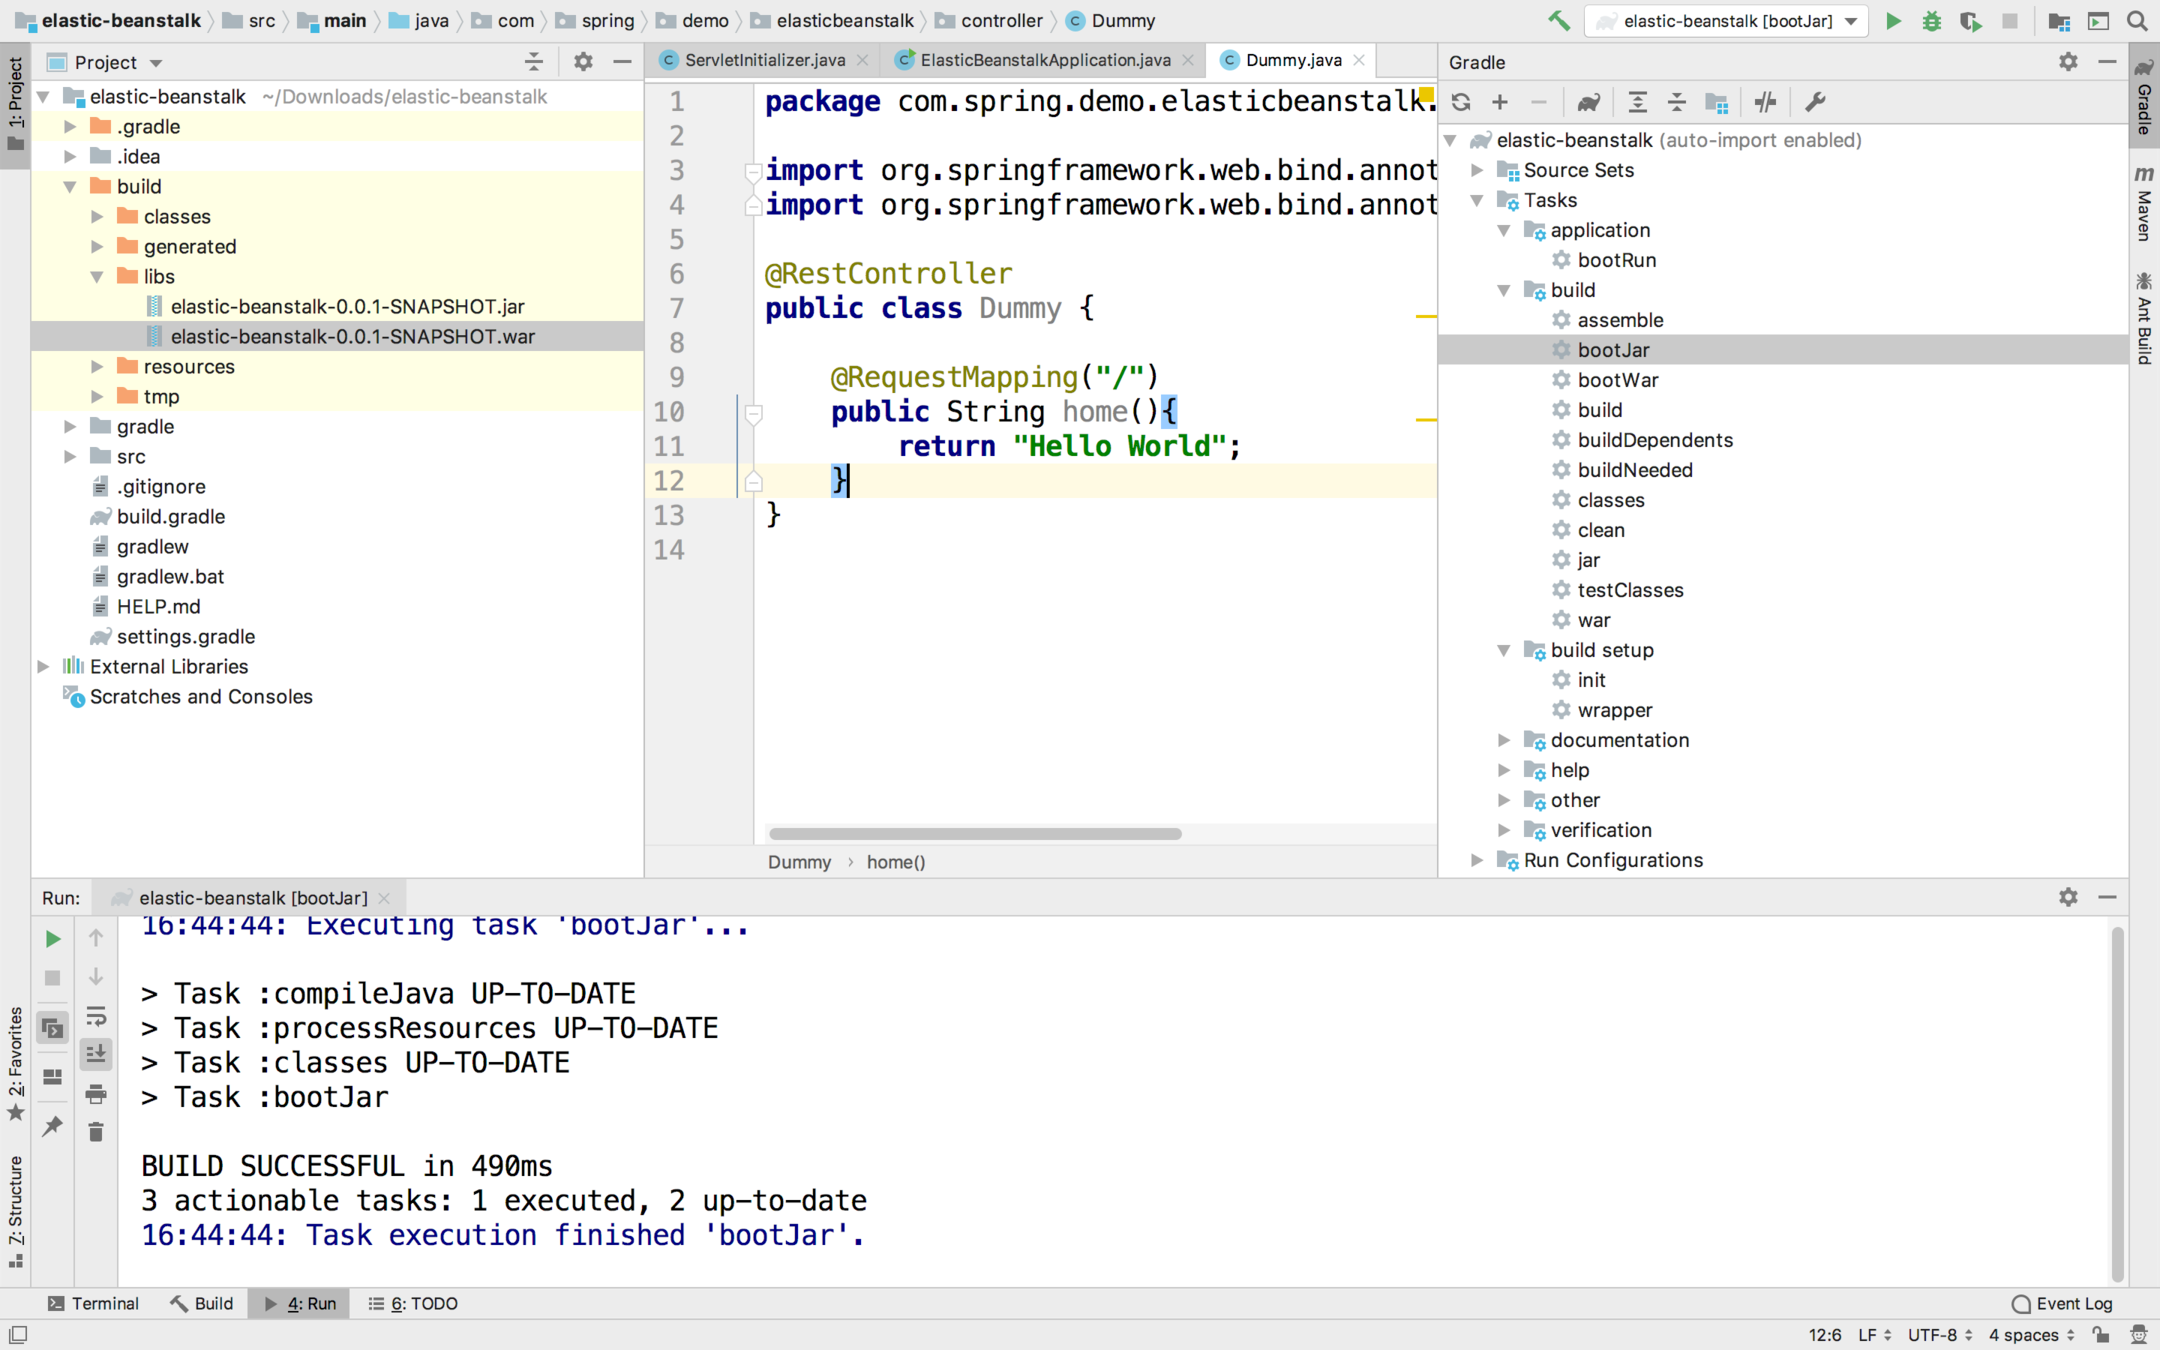
Create a dummy Controller and Build the war file
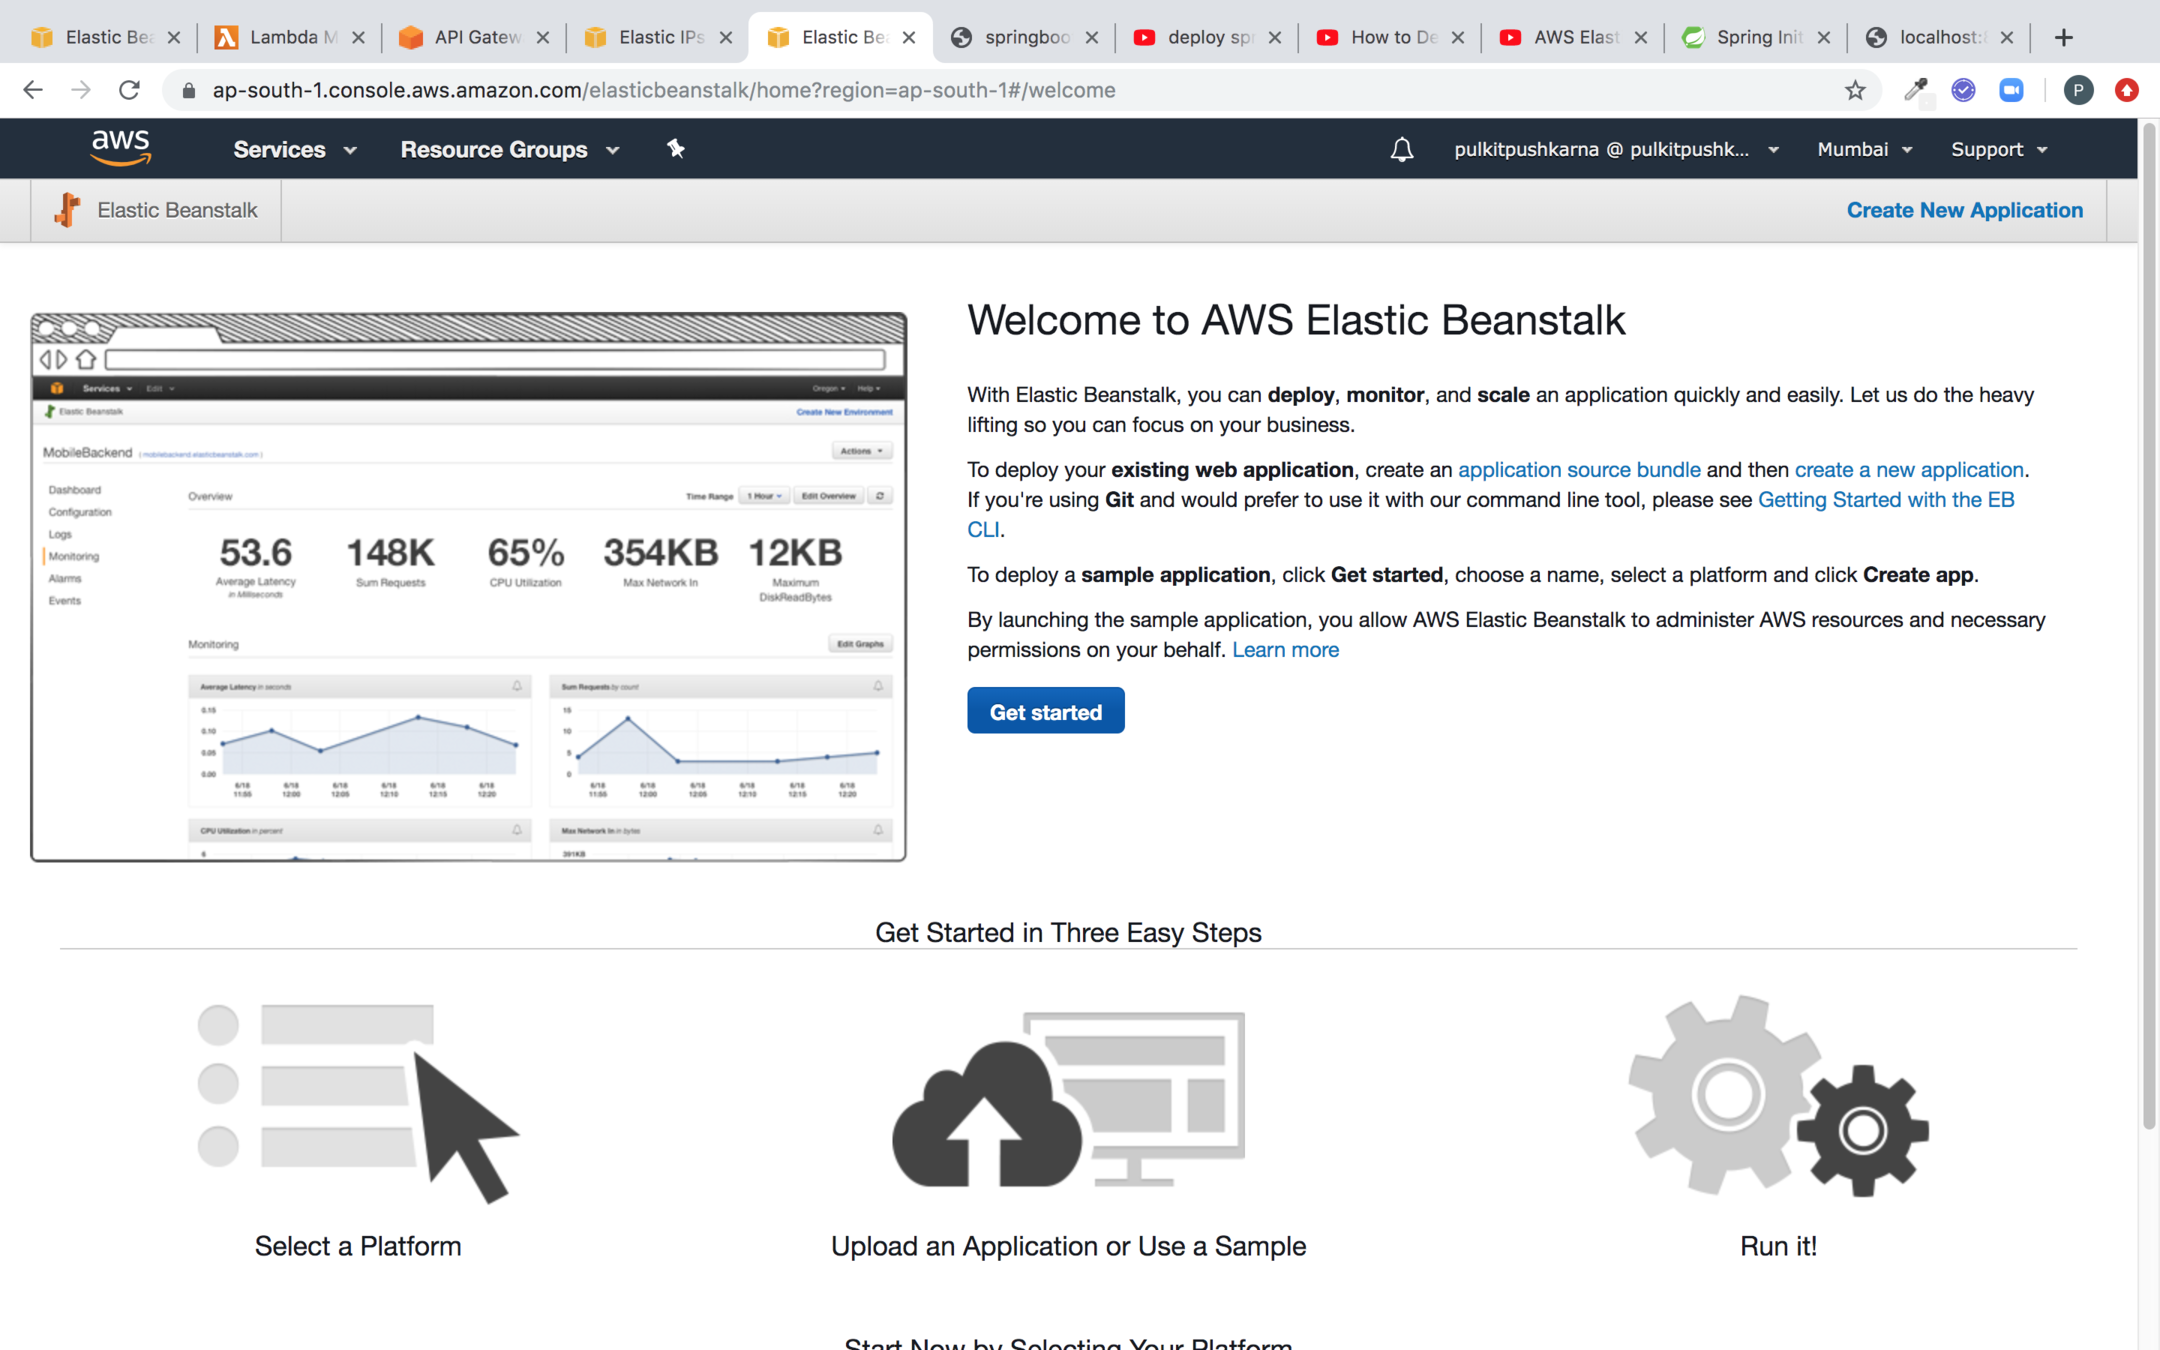
Go to Elastic Bean Stack Service and Click on Get Started
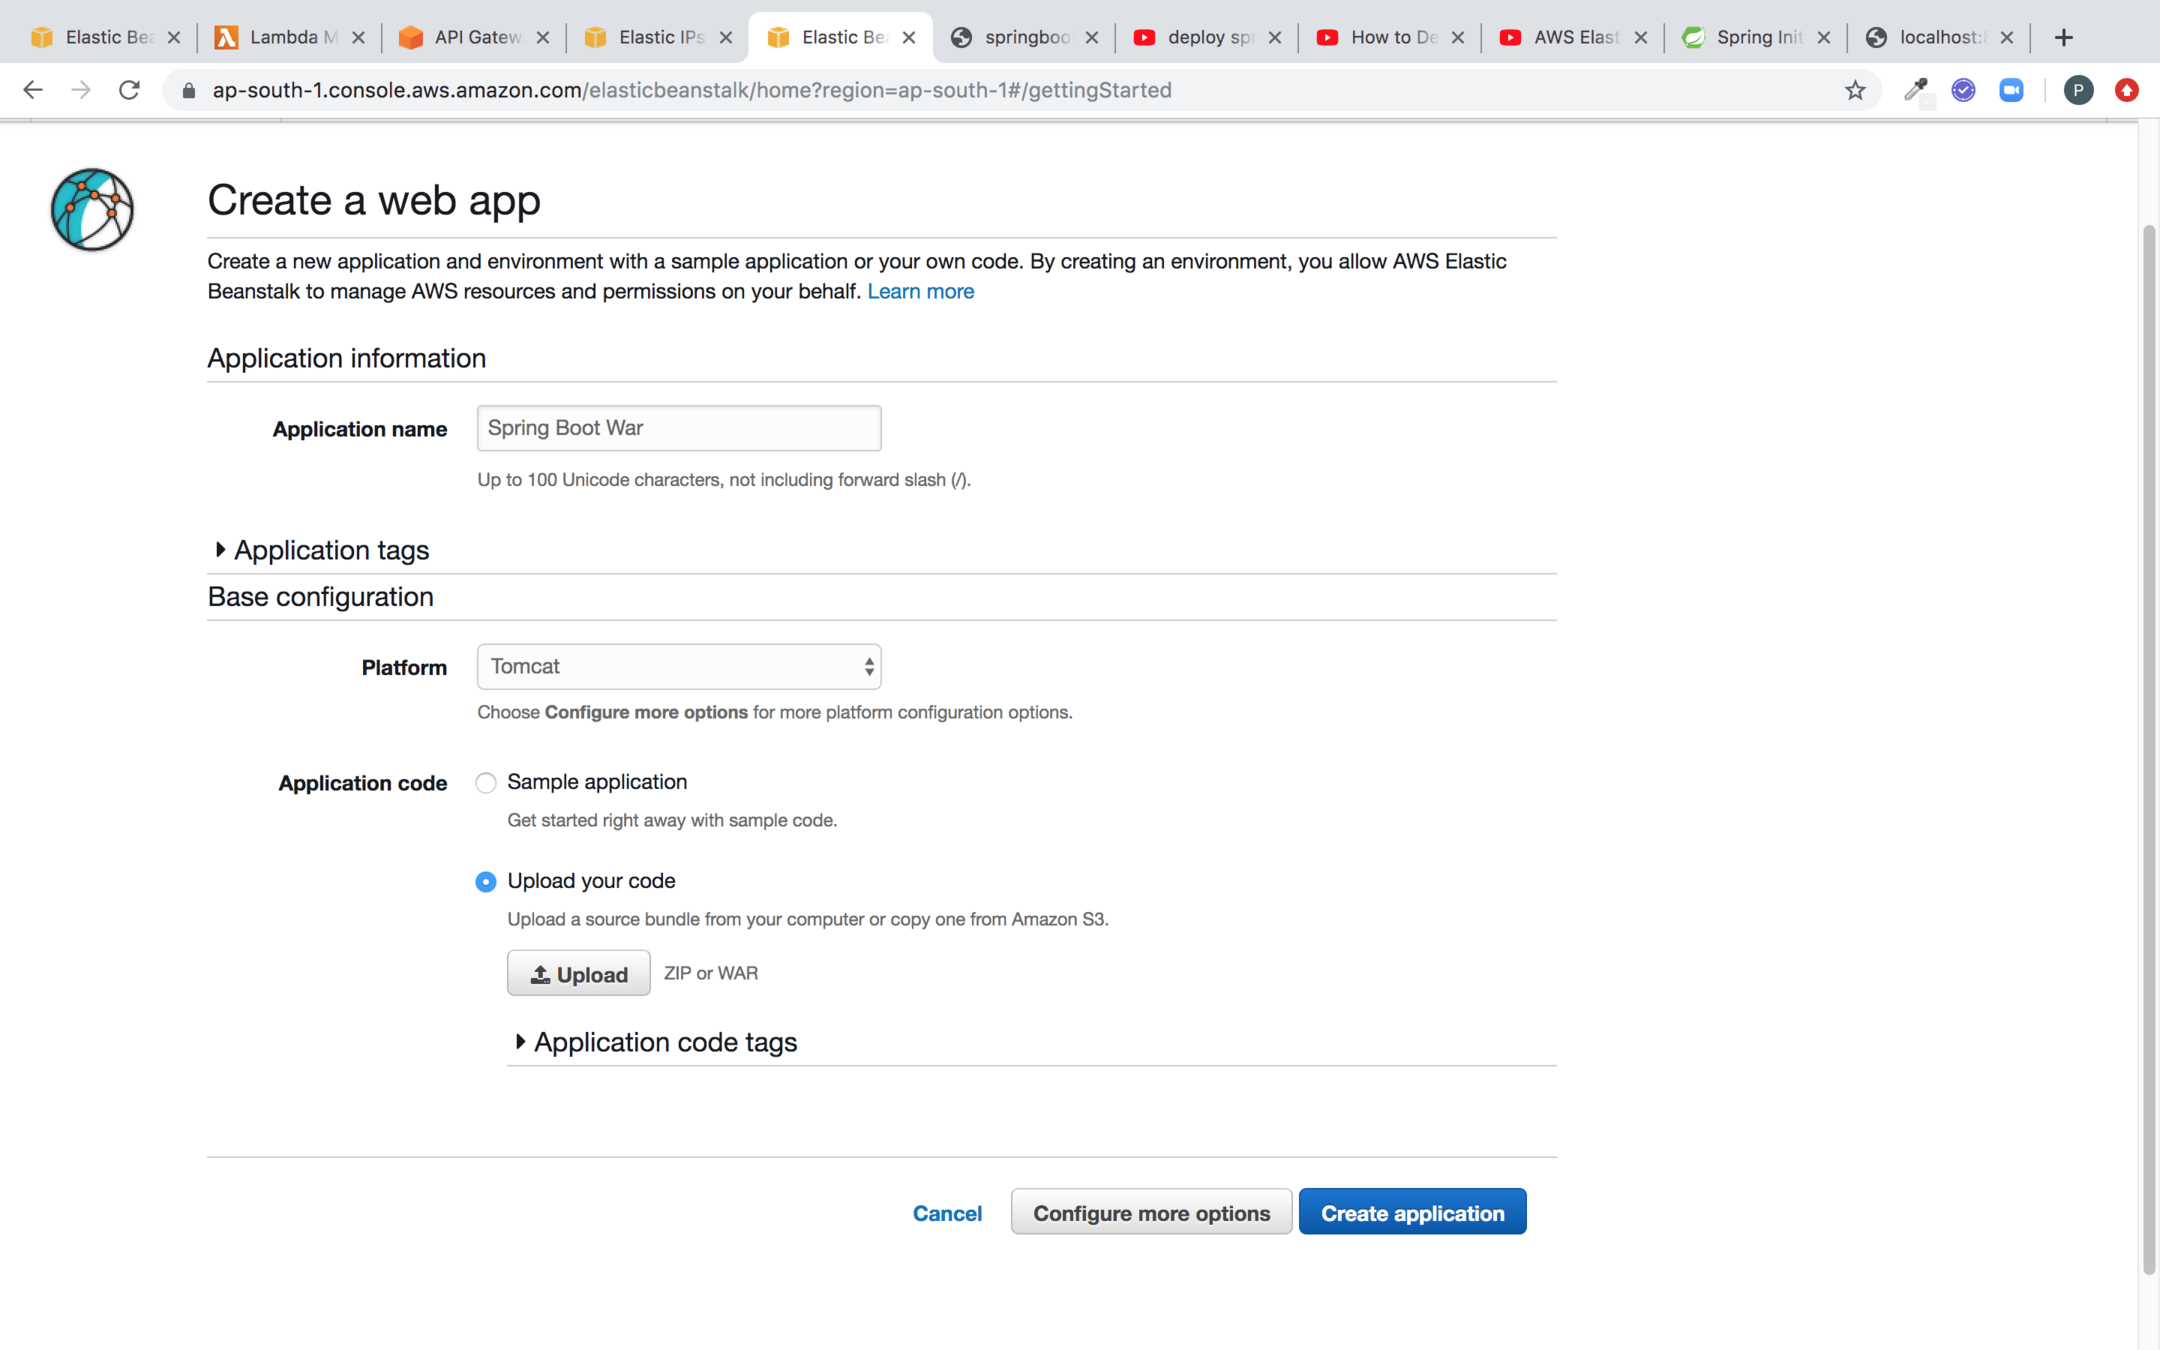
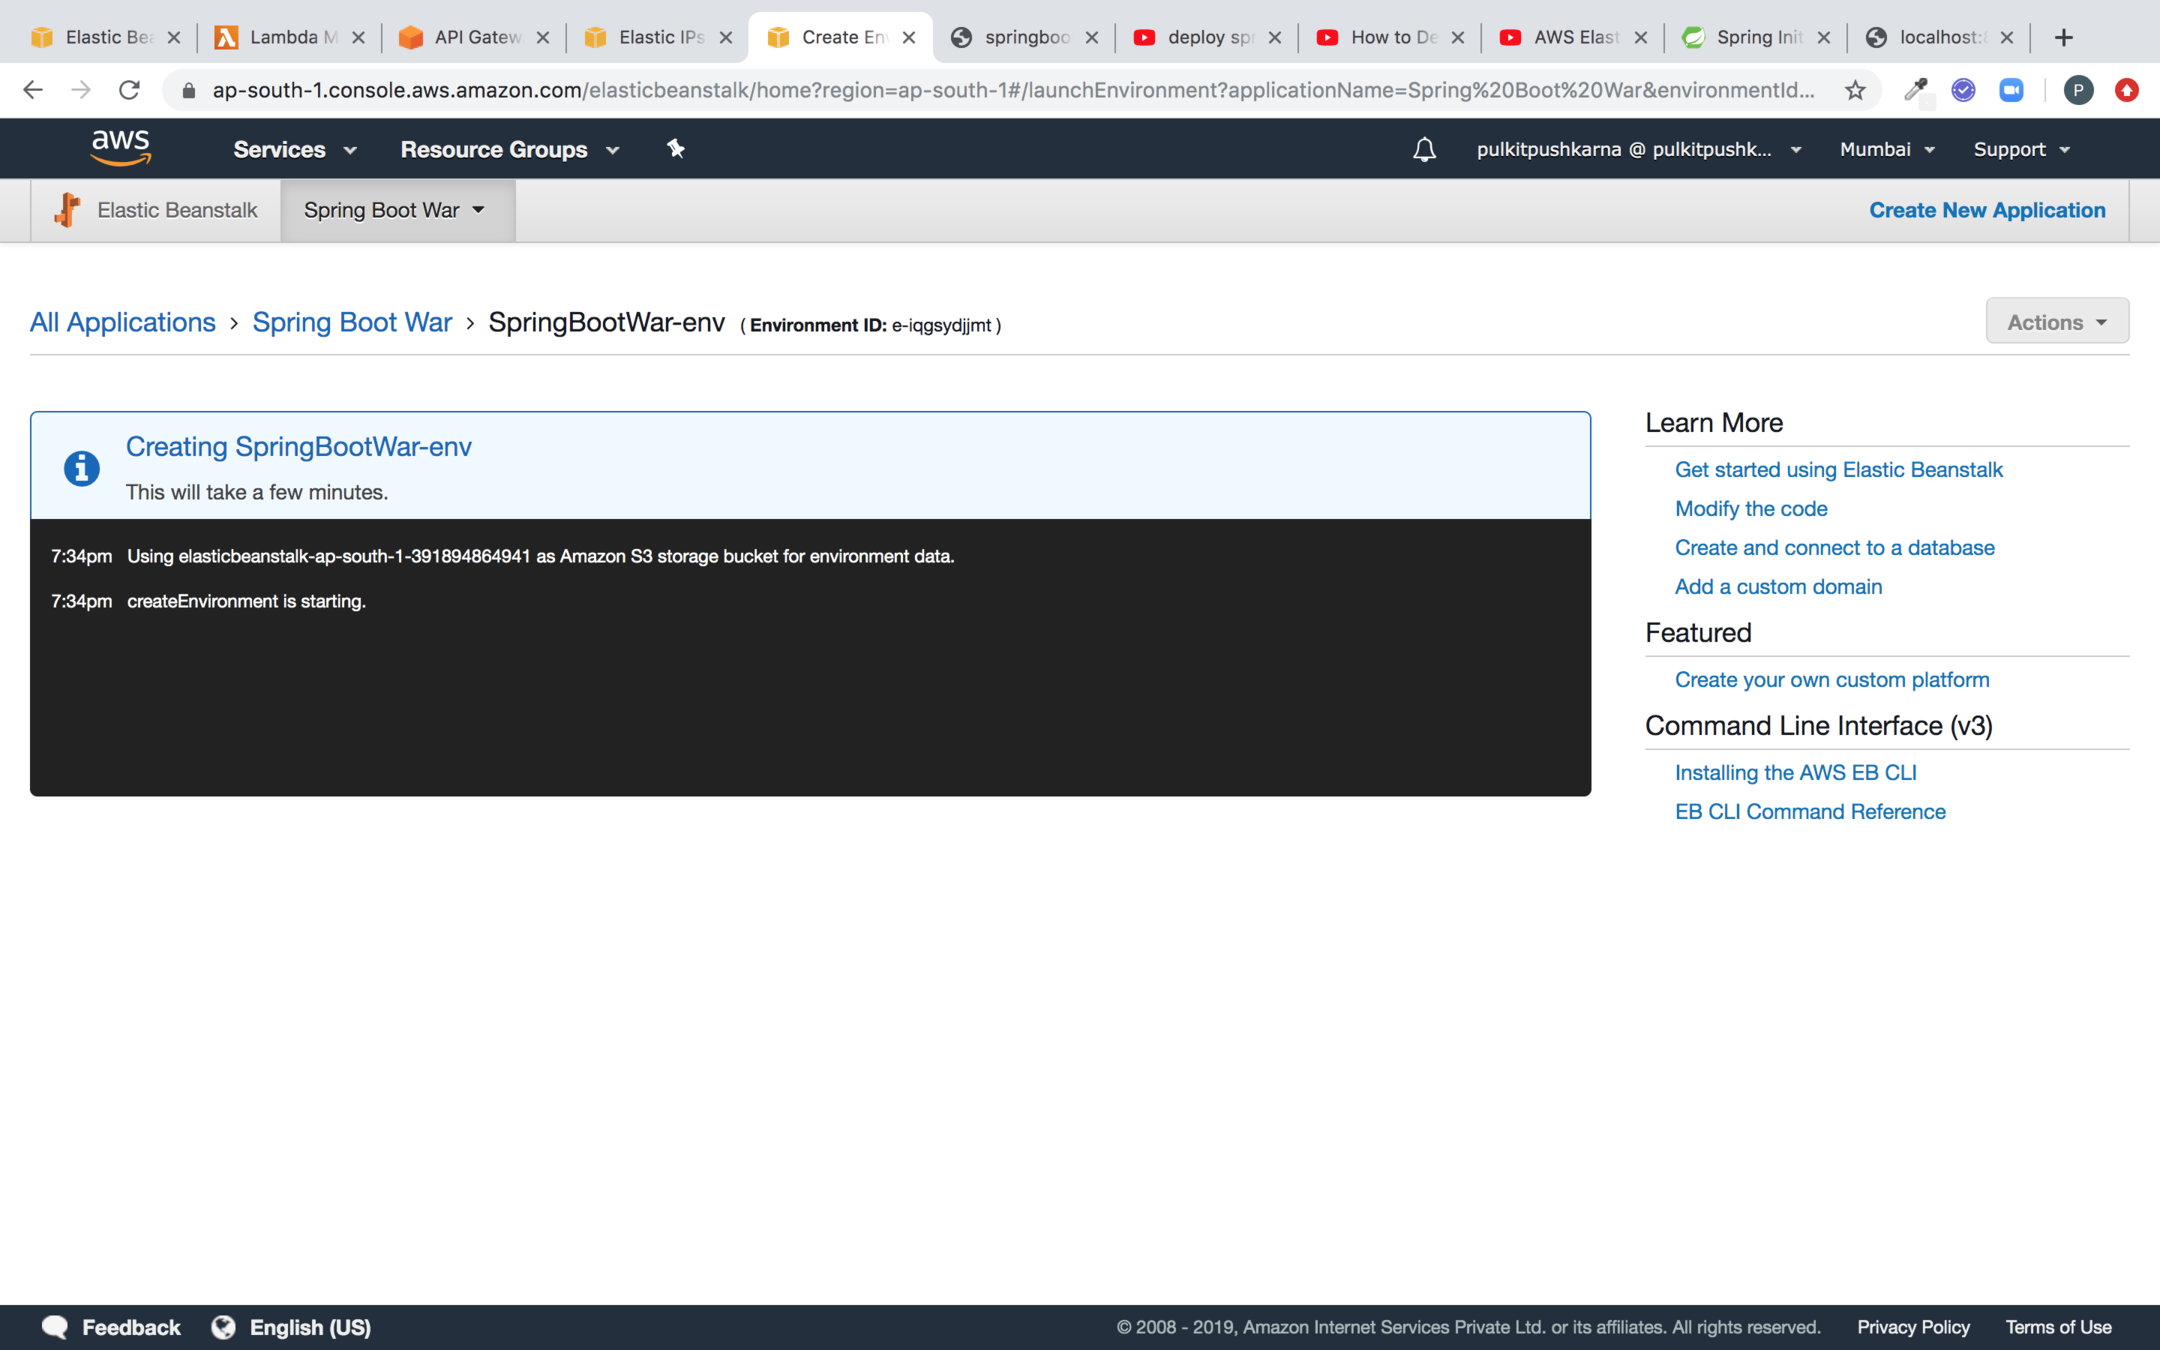
Enter the Application name and platform, upload the spring boot war and then click on Create application
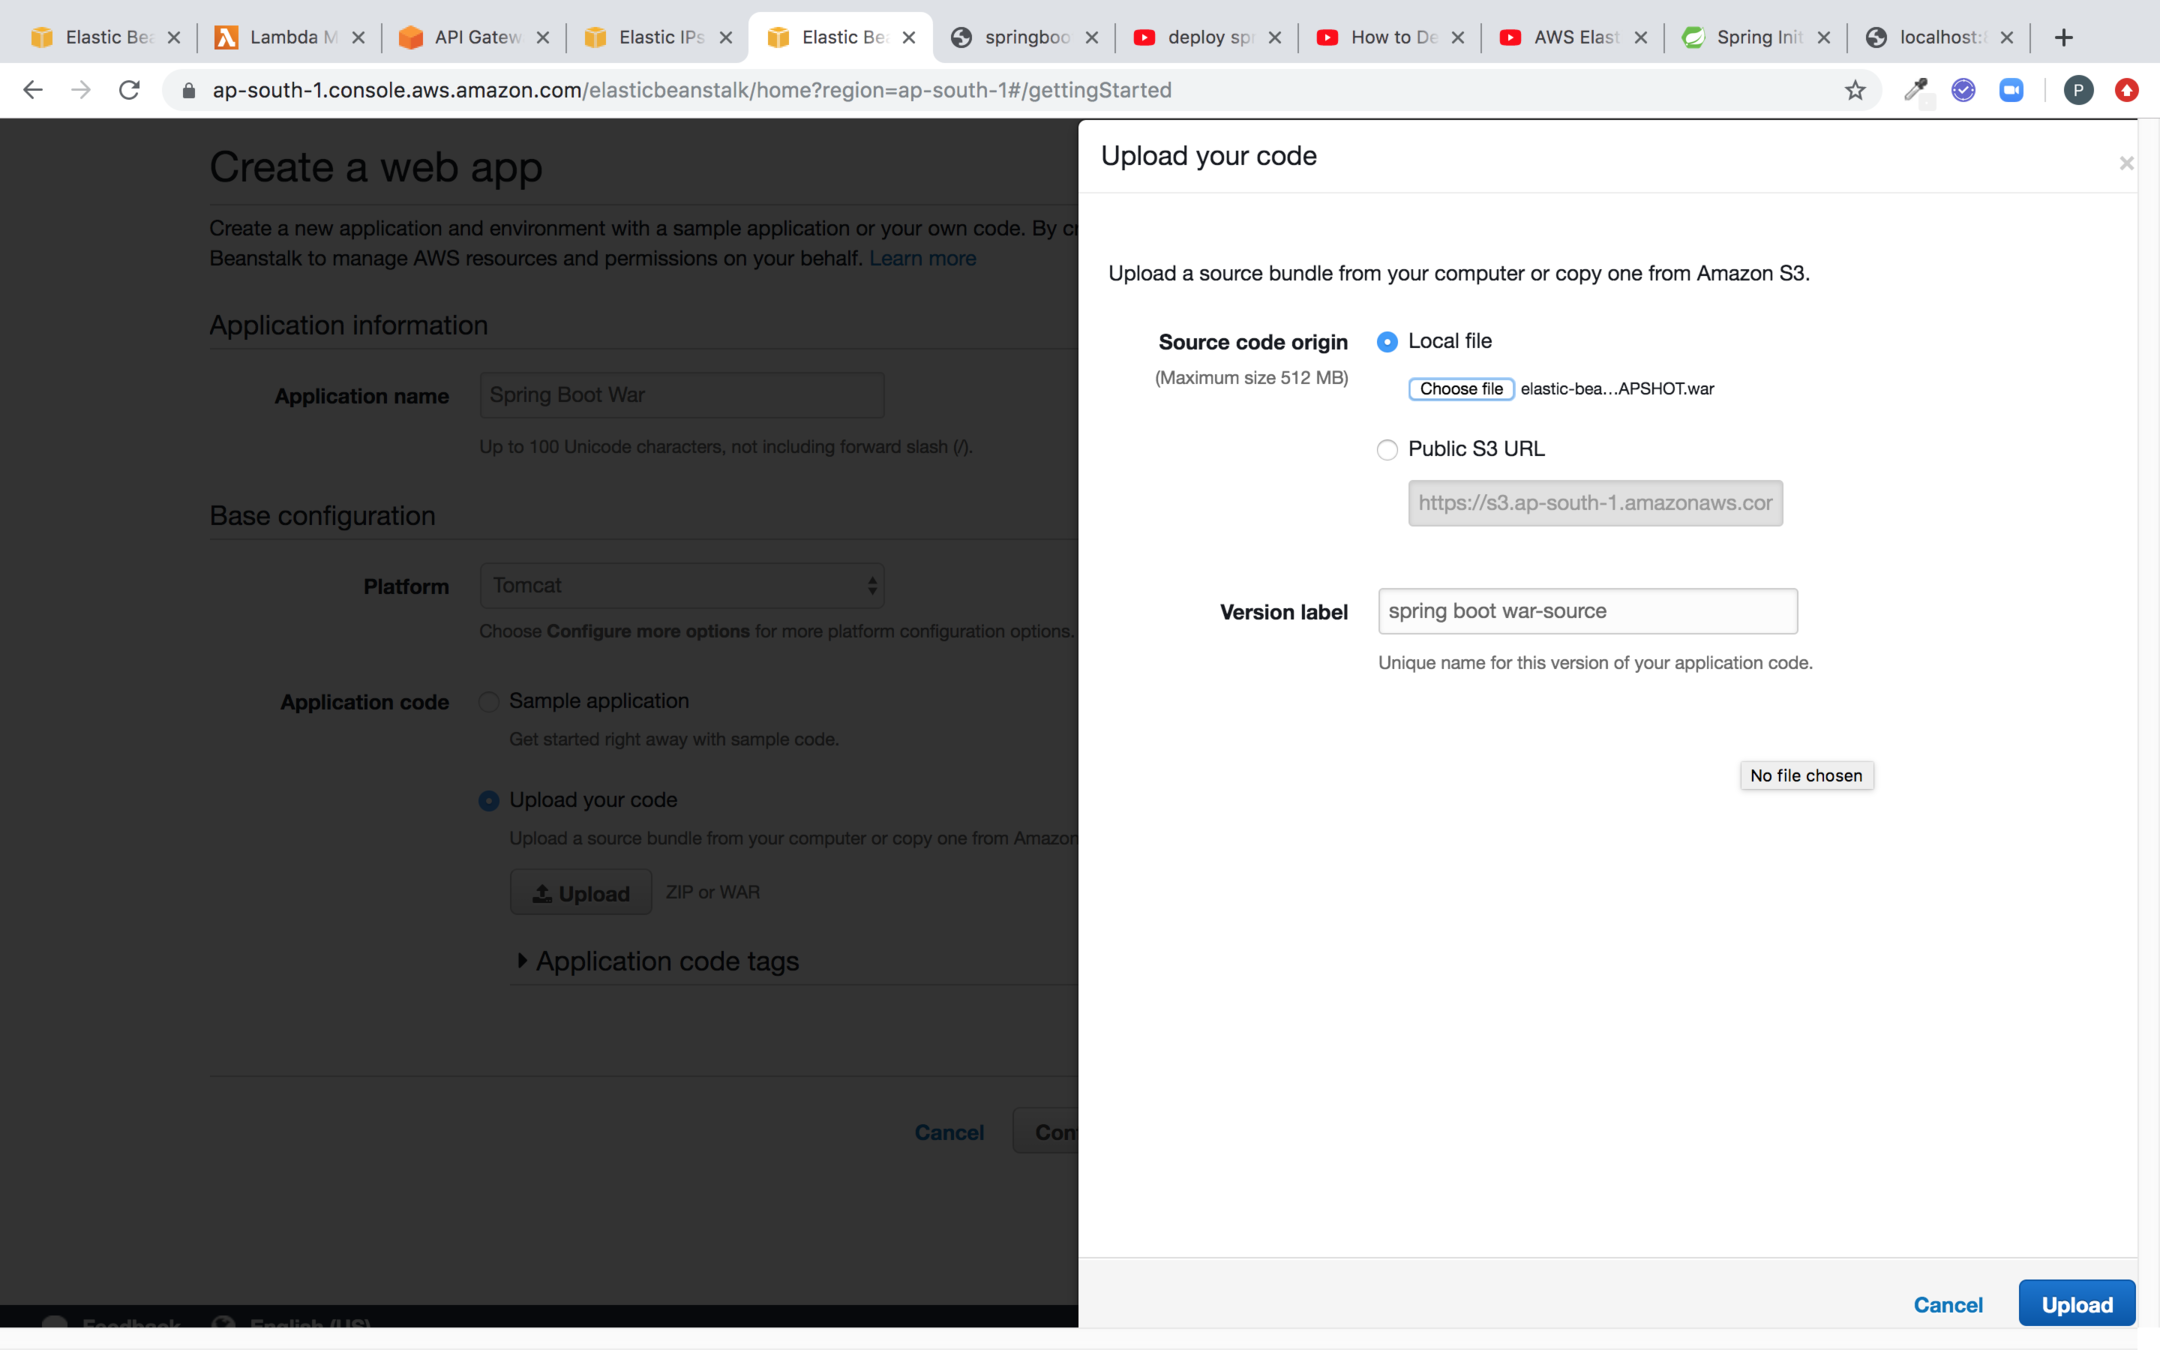
Select the war, click on upload and click on Create Application
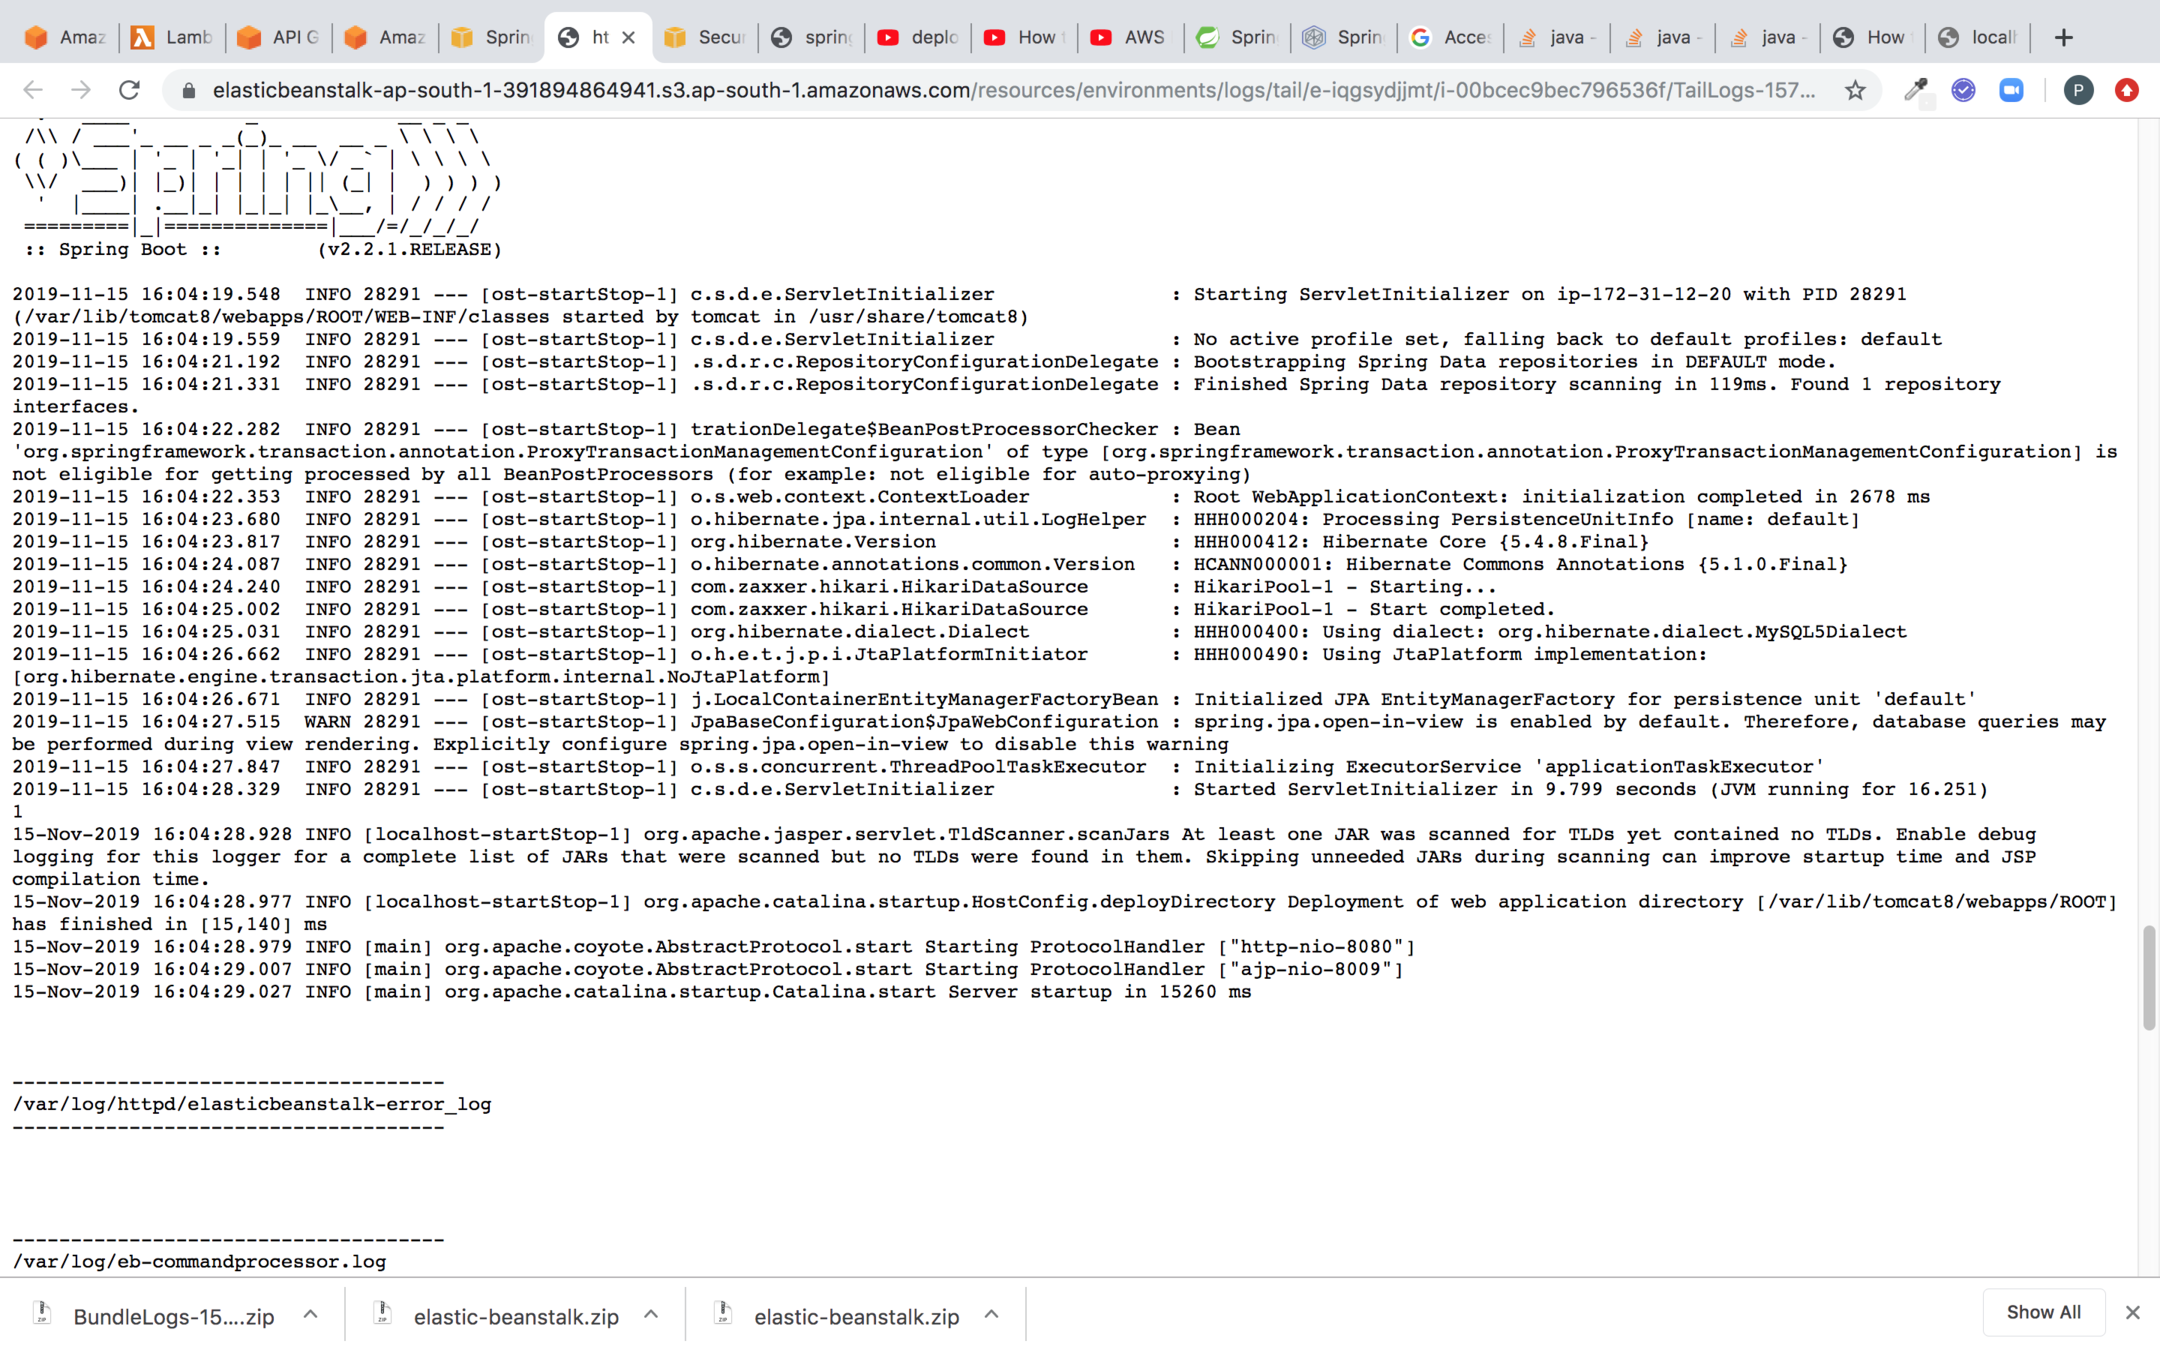
You will start getting the logs now
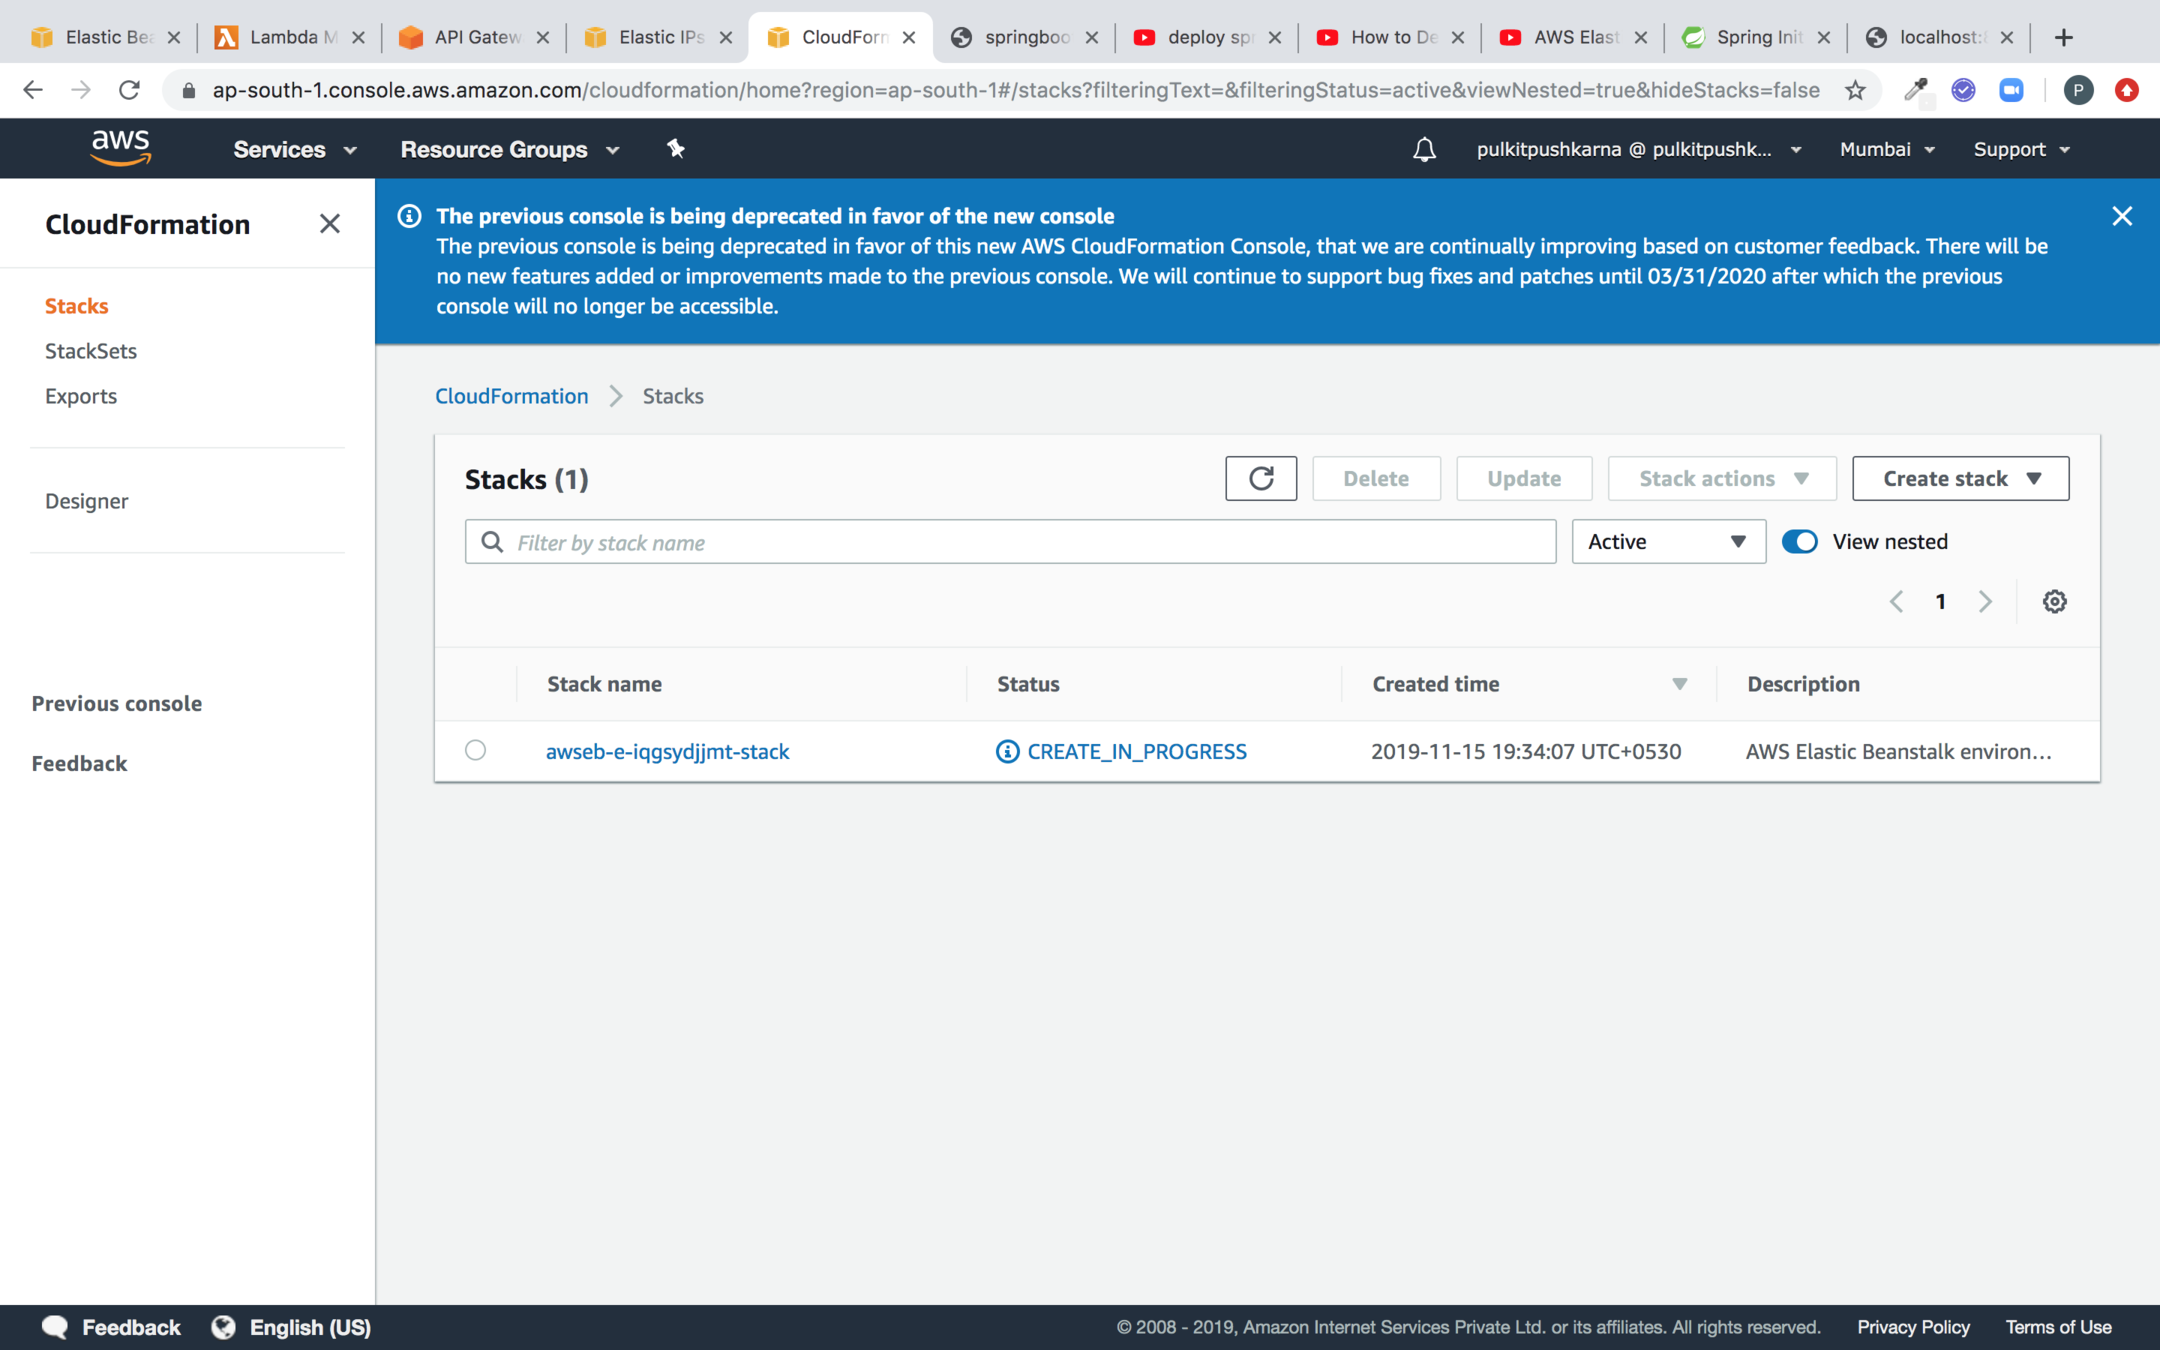
You can check the status of your application in Cloudformation
You can check the various resouces created by Elastic beanstalk


Elastic IP
EC2
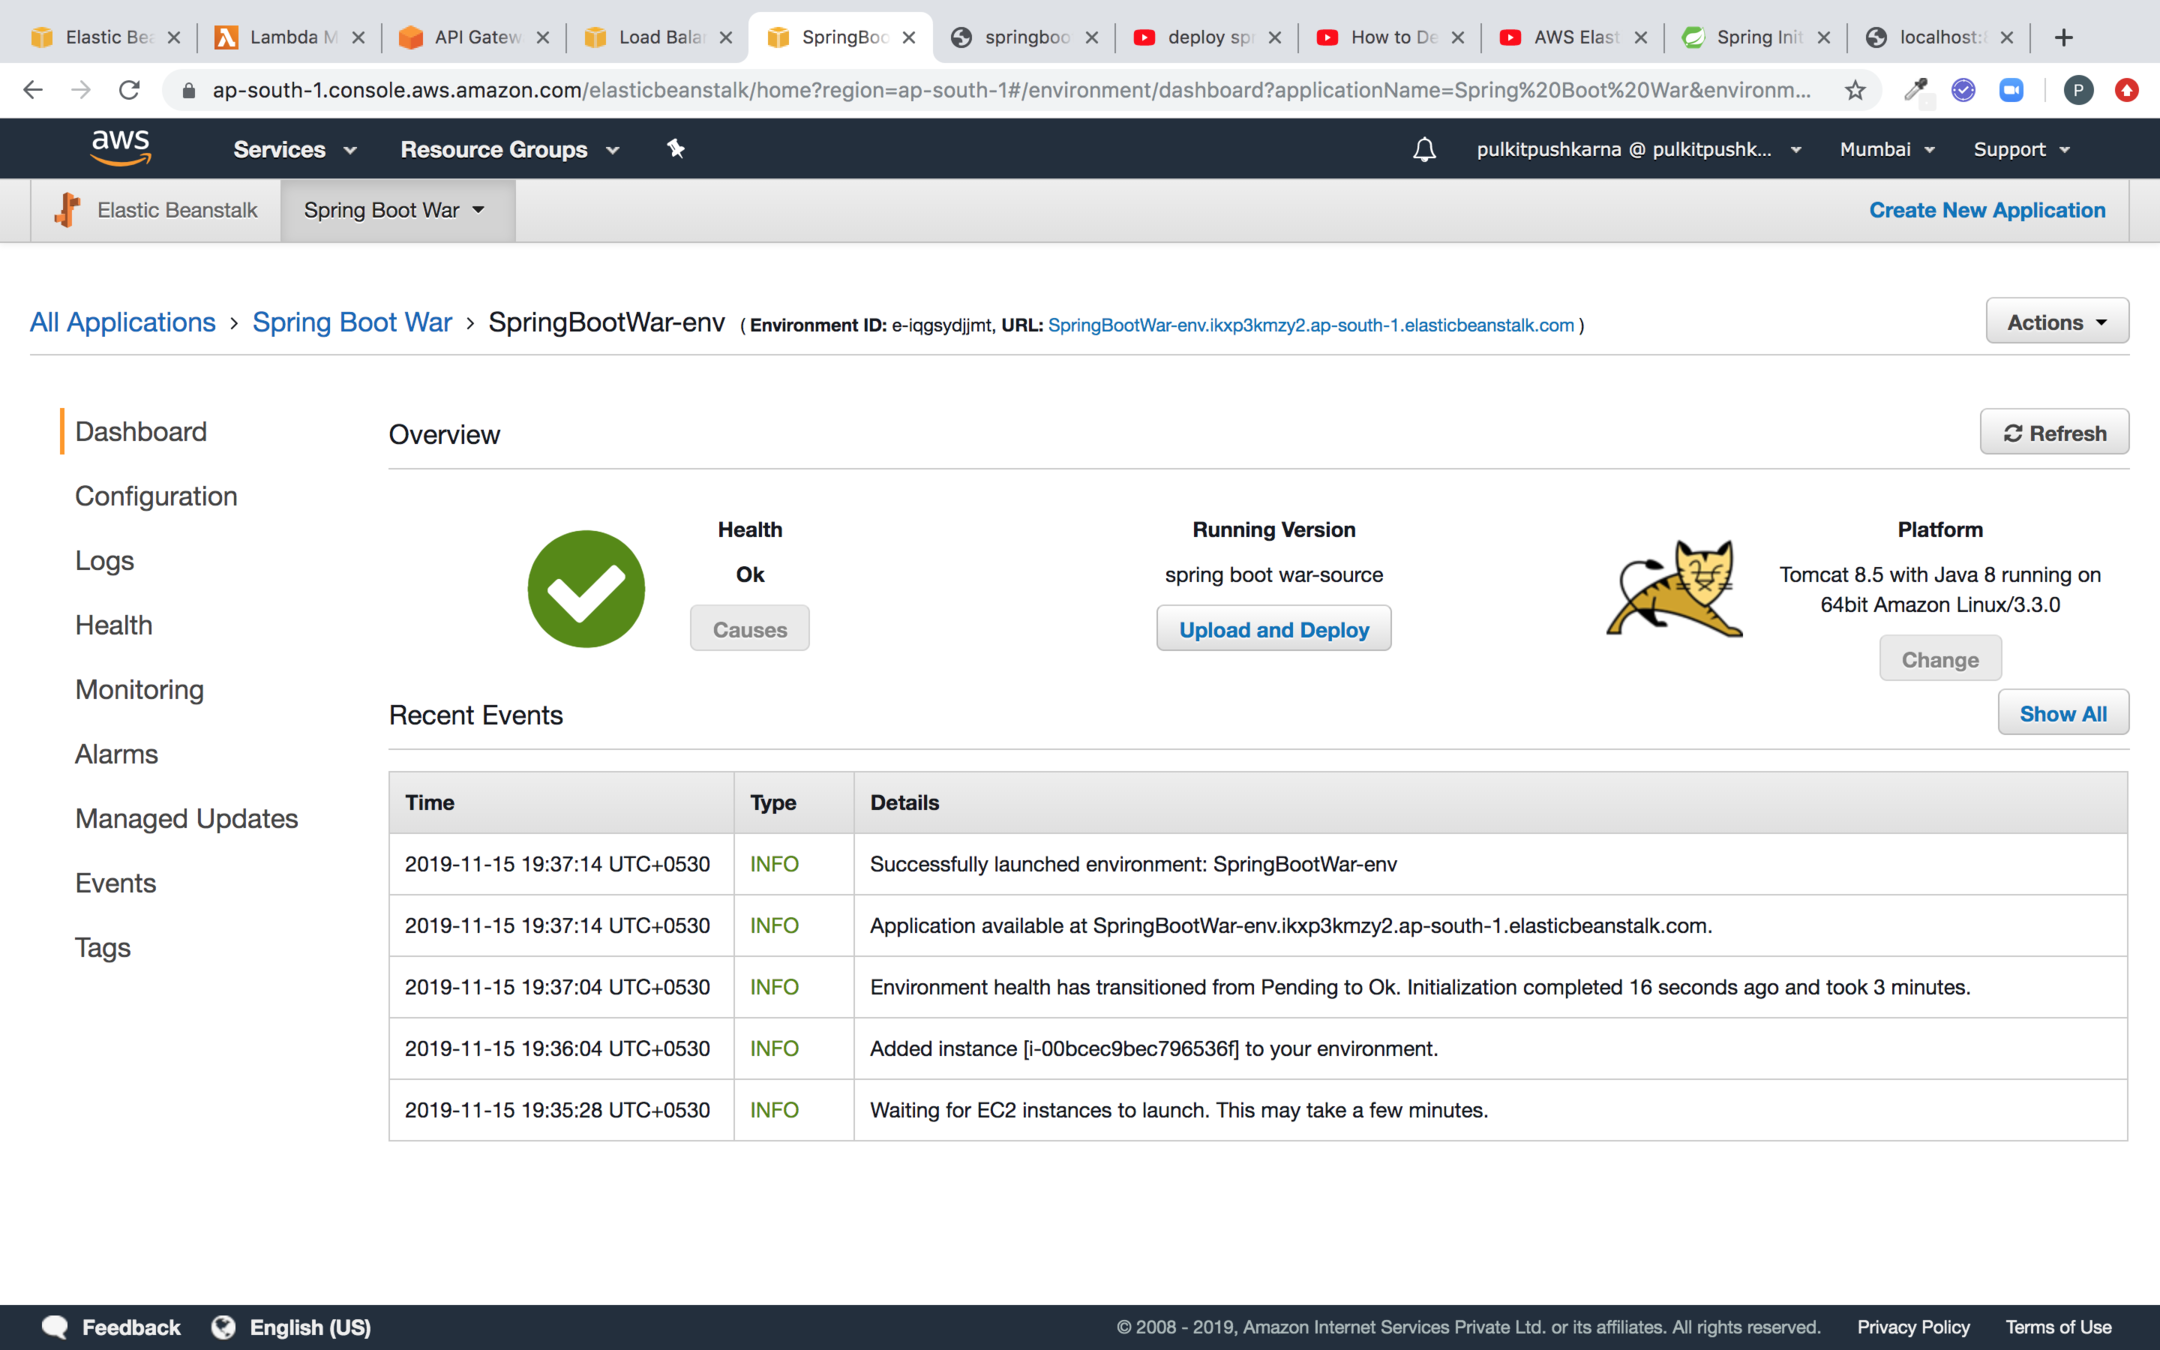
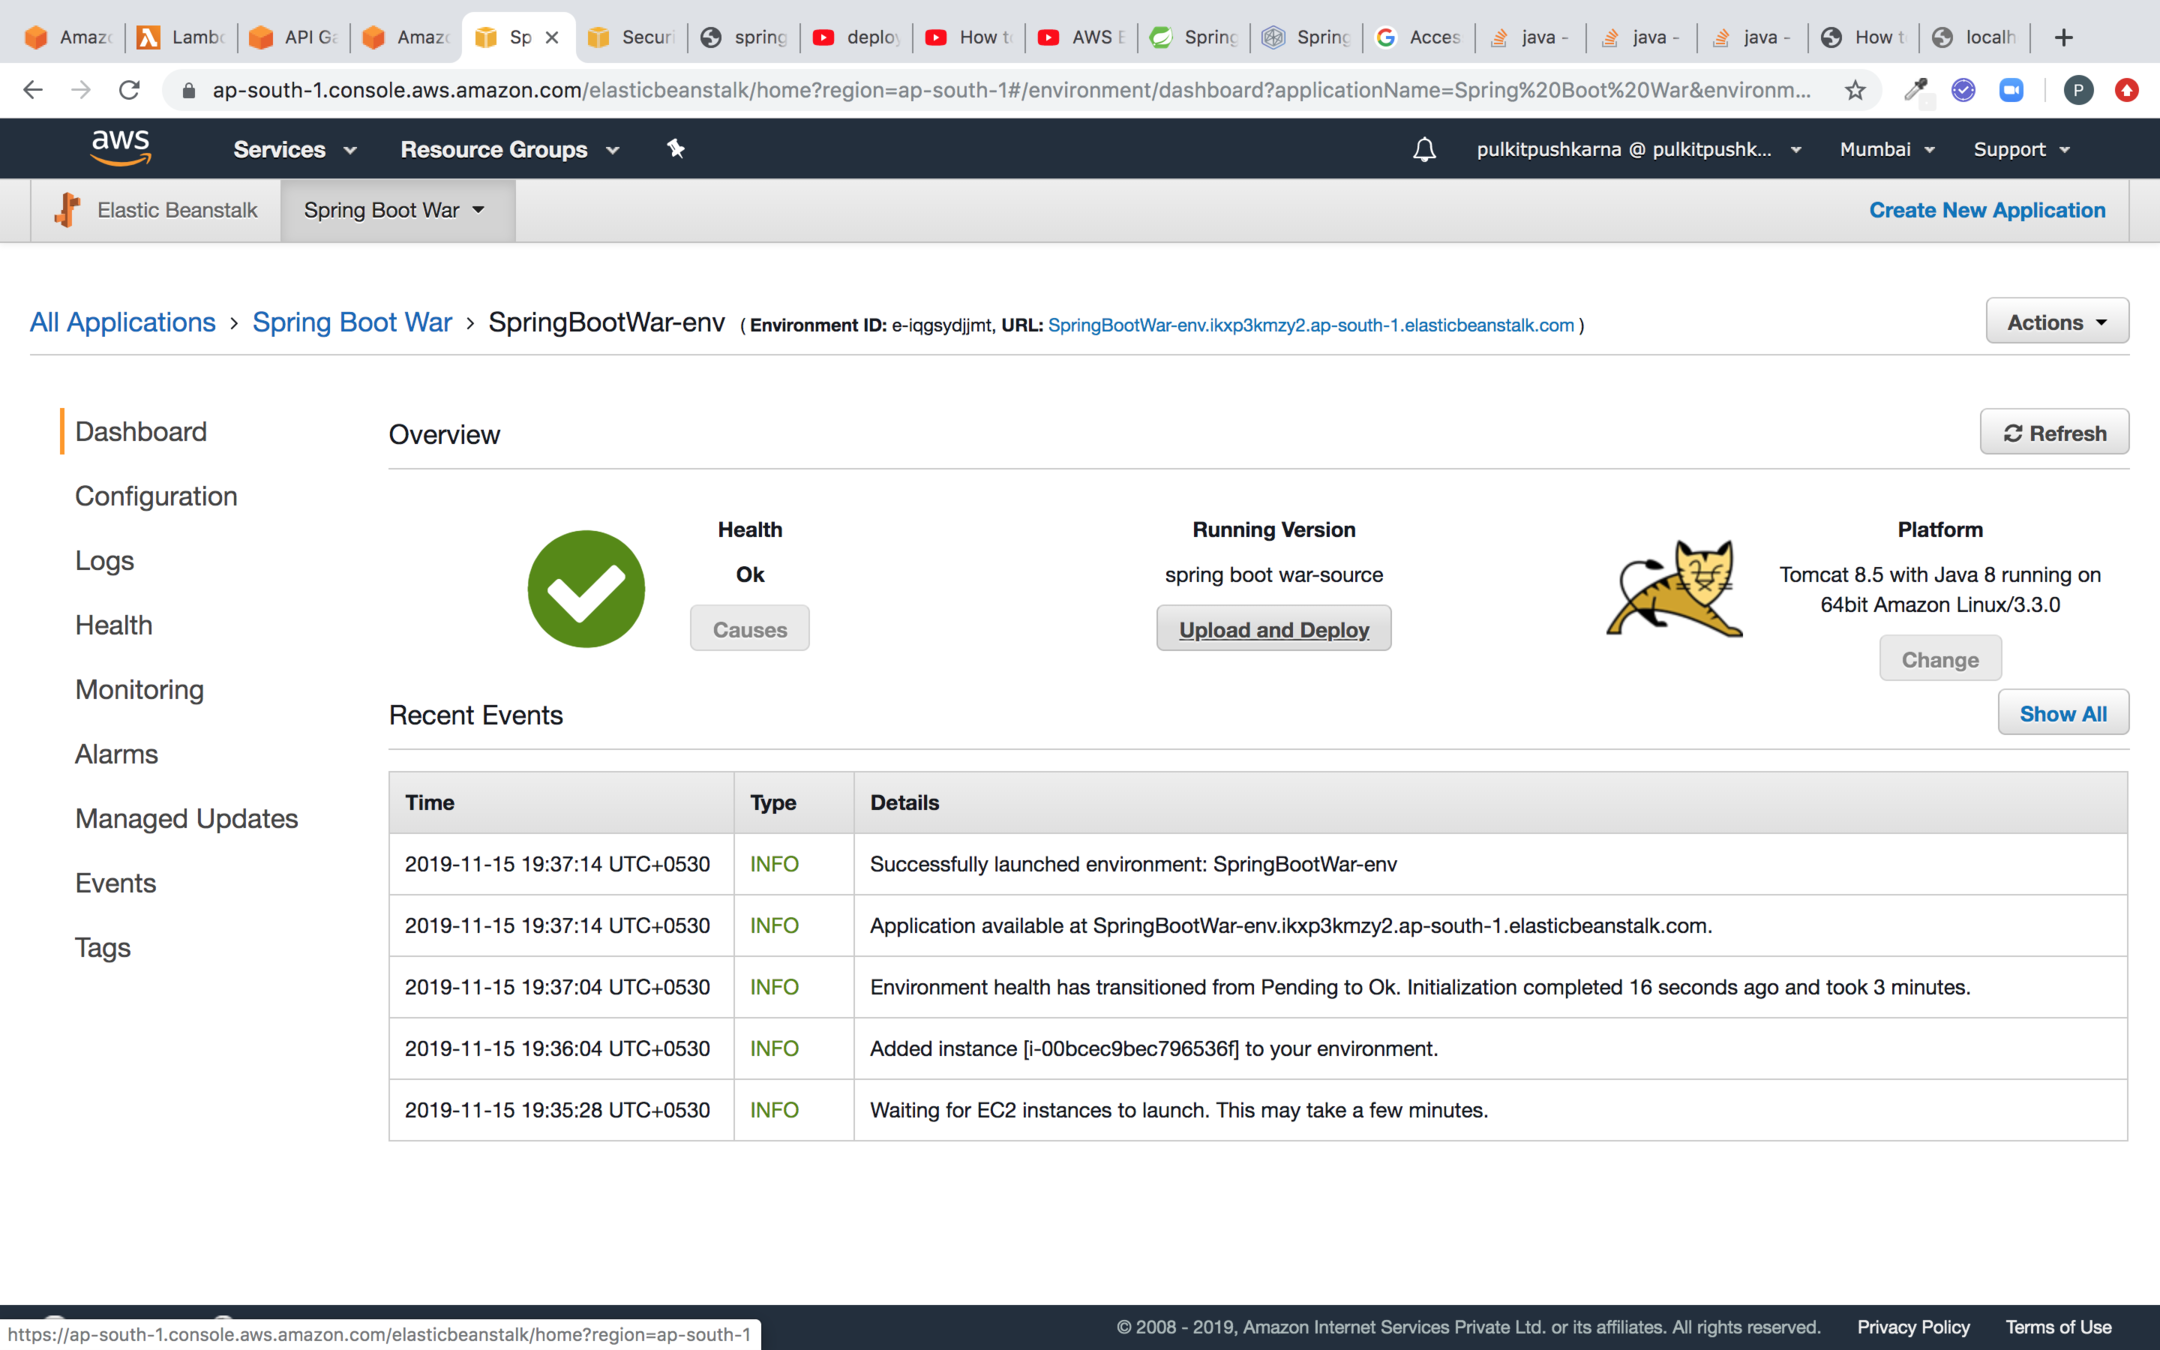
Now our Application is Deployed via elastic beanstalk. Url displayed at the top of this screen will be used to access the application
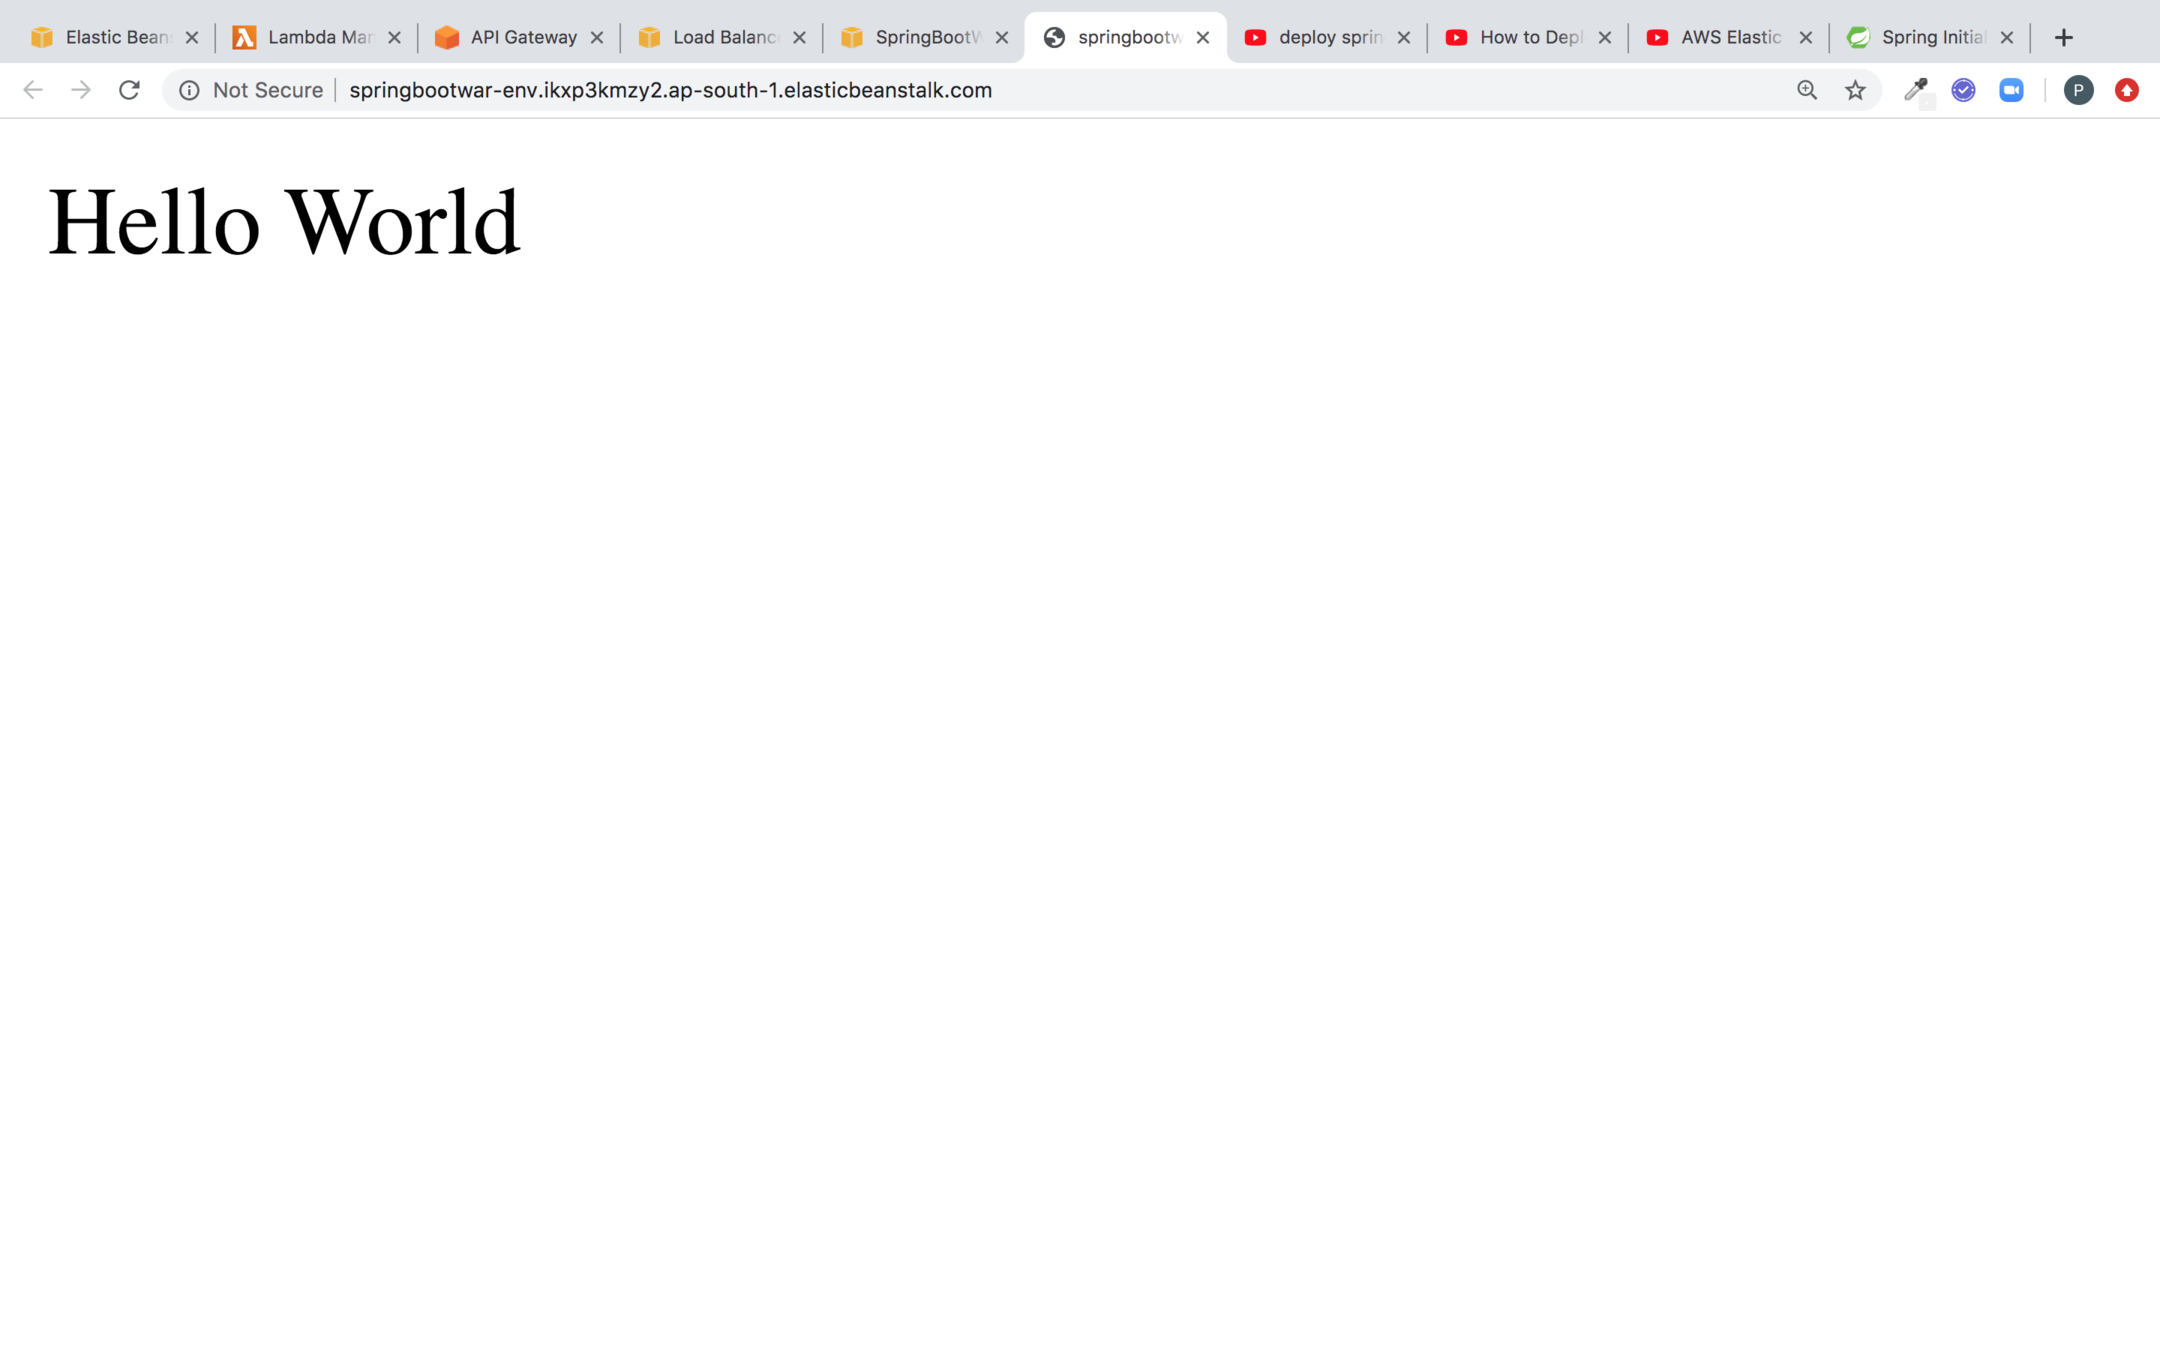
Hit the Url on the browser and you can see the result
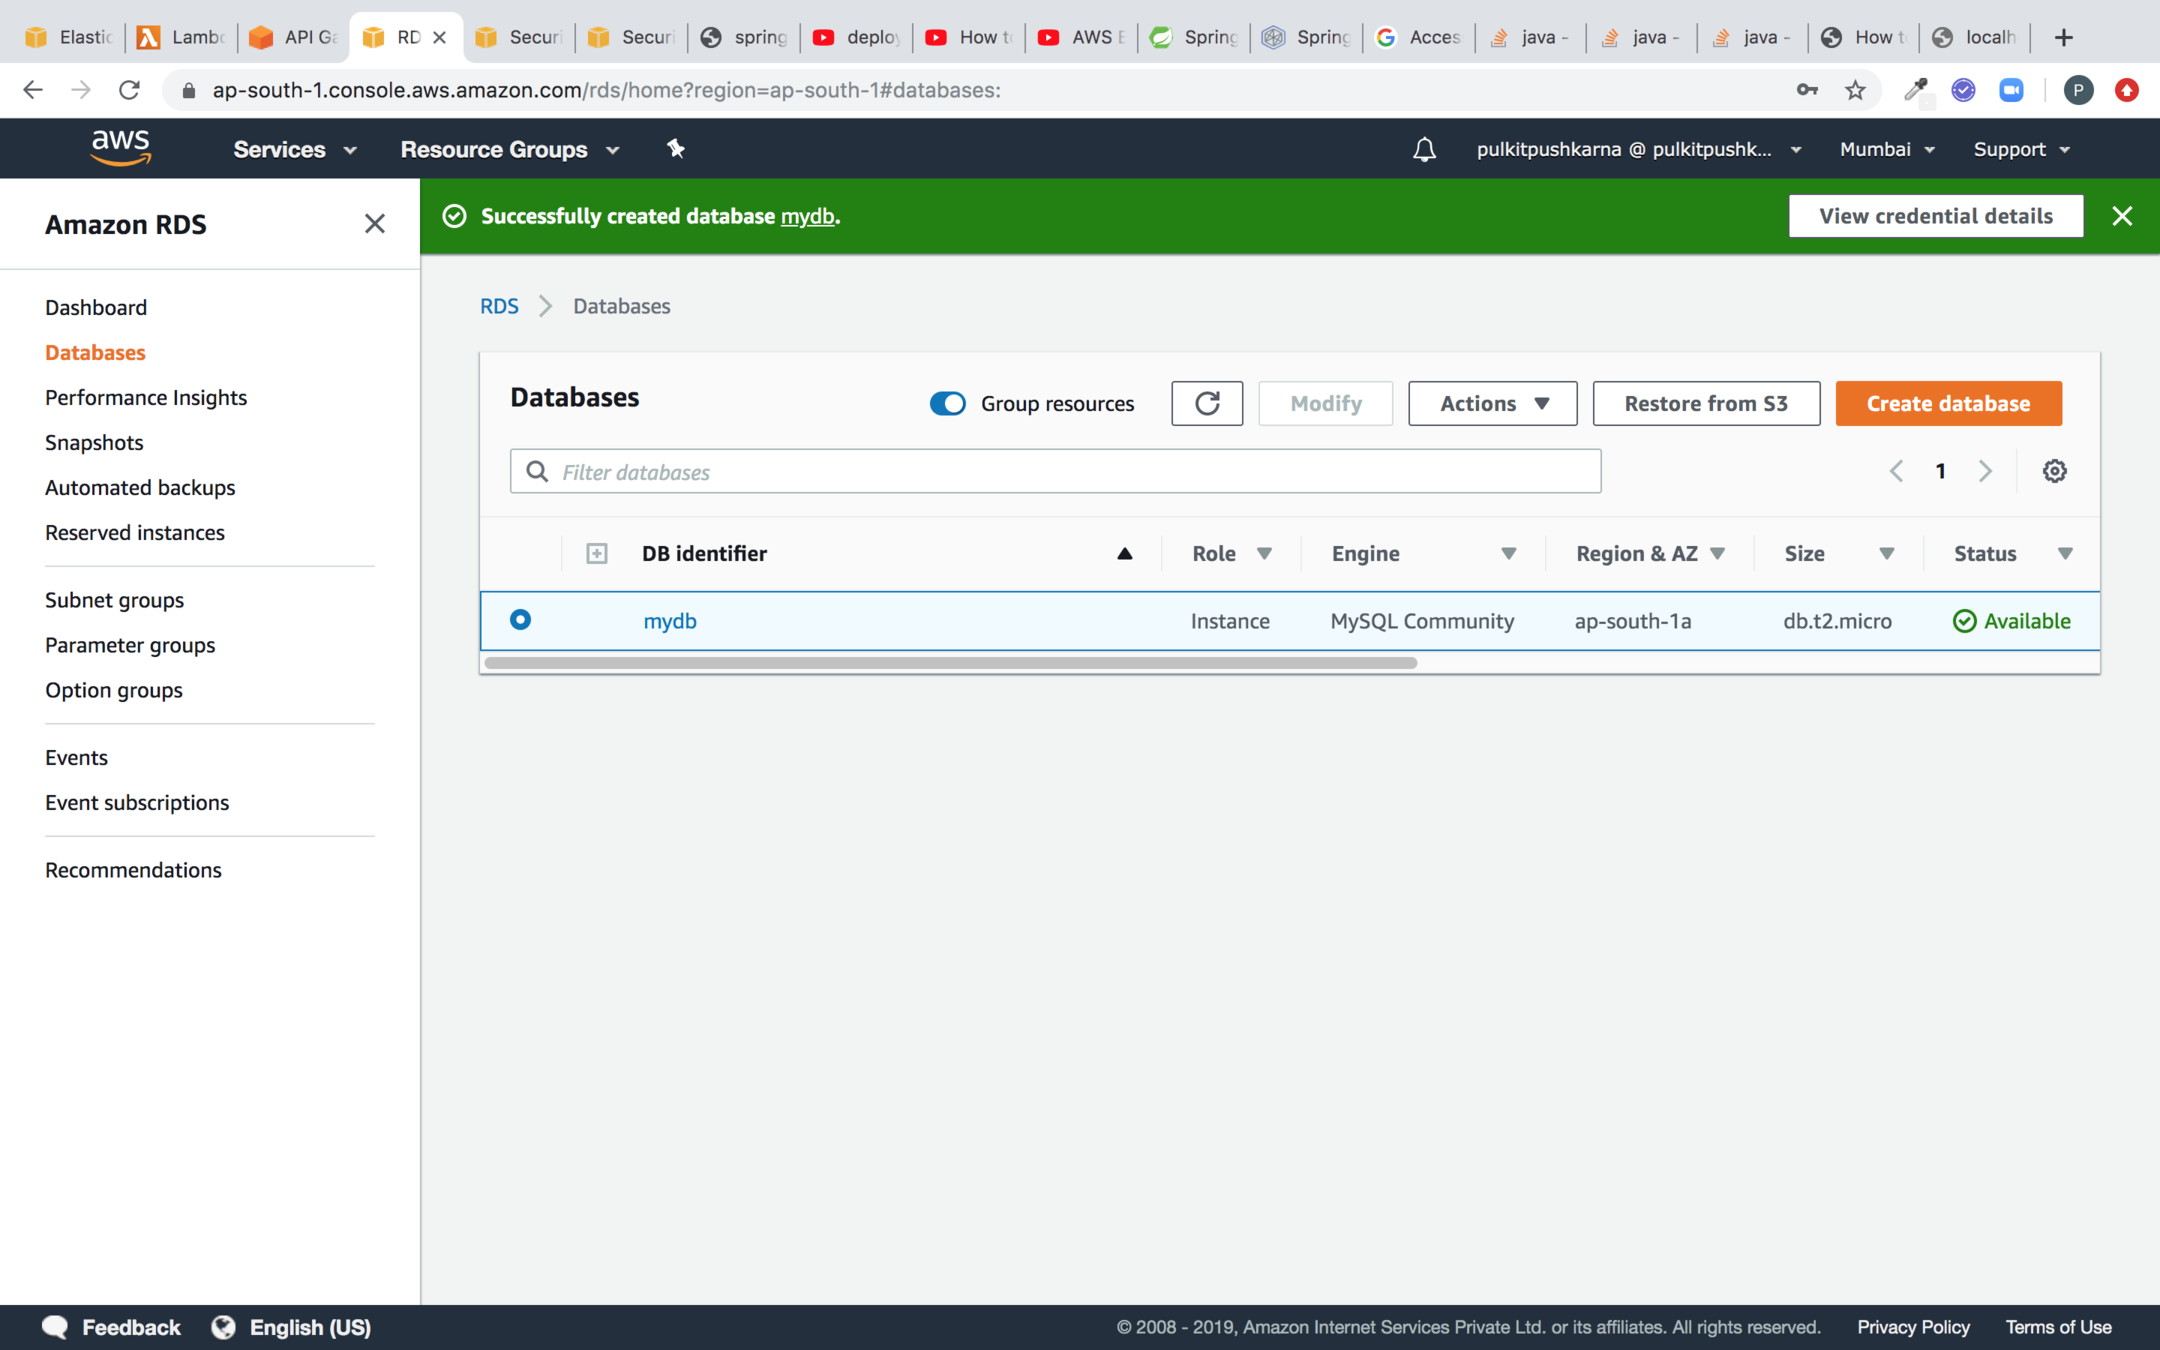
Create an RDS instance
Introduce Spring Data JPA in Spring Boot Application
plugins {
	id 'org.springframework.boot' version '2.2.1.RELEASE'
	id 'io.spring.dependency-management' version '1.0.8.RELEASE'
	id 'java'
	id 'war'
}

group = 'com.spring.demo'
version = '0.0.1-SNAPSHOT'
sourceCompatibility = '1.8'

repositories {
	mavenCentral()
}

dependencies {
	implementation 'org.springframework.boot:spring-boot-starter-data-jpa'
	runtimeOnly 'mysql:mysql-connector-java'
	implementation 'org.springframework.boot:spring-boot-starter-web'
	providedRuntime 'org.springframework.boot:spring-boot-starter-tomcat'
	testImplementation('org.springframework.boot:spring-boot-starter-test') {
		exclude group: 'org.junit.vintage', module: 'junit-vintage-engine'
	}
}

test {
	useJUnitPlatform()
}
spring.datasource.url=jdbc:mysql://mydb.cmetoyhg7bms.ap-south-1.rds.amazonaws.com:3306/mydb
spring.datasource.username=admin
spring.datasource.password=password
spring.datasource.driver-class-name=com.mysql.cj.jdbc.Driver
spring.jpa.hibernate.ddl-auto=create
spring.jpa.database-platform=org.hibernate.dialect.MySQL5Dialect
application.properties
Employee Entity
package com.spring.demo.elasticbeanstalk.entity;

import javax.persistence.Entity;
import javax.persistence.GeneratedValue;
import javax.persistence.GenerationType;
import javax.persistence.Id;

@Entity
public class Employee {

    @Id @GeneratedValue(strategy = GenerationType.IDENTITY)
    private Integer id;

    private String name;

    private Integer age;

    public Employee() {
    }

    public Employee(String name, Integer age) {
        this.name = name;
        this.age = age;
    }

    public Integer getId() {
        return id;
    }

    public void setId(Integer id) {
        this.id = id;
    }

    public String getName() {
        return name;
    }

    public void setName(String name) {
        this.name = name;
    }

    public Integer getAge() {
        return age;
    }

    public void setAge(Integer age) {
        this.age = age;
    }

    @Override
    public String toString() {
        return "Employee{" +
                "id=" + id +
                ", name='" + name + '\'' +
                ", age=" + age +
                '}';
    }
}
Employee Repository
package com.spring.demo.elasticbeanstalk.repository;

import com.spring.demo.elasticbeanstalk.entity.Employee;
import org.springframework.data.repository.CrudRepository;

public interface EmployeeRepository extends CrudRepository<Employee, Integer> {
}
package com.spring.demo.elasticbeanstalk.event;

import com.spring.demo.elasticbeanstalk.entity.Employee;
import com.spring.demo.elasticbeanstalk.repository.EmployeeRepository;
import org.springframework.beans.factory.annotation.Autowired;
import org.springframework.boot.CommandLineRunner;
import org.springframework.stereotype.Component;

@Component
public class Bootstrap implements CommandLineRunner {

    @Autowired
    EmployeeRepository employeeRepository;

    @Override
    public void run(String... args) throws Exception {
        employeeRepository.save(new Employee("Peter",29));
        System.out.println(employeeRepository.count());
    }
}
build a new jar and upload the new version to the elastic beanstalk application
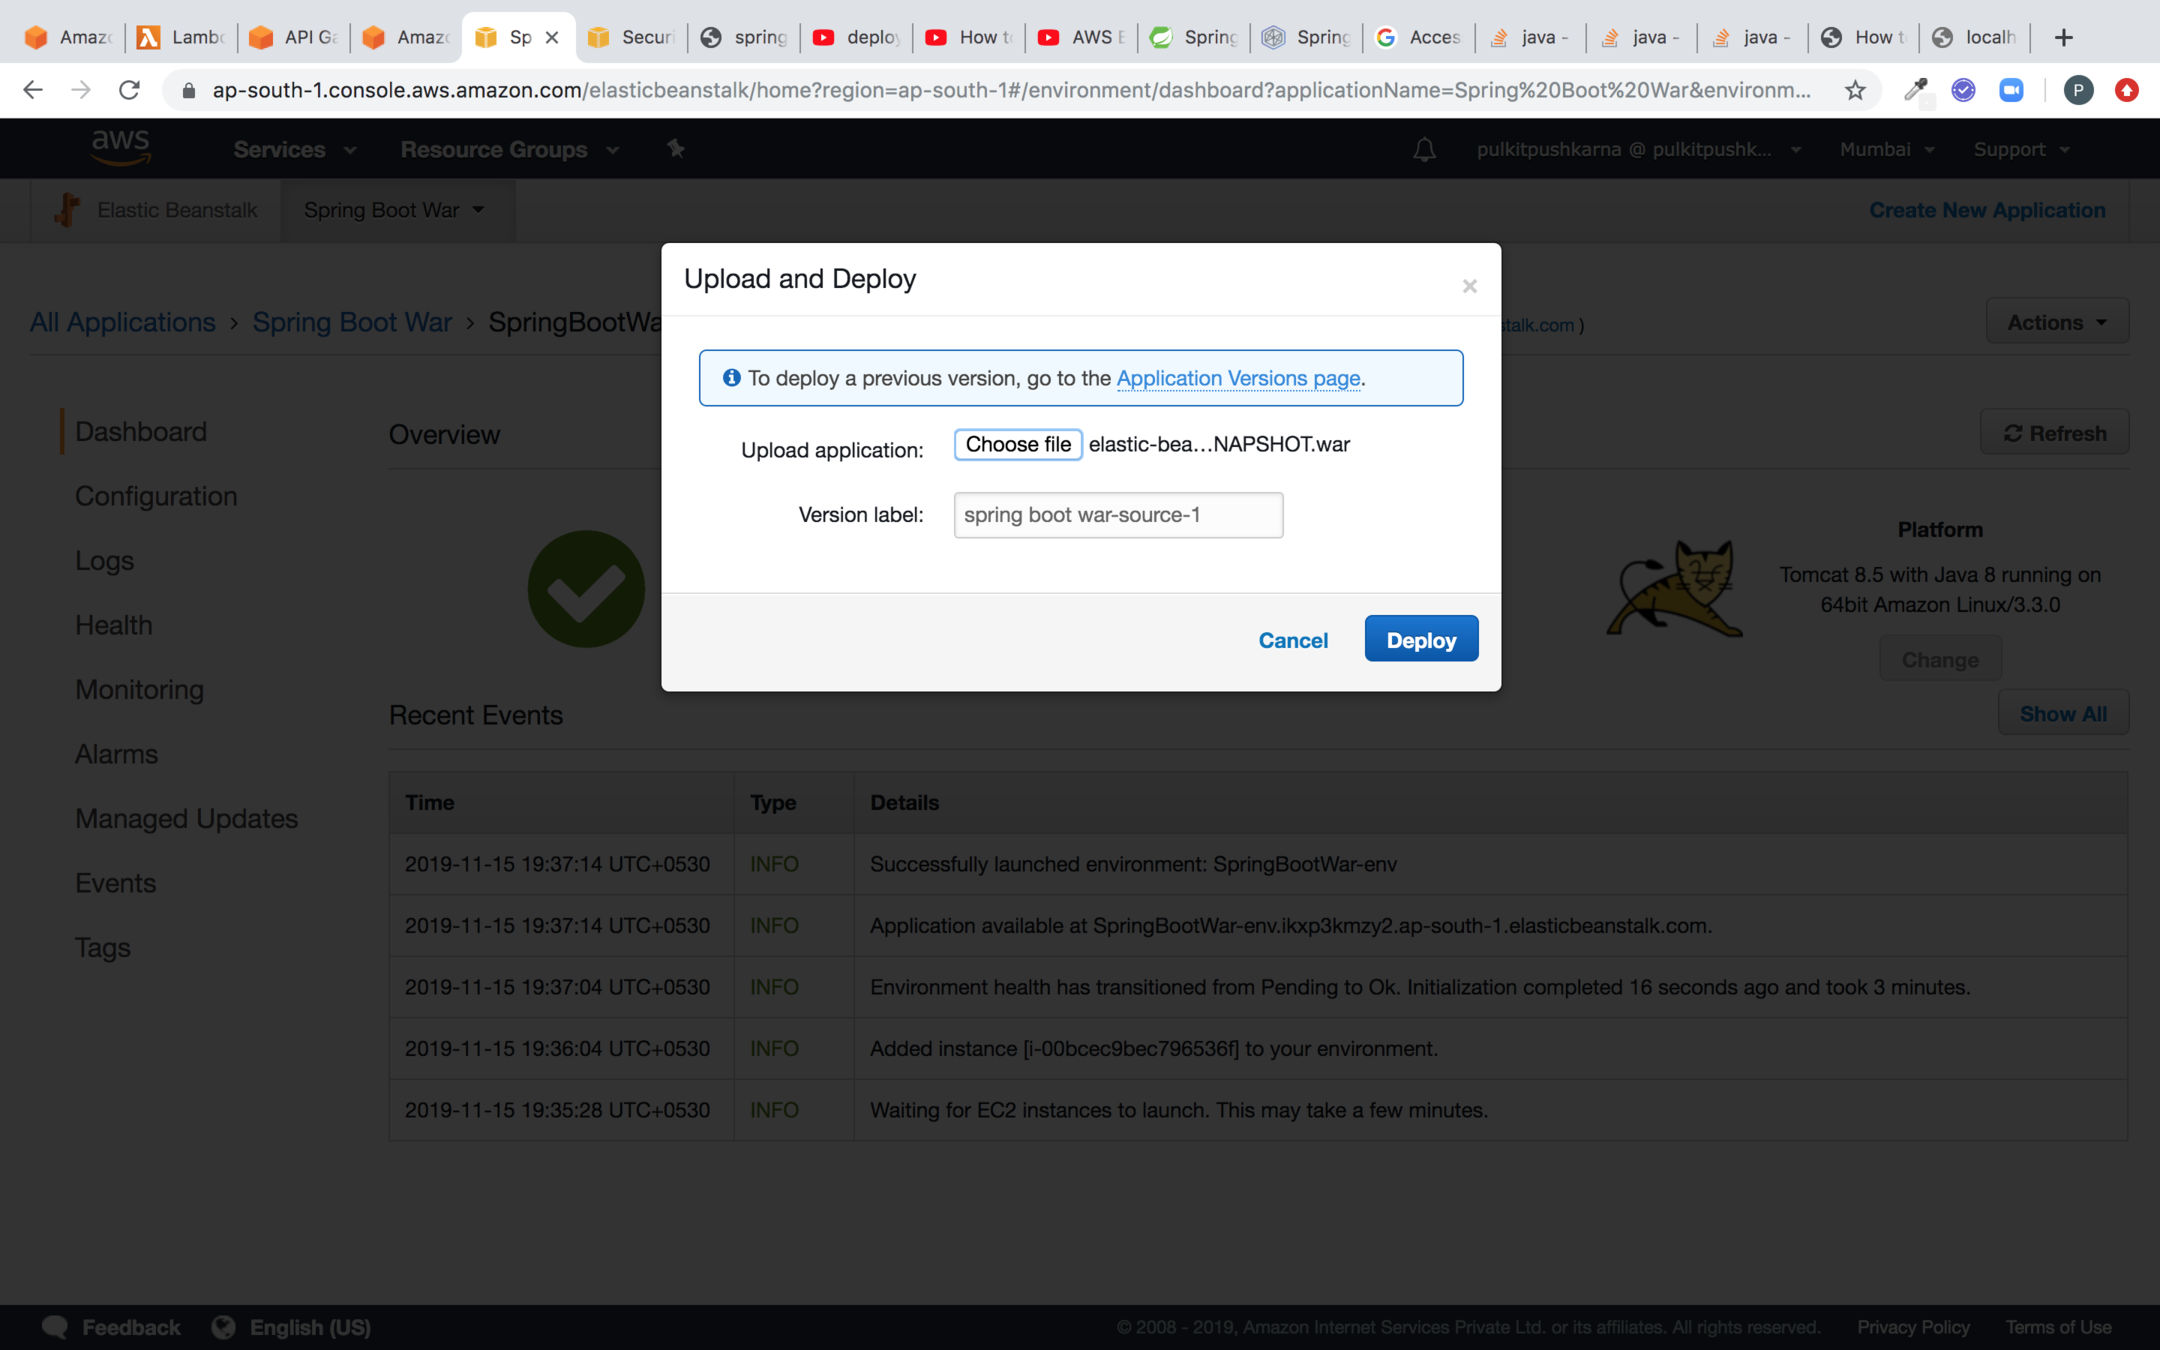
Select the war and click on deploy
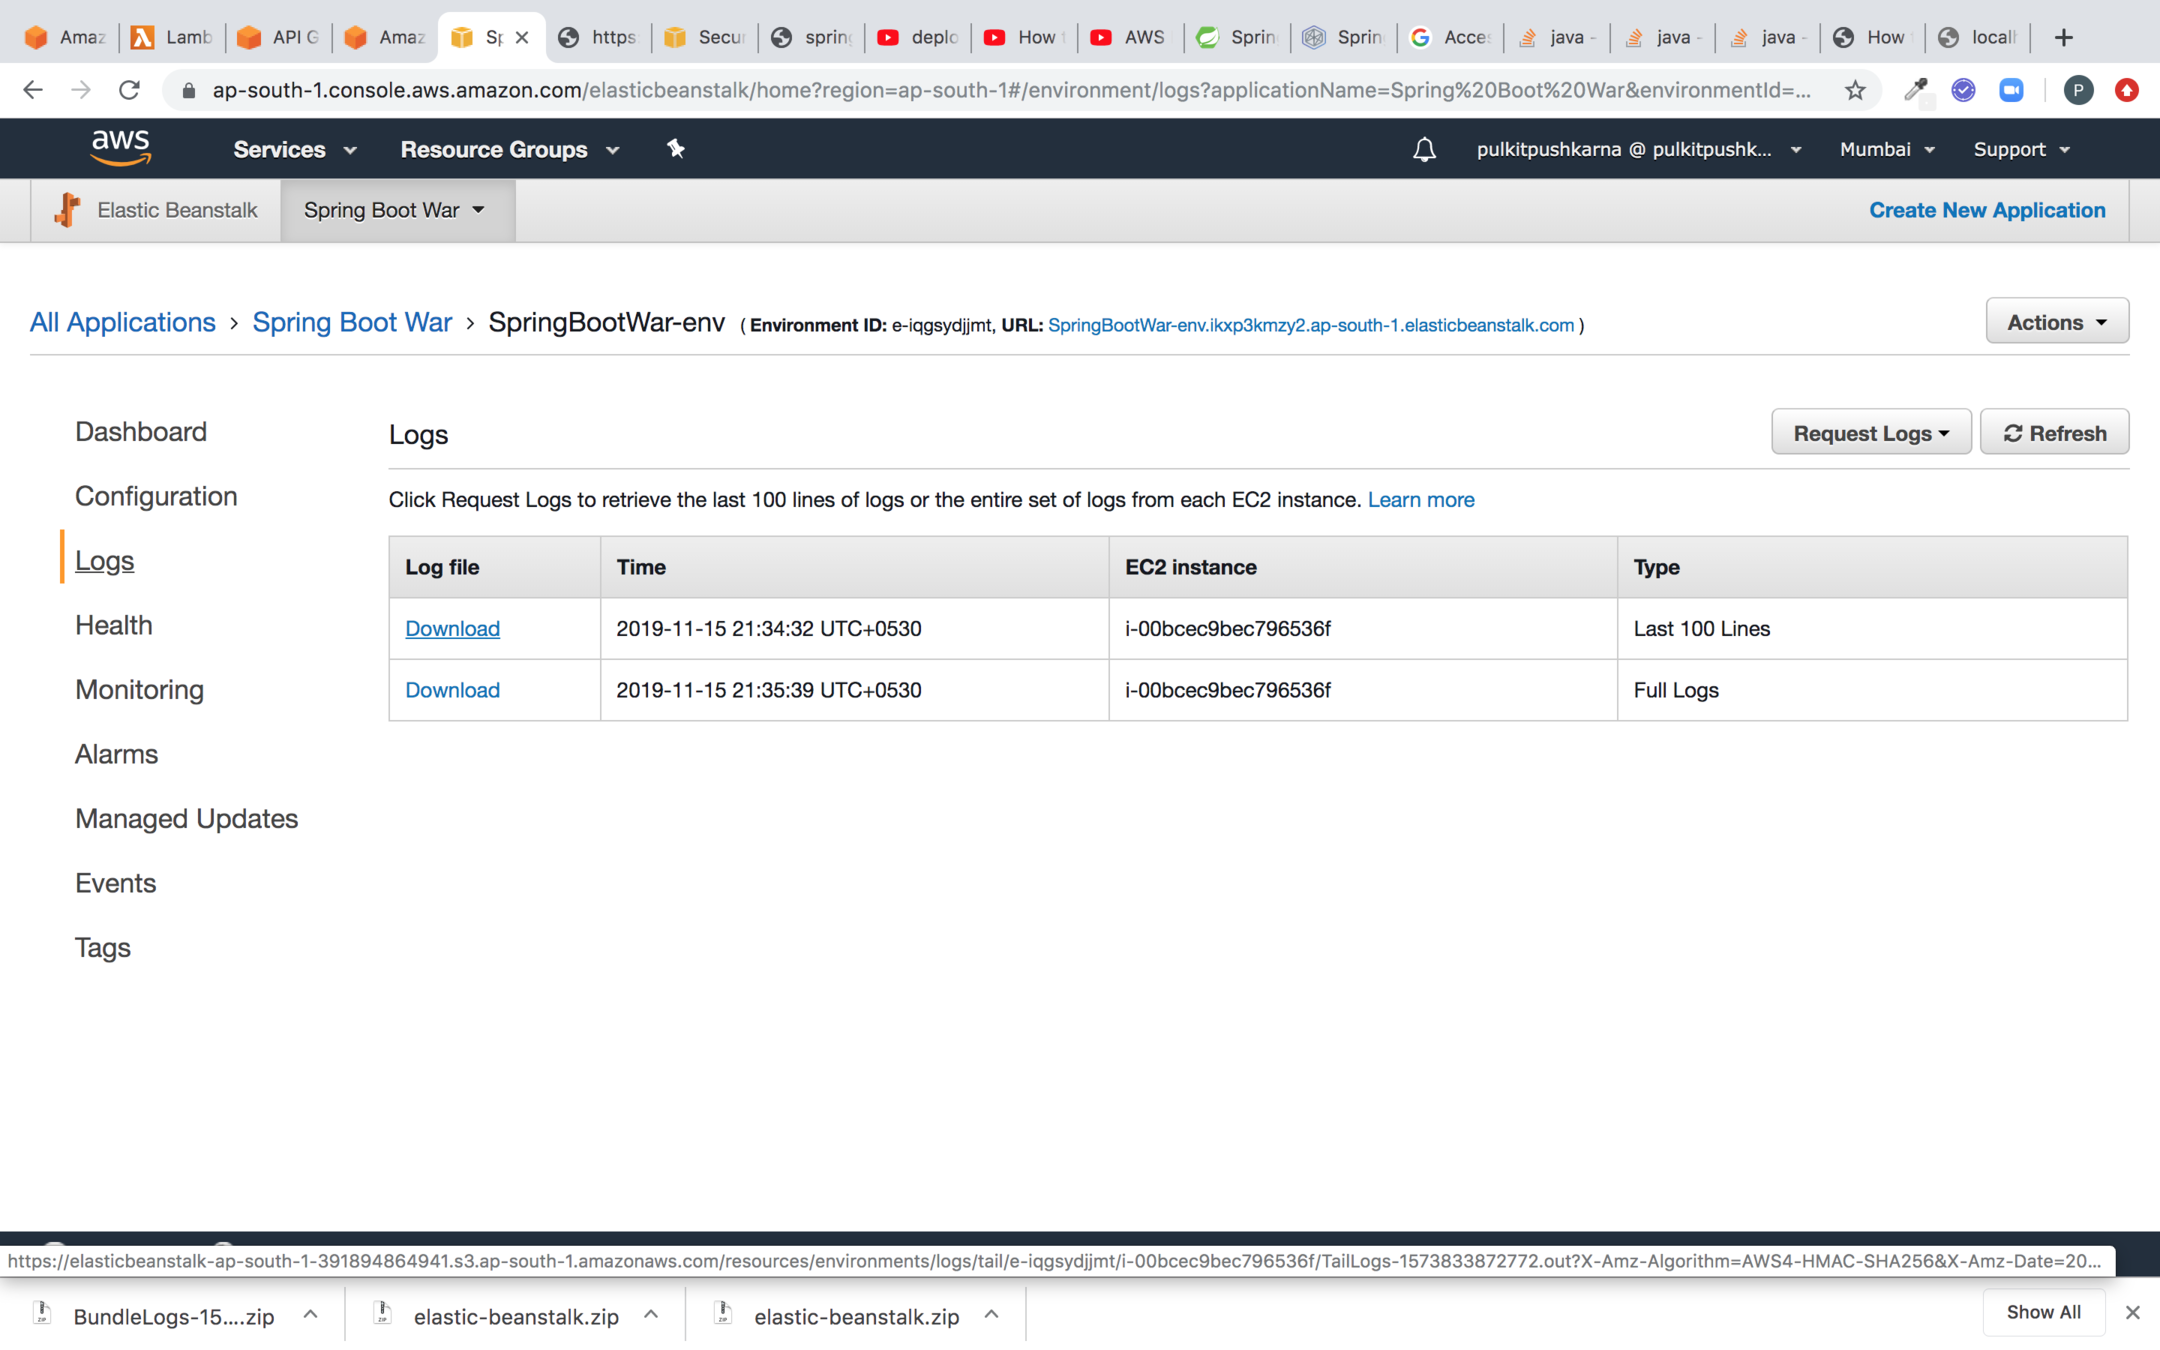
You can check the logs of the deployed application
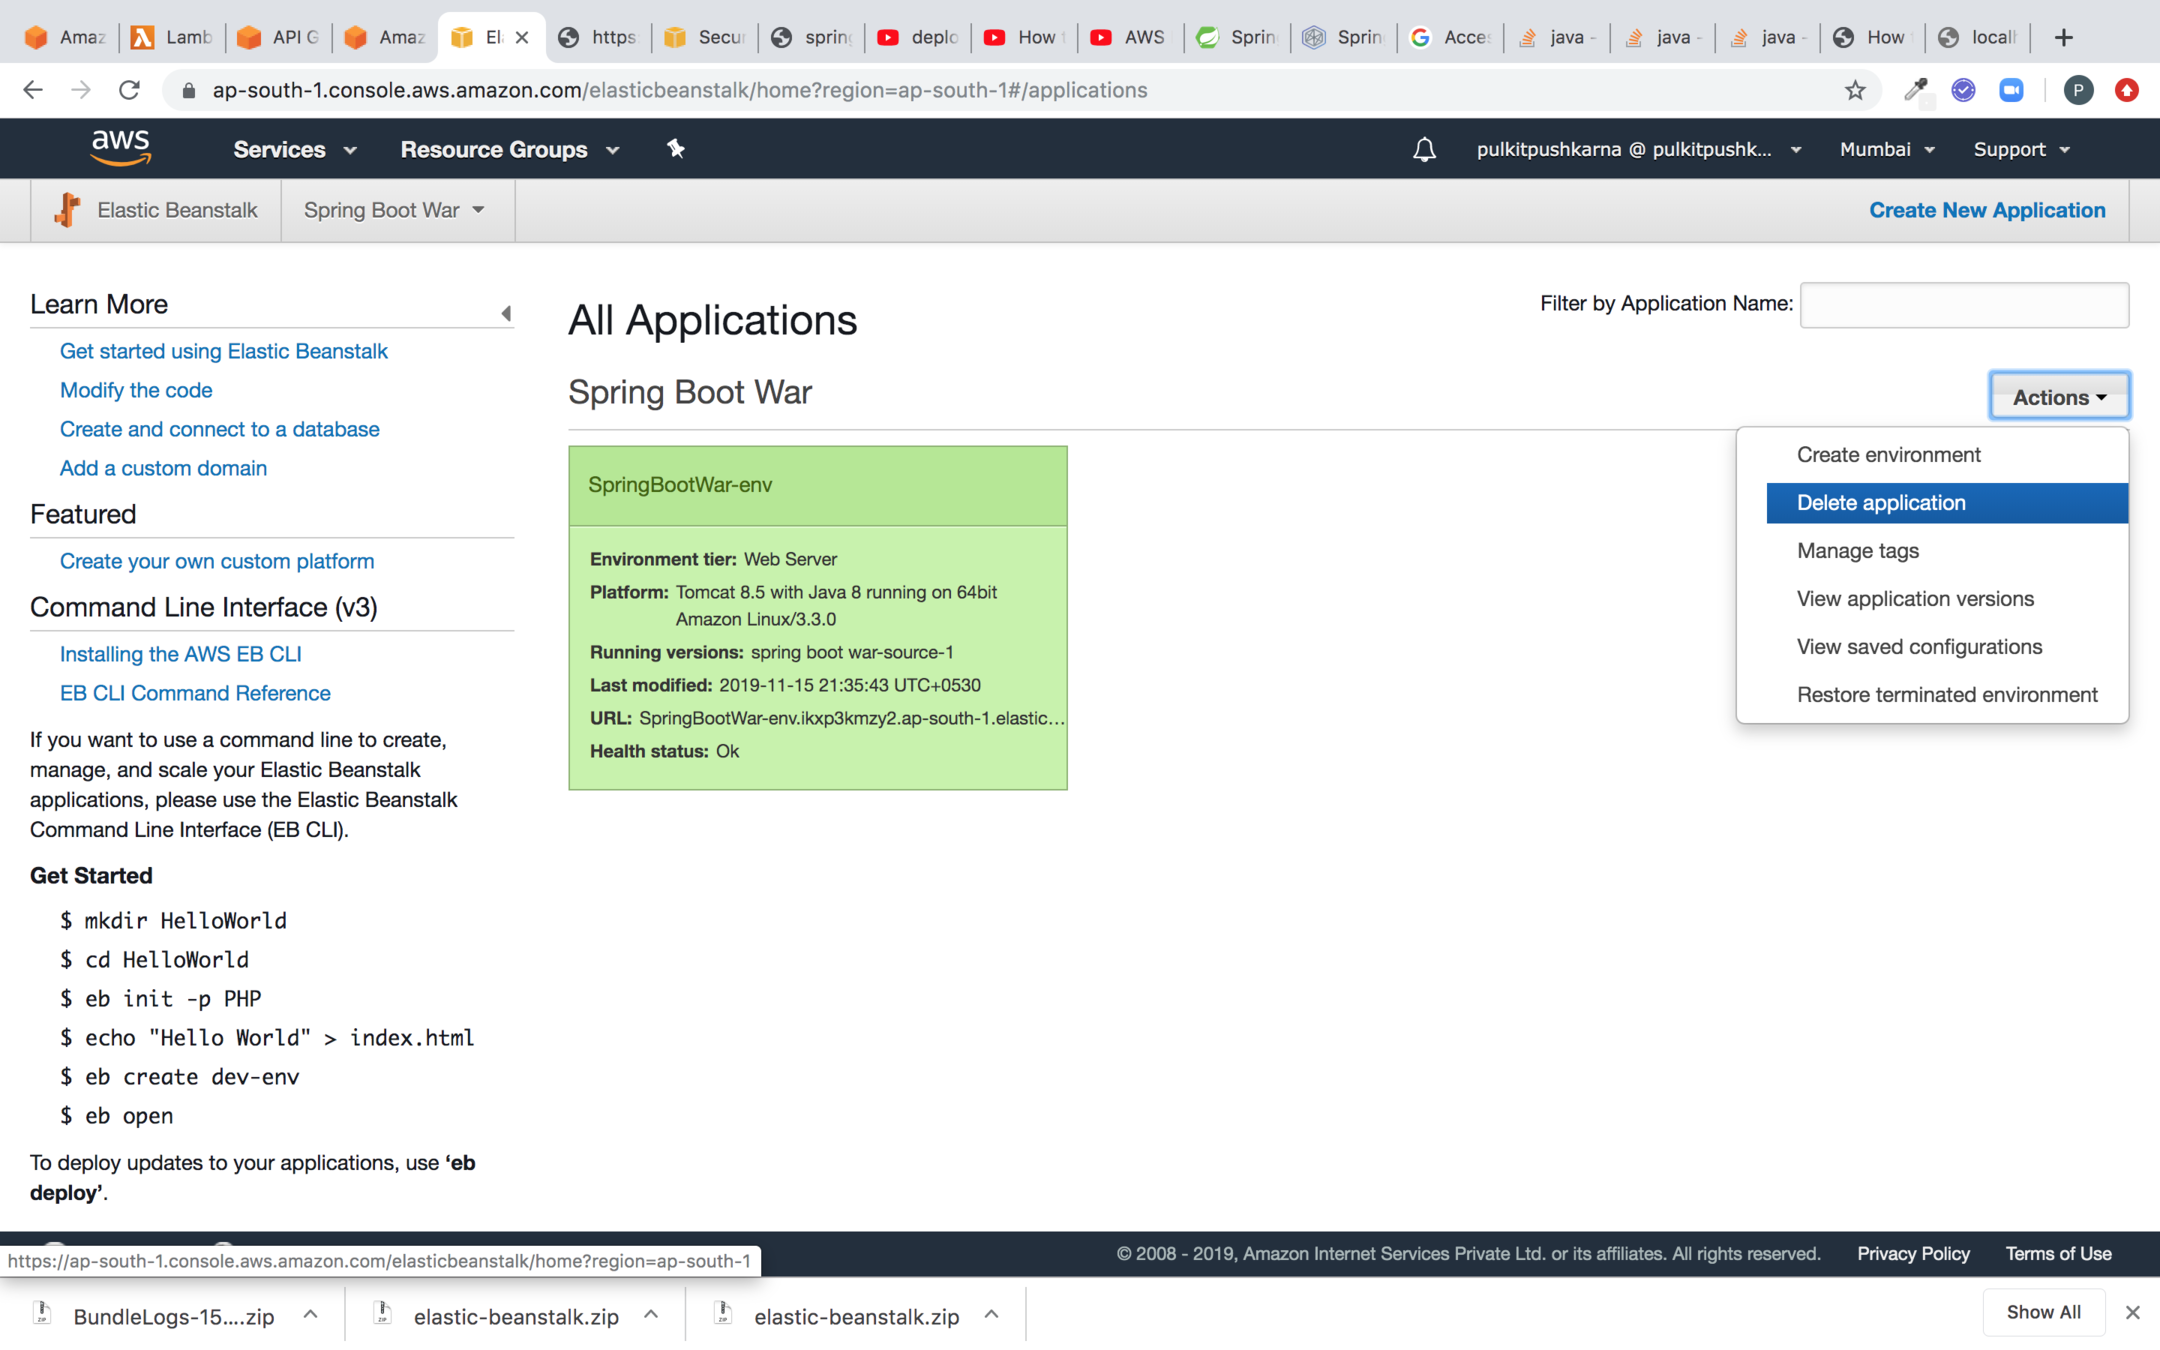
You can delete the application as shown below. It will also delete all the associated resources created by application

AWS for Java Developers Part 4
By Pulkit Pushkarna


