React Native
The confusing parts
React-Native link
App Signing
Disclaimer
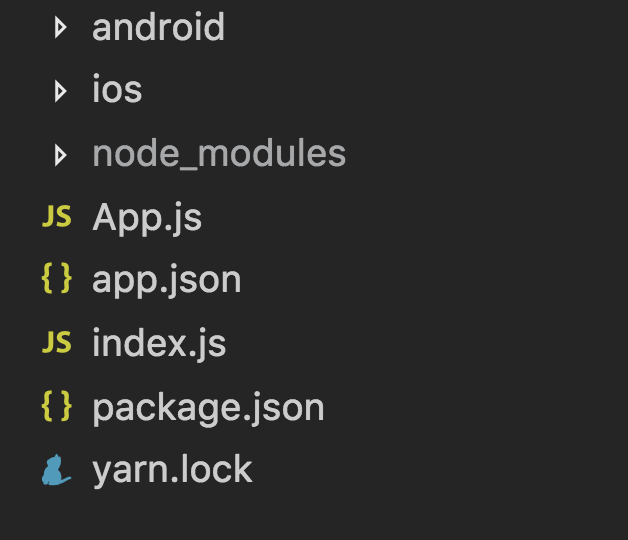
react-native init
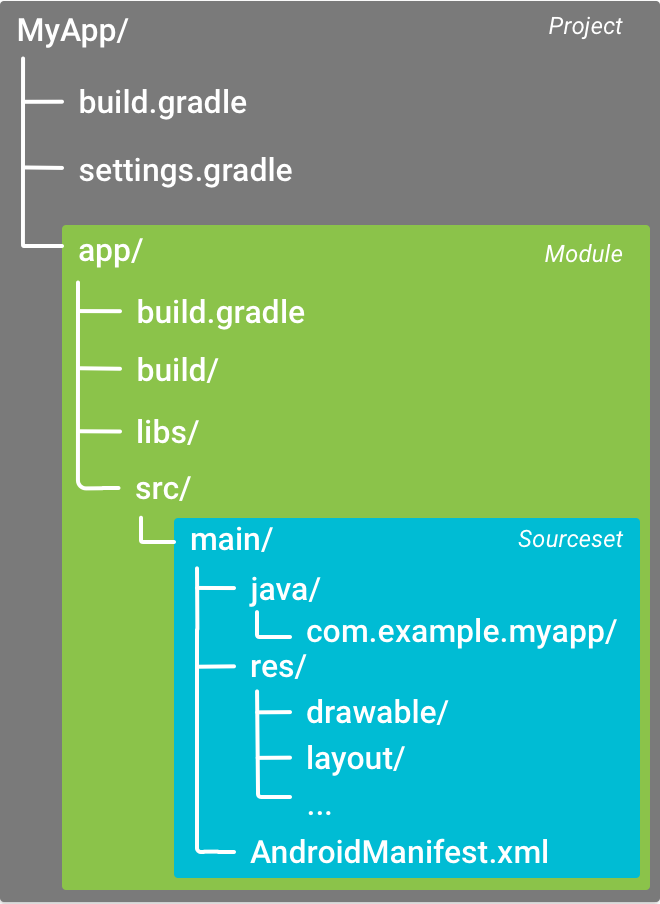
Default Android Project

Build Tool
Dependency Manager
Gradle files
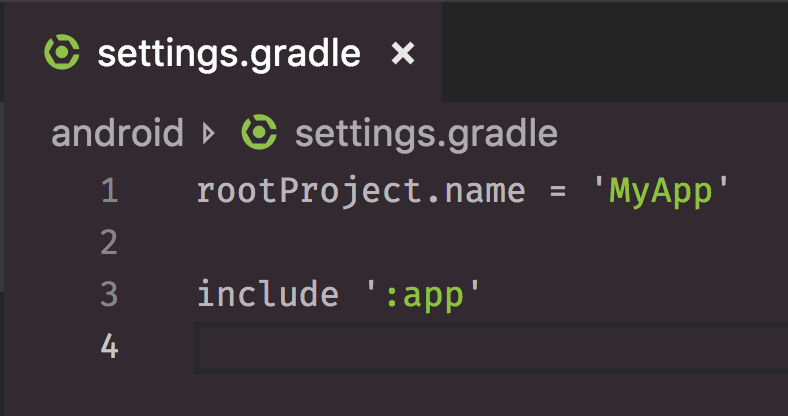
settings.gradle
-
Which modules should be included when building the app?
build.gradle
Top level build file
Module level build file
Top Level build.gradle
-
Every Android project has a single top level build file
-
Usually no need to change this file
Module Level build.gradle
-
Build settings for the specific app
-
Changed fairly often:
-
New app dependencies
-
Configure product flavours (e.g. free vs paid version)
-
Configure build types (debug vs release)
-
react-native link
-
settings.gradle
-
app/build.gradle
-
MainApplication.java
Gradle Wrapper (gradlew)
-
Usually you don't use Gradle directly
-
GradleW makes sure that
-
Every dev uses the same version of Gradle
-
Every dev can actually run Gradle (even if it's not installed)
-
Gradle Wrapper (gradlew)
-
When you run gradlew:
-
Parses the argument (e.g. assembleRelease)
-
Install the correct version of Gradle
-
Invoke Gradle to run the specified task
-
react-native init
iOS files
-
Start with main.m
-
Delegate to AppDelegate.m
-
Defines the initial ViewController
-
Links up to the JavaScript bundle
-
XCode project
-
Workspace: Collection of projects
-
Project: Collection of source code and resources
-
Target: Product, built using some of the project source code and resources
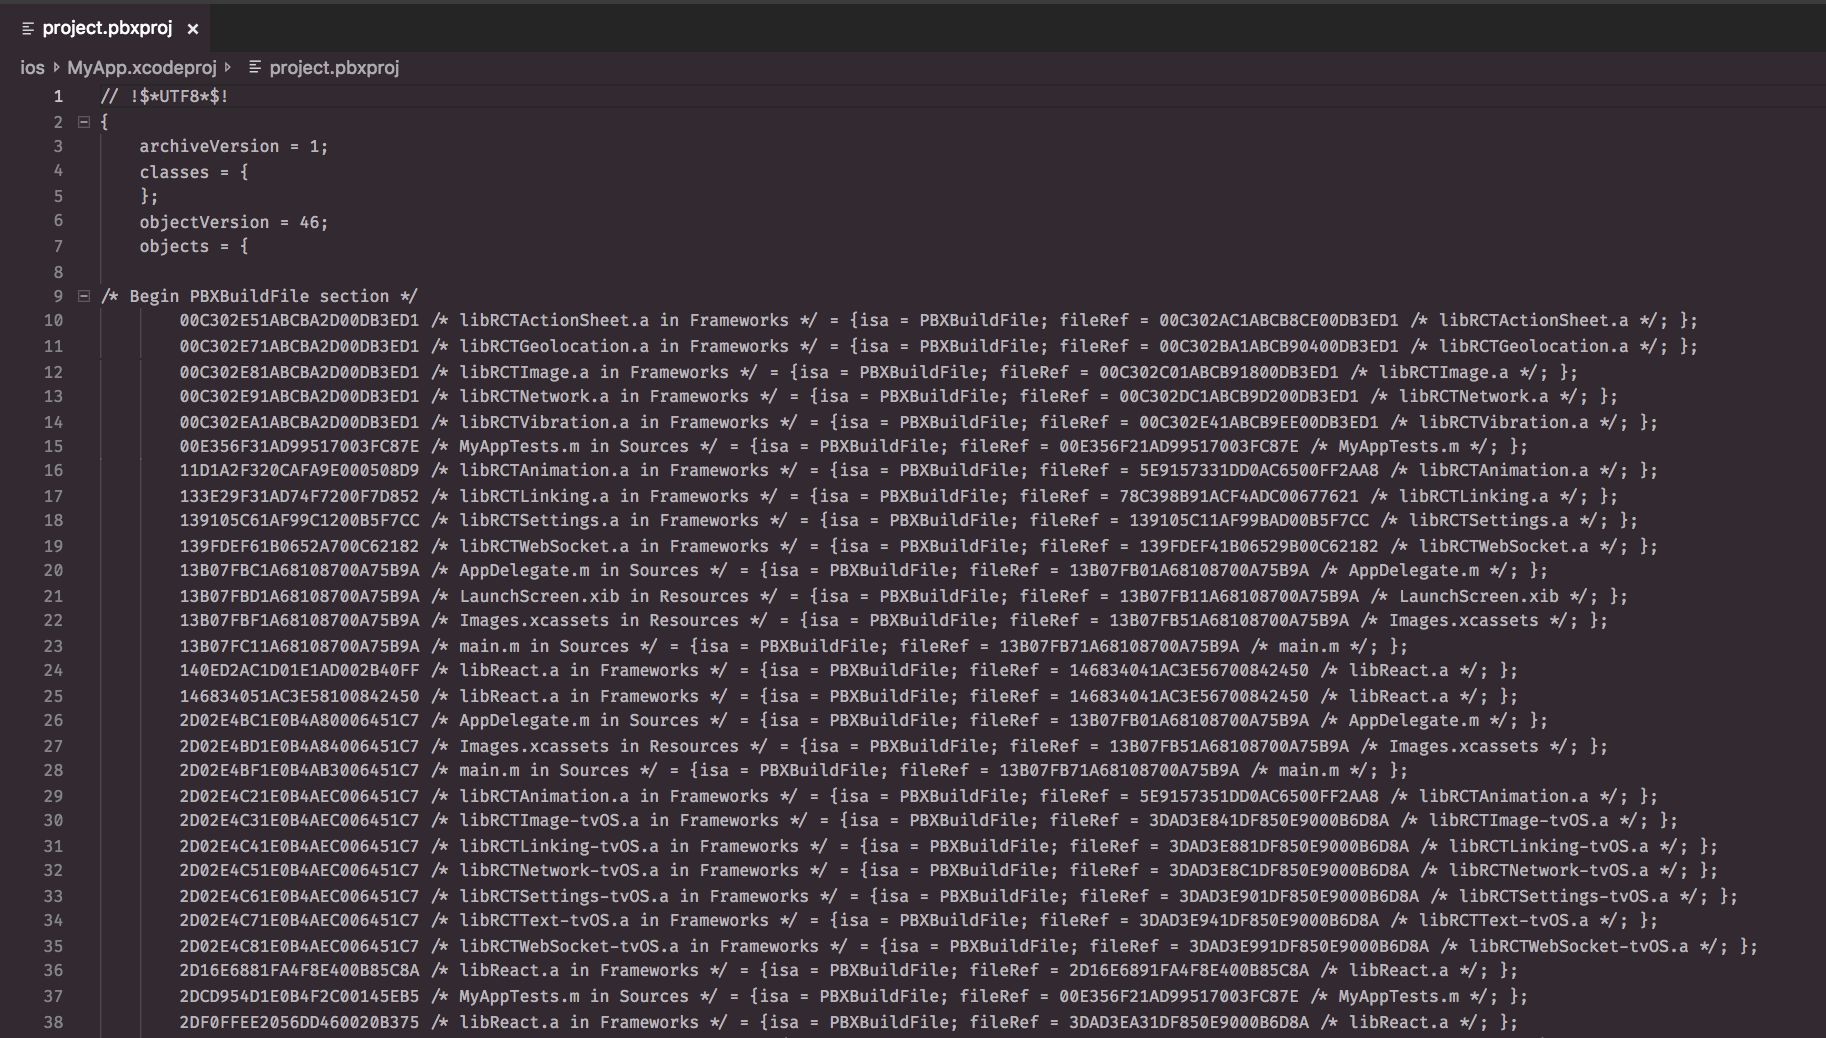
project.pbxproj
-
Used by XCode to keep track of everything!
- File references
- Metadata
- Build settings
- Targeted platforms
- config
- ...
Manually Linking Native Code on iOS
-
Update project.pbxproj to add new module to your project
-
Update project.pbxproj to link binaries of your new module
-
Update project.pbxproj to add module headers
project.pbxproj
Manually Linking Native Code on iOS
Step 1: Drag and drop native module into your XCode project
-
Makes the source files available to your targets
Manually Linking Native Code on iOS
Step 2: Link new binaries
-
Otherwise, JavaScrip crashes when importing the native module
Manually Linking Native Code on iOS
Step 3: Expose headers of new module
-
Only necessary if you need to know about the new module during compile time (e.g. AppCenter)
Alternative: CocoaPods
Dependency Manager for iOS packages
| CocoaPods | Yarn |
|---|---|
| https://cocoapods.org/ | https://www.npmjs.com/ |
| Podfile | package.json |
| Pods | node_modules |
| Podfile.lock | yarn.lock |
-
If you have pods: Open MyProject.xcworkspace, not MyProject.xcodeproj in XCode
-
Otherwise, your build will fail
React-Native link
-
Edits project.pbxproj file for you
-
Will use CocoaPods if new native package has a .podspec file
React-Native link, CocoaPods or Manual Linking?
- Try react-native link
- But inspect the changes. Make sure they make sense
- Otherwise:
- CocoaPods: More convenient
- Manual Linking: Deterministic
Required to install your app on a device
App Signing
(Unless your phone is jailbroken/rooted)
Allows the OS to:
-
identify who signed your app
-
verify that your app hasn’t been modified since you signed it
App Signing
Generate a keystore file:
Android App Signing
keytool -genkey -v -keystore
    my-release-key.keystore
    -alias my-key-alias
    -keyalg RSA -keysize 2048
    -validity 10000
Tell Gradle to sign your app
Android App Signing
android {
    ...
    defaultConfig { ... }
    signingConfigs {
        release {
            storeFile file("my-release-key.jks")
            storePassword "password"
            keyAlias "my-alias"
            keyPassword "password"
        }
    }
    buildTypes {
        release {
            signingConfig signingConfigs.release
            ...
        }
    }
}
Keep the keystore file secure!
-
Don't add it to git
-
Set a strong password
-
Otherwise, people can impersonate you, if they get hold of the keystore
-
Keep the keystore file secure!
-
Don't lose it!
-
Every apk that you publish should use the same keystore
-
Otherwise, Google PlayStore will force you to publish your app under a new name
-
Keep the keystore file secure!
-
Set a far expiry date
-
Once the keystore expires, you can't publish updates to your apps anymore
-
Keep the keystore file secure!
-
Set a far expiry date
-
Once the keystore expires, you can't publish updates to your apps anymore
-
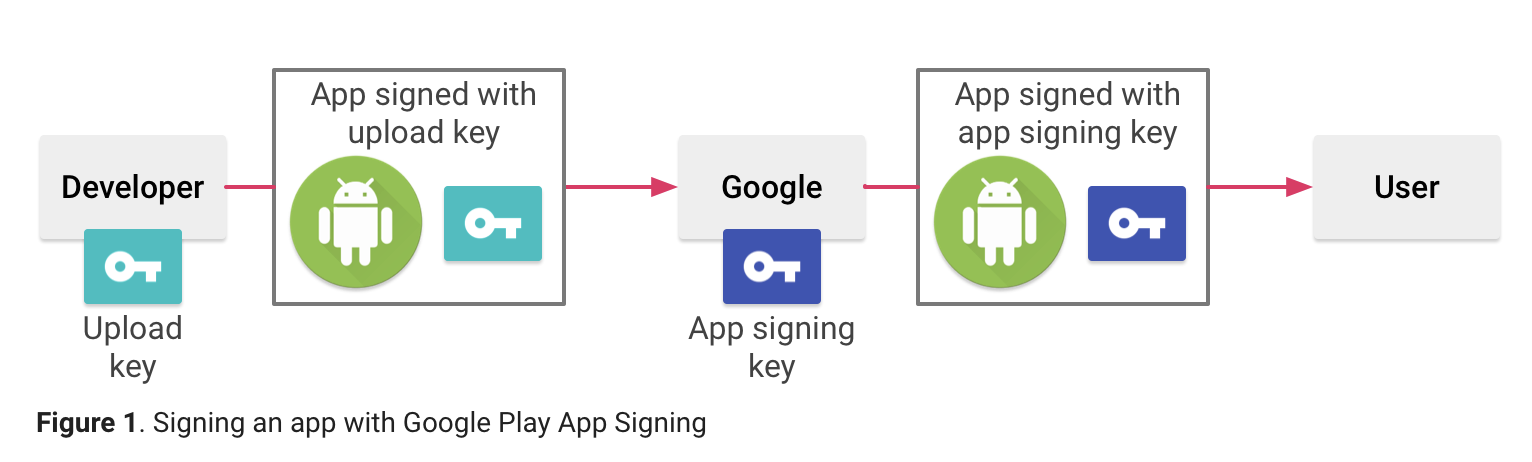
Google Play App Signing
iOS App Signing
Certificate
-
Public Key + additional info
-
Needs to be signed by Apple
-
-
Create a private key and CertificateSigningRequest locally
-
Upload Request file in Developer Portal
-
Apple returns a Certificate
-
Certificate
-
For iOS, there are 2 types
-
Develop Certificate: For Debug build
-
Distribution Certificate: For Release build
-
Certificate
-
You can sign app with your certificate
$ codesign -f -s "iPhone Developer:
    Brian Azizi (7TPNXN7G6K)" Example.app
$ codesign --verify Example.app
$-
OS can then verify the app
-
Signing seals the app
$ echo 'lol' >> Example.app/Example
$ codesign --verify Example.app
Example.app: main executable failed strict validation
Signing iOS apps
-
A lot of information is embedded in the signature:
-
App ID
-
Entitlements
-
$ codesign -vv -d Example.app$ codesign -d --entitlements - Example.appApp Signing: Android vs iOS
Difference 1:
-
On Android, you can sign your App with any keystore
-
On iOS, the Signing Certificate itself needs to be signed by Apple
App Signing: Android vs iOS
Difference 2:
-
On Android, app signing is enough to install your app on a device
-
On iOS, you also need a provisioning profile
Provisioning Profile
-
Generated on the Developer Portal
-
Ships with the iOS app:
-
The device checks that the profile is valid before installing the app
-
Provisioning Profile
-
Provisioning profile contains:
-
App ID of the app
-
List of allowed devices
-
List of allowed certificates
-
List of allowed entitlements
-
-
If any don't match, the device app icon will be greyed out on your phone
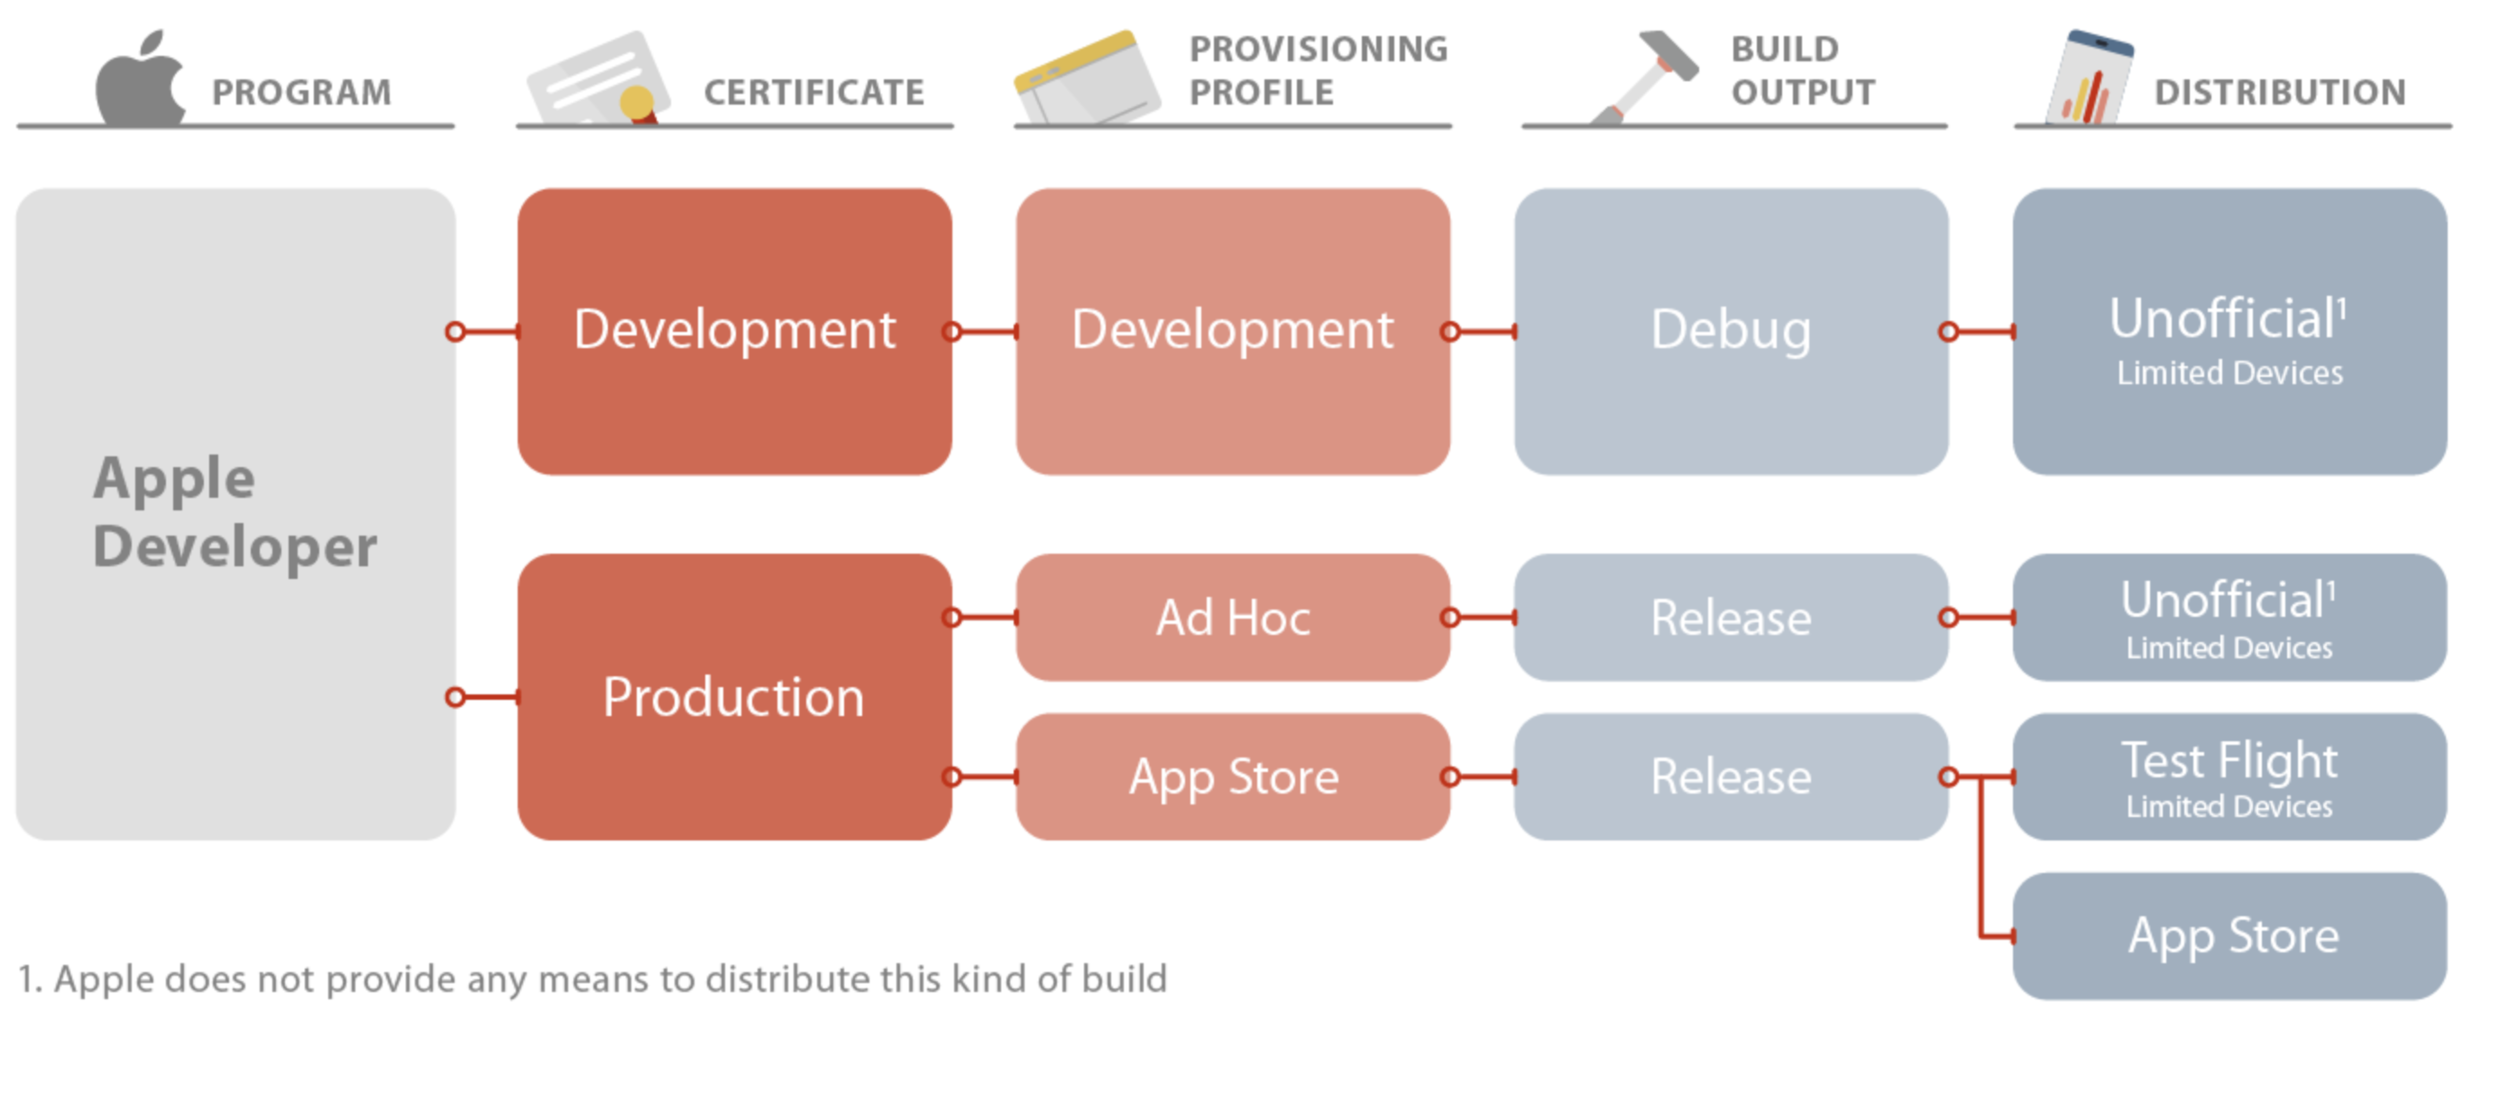
Types of Provisioning Profiles
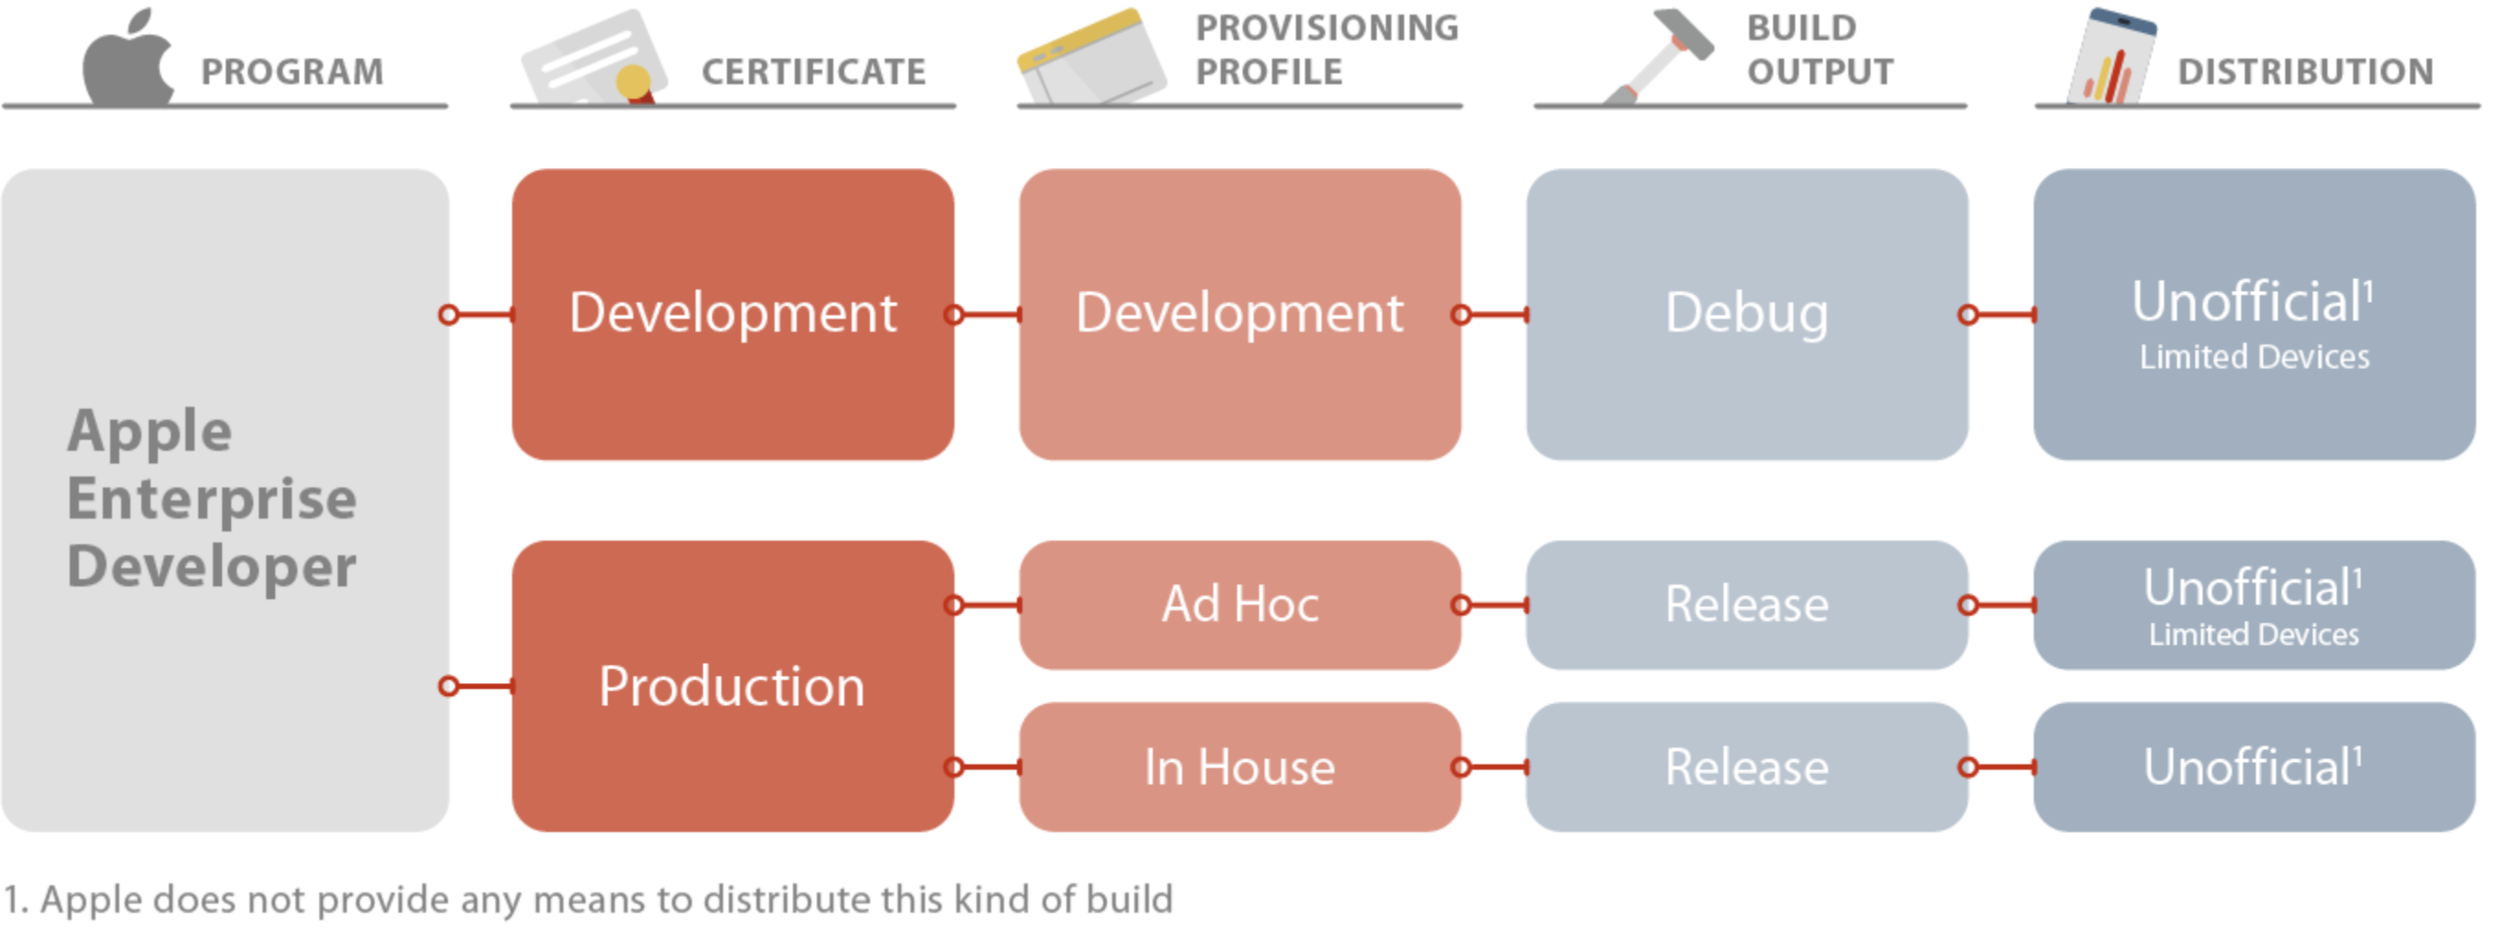
Enterprise Program
Conclusion
-
Don't be scared of native code
Next time:
React Native: The confusing parts
By Brian Azizi


