ECSE 321 - Tutorial 4
Dominic Charley-Roy
https://github.com/dominiccharleyroy
dominic.charley-roy @ mail.mcgill
JUnit & Travis

Basic Introduction
JUnit is a unit testing framework for Java.
What does that even mean?!
Unit tests are small tests which are responsible for testing a single rule of your program. JUnit provides classes and methods for writing these tests and runs them automatically.
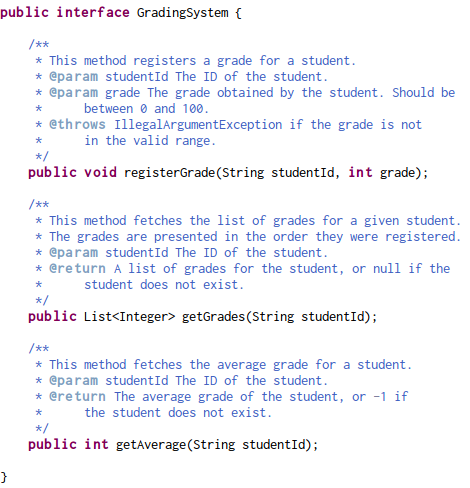
Motivating Example
- A Grading System class which lets you add grade, get a list of student's grades, and compute the average.
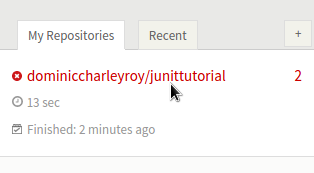
- You will want to fork https://github.com/dominiccharleyroy/junittutorial in order to have your own copy of this tutorial.


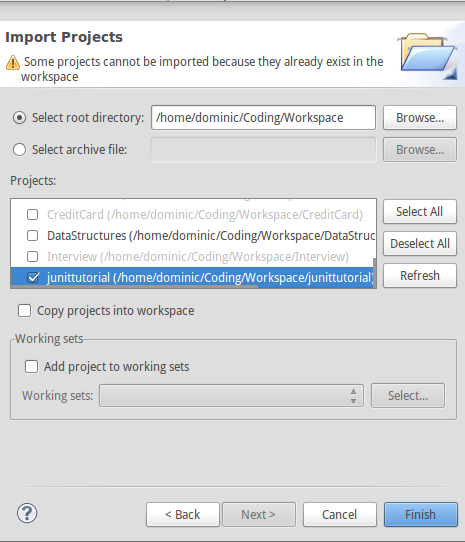
Importing into Eclipse
1. Clone your new repository:
git clone url
2. Open Eclipse
3. File > Import > Existing Projects into Workspace
4. Set directory to the directory containing your cloned repository.
5. Select the project an import!
Example Overview
Adding JUnit
In order to test our implementation, we need to add the JUnit library to our project.
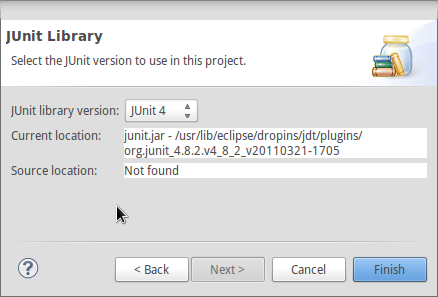
1. Right-click project > Build Path > Add Libraries...
2. Select JUnit and Next
3. Set JUnit version to 4
Non-Eclipse Users
If you aren't using Eclipse, you have to take some extra steps to install JUnit in your project.
1. Go to https://github.com/junit-team/junit/wiki/Download-and-Install
2. Download junit.jar
3. Add junit.jar to your project's class path
Anatomy of a JUnit Test
- A Java class usually has a corresponding test case class. If the class is called A, then the test case class is ATest.
- A test case has tests which are methods. Each test should correspond to one single functionality / logic rule. Usually prefixed with test and describe what is being tested, eg. testGetName or testSetAgeWithNegativeValue.
- Many test cases can be bundled together in a test suite.
- JUnit lets you run either a single test, all tests in a single test case, or all tests in a test suite.
Where are tests stored?
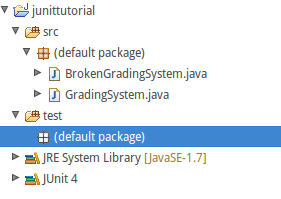
- Tests are usually kept separate from our src/ folder to keep things clean and allow tests to be easily included/excluded from a jar file.
- We store them in a test/ source folder. In Eclipse, we create this like:
- Right-click project and New > Source Folder
- Set Folder Name to test and click Finish.
Creating a Test Case
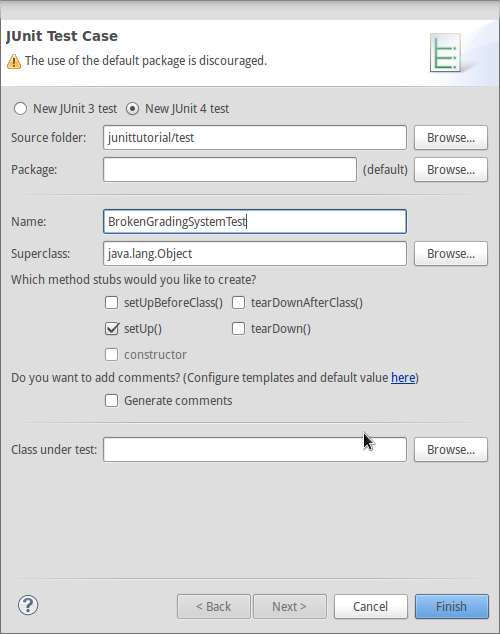
Let's create a test case for BrokenGradingSystem!
1. Right-click test/, New > JUnit Test Case
2. Set the name to BrokenGradingSystemTest.
Running a Test Case
Once we've added tests, we'll want to run an entire test case. JUnit follows a special process for this based on method annotations. These must be imported (eg. import org.junit.Test).
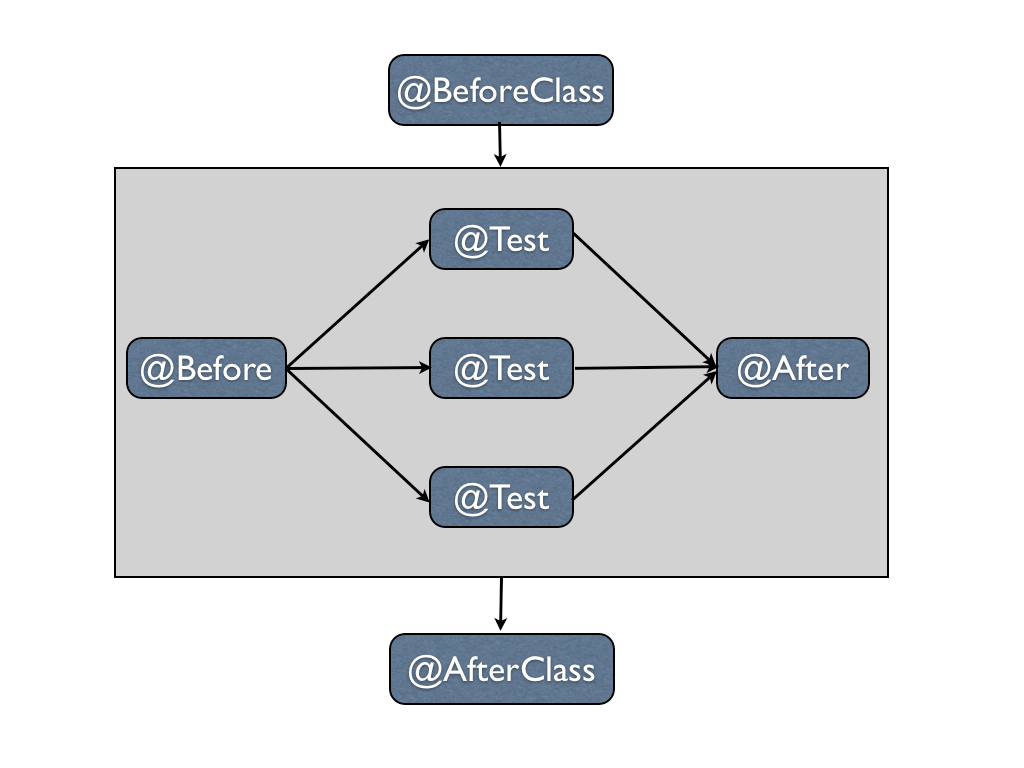
BeforeClass/AfterClass methods should be static and are only run once. Before/After methods should be non-static and are run before and after every test (for setting up / cleaning up).
What's in a test?
- A test is any method annotated with @Test.
- A test runs code and makes assertions about it.
- If any assertions are false in the test, the test fails.
- JUnit provides many different assert statements, including: assertEquals, assertNull, assertTrue, assertFalse.
- JUnit also provides a method for automatically failing, fail.
-
Generally put import static org.junit.Assert.*; to have access to all assert methods without qualifying.
Our First Test!!
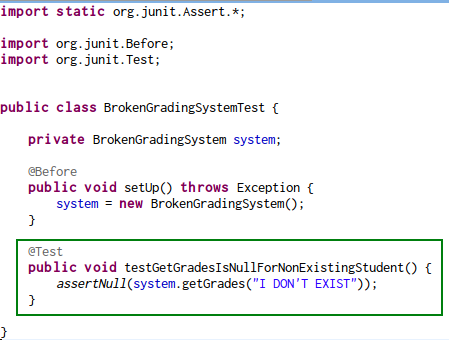
The first test is that getGrades returns null for a student that doesn't exist.
We use @Before to create a new Grading System for each test.
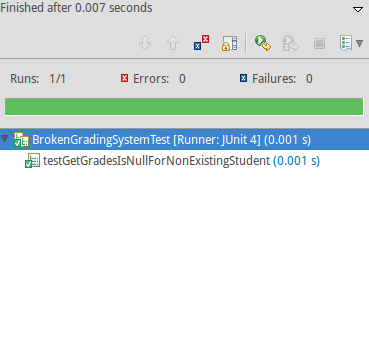
Running our Test Case
We're now ready to run our test! We do this by either hitting the run button when our test file is open, or by right-clicking on the *Test file and Run As > JUnit Test
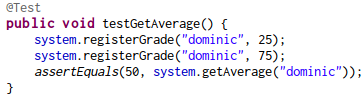
Testing getGrades Works!
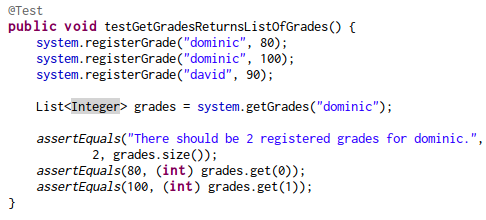
Note that assertEquals, as do most other assertions, have two signatures.
1. assertEquals(expected value, obtained value)
2. assertEquals(message, expected value, obtained value)
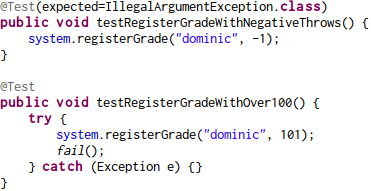
Testing Exceptions
Some tests should only pass if an exception is thrown! There are two ways of testing this.
1. (Preferred way)
@Test(expected=ExceptionName.class)
2. Wrap the code in a try catch and put a fail() after the call which should throw an exception.
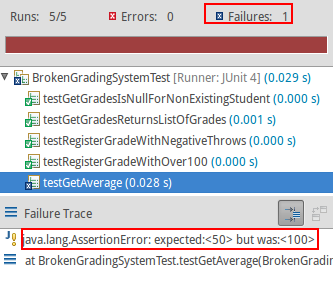
Finding a Bug!

Who is this Travis fella?
- Travis is a continuous integration service.
- Brief summary: Travis looks after the health of your project, running tests every time you push a commit to GitHub.
Getting started with Travis
First step is to go to https://travis-ci.org/

2.

3.

4. Enabling Travis for your repo
Note about Travis
Travis uses a .travis.yml and build.xml file to describe what Travis should do. I've included these files as well as a lib folder in the original repository for Travis.
If you want to use Travis on your own project, the simplest way is to keep the same src/ and test/ structure and copy over travis.yml, build.xml, and the lib folder.
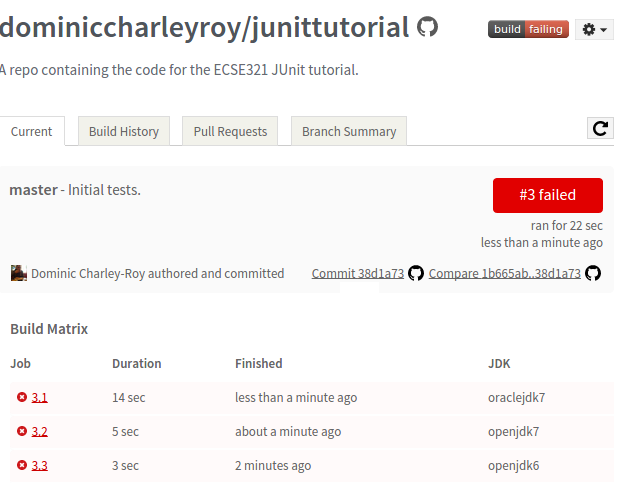
Our first Travis build
- Travis will build your project and run tests on every commit!
- To get Travis started, let's push your test:
git add .
git commit -m "Initial tests."
git push -u origin master
Travis will take a while to get set up on your first push, so just be patient.
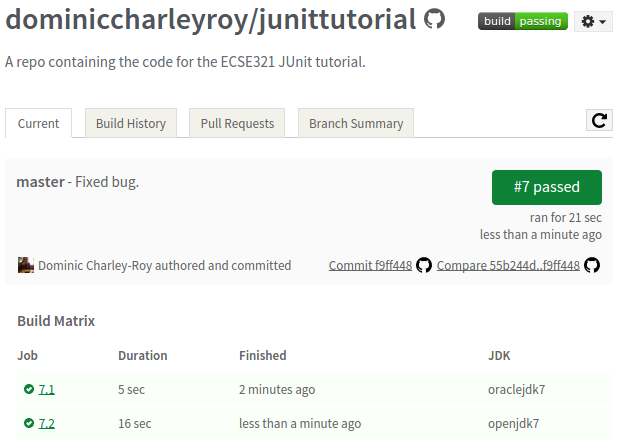
Viewing your Repo Status
Once we've kicked off our first build, after waiting a minute or so we should be able to see the status by going to the Travis page and clicking on our repository.
Time to fix our code!
Our test helped us pinpoint a bug in getAverage, so let's take a look at our function.
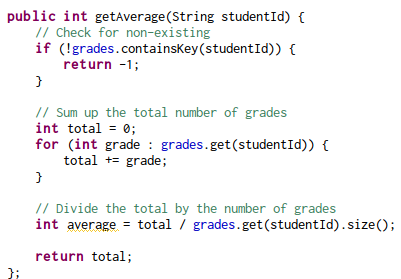
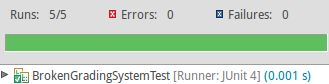
Once it's fixed...
After fixing our bug, we run the JUnit tests and then commit.
TL;DR
- JUnit lets you write tests which can be run automatically to find bugs in your application.
- Travis is a tool that runs these tests every time you push to GitHub.
- These let you find new bugs as well as make sure new features aren't breaking old code (regression bugs).
- Note: Test-driven development works by writing tests first and then coding to make the tests pass.
Copy of ECSE 321 - Tutorial 3
By dominiccharleyroy