ECSE 321 - Tutorial 1

+


Dominic Charley-Roy
https://github.com/dominiccharleyroy
dominic.charley-roy @ mail.mcgill
Before we get started...
My name is Dominic Charley-Roy! I'm a U3 Honors Software Engineering student! This is my first time as a TA so if there is anything I can do to improve or to make your lives easier, please let me know!
Questions? Don't be shy to interrupt me! ツ
Tutorial slides are available in PDF and HTML form at https://github.com/dominiccharleyroy/ecse321
Quick Poll
- Who has used the command line?
- Who has used Git?
- Who has used GitHub?
What is Git?!
Before I tell you all to download a random program...
Git is a version control system!
Version control system?!
This is a software system which keeps track of changes to a group of files. Ideally, it lets you do the following:
- See changes to files over time
- Go back to an older version of a file
- Undo changes from a given version
- Much more advanced functionality...
Why do we need version control?


You could do it by hand, but then...
- Maintaining versions by hand is tedious
- Figuring out what changed is hard
- Sharing with others is difficult
- What if you only want to undo a change from v2, but keep changes from v3?
Windows
Mac OSX
Let's get started!
brew install git
Linux
apt-get install gitOnce installed, either open up the terminal (Mac OSX/Linux) or git bash (Windows)
The repository
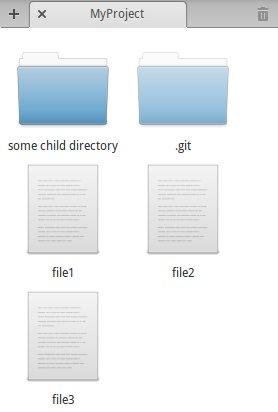
A repository is any folder that you which to keep track of using git.
Git adds a .git folder containing metadata when instantiating a folder as a repository.
# Create the project folder
mkdir MyProject
cd MyProject

# Instantiate the folder as
# a git repository.
git init
Populating the folder...
To get started, let's create 2 files in MyProject.
- Create song.txt and add your favorite song lyrics to it.
- Create wiki.txt and copy the text from any wikipedia article over to this file.
Our first commit
- A commit is a set of changes to a Git repository.
- Think of it as a small version: every commit represents a new version of your repository.
- A commit contains a list of files which were modified, added, and deleted since the last commit.
- A commit has a message describing the change as well as a unique identifier (a SHA-1 hash)
eg. ca82a6dff817ec66f44342007202690a93763949
So we've made some changes...
We now need to specify what changes we want to package up in our commit! We do this by moving changes to the staging area. Before being staged, a file is in the working directory (containing all changed, unstaged files). All files staged in the staging area are included in the commit.
Why is the staging area separate?

If we are working on many files and only want to save some in a commit!
Simply add those files to the staging area!
Staging our files
The git add command supports staging both new files and changed files. The syntax is:
git add filenameNote that you can also put file globs / wildcards here!
# Stage all files/folders in current directory
git add .

# Stage all files starting with pic
git add pic*
Let's stage our files!
git add song.txt
git add wiki.txtCommitting our change!
We're now ready to commit our change! This is done via the git commit command.
git commit -m "Description goes here"Note that the commit message (-m) is optional! If you don't specify one, it will open a text editor and let you enter one there.
If the commit is succesful, a shortened version of the unique identifier is given (eg. f38b79b) and a list of the commit changes are output.
Let's make more changes!
So version control isn't all that useful if you don't make any more changes!
- Change the lyrics of your favorite song in song.txt
- Delete wiki.txt - Wikipedia isn't a source!
Wait - I forgot what I changed!
Suppose we leave our project for a few days. When we come back, we can't remember what we changed! Enter git status, one of the most useful commands! It lists all the current changes in the working directory as well as in the staging area.
Remember - the staging area is "reset" after committing, but not the working directory.!
$ git status
# On branch master
# Changes not staged for commit:
#   (use "git add/rm <file>..." to update what will be committed)
#   (use "git checkout -- <file>..." to discard changes in working directory)
#
#	modified:   song.txt
#	deleted:    wiki.txt
But what did I really change?
So git status shows us the new/modified/deleted files - but what if we want to see what acutally changed in a file? The git diff shows us all the changes between the current working directory and the last commit.
git diff

diff --git a/song.txt b/song.txt
--- a/song.txt
+++ b/song.txt
@@ -6,7 +6,7 @@ Oppa Gangnam Style
 Gangnam Style

 Op, op, op, op
-Oppa Gangnam Style
+Oprah got no style
 Gangnam Style

diff --git a/wiki.txt b/wiki.txt
deleted file mode 100644
What else can diff do?
git diff is extremely powerful!
Here's a short list of things it can do:
1. Show the difference between the current working directory and a specific commit
git diff commit-id-goes-here2. Show the difference using the staging area and not the working directory
git diff filename3. Show the difference only for files matching a given name / wildcard pattern
git diff --cachedCommiting our song changes
Let's make a commit to save only our changes to the song.txt file and not our removal of wiki.txt
git add song.txtStep 1: staging the file
If you run git status at this point, you'll see that song.txt is in our staging area (eg. changes to be committed)
git commit -m "Improve song."Note: At this point only changes to song.txt is in the staging area.
Step 2: committing the change
Commiting our wiki change
Now we want to commit the fact that we deleted wiki.txt.
Recall that git add works for created/modified files. What about deleted files? We have to use git rm to add the deletion to the staging index.
git rm wiki.txt
git commit -m "Removed wikipedia file."
Commit history
As a project grows, you'll find yourself wanting to see the history of commits to a certain project. To do this, you use the git log command! This shows the name, date and unique ID of commits, in chronological order
git log

commit 440695e7810f4ec3d01d277e91a3c63b7a069b7b
Author: Dominic Charley-Roy <...>
Date:   ...
    Removed wikipedia file.

commit f9494d46c78fc5e20d166ec1fa2060a25b7f7089
Author: Dominic Charley-Roy <...>
Date:   ...
    Improve song.

commit 6206e8b088d8967a7d2da86629ba4e18ea88c0ac
Author: Dominic Charley-Roy <...>
Date:   ...
    Initial commit.
Checking out an older version
Suppose we wanted to temporarily put our repository back to an older version to see what it looked like. A git repository has a piece of metadata called the HEAD. This is what commit the repository is currently at.
To move the head to an older commit, we use git checkout
git checkout commit-idNote that your command line changes from (master) to (commit-id), letting you know where HEAD is. To go back to the latest commit (master), we do:
git checkout masterOh no - how do I undo?!
One of the best features offered by version control is the ability to undo/revert a commit. The git revert command creates a new commit which is the reverse of the commit you wish to undo. Let's undo our song changes.
git revert commit-idHow do we find our commit ID?
git logProtip: You can specify a search query for git log to find commits with a message that matches.
git log -g --grep "query"What about undoing uncomitted changes?
Suppose you want to write code for a new feature which hasn't been comitted yet. Someone decides the feature isn't necessary. How do I get back to a clean state?
If the change is staged, we have to unstage it first
git reset HEAD file1 file2 file3Once the change is unstaged, we can undo it
git checkout -- file1 file2 file3Note: if the file is untracked (ie. is a newly created file), you don't need to run git checkout. Simply erase it!
Tagging Versions
Git best practice is to have a commit for every small feature. This makes it so that it is easy to undo only a small part of the functionality. Git tags let you add a label to a specific commit.
Common use: releasing new versions of software!
In between v1.1 and v1.2, a software may have tons of commits, but we want to specify exactly when v1.1 was released and when v1.2 was released
Tagging Versions
Creating a tag for the last commit (ie. master)
git tag new-tag-name
eg. git tag v1.2
git taggit tag -d tag-name
eg. git tag -d v1.2git checkout tag
eg. git checkout v1.2Listing all tags
Deleting a tag
Checking out a tag
Remote Repositories
Git supports having repositories stored on a remote server.
This means that a repository can be stored locally on your computer as well as on many other servers / computers. Git provides functionality for keeping these in sync.
Why is this useful?
- Can work on a repository in a distributed fashion (from many different devices)
- Allows collaboration!
Motivating Example

A local repository exists on the desktop PC, school PC and laptop. Git provides mechanisms for pushing commits to the remote server and pulling the latest commits from the remote server.
Enter GitHub!

What is it?
GitHub is a free service for hosting remote git repositories!
It supports both public and private repositories - in the private case, you have to give access to people.
As a free user, you have unlimited public repositories.
Go to https://education.github.com/discount_requests/new to get 5 free private repositories with your school e-mail address!
My favorite GitHub tip...
GitHub supports forking a repository. This means you can make a copy of someone else's repository and do your own changes on it.
Who uses GitHub? Linux, Ruby on Rails, Node.js, jQuery, Facebook, Nasa, ...?
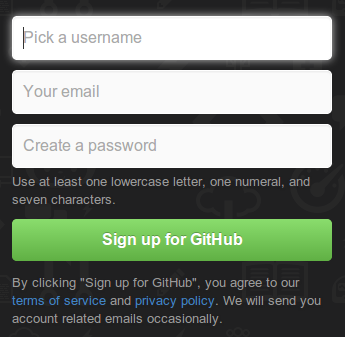
Let's Sign Up!
1. Navigate to github.com
2. Create an account. Try to make a username which reflects your real name for this class.
3. Make sure to fill out the GitHub survey on MyCourses. This is obligatory for grading and to have access to your team repo.
Configuring Git for GitHub
To make future Git commits match up with your GitHub account, enter the following lines in terminal / git bash.
git config --global user.name "YOUR NAME"

# Make this the same email as the one you used for GitHub
git config --global user.email "YOUR EMAIL ADDRESS"
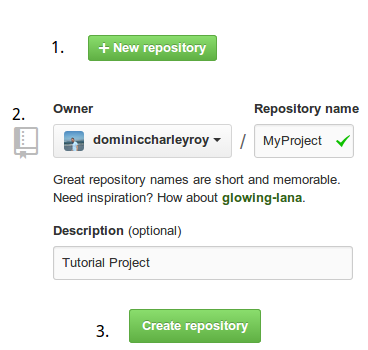
Creating our GitHub Repo
1. Click New Repository
2. Enter a name and description. Leave the repository as public.
3. Click Create Repository
Linking our local repository to GitHub
Now we want to set up GitHub as a remote server for our repository. GitHub remotes have a name and a URL, and are added via the git add remote command.
As our repository already exists locally, let's follow the GitHub instructions for import it. Ignore the git push command for now.

This sets up a remote server called origin linked with the GitHub repository.
Pushing our changes to the remote server
The whole point of setting up a remote server is to be able to send our changes to it so that everyone working with the remote server can see them!
This is done via the git push command. This command requires the name of a remote server and a reference to push (don't worry about this - master for now).
git push -u origin masterThis command is the first basic tool for working with remote servers. Until you push, any commits you make will only exist on your local repository.
Authentication Tips
GitHub offers two different ways of identifying which GitHub account you are using when working with Git. We opted for the HTTPS option, which prompts you for your username and password every time you push - annoying . To make it so that Git remembers your credentials for 15 minutes, enter:
git config --global credential.helper cache
git config --global credential.helper 'cache --timeout=3600'
GitHub also supports authentication via SSH Keys. This is trickier to set up, but makes it so you don't have to enter your password. Interested?
Check out https://help.github.com/articles/generating-ssh-keys
Tags and Remotes
When you create a tag on a local repository, the tag metadata is not sent to the remote server when you do git push. To get around this, you have to send them manually via the command:
git push --tagsPulling Changes from Remote
Suppose you were working on your repository at school and pushed your changes to GitHub. How do you update your local repository at home? This is done via the git pull command! If you pushed using -u, this will automatically pull from GitHub.
git pullThis will merge in any changes on the remote server.
Note: If you've done changes locally, Git will do its best to merge in changes on the remote server. This doesn't always work (eg. editing same file) and results in a merge conflict. We'll see how to resolve that in a later tutorial.
Making a second local repo
Suppose you want to set up a second local repository, either on another computer, or on a different folder on your local computer. Git provides the git clone command for cloning an existing repository and creating a new local repository.
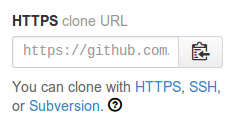
Enter this command to create the new local repository set up with the GitHub remote.
git clone urlGo to your project page on GitHub and copy this URL:
Some final tips
- You don't need to enter the entire commit ID - Git can usually figure out if you only put the first few characters, as long as it is uniquely identifiable. For example instead of e46396edf2254efc993c766673dfe6aa91741986 you could use e46396edf. Ah - much shorter!
- Go to try.github.com for an interactive Git tutorial - this covers more advanced topics.
- Commit early and often - try to have small, contained commits. This makes undoing them very easy and makes the history log more useful (eg. "added feature A" is better than "added feature A, B, C and rewrote D, E, F and ..."). Similarly, try to write useful commit messages. If you fix a bug, explain how you fixed it instead of just "Fixed a bug."
- Push and pull frequently - this helps avoid merge conflicts and also ensures that the remote server is always up to date if you want to work on your project somewhere else or you lose access to your local repo (eg. laptop dies).
Cheat Sheet
Create a local repo out of a folder
git initStage new / modified files
git add filenameStage deleted files
git add filenameSee current changes and staged changes
git statusCommit staged changes
git commit -m "message"See commit history
git logSee unstaged changes since last commit
git diffCreate a tag
git tag namePush changes to remote
git push -u origin masterGet changes from remote
git pullClone a remote repository
git clone urlCheckout a commit / tag / master
git checkout commit/masterThanks everyone! Questions?
Slides available in PDF and HTML form at
https://github.com/dominiccharleyroy/ecse321
Tutorial 1 - Git
By dominiccharleyroy