Godot 101
The links and content in this presentation are meant to be informational only and do not imply endorsement of content, sources, organizations, or authors
What is Godot?
Godot is a free and opensource game engine (2D/3D) and IDE maintained by the community and its founders!

Where can I learn more?
I'm Not an Artist or Musician, What Can I Do?
Lucky for you (and me!) you don't need to be! There's lots of free and Royalty-free assets out there!
itch.io is a one-stop-shop for all your asset and game dev needs! Including Game Jam schedules! (more on that later 🙊)
For music, One Man Symphony has created a ton of excellent music that can fit the mood of all your games!
Creative Process
How do you get Ideas for games?
Recycle ideas! Pretty much every game mechanic has been done some how, your job is to do it better and make it more fun!
Games are about the whole experience, so polished graphics make even a simple game more fun!


Concept Art
I like to use Affinity Designer for concepts and for assets
Anything you're comfortable with is totally fine too! Inkscape is a great free tool, Adobe suite is available through Terpware!
I'll google images then import them into AD and spend maybe 10 minutes on ideas the team talks about
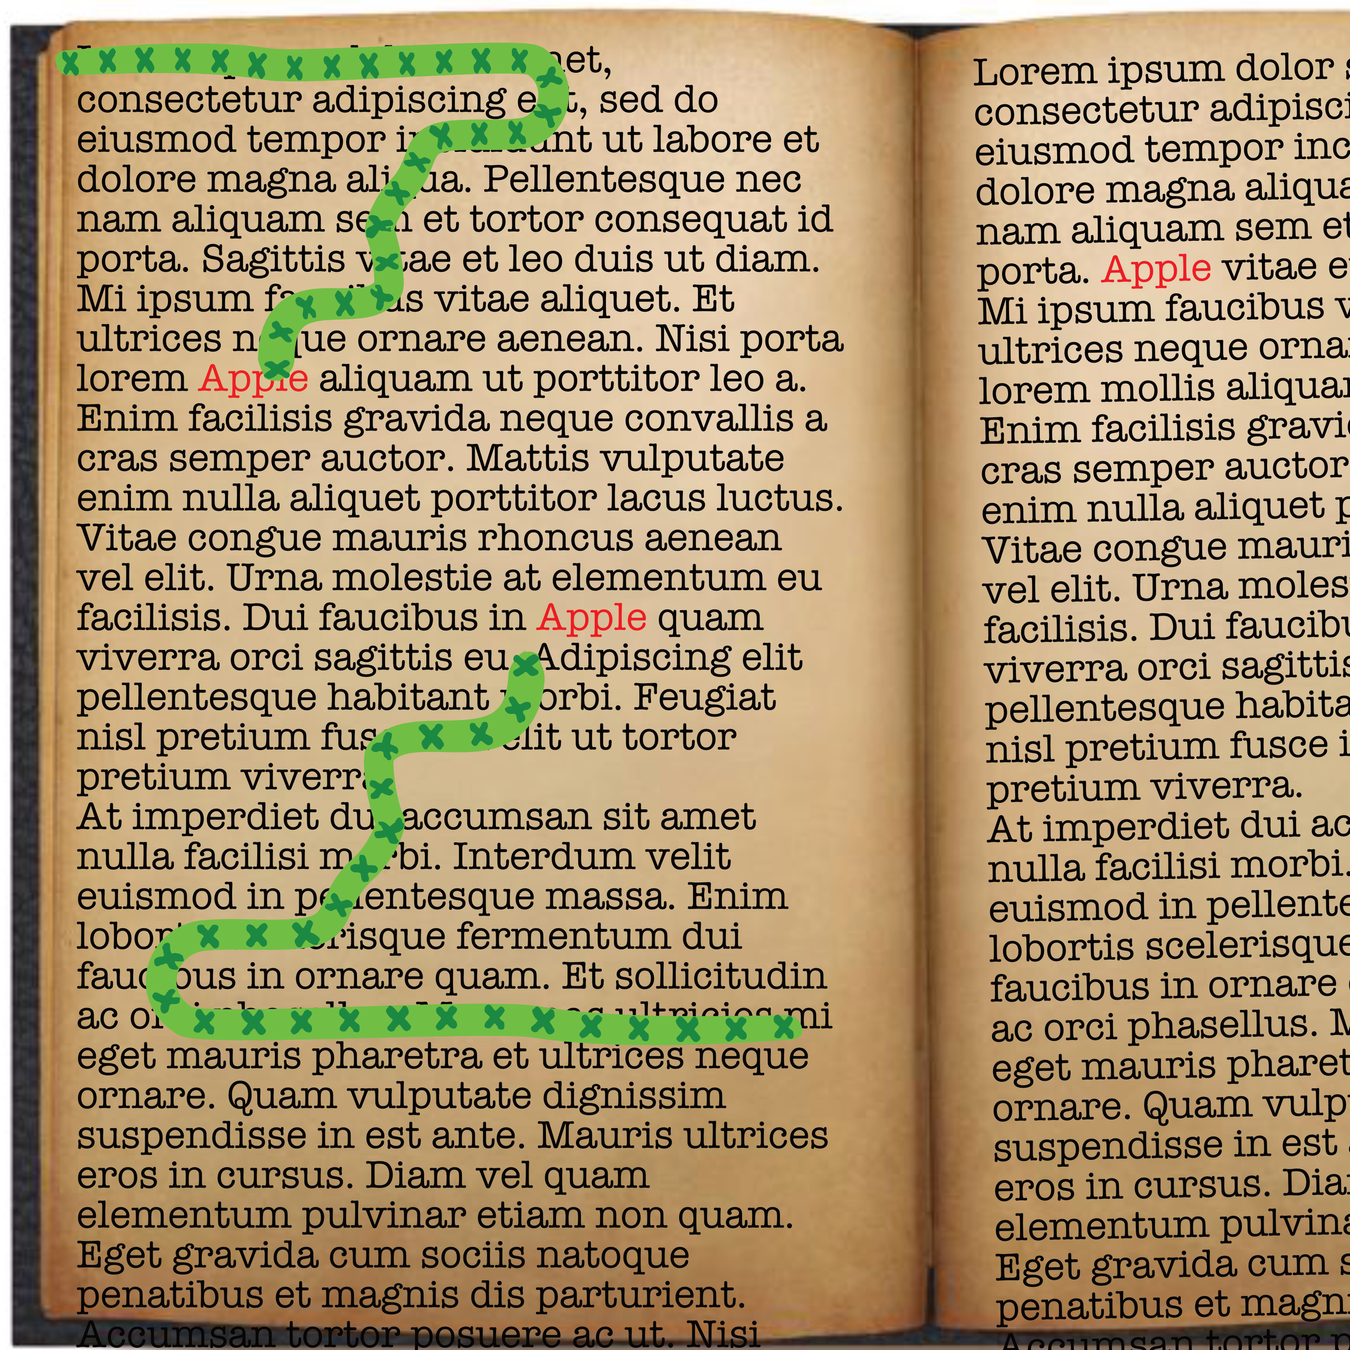
Bookworm concept submission: GWJ23
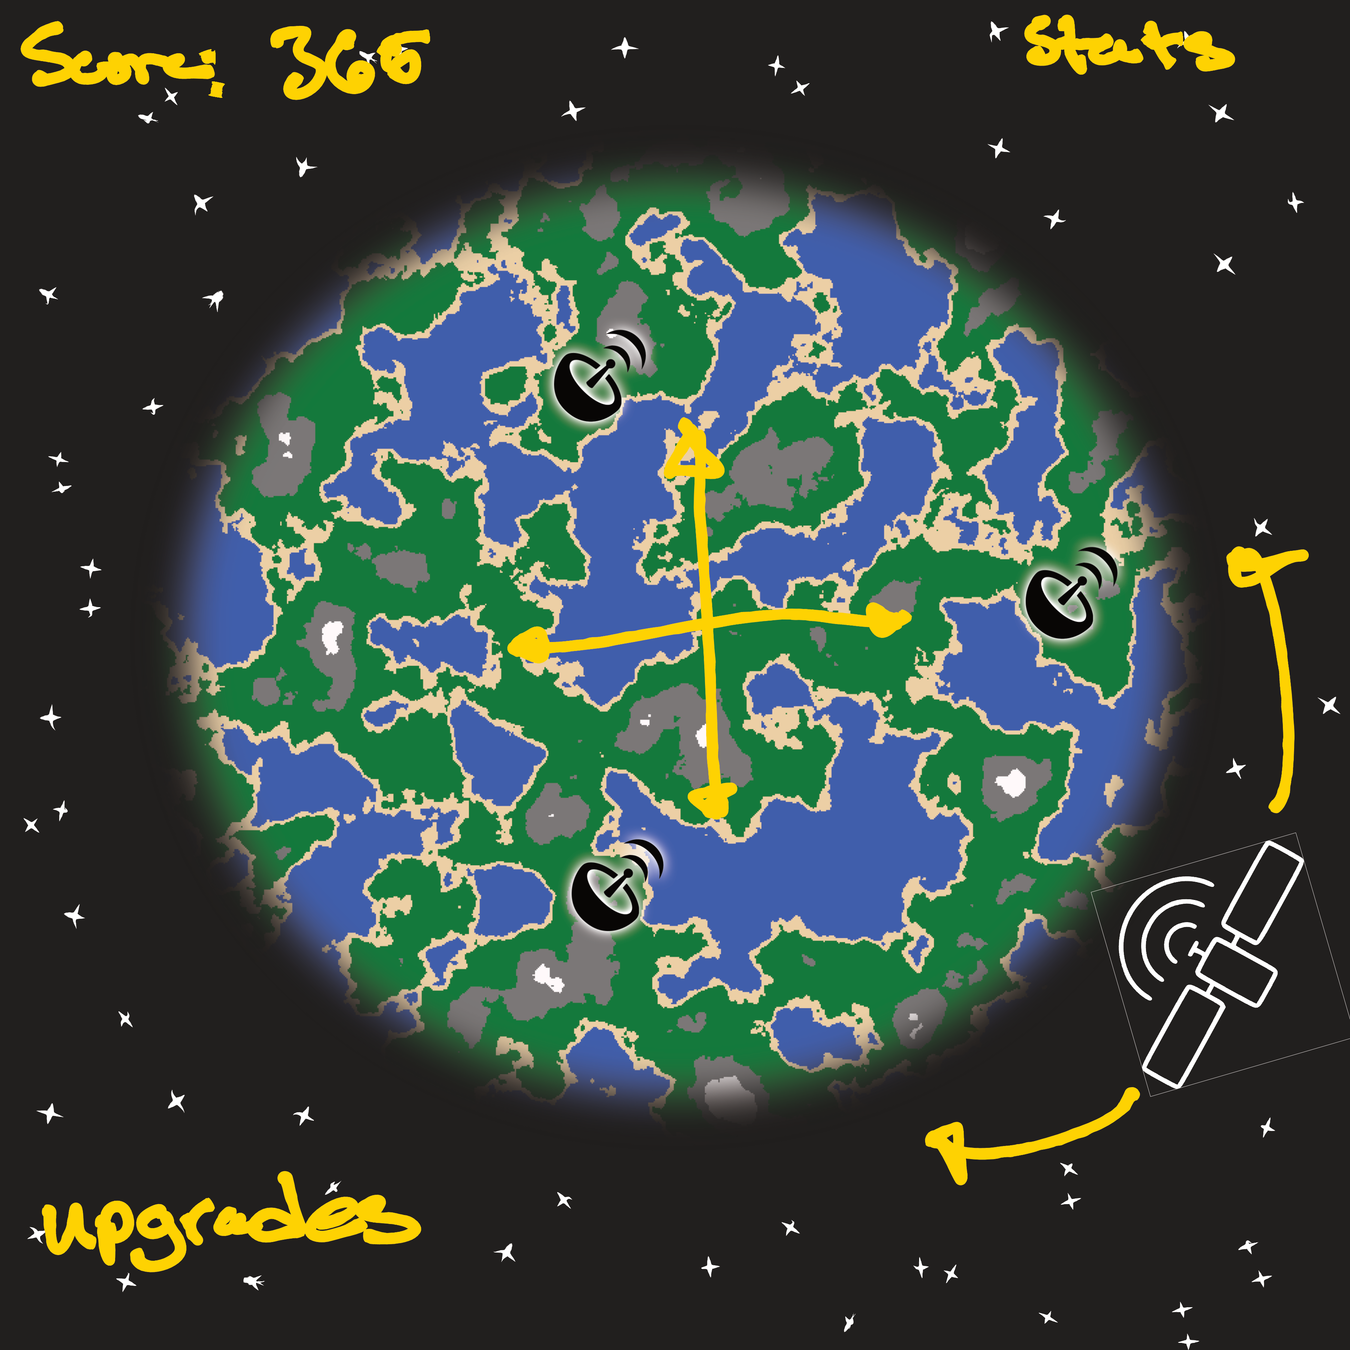
Satellite concept
Today's game!
Your First Game!

Concept
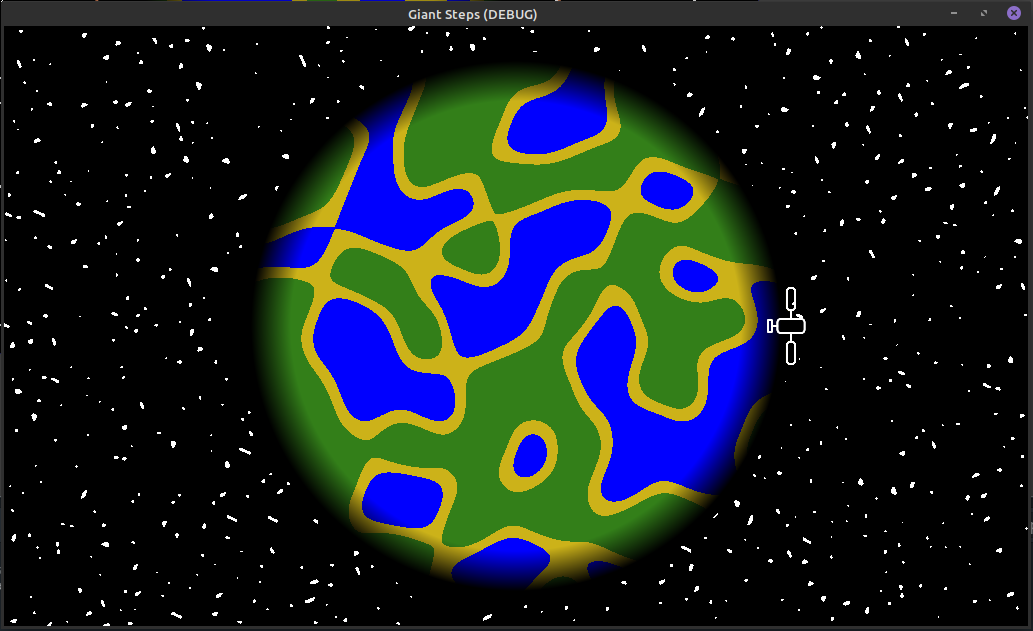
Proof of Concept
Your First Game!

Concept

Proof of Concept
Download Godot!
If you haven't installed Godot for your operating system go here: Godot Official Download
Recommended:
64bit - Standard version
Projects work pretty well cross platform, in my experience, but exporting to target platforms can be tricky sometimes (will briefly cover this)
Recommended for Mac users: `brew cask install godot`
First Project
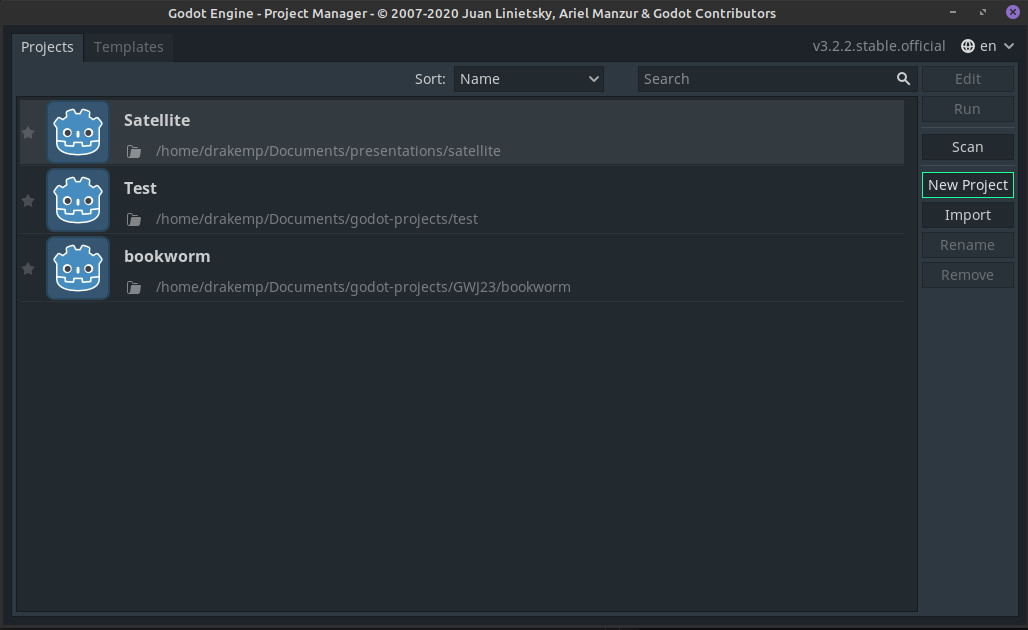
Empty for you!
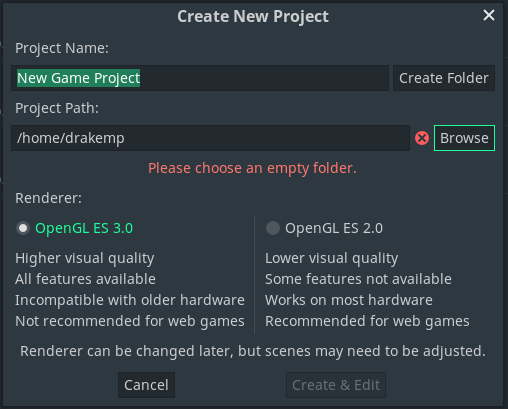

Choose a place for your project
Then name your project here
The folder name will automatically be your project name
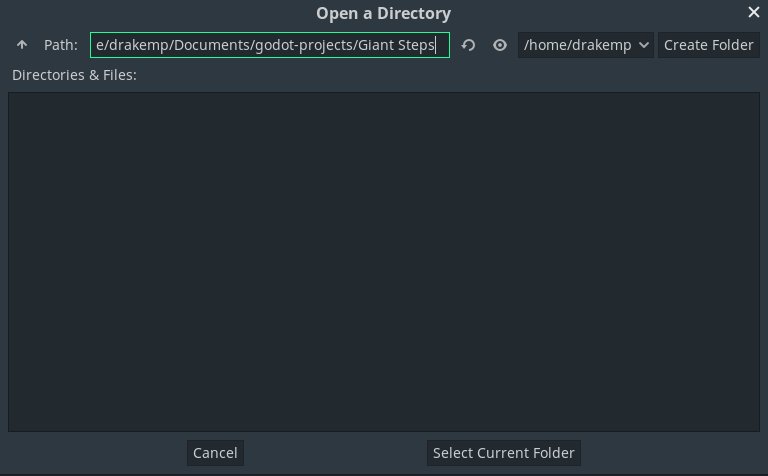
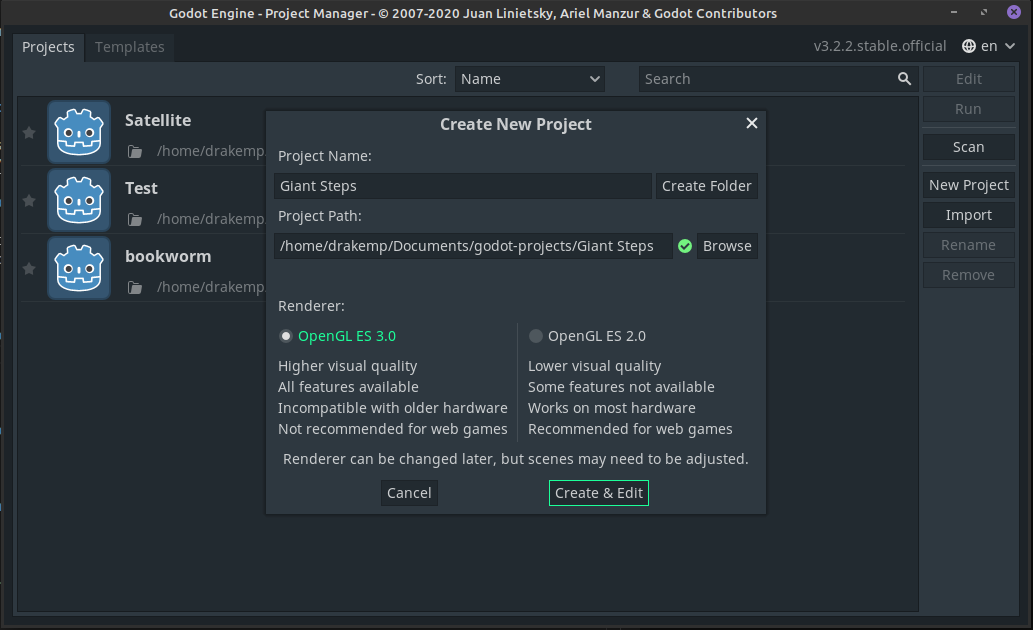
Cancel opening the Open Assets Library (check it out later!)
Personalizations
Just like in any editor, play with the settings and take a look around and play with things.
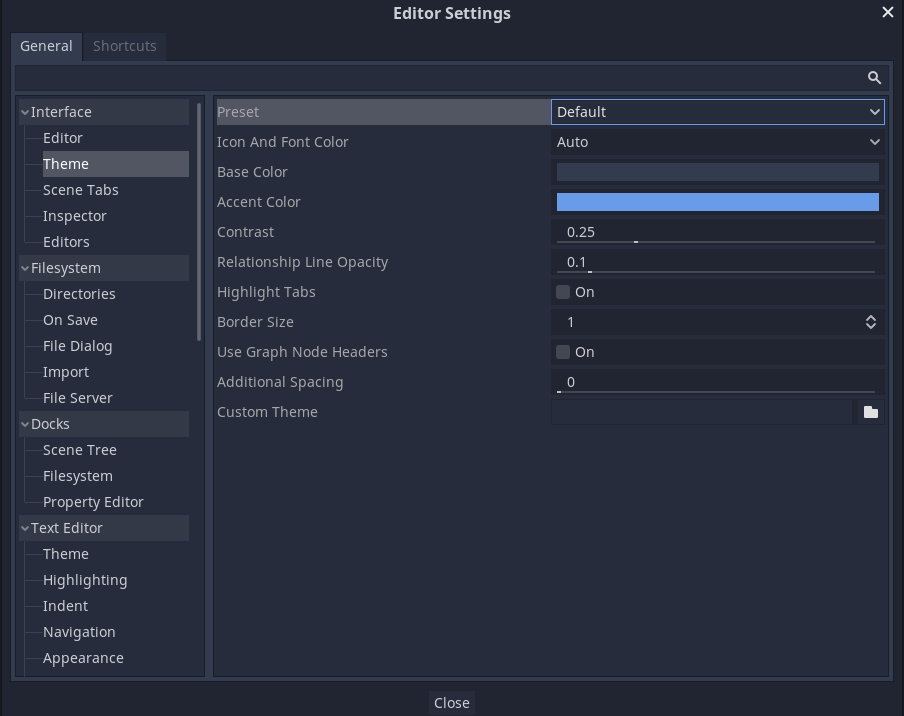
Editor -> Editor Settings
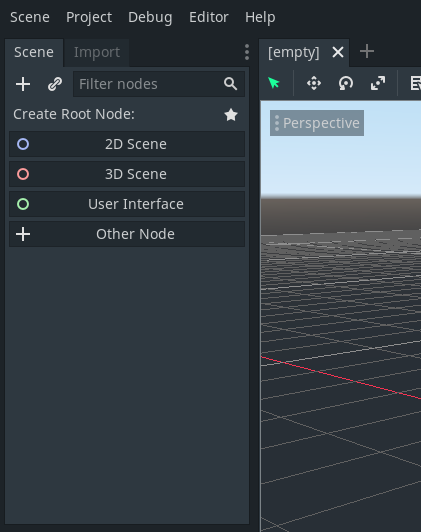
I personally like "Alien" theme (above), default is this blue image on the right.
Take a look around!
View selector
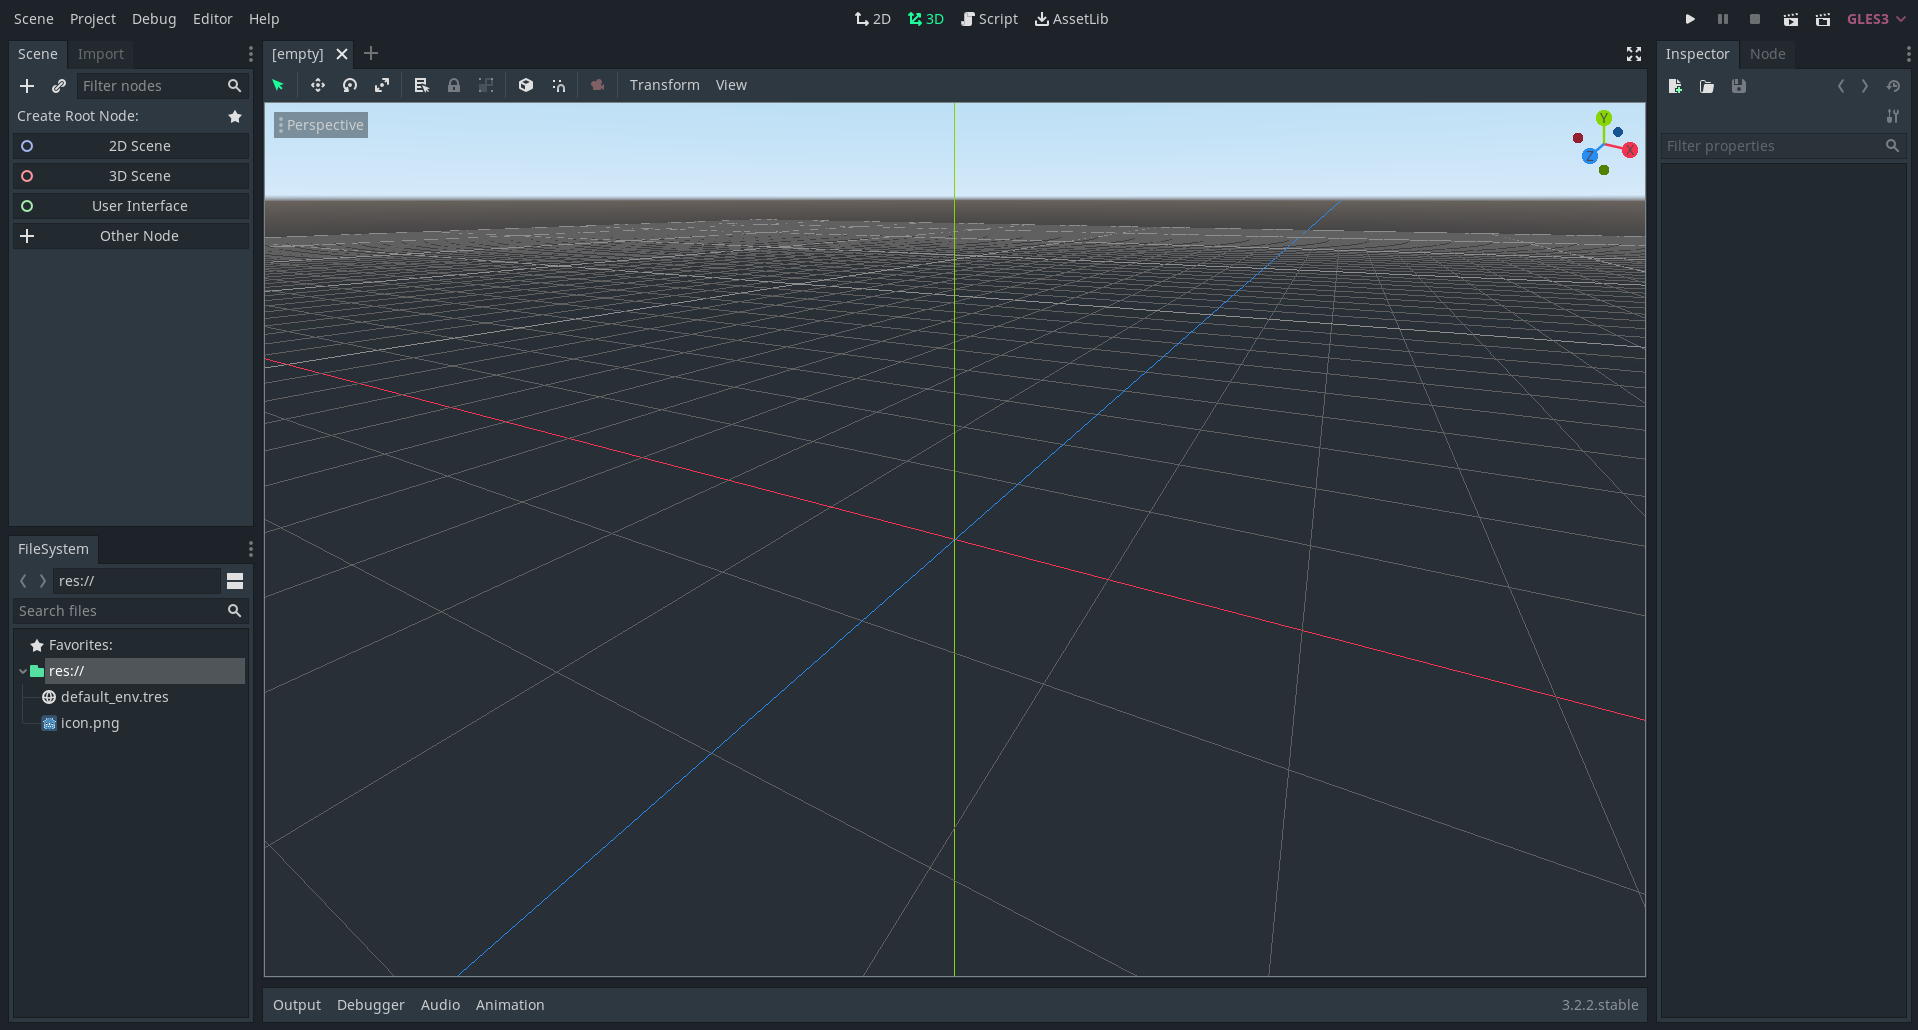
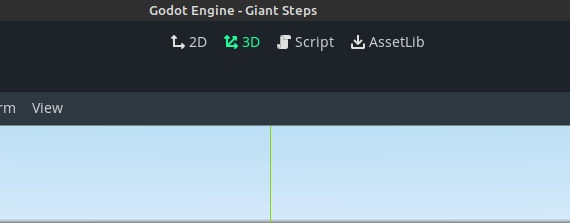

Scene viewer / Node Tree
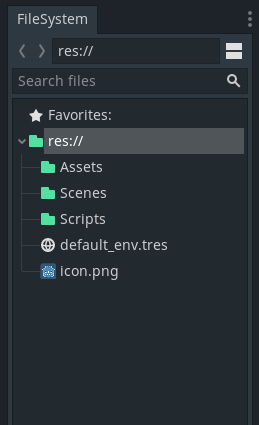
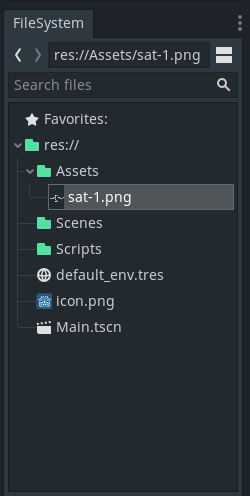
Filesystem tree
I recommend making these three folders to keep organized!
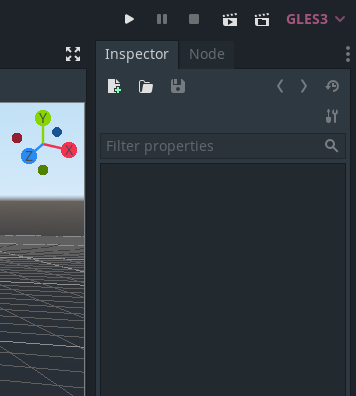
Play current Scene
Fine tune options for nodes appear in the Inspector
Signals and handlers are viewable in the Node tab
Play Project (set main scene in Project Settings)
Download the Assets
You can get the assets from here: Google Drive Share
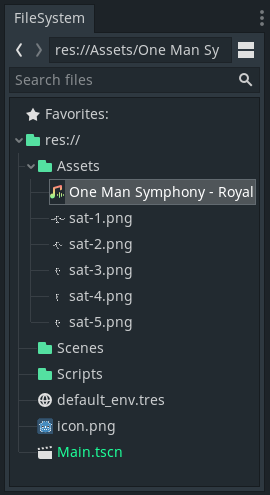
Toss these files into your Assets folder in your filesystem, Godot will detect them automatically!
Setting the Scene!
Main Scene
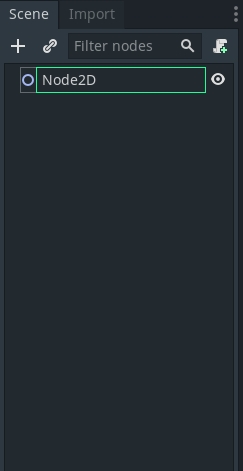
We need to select a top-level node (a parent) for the scene. We can rename this what ever we like, "Main". Note the Icon to the left (blue circle), indicates the type of node.
Like Java, everything is an Object, here everything is a Node!
Main Scene
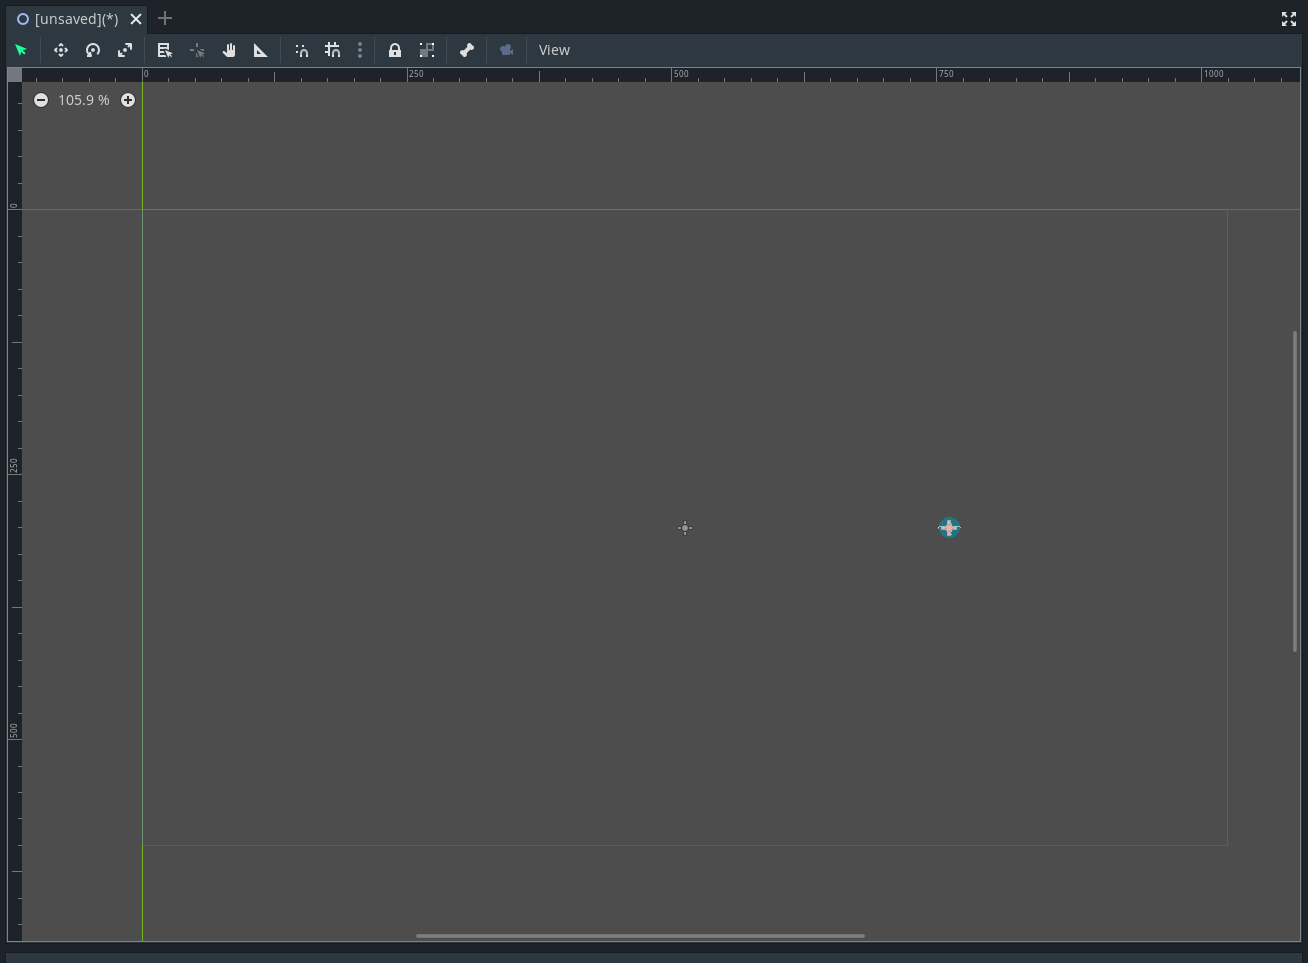
Lets move our Main (Node2D) to the center of the screen, this will make things easy for us later. Basically our new origin (0,0) is the center of the screen!
If you need to figure out your dimensions or change them go to Project -> Project Settings -> Display -> Window
My dimensions are 1024x600, so my center is (512,300)
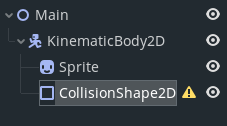
Lets add some children! (Right click -> Add child node)
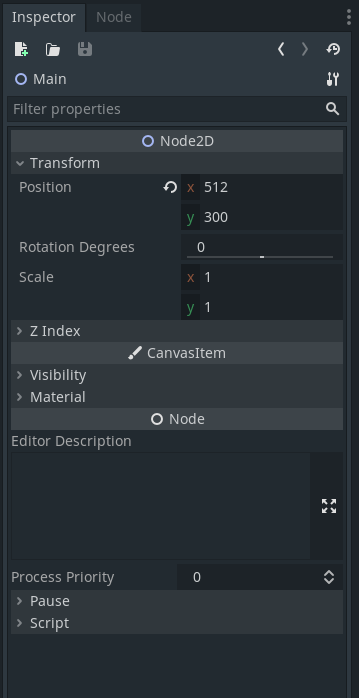
Select you Node2D and then look at the Inspector to set a new position
Main Scene
We can search at the top for nodes we need, or we can explore the tree a little for things we need.
Common things we'll need are:
-
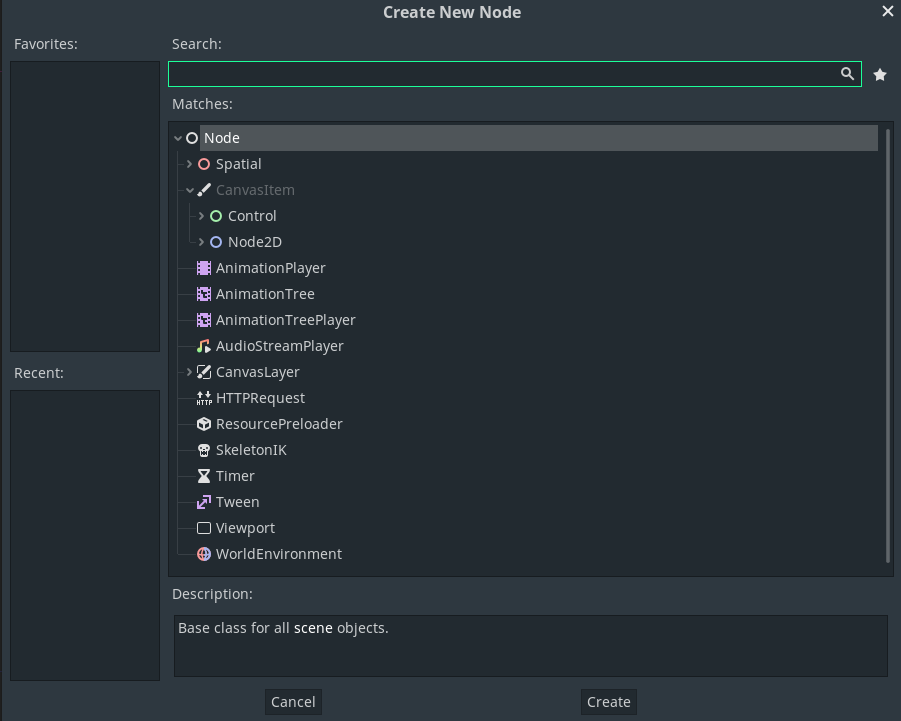
KinematicBody2D - top level character usually
- Sprite - Used to visually represent the character
- CollisionShape2D - hitbox/walls/etc
Add these in this same tree structure under our Main (Node2D)


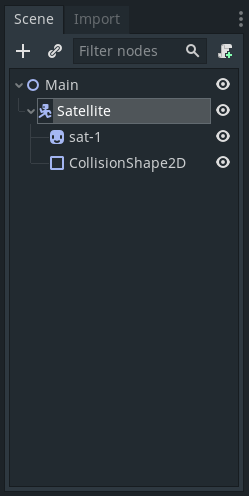
Satellite!
We need a controllable satellite, we need space some space, and some earth.
Lets start with the satellite!
Set the CollisionShape2D's Shape to a CircleShape2D

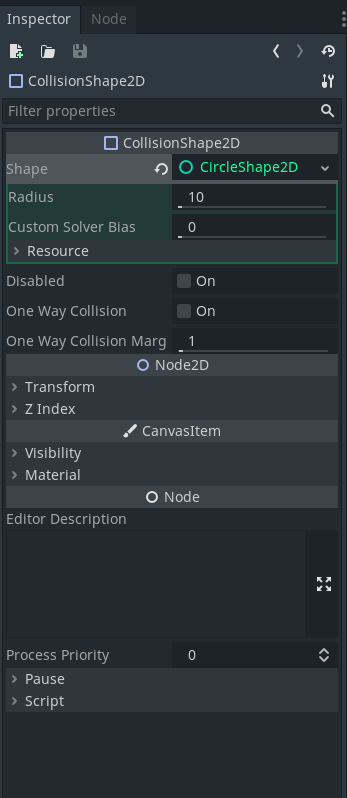
The dimensions of the CollisionShape2D doesn't matter much at the moment since we aren't hitting anything in space!
Satellite!
Drag our sat-1.png from the filesystem into our sprite's texture
Then we can update the transform options (green values)

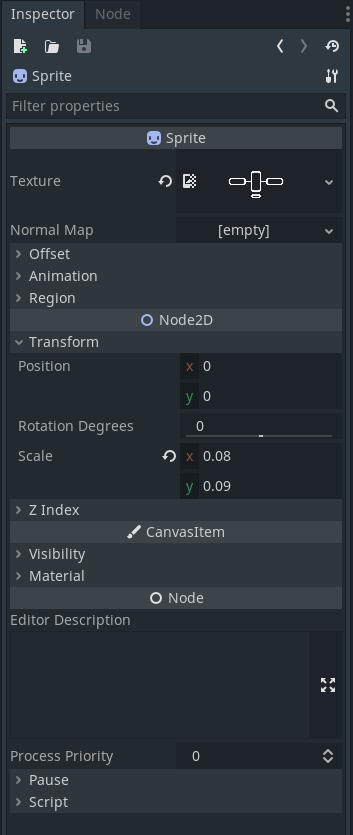
0.30
0.30
275
275 will be our earth's radius!
We can't control it yet, but that's okay!
90
Earth!
Add a rectangle texture, update these values, this will serve as our earth!
in the Texture Field, add a new OpenSimplex. Update the values you see in next image.
OpenSimplex is Godot's implementation of Perlin Noise, this gives us a more smooth, continuous randomness for our terrain!

550
550
550
550
-275
-275
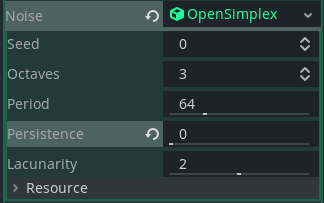
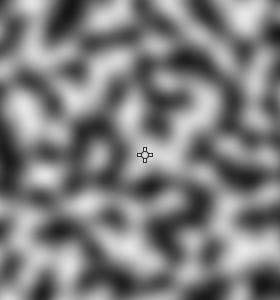
Earth!
You should see something like this in your viewport now!

550
550
550
550
-275
-275
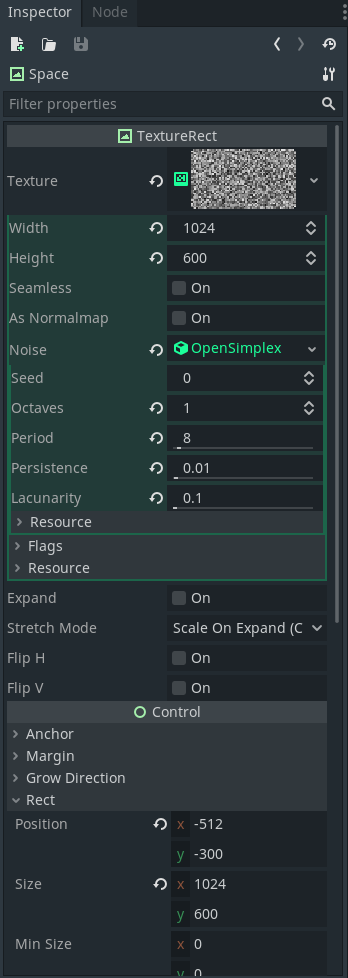
Space!
Lets do the same thing for space, new TextureRect, add OpenSimplex, update all the values!
This time I had the right screenshots!
ENHANCE!


Shaders
Space Shader!
Shaders are one of the coolest parts of doing graphics, (check out water shaders people make, insane!)
Our space shader needs to do two things,
- Leave open space for the earth (right now it's on top of the earth texture!)
- Look like stars in space!


Space Shader!
Our space shader needs to do two things,
- leave open space for the earth (right now its on top of the earth texture!)
- Look like stars in space!
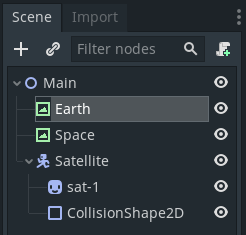
Select the Earth node, then under Materials in the Inspector, add a new ShaderMaterial, and then select Shader, and a empty code window should open up
Feel free to name your shader under Material -> Shader -> Resource

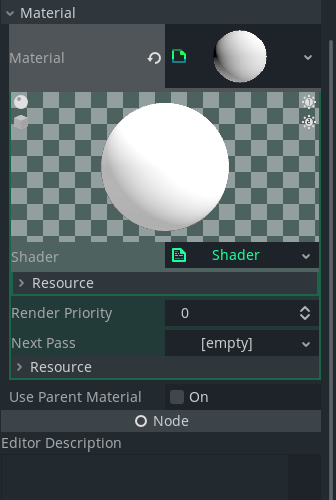
Space Shader!
There's a lot here, but I'll try to explain best I can, playing with it will help make sense of it.
In code window insert this code:

shader_type canvas_item; //declares this is a 2D Shader

/* This Shader takes perlin noise and produces a star like effect.
 * Also the center of the noise is ignored to show underlying images.
 * Near the edge of the center is blurred and darkend to give a round effect.
 */

void fragment(){
	// vec2 should be the center coordinate of view port from top left
	float dis = distance(vec2(512,300), FRAGCOORD.xy);
	float diff = (dis - 225.0)/40.0; // made this up for short cut off around edges

	if (dis > 275.0){ //This creates the black outline (just bigger than radius)
		COLOR = texture(TEXTURE,UV);
		if (COLOR.r > .85) { 	// Stars
			COLOR.rgb = vec3(1,1,1);
		} else {                // empty
			COLOR.rgb = vec3(0,0,0);
		}
		COLOR.a = diff;
	} else { // shade edges in middle
		COLOR = vec4(0,0,0,max(diff,0.001));
	}
}
Earth Shader!
This one is a little simpler, since we don't need to cut a hole with the alpha value.
In code window insert this code for Earth's shader material:

shader_type canvas_item; // 2D shader

void fragment(){
	vec4 curr = texture(TEXTURE,UV); //preserve original values

	if (curr.r > .6) {             // Water
		curr.rgb = vec3(0,0,1);

	} else if (curr.r > .45) { // Sand
		curr.rgb = vec3(0.8,.7,.1);

	} else {                   // Grass
		curr.rgb = vec3(0.2,.5,.1)
	}

	COLOR = curr;
}
What the game should look like right now!
It will look weird in the viewport but if you run the game it should look like this!

We can't do anything yet but the game is starting to look good!
Animations/Music
Let's animate our Satellite!
Throw the rest of the assets into your Assets folder!
Delete our sat-1 Sprite and replace it with an AnimatedSprite
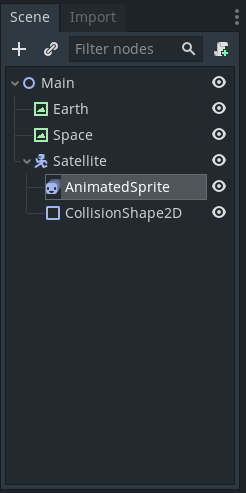
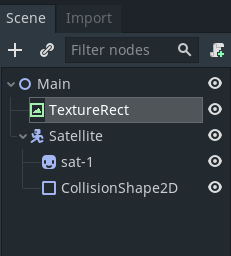
Let's animate our Satellite!
Lets copy our transform options from before! Set playing to on
Set FPS to 2, and drag our sats in the Frames window, order them sat-1,...,sat-5, then sat-2 again at the end. Look at how easy that was!
Also turn Loop on (bottom right)
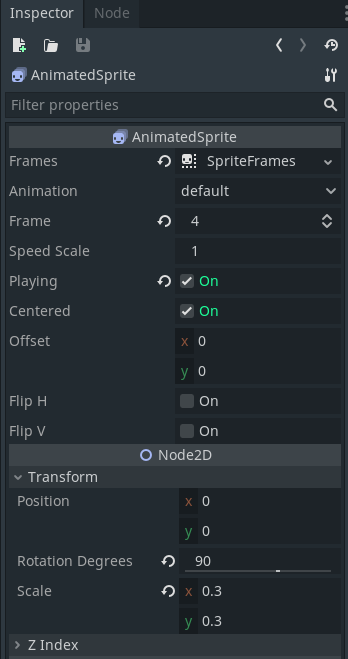

Music!
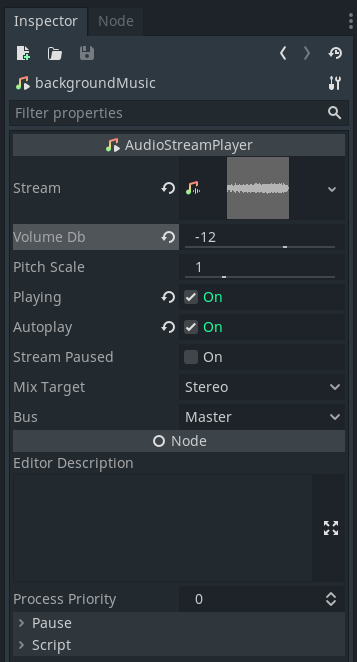
Go ahead and add an AudioStreamPlayer to your Main node, set the Volume Db to -12 so its not too loud, adjust as needed, Drag your WAV file into the Stream field. Godot Supports WAV and OOG audio formats. This should be enough to start playing when the game starts as well.
Bottom right is a playback deck, you can pause it so it doesnt play while we are in the IDE
GDScript
Your first script!
Right click the Satellite node and Add Script
Scripts are part of the node, no separation between Nodes and Scripts. Scripts just another way to extend a Node!
extends KinematicBody2D


# Declare member variables here. Examples:
# var a = 2
# var b = "text"


# Called when the node enters the scene tree for the first time.
func _ready():
	pass # Replace with function body.


# Called every frame. 'delta' is the elapsed time since the previous frame.
#func _process(delta):
#	pass
Your first script!
- GDScript is Object oriented
- Nodes inherit functions and attributes from parent classes
- Contain constructors, etc.
extends KinematicBody2D


# Declare member variables here. Examples:
# var a = 2
# var b = "text"


# Called when the node enters the scene tree for the first time.
func _ready():
	pass # Replace with function body.


# Called every frame. 'delta' is the elapsed time since the previous frame.
func _process(delta):
	pass

func _input(event):
	pass
Getting started functions
- _ready() - is a constructor, this executes when a node enters the scene tree!
- _process(delta) - called every frame. This is where you would put physics logic
- _input(event) - Handling player input data like button presses
extends KinematicBody2D


# Declare member variables here. Examples:
# var a = 2
# var b = "text"


# Called when the node enters the scene tree for the first time.
func _ready():
	pass # Replace with function body.


# Called every frame. 'delta' is the elapsed time since the previous frame.
func _process(delta):
	pass

func _input(event):
	pass
Satellite Orbit!
For this to work correctly, we need to add a dummy node above our Satellite.
ui_left/ui_right/etc can be set to anything you like in Project Settings -> Input Map tab
extends KinematicBody2D

var direction = 1
var boost = 0
export var drift = .0005
export var degrade = .003
export var BOOST = .005

# Multiple ways to handle input, I used the Global `Input` reference here
func _input(event):
	if Input.is_action_just_pressed("ui_left"):
		boost = BOOST
		direction = 1
	if Input.is_action_just_pressed("ui_right"):
		boost = BOOST
		direction = -1

func _process(delta):
	var rot = (drift+boost)*direction
    # rotates parent in the scene about the origin
	get_parent().rotate(rot)
	boost = boost * (1-degrade)
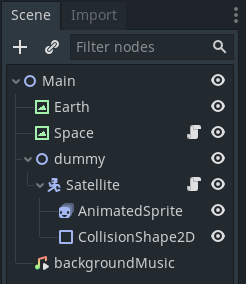
Satellite Orbit!
First, we can use 'export' to expose variable options to the Inspector!
Play with different values to see what "feels" good, half the experience of games is the "feel" of the controls!
extends KinematicBody2D

var direction = 1
var boost = 0
export var drift = .0005
export var degrade = .003
export var BOOST = .005

# Multiple ways to handle input, I used the Global `Input` reference here
func _input(event):
	if Input.is_action_just_pressed("ui_left"):
		boost = BOOST
		direction = 1
	if Input.is_action_just_pressed("ui_right"):
		boost = BOOST
		direction = -1

func _process(delta):
	var rot = (drift+boost)*direction
    # rotates parent in the scene about the origin
	get_parent().rotate(rot)
	boost = boost * (1-degrade)

Satellite Orbit!
This could have been written using the event passed in, would work either way. (see docs)
My logic here is: since we are rotating in clockwise or counter-clockwise, direction only needs to change positive or negative. Boost is a push in that direction!
extends KinematicBody2D

var direction = 1
var boost = 0
export var drift = .0005
export var degrade = .003
export var BOOST = .005

# Multiple ways to handle input, I used the Global `Input` reference here
func _input(event):
	if Input.is_action_just_pressed("ui_left"):
		boost = BOOST
		direction = 1
	if Input.is_action_just_pressed("ui_right"):
		boost = BOOST
		direction = -1

func _process(delta):
	var rot = (drift+boost)*direction
    # rotates parent in the scene about the origin
	get_parent().rotate(rot)
	boost = boost * (1-degrade)

Satellite Orbit!
In the process function, we can handle the physics. We can use the builtin rotate function and a dummy parent to avoid rotational transformations and complicated math!
We'll also want to degrade the speed over time with degrading a small amount.
extends KinematicBody2D

var direction = 1
var boost = 0
export var drift = .0005
export var degrade = .003
export var BOOST = .005

# Multiple ways to handle input, I used the Global `Input` reference here
func _input(event):
	if Input.is_action_just_pressed("ui_left"):
		boost = BOOST
		direction = 1
	if Input.is_action_just_pressed("ui_right"):
		boost = BOOST
		direction = -1

func _process(delta):
	var rot = (drift+boost)*direction
        # rotates parent in the scene about the origin
	get_parent().rotate(rot)
	boost = boost * (1-degrade)

Everything can be done in GDScript!
We could make a script for our Space and Earth nodes. Here's a space script!
Note at the bottom:
We can use $name syntax to reference children nodes, not required here just wanted to showcase!
var osn
const WIDTH = 1024
const HEIGHT = 600

# Set up perlin noise for world generation
func _ready():
    randomize() # Seed

    # create OSN instance
    osn = OpenSimplexNoise.new()
    osn.seed = randi()
    osn.octaves = 1
    osn.period = 8
    osn.lacunarity = .1
    osn.persistence = .01

    var texture = NoiseTexture.new()
    texture.noise = osn
    texture.width = WIDTH
    texture.height = HEIGHT

    # 'self.' is not needed here, just showcasing
    self.set_texture(texture)

    # Children in the Scene tree can be called via '$child' syntax
GDScript is awesome!
There's so much more but we don't have time to do everything! I recommend checking out signals for async programming/in-game events
Hopefully this gives you a better idea of how to navigate Godot and will help you develop your own games!


Export
Share your games!
Project Settings -> Export...
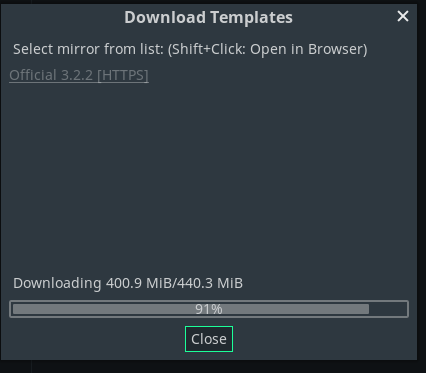
Install the templates, can take a while!
Exporting to Windows, Linux, HTML5 for me are most successful.
Share your games!
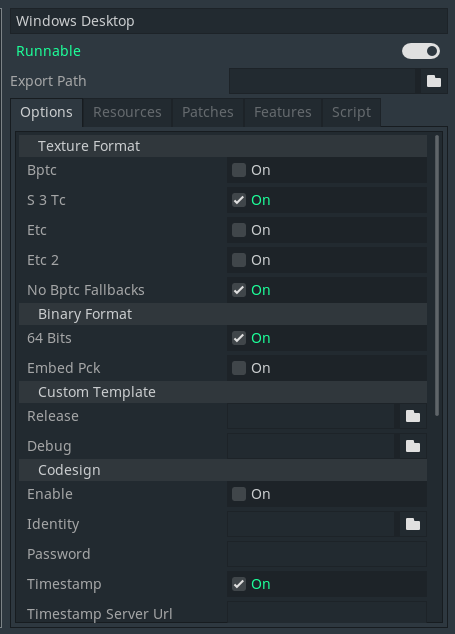
For any export, if applicable, check Embed Pck
This will include all your assets into the single binary, otherwise a .pck will be generated and required to execute.

Share your games!
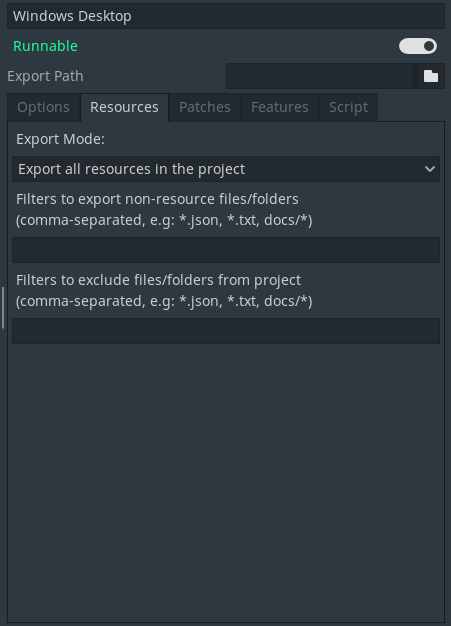
Include wild cards for all your asset types! Especially if you use text files to configure level design!
We might not need this but I like to be safe, so for this project we should have:
*.png, *.wav
Lastly, save the binary OUTSIDE of the project folder!
itch.io
itch.io
Great place for game developers to share games, tools, and assets! You can sell your games, tools, assets there too!
Game Jam schedules are posted there, my personal favorite is Godot Wild Jam, a Godot exclusive monthly jam! The Discord is lively and very supportive!

Thank you!
Godot 101
By Drake P
Godot 101
This slide deck is meant to serve as an introduction and reference for beginner Godot users.
- 522


