


Elisa Beshero-Bondar PRO
Professor of Digital Humanities and Chair of the Digital Media, Arts, and Technology Program at Penn State Erie, The Behrend College.
Link to these slides: https://bit.ly/shell-git-nav
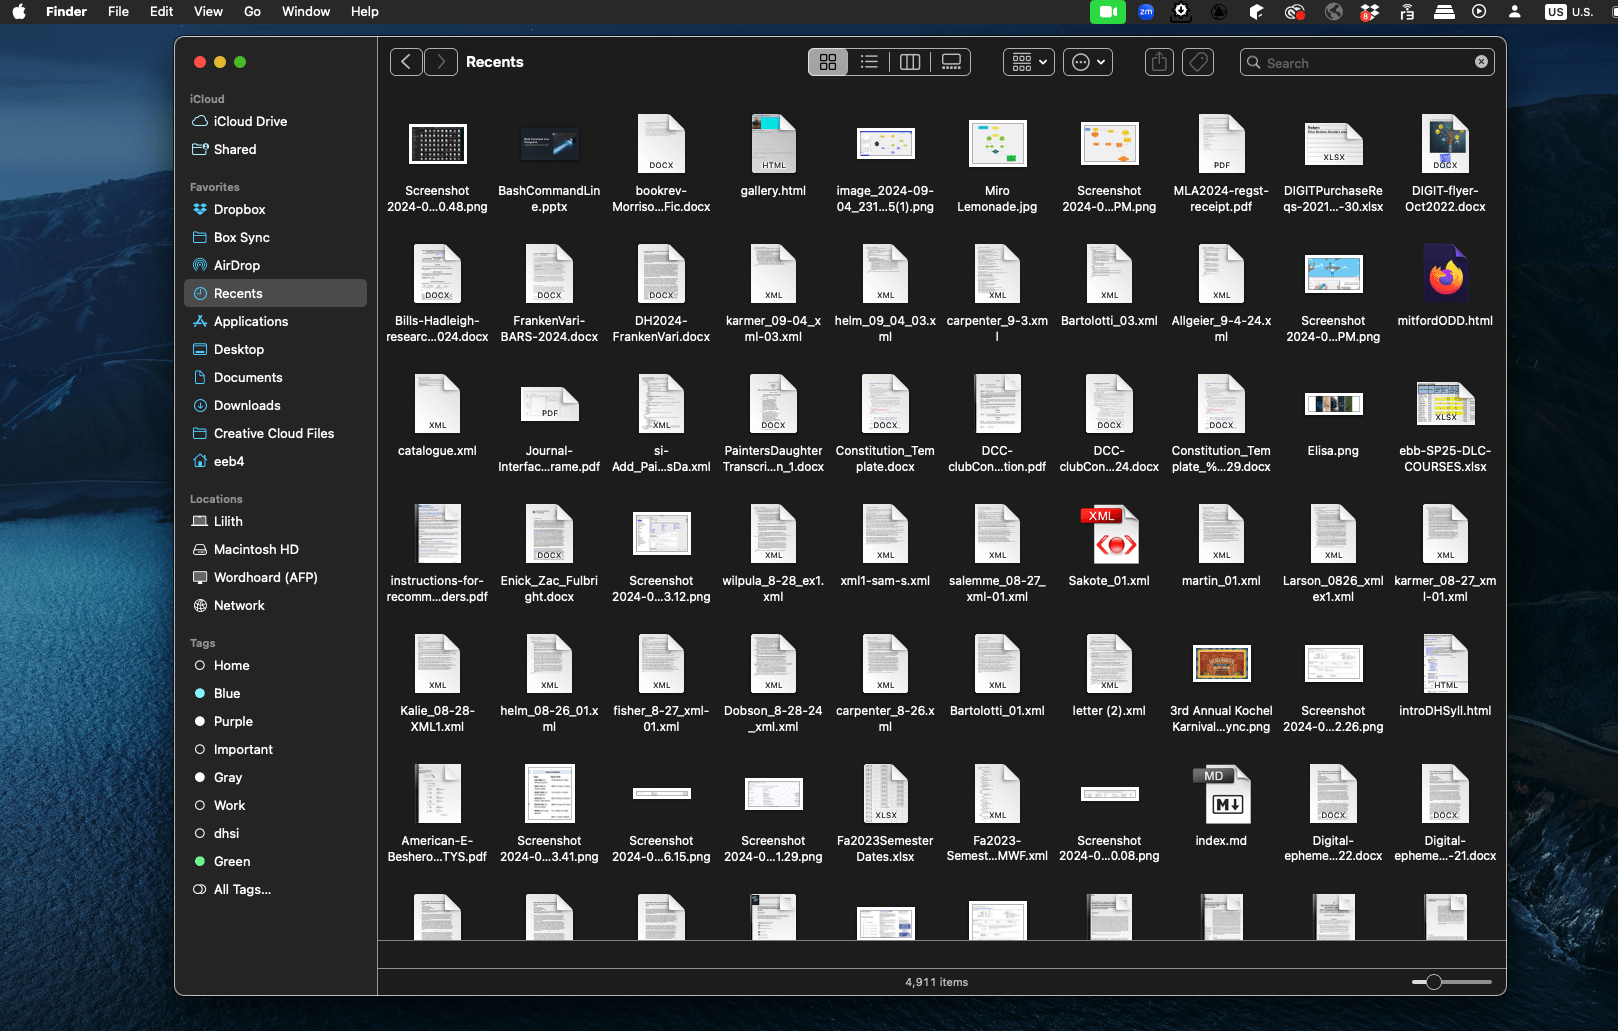
Getting Lost in the Graphical User Interface: Recents on my Mac
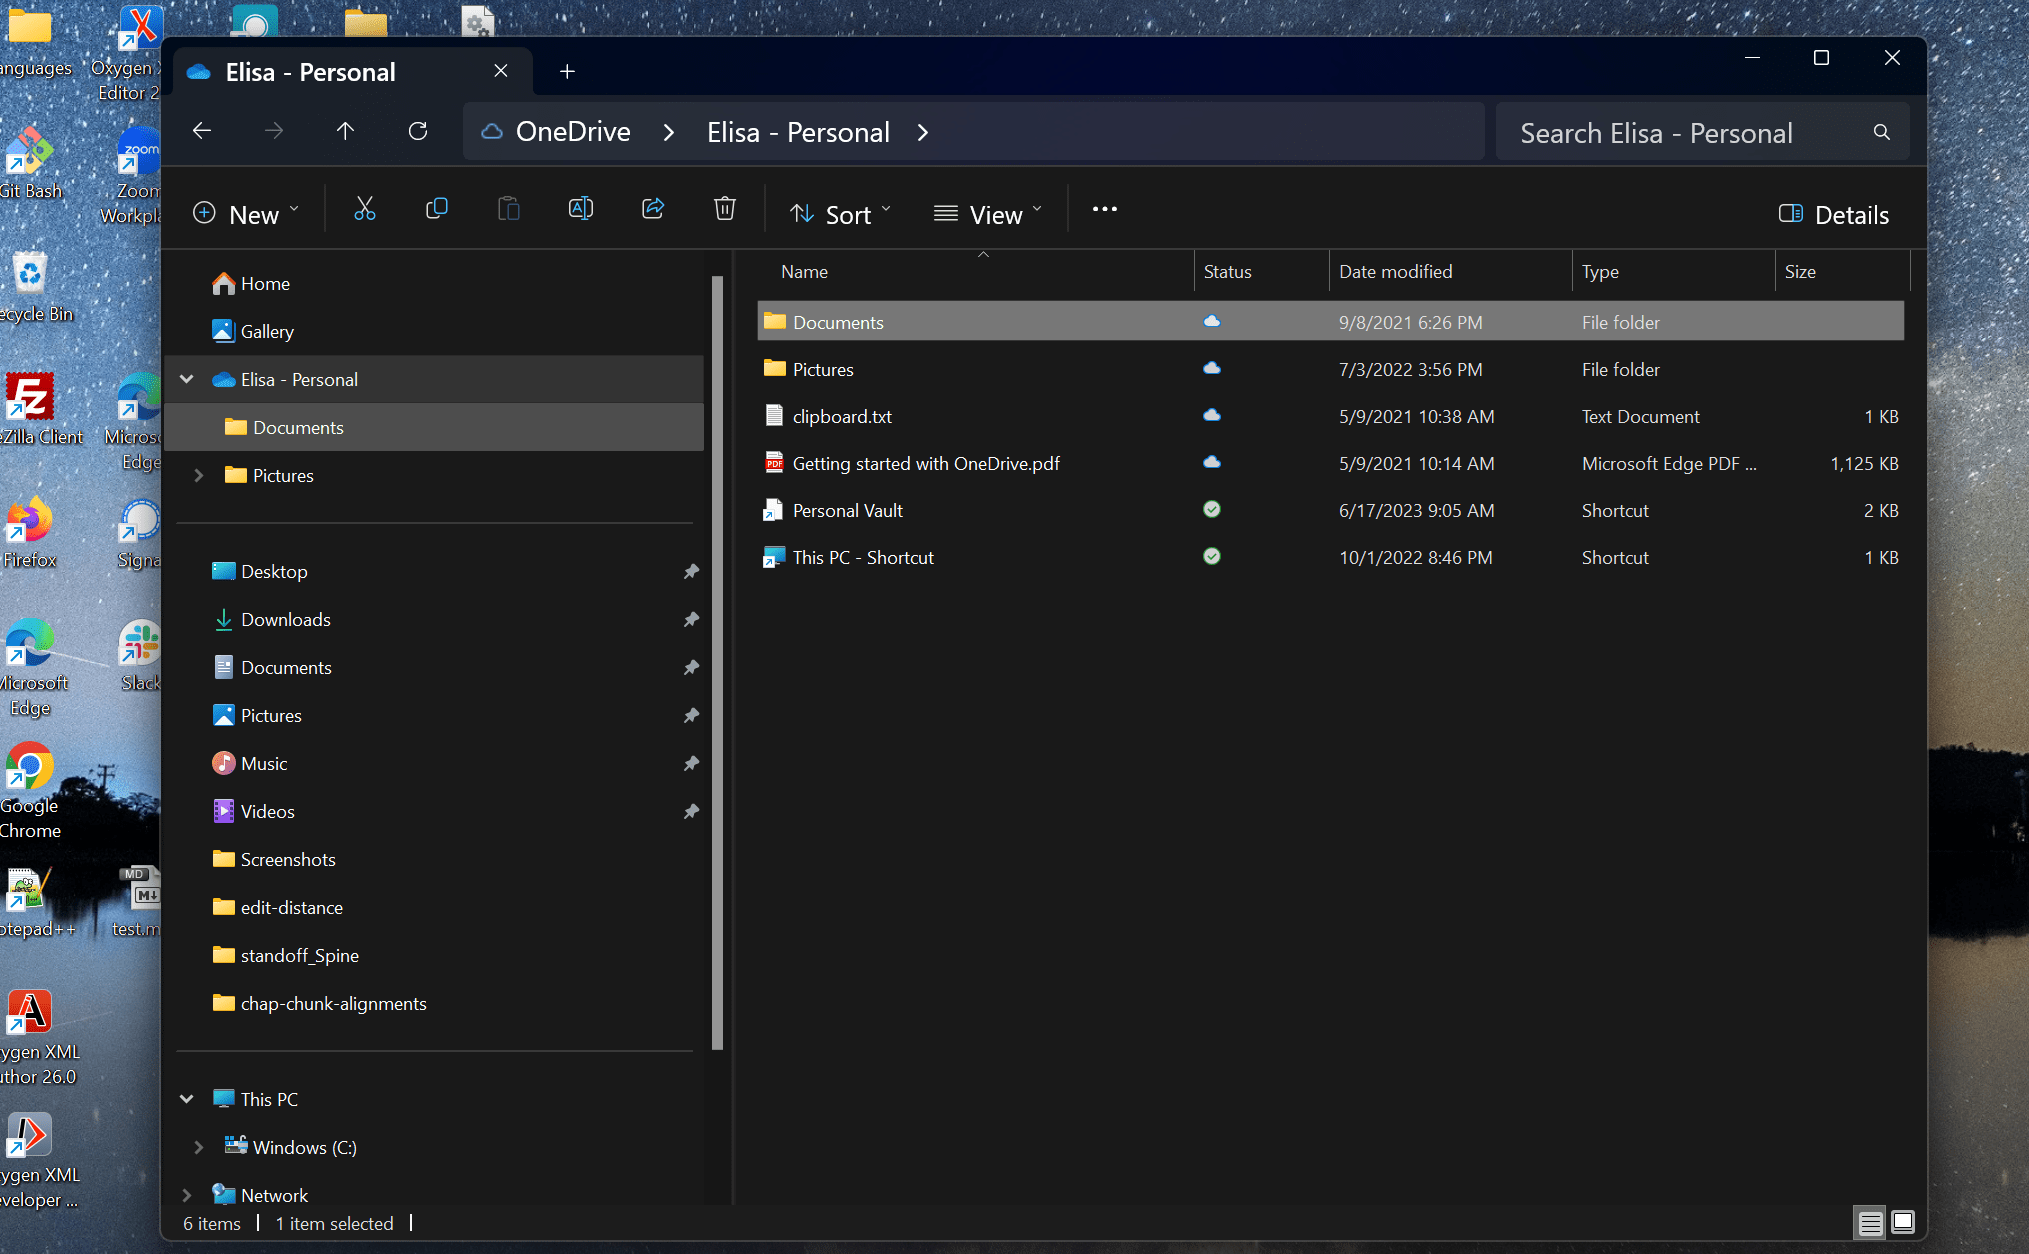
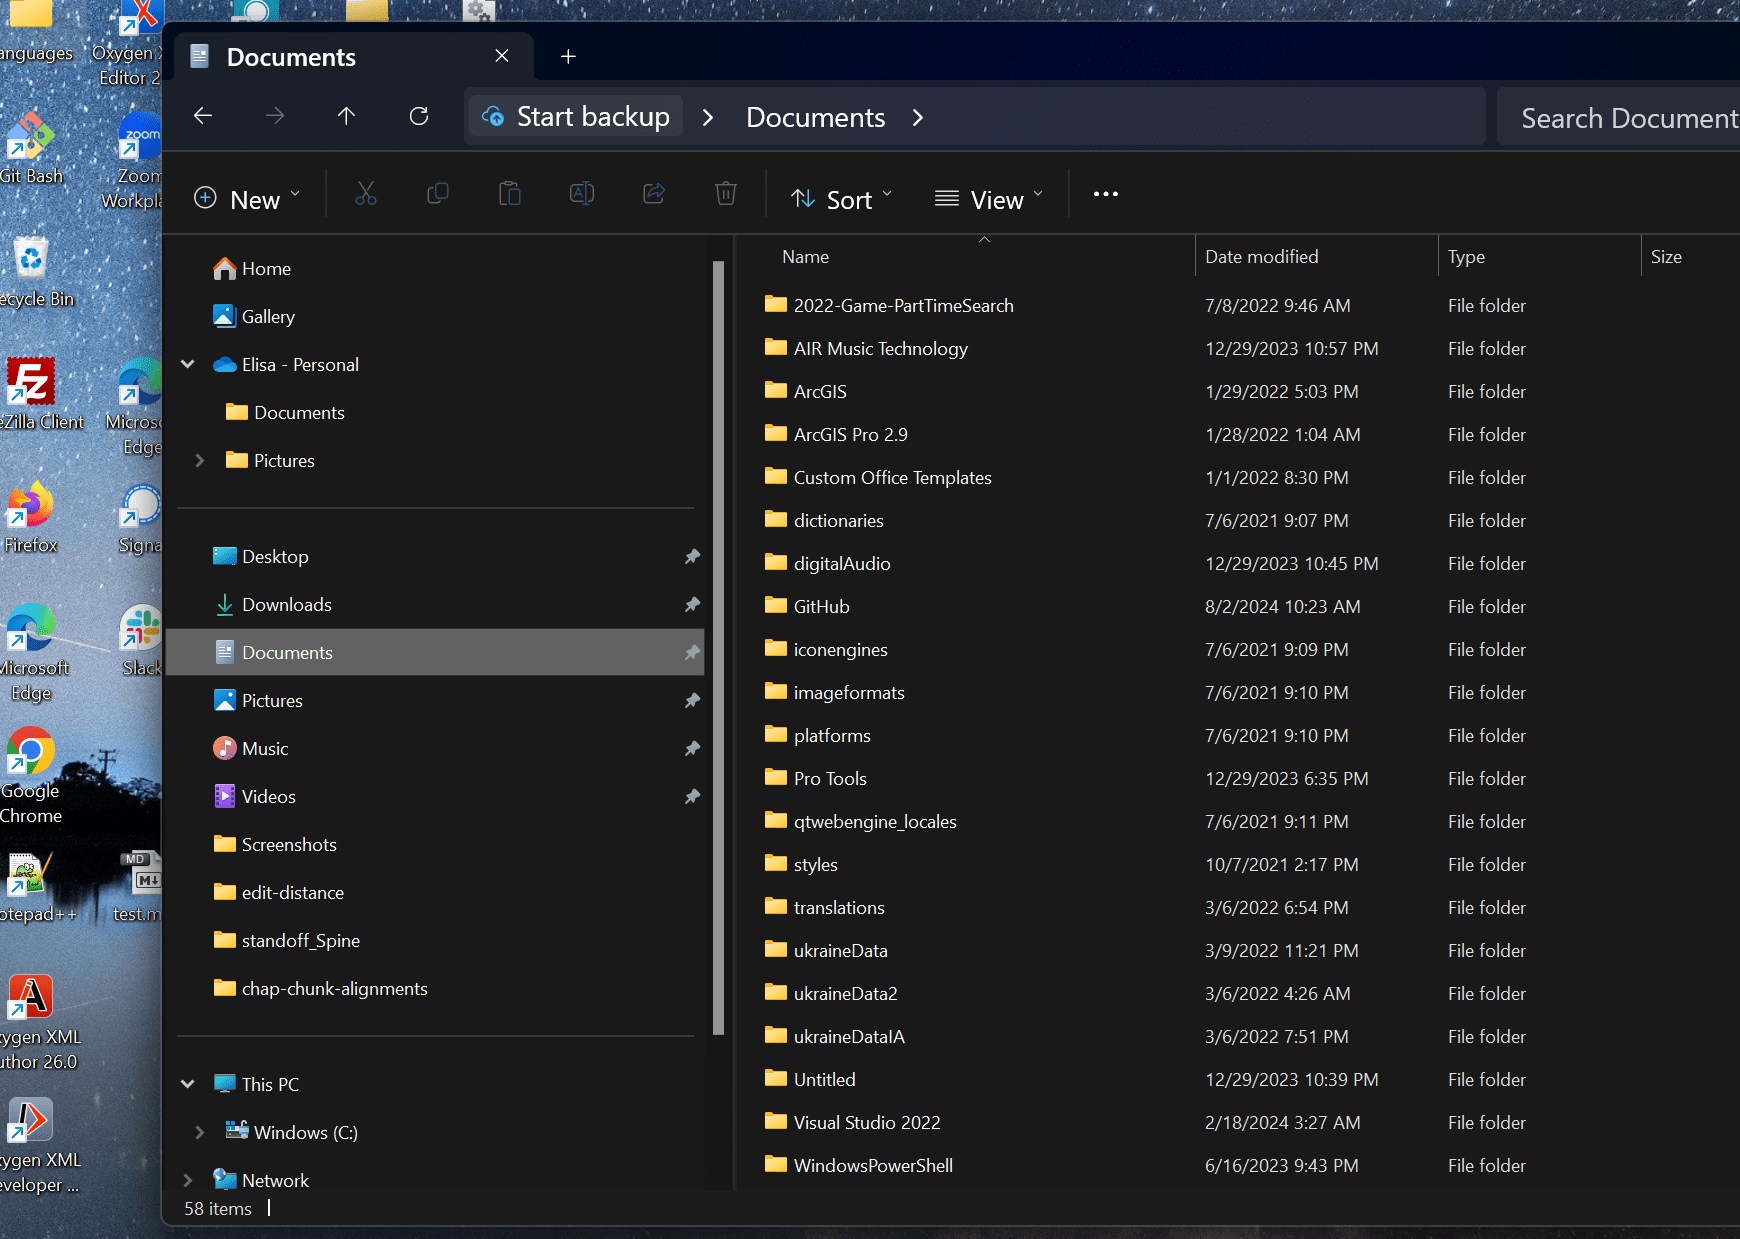
Totally confused in the Windows GUI: Which "Documents" am I using?
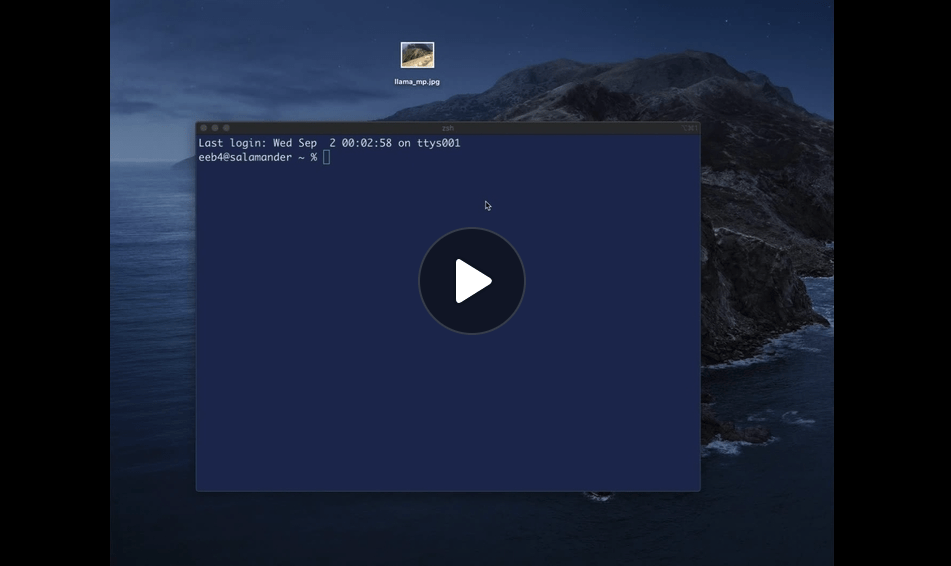
??
Totally confused in the Windows GUI: Which "Documents" am I using?
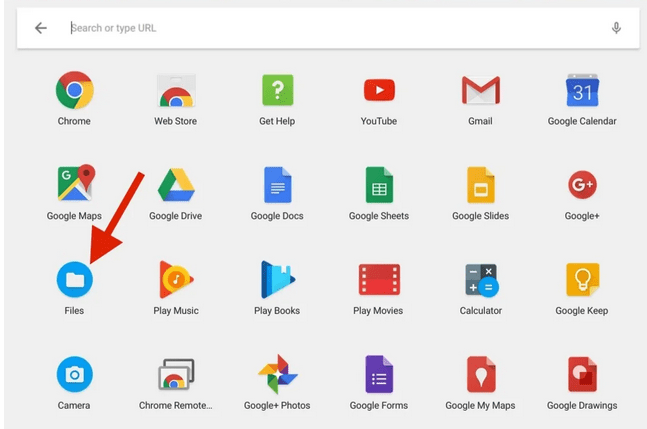
Navigating files in a Chromebook?
Text
?
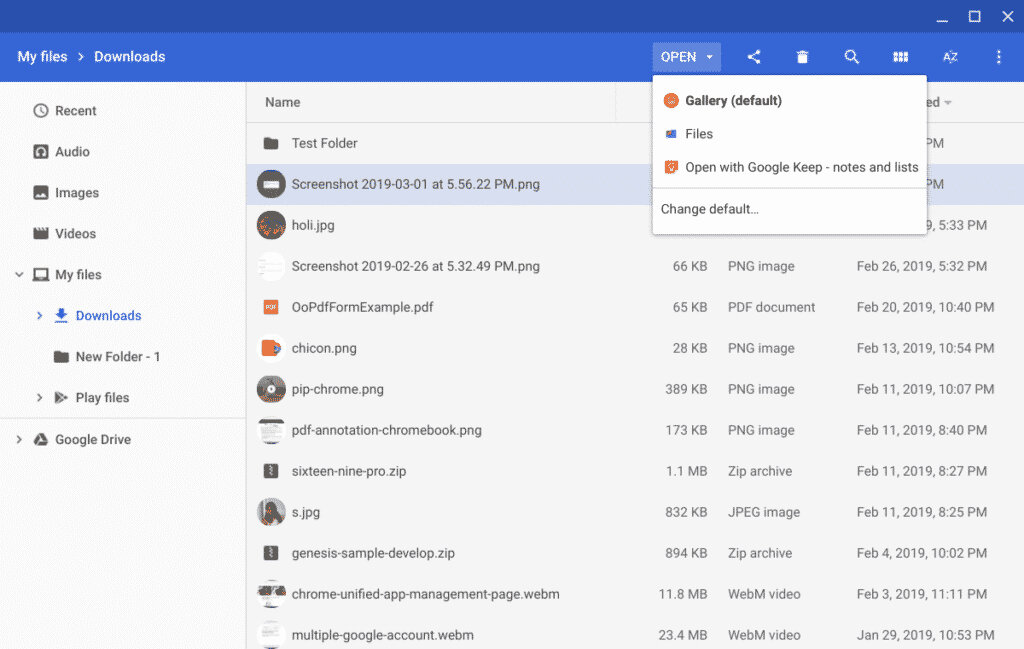
Saving everything in the Downloads directory?
Source: Amin Shariati, “Adding a Splash of Style to Your Workspace: The OS Folder Icons Tale” Medium (July 25, 2023)
But everyone's navigation troubles are a little different...
...depending on cloud storage configuration, how you've had to work with files in the past
We all get lost in the GUI...
Coding requires keeping your folders and files together and being able to navigate them.
Mindful File Management
See "Zen and the art of file and folder organization" How-To-Geek (2010)...or better yet...
...learn command line!
a proper place for everything, and everything in its proper place
You can call it:
It offers:
Helps to mindfully manage files and directories so we can easily do things like:
Our shells are different, but some speak the same language
Windows:
Mac / Linux (+ Linux on Chromebooks)
Our shells are different, but some speak the same language
So...why are we using git?
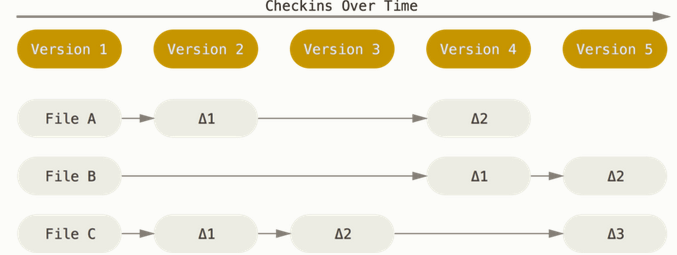
Git offers a precise method of version control, and this is especially important for coders and web developers.
Check out the following articles for details:
Plus, we'll be using it with GitHub, a service applies git to share code and build websites!
Windows users: Start here!
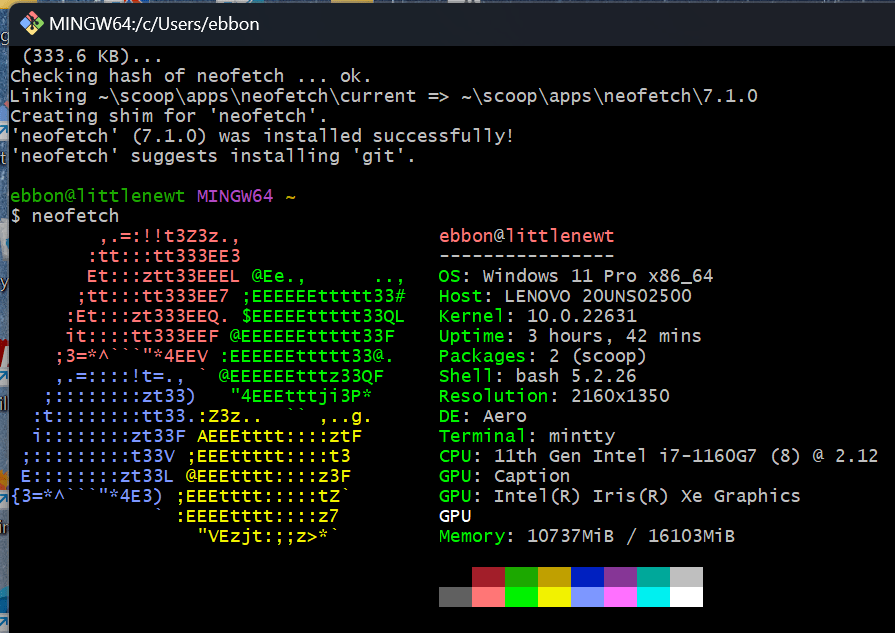
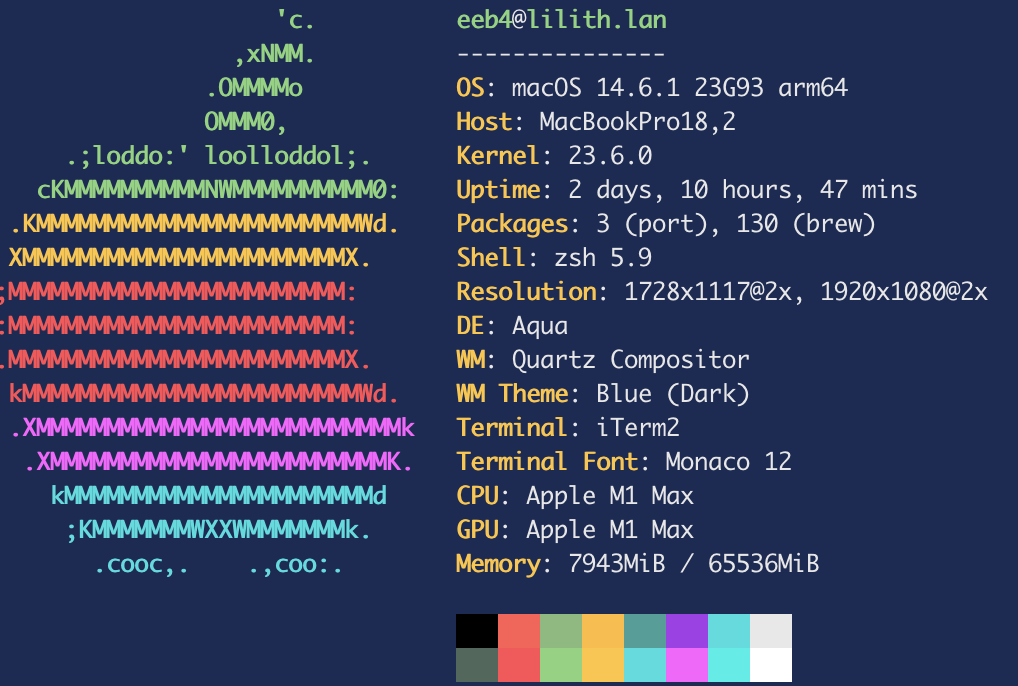
neofetch art + info, but you can figure out how to install neofetch on your own)Mac / Linux users: Start here!
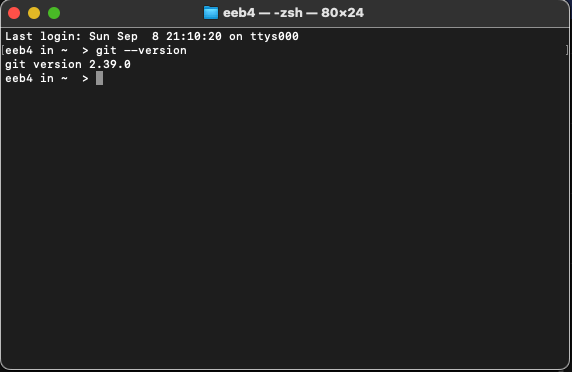
git --versionneofetch, too? Find the installation instructions for Macs, only you need to install Homebrew on Mac first.
Can you install git on a Chromebook?
We're all using the "posix-compatible" shells now, so we will speak mostly the same language
So, we'll start with some basic shell commands for navigating your system and getting info about your files
Then we'll move to the special git commands that handle version control:
cd [space]
cd yourDirectoryName
cd ..
ls -lh
change directory (go walking the directory tree up or down)
print working directory
(show me the full filepath location where I am right now)
list files and directories below me
(“look see”)
cd [space] takes you to the "home" directory of your computer. Try it, and then enter pwd to see where it takes you.
cd yourDirectoryName goes down a level into the directory you indicate
cd .. climbs UP to the parent directory
ls -lh adds a special flag to return lots of information about last-access dates and file sizes and more.
mkdir myNewDirectory
“make directory”: Use this as a convenient way to create and name a new directory. Remember: do NOT put spaces in your directory or file names!
Spaces in folder and filenames makes it very difficult to navigate or share them!
Use this to create a new file. It will be empty until you edit it to add new content. You could, for example, start a new file named newFile.xml, open it in oXygen and edit it.
touch newFile.xml
grep -n "slime" Slime.xml
grep -r "string" .
grep "string" file.xml
grep literally means "global regular expression print". It means, go searching for a string in a file or a directory.
You can ignore case with -i.
You can plug in regex patterns with -E or egrep
literally "concatenate" or just show all the text contents of a file
cat Slime.xml
grep -E rec.p Slime.xml
wc Slime.xml
"word count". Gives you four columns:
numbers of lines, number of words, number of characters, filename
Take the result of one command and feed it to the next
that reads:
ls "pipe" wc -"el"
This is handy way to count the files in a directory! ls sends a list of your files to the wc function, which counts their lines, giving you a file count.
These commands can rename a file, or move it to a new location. Indicate the source file and the destination directory.
mv deletes the original. cp copies without deleting the original
Renaming a file: Navigate to its directory, and use mv to change the name:
eeb4@salamander textAnalysis-Hub % cp Class-Examples/XML/joeyClassPush.xml Sandbox/Copies the file without deleting the original. Use the [tab] key to autocomplete to help you be sure a directory or filename is where you think it is.
mv joeyClassPush.xml joeyExample.xml
Usually we do that in GitHub, and then clone it to a precise location on our local computers.
Find a good, visible folder on your computer that is not actively syncing to OneDrive or Google, and that's easy for you to locate. We'll open your Git Bash (Windows) or Terminal/iTerm (Mac) in that location.
A proper place for everything, and everything in its proper place.
mkdir GitHub
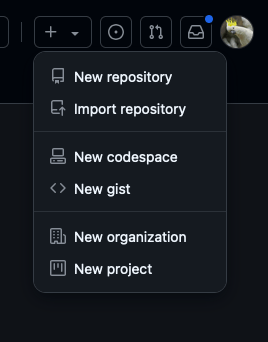
Create this in the web browser on GitHub
+ near your profile, and select New repository
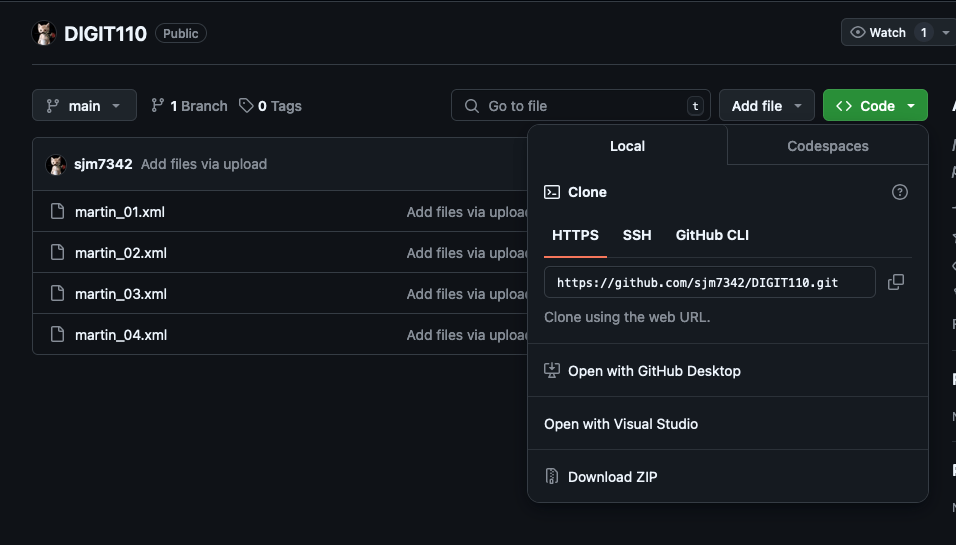
pwd to make sure you're at the GitHub foldergit clone and right-click to paste in the HTTPS address, so it's like this:
Pull in anything new from remote before you start making changes!
pulls in new files committed to the branch you've checked out.
Scenario 1: Could you have pushed something to your remote repo from a school computer or the web interface? Are you at home now? Pull in your changes!
Scenario 2: Did your teammates or Dr. B push something to your branch the remote class or project repo? Pull in their changes!
Usually you should git pull before you add, commit, and push anything new.
Exception to this: You have a change that you needed to commit but neglected. someone else added changes to the file. If you pulled in those changes, you'd lose your work. In this case, you should add the file first, with git add filename.ext
This tells you the status of your local repo only, whether there is anything new to be added, committed, or pushed.
Super useful command! git remote show origin provides information on the status of the remote repo on this branch by comparison with your local repo.
git add filename.ext
This "stages" your files or deletions in git's system to indicate that they are important and should not be overwritten when you do a git pull. You must git add your files before you can commit them. You can add every change with -A, or add only specific files.
You must remember to write a meaningful commit message (ideally short and clear). This will be logged in the git repo's history. Your message documents what this change is about.
Sends your commit to the remote repo's version of your branch.
git push:Why isn't my username and password enough?
Follow HowToGeek's super-helpful instructions on how to set up your Developer token. Follow instructions for your computer (Windows / Linux / Mac) on storing your credentials. Once you enter them and have your local git configuration properly set up, you won't ever need to enter a password again!
When you'll need this:
You'll be prompted in your shell when you try to push to enter a special developer token and it can't just be your password.
Because hackers are everywhere, what's stored in GitHub repos can be sensitive, and GitHub provides enhanced security. Passwords are more easily hacked than long developer tokens.
Practice these commands for now until you get used to them!
Later on, we'll move to Level 2: Branching and Forking!
Remember:
By Elisa Beshero-Bondar
An orientation to the shell commands for working with git and GitHub.


