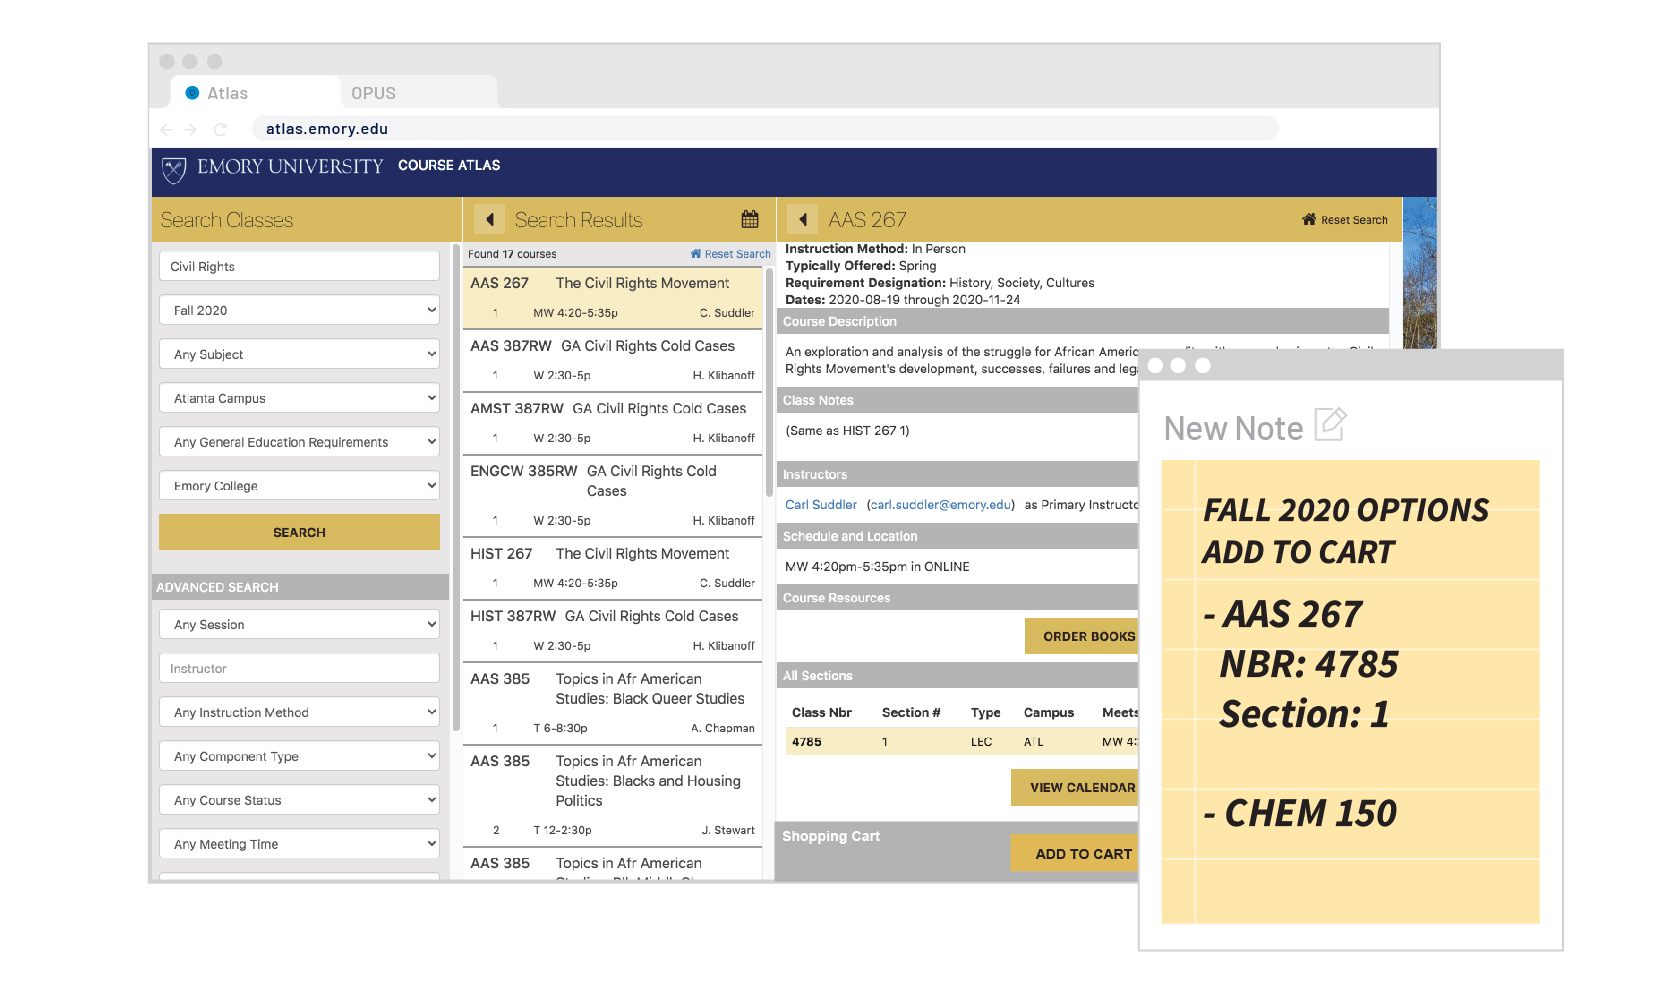
Let's pick up where we left off! First let's switch over to OPUS by logging into opus.emory.edu. For the purposes of this walkthrough, select the "OPUS" tab in our browser below.
STEP 1

Once logged-in let's select Course Planning and Enrollment. This is where you will make all Course selections and changes up through Add/Drop/Swap.
STEP 2
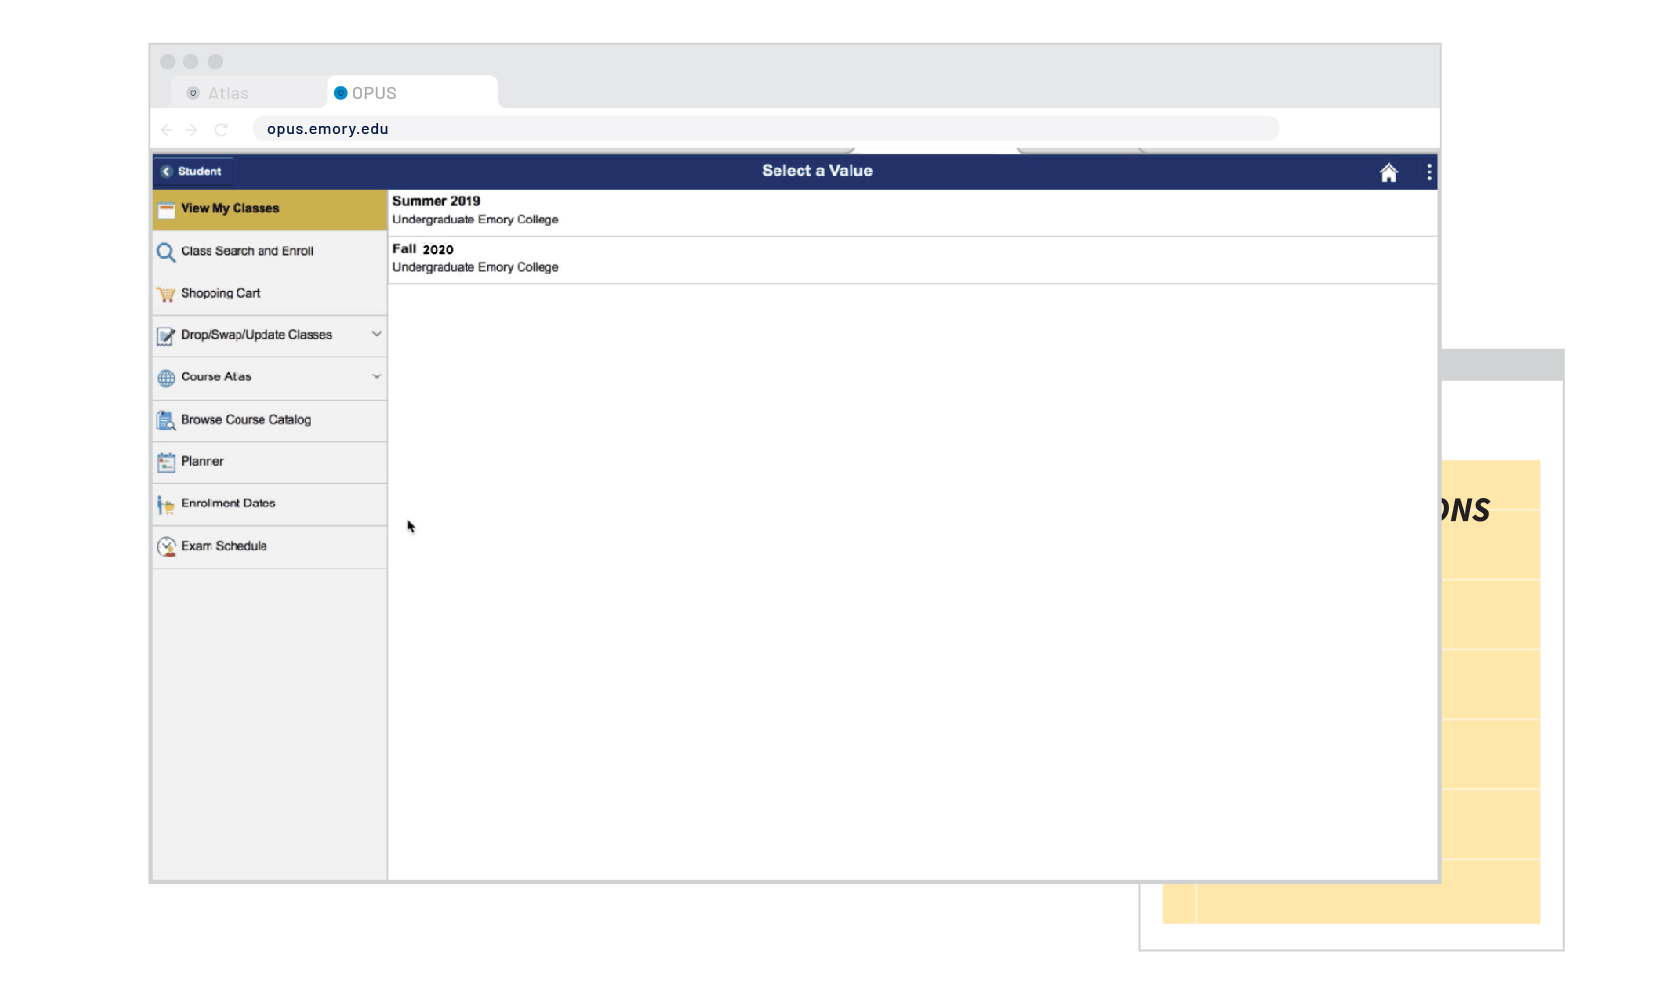
To begin, let's search for courses from the list we created after looking through the Course Atlas. Select Class Search and Enroll from the sidebar below.
STEP 3
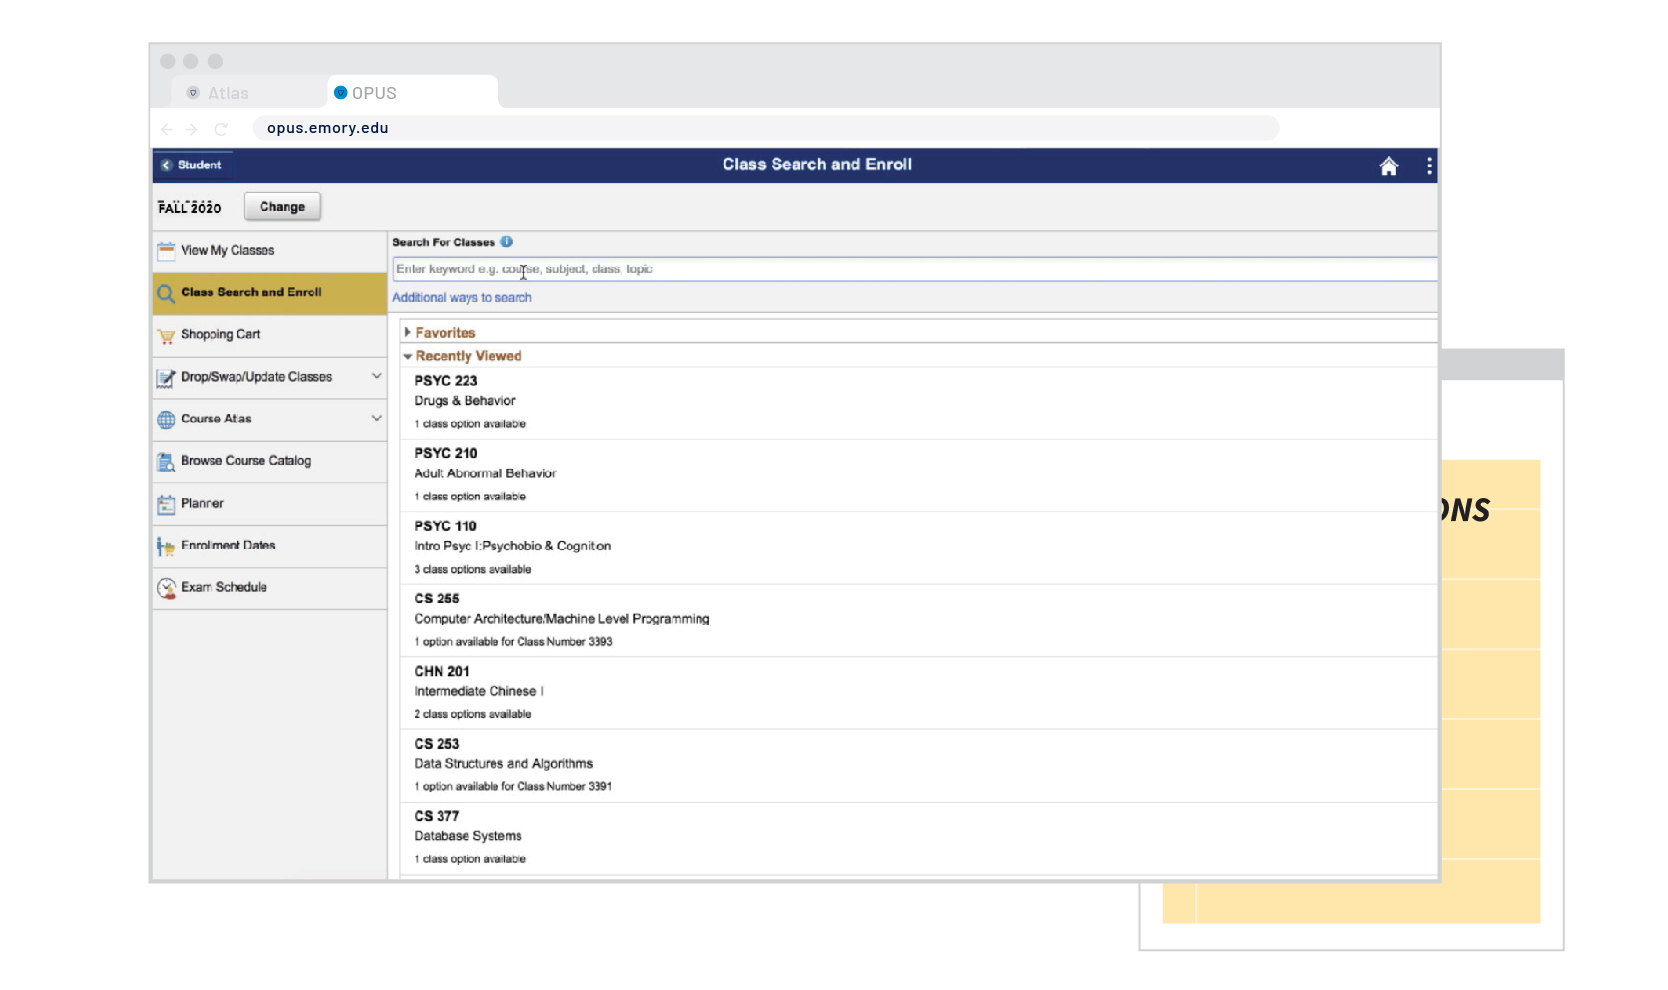
Let's start by using the search field. Click inside the search field to begin inputting some terms and filters.
STEP 4
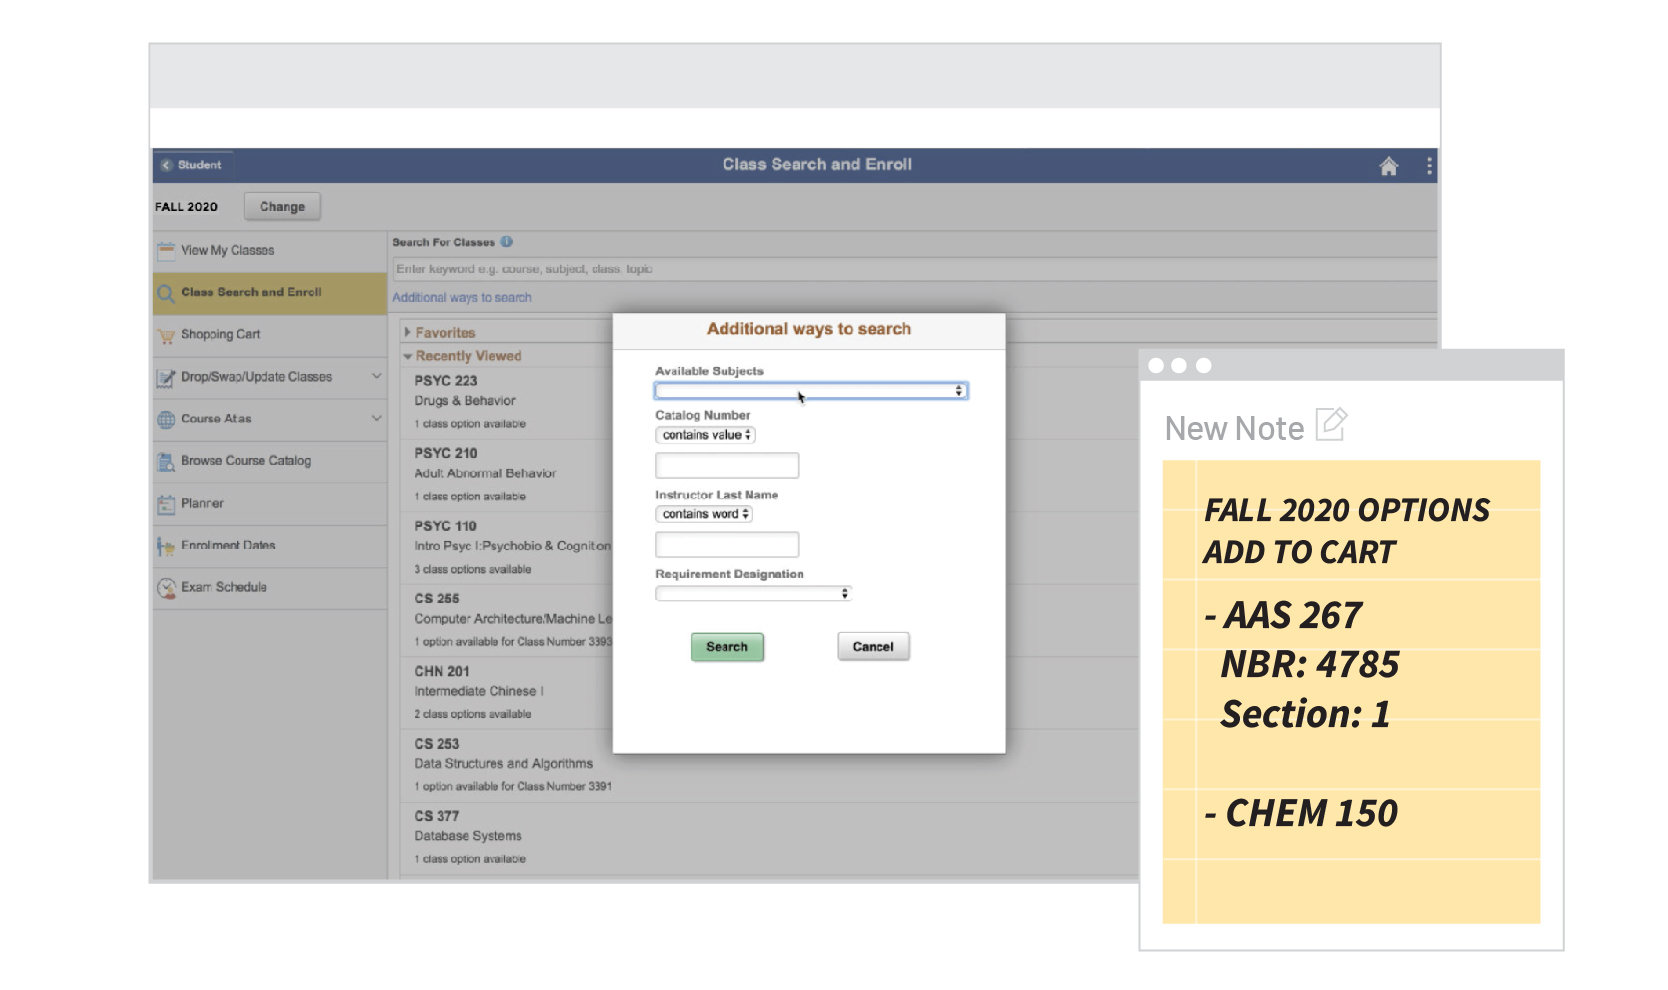
Use the drop-down menu to select the Subject. From our note we took earlier, let's search for some CHEM 150 courses. Click the "Available Subjects" dropdown to continue.
STEP 5
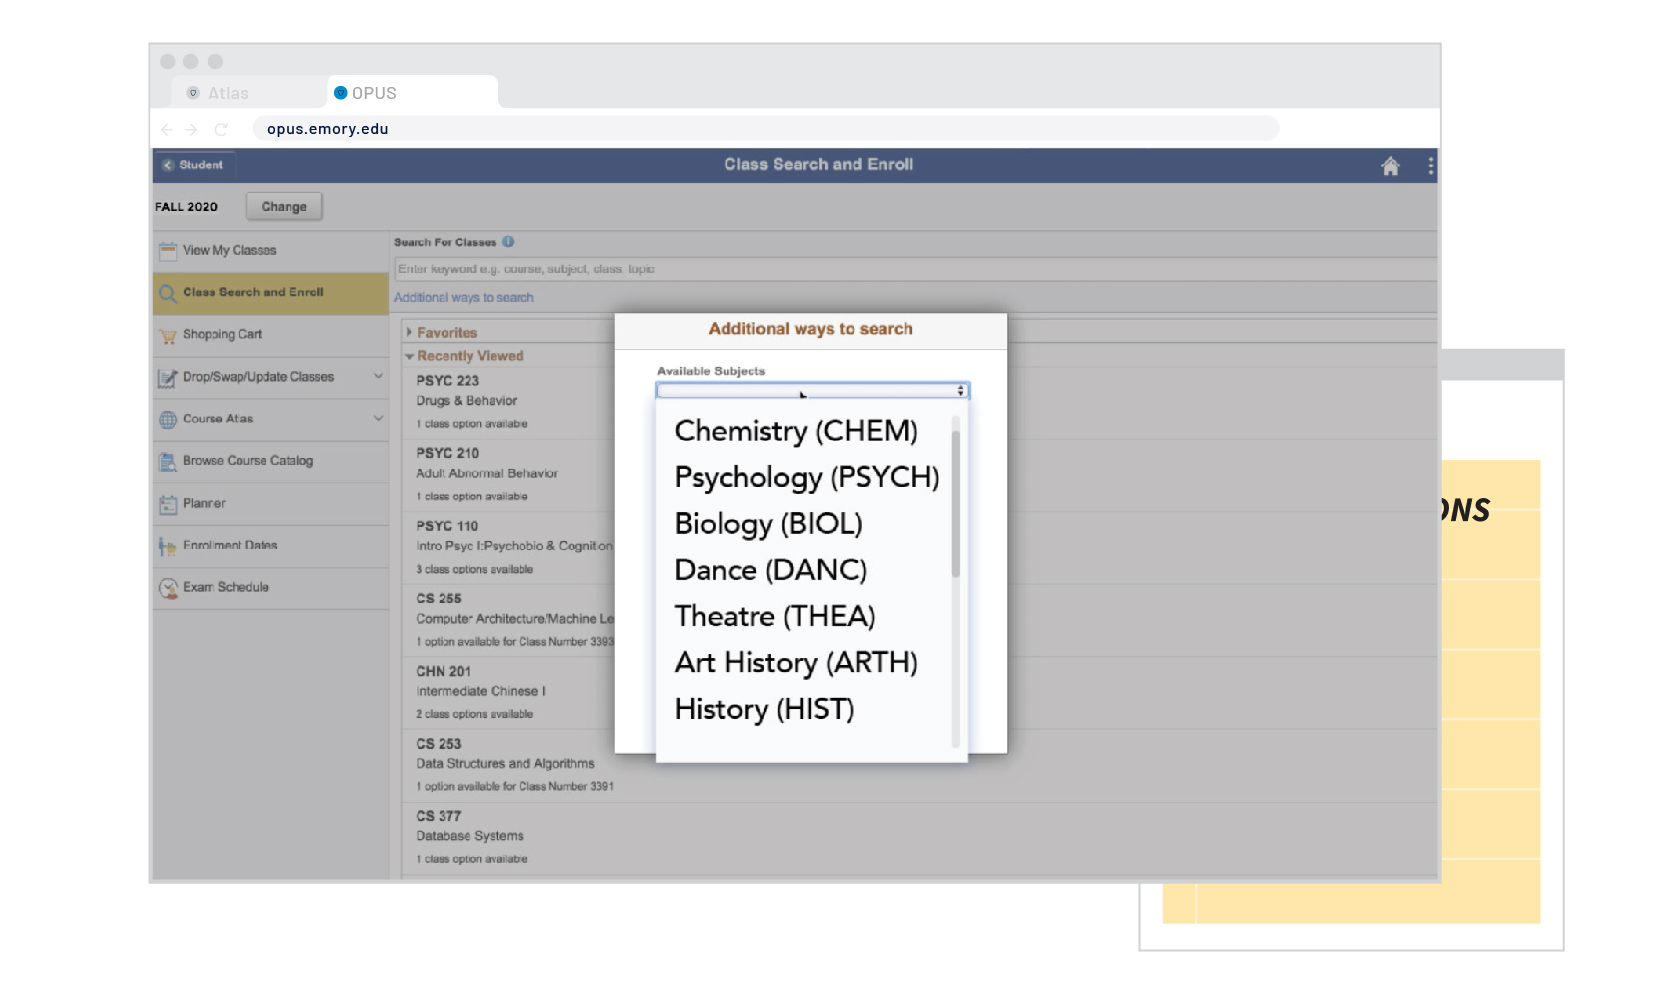
Select "Chemistry (CHEM)" from the options below.
STEP 6
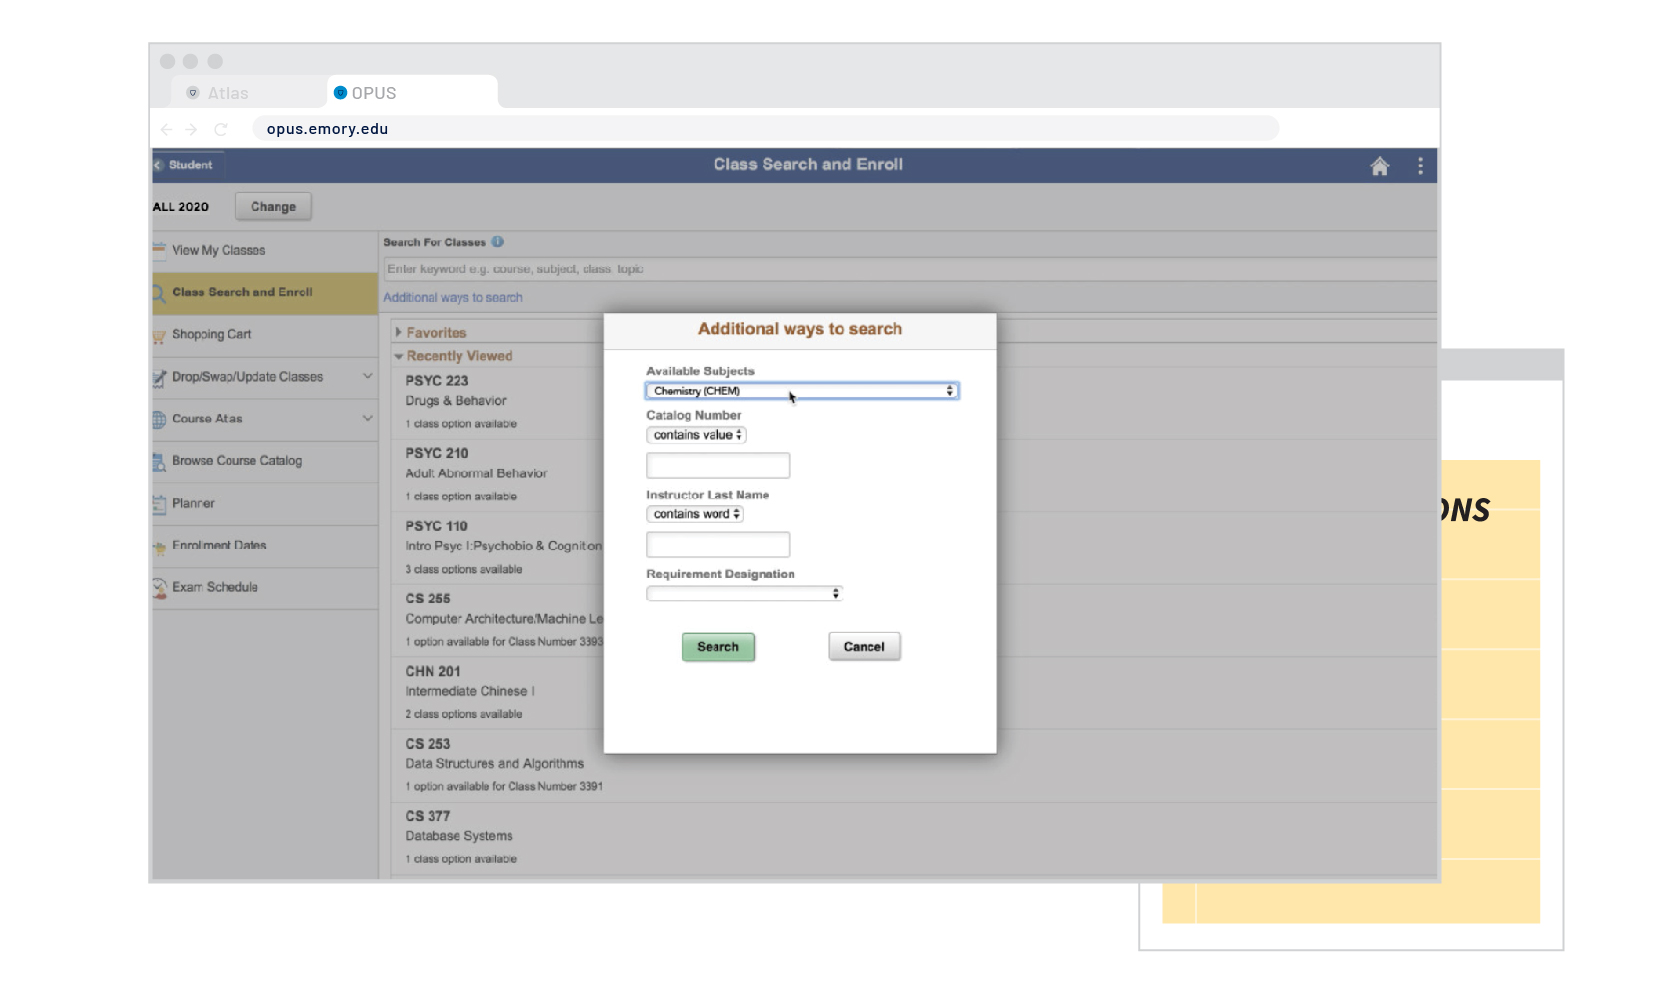
Next, click the input field under Catalog Number to input "150"
STEP 7
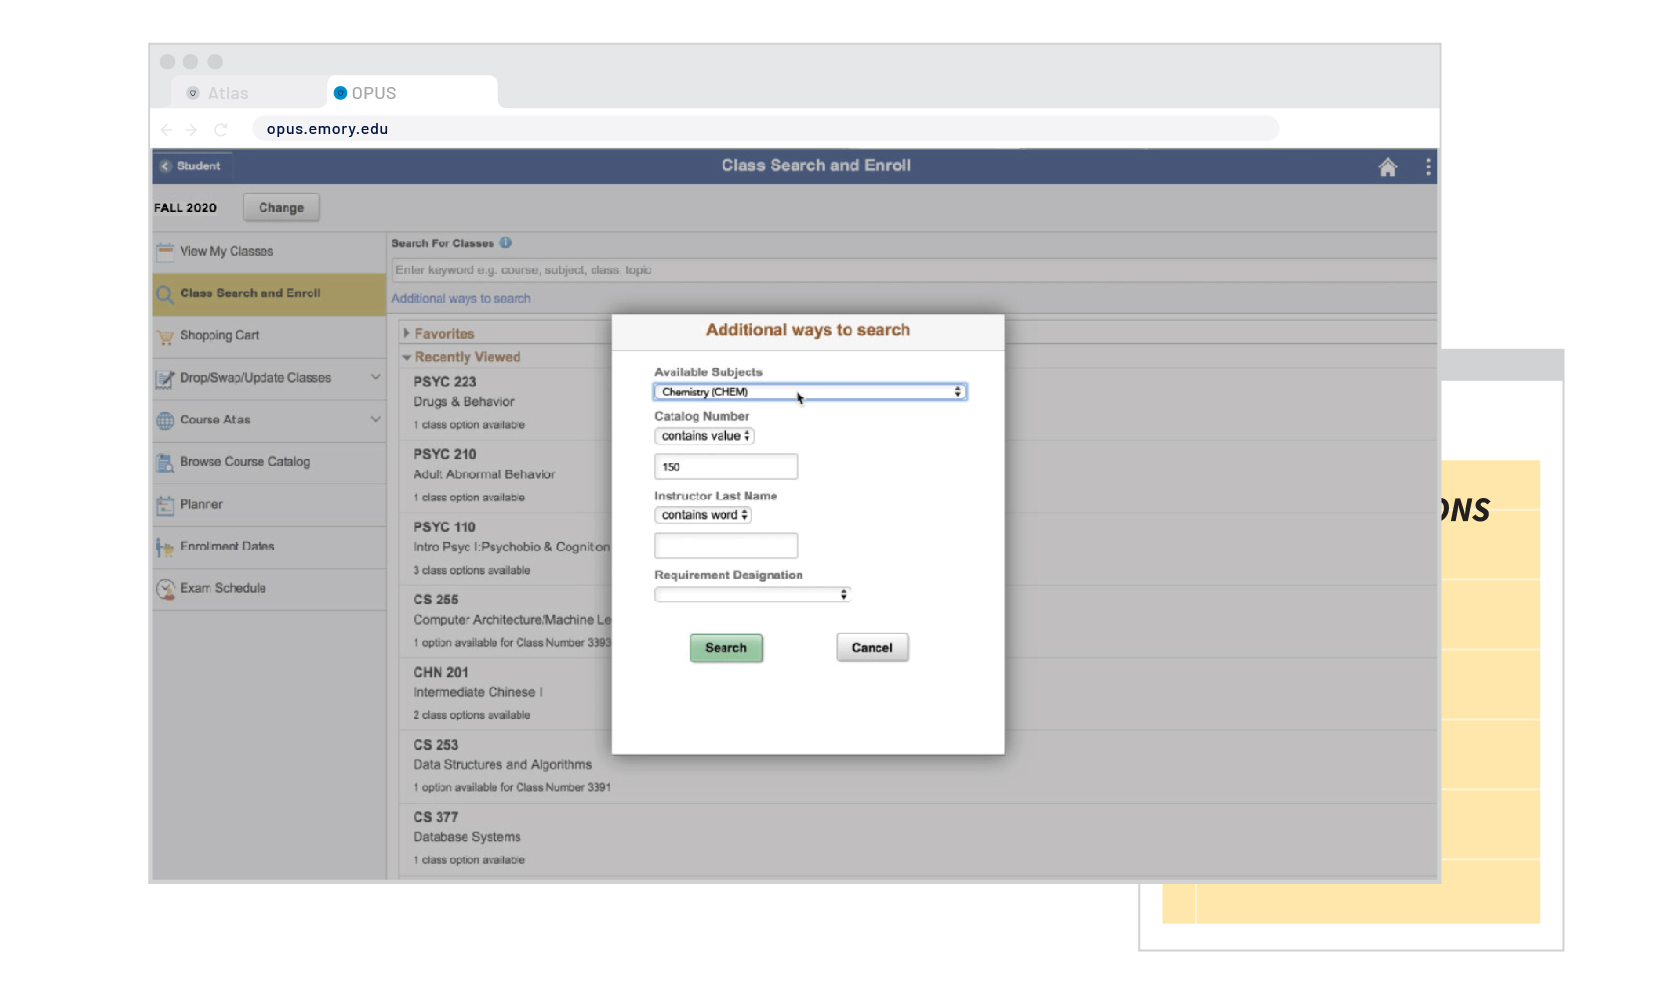
Click the "Search" button to search for courses.
STEP 8
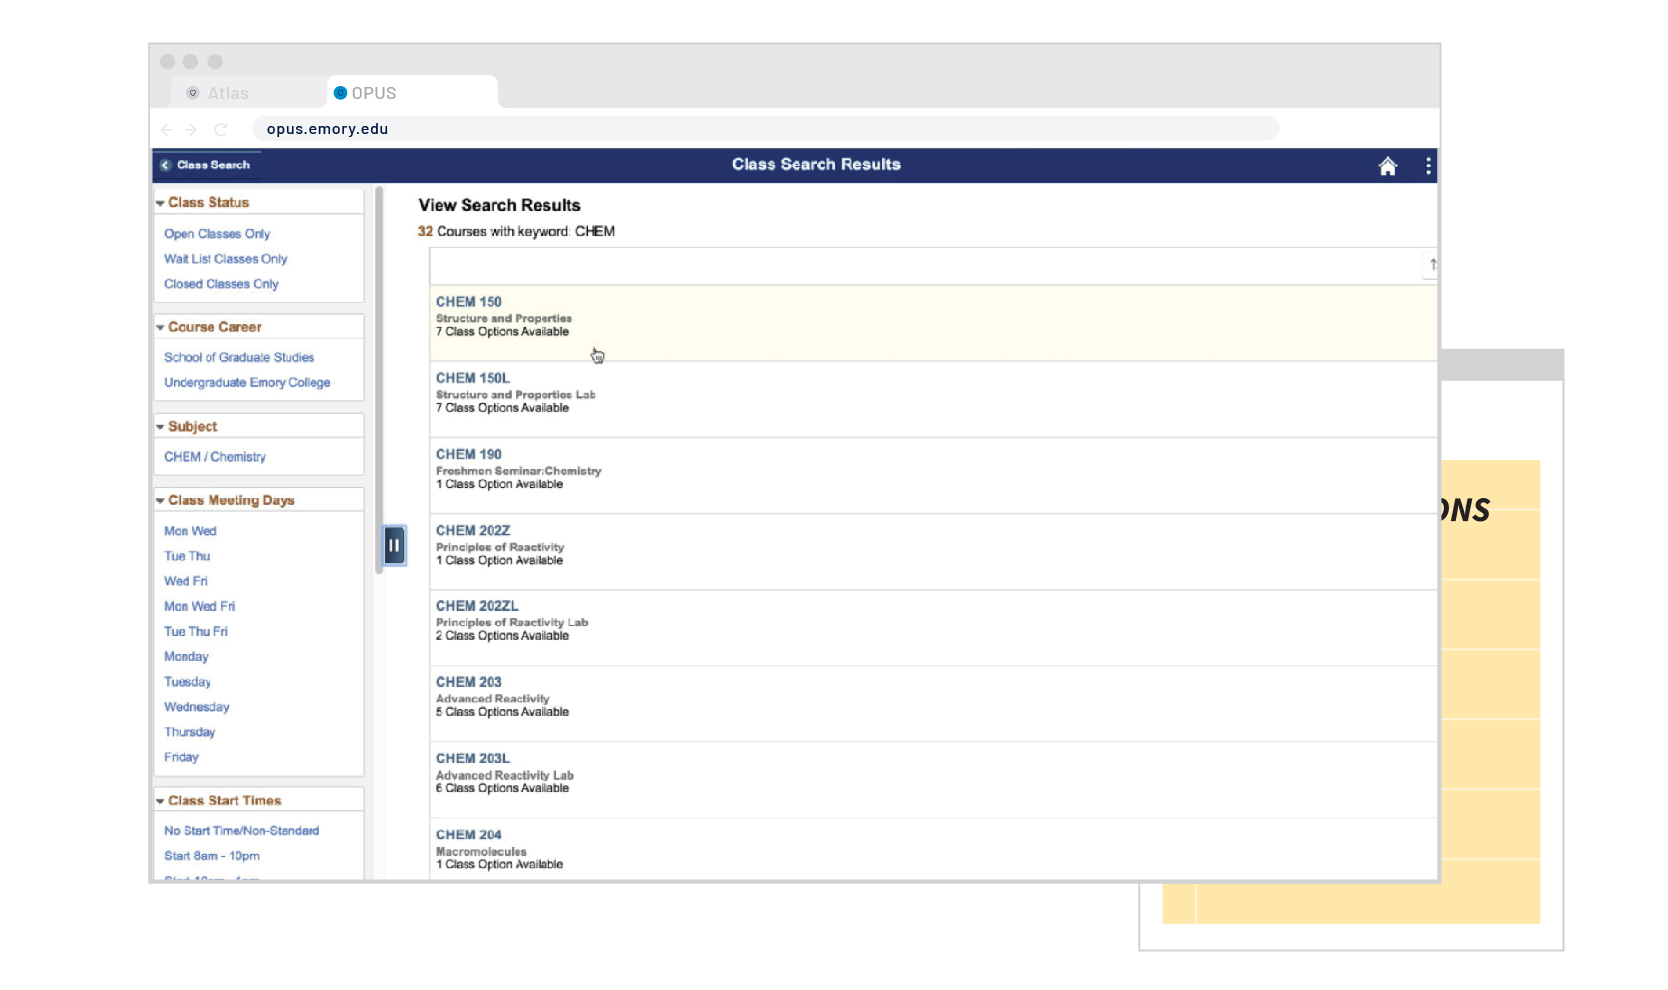
From the found courses, let's select the one that fits our initial search "CHEM 150." Select this course from the list below to continie.
STEP 9
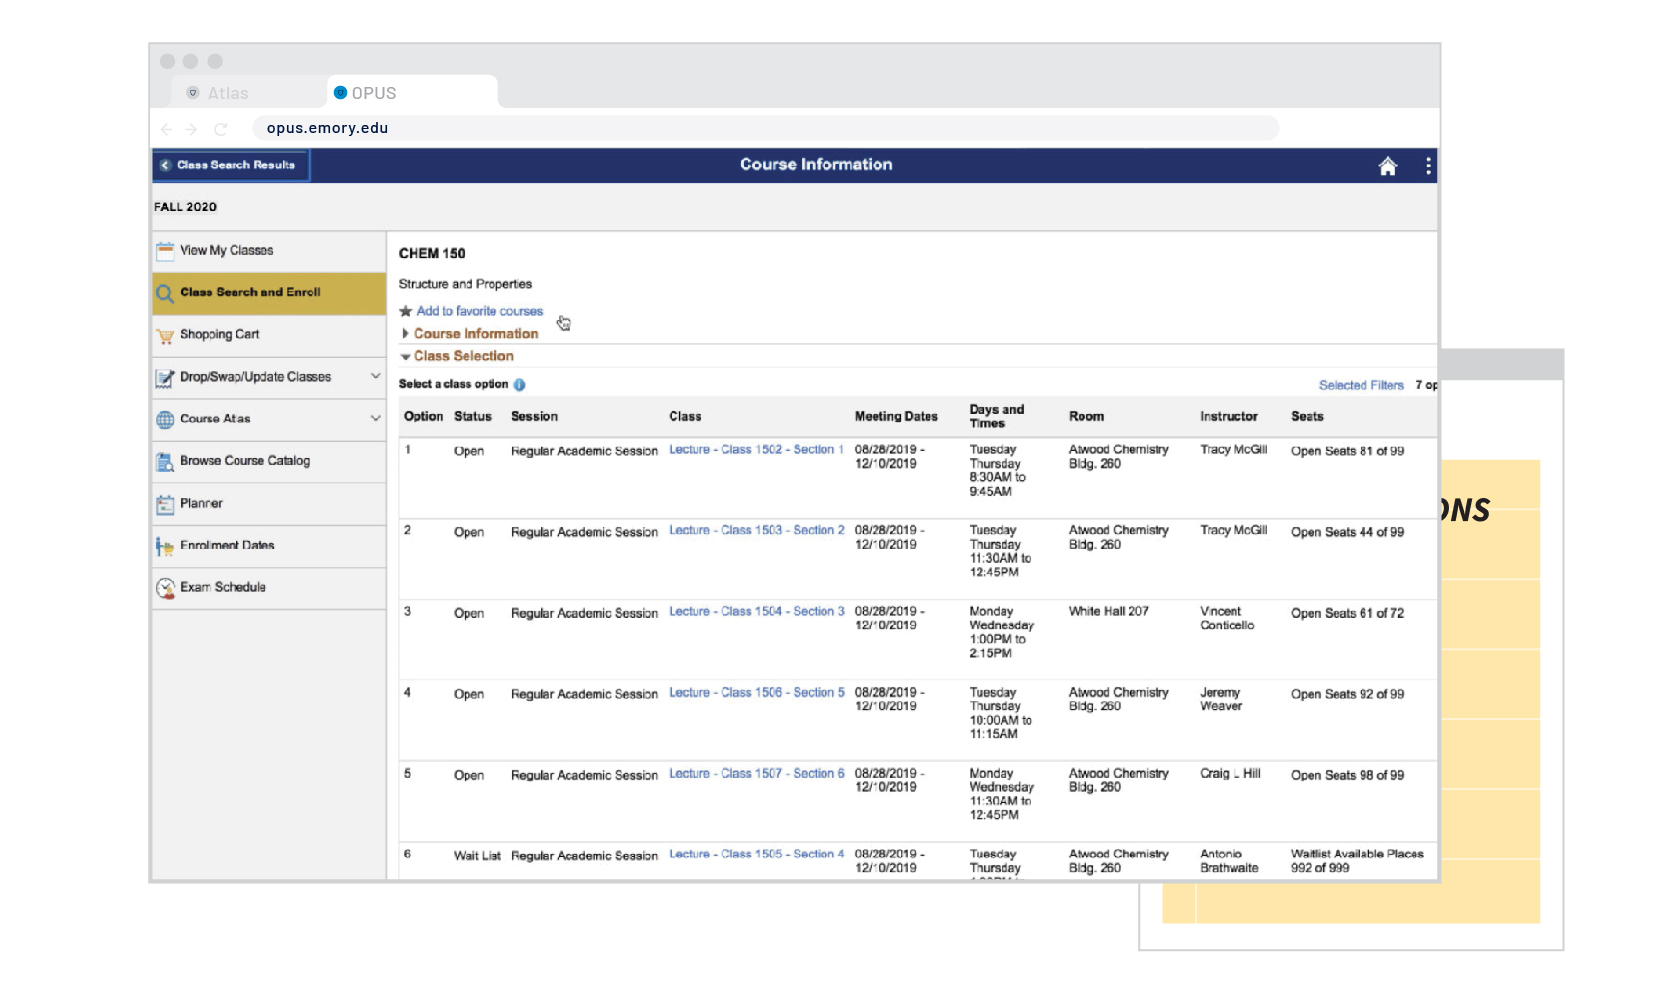
If a course has multiple sections, you will be taken to a list of all available class offerings for this specific course. Let's select Section 1, as it seems to fit our schedule the best!
STEP 10
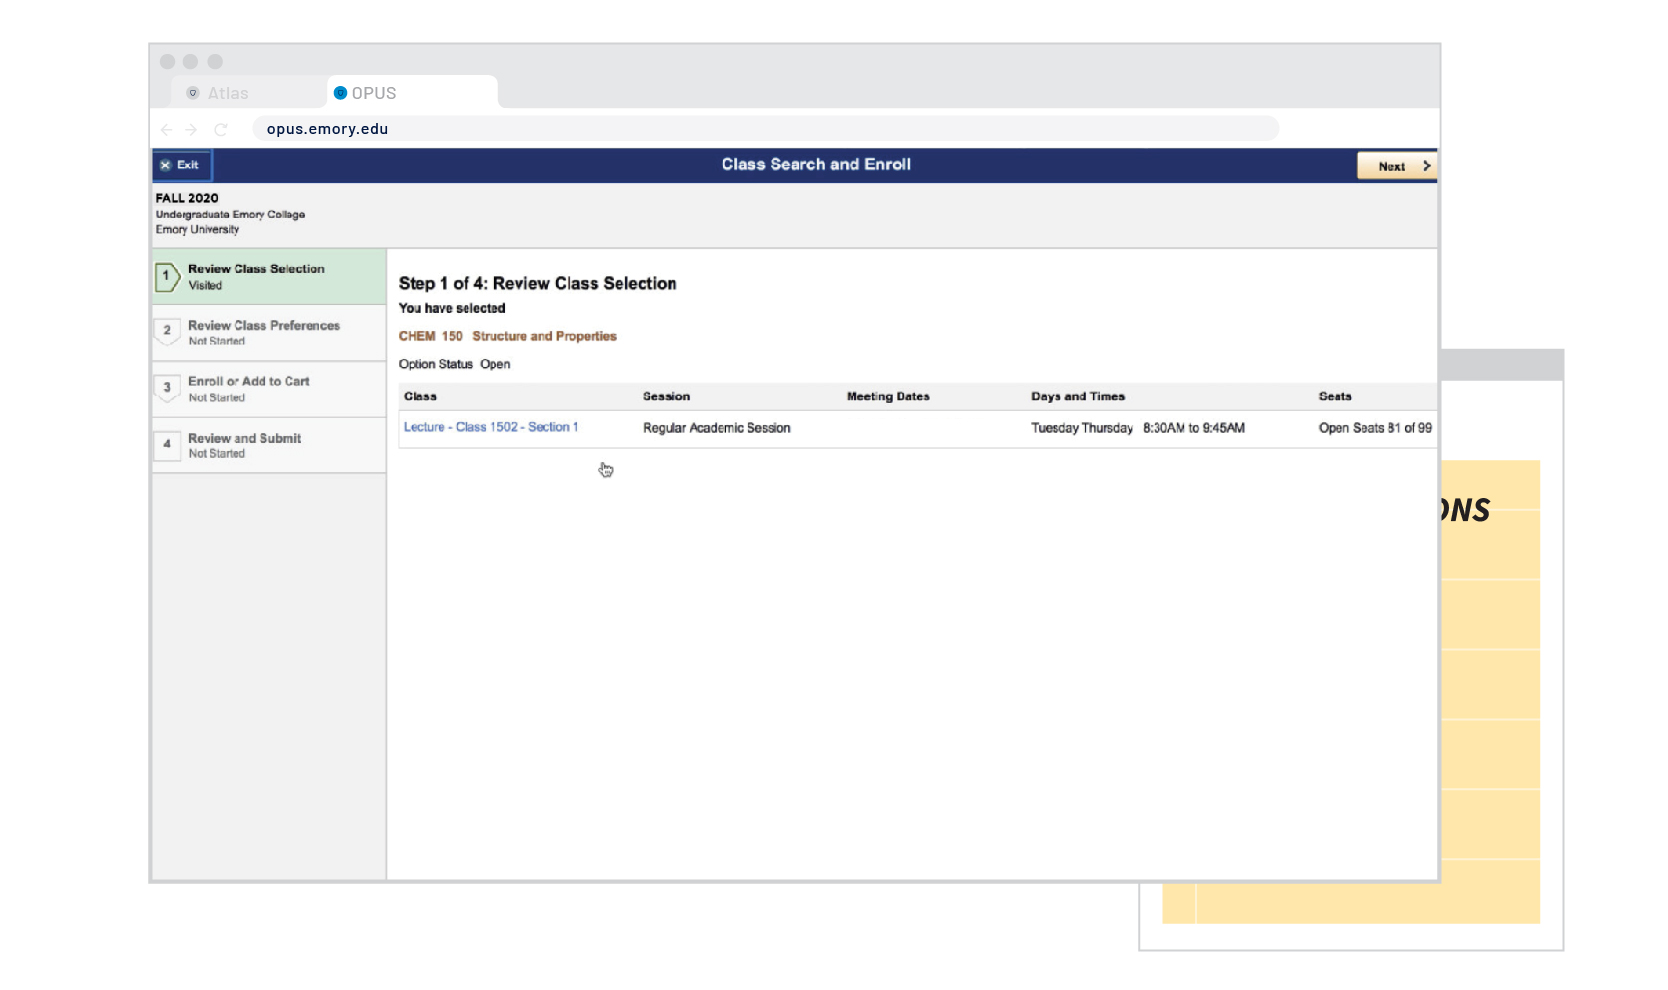
Now let's start adding this course to our Shopping Cart. Review the information and select "Next"
STEP 11
Why we use Shopping Carts
Think of your OPUS Shopping Cart like an Amazon wishlist. When it comes time to Enroll (or check-out), you can easily select Shopping Cart courses instead of having to go course by course (which can be timely). It's best to put the work in ahead of time so during your Registration Appointment, you are good to go.
Using your shopping cart also allows you to have options in case a course you previously selected fills up or is no longer available. Having options means you can quickly adapt your schedule and not waste additional time looking for courses. We suggest first-year students fill up their shopping cart (10 - 15 courses) to give options during the Registration Appointment.
Now that we have reviewed why we use a Shopping Cart let's select the "Next" button again!
STEP 11
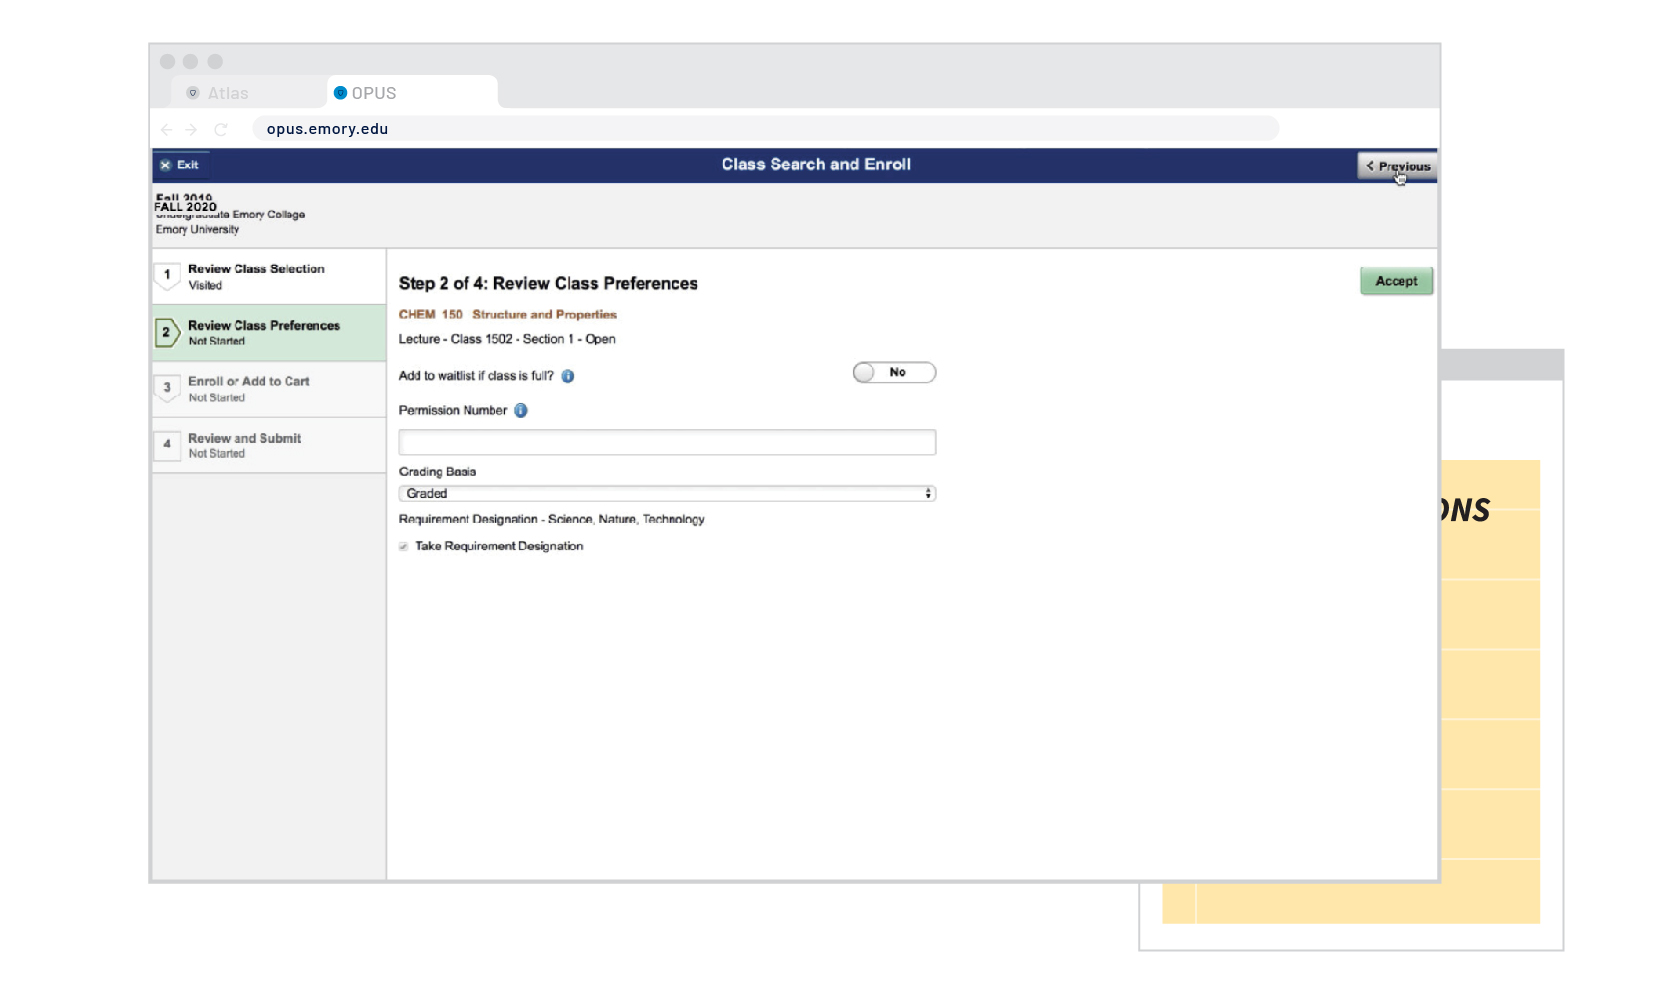
If a course requires a Permission Number you can input this here as well as indicate a Waitlist preference. Click Accept after reviewing this information.
STEP 12
Some courses allow students to be placed on a Waitlist. This means if a course is full by the time you enroll, you can be added to a queue that will automatically add you to a course, if a certain number of spots open up (other students drop the course).
For your first Enrollment Period, try to avoid Waitlisting until you have a schedule and utilize the "Drop/Swap If" function. More information is available in the Reference Pages.
WHAT'S A WAITLIST?
Some courses are restricted to a certain group of students. Typically the course description will say if a Permission Number is required. If you would like more information about a specific course, you can reach out to that department directly to inquire about obtaining permission to enroll.
This is why it's a good idea to begin your exploration early.
WHAT'S A PERMISSION NUMBER?
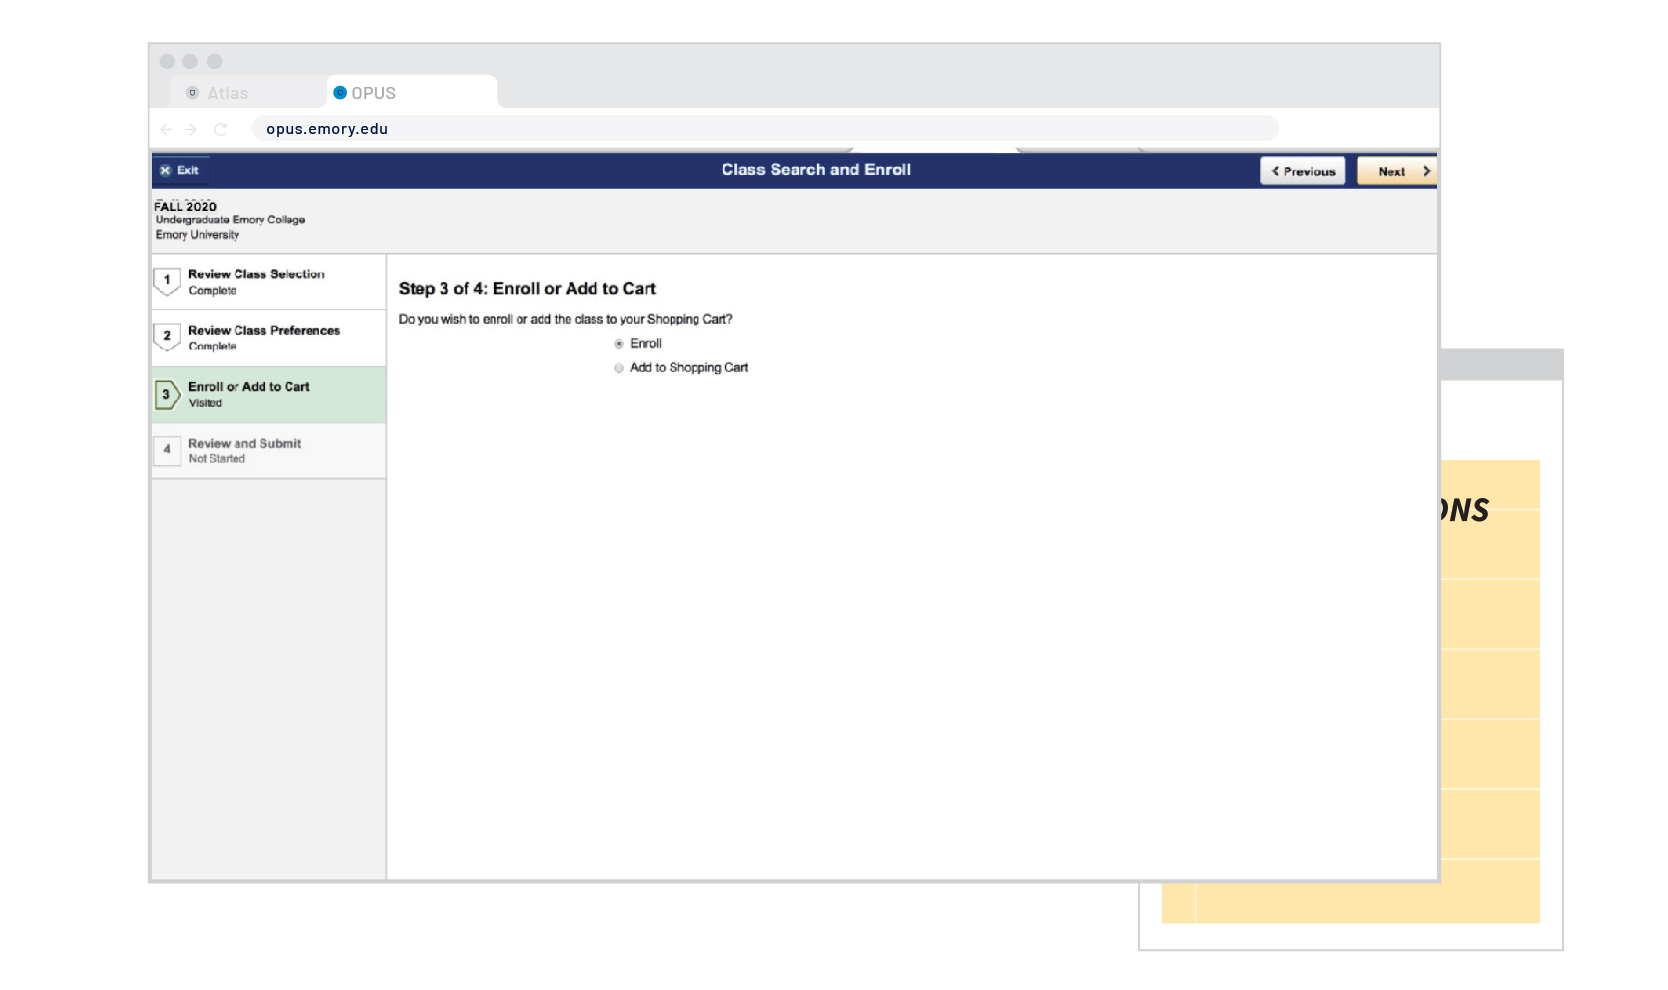
Change your option from enroll to "Add to Shopping Cart." The Enroll button may not be available until during your Registration Appointment or Add/Drop/Swap.
STEP 13

Click next to continue to the last step.
STEP 14
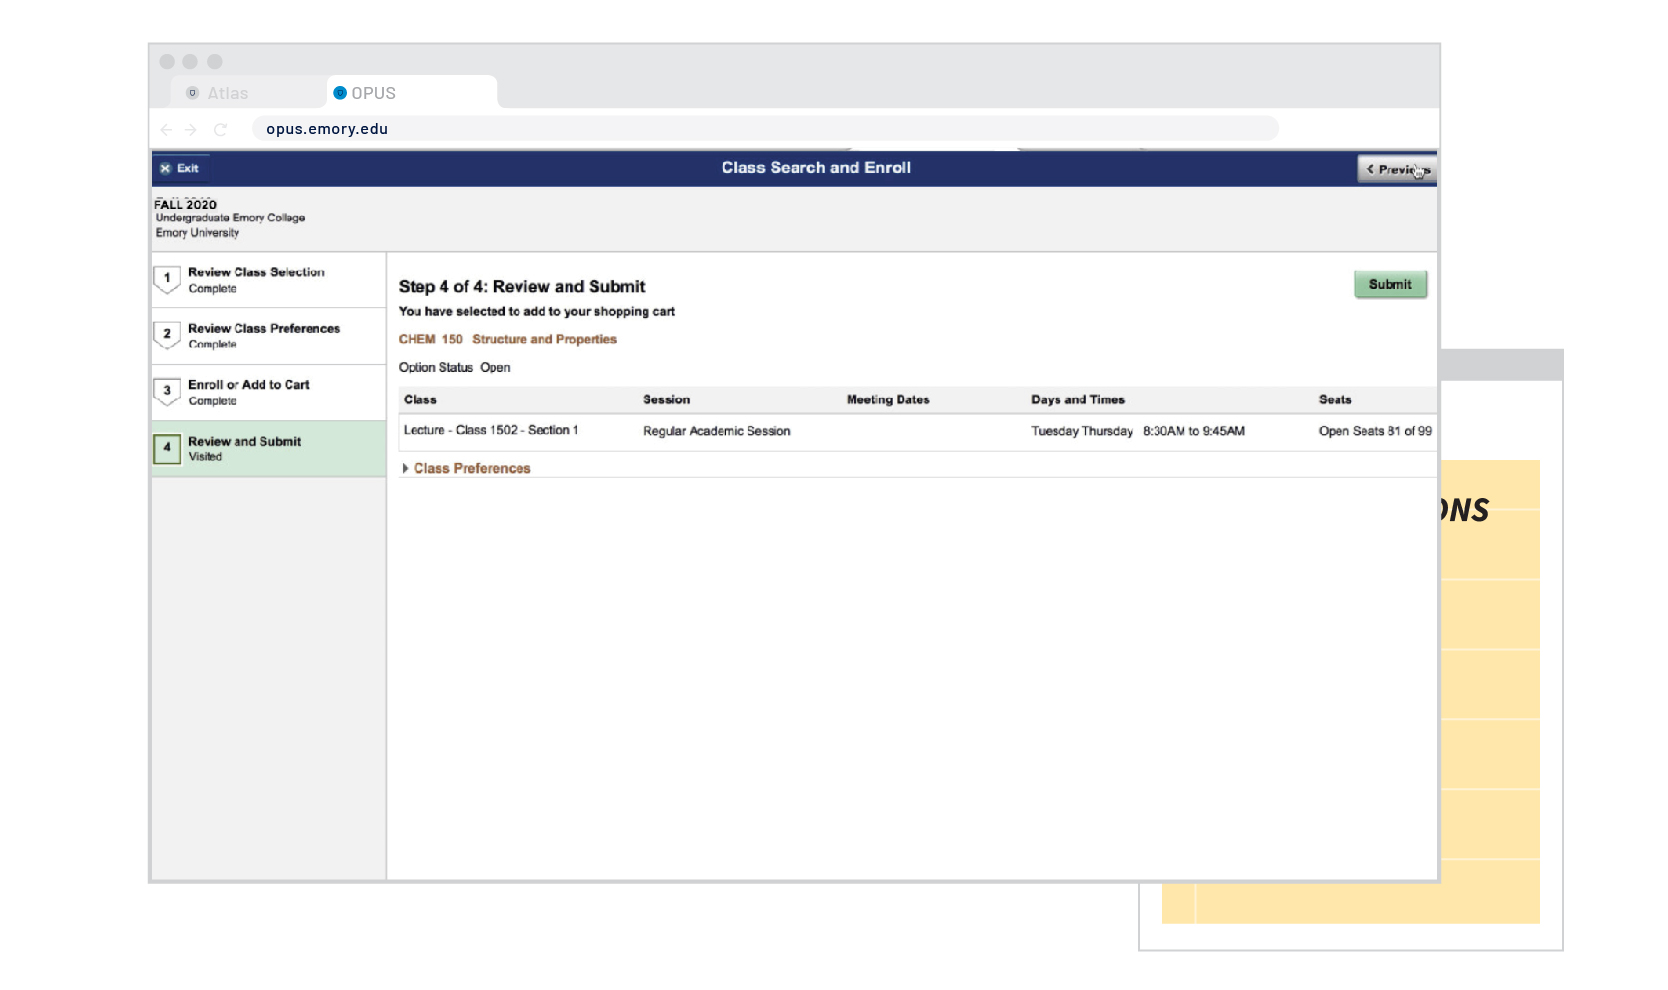
Review the information you have selected and choose "Submit" to add this course to your Shopping Cart.
STEP 15
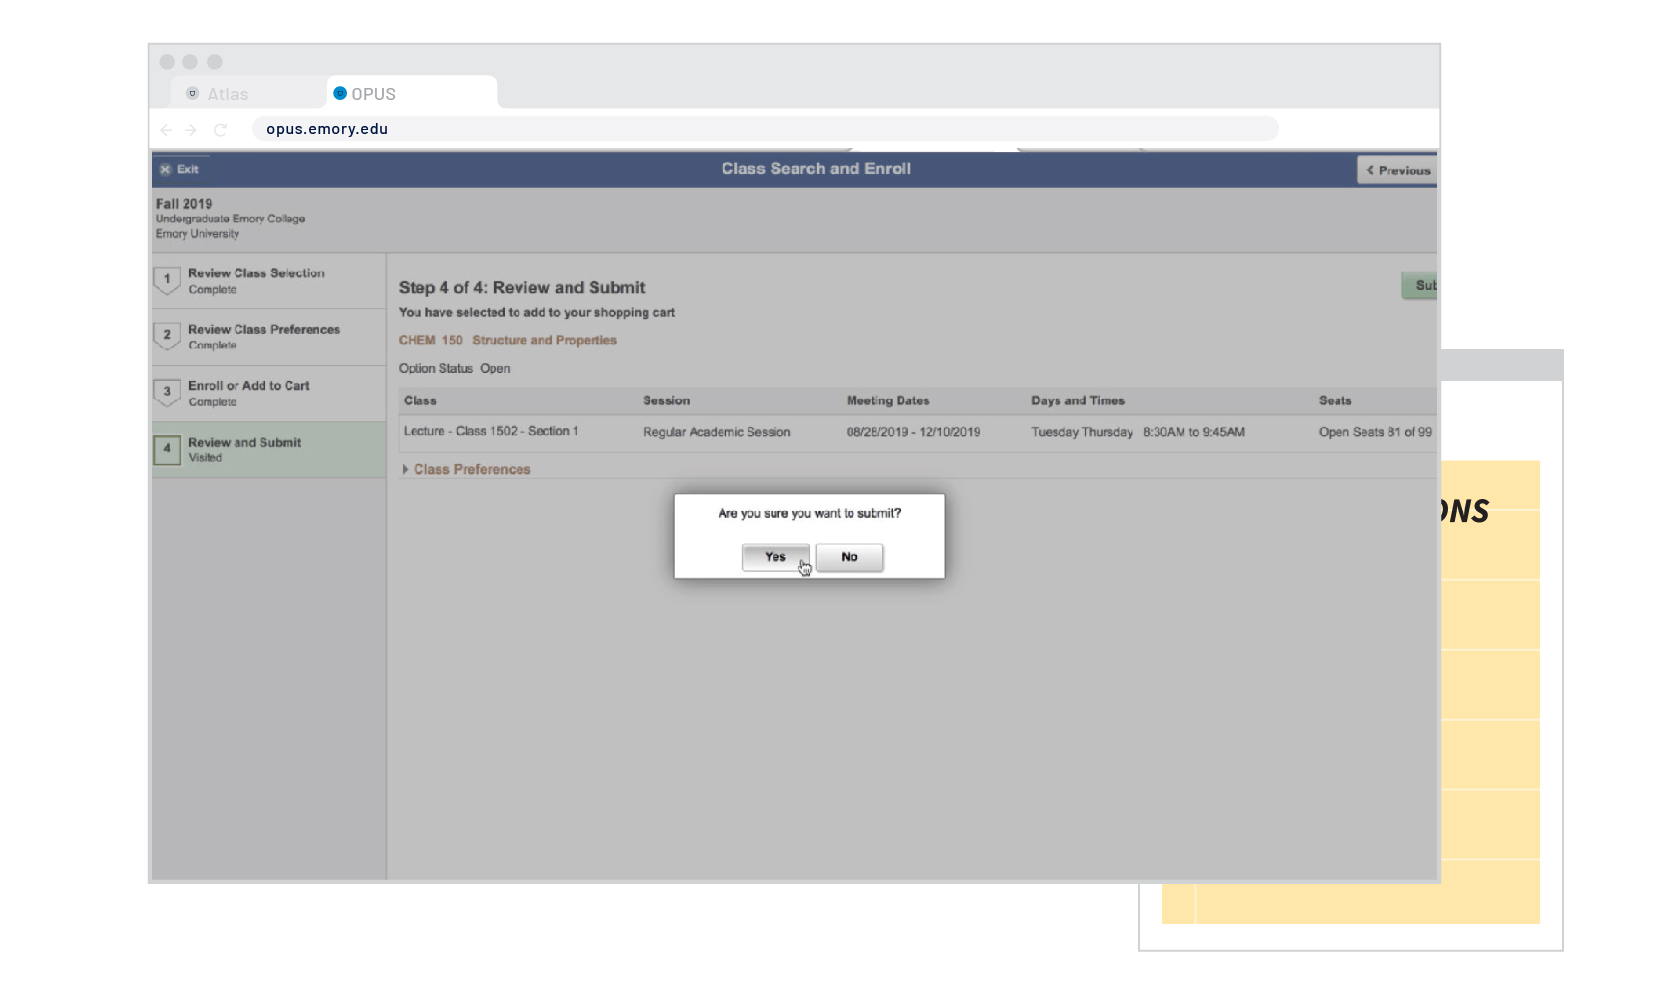
Confirm your submission by clicking "Yes."
STEP 16
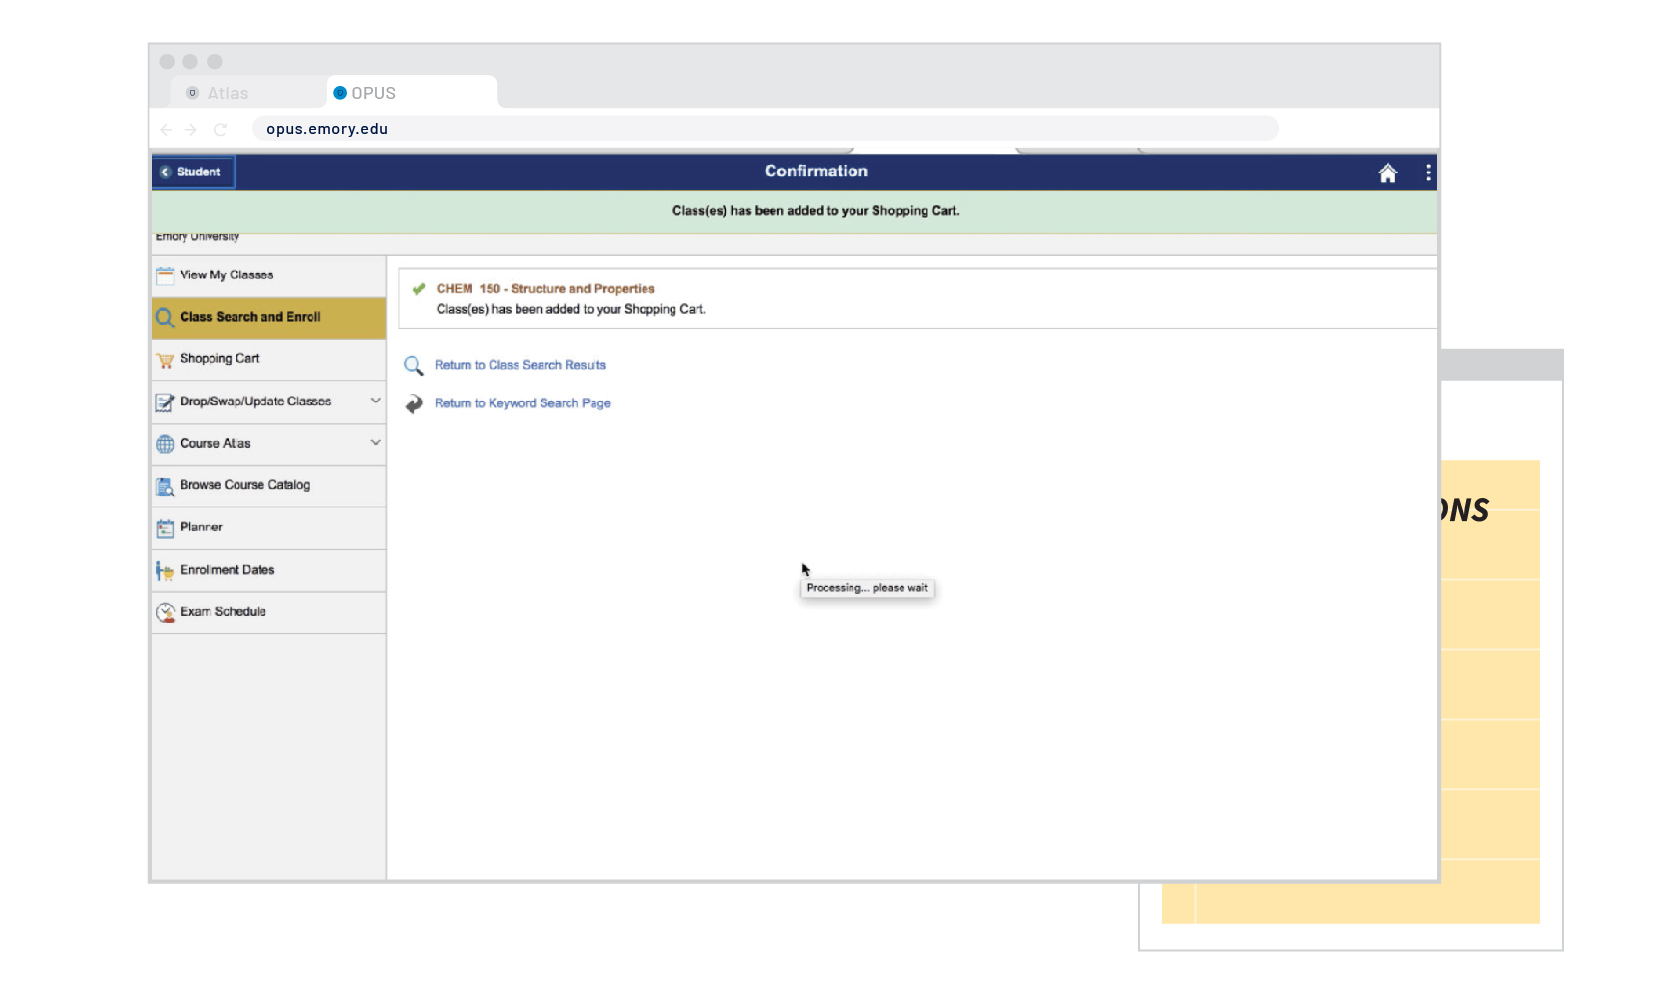
Success! If there are any errors you will receive a message on this screen. Let's review your Shopping Cart by selecting "Shopping Cart" on the left hand sidebar.
STEP 17
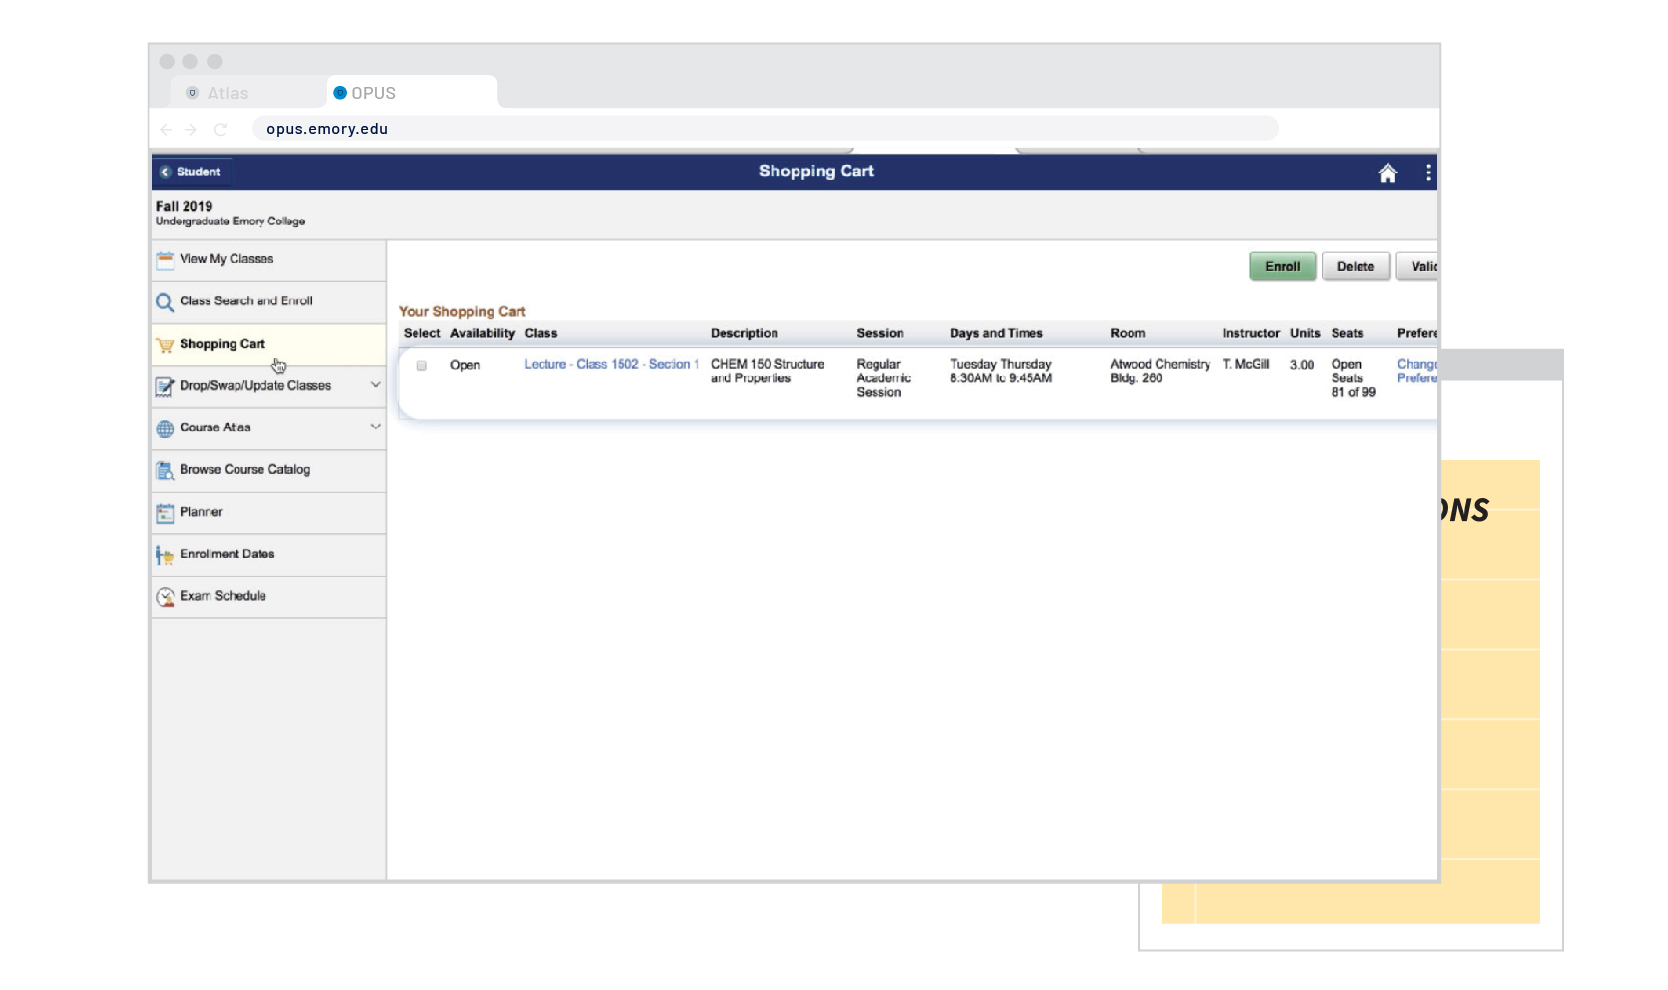
When it's time to enroll, you will use the checkbox to select the courses you want to enroll in. Select "Validate" on the left side to ensure you have met the requirements to be in that course. Then you will click "Enroll," to enroll in the course. Practice by clicking "Enroll" now!
STEP 18
Great work! You can now continue to the next part of Emory Essentials. Be sure to review the resources below for additional help into using OPUS during course enrollment.
COMPLETE!
Additional OPUS Help and How-To are available in the Reference Pages and on IT's website.
In addition to links to OPUS guides, you can learn more about the Waitlist and overall Course Registration.
OPUS Walkthrough
By Emory College New Student Programs


