Admin
Quick Start Guide
This guide is no longer monitored or updated - please visit the help tab of your StaffConnect login for more up to date support
Basic Setup
Browser
StaffConnect works best with a modern browser.


Click an image to download
Google Chrome & Mozilla Firefox are recommended, but you can use just about anything!
You can download them for free!
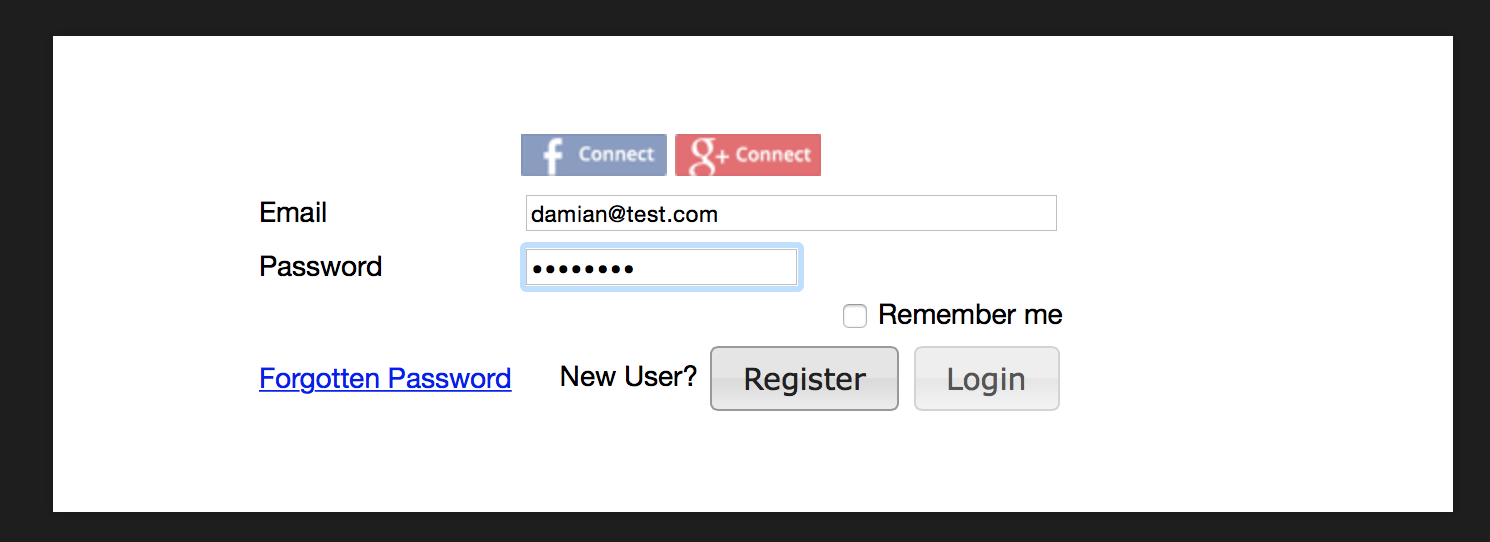
Logging In
Use your email and password to log in to the system.
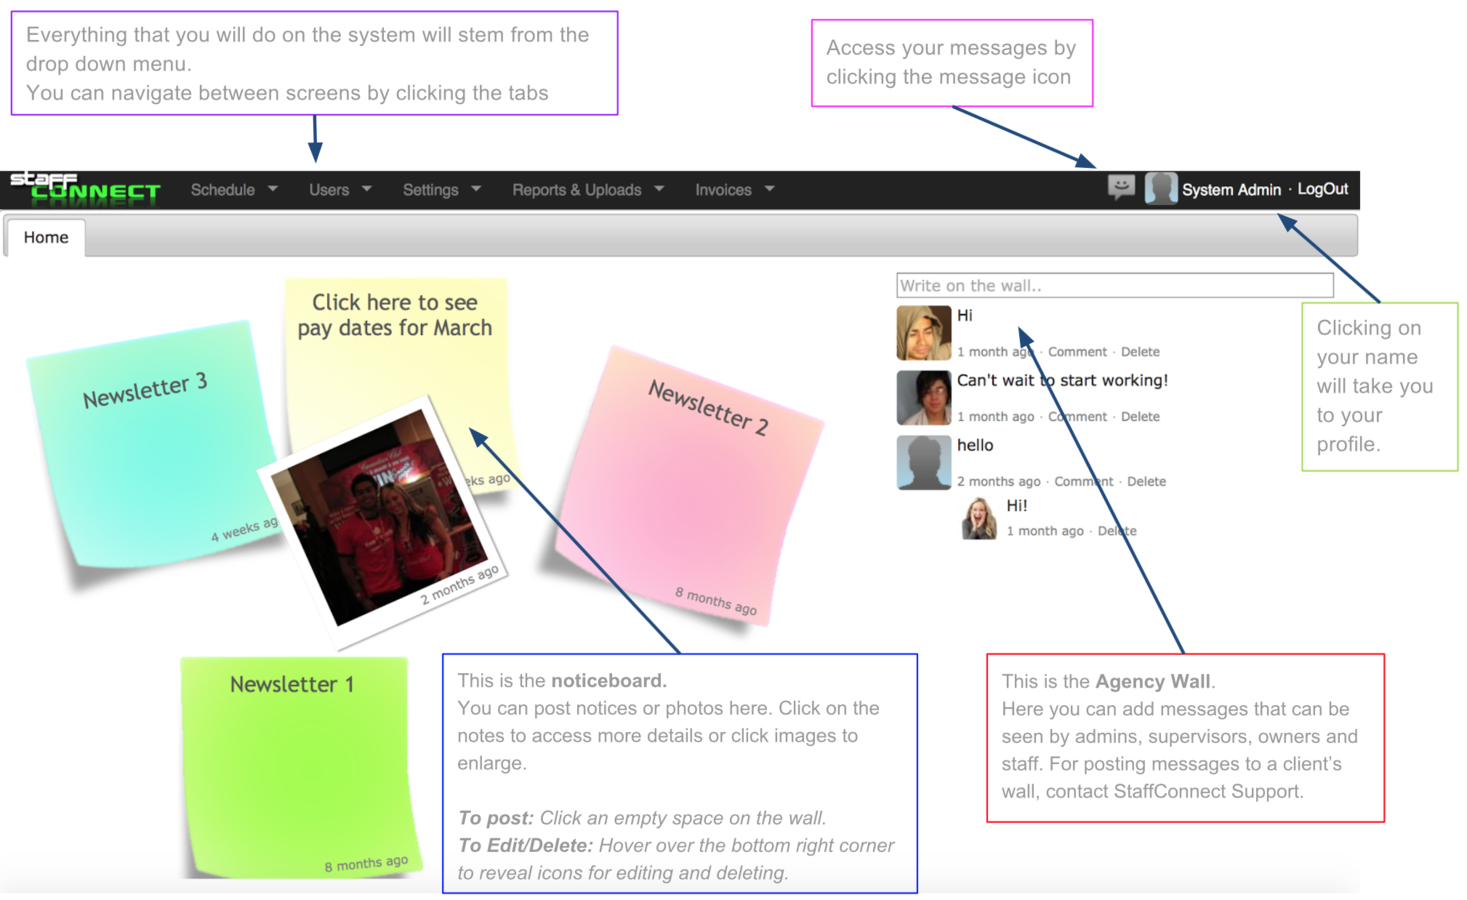
Home Page
To create a field: simply type it into the Add Element box, click the add button, then drag and drop it where you want it to appear.
You can change it to male or female only by clicking the both element, and change the type to a 'list' by clicking the text element. We recommend using lists as much as possible to maintain consistancy and control what staff enter. If you wish to enter a list - click the pencil icon to enter the options staff should choose from.
Customise Profile
This page allows you to create whatever fields you want to store information about your staff.
Setting Regions
Regions are used to manage timezones, organise shifts and help ensure that only staff located at or willing to travel to that area can see those events.
It is important to add all regions before staff register as they will be asked to select their region(s).
You can set a limit on the number of regions allowed at registration via
Settings > General Settings
Setting Attributes
Here you can enter all the skills/qualifications you need to know about your staff; for example: driver's licences, bar experience, model experience etc.
There are 2 types of visibility: Admin and User - use Admin for internal attributes that you don't want staff members to see or set themselves. Use User for those that you do.
The Role Default controls the default requirements on newly created roles.
If you have an attribute 'Driver's License' set to 'Yes' - then all newly created roles will require staff to have a driver's licence by default. If it set to 'No' then only the staff who do NOT have a driver's licence are eligible. Setting to 'Any' is the most common setting and in this case will allow all staff to the role regardless of whether or not they have a driver's licence.
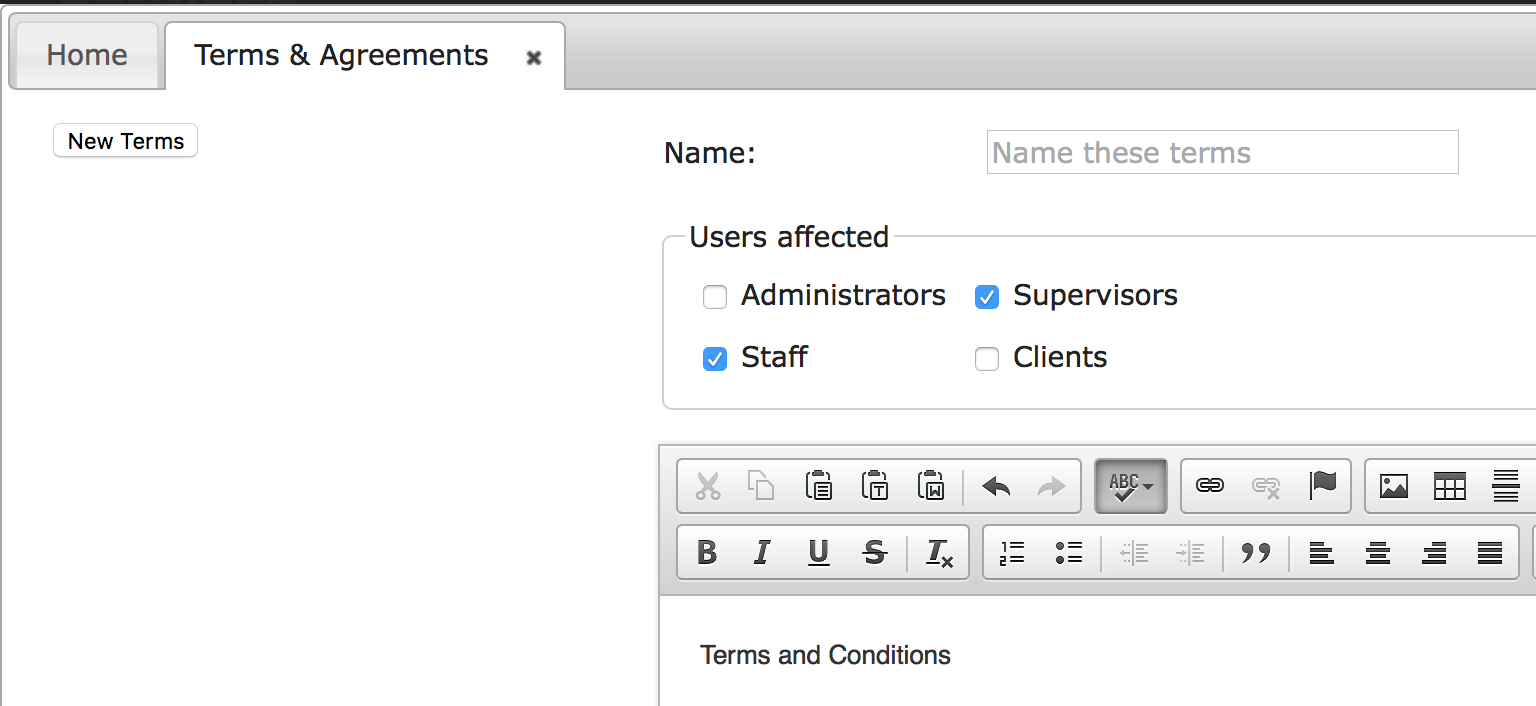
Terms and Agreements
You can add in any terms and agreements and have your users agree to them in their registration process.
To do this, go to Settings > System > Terms & Agreements and add in your information.
You can even have your staff write their name to agree to the terms. Activate this in Settings > System > Staff.
Once staff have agreed, the date will be recorded in the documents section of their profiles, so you can reference it at any time. If any changes are made to the terms, or new terms are added, existing staff will be automatically prompted to re-read and sign again the next time they log in.

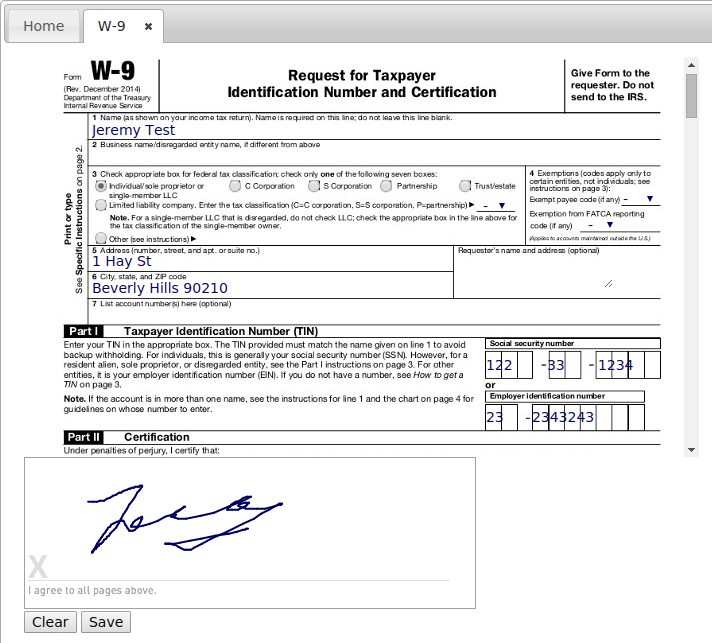
W-9 Forms - USA ONLY
W-9 Forms can be filled out and signed online within StaffConnect. A link to complete the form has been added to the Documents section on staff profiles.
Once submitted the form will be converted to a PDF and accessible in the Documents section.
If you would like your EIN to be auto-populated, please let us know what it is.
It is possible to have this automatically emailed – get in touch if you’d like this set up
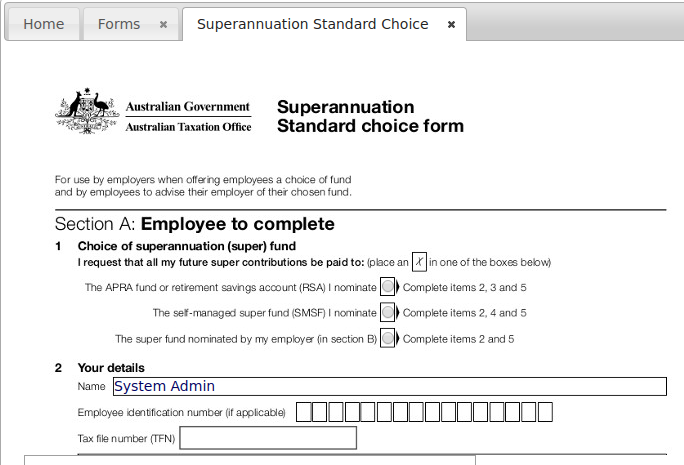
Superannuation Standard Choice Form
- AUS ONLY
Superannuation Standard Choice Forms can be filled out and signed online within StaffConnect. A link to complete the form has been added to the Documents section on staff profiles.
Once submitted the form will be converted to a PDF and accessible in the Documents section.
To enable this form, have your details auto populated or the completed form emailed; you can set this up from
Settings > Forms
Users
Register
The easiest eay to get staff or people applying to work for your agency onto the system is for them to register themselves.
You may set up a Registration Code so staff can be approved into the system automatically.
How to access this: Settings > System > Registration Settings
The registration code can be removed / disabled by making it blank.
To Register: Go to your Agency’s StaffConnect page.
The address will look something like this:
http://youragency.staffconnect.net
Approval
After a registration has been completed, the account will need to be approved (if a Registration Code hasn't been entered).
Applicants will be notified via email once their registration has been approved.
In the mean time, applicants can update their registration details at anytime.

Add a New User
You can also create users by going to Users > New User

You can add other owners, administrators, supervisors, staff and clients.
Your Profile
Editing your online profile is easy!
1. Access your own profile by clicking on your name in the top right corner
2. Click on a field to edit
3. Complete the field and click or push enter to save

Upload Files
To upload files or photos , select Choose Files and select the file you wish to upload.

Click the Pin icon under a photo to set this as the profile picture.
Click the Lock icon to remove the ability for staff to delete/change that picture.
Click the Arrow icon to move between Admin Only and User visibilities.
To remove, click on the Trash Can under the file.
View Users
You are able to view all your Staff simply by going into the Users tab
Here you will find all of the information for each of your Staff.
You can utalise the filter to search for specific staff.
Use the drop menu at the top right to switch between user types.
Performance Rating
Staff can be rated on each shift they complete, located under their Experience tab or directly from a shift. Experience can also be linked to categories to appear on staff showcases.
Receiving good reviews from Clients or Admins, applying for and completing shifts improves the rating, while requesting replacements, ‘no shows’ or poor reviews will have a negative effect on the rating.
StaffConnect gives your staff a Performance Rating which is visible to Admin only.
You can filter by ratings in the users database & set role requirements so only staff with a certain rating can apply.
You can also add in your own ratings; such as punctuality, by going to Settings > Profile > Ratings
Showcase Templates
The Showcase Template is customisable so you can tailor your staff presentations to suit your clients requirements.
You can create as many Showcase Templates as you like.
To customise your showcase templates go to: Settings > Profile > Showcase
Photo Categories
Assigning photos to a photo category will ensure that only photos within that category are sent to your client via the showcase, keeping everything consistent.
You can also add photo categories to your showcase: Settings > Profile > Photo Categories.
You will then need to assign your talents photos to a category by dragging the photo and dropping it on the category title in the photos section of their profile. Click on the category to view which photos are filed under it.
Experience
To capture your talents previous experience, you can add in categories for them to complete and then assign them within your showcase.
To set up experience categories: Settings > Profile > Experience
You can also assign system experience by either clicking the + icon
or assign it within a role to have it automatically link to that experience category!

Email Showcases
To email a showcase, simply select the staff you wish to present, click Email Showcase and choose your template.
Presentations
To create a presentation, select Users > Presentations.
1. Create your Presentation Name
2. Select Users from your database and select Add to Presentation.
3. Customise your presentation.
4. Send your client the link to review, or download as a PDF.
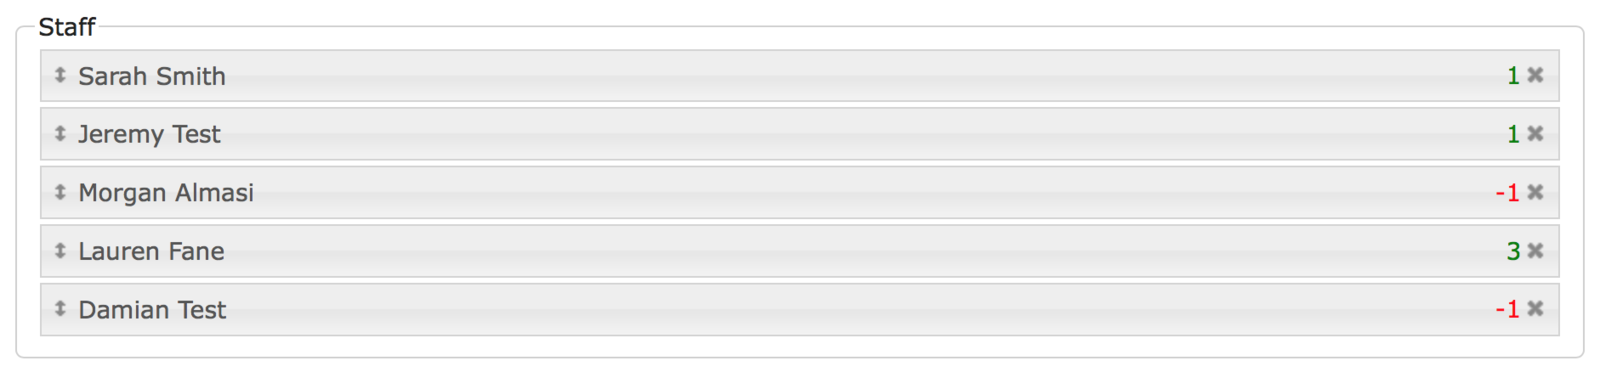
You can choose to have your client rate their preferences with the thumbs up or thumbs down icons. These ratings will then appear by the staffs names in the presentation template.
Please chat to us if you need to customise your presentation/showcase templates with your company logos and colours.
Submissions
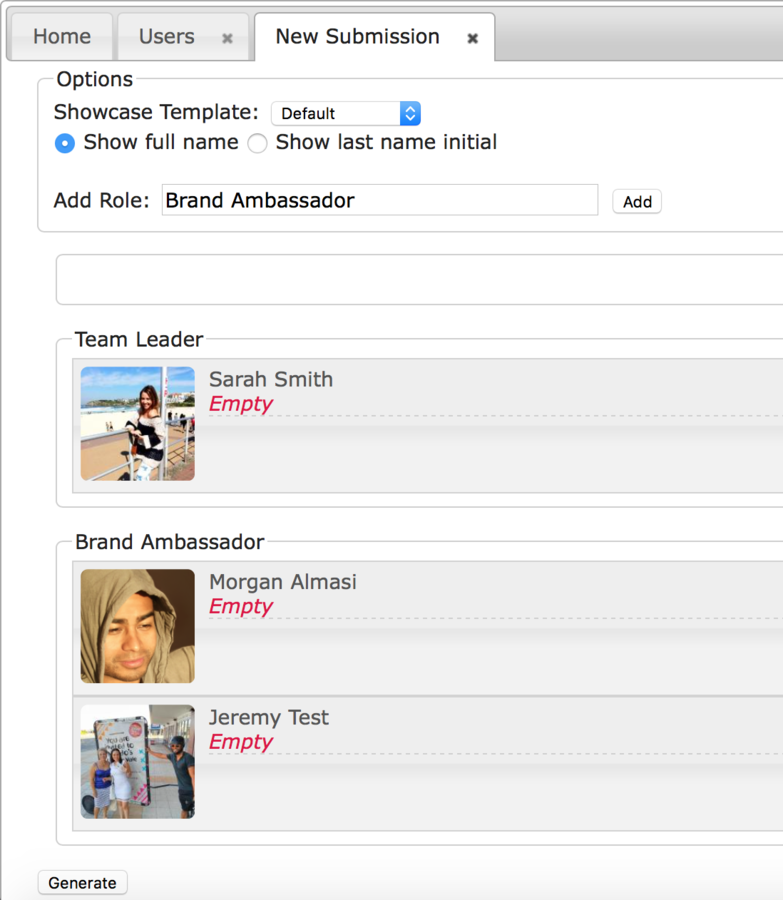
The submission feature is another way to showcase your talent to a client in an email.
1. Select Users > New Submission
2. Enter in as many role titles as you require.
3. Filter for specific talent in the User tab.
4. Drag and drop their image onto the new submission tab, or highlight all talent and select Add to submission.
5. Drag and drop them into the suitable role.
6. Add any required notes.
7. Generate email
An email will be generated with all headshots in the email. Clients can then click on the headshot to view the staff showcase.
Want to change the headshot that appears in the email?
Simply click on the headshot in the new submission and select a new one!
Manage External Agencies
You can now allow external agency staff to use and be managed on the system.
External agency staff are the same as normal staff users except:
- They cannot see and apply for future jobs on the calendar (they only see shifts they’ve been selected for)
- They cannot see pay rates
- They cannot invoice
- They appear in a separate category (Other Agency Staff) on the User Table
- They are not recipients of shift casting emails
To set agency:
1. Add other agencies from Settings > Agency
2. Once at least one other agency has been added you will be able to select which agencies any staff user works through by ticking checkboxes on the Settings tab on their profile
3. Choose which agency a staff user is working through by right clicking on them in a shift and choosing Change Agency
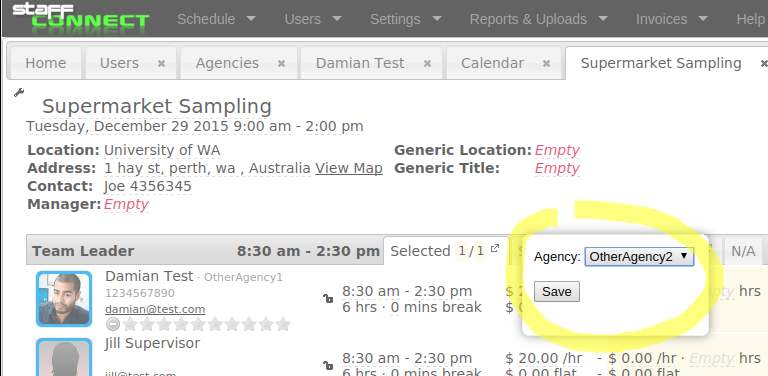
Note: Staff can work for multiple agencies and by default work for your agency (the This Agency checkbox will be ticked). If a staff user works for your agency as well as another agency they will have all the same permissions as a ‘normal’ staff user.
Schedule
Calendar
Here is where you staff will apply for the work available.
You can import information such as where the event will take place, what the work involves, payment and the hours the event will be.
You can have staff upload any documents after a shift is completed, as well as complete reports and add photos.
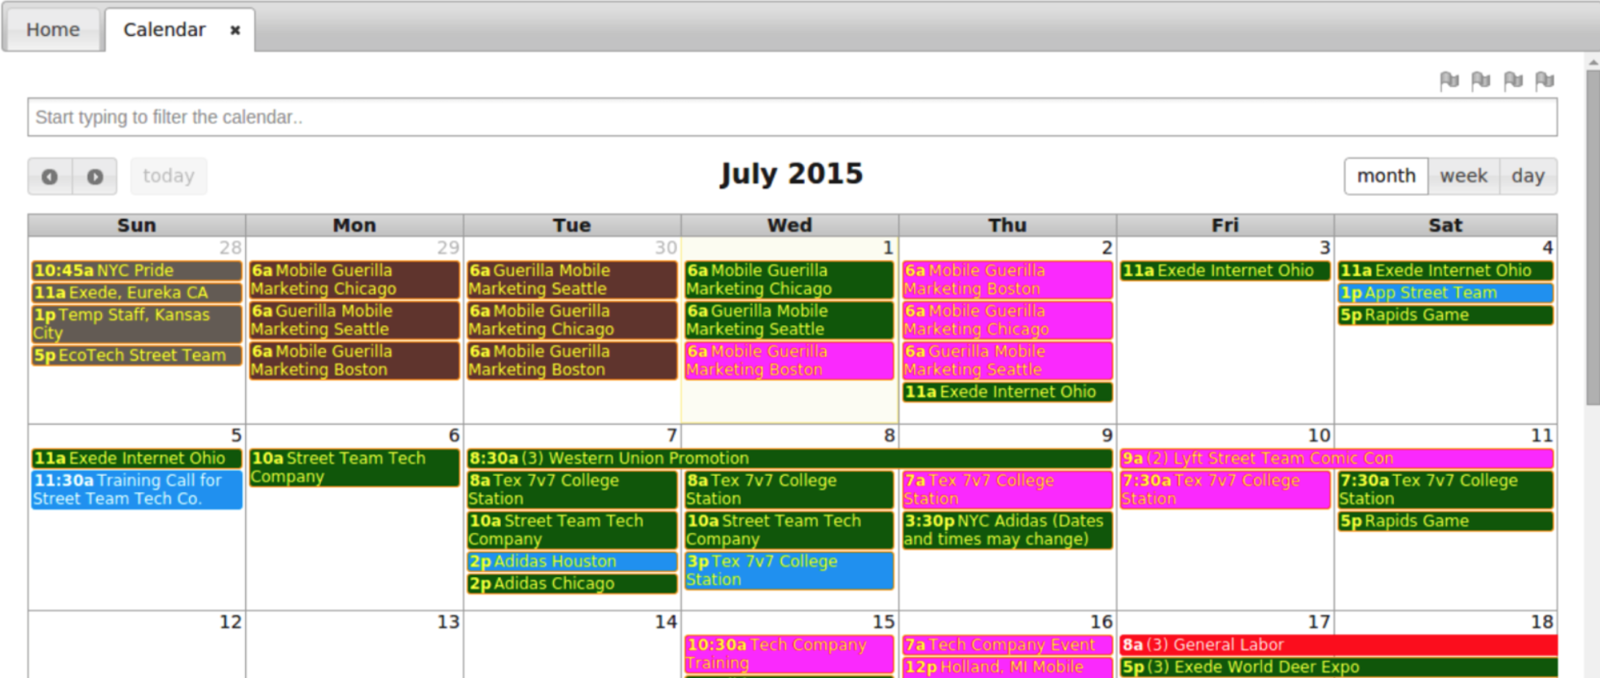
The Calendar where you can view all your events.
Calendar- List View
Here you will be able to filter for shifts using the text box at the top of the screen and select the timeframe by indicating which dates in the boxes to the right for quick and easy access to information.
You can also edit your selected shifts by clicking on Edit Selected to the top left side.
To access: Go to List under the Schedule menu.
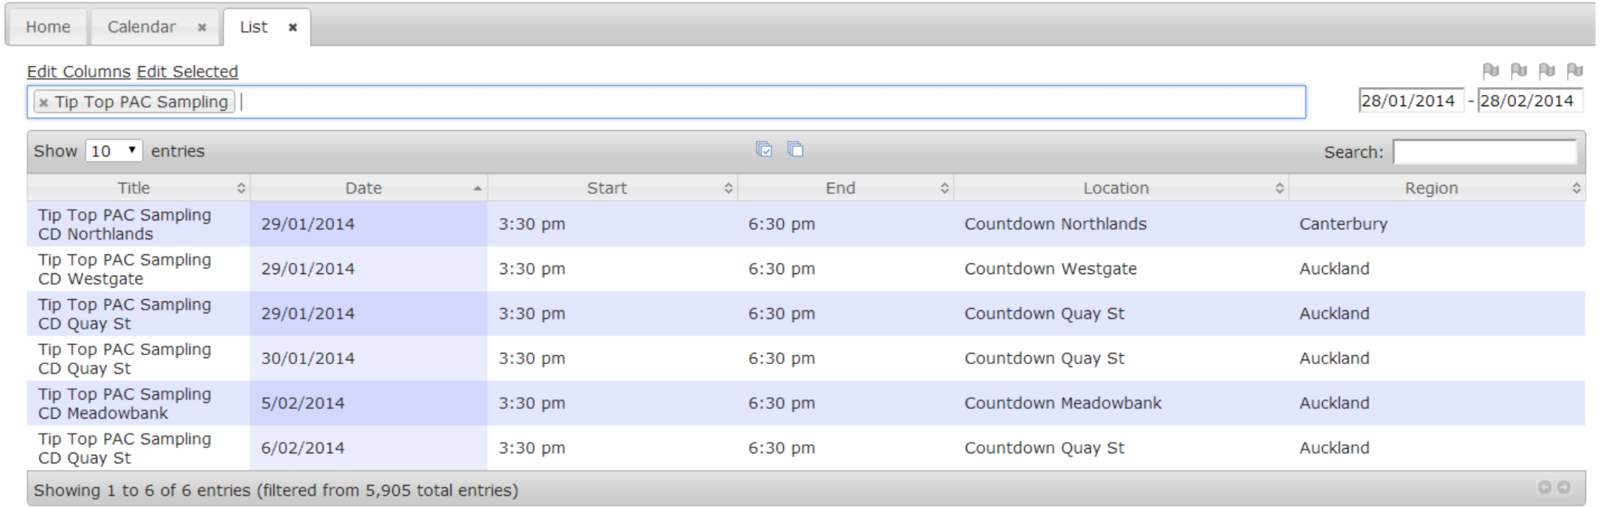
The Calendar can also be accessed as a List View for easy visibility.
Flags
You can assign names to your flags in your General Settings.
Simply click on a flag in your calendar or list view to filter for it. You can filter for multiple flags at a time.
Filtering for a shift without a particular flag set can also be done. From the calendar or list view, right click on a flag (it will turn black) to filter for shifts without that flag set.
In the image above we are filtering for shifts which don’t have flag 1 set but do have flag 2 set.
To filter for ‘No Flags’, just right click on all four flags to filter for shifts which do not have any flags set.
Flags can be assigned to anything you like and used to filter shifts.


Tracking Categories
Tracking categories are useful to filter data and assign client access, supervisor access, teams & files to multiple shifts at once
To set a tracking Category
1. Go to Settings > Tracking Category
2. Create your Category name, e.g: Campaign
3. Create your Category Options, e.g: the campaign title 'Coca Cola Sampling'
4. Within the option, you can assign client access, supervisor access, assign a team or add files.
Adding Shifts
There are a multiple ways you can add shifts to your calendar.
Manually add a shift
Click on a date in the calendar to be automatically prompted to manually add a new shift. Simply complete all the information and then select save.
Copy an existing shift
Duplicate a shift already in the calendar by right clicking and selecting copy.
You can duplicate this shift multiple shifts by clicking the + icon under
Dates & Times
Grouping Shifts
1) Create a column in your spreadsheet named Group and give all the shifts you want grouped together the same group name.
2) From the Calendar, just drag one shift onto the other to automatically group those shifts together.
3) From List View (Schedule > list) select the shifts you want by clicking on the rows to highlight, then click Group Selected.
There are a couple of ways to group shifts in your calendar:
Edit Multiple Shifts
You can edit multiple shifts at a time by using the Edit Shifts Tool.
1. View the Calendar in 'List' mode
2. Filter for your desired shifts.
3. Select all or highlight the individual shifts you wish to edit.
4. Select Edit Selected
5. Make your changes.
6. Click Apply to save changes.
Edit Shift Time
There are 3 levels of times:
1) Shift Level
2) Role Level
3) Individual Level
The Role Level should only be changed (by clicking on the role name to edit it) when there are multiple roles in the same shift that need different times
The Individual Level should only be changed when there are multiple models in the same role that need different times.
Locking Shifts
Shifts can be locked to prevent edits of the shift, role and staff details.
The lock icon is found in the top right corner and takes 3 colours depending on the status:
A red open lock indicates the shift is unlocked and any Supervisor (with the right permissions), Administrator or Owner can edit it.
A blue closed lock indicates the shift is admin locked and only Administrators and Owners can edit it.
A green closed lock indicates the shift is owner locked and only Owners can edit it.


Left clicking on a lock icon locks the shift to a higher level while right clicking unlocks it to a lower level.
View a Shift
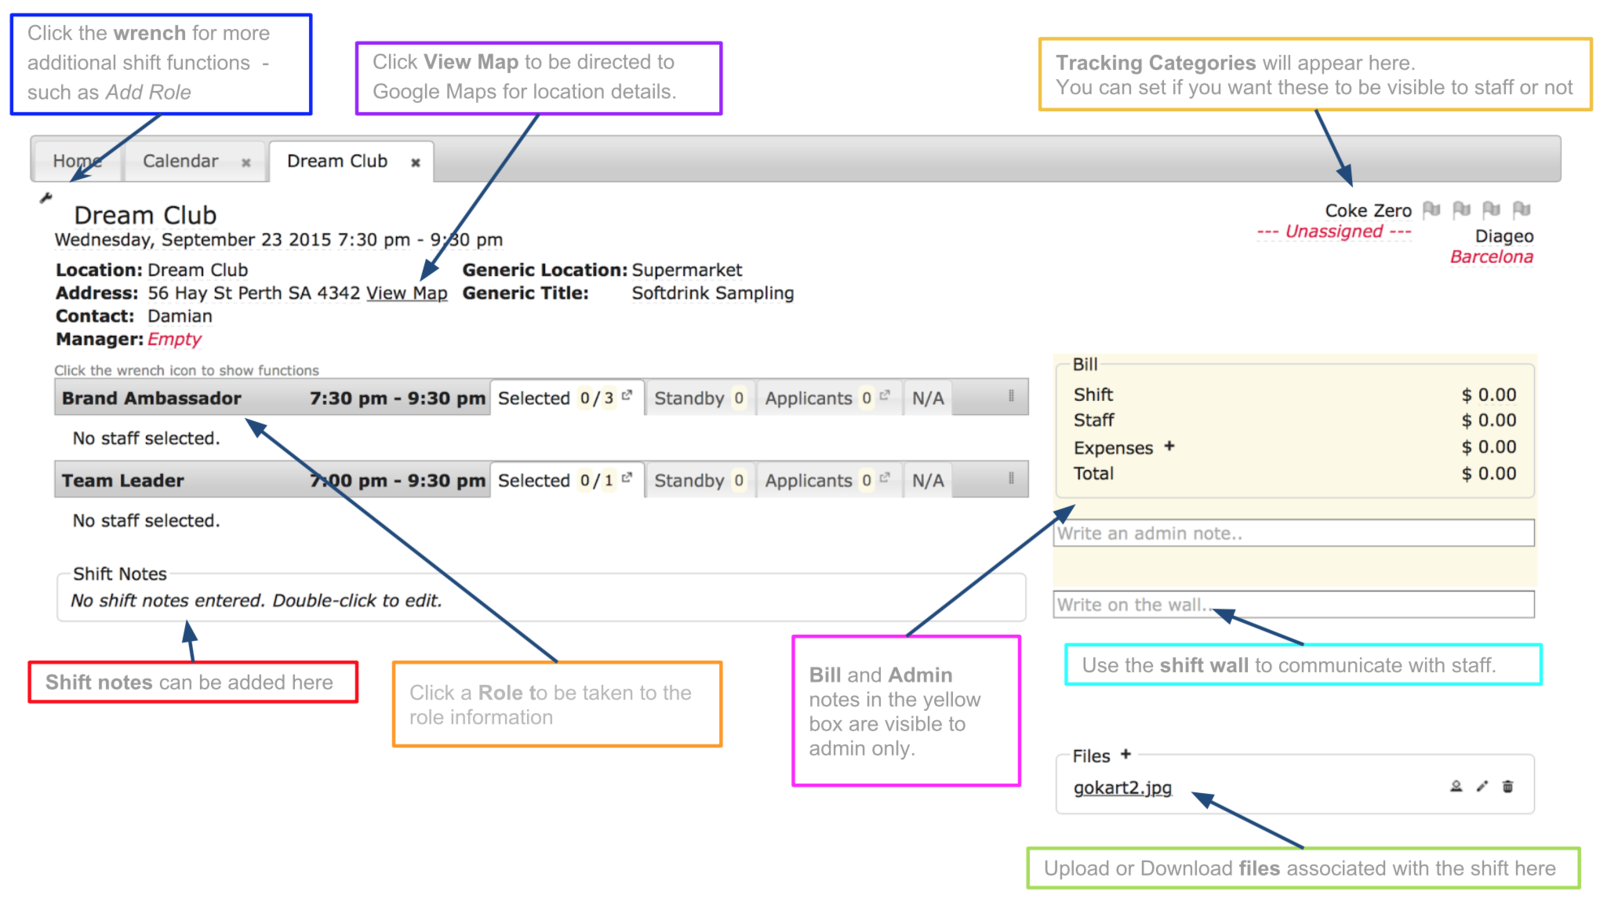
Click on a shift in your calendar to view the events information.
Terms for Shift Confirmations
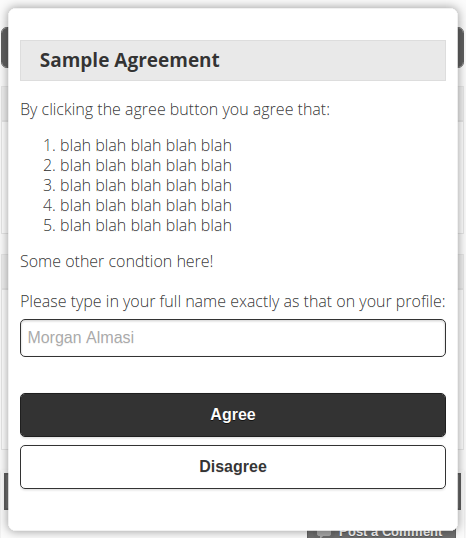
You can also add Terms & Agreements / Contracts that staff will be forced to read and agree to in order to confirm a shift.
These are assigned via Tracking Categories and are displayed on the confirmation dialogue when staff confirm a shift.
Upon clicking the ‘Confirm’ button the above dialogue will pop up should there be one or more Terms & Agreements assigned to the shift that the user has not yet agreed to. Should they have agreed previously then it will not be displayed.
The date & time of their agreement will be saved and visible at the bottom of the ‘Documents’ tab of their profile.
Should they disagree to any Terms & Agreements they will be unable to confirm the shift, and their only option would be to request a replacement.
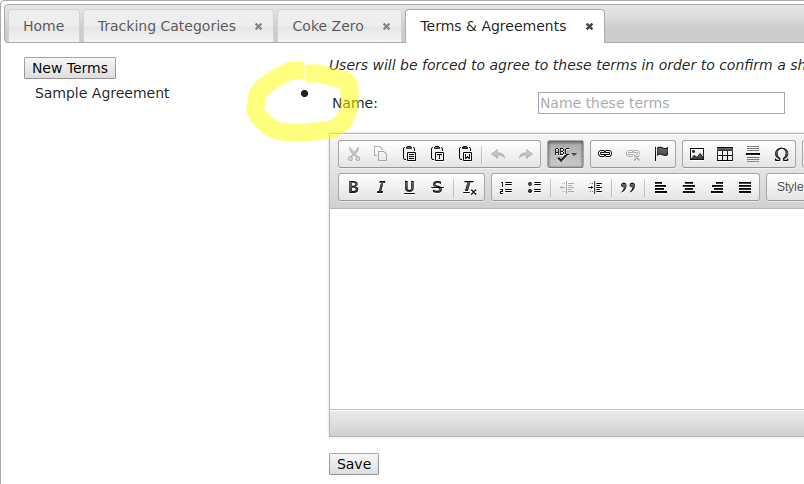
Terms & Agreements can be created and edited from Settings > Tracking Categories – click on a category, click on an option, then click on ‘Terms & Agreements’ on the left hand menu:
The circled dot in the image above controls whether the particular Terms & Agreements are active (solid circle) or inactive (hollow circle). Should you delete or modify the content any users who had previously agreed will be forced to agree again, and the date and time of their previous agreement will be lost. Should you want to keep previous agreements recorded then rather than editing them simply set them to inactive (by clicking on the solid circle) and create and assign new terms instead.
Confirming Applicants

Once you have applicants for your event, you can confirm which staff you wish you book.

Applicant Options:
Booking Staff
You can also book staff onto shifts without needing them to apply or reconfirm the shift.
This is especially handy for staff booked onto shifts via phone communication.
1. Open up both the Shift and Users page so both tabs appear in the top bar.
2. Find the selected staff member in Users,
drag their photo and drop it into the shift tab.
3. Select staff by clicking the ‘+’ icon.
4. Press escape to close the dialogue
Follow these steps to confirm staff straight away:
1. In the shift, right click on the selected staff member’s picture
2. Select ‘change status’
3. Set status to ‘confirmed’
Staff Check In
They do this by clicking a ‘Check In’ button on a shift, which will be available from 1 hour before their start time till their end time.
Location tracking must be allowed in users’ browser settings for this to work. Those who do not allow StaffConnect access to their location will not be able to check in and will see an error message should they try.
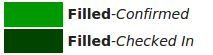
Currently there is no restriction to the user’s location when checking in, however their distance to the shift is recorded in the shift history provided an address is entered for the shift. Once a user has checked in their user status will be 'Checked in', indicated by a dark green colour.
To view check-in details click the wrench on a shifts and select history.
Staff can check-in to shifts to indicate that they have arrived

Staff Check Out
They do this by clicking a ‘Check Out’ button on a shift, which will be available after they’ve checked in.
Location tracking must be allowed in users’ browser settings for this to work. Those who do not allow StaffConnect access to their location will not be able to check in and will see an error message should they try.
The distance restriction to the user’s location when checking out is the same as when checking in and can be adjusted from Settings -> General Settings – Shifts “Checkin max. radius”.
Similar to the check in, the distance to the shift is recorded in the shift history provided an address is entered for the shift.
Once a user has checked out their user status will be ‘Checked Out’, indicated by a dark blue colour.
Staff can check out of shifts to indicate that they’ve left.


Leader Check In/Out Team
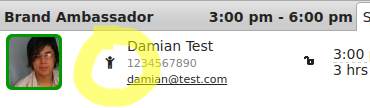
Staff can be assigned as a “Leader” by right clicking on them in a shift and selecting ‘Toggle Leader’.
Once assigned, the leader icon appears next to their picture:
When a leader checks in or out of a shift they have the option to check in or out for others, and optionally specify each individual’s time:
You can allow one (or more) staff within a shift to check others in the shift in and out.
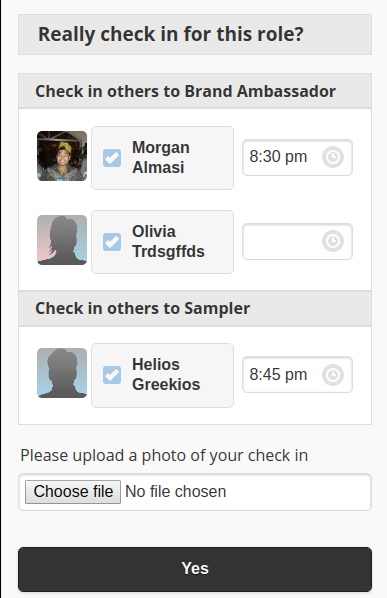
Check in time and details will be logged in the shift history, and the same restrictions apply – the Leader must be within the specified distance to the shift address and must be within the check in time window
Complete a Shift
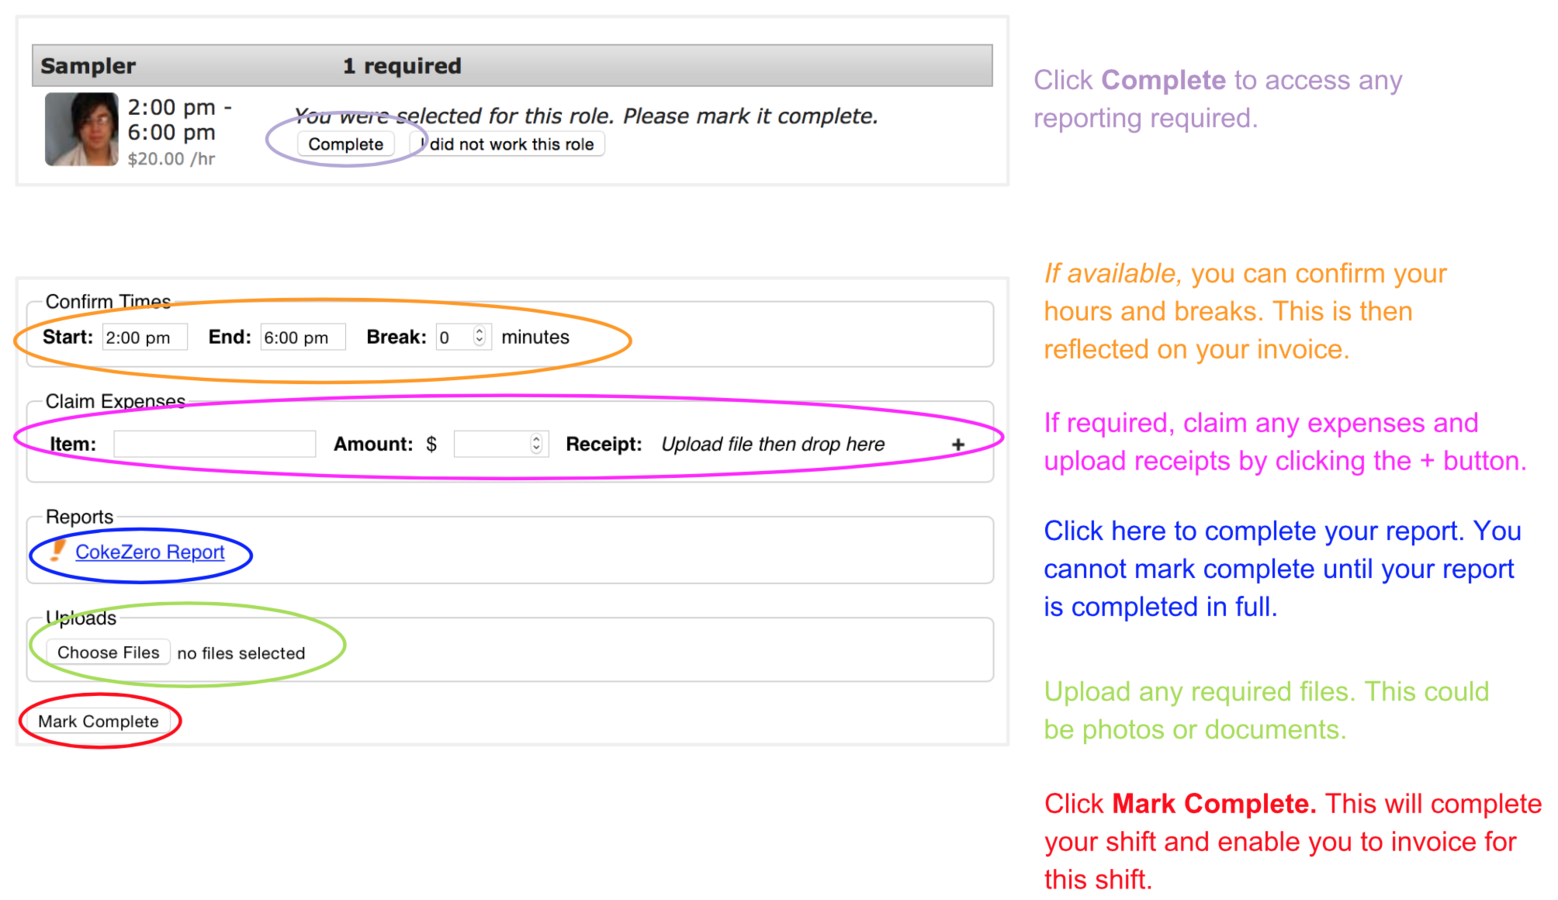
Once staff complete their shift, they will need to log in to StaffConnect to mark as complete.
Shift History
You can easily view a shift's history by clicking on the wrench icon and selecting History
Staff Mobile Access
StaffConnect is mobile friendly for all Staff User types.
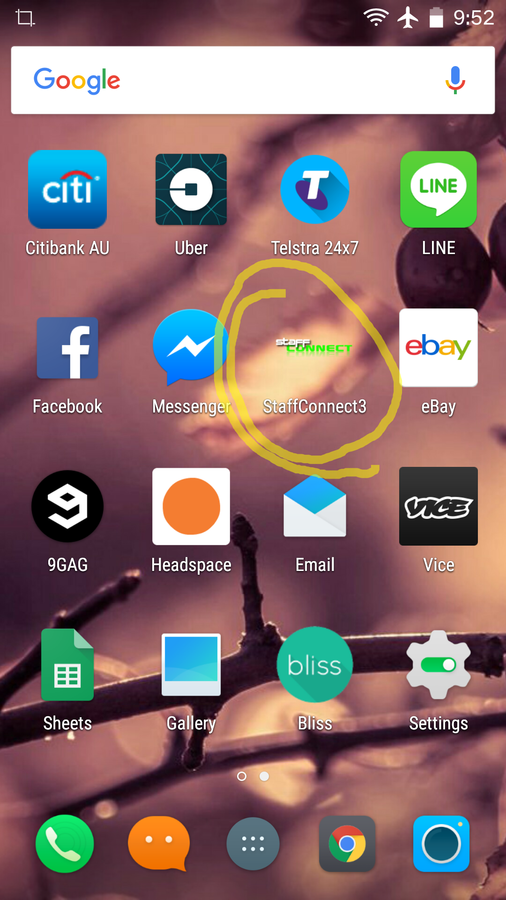
Staff logging in from mobile devices will now be prompted to add the web app to their home screen. This adds a shortcut icon to their home screen:
The image used is your logo, the name will be whatever you have named your system. (You can name your system from Settings -> General Settings – ‘System Name’ field)
Reports & Uploads
Create a Report
To create a Report:
• Select Report Designer from the Reports & Uploads tab on the home page.
• Select Add Element to add to your report.
Only qualitative data or short answers from checkboxes will work for automatic graphing purposes. For longer answers, your data will still all turn up in an excel format but will not work in the automatic summarising
Add Report to Event
Reports must be assigned to a Role in order to be completed.
You can add a report to an individual event by editing the Role within the shift.
Follow the Edit Multiple Shifts instructions to assign reports to multiple roles / shifts
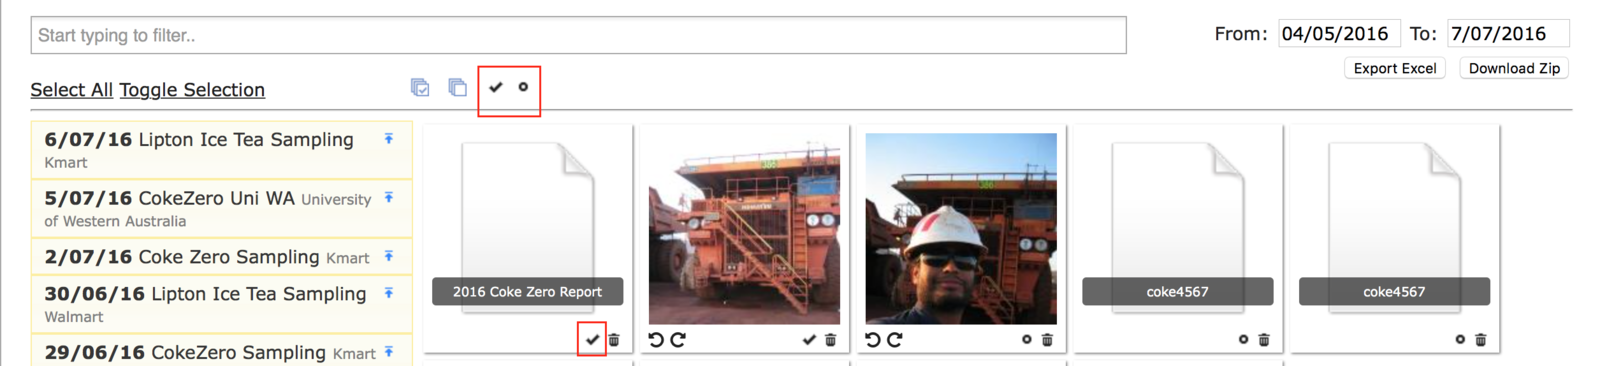
Approving Reports for Clients
Reports can be reviewed and approved before your clients can access them.
Click Reports & Uploads
Filter for your Reports and Uploads
Click on a Report to open and review it
Check the Approved Icon to Approve client access
You can approve in bulk by selecting those you wish to approve and clicking the Approve Selected icon.
Client Report Email Notification
Notify client users of reports available to them. The notification is sent when one or more reports are approved.
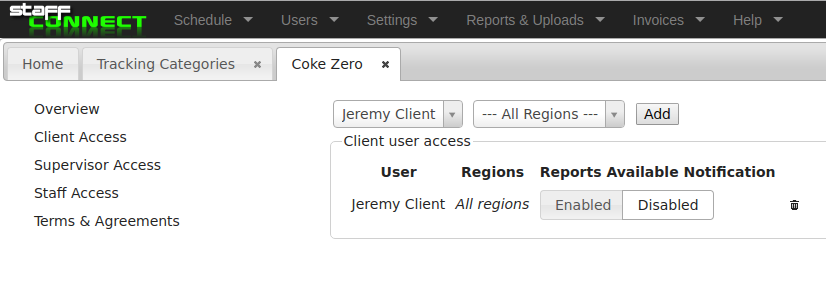
The notification is disabled by default, to enable it find the ‘Reports Available’ email template in Settings -> Templates -> Email and set it to active.
Specify recipients of this email notification via Tracking Categories > client access:
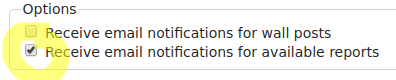
Note that client users have the option to opt out of receiving these emails on the settings tab of their profile:
Export Reports

You can export your reports in either Excel or Zip Format.
To export: Go to Reports & Uploads.
Filter for your reports and uploads and export.
Export Reports

You can also export your reports in either PDF or Excel Format.
To export: Go to Export Shifts under the Schedule tab. Tick include reports.
In excel, your reports can be found on the second tab located at the bottom left.
Invoices
Invoicing
If you require your staff to invoice you, you may use the system to manage your invoices.
Navigate to Invoices from the menu to view invoices

Limiting Staff Expenses
You can ensure staff cannot claim expenses totalling more than a set limit.
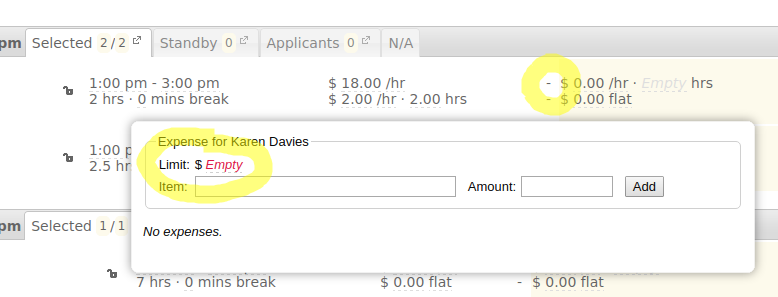
To view and set this limit click on a staff members expenses in a shift (this will be a dash if empty – top circle below in yellow)
The above dialogue will pop up – simply enter the limit in the ‘Limit:‘ field.
Should staff try to claim expenses greater than the limit they will see an error message and will not be able to mark the shift complete till the expenses are reduced.
View an Invoice
Once staff have created an invoice, you can view it by clicking on the Invoices tab.
- The status of your invoice will be displayed in the Status column
- Click on an invoice to view the individual details of that shift.
- You can choose to approve or reject the invoice
Reject Invoice
To reject an invoice, simply click reject and enter your reason. Staff will then be prompted to review the changes required and resubmit their invoice.
Download Invoices
1. Filter for your desired shifts.
2. Select all or highlight the individual shifts you wish to download.
3. Select Download. You can choose to dowload in either Excel or PDF format.
4. You can then add any user information you need exported with the invoice.
5. Select Export
You can easily download invoices in either Excel or PDF format.
Updates & Support
System Updates

You can view our Updates and changelog page here:
http://updates.staffconnect.net
Everytime a new feature is added or something is changed, it will be accompanied by a post to the update page, so please check it out if you notice something new on your system and are unsure what it does.
All system updates and features are listed online so you can view at your convenience.
For additional technical support, please contact support@staffconnect.net.
Admin Quick Start Guide
By staffconnect


